SephenDeVos
-
LCD
10/21/2016 at 10:51 • 0 comments![]()
![]()
![]()
-
Paneling
10/21/2016 at 10:49 • 0 comments![]()
![]()
![]()
![]()
-
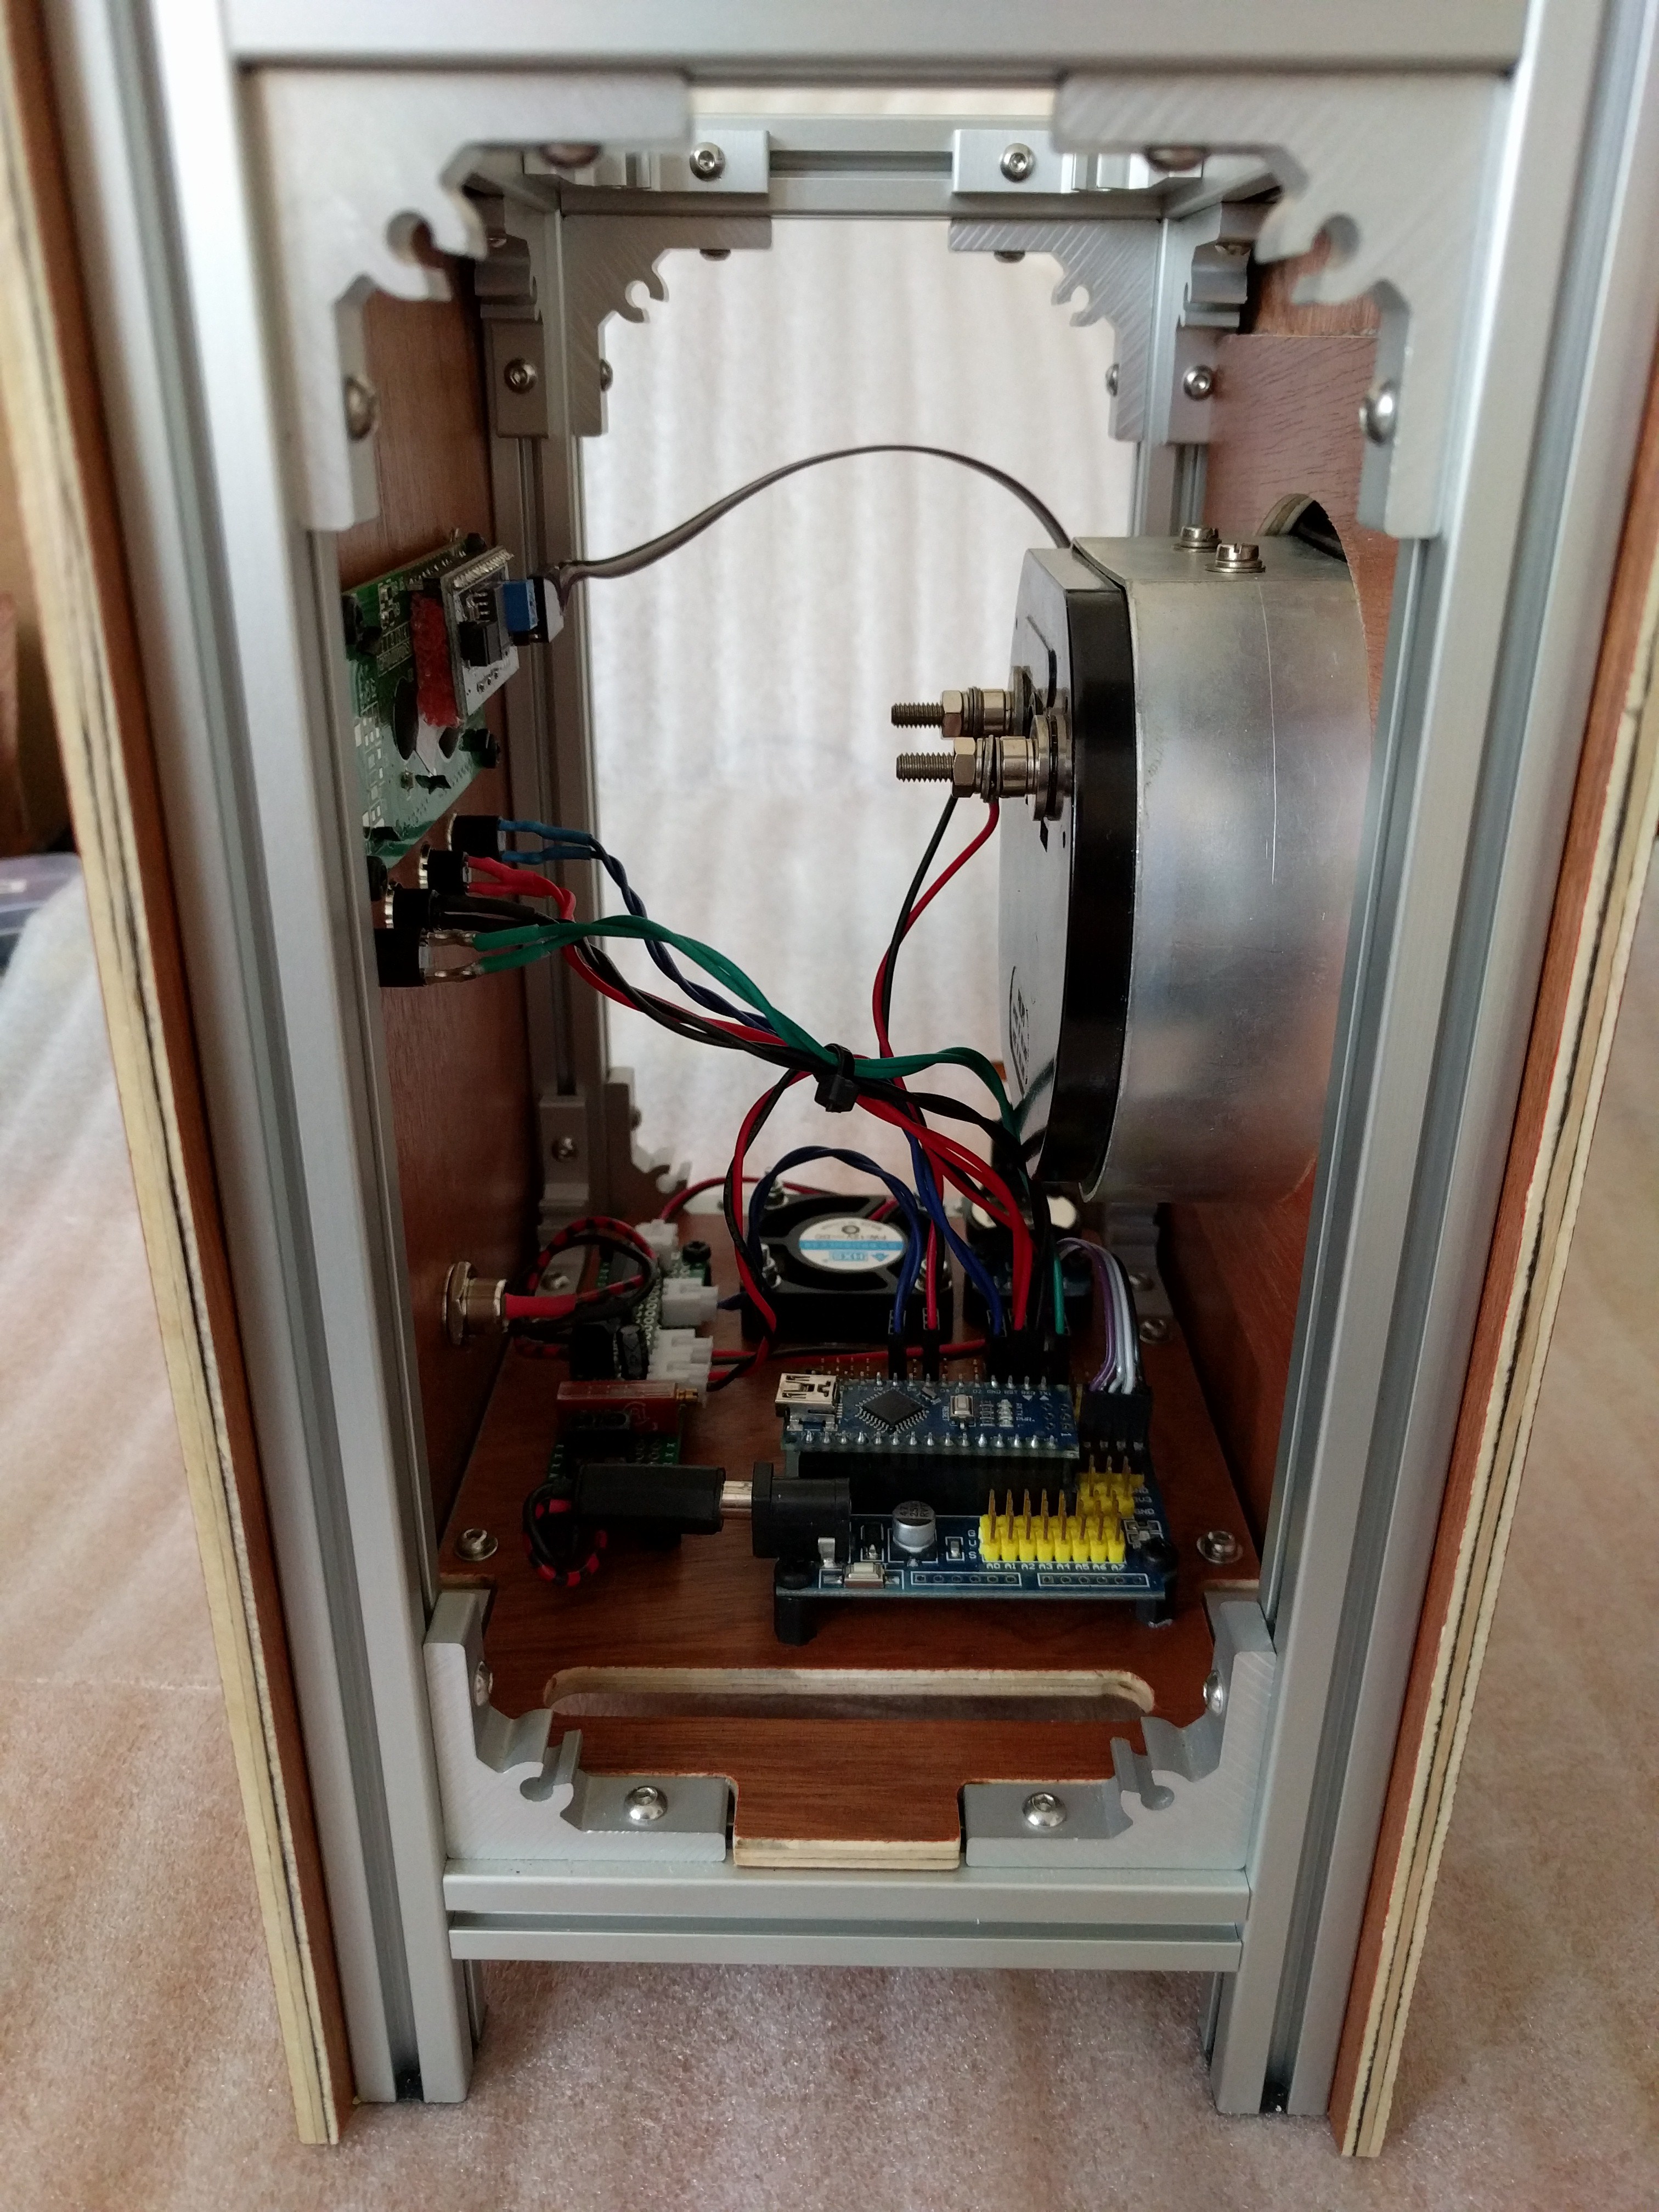
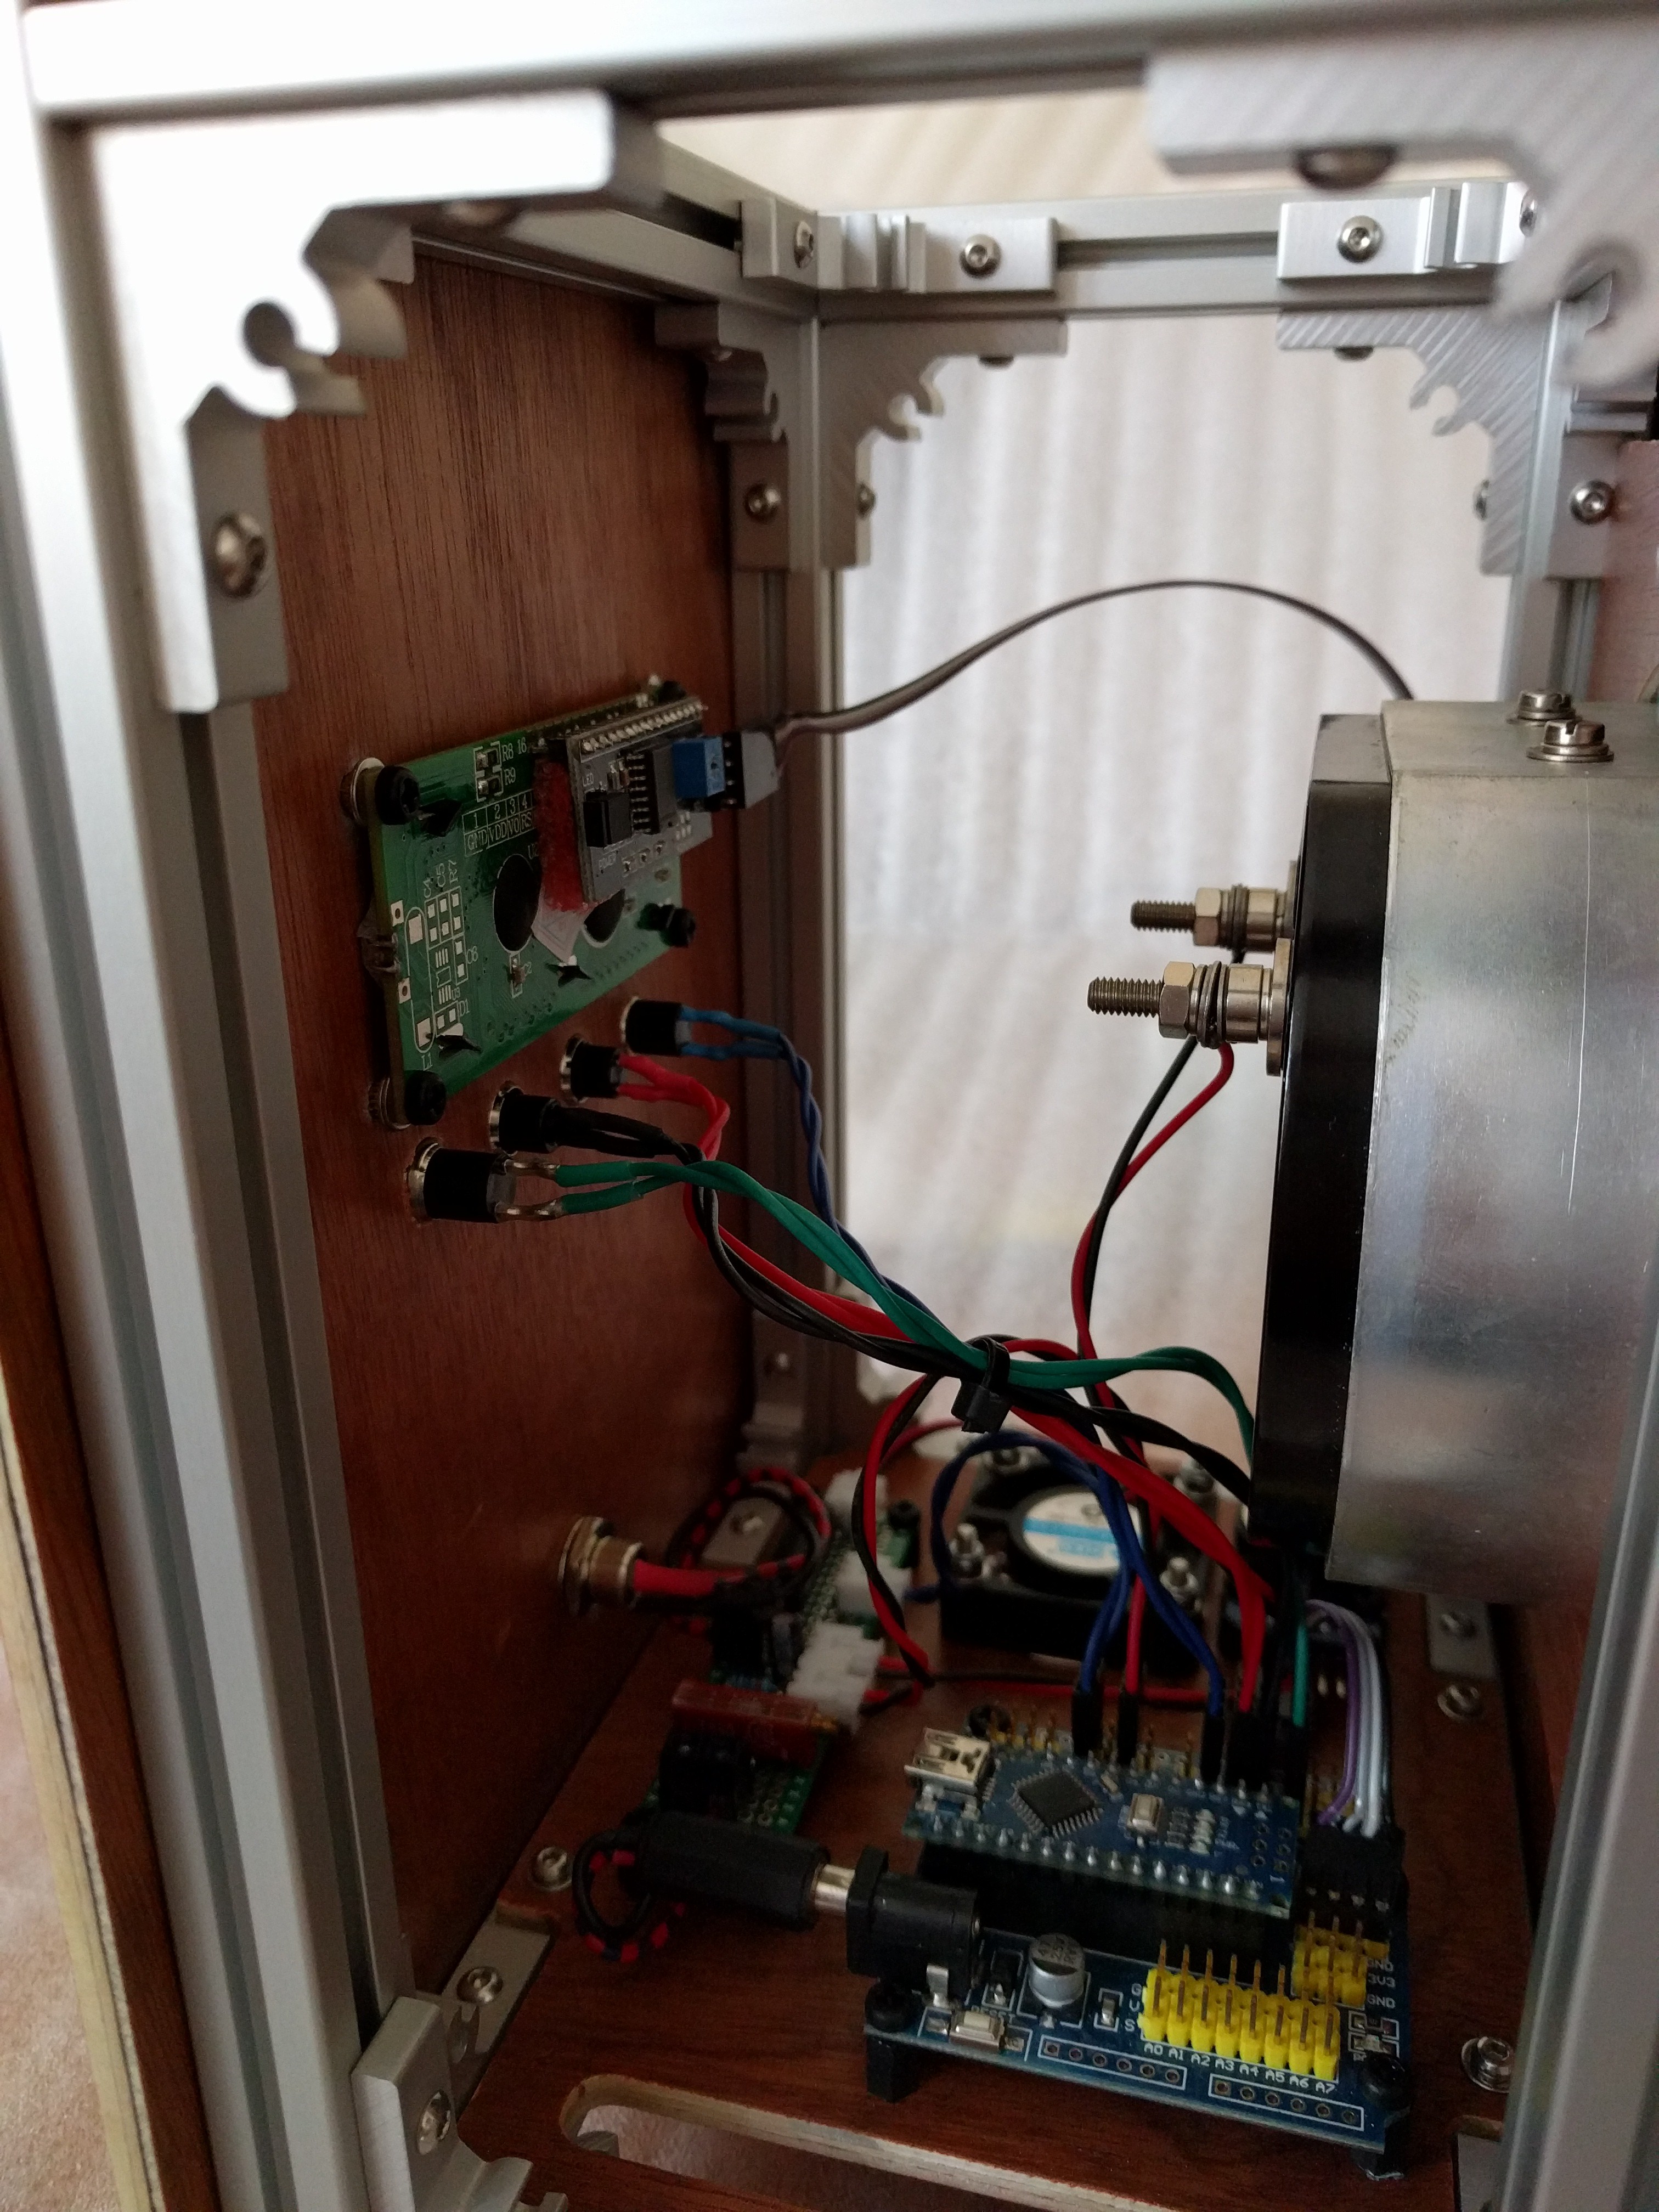
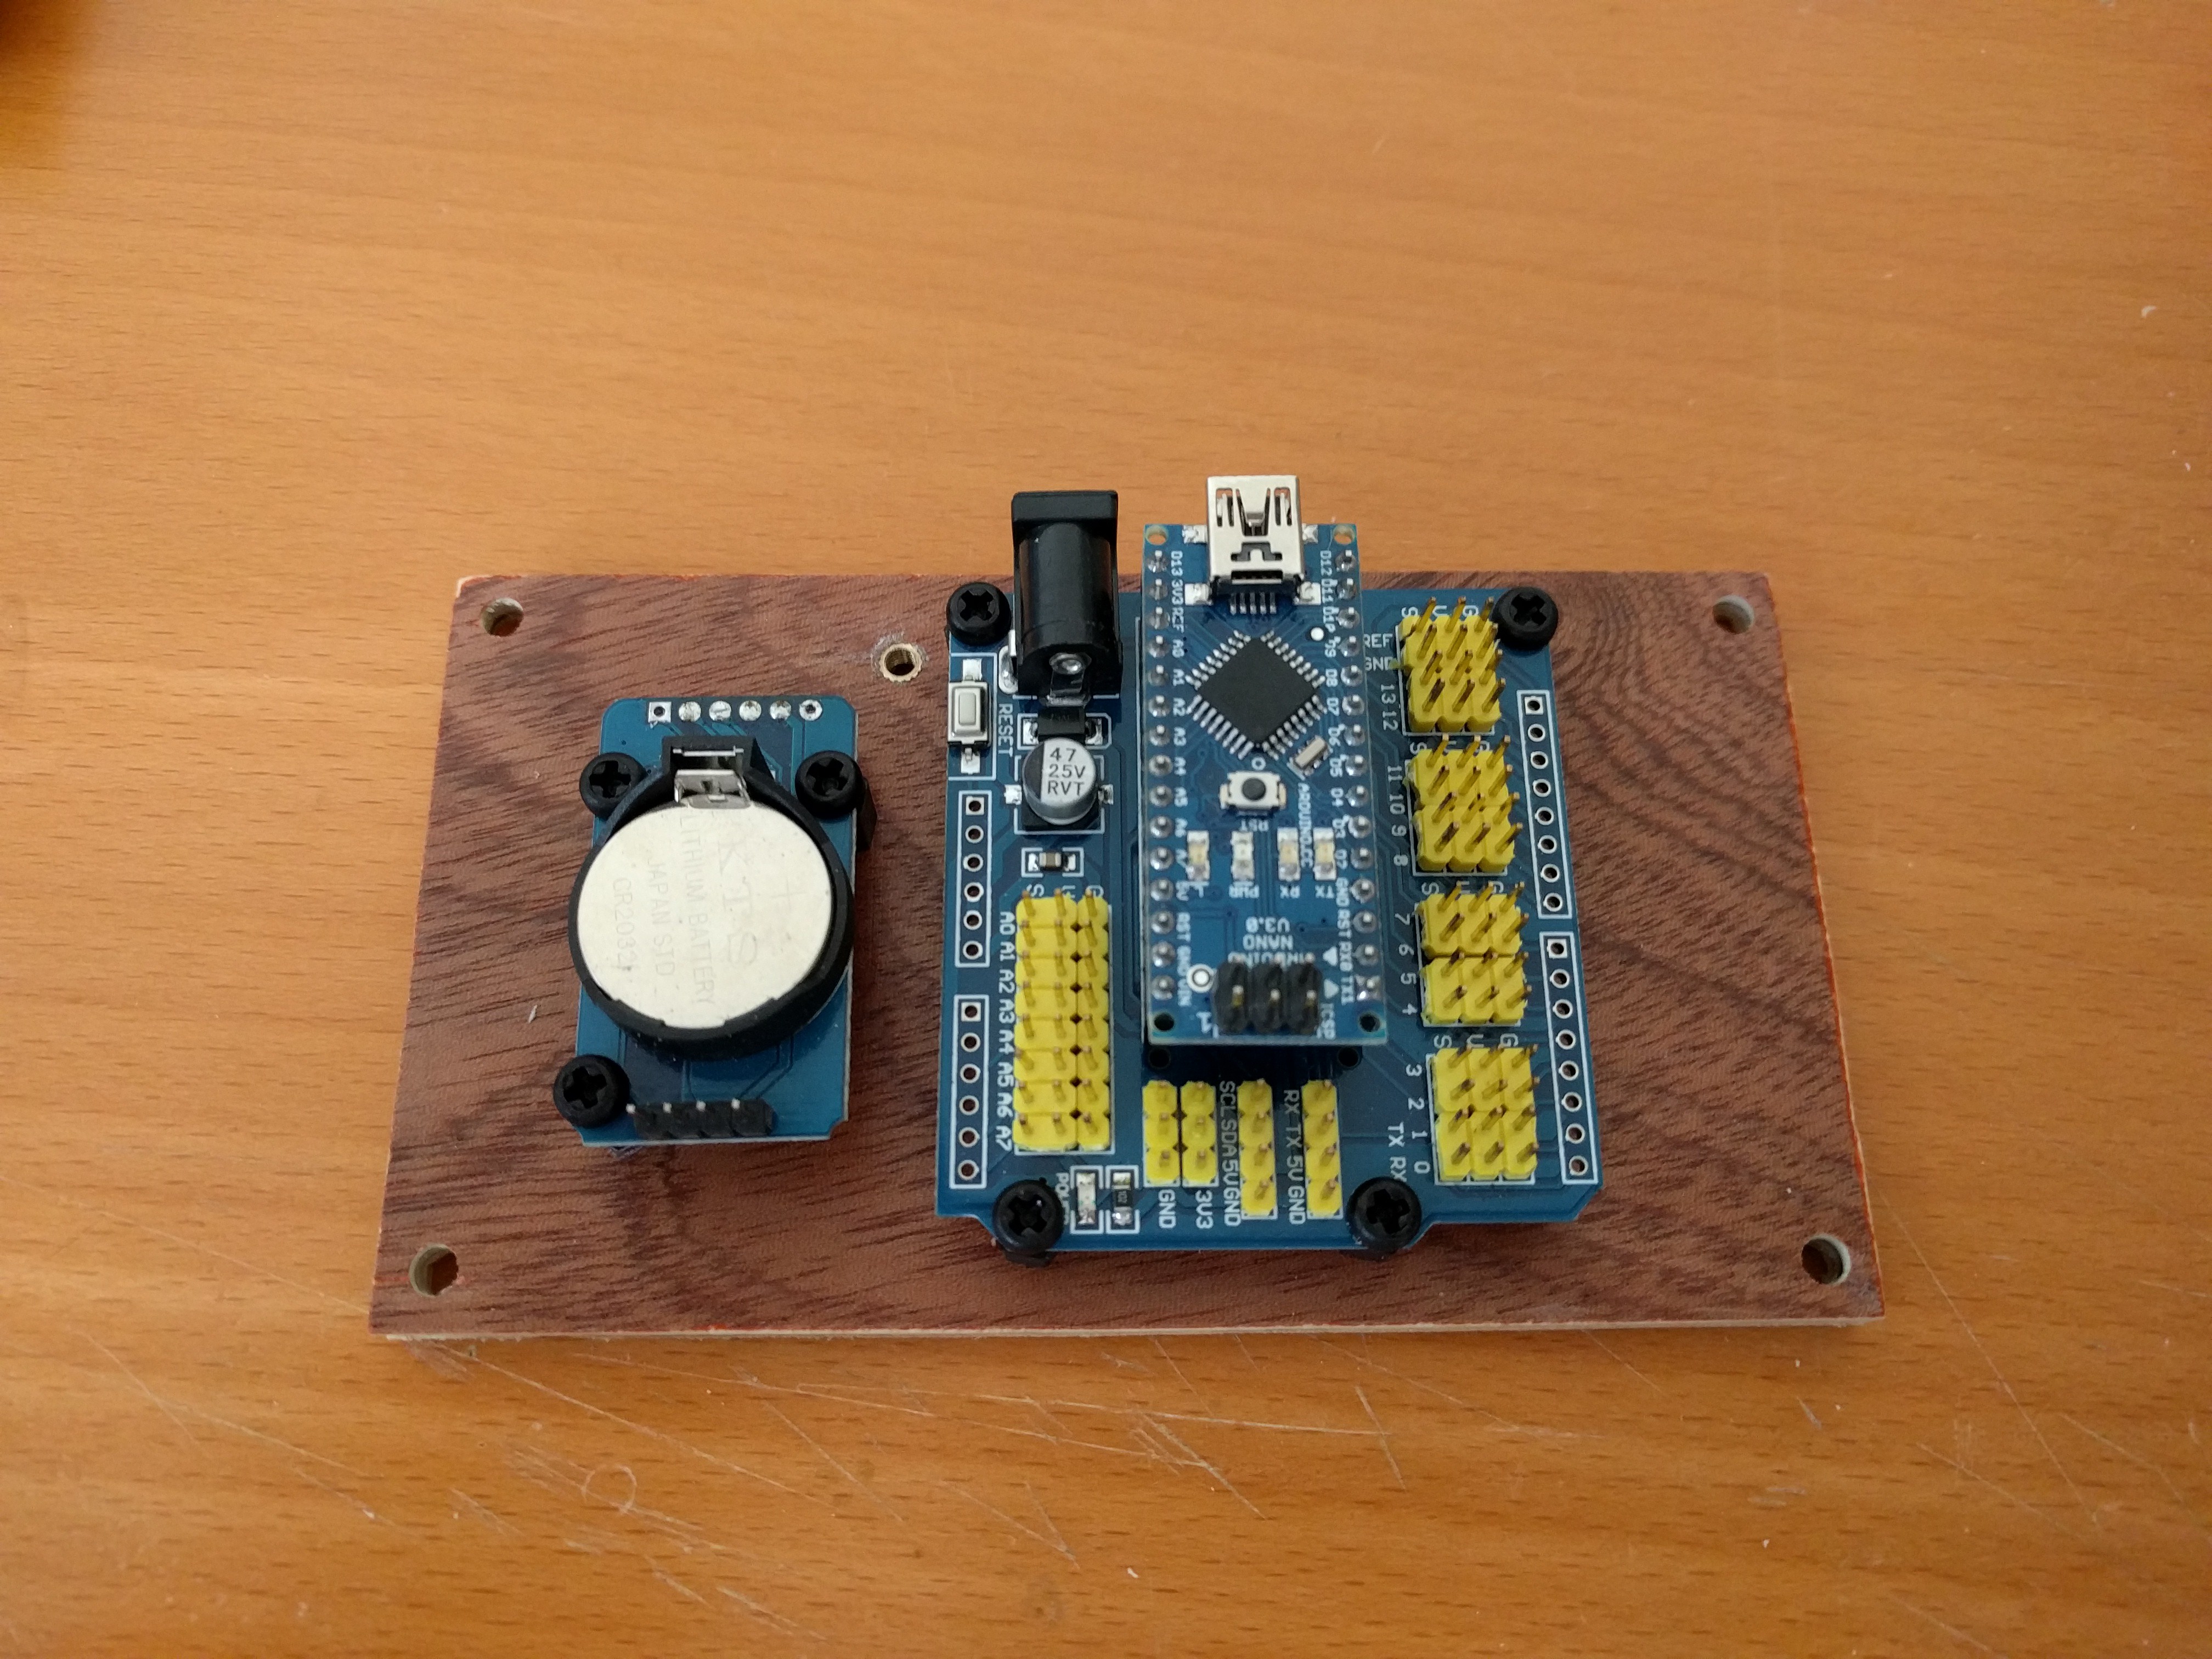
Electronics
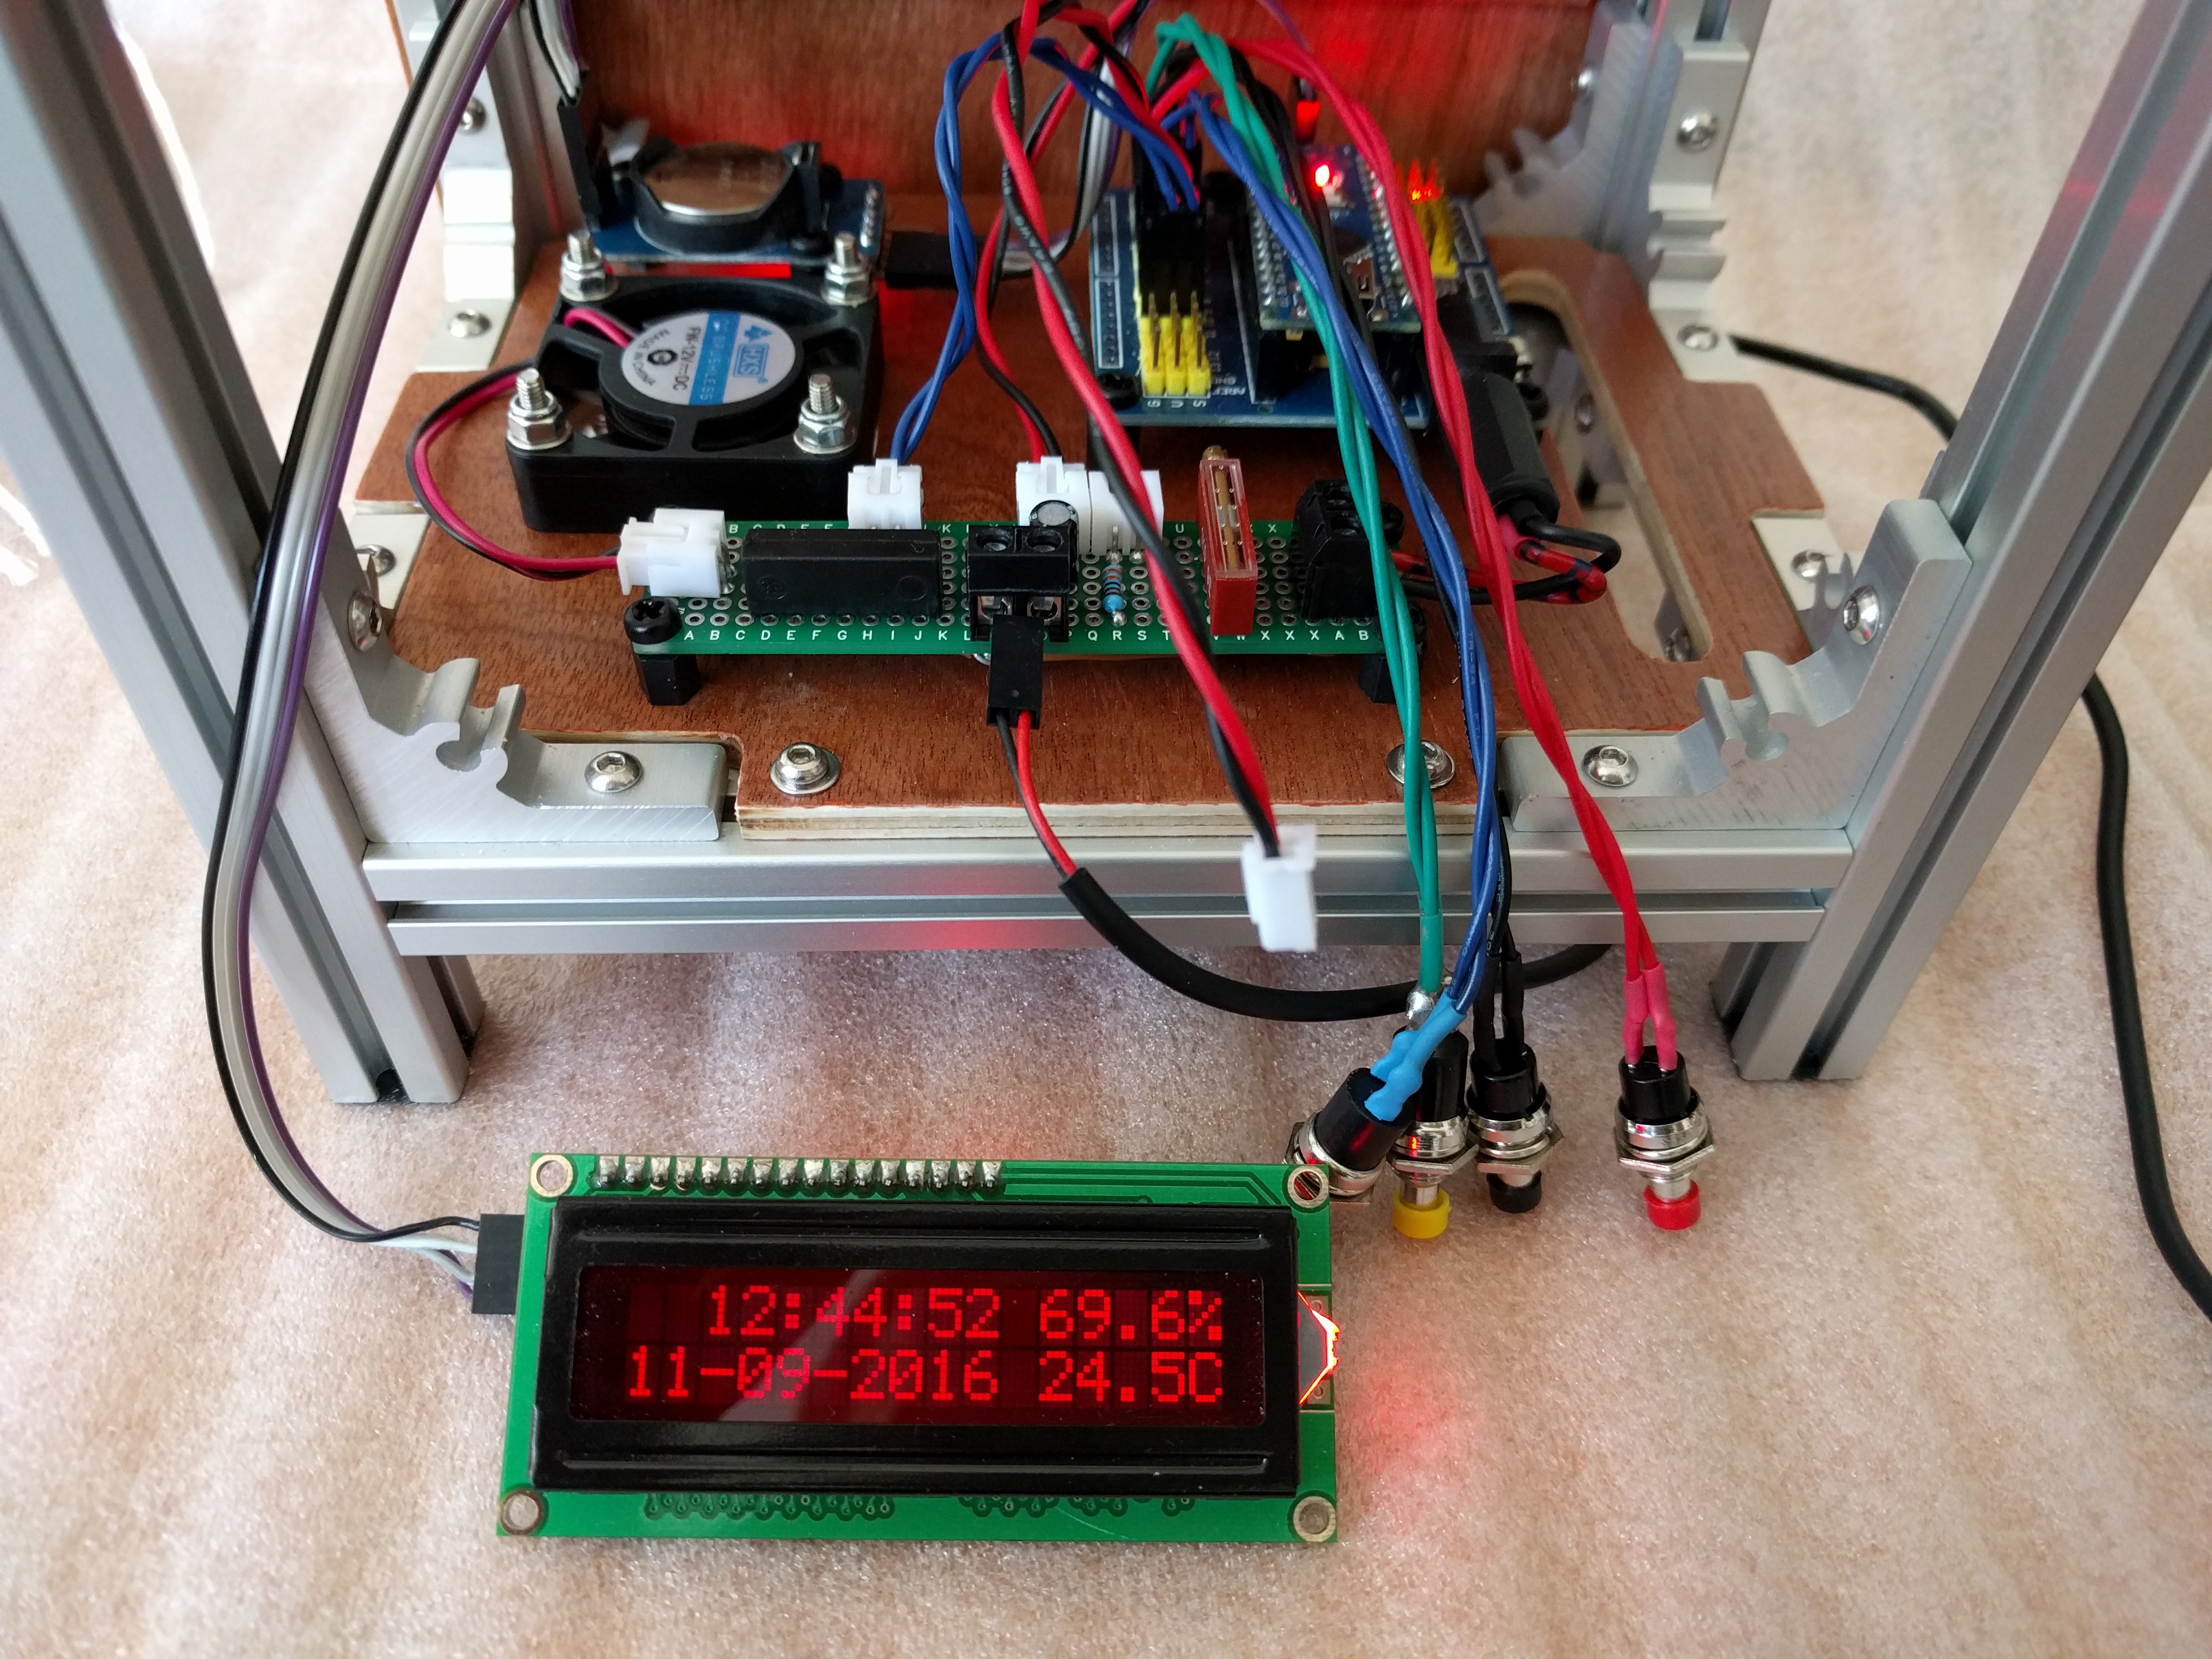
10/21/2016 at 10:44 • 0 commentsFinally found some time to update my project.
![]()
All electronics are working.
![]()
Installed everything.
![]()
-
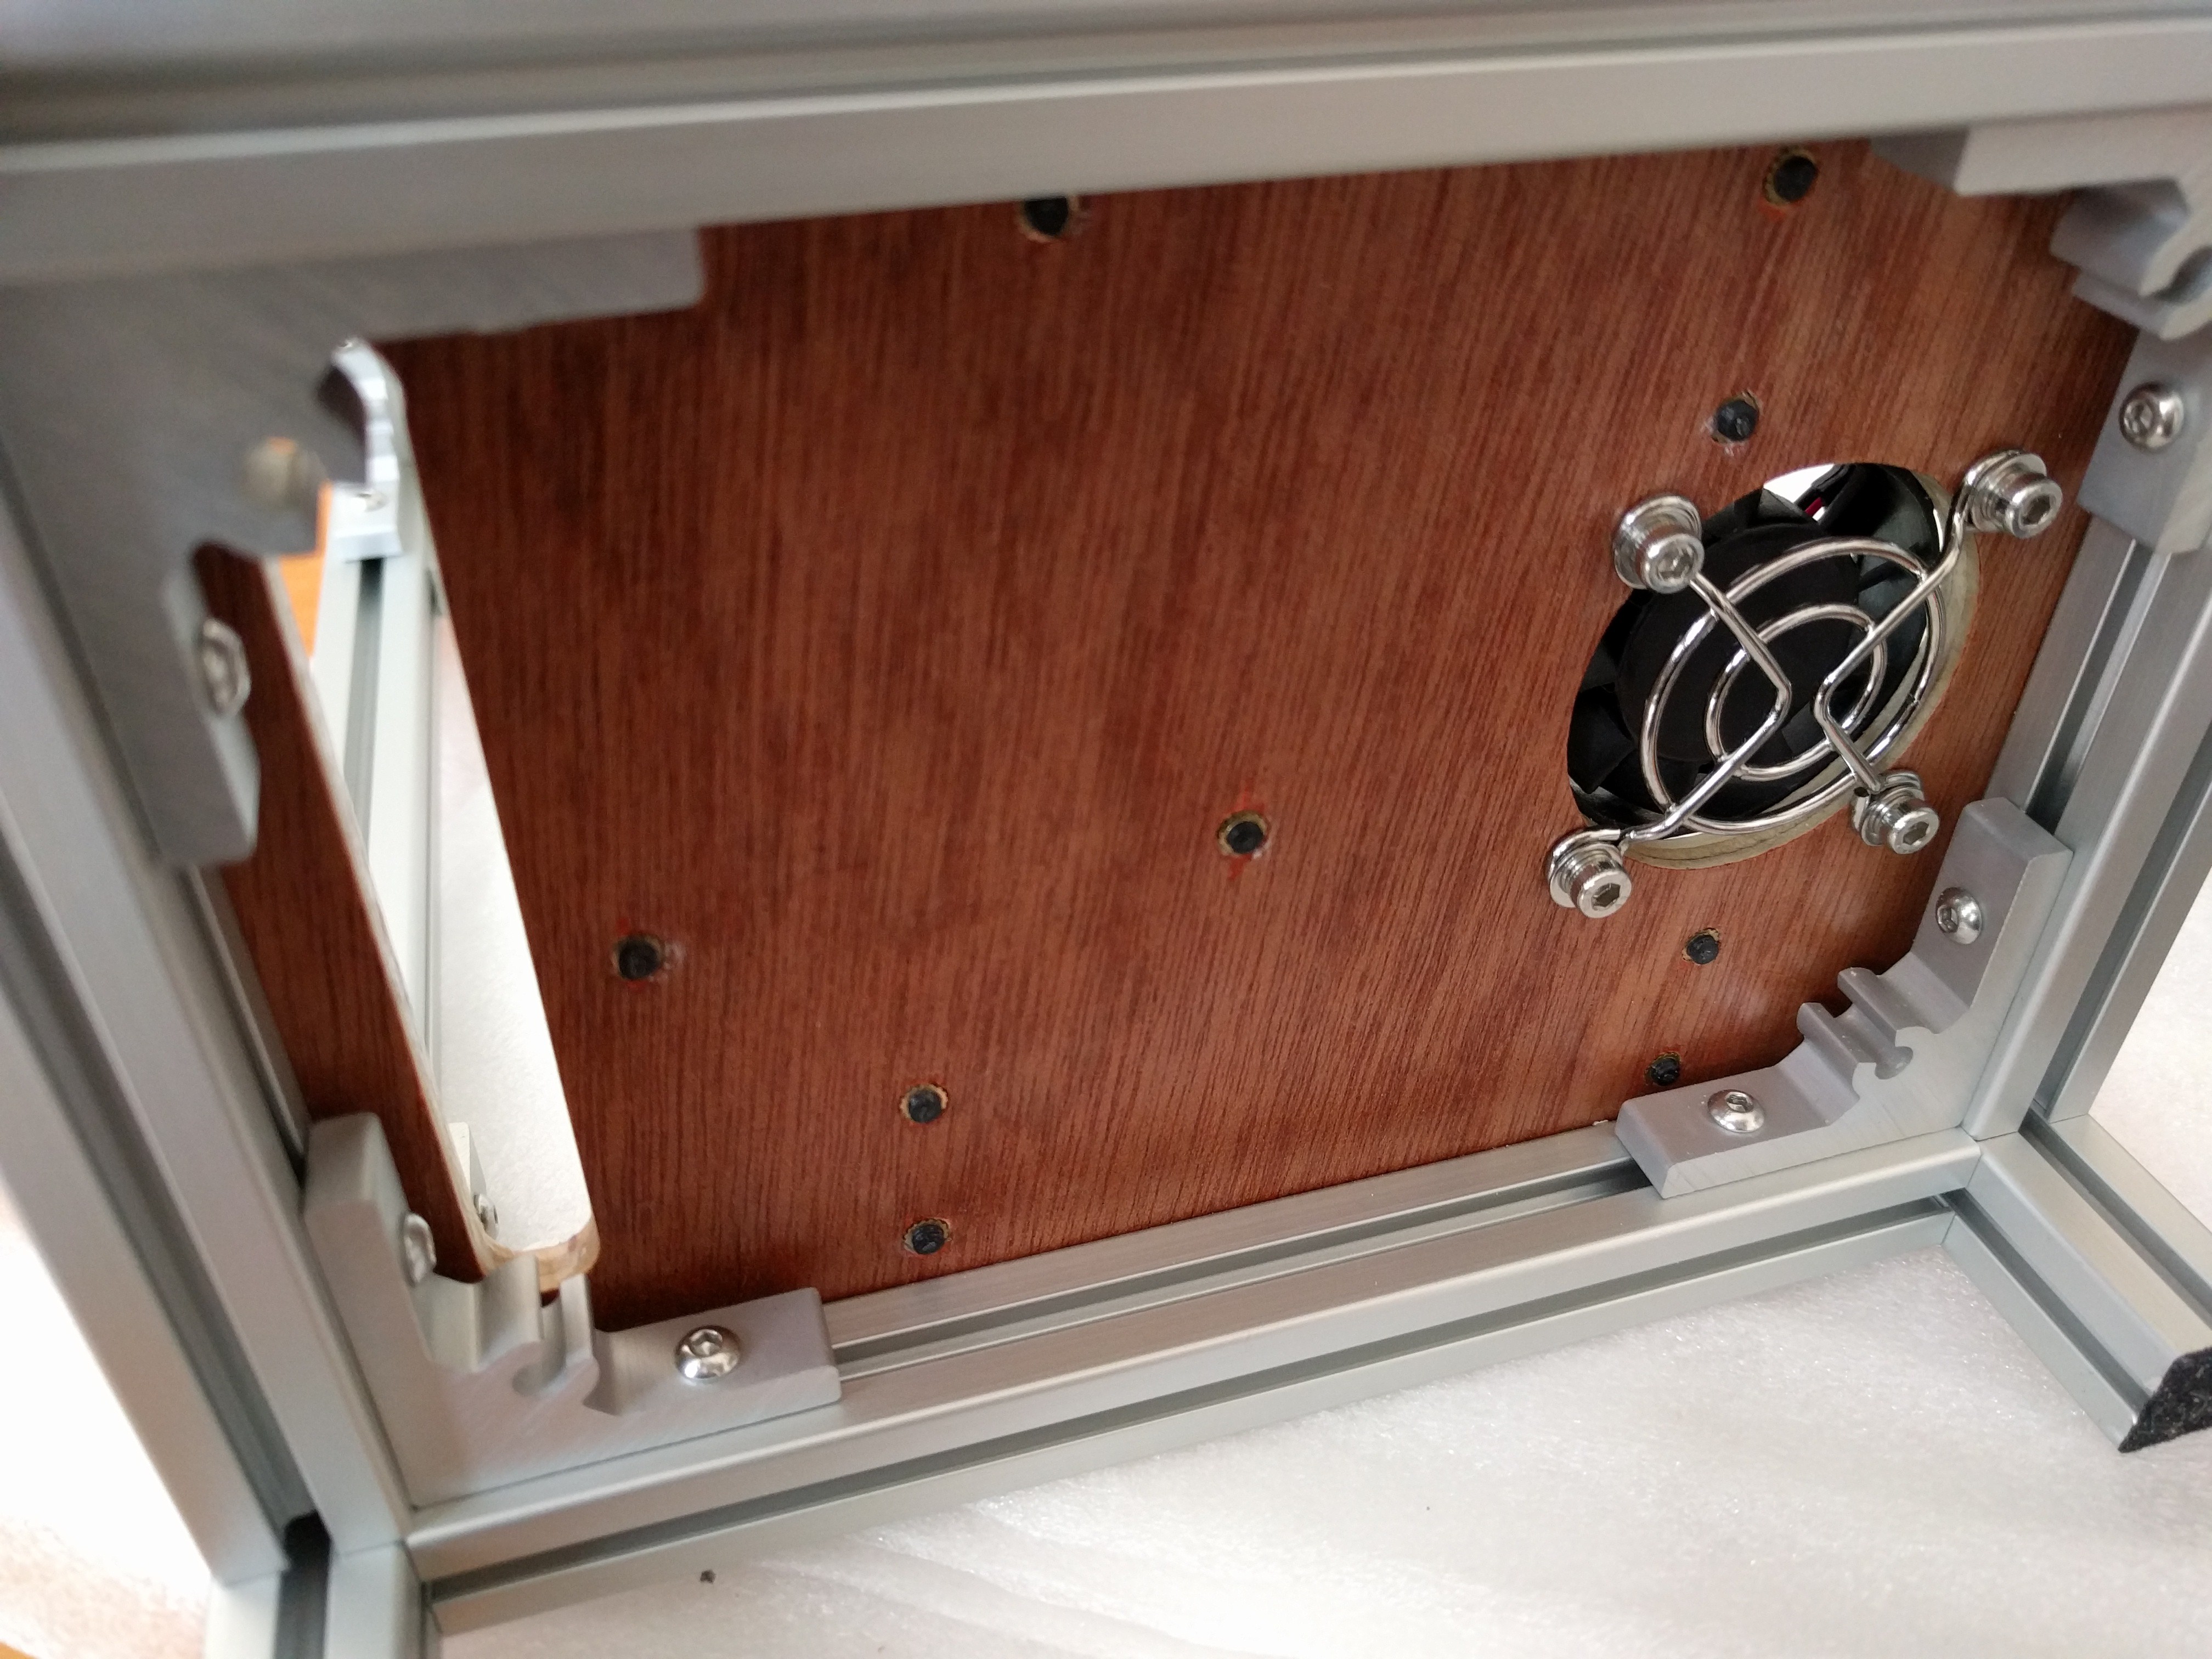
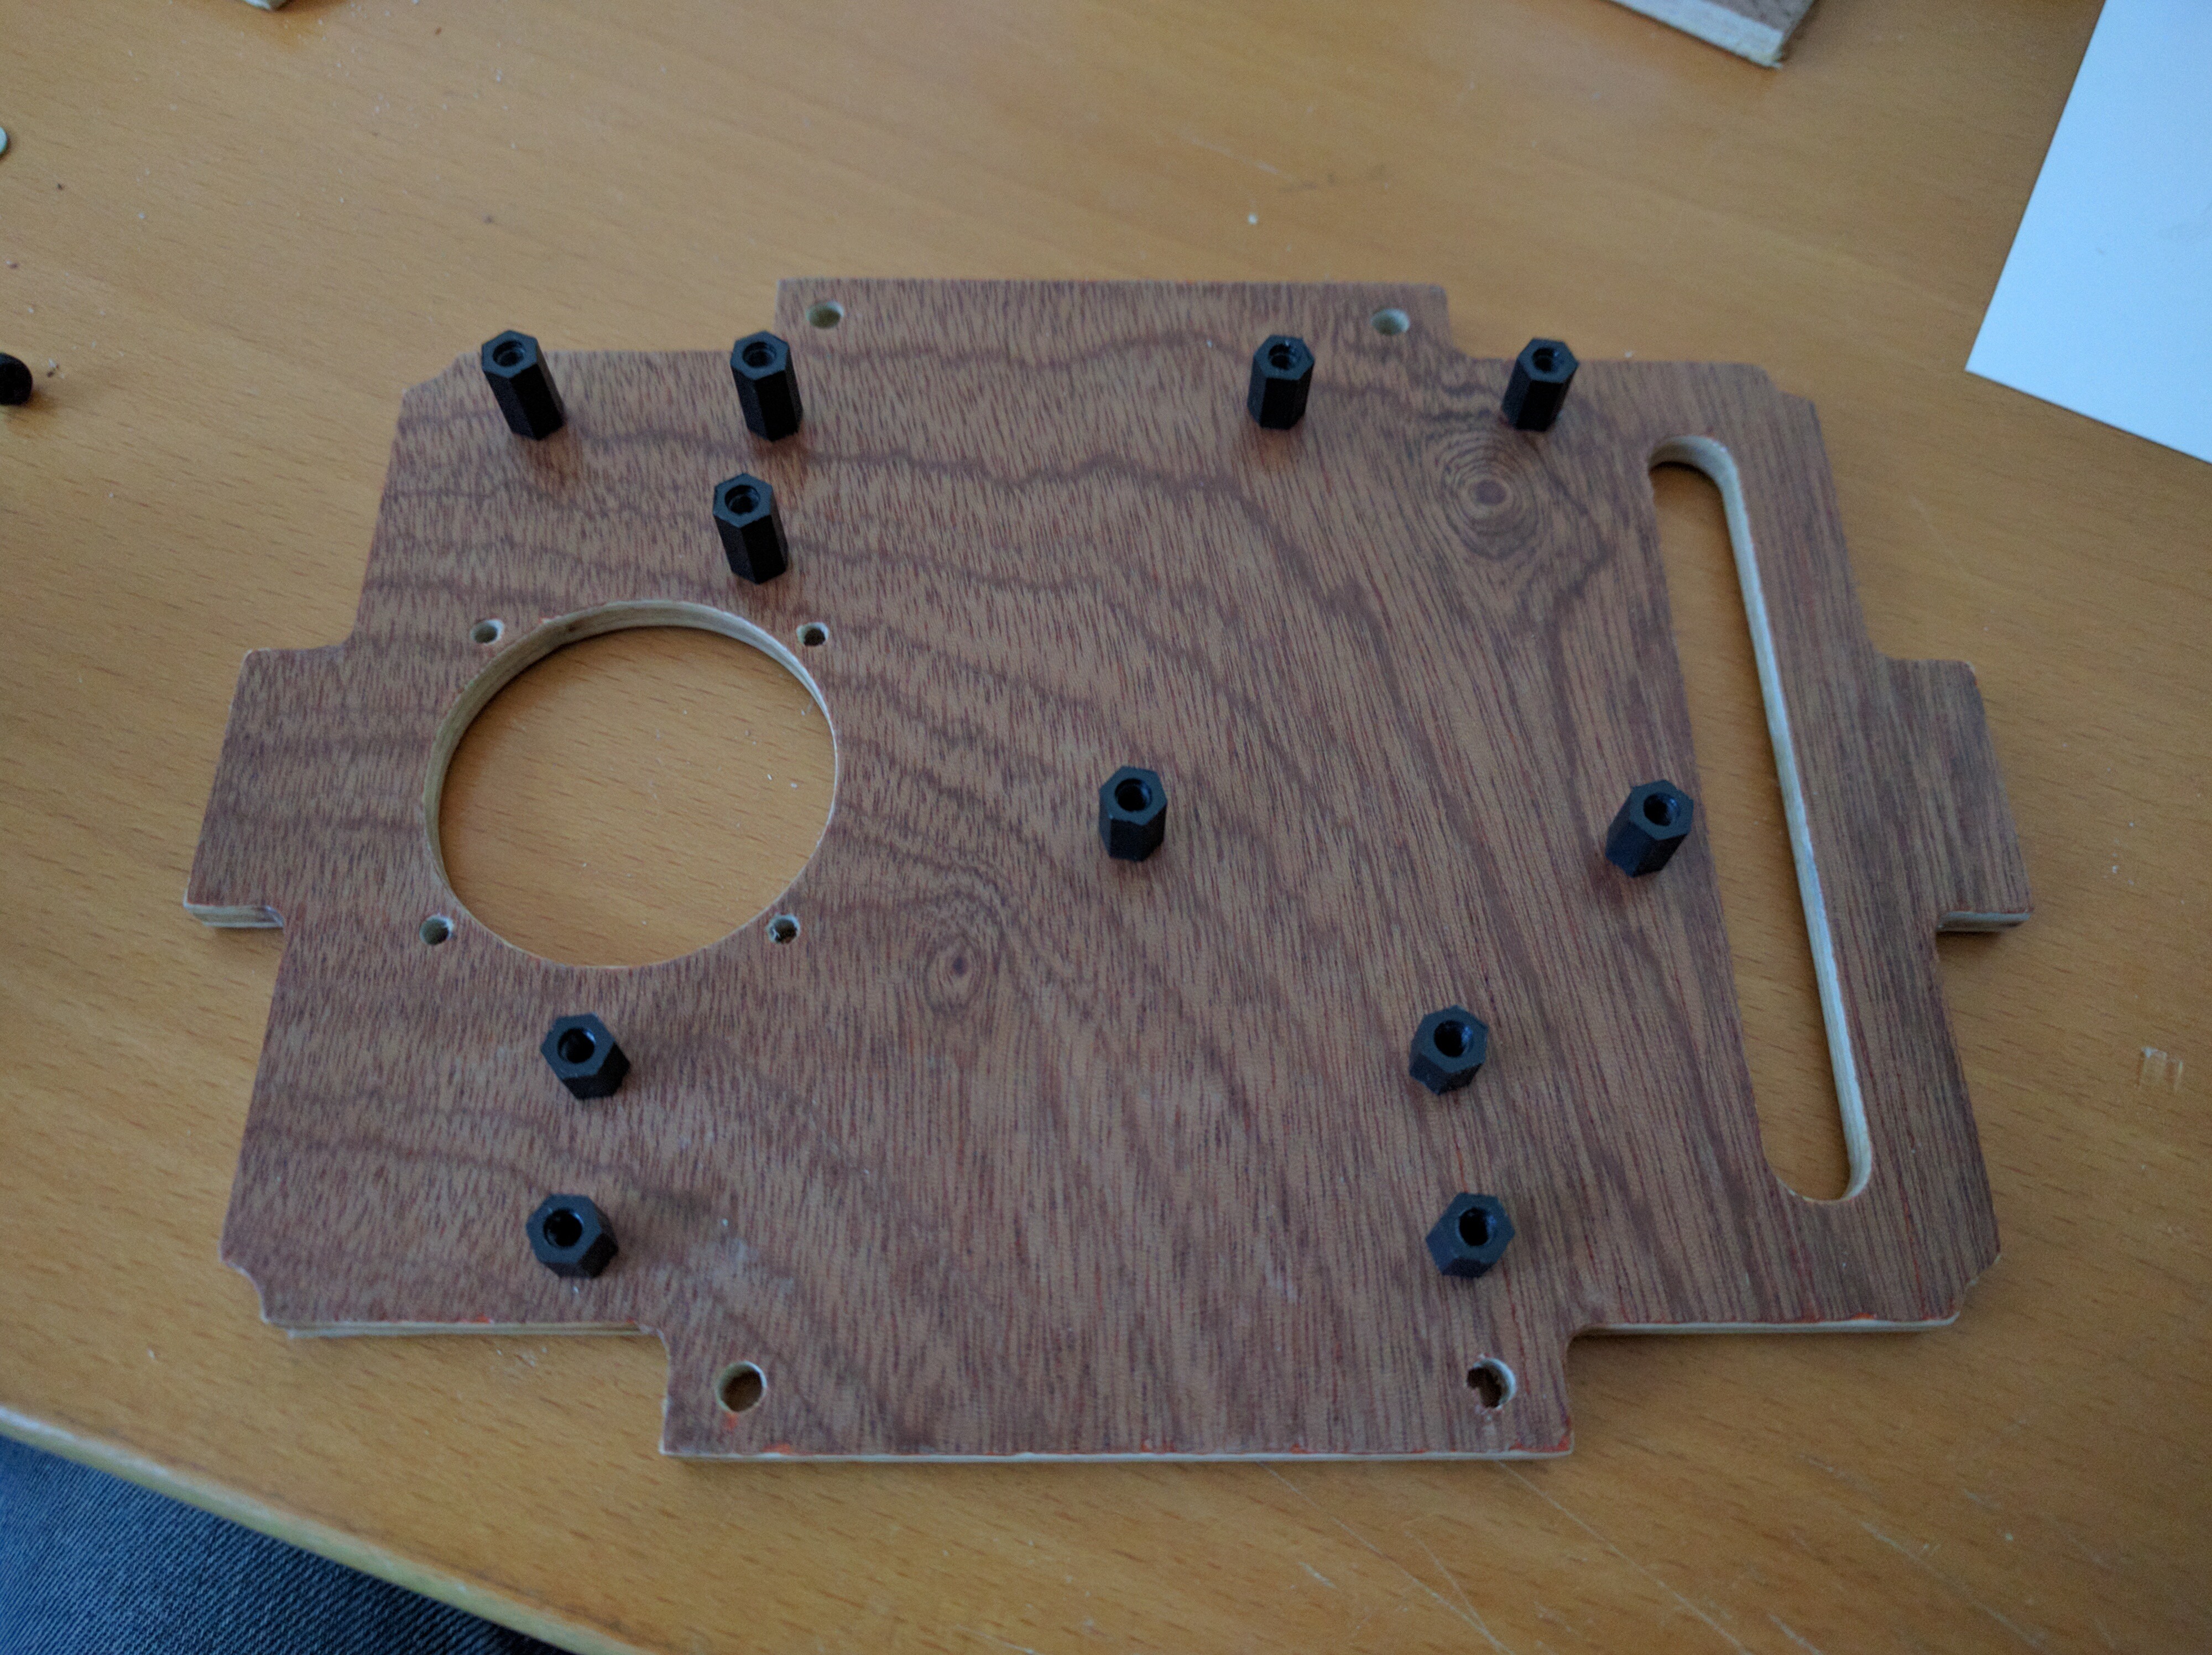
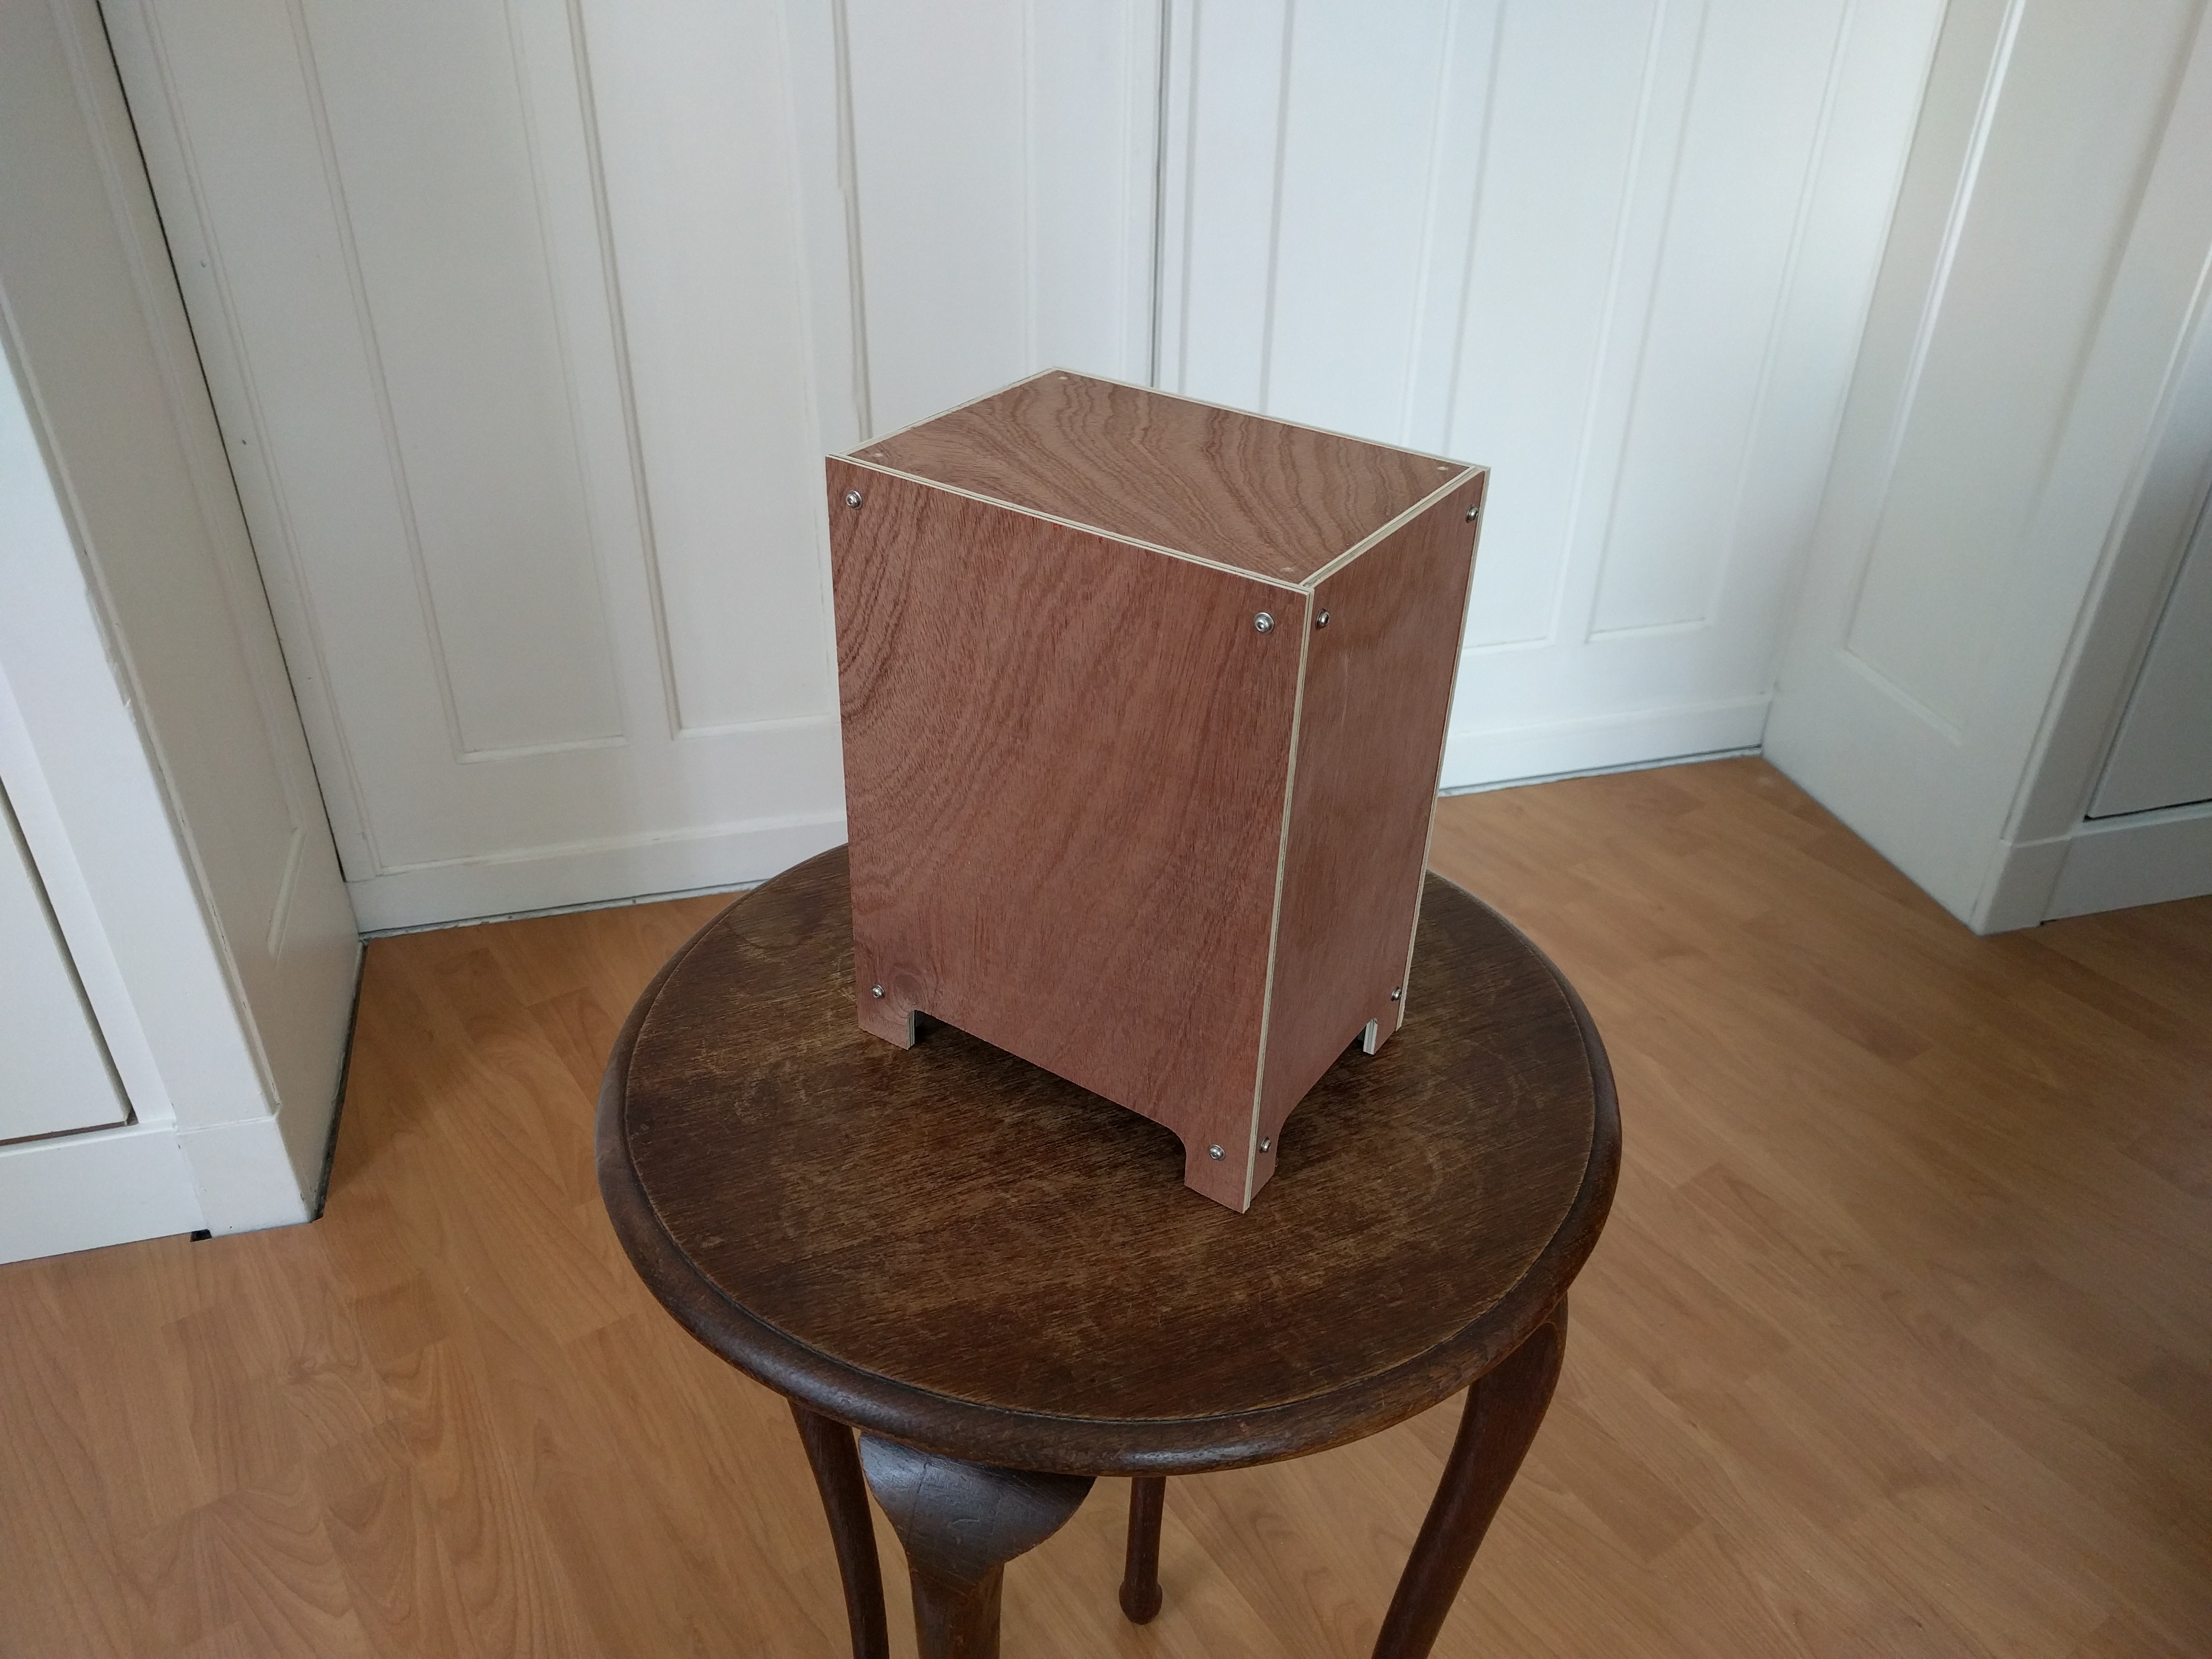
New Bottom panel
09/11/2016 at 13:50 • 0 commentsI wasn't very happy with the bottom panel, it looked cheap and was to small for all the components that had to be installed. I had to make a new one.
![]()
After locating where the parts should go I drilled the holes for the standoffs.
![]()
-
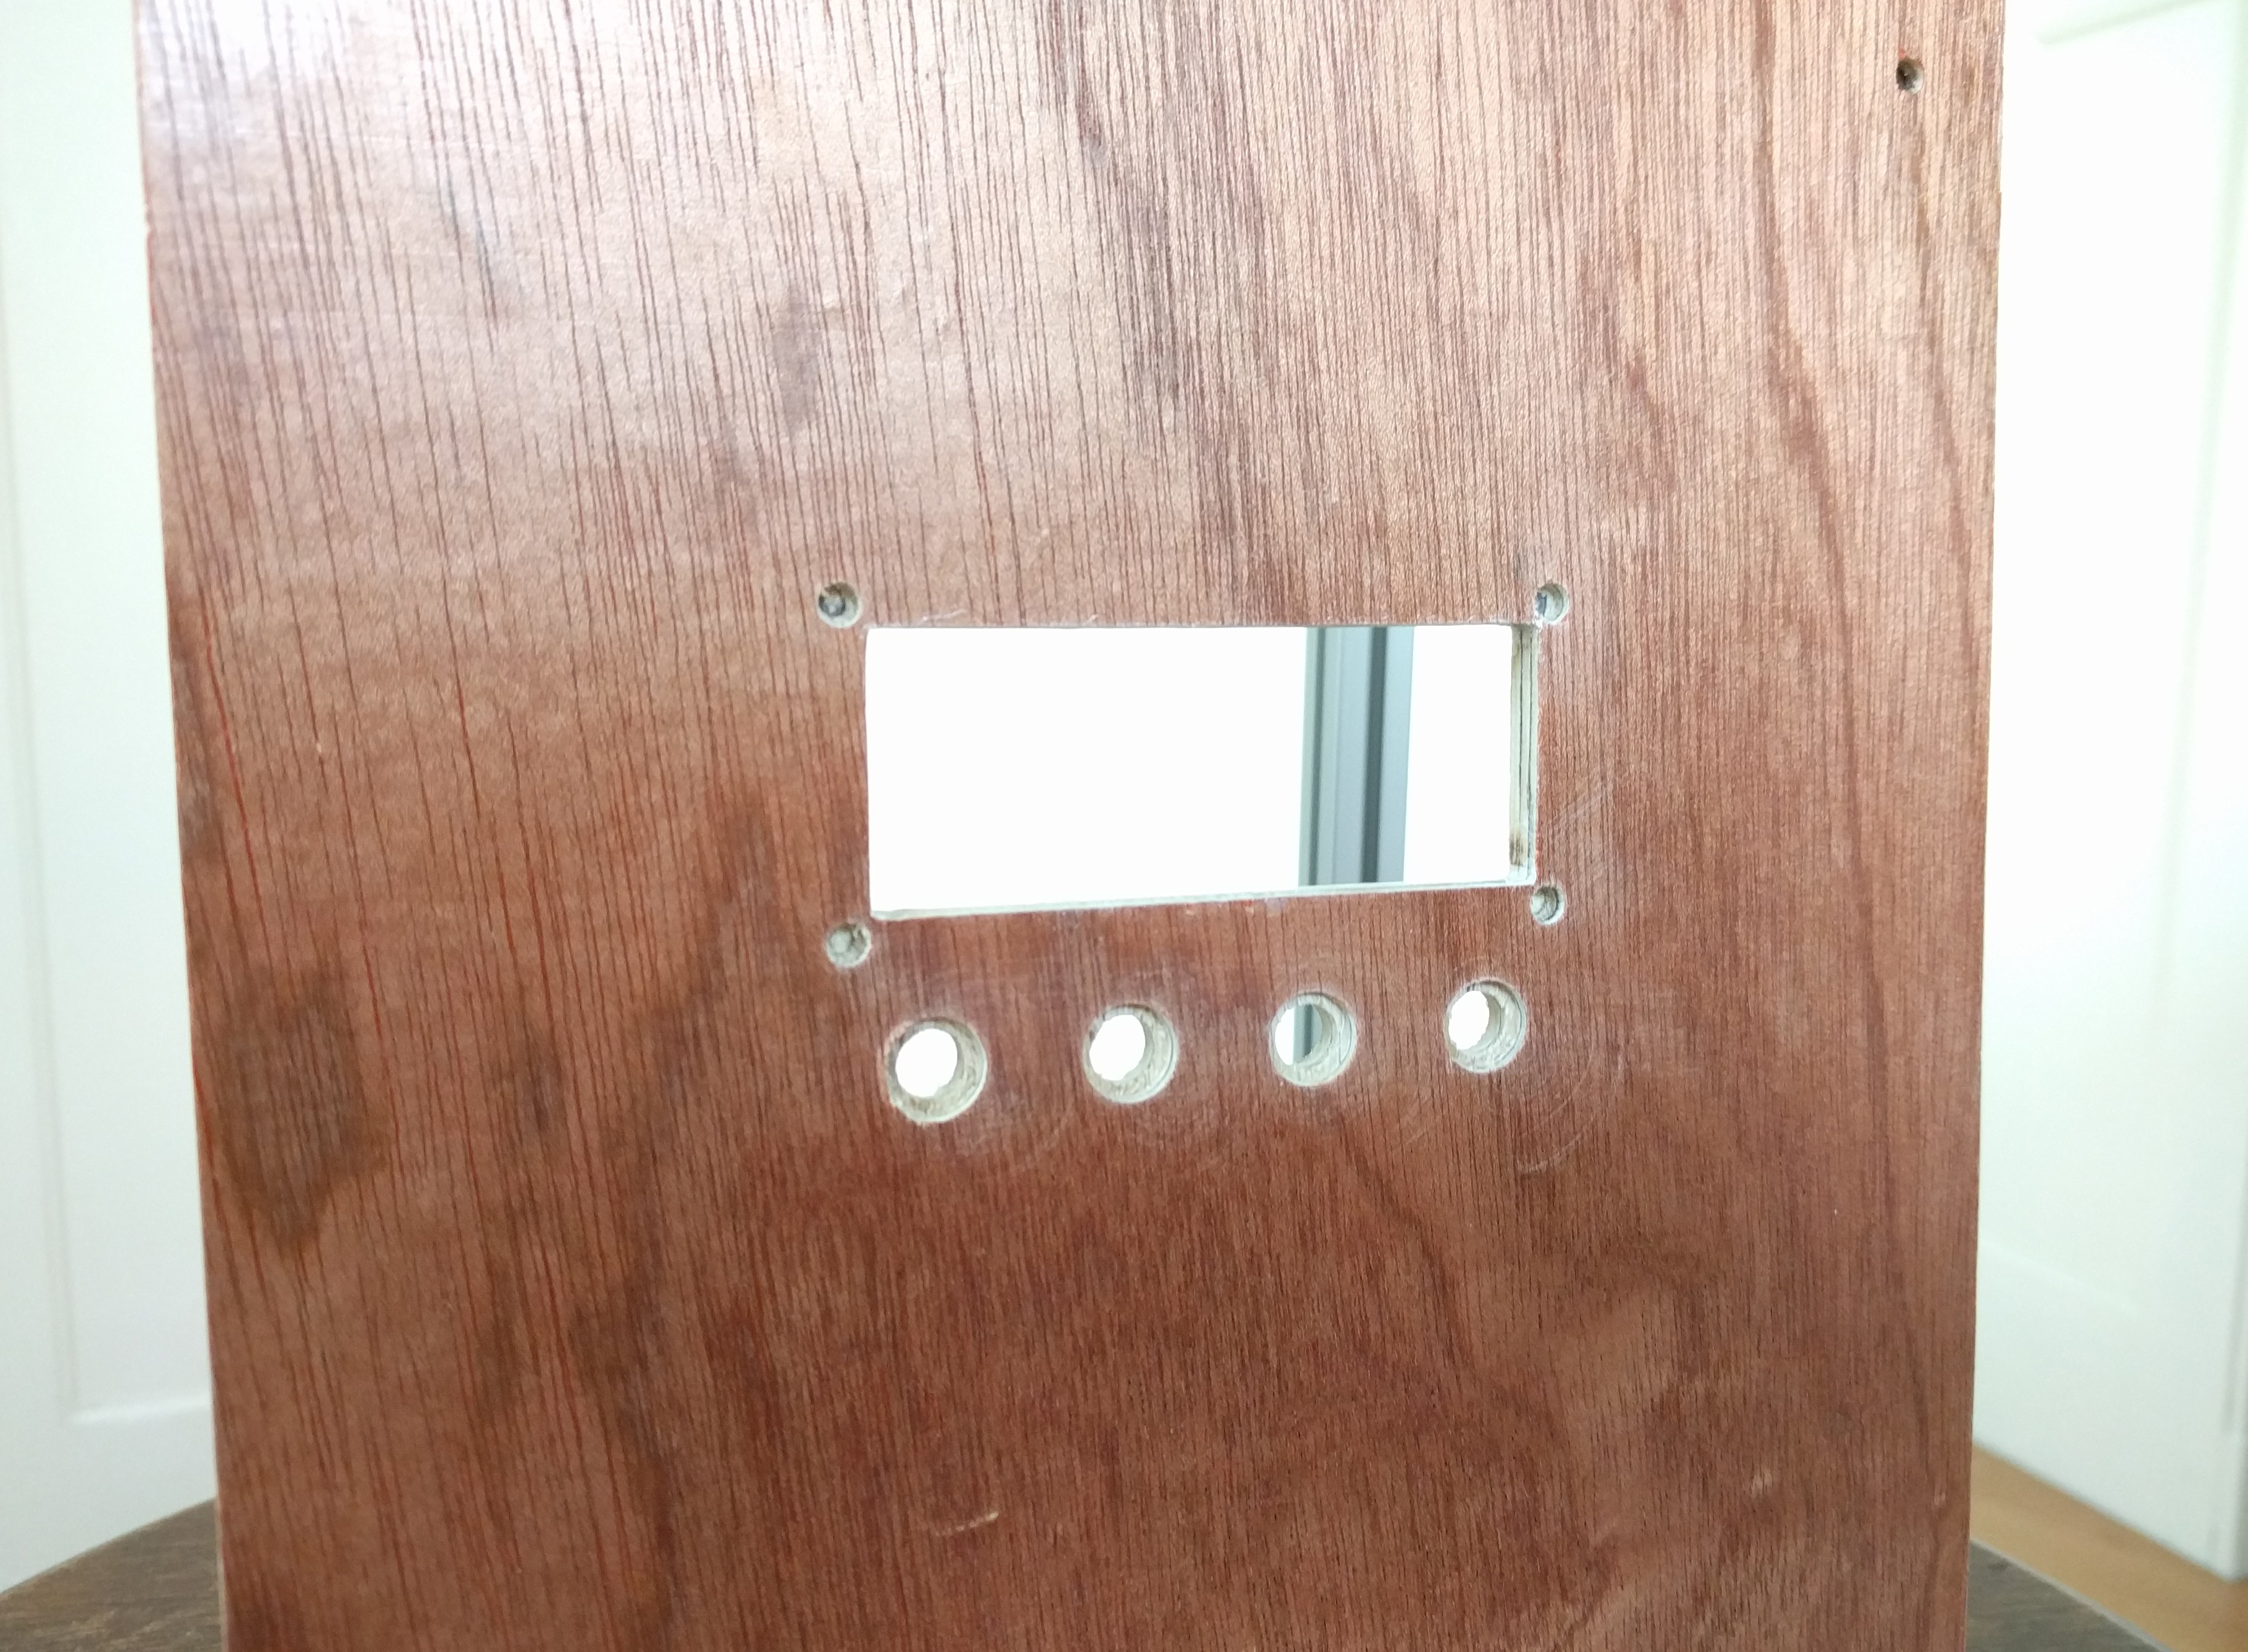
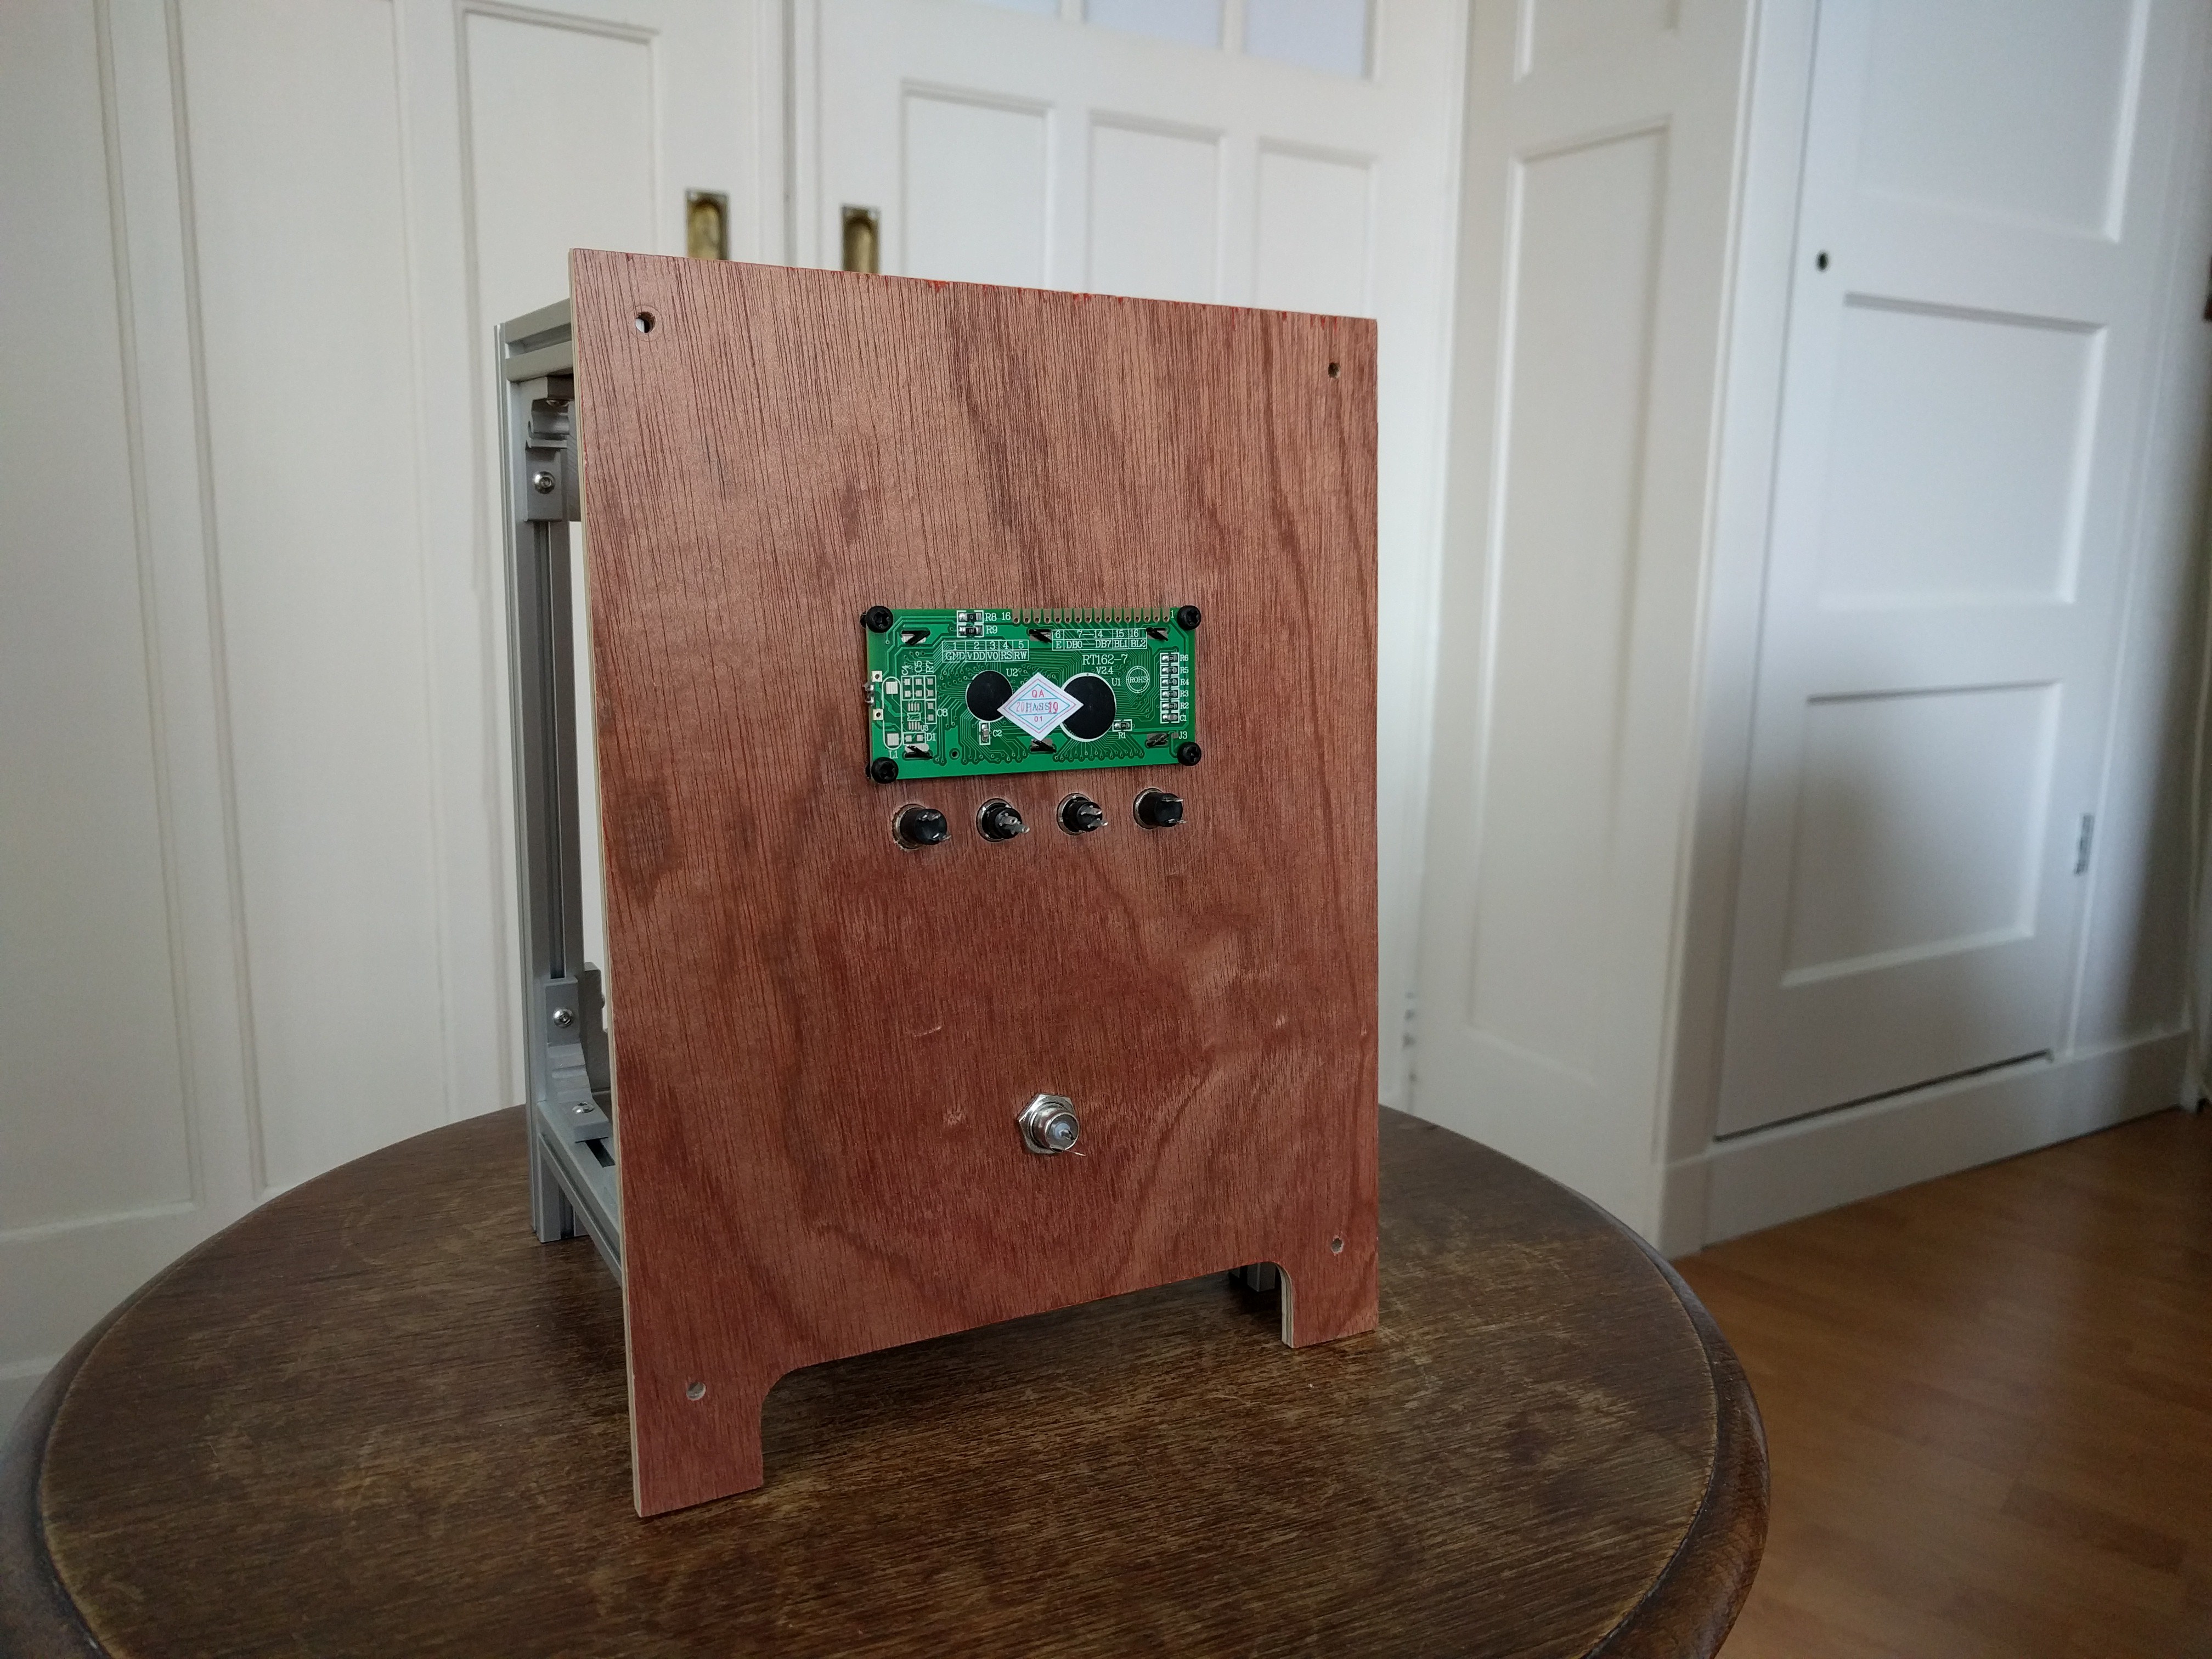
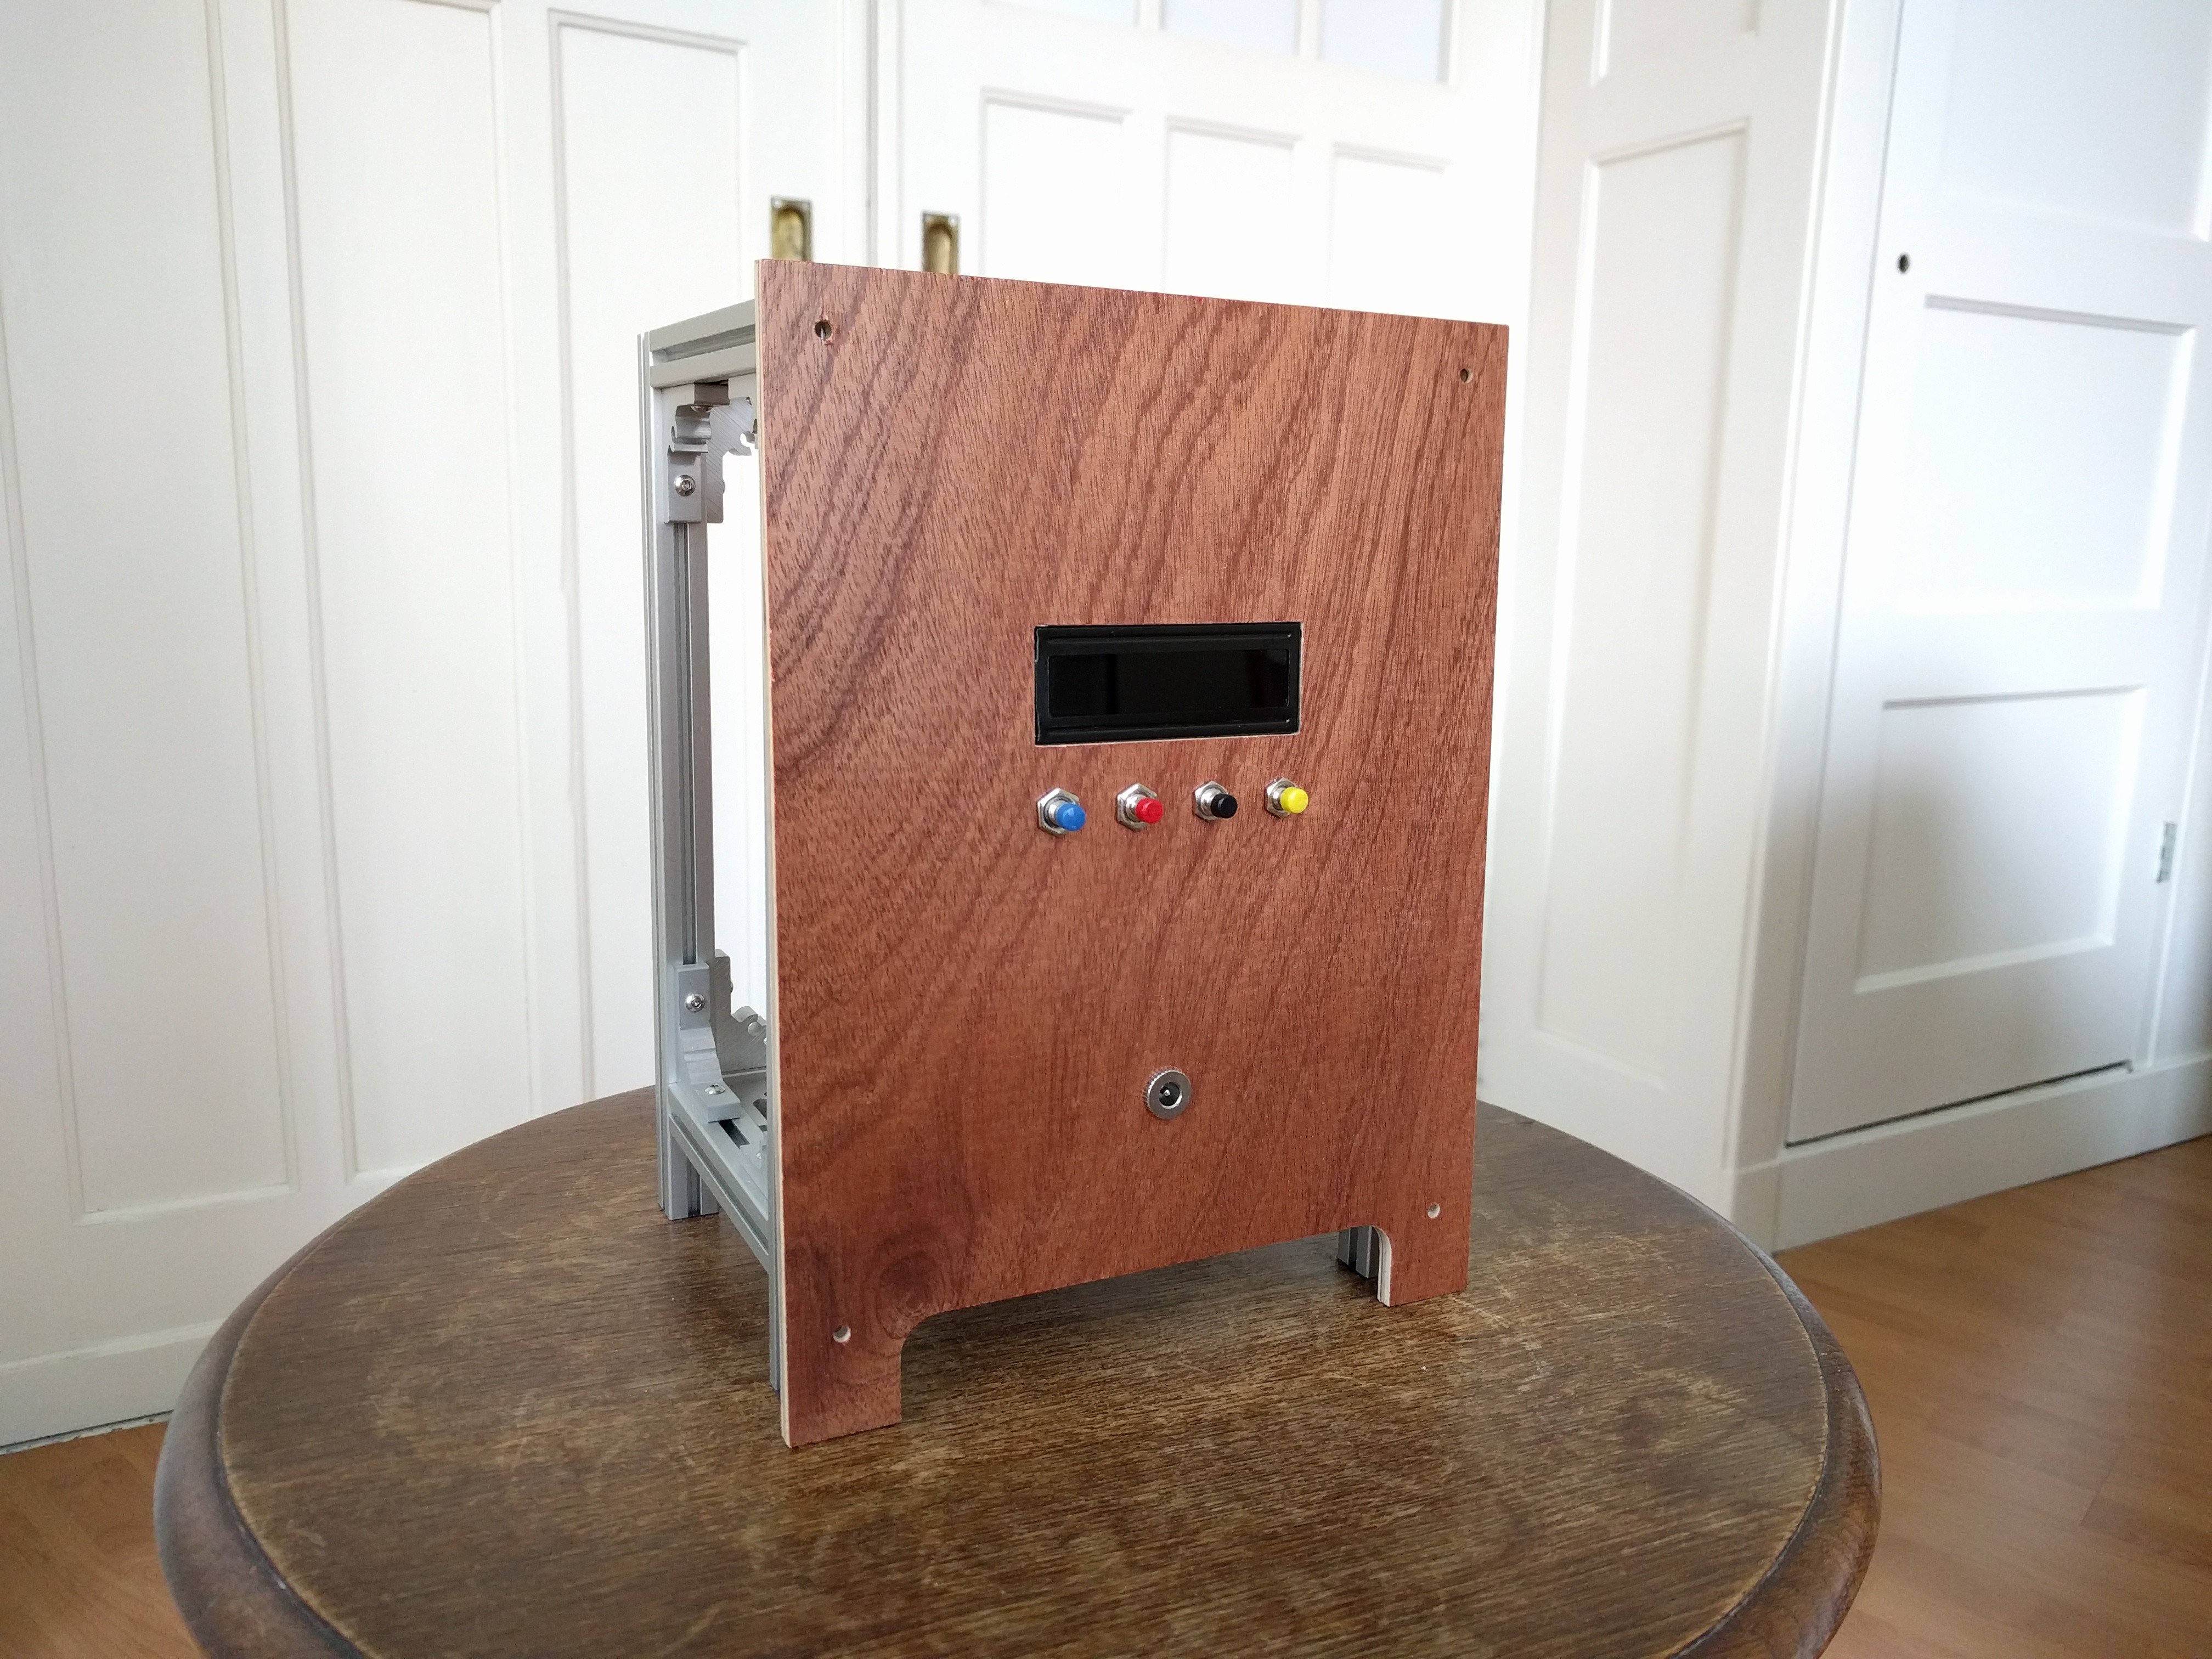
The Backside
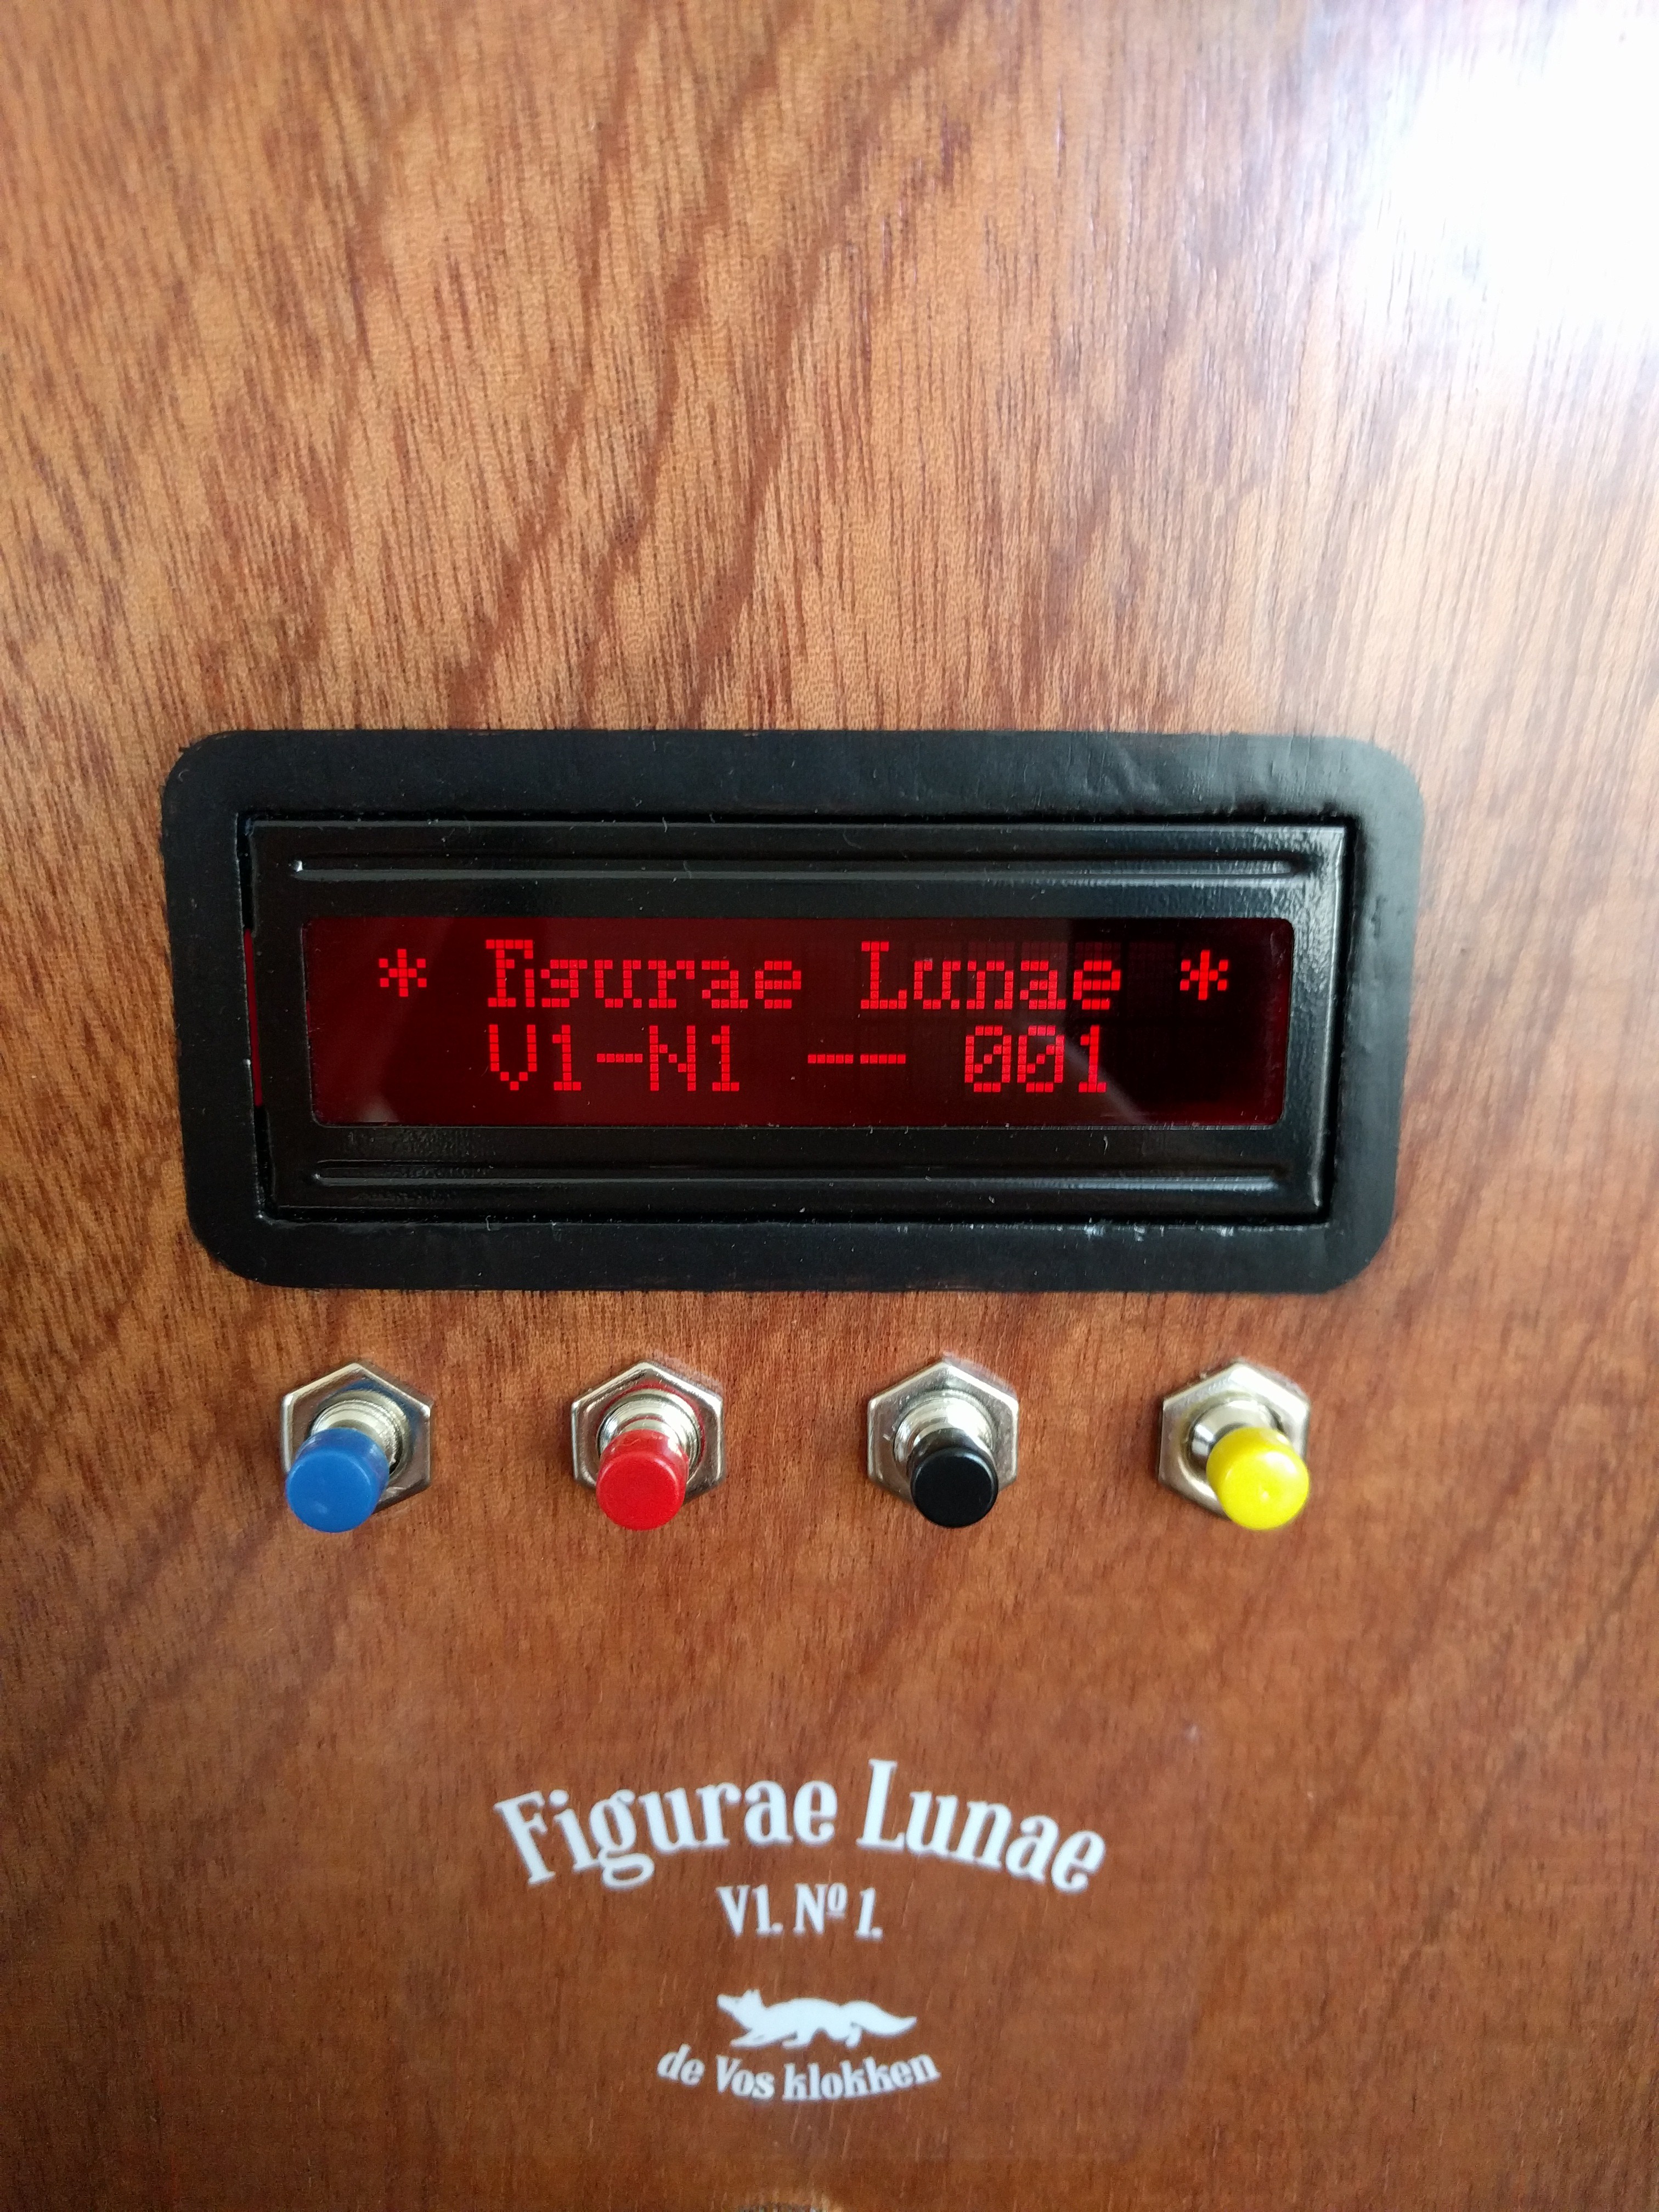
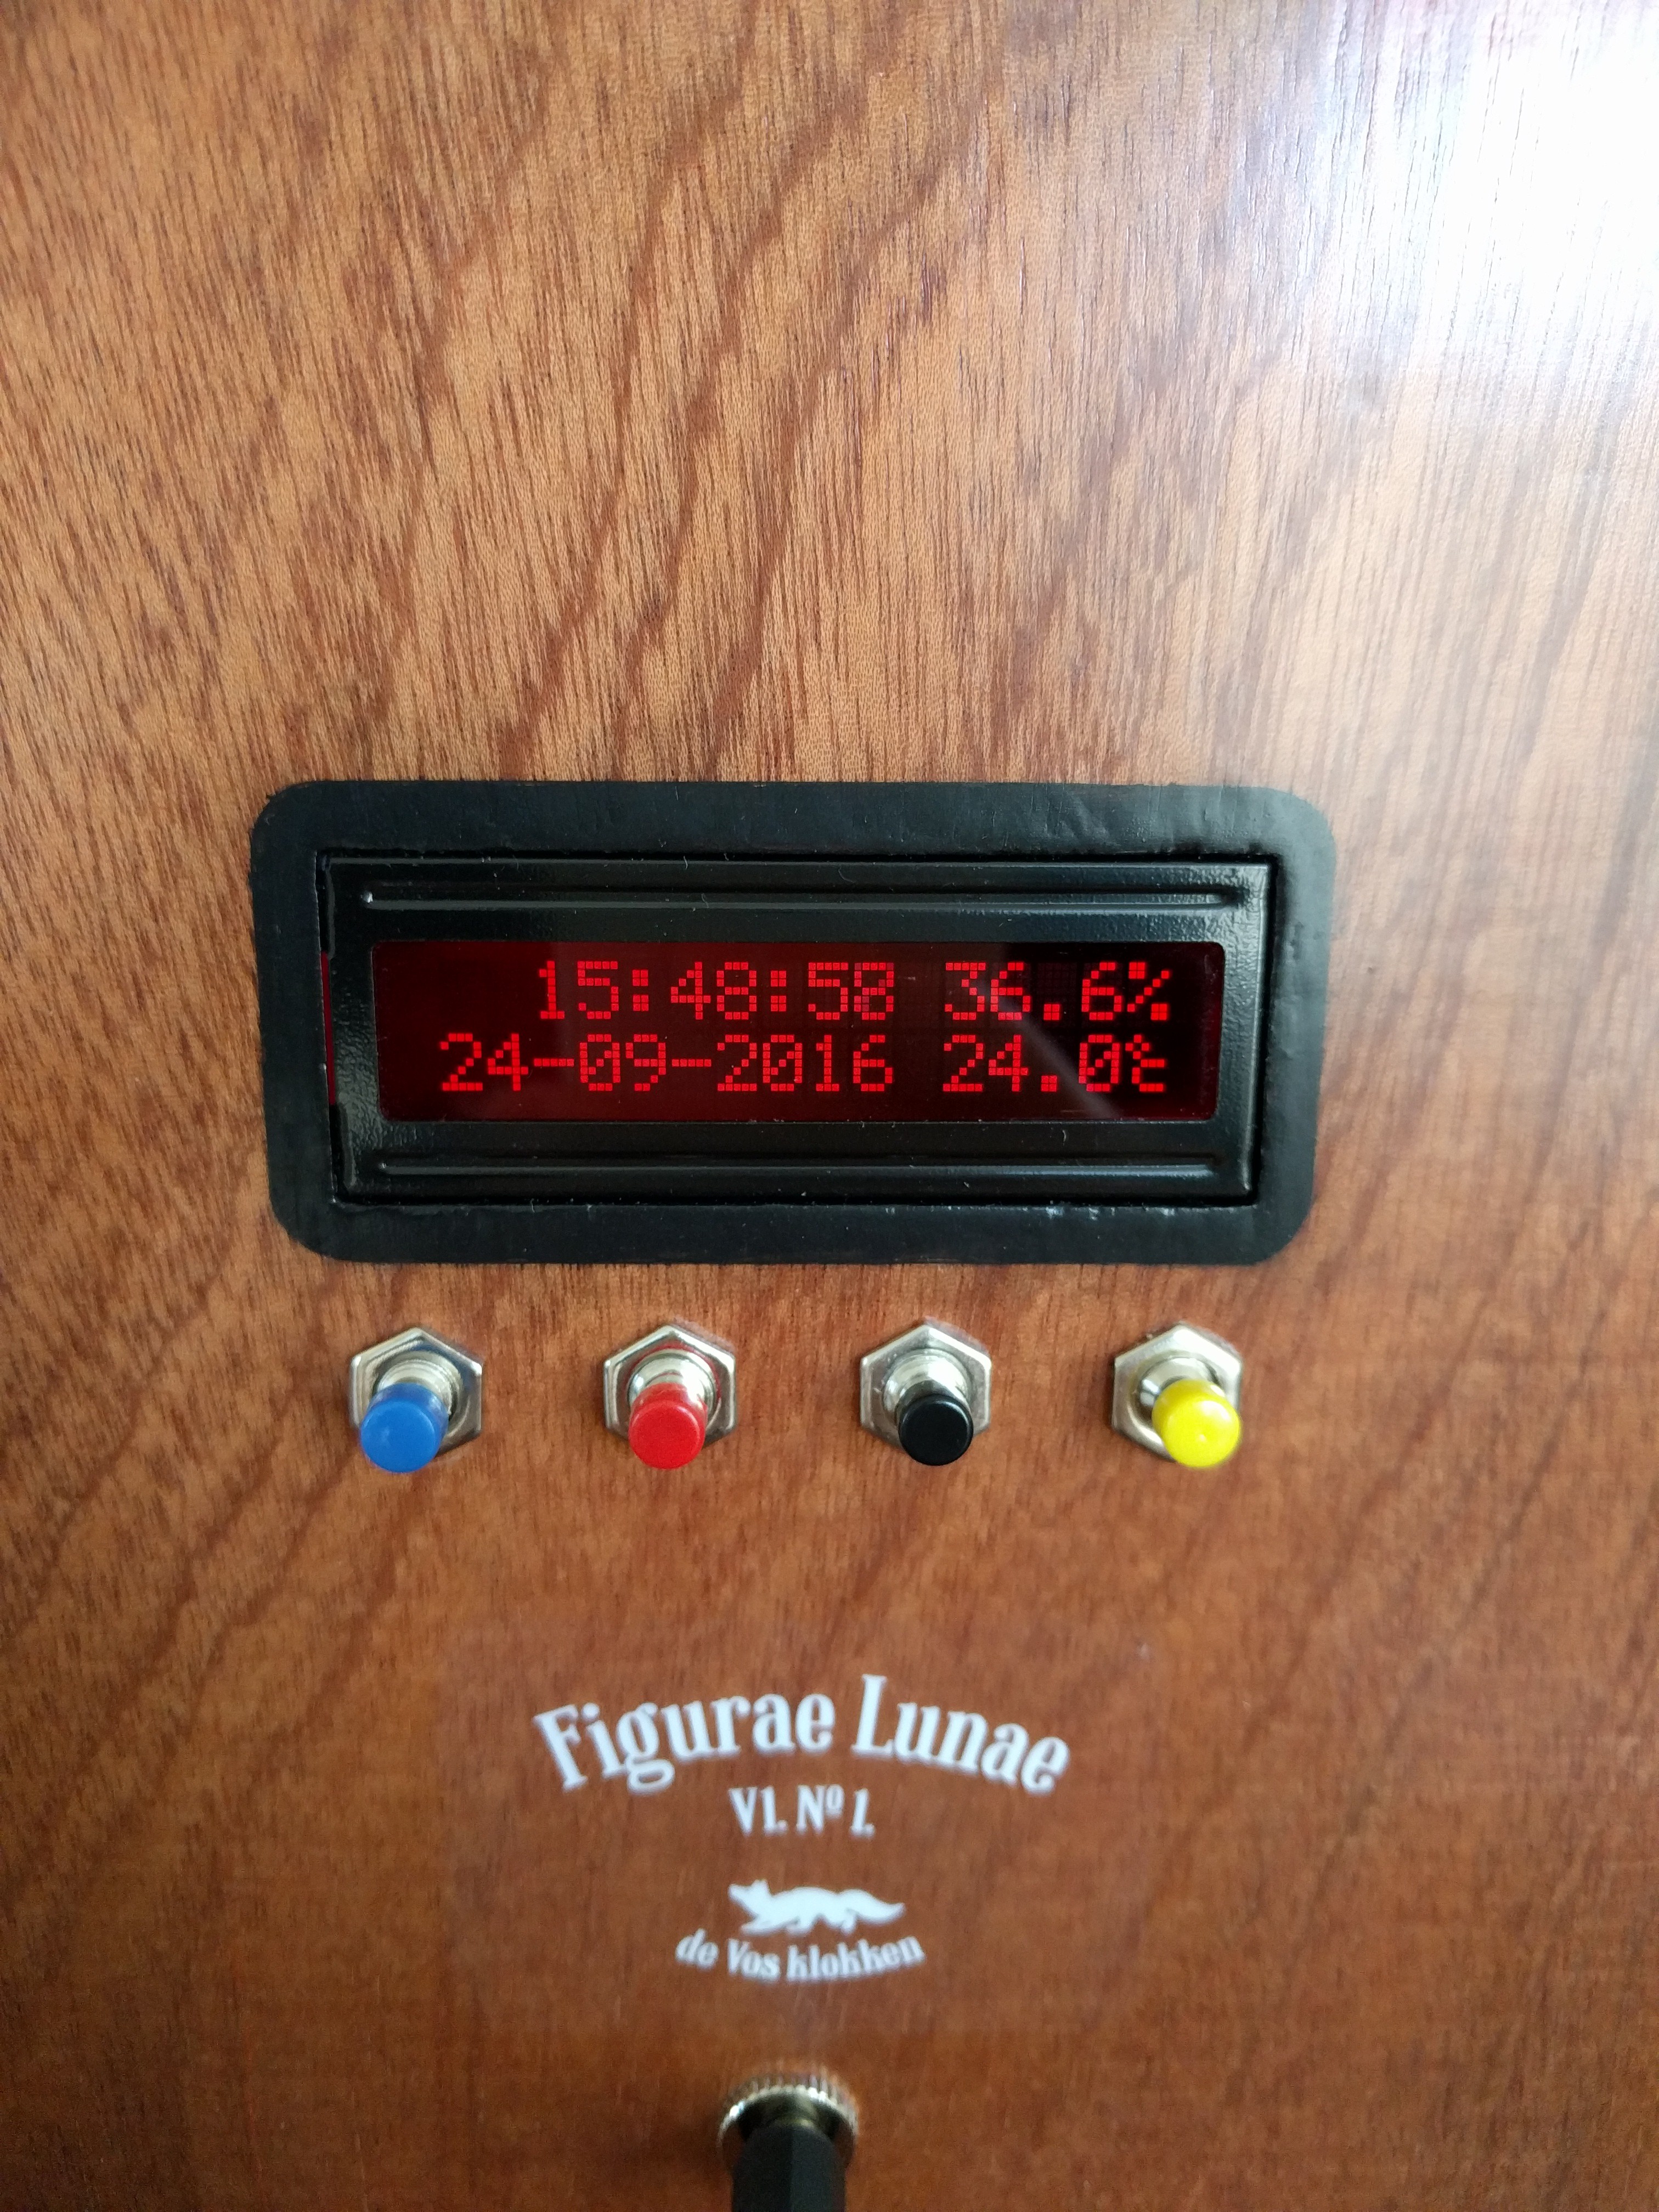
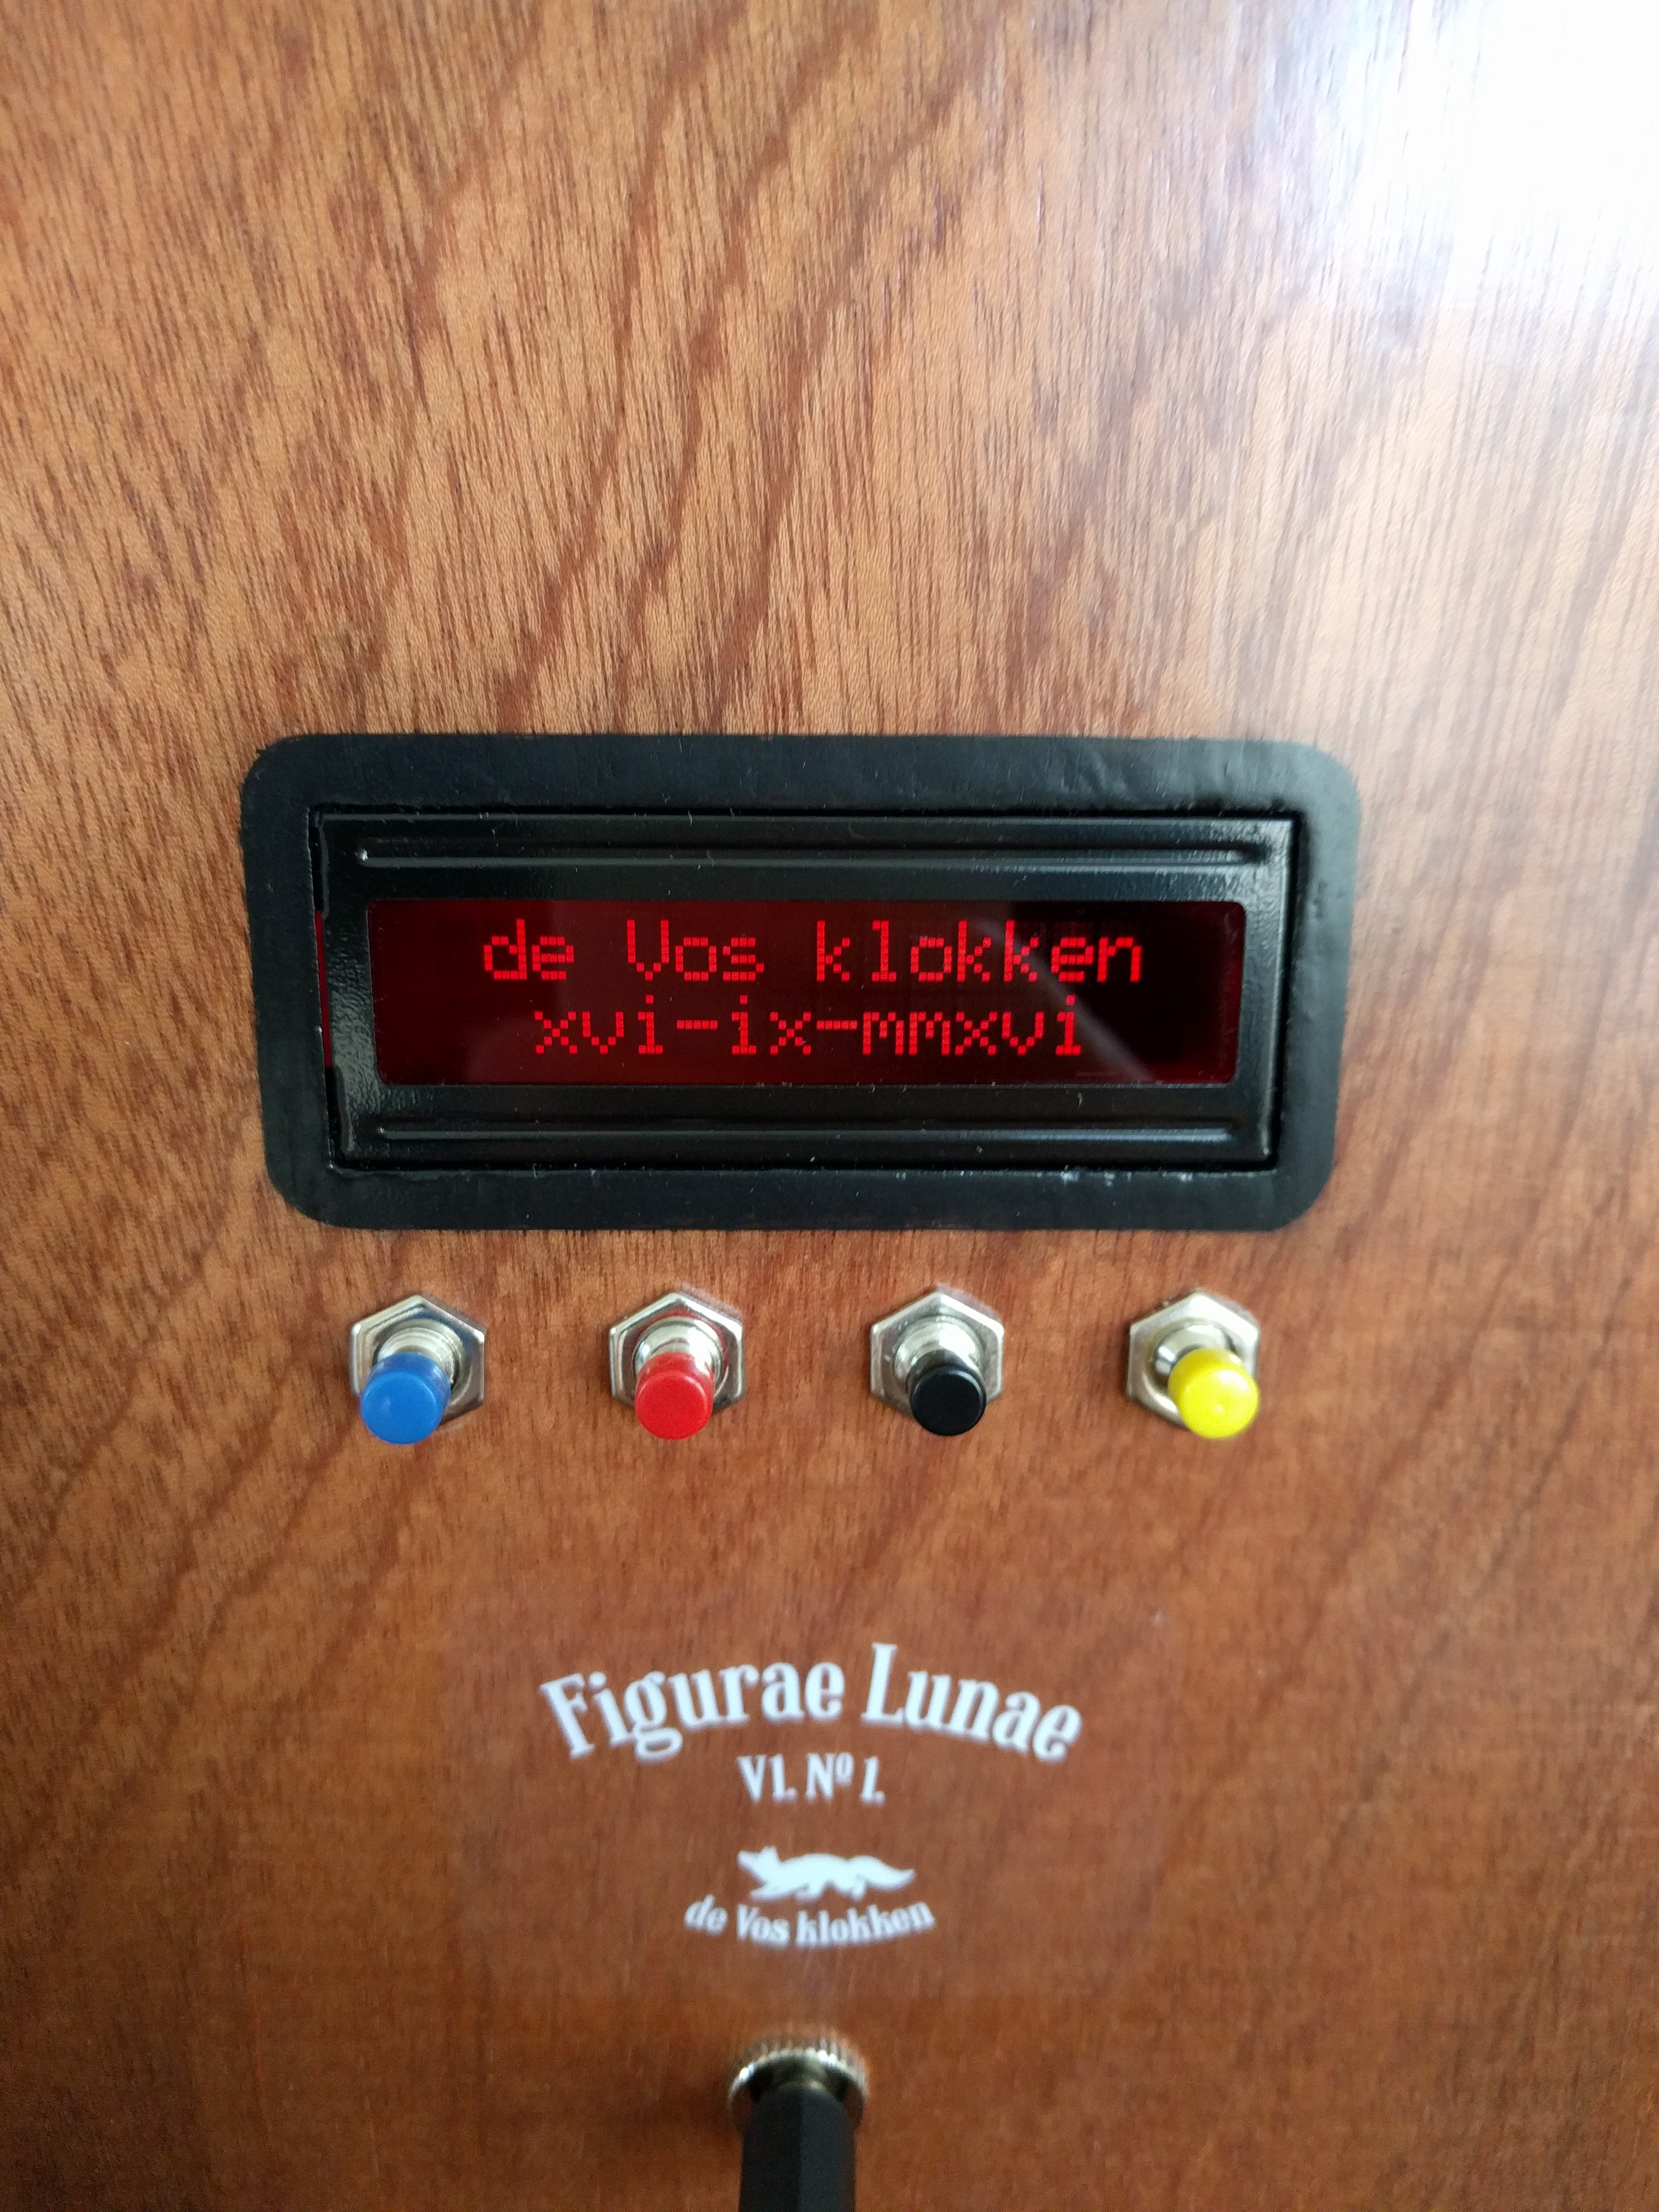
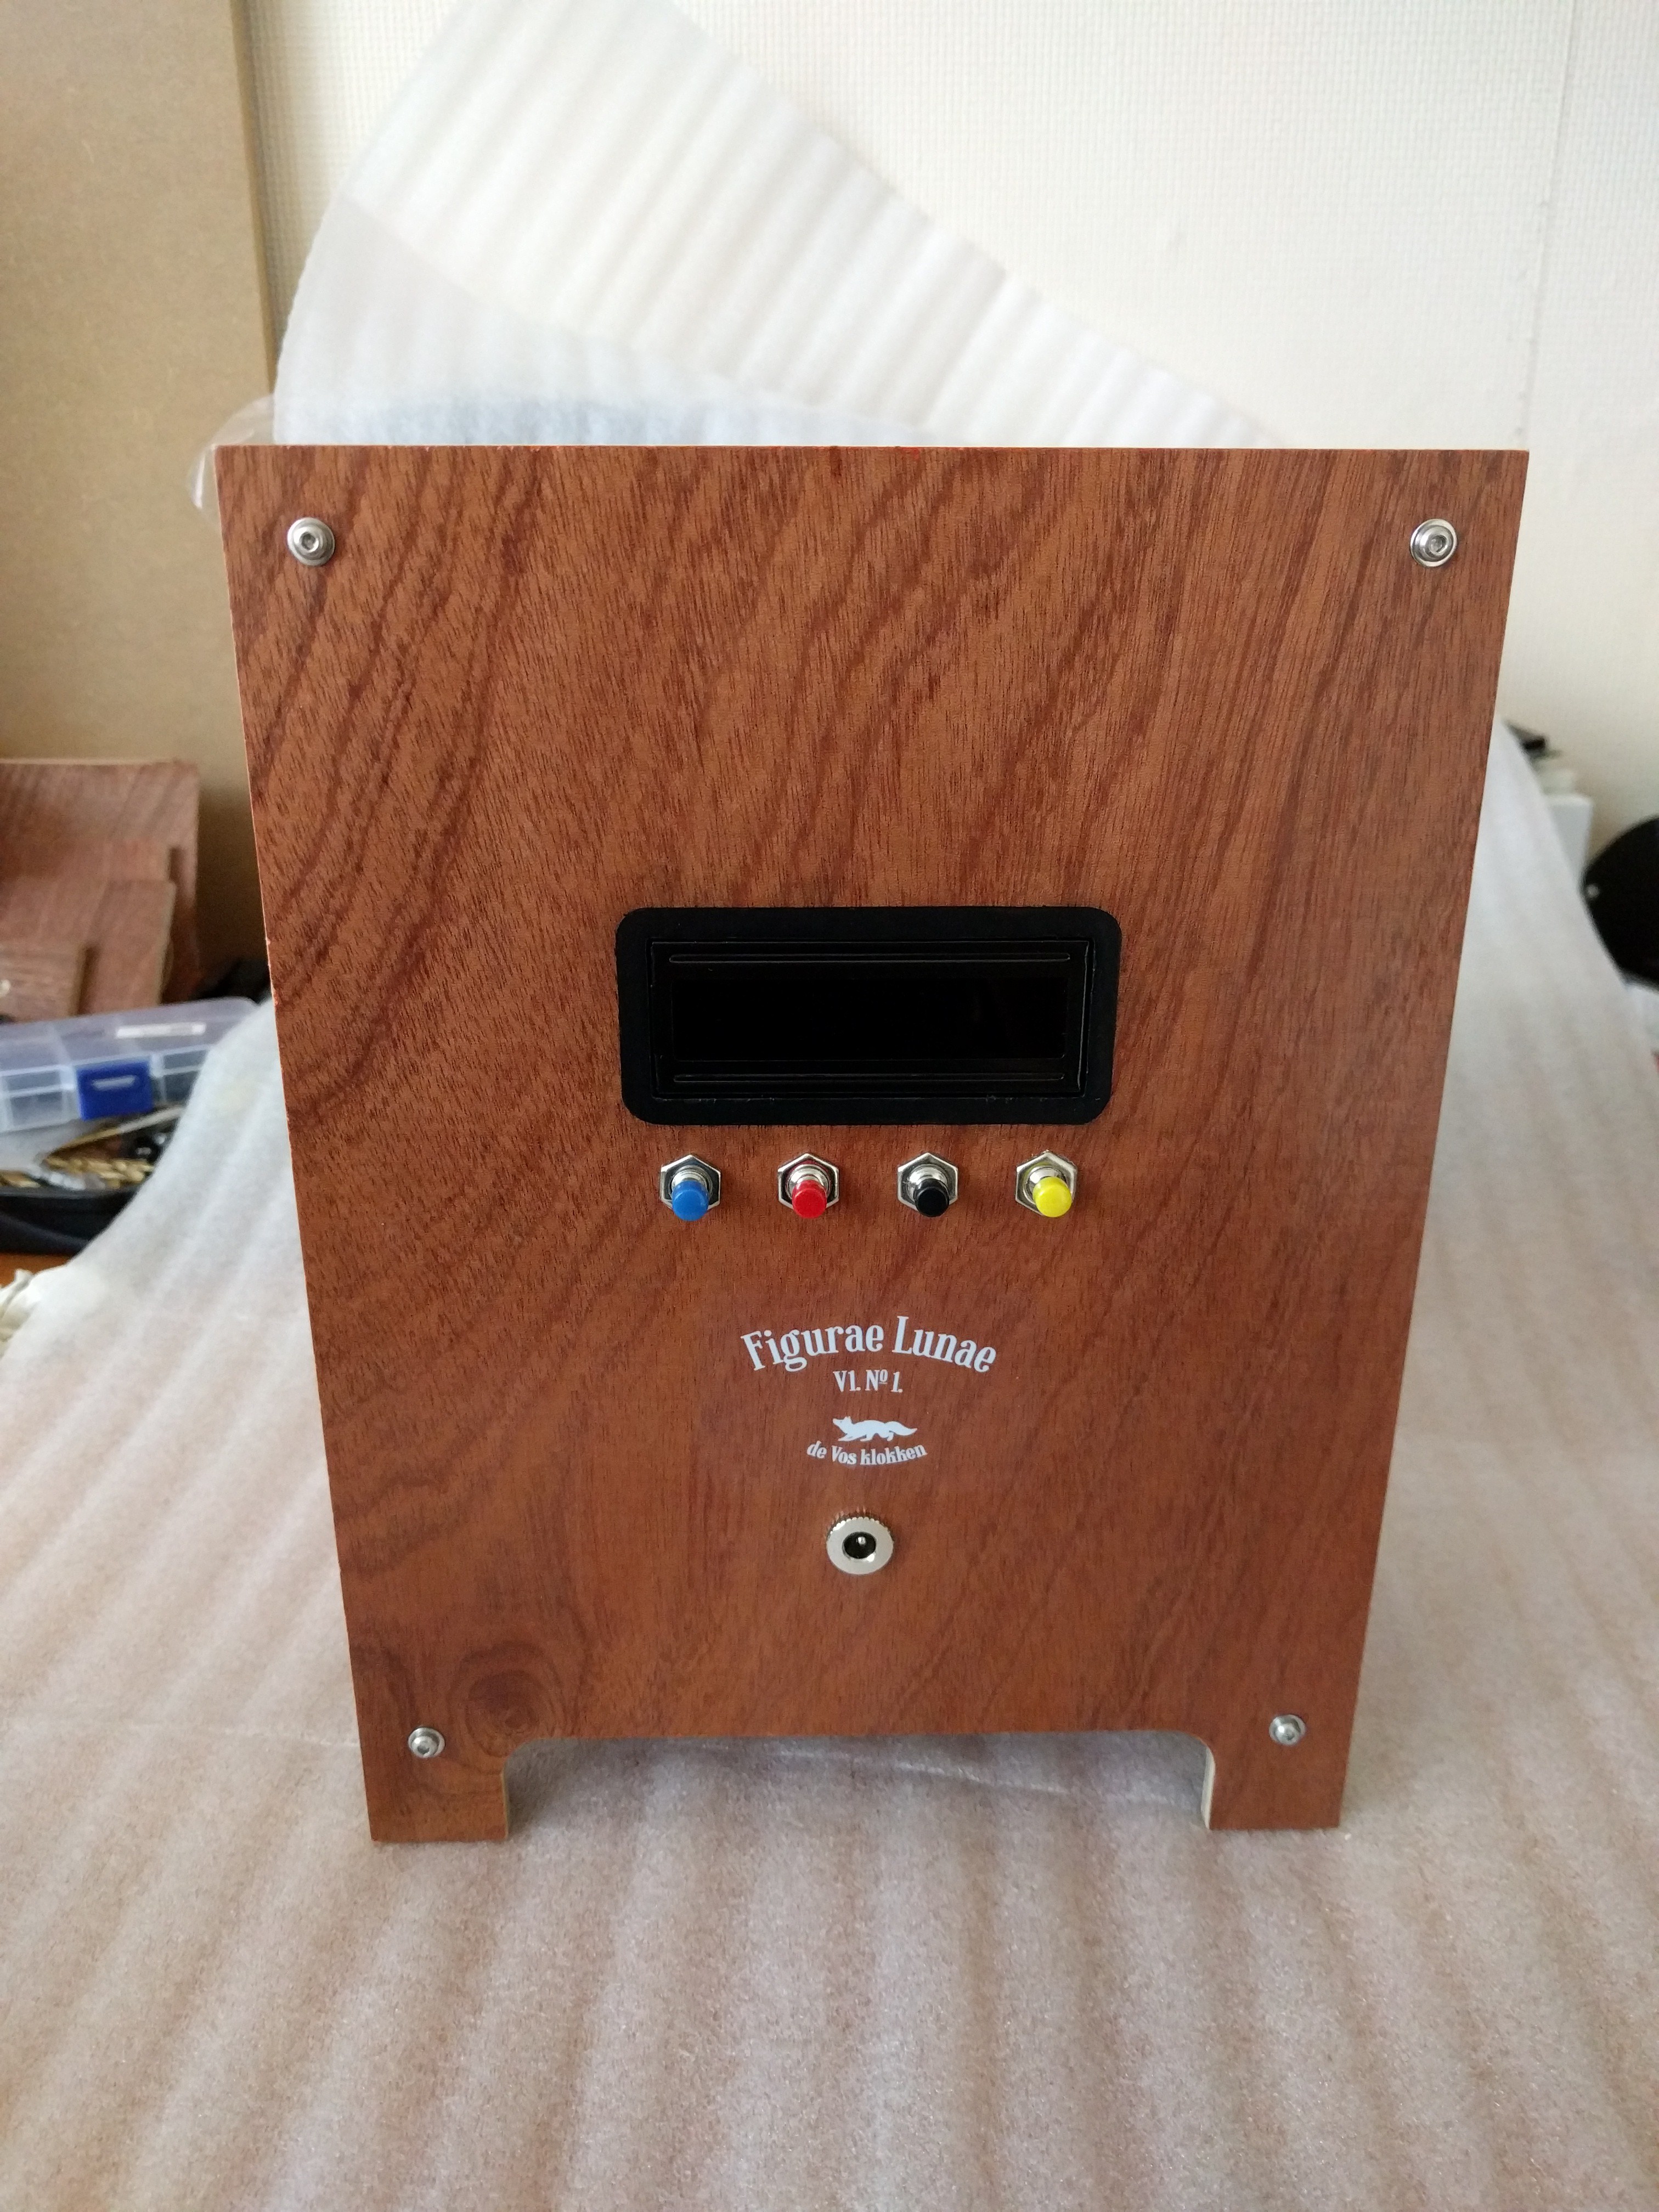
08/28/2016 at 10:57 • 0 commentsWhen i started this project I wasn't sure how I would set the the date and time. The easiest way was to set it with an Arduino via serial but if this clock would end up with someone else with no programming experience this would be very hard. So I went the extra mile to create a menu to the date and time could be set on the device itself. First I tried to mount the menu on the bottom which meant you had to flip the clock over, but this turned out to be very unpractical. Eventually I decided to put the menu on the backside together with buttons and a DC-in connector. I didn't want to screw this up because the panels where already lacquered.
![]() Cut the holes and recesses on the cnc (The scratches are form a light sanding).
Cut the holes and recesses on the cnc (The scratches are form a light sanding).![]()
All the parts mounted
![]()
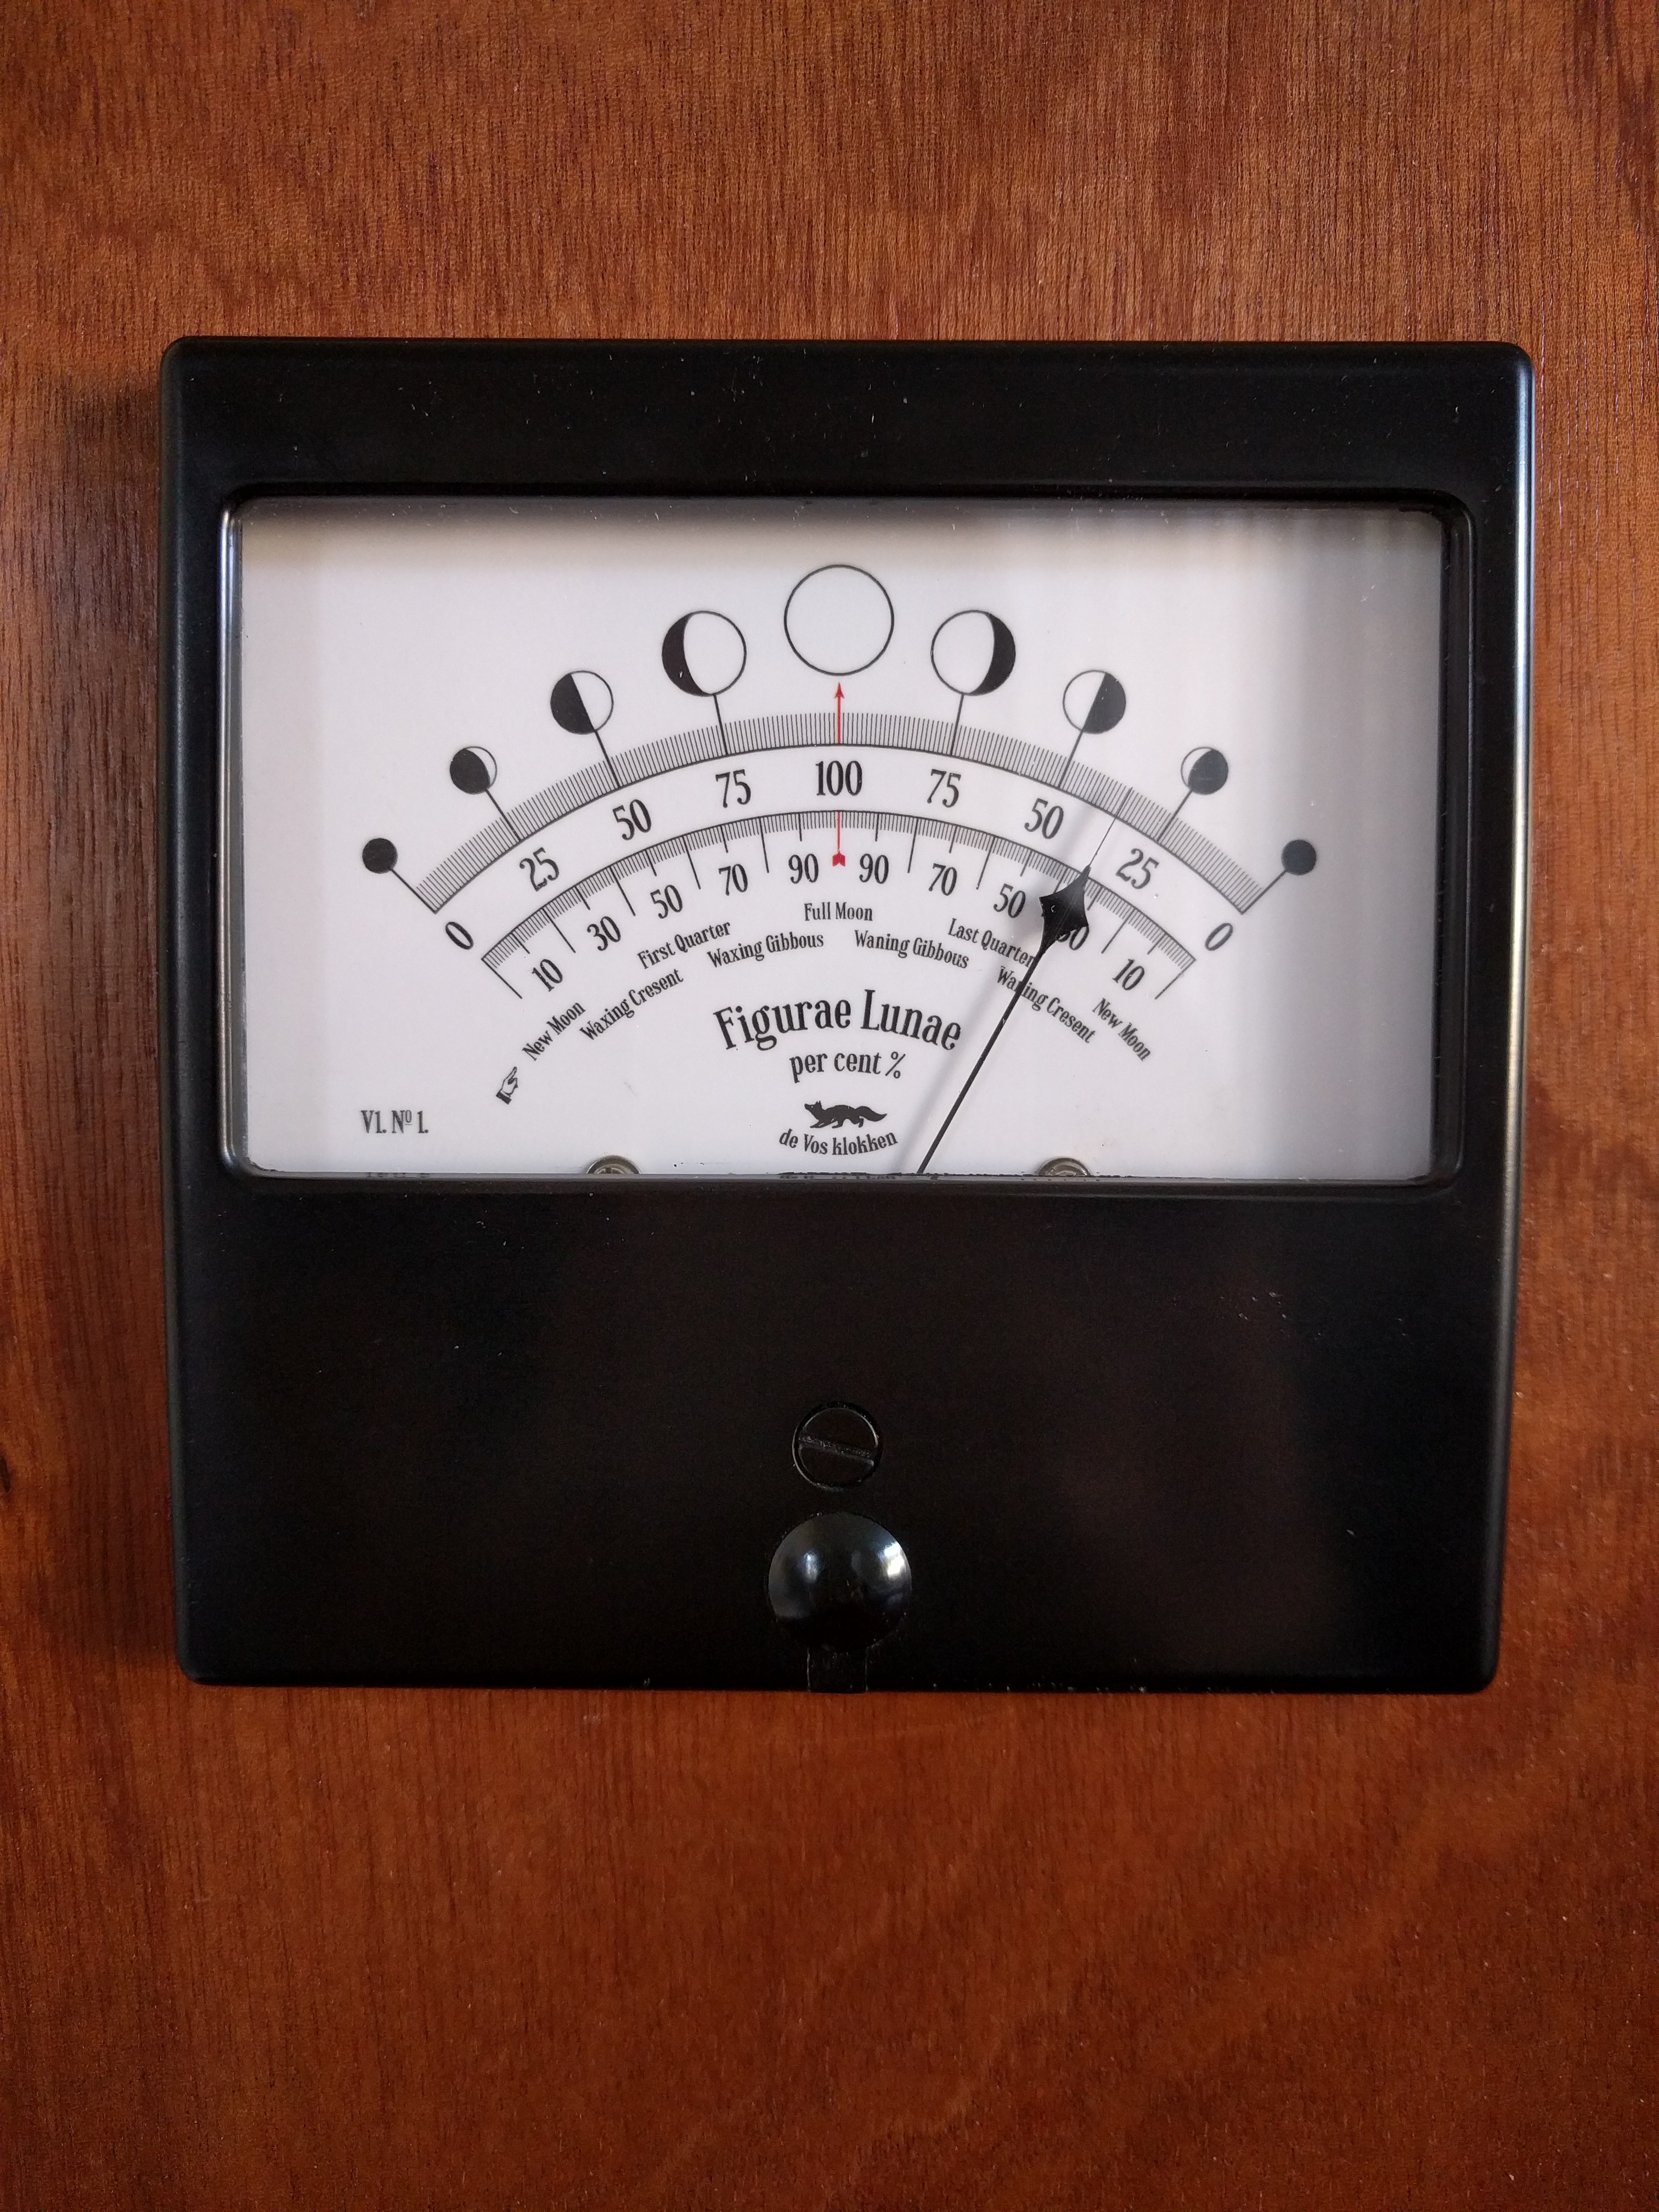
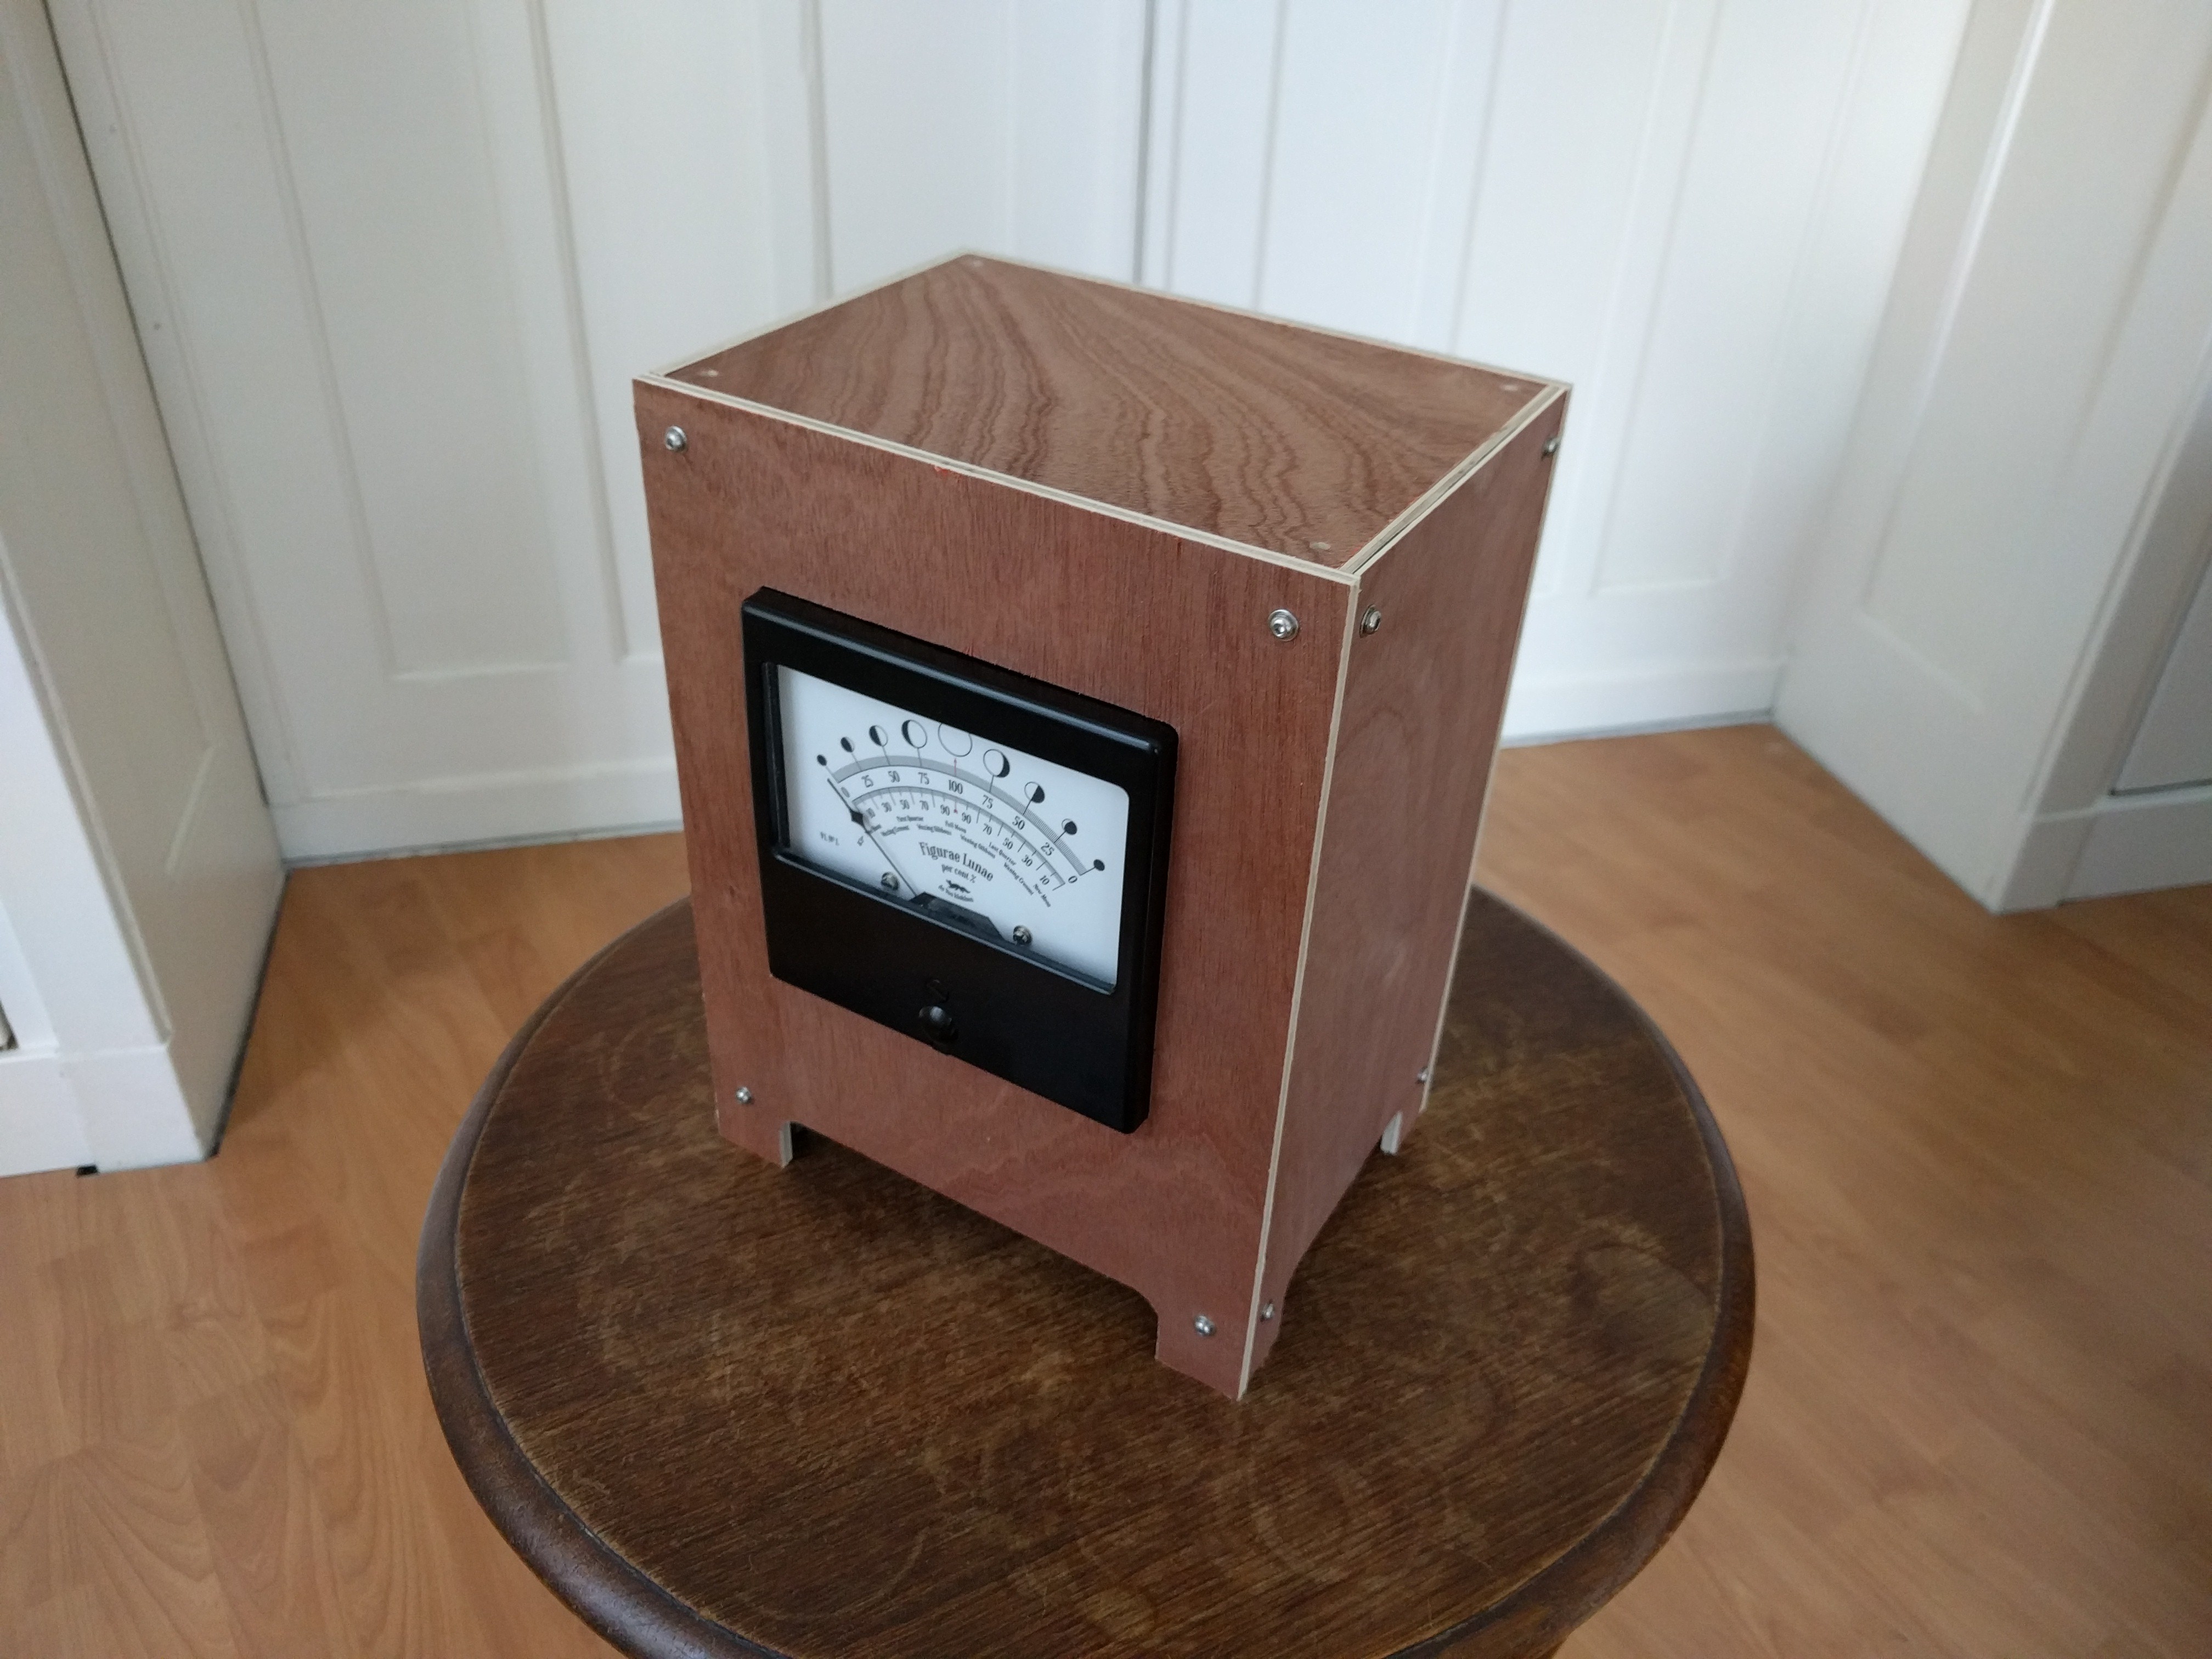
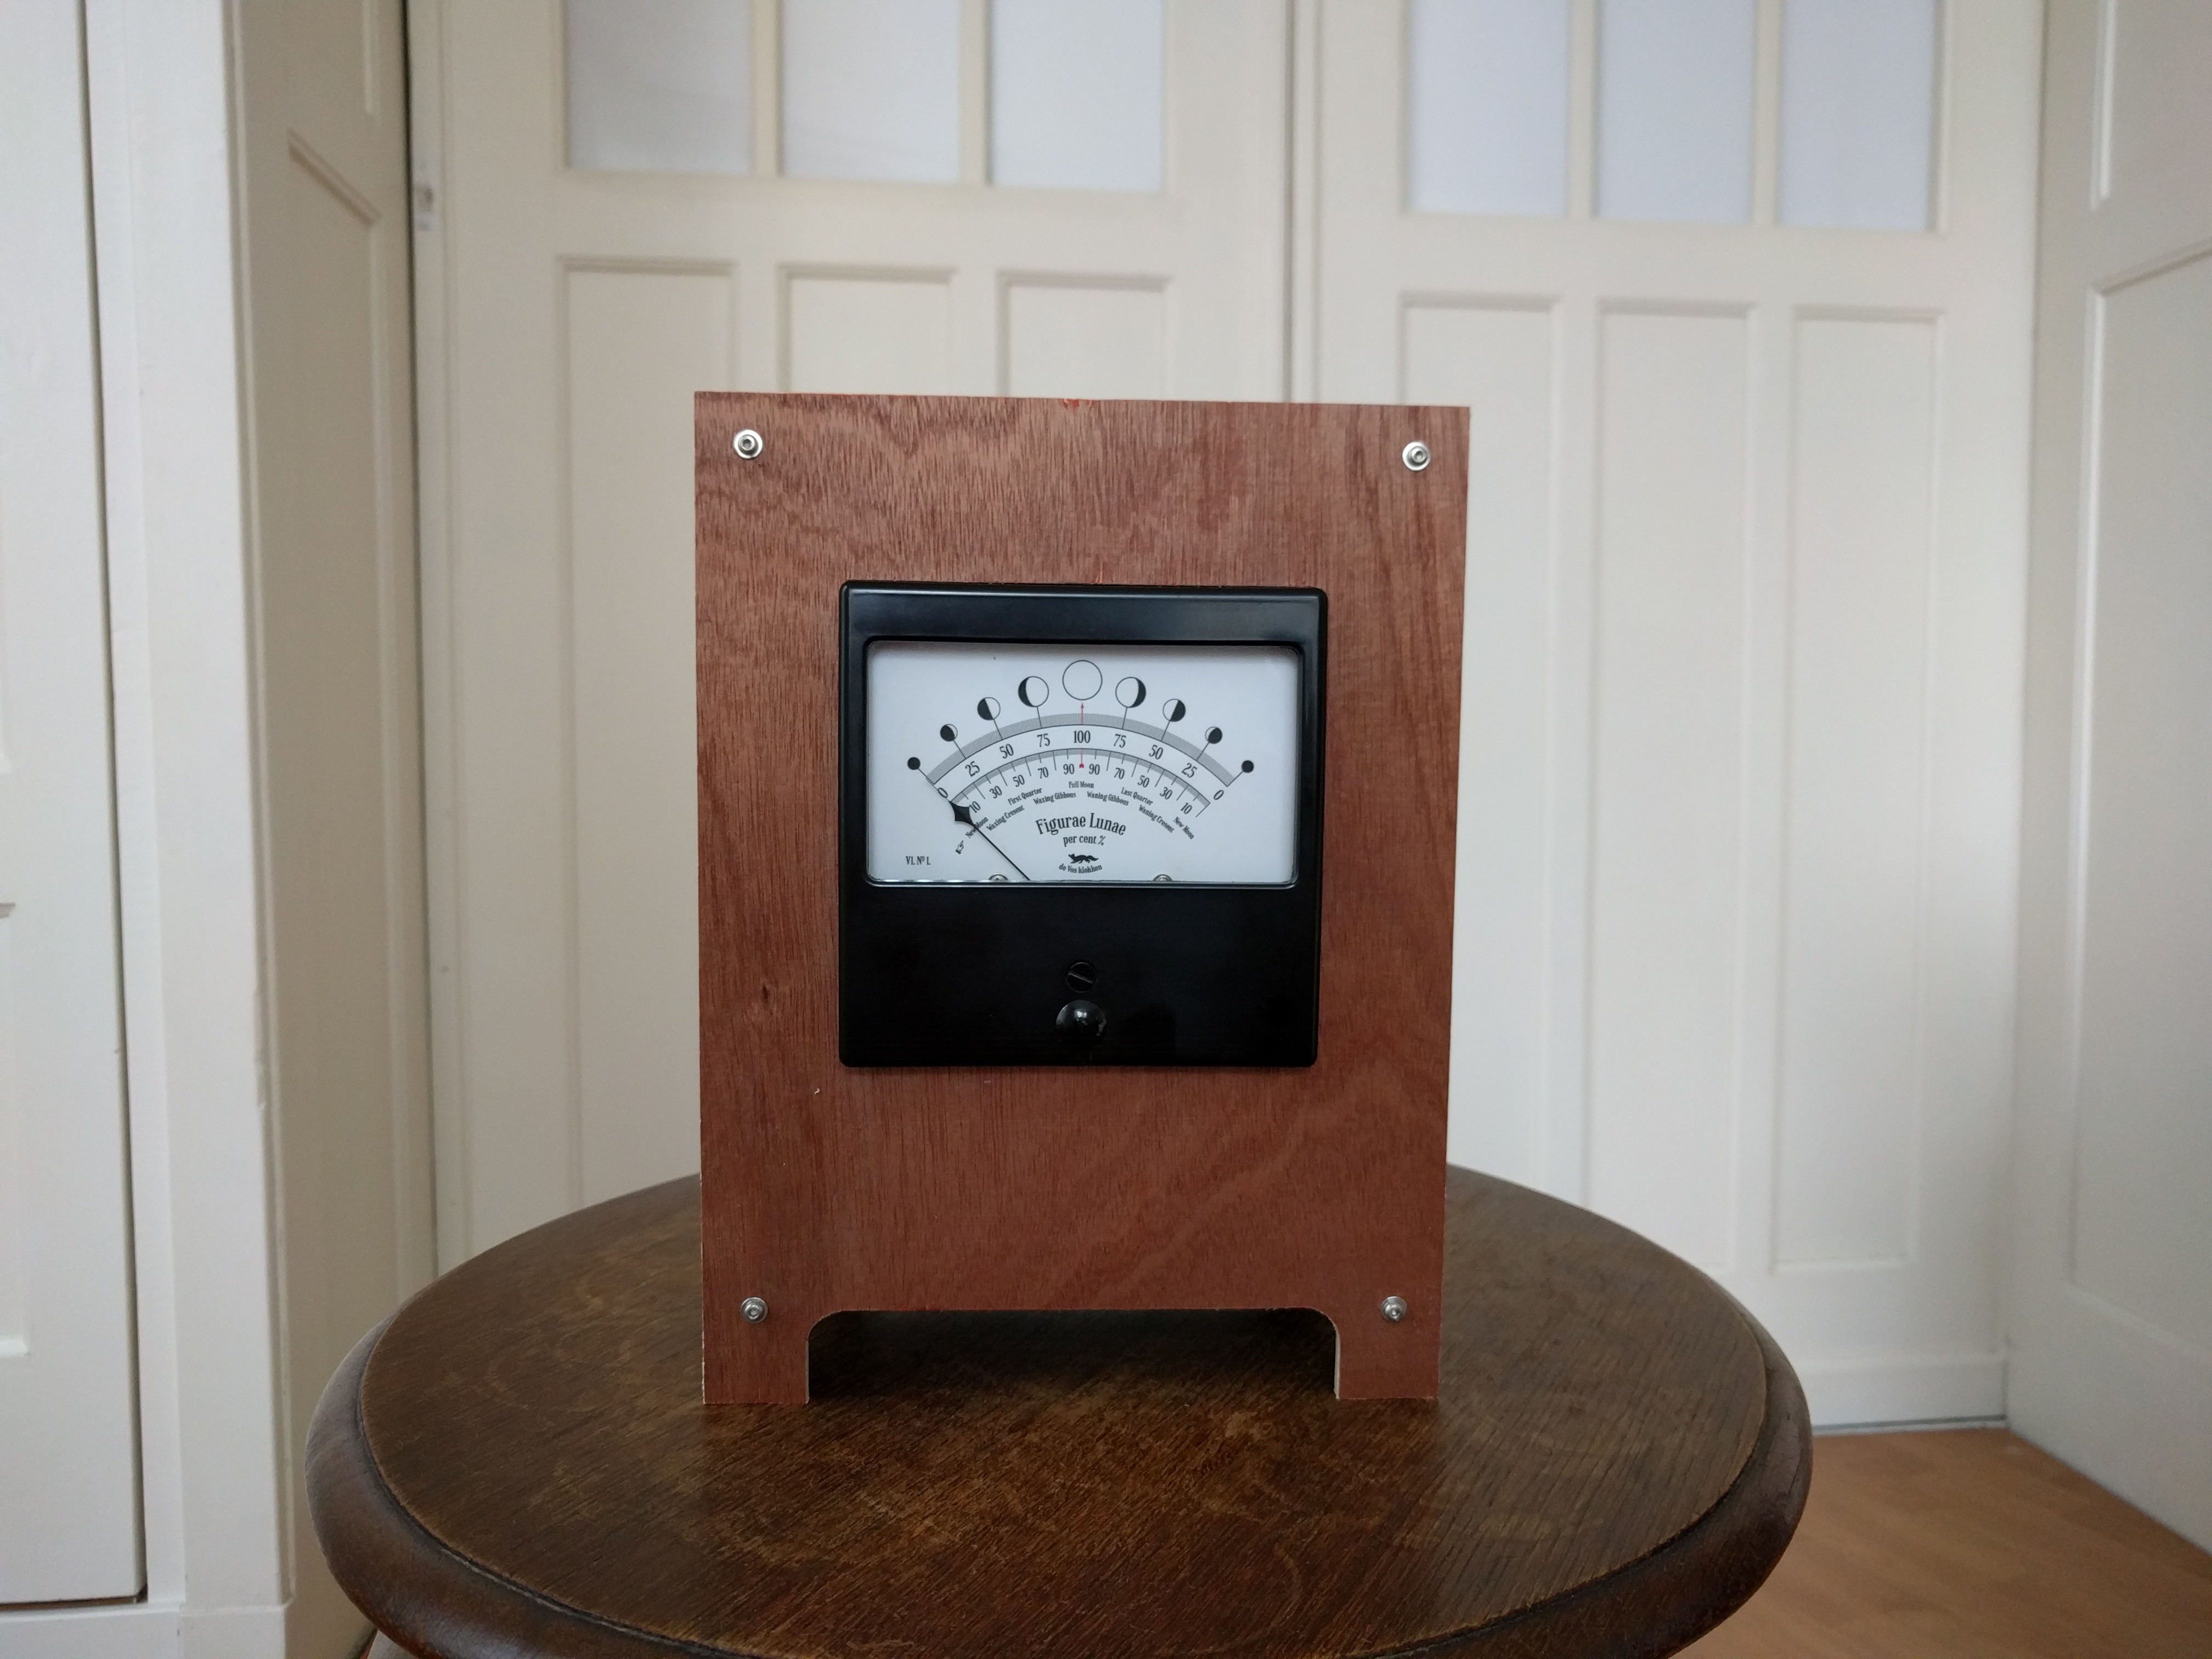
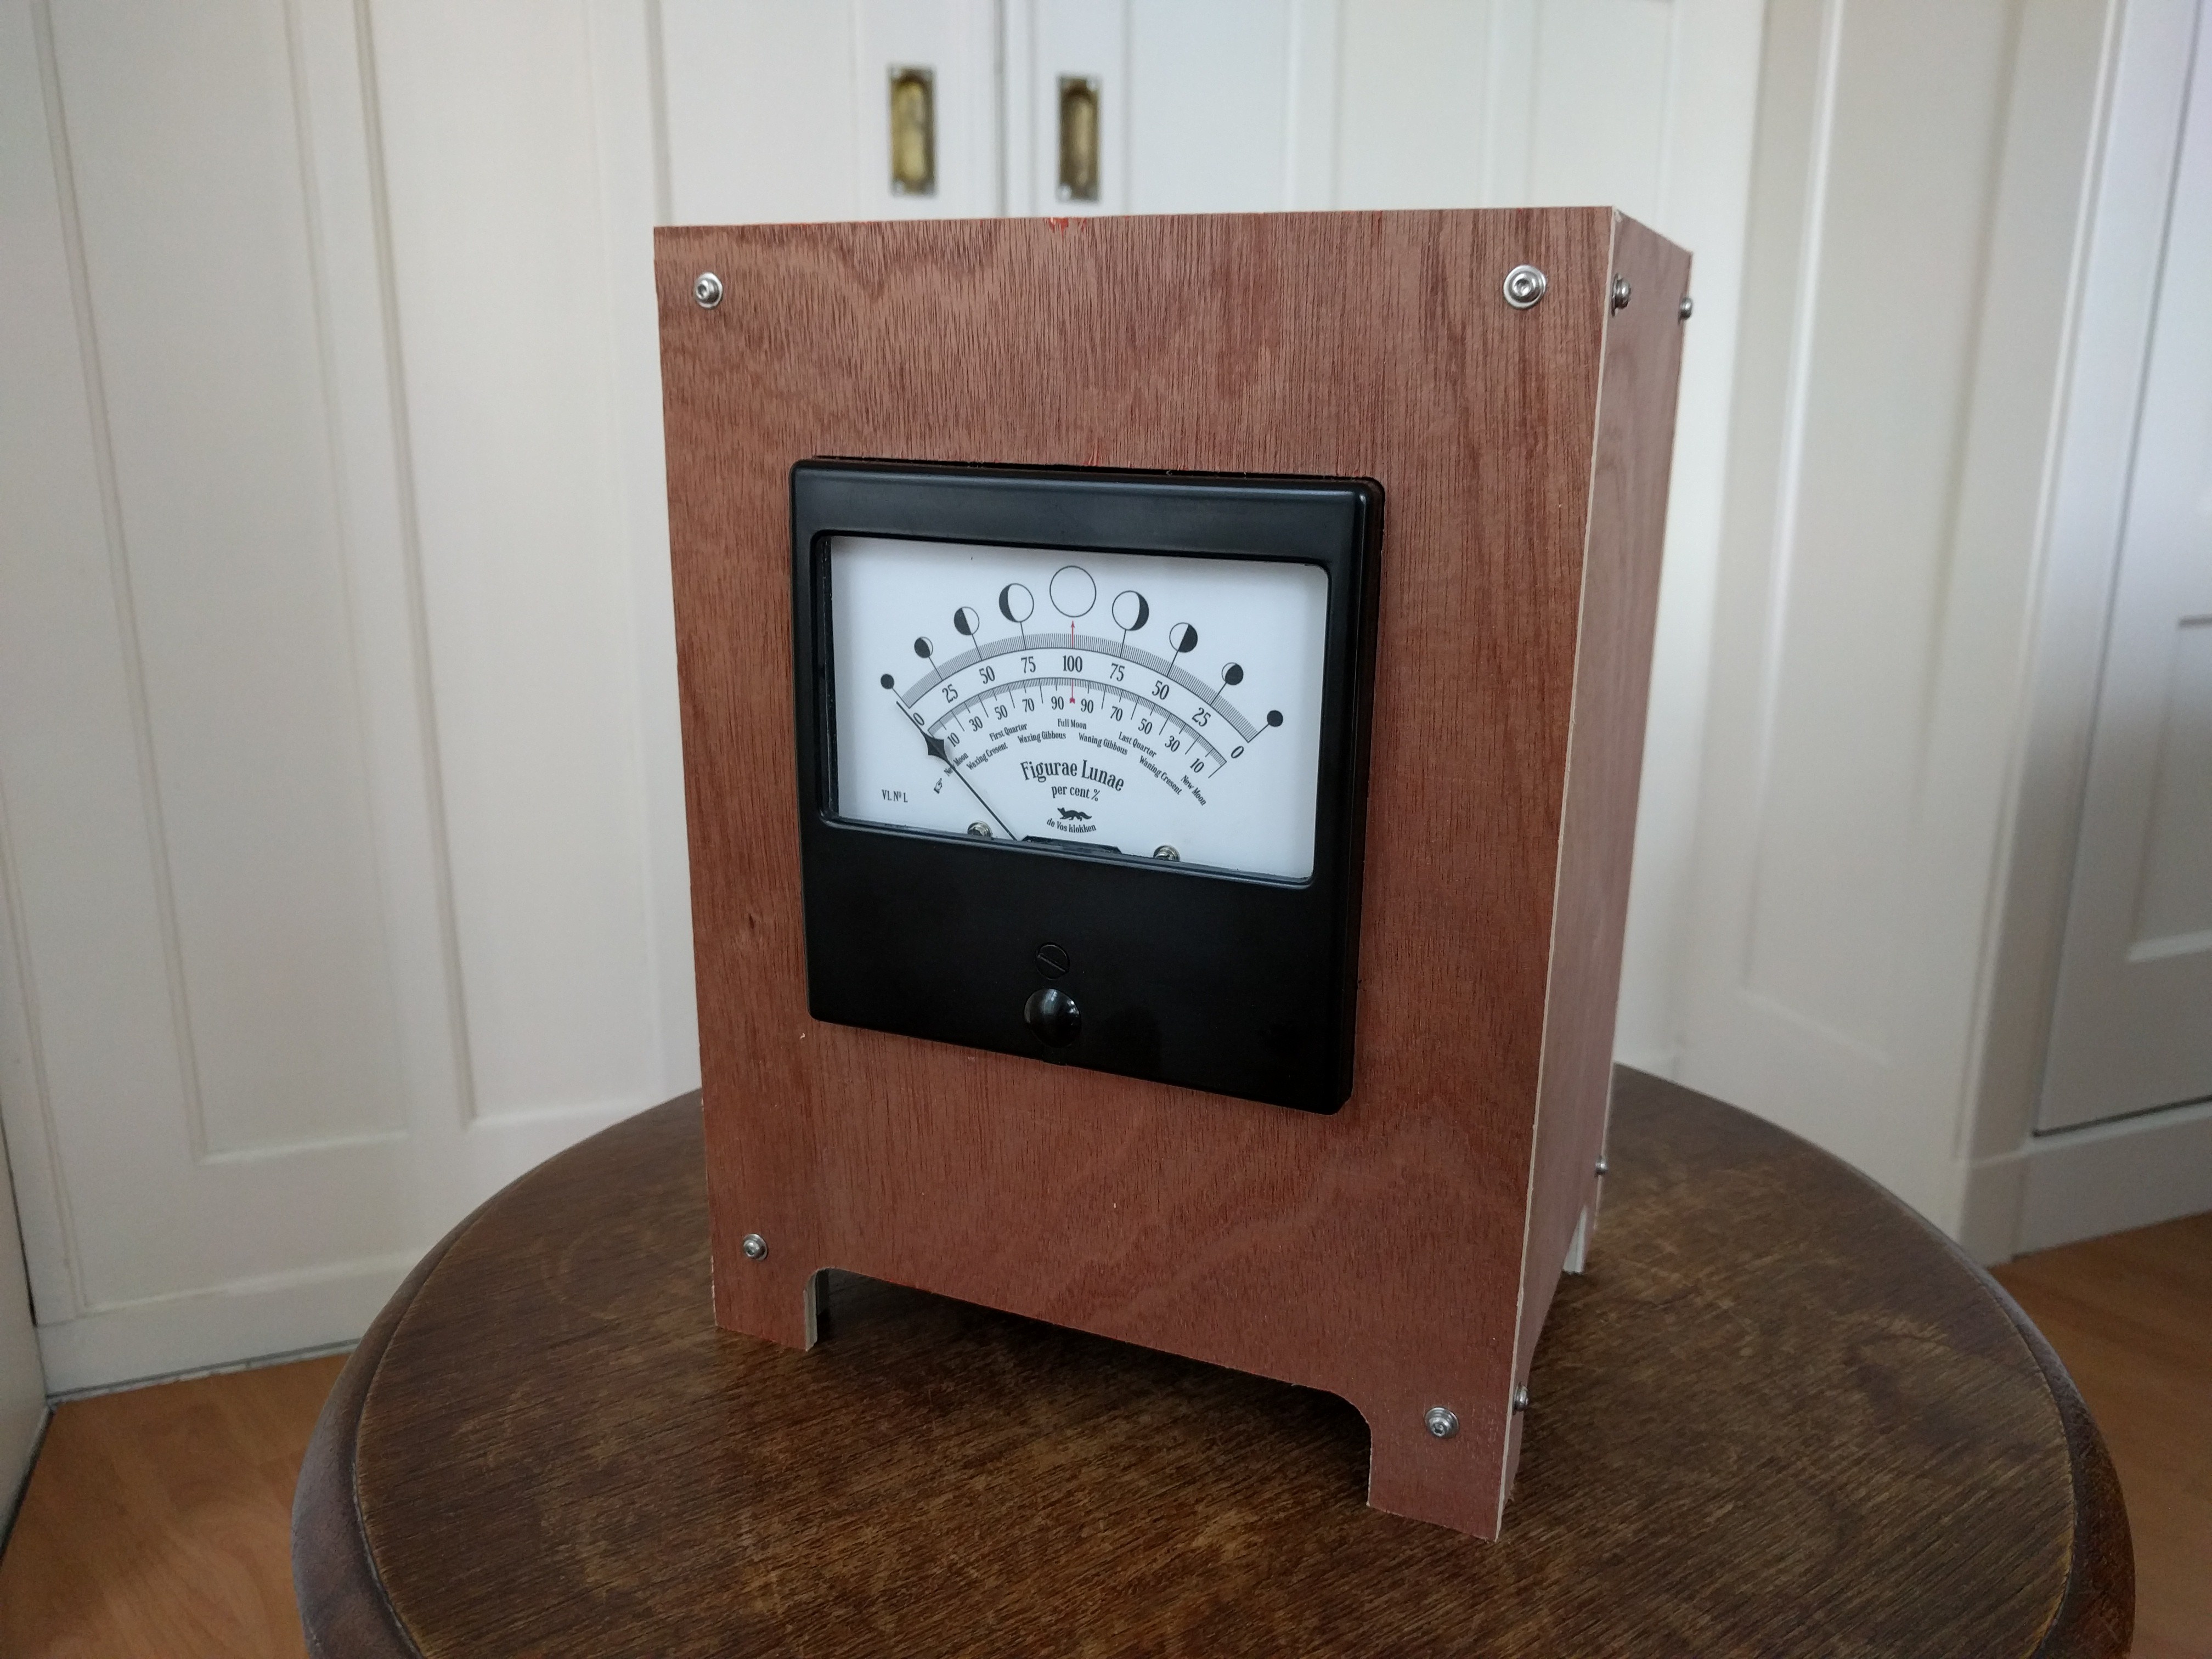
The Lcd screen displays the date, time, moon phase percentage and the temperature. The functions of the buttons will be, blue: Menu/set/next, red: up, black: down, yellow: backlight (which will automatically switch of after about 30 seconds).
-
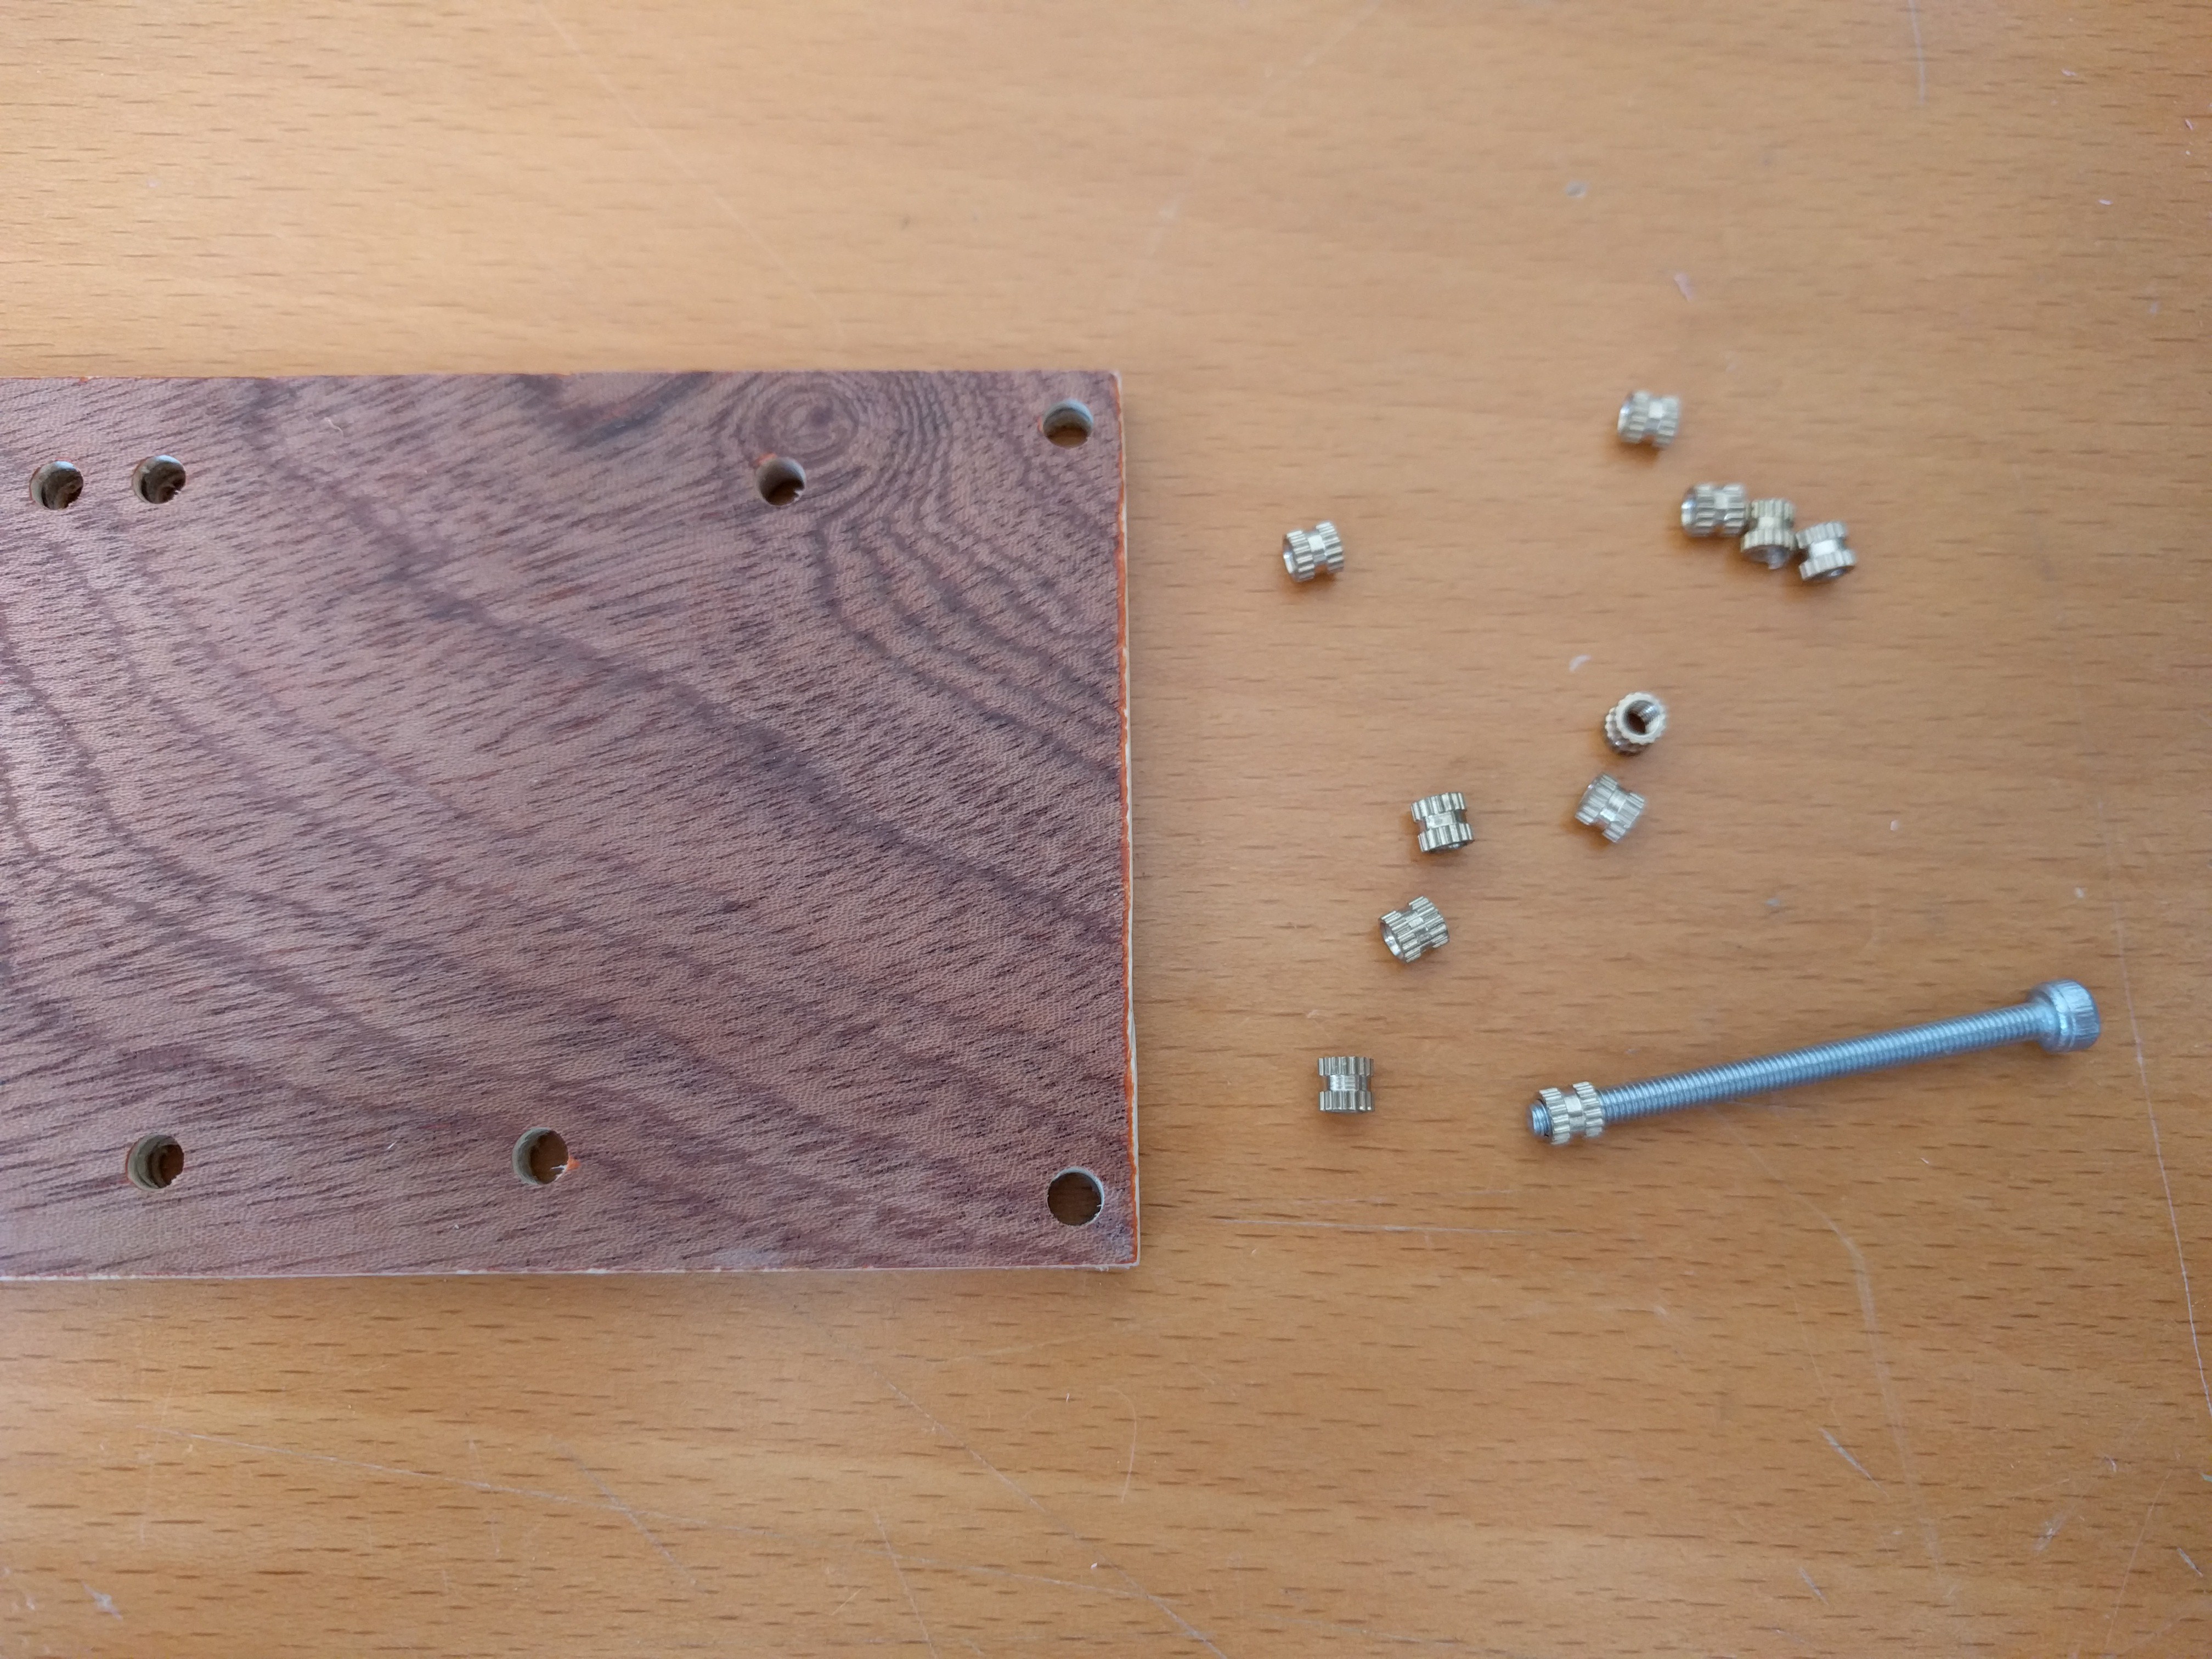
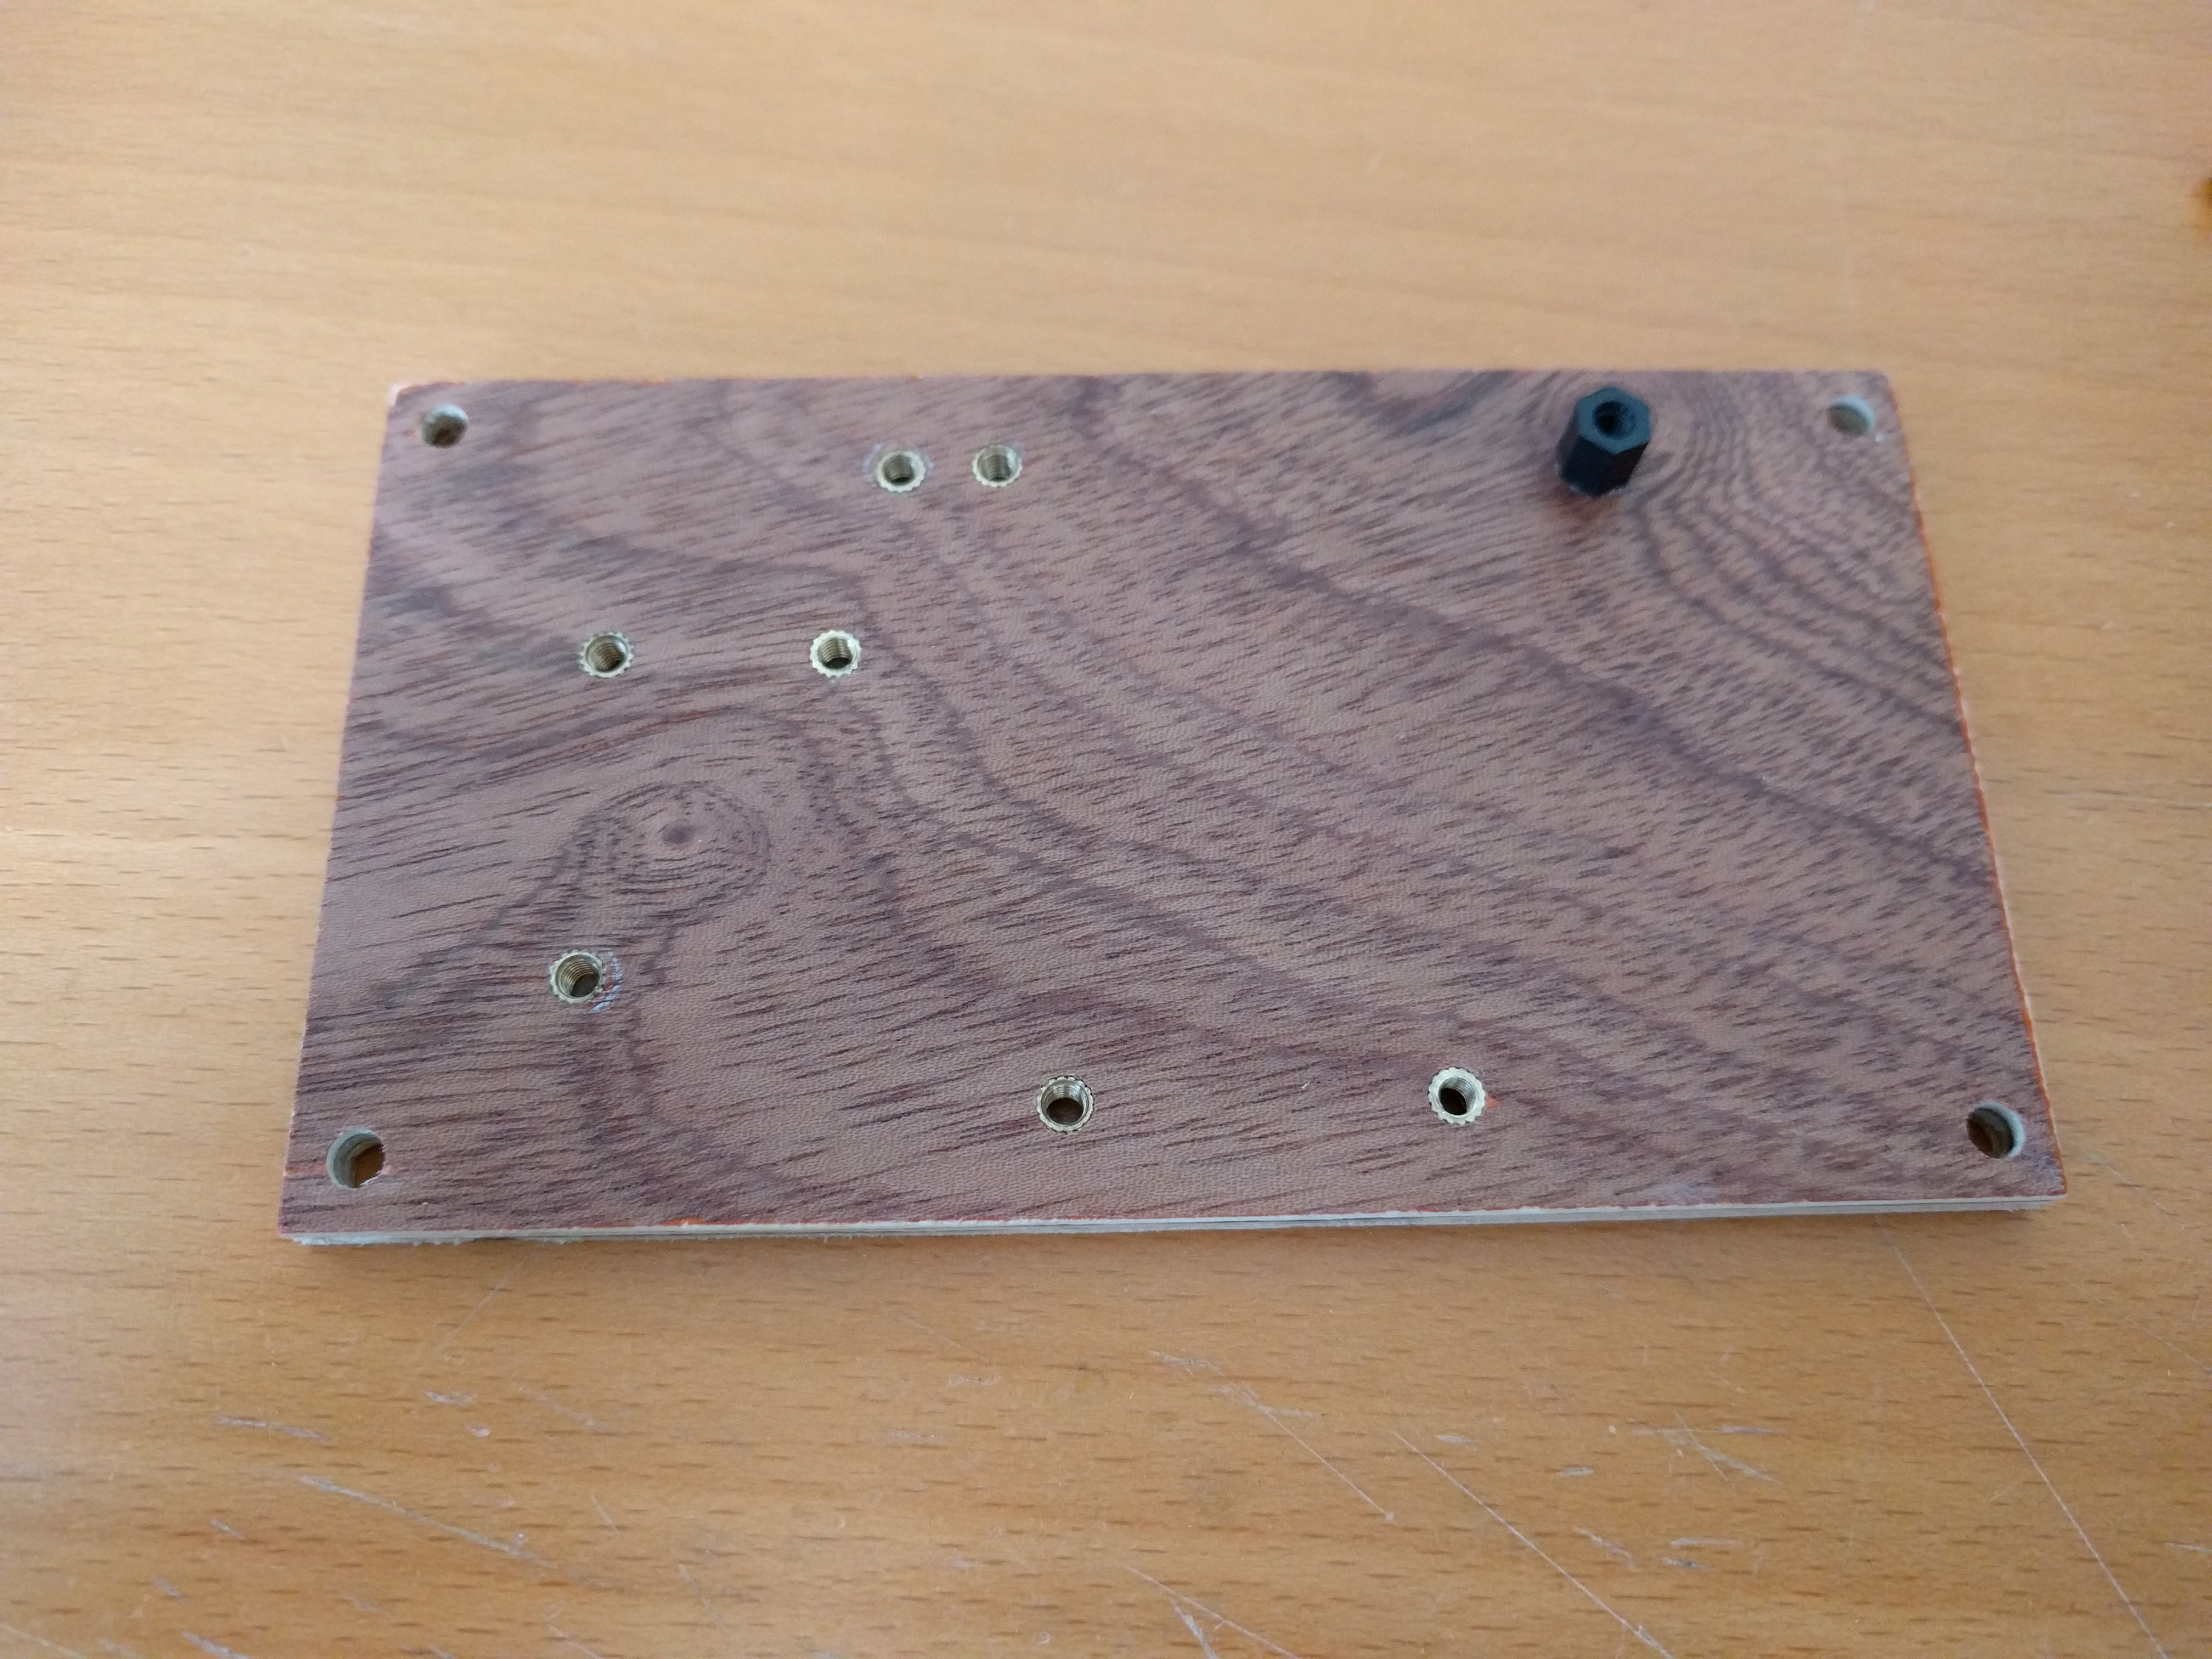
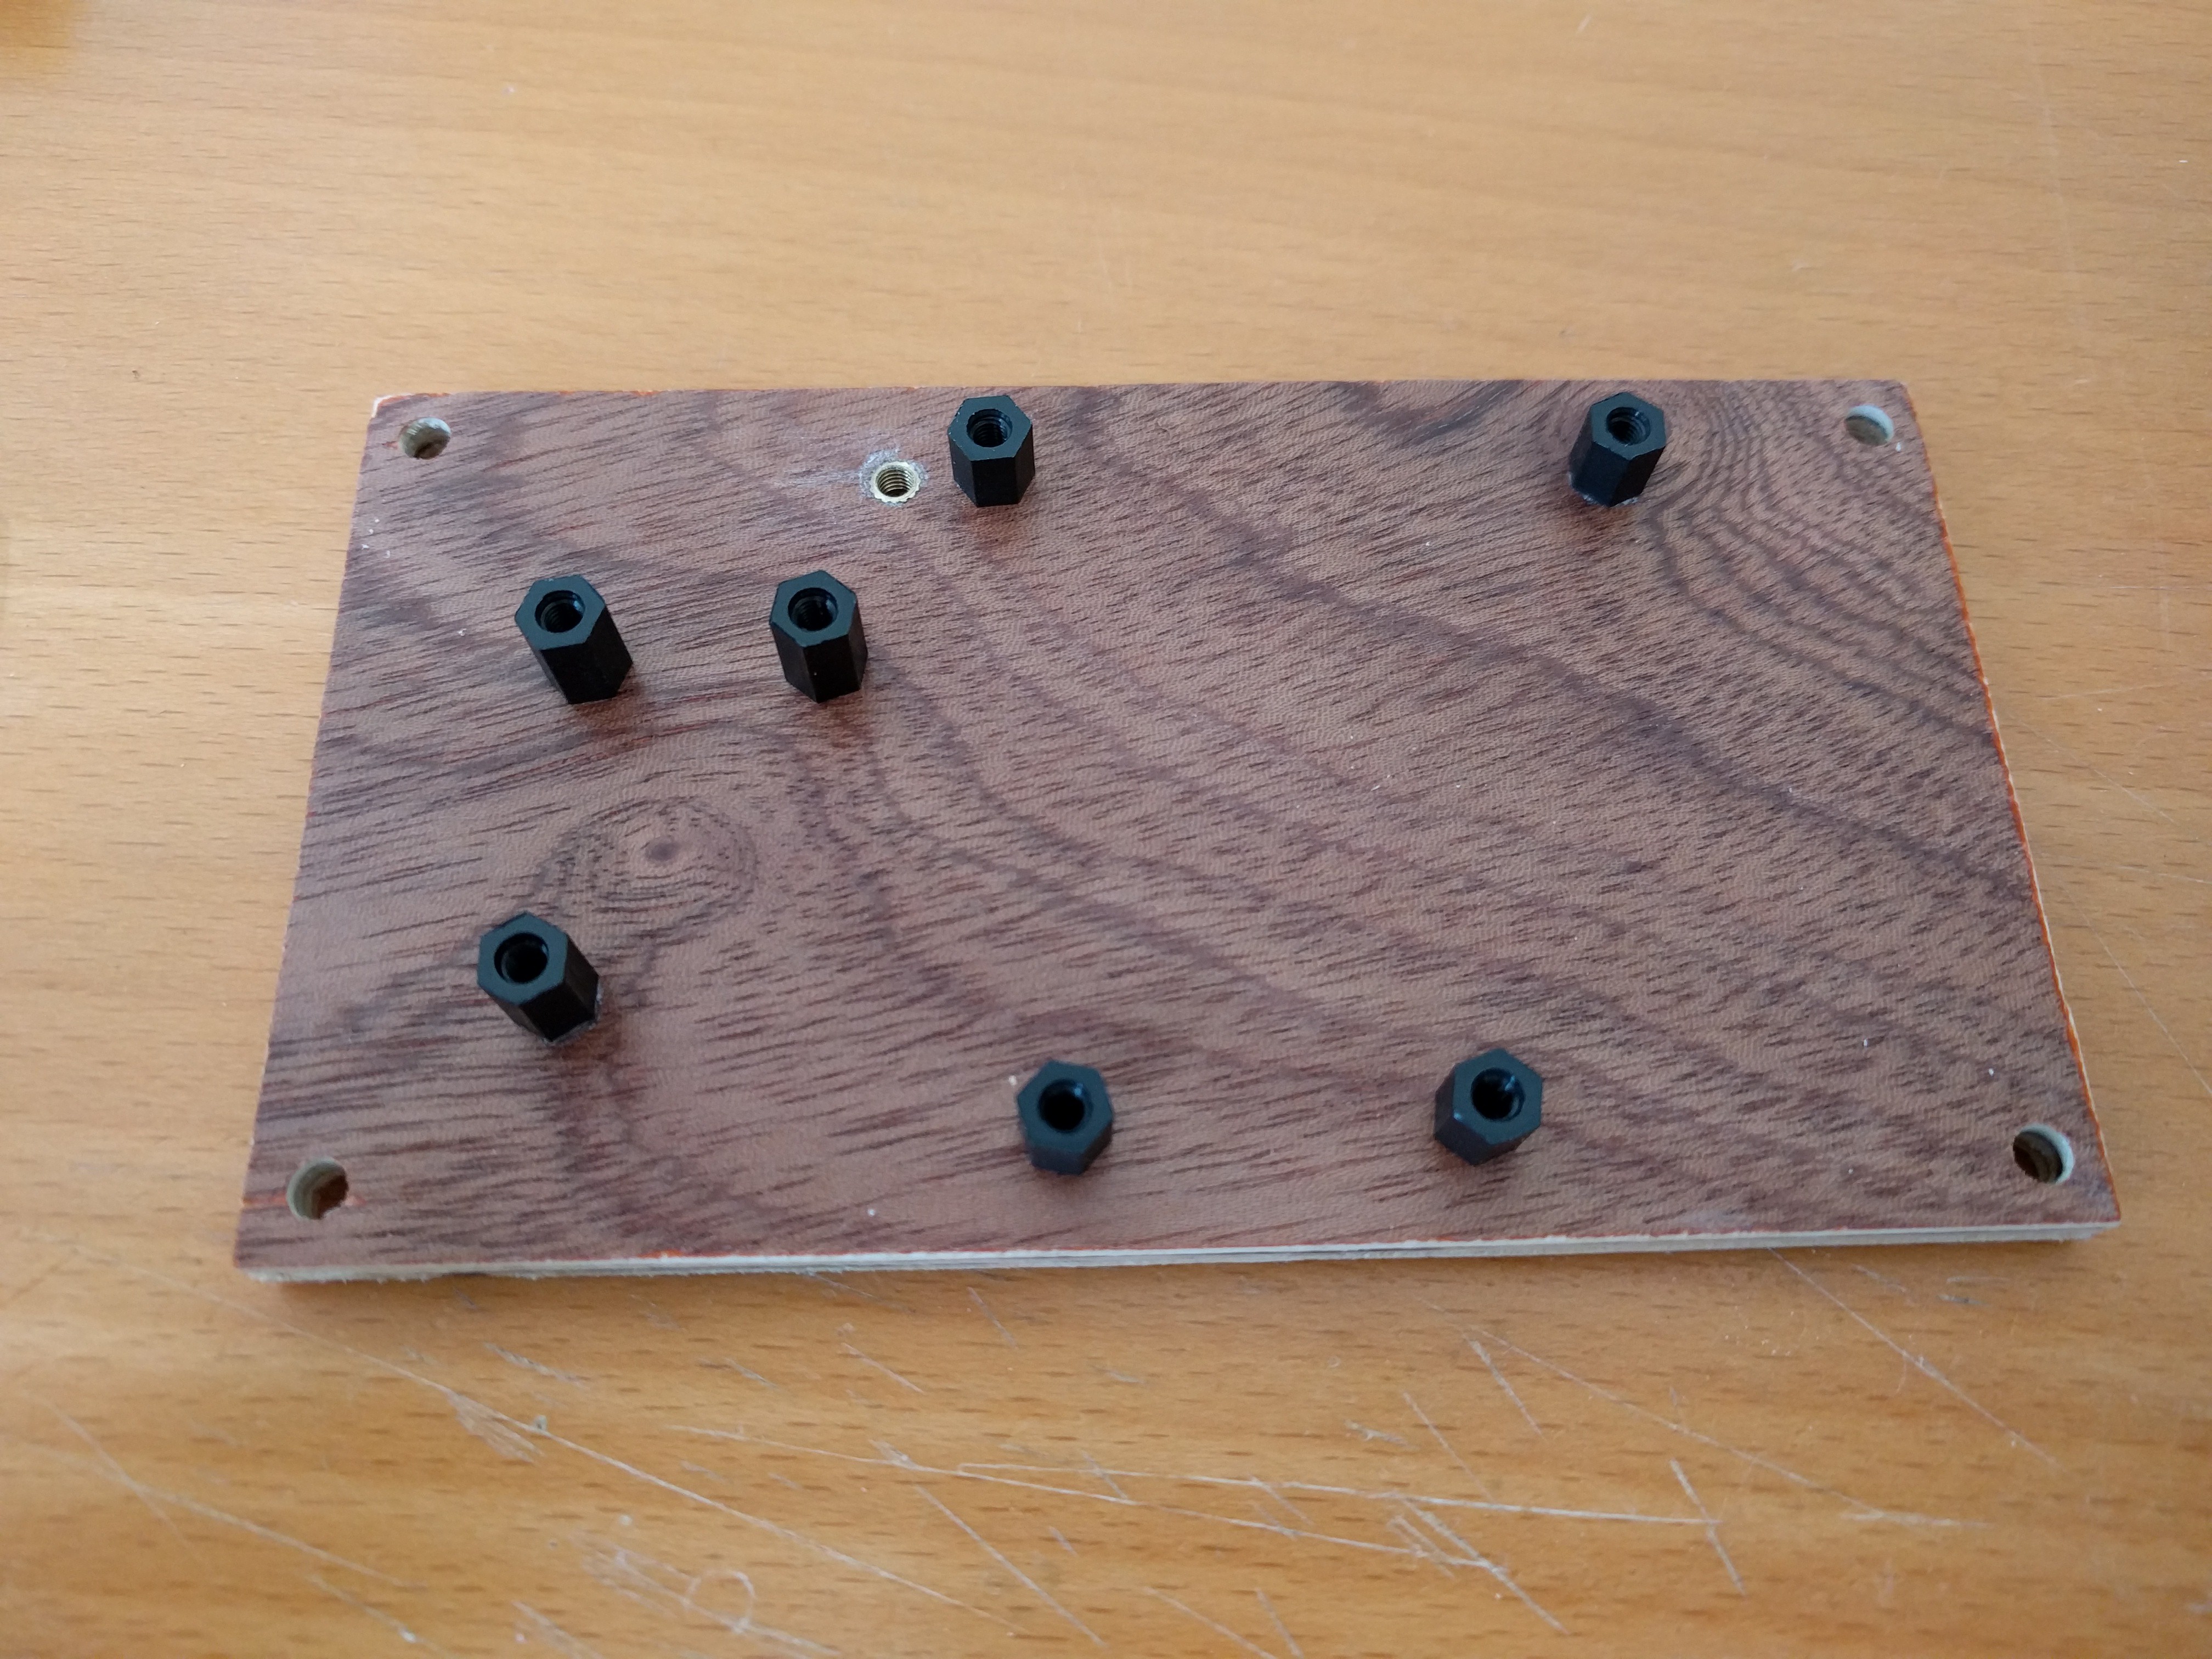
Mounting the electronics
08/21/2016 at 12:57 • 0 commentsFor mounting the electronincs I use a little piece of plywood and drilled the holes for the components.
![]()
I bought m3 brass insert-nuts and tapped them in with a hammer and a longer m3 bolt. To hold them in place I put a little superglue/cyanoacrylate gel on them before I tapped them in.
![]()
Added the standoffs.
![]()
The hole without a standof is to a attach a zip-tie for a little strain relief on the power cable.
![]()
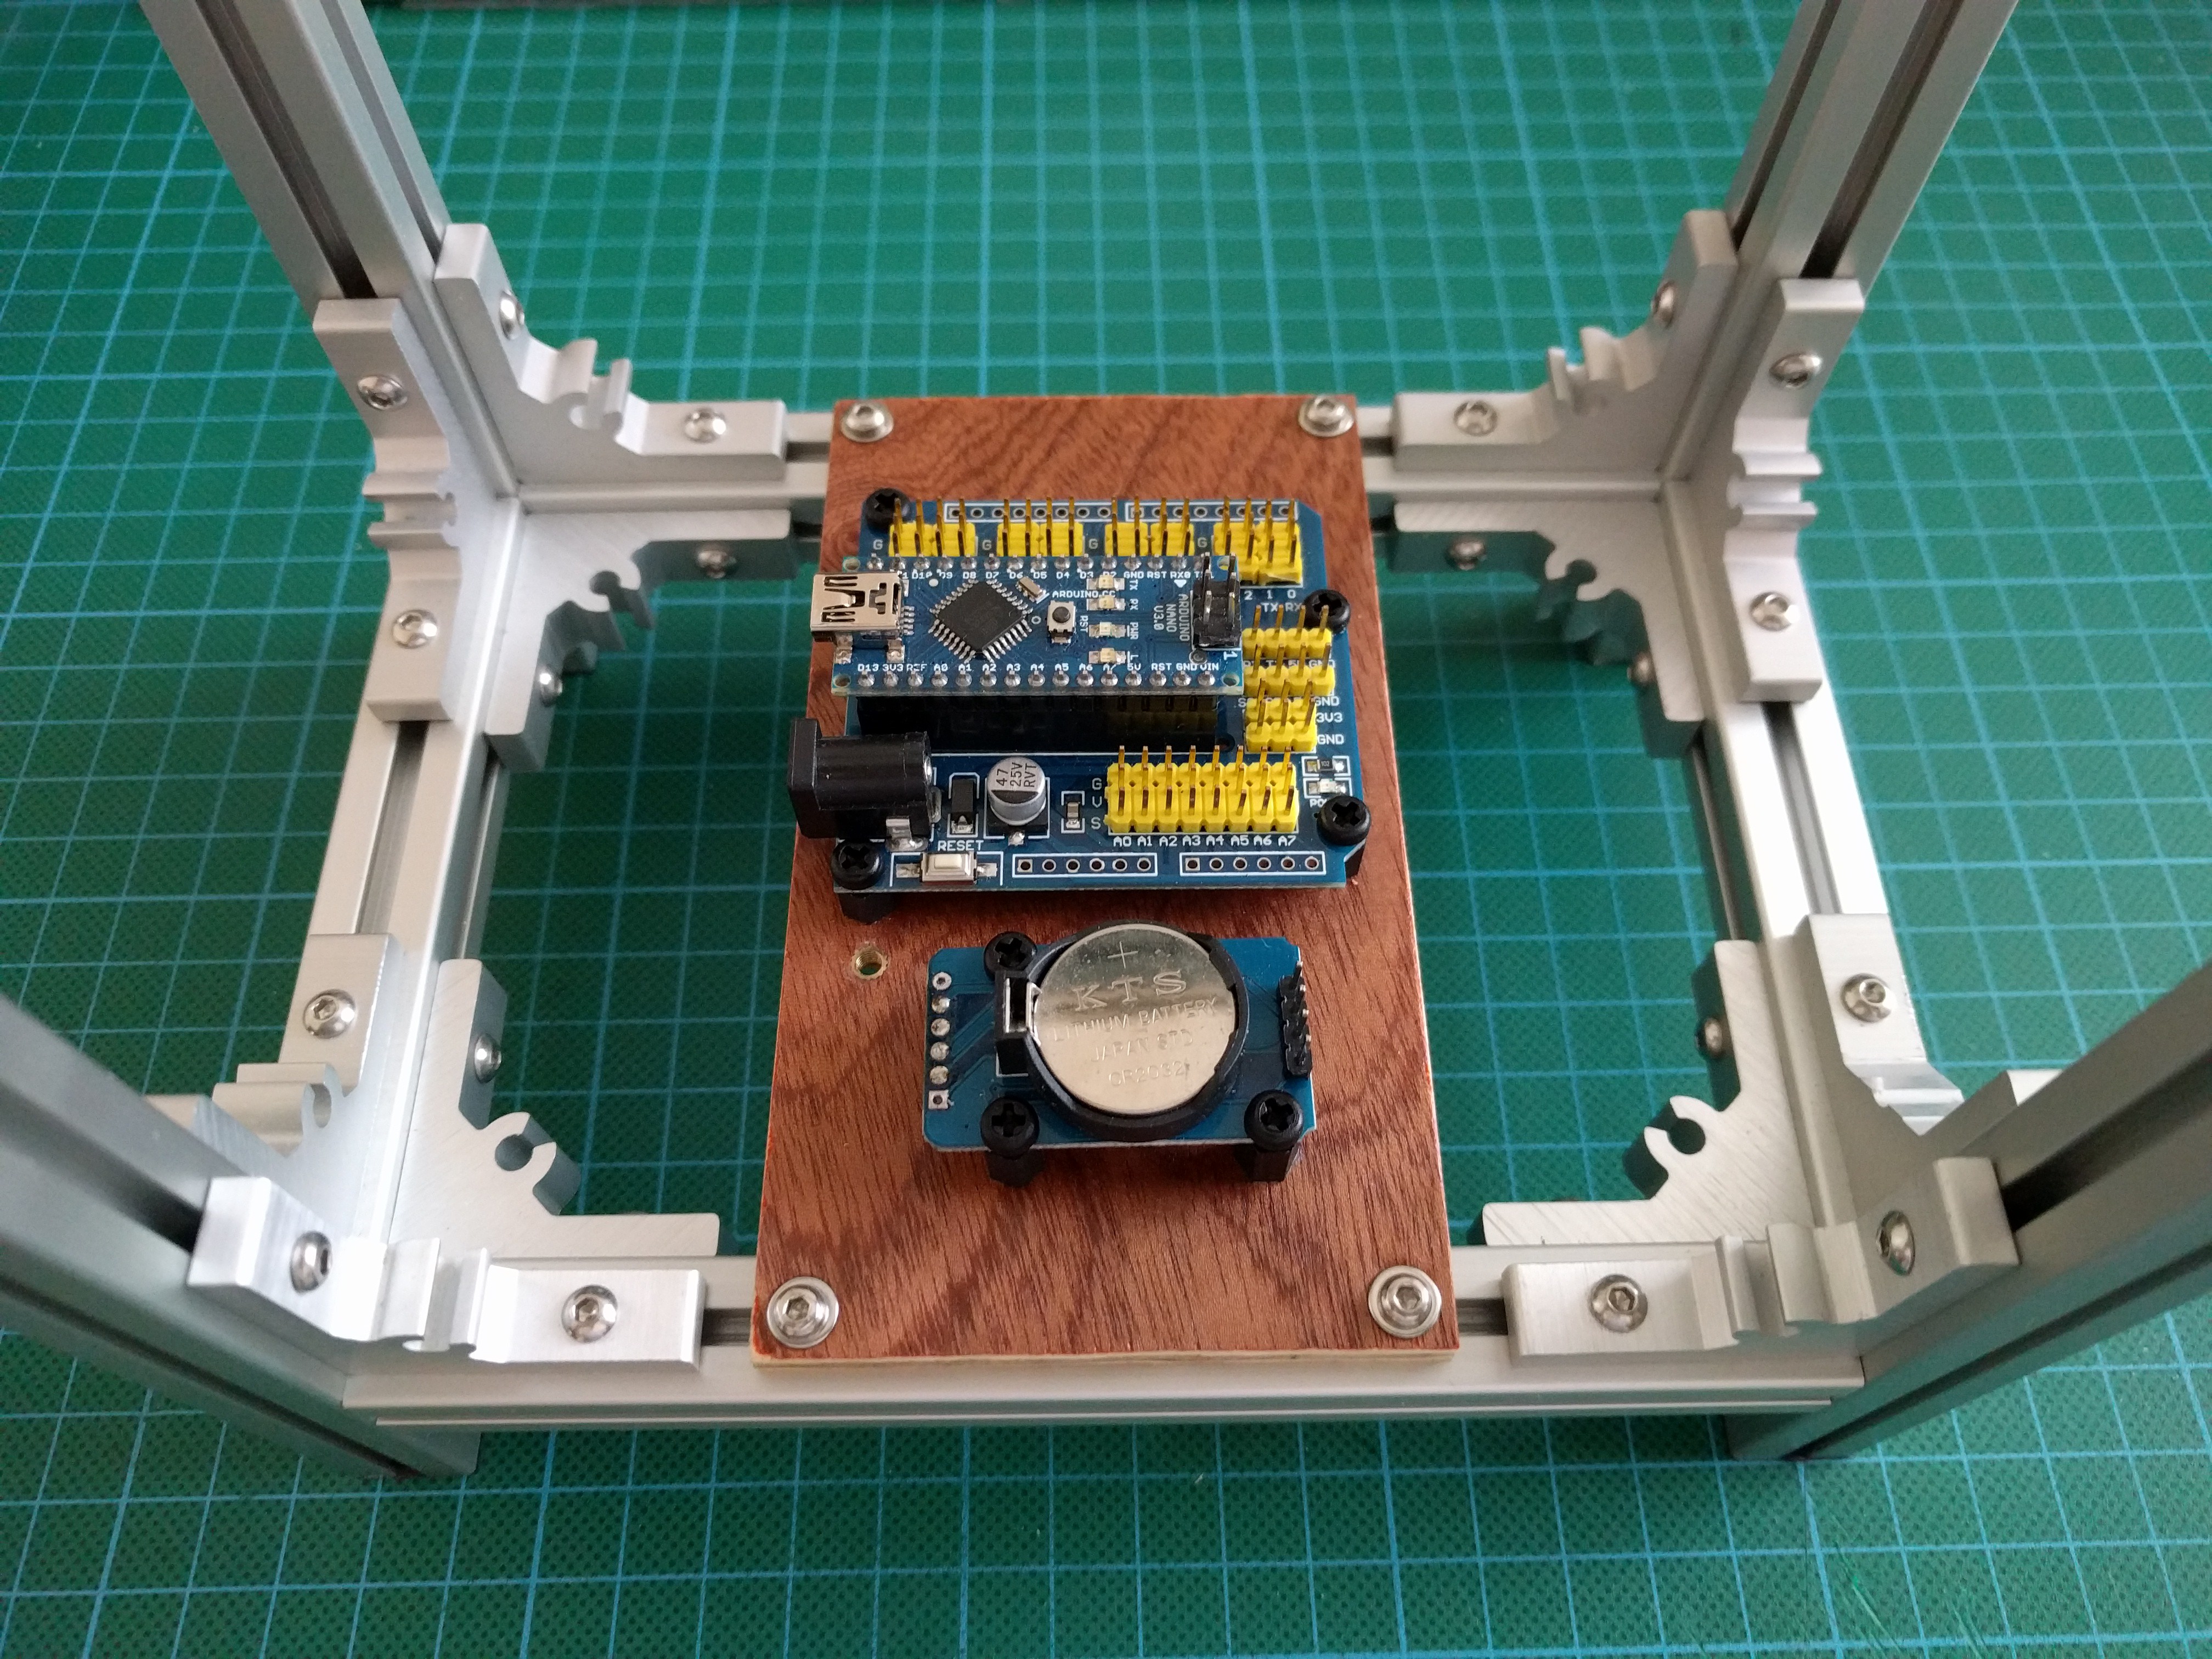
All the parts mounted.
![]()
Added extra nuts in the frame for holding the electronics plate.
![]()
Everything mounted and ready to go. Now waiting for the lacquer to dry on all the panels
![]()
-
Pre-painting/staining test fit
08/19/2016 at 09:14 • 0 commentsI drilled all the holes in the panels to do a test fit if everything lines up the way i would like. Must tap the top holes in the aluminium profiles. but I broke my tap. so that has to wait.
![]()
![]()
![]()
![]()
![]()
![]()
![]()
-
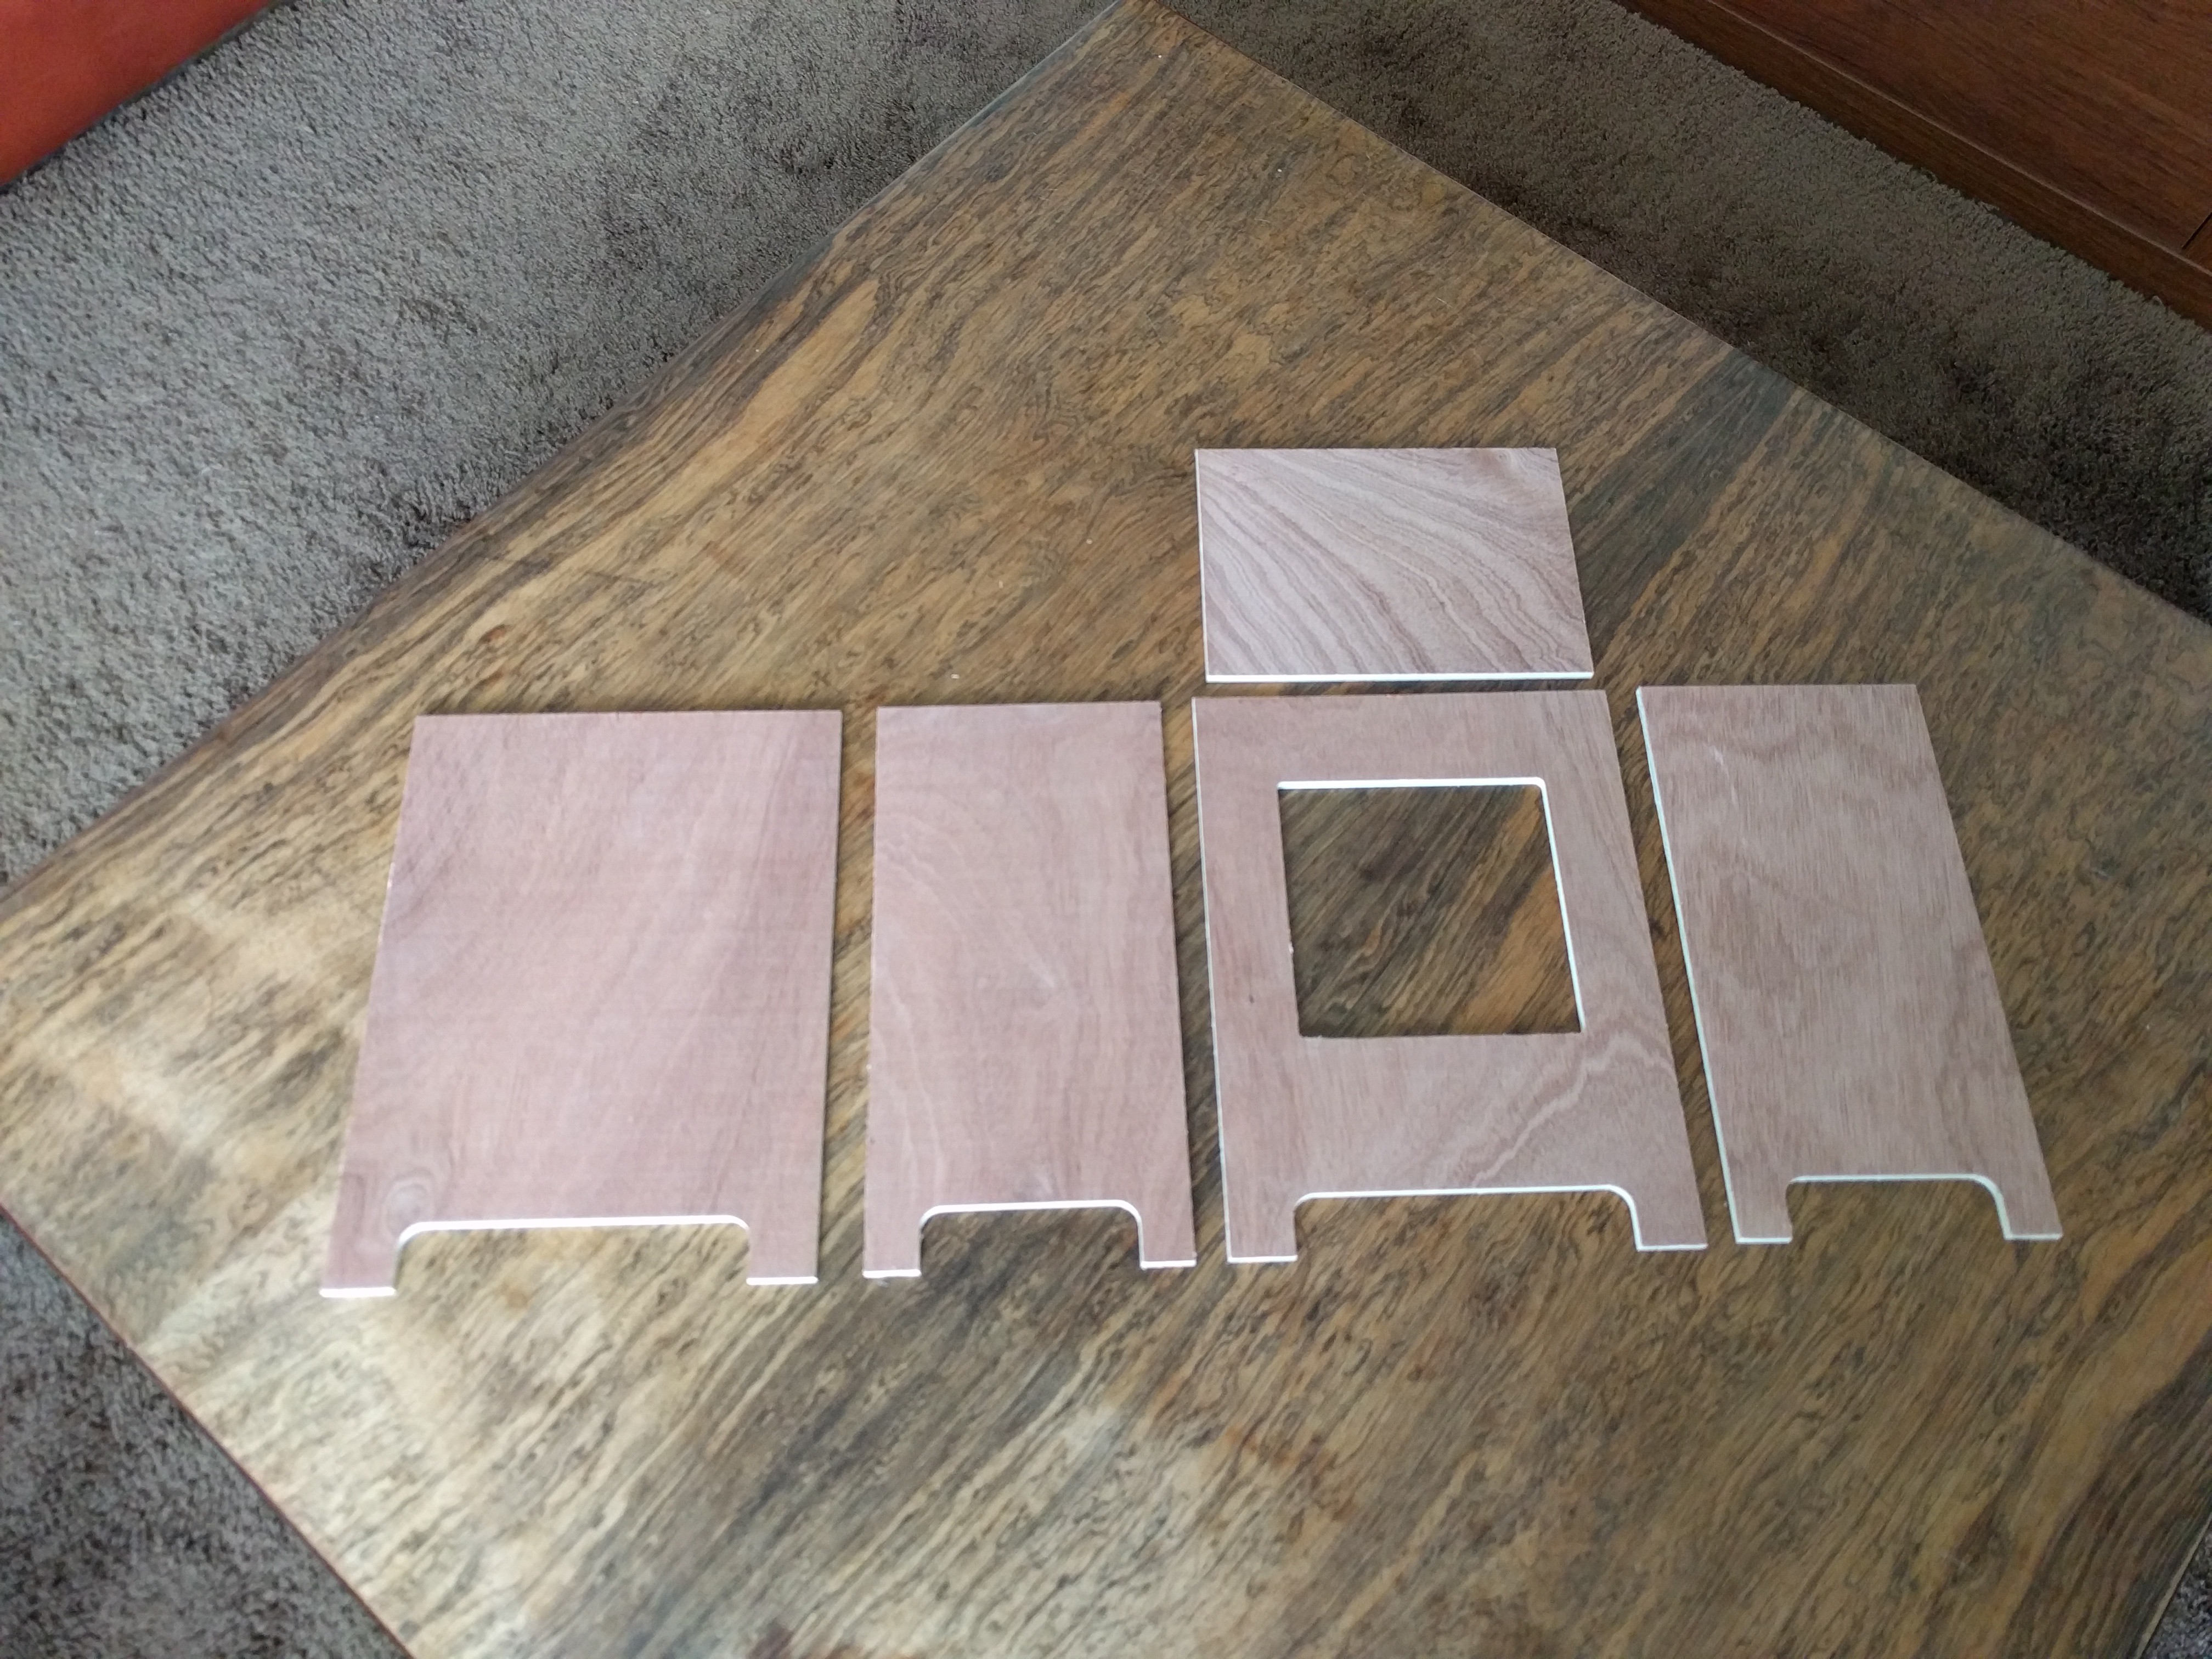
Cutting the Panels
08/08/2016 at 11:07 • 0 comments![]()
Finally had some time to play with my recently bought Ox CNC Mill. After destroying a few bits and a lot of wood i eventually had some nice panels. These panels were cut from ±5,5mm (±0.22") 3 layered plywood.
-
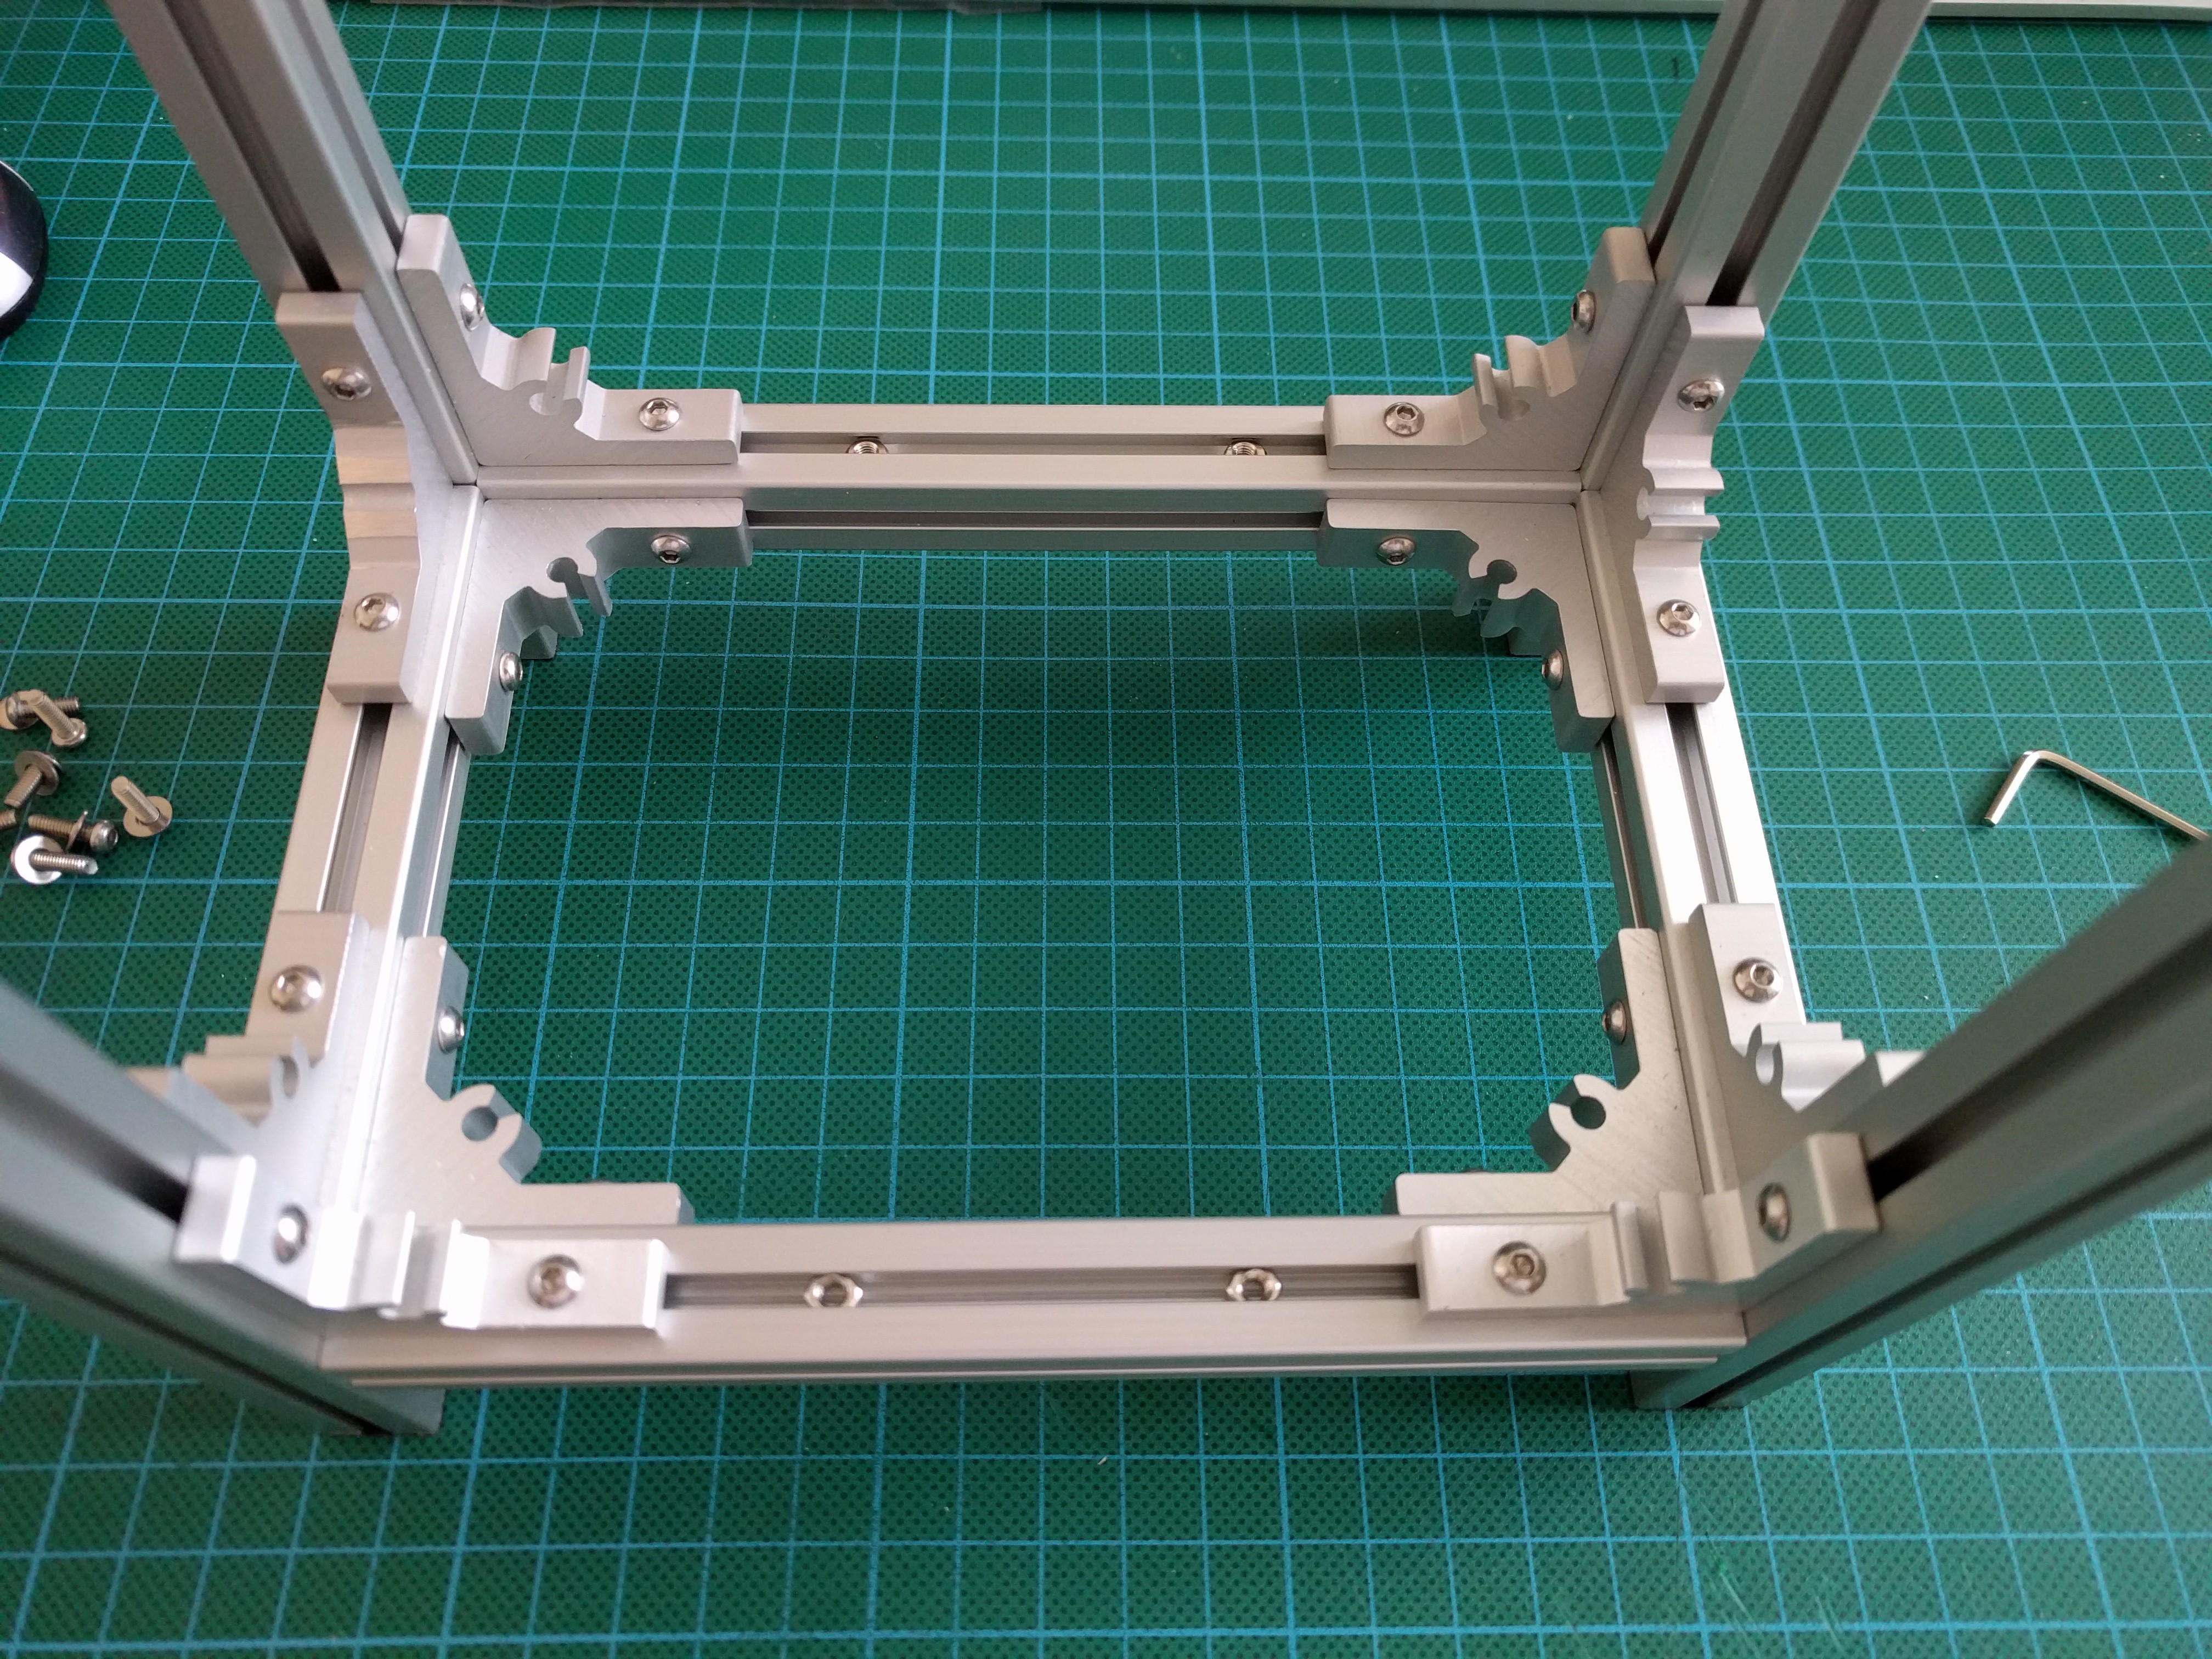
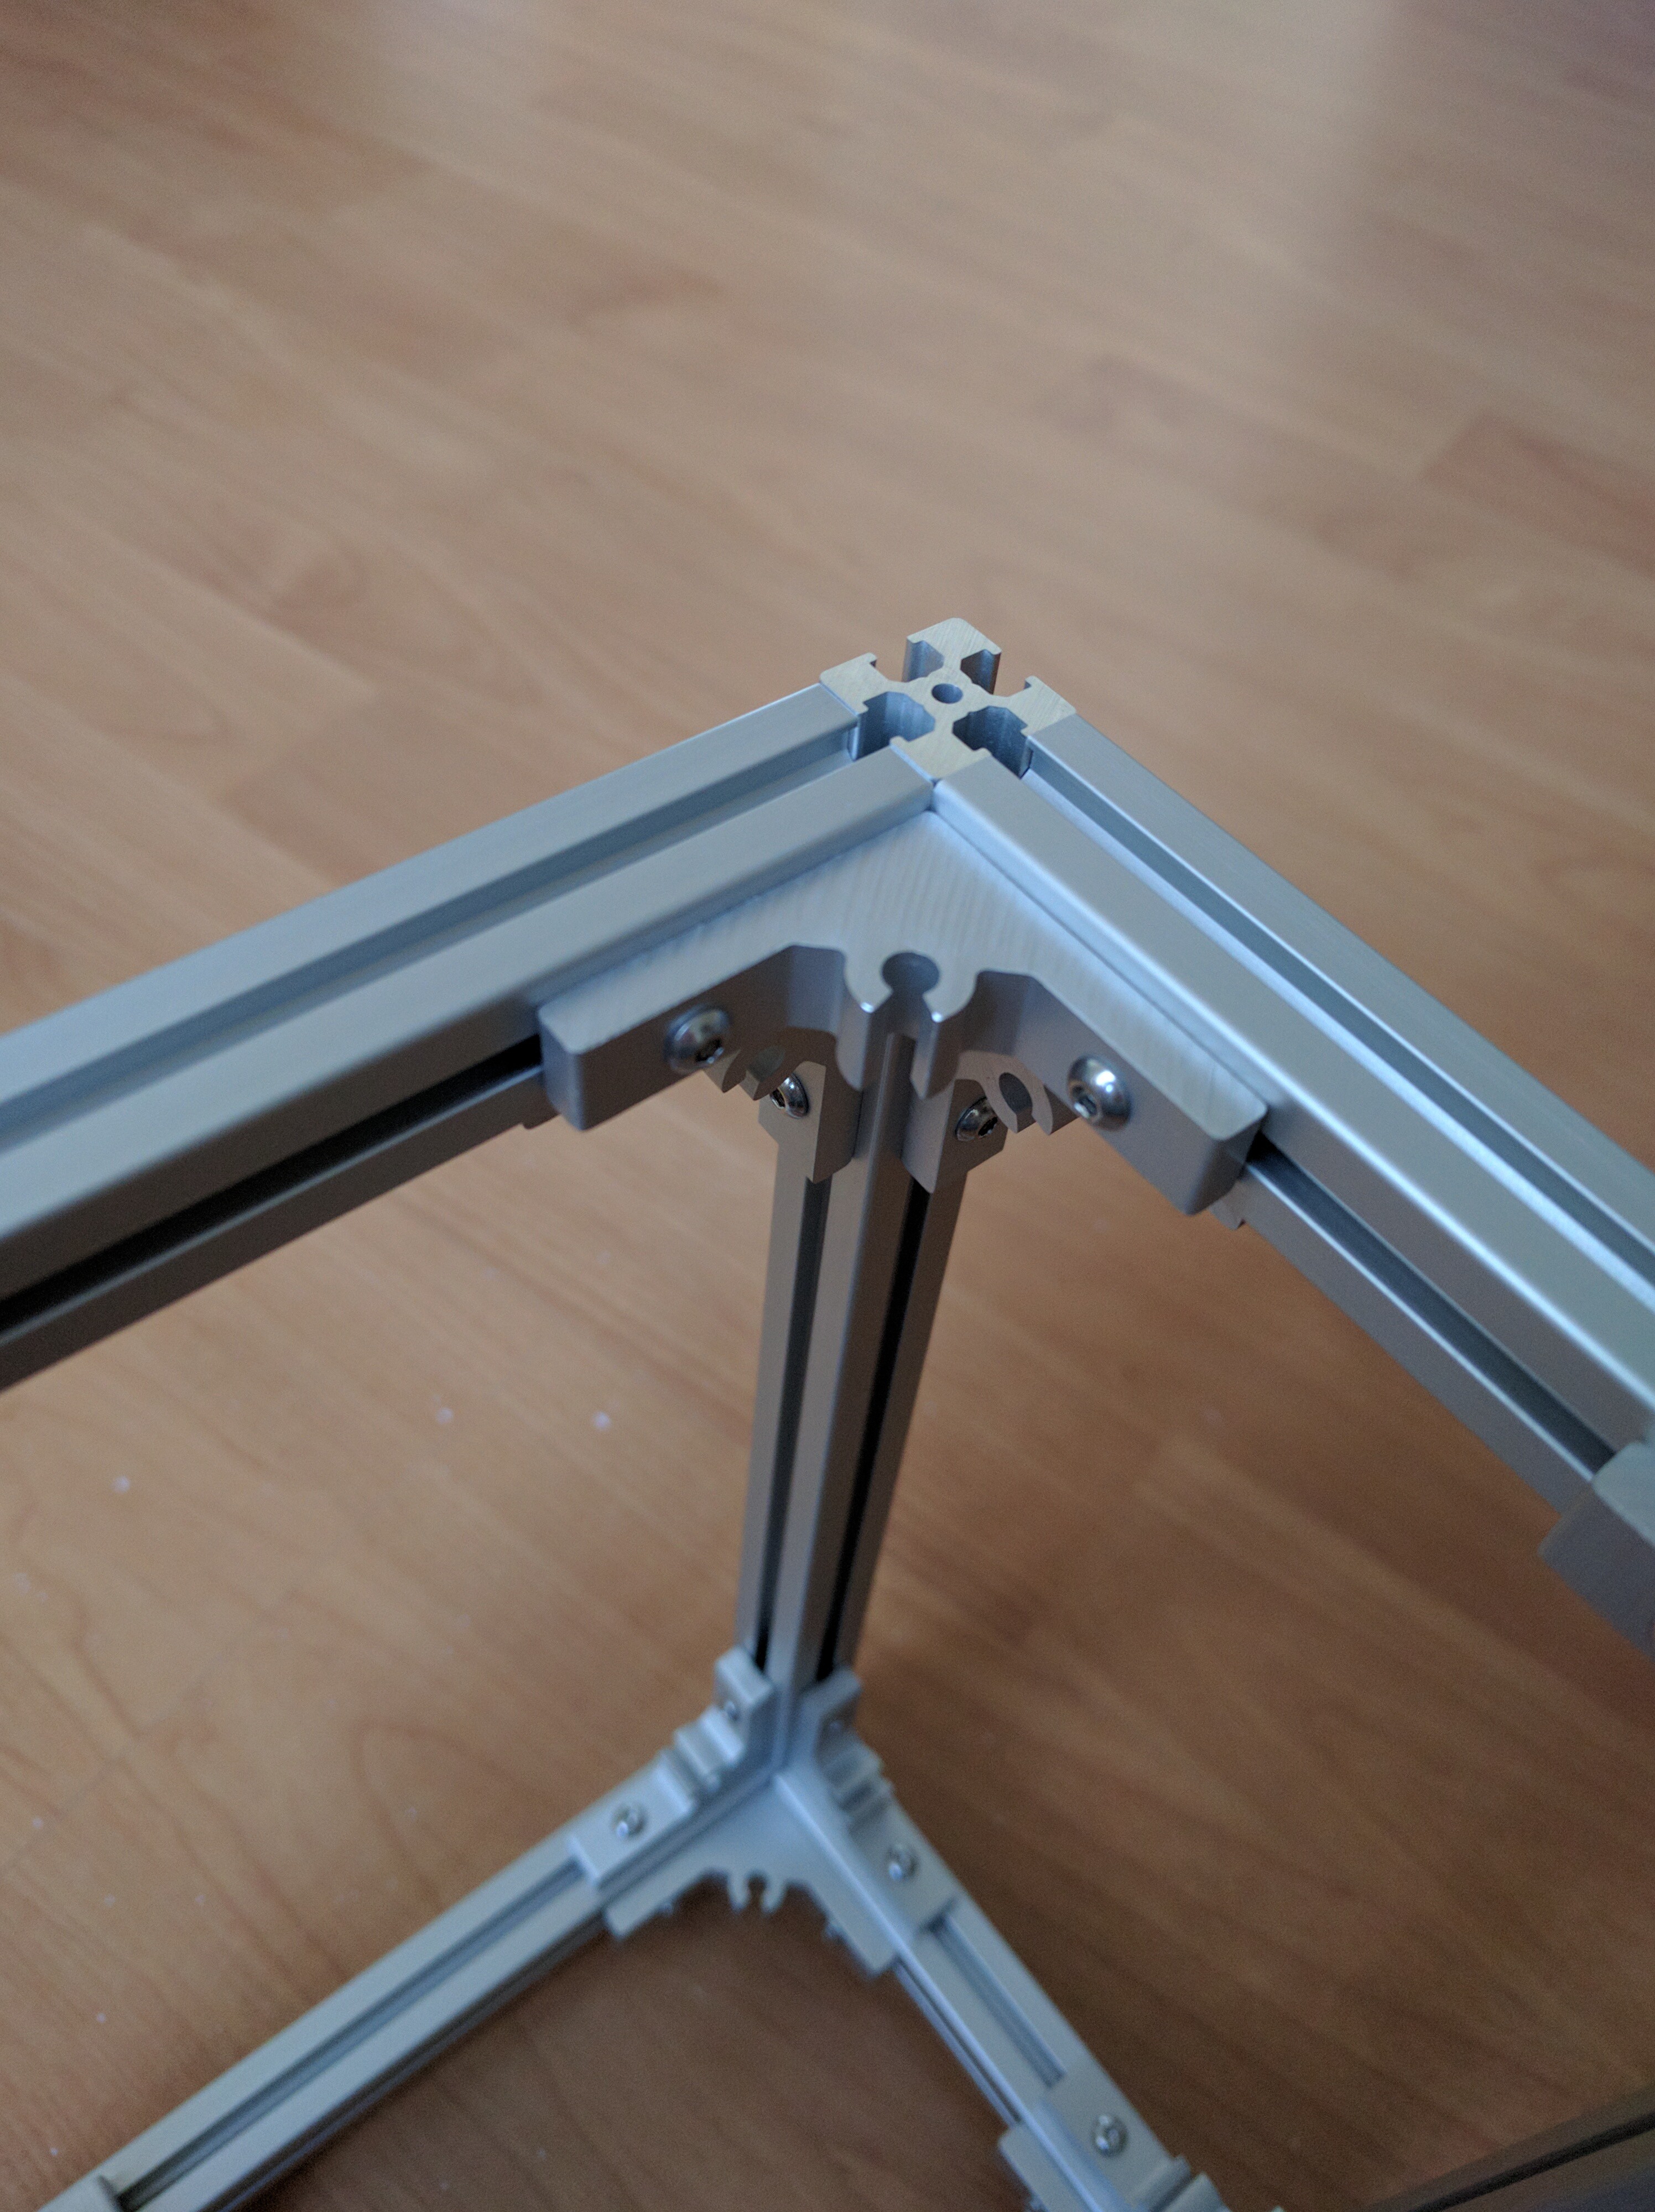
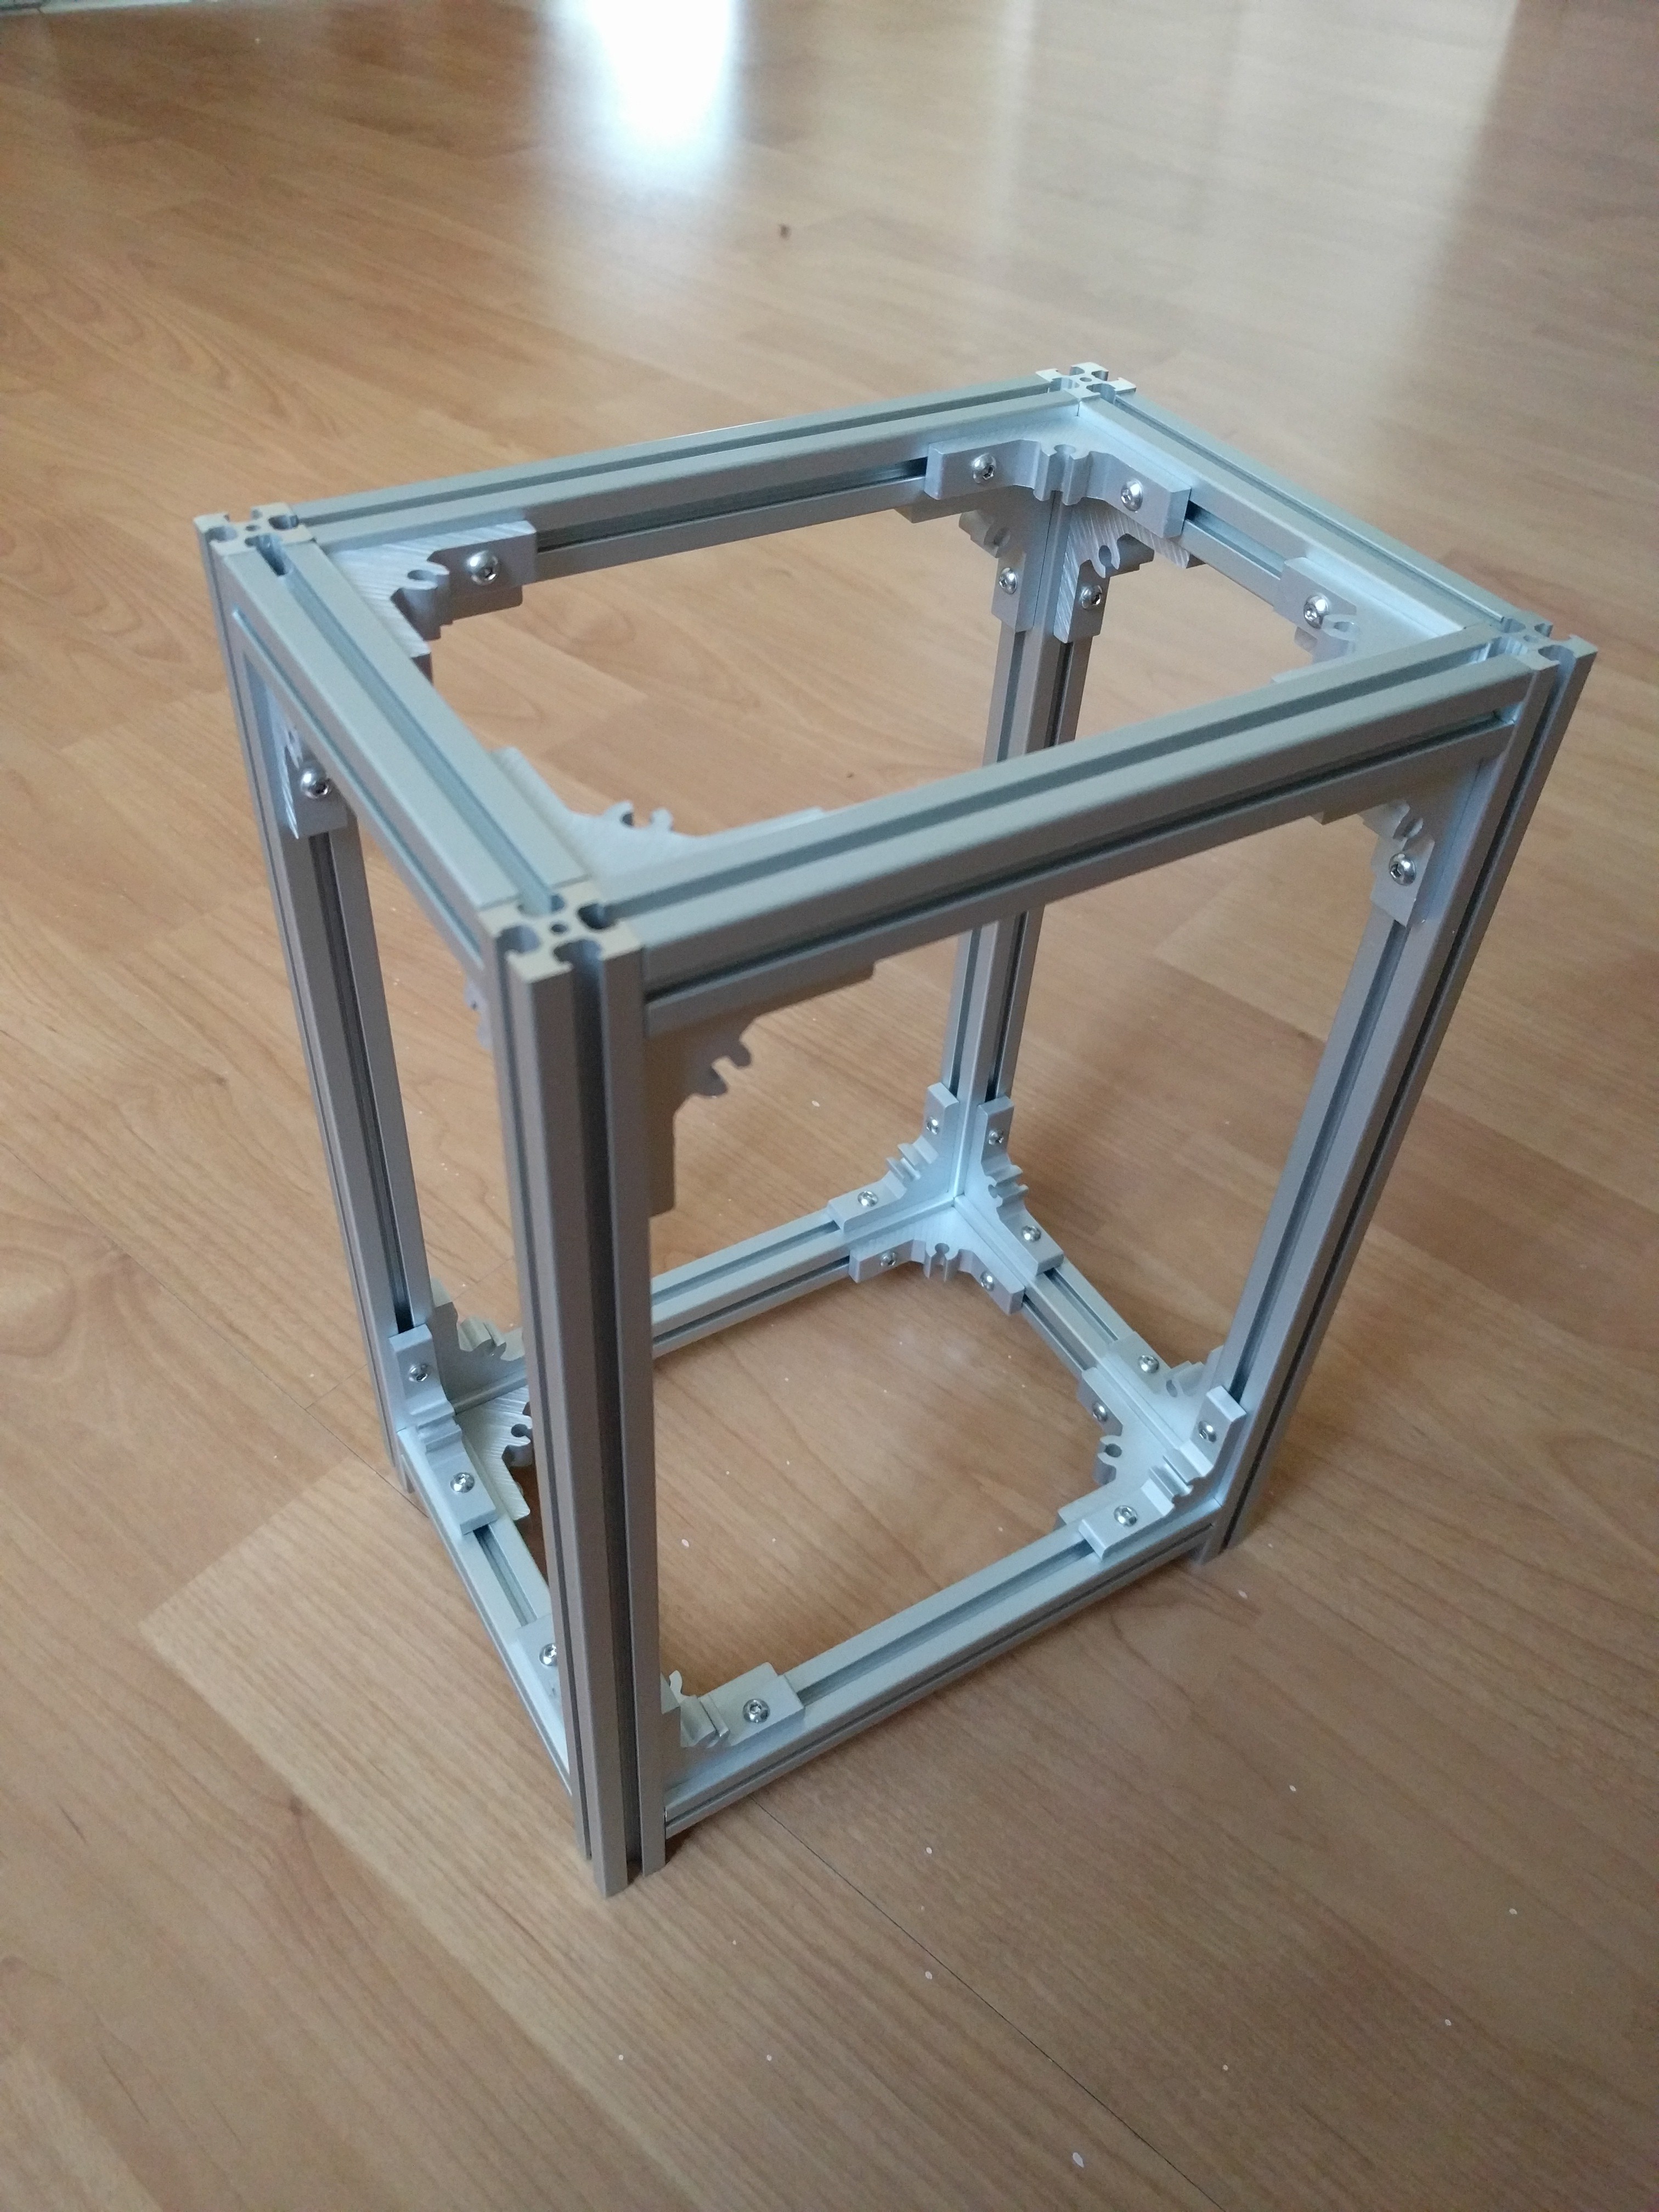
Building the Frame for the Clock
06/12/2016 at 08:18 • 0 commentsFor this clock i'm not going to use a donor clock, instead i'm going to build it from aluminium profile and cover it with plywood. This will give it a nice industrial look.
Ordered aluminium profiles and 90 degree connectors from Misumi and m3 x 8mm hex screws. And after 10 minutes fiddling it looked like this. Just a quick pre-assembly so the alignment is still a bit off.
![]()
![]()
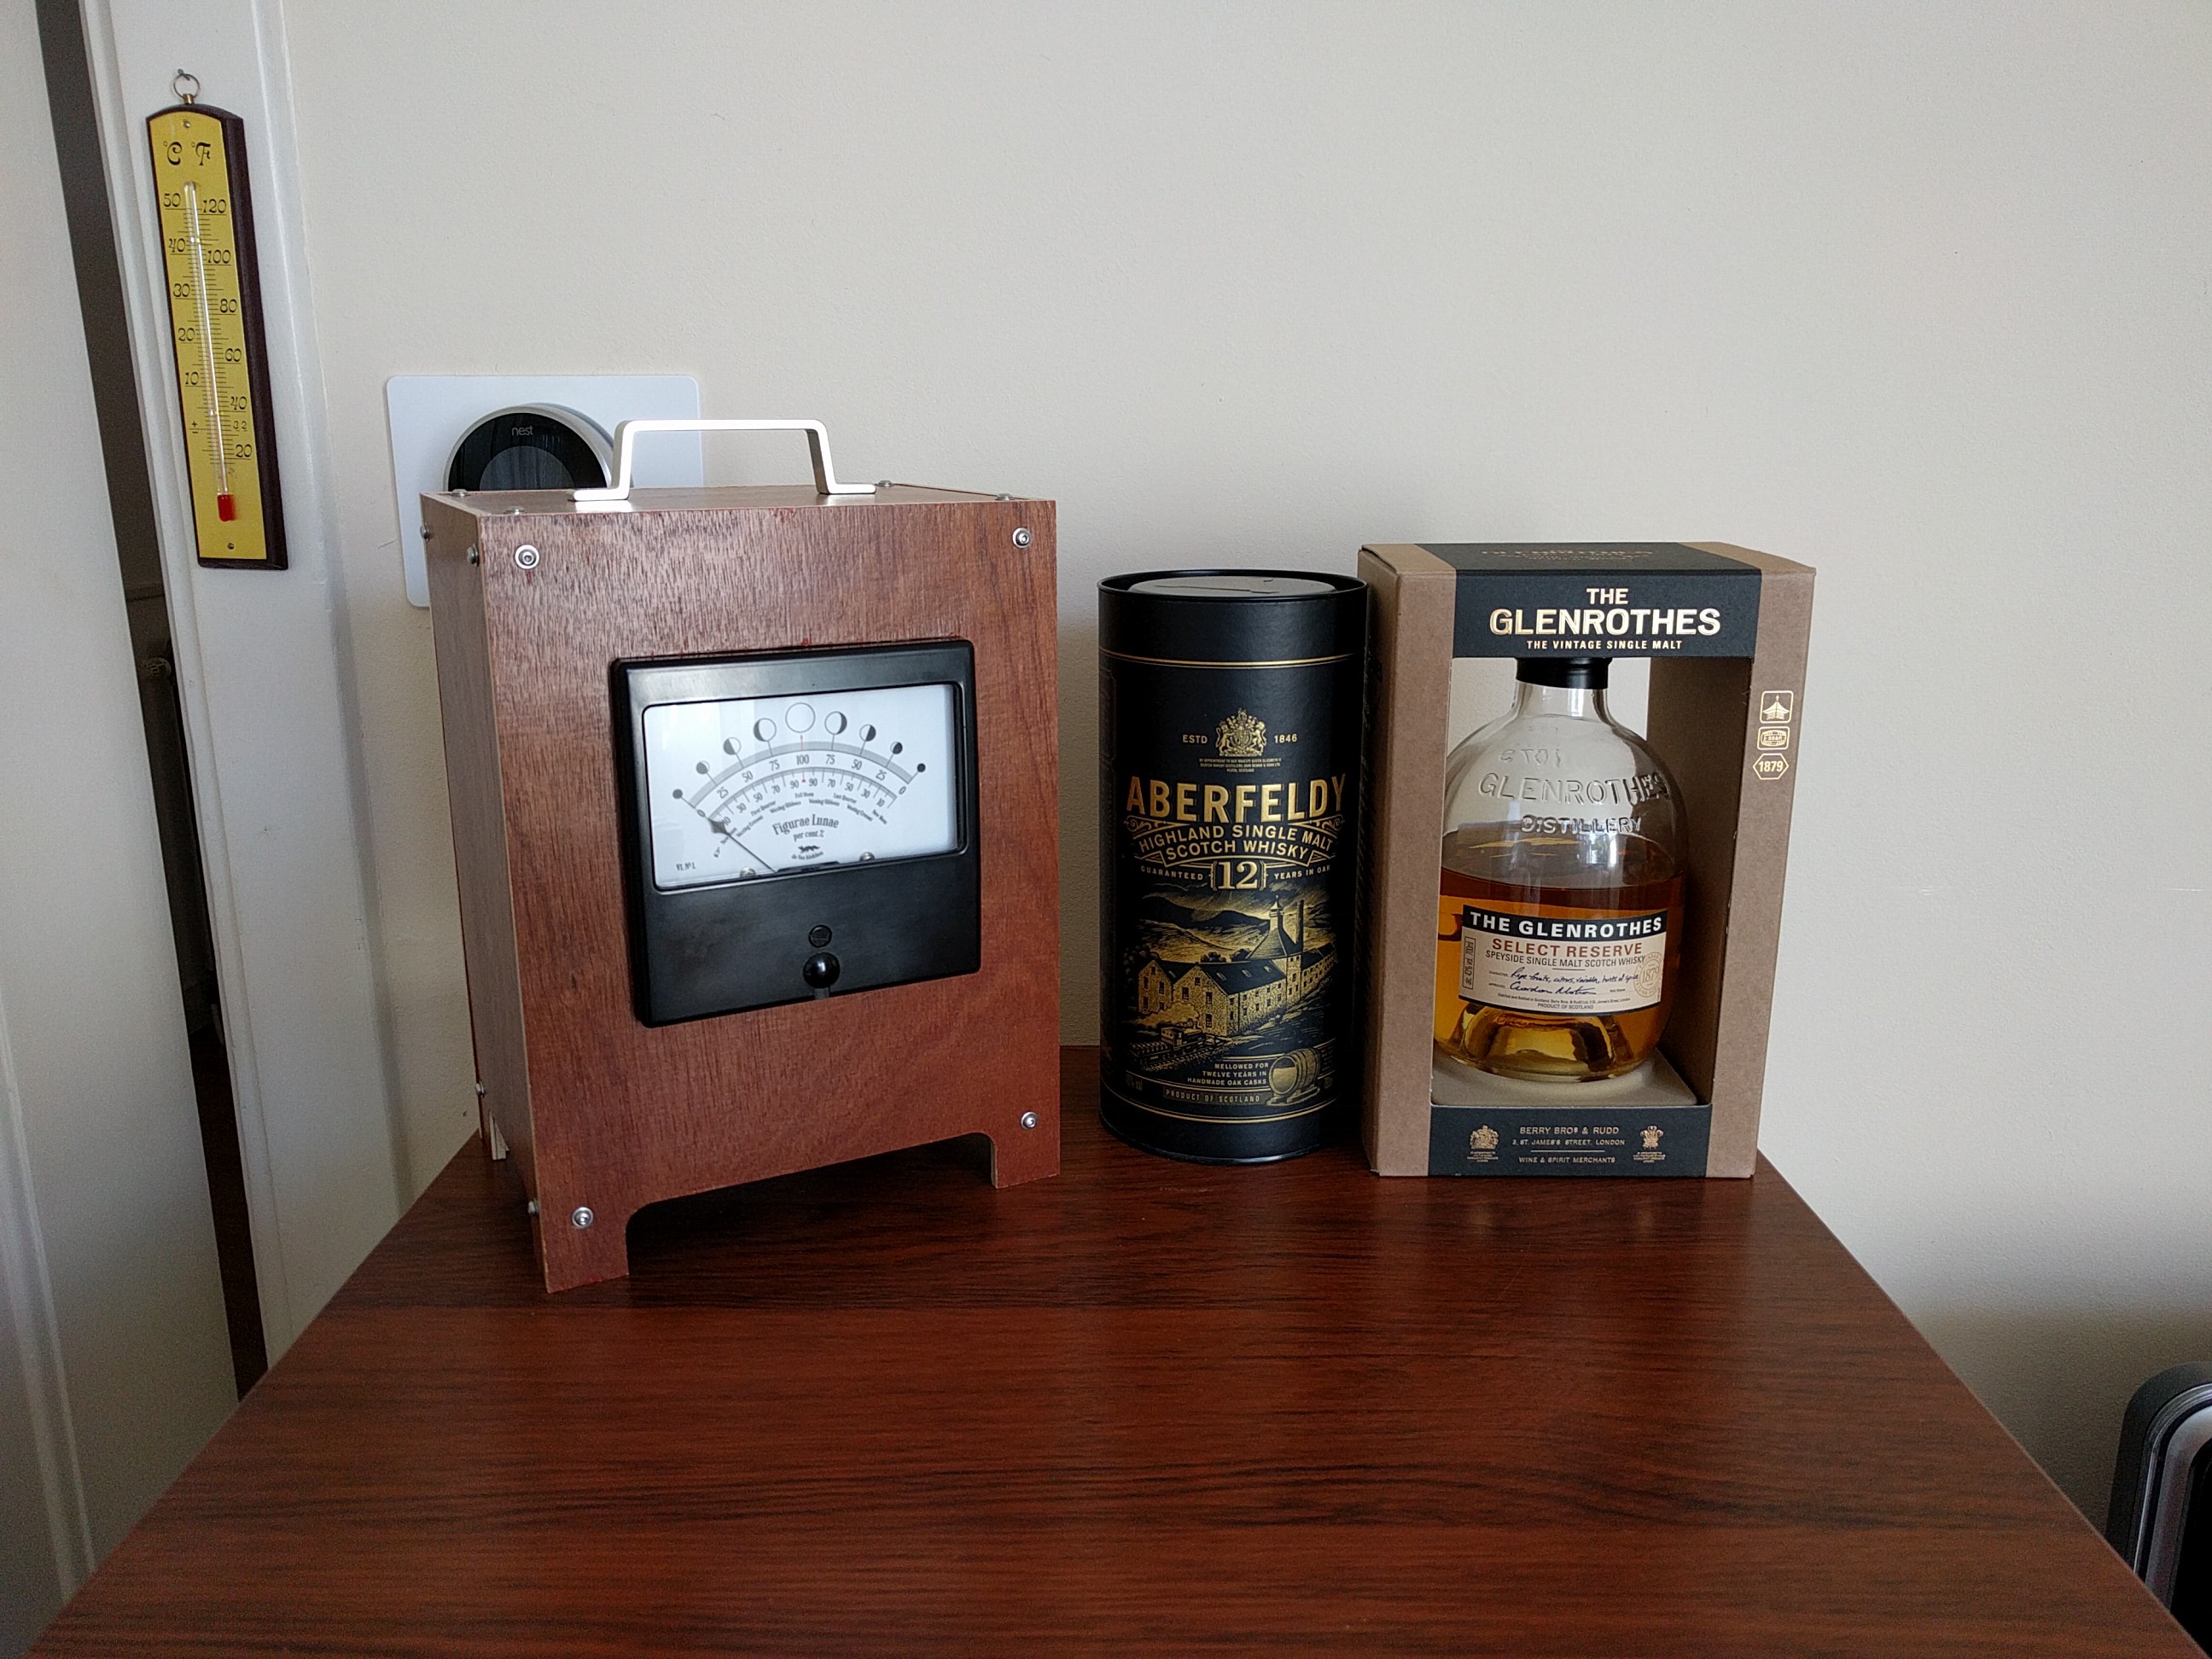
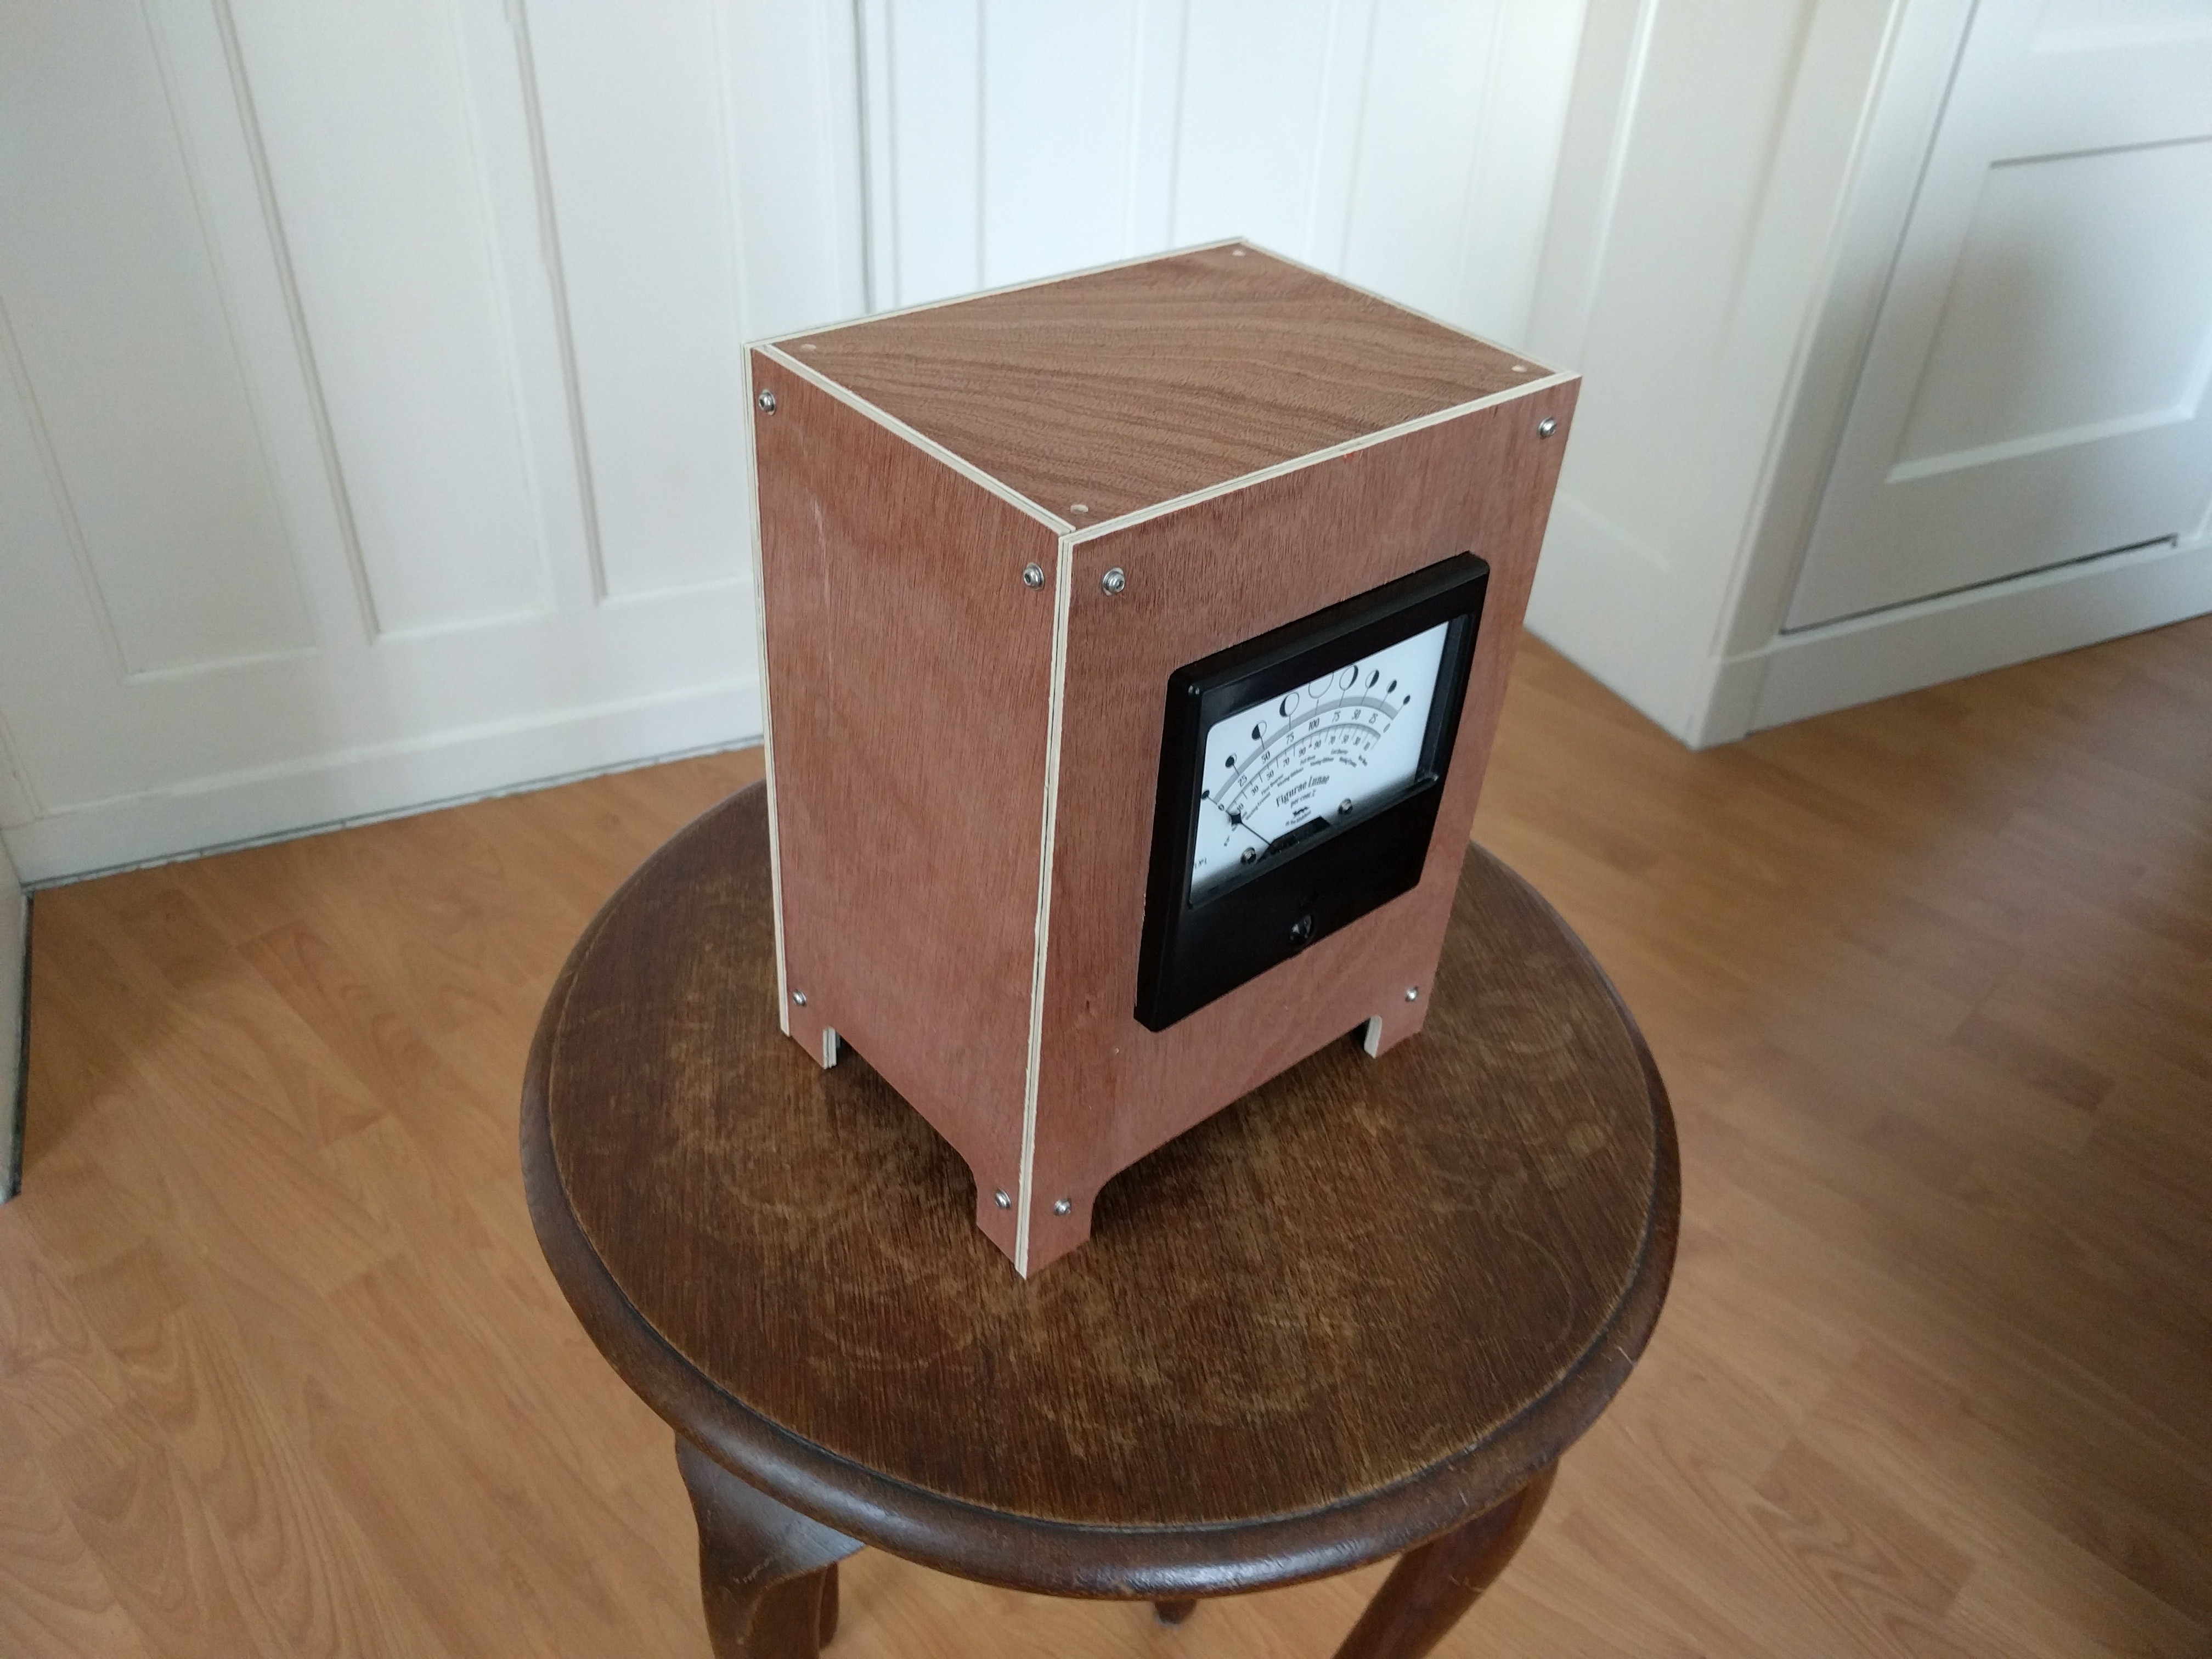
Panel meter Moon phase Clock
A mantle style clock that displays the phase of the moon with an large old (30/40 years) analogue panel meter