 Sundance Multiprocessor
-
1Step 1
Running the demo
1 Hardware
1.1 Hardware requirement
For the demo you will need
- an EMC² board with a SEIC and a FMC Imageon board,
- a HDMI screen
- a computer running Windows 8 and above
- cables: power, mini USB to USB, 2x HDMI.
- a HDMI source such as a camera
1.2 Hardware setup
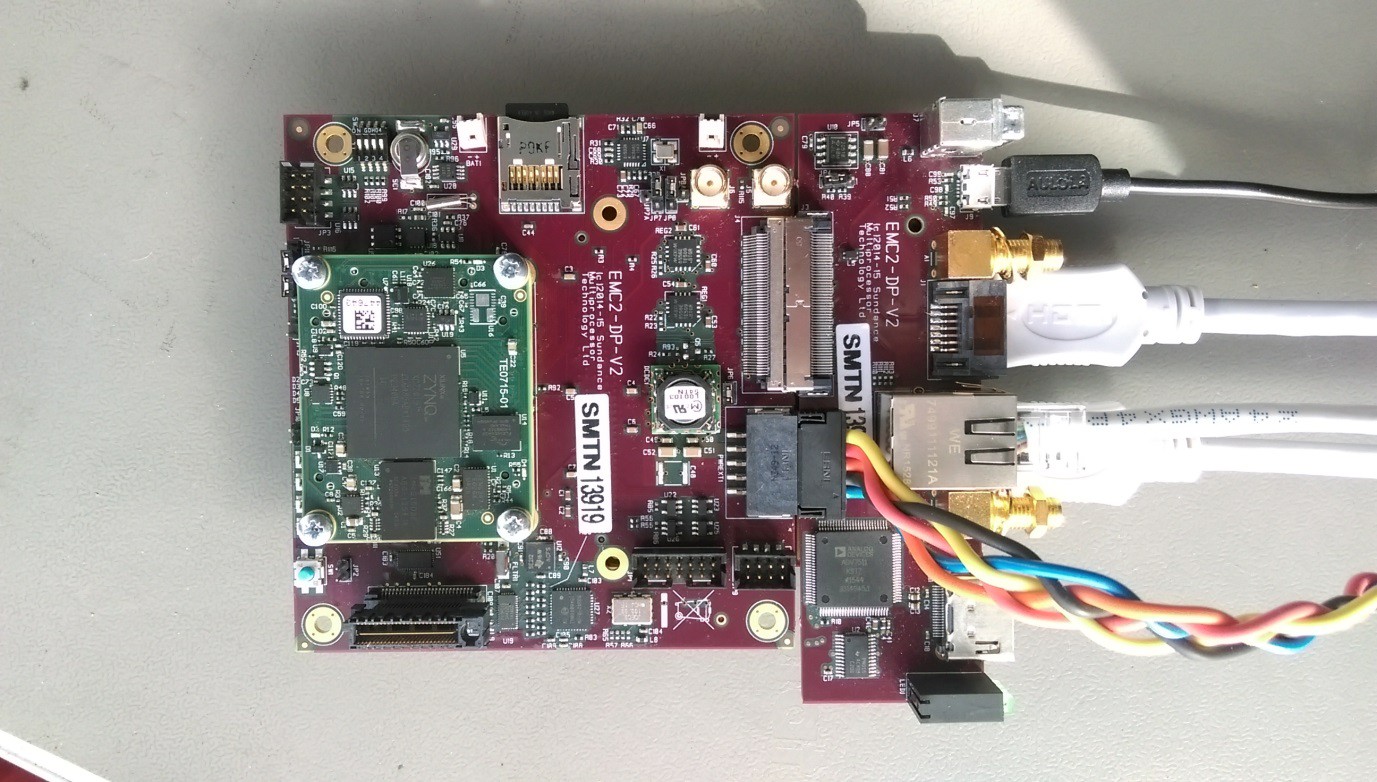
![]()
Figure 1: Hardware setup
- Connect the power cable to the EMC² board but don’t switch the power on for now.
- Connect the USB cable between the EMC² board and the computer.
- Connect the computer screen (or HDMI camera) to the HDMI in on the FMC board and the other monitor to the HDMI out on the FMC board.
2 Software
- Copy to the micro SD card (previously formatted as explained here: http://www.wiki.xilinx.com/Prepare+Boot+Medium) the file: BOOT.bin from the “2017.2\workspace\emc2_hdmii_hdmio_sa\Release\sd_card” folder.
- Insert the micro SD card and switch the power on to boot the EMC² board.
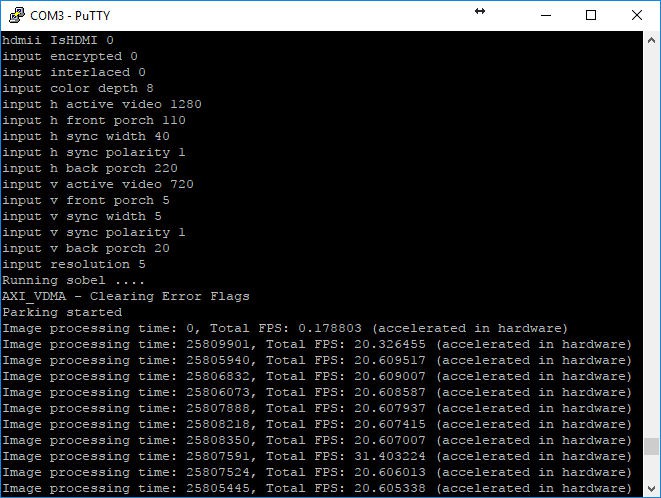
- Open a serial console (for example Putty) with the following settings:Speed: 115200Data bits: 8Stop bits: 1
Parity: NoneFlow control: None
![]()
Figure 2: Serial console settings
In the serial console, you should see information about the status of the configuration of the different components from the design (HDMI, VTC, VDMA). Once all the components in the system are configure the video output will be displayed on the monitor.
![]()
-
2Download the source files
The source files can be downloaded from here:
HDMI in to HDMI out on a ZYNQ based platform.
HDMI demonstration on the EMC2 development platform from Sundance with signal processing

Discussions
Become a Hackaday.io Member
Create an account to leave a comment. Already have an account? Log In.