Dan
Dan-
*Update* - PCBs & Component Kits
05/16/2015 at 22:30 • 1 comment![]()
![]()
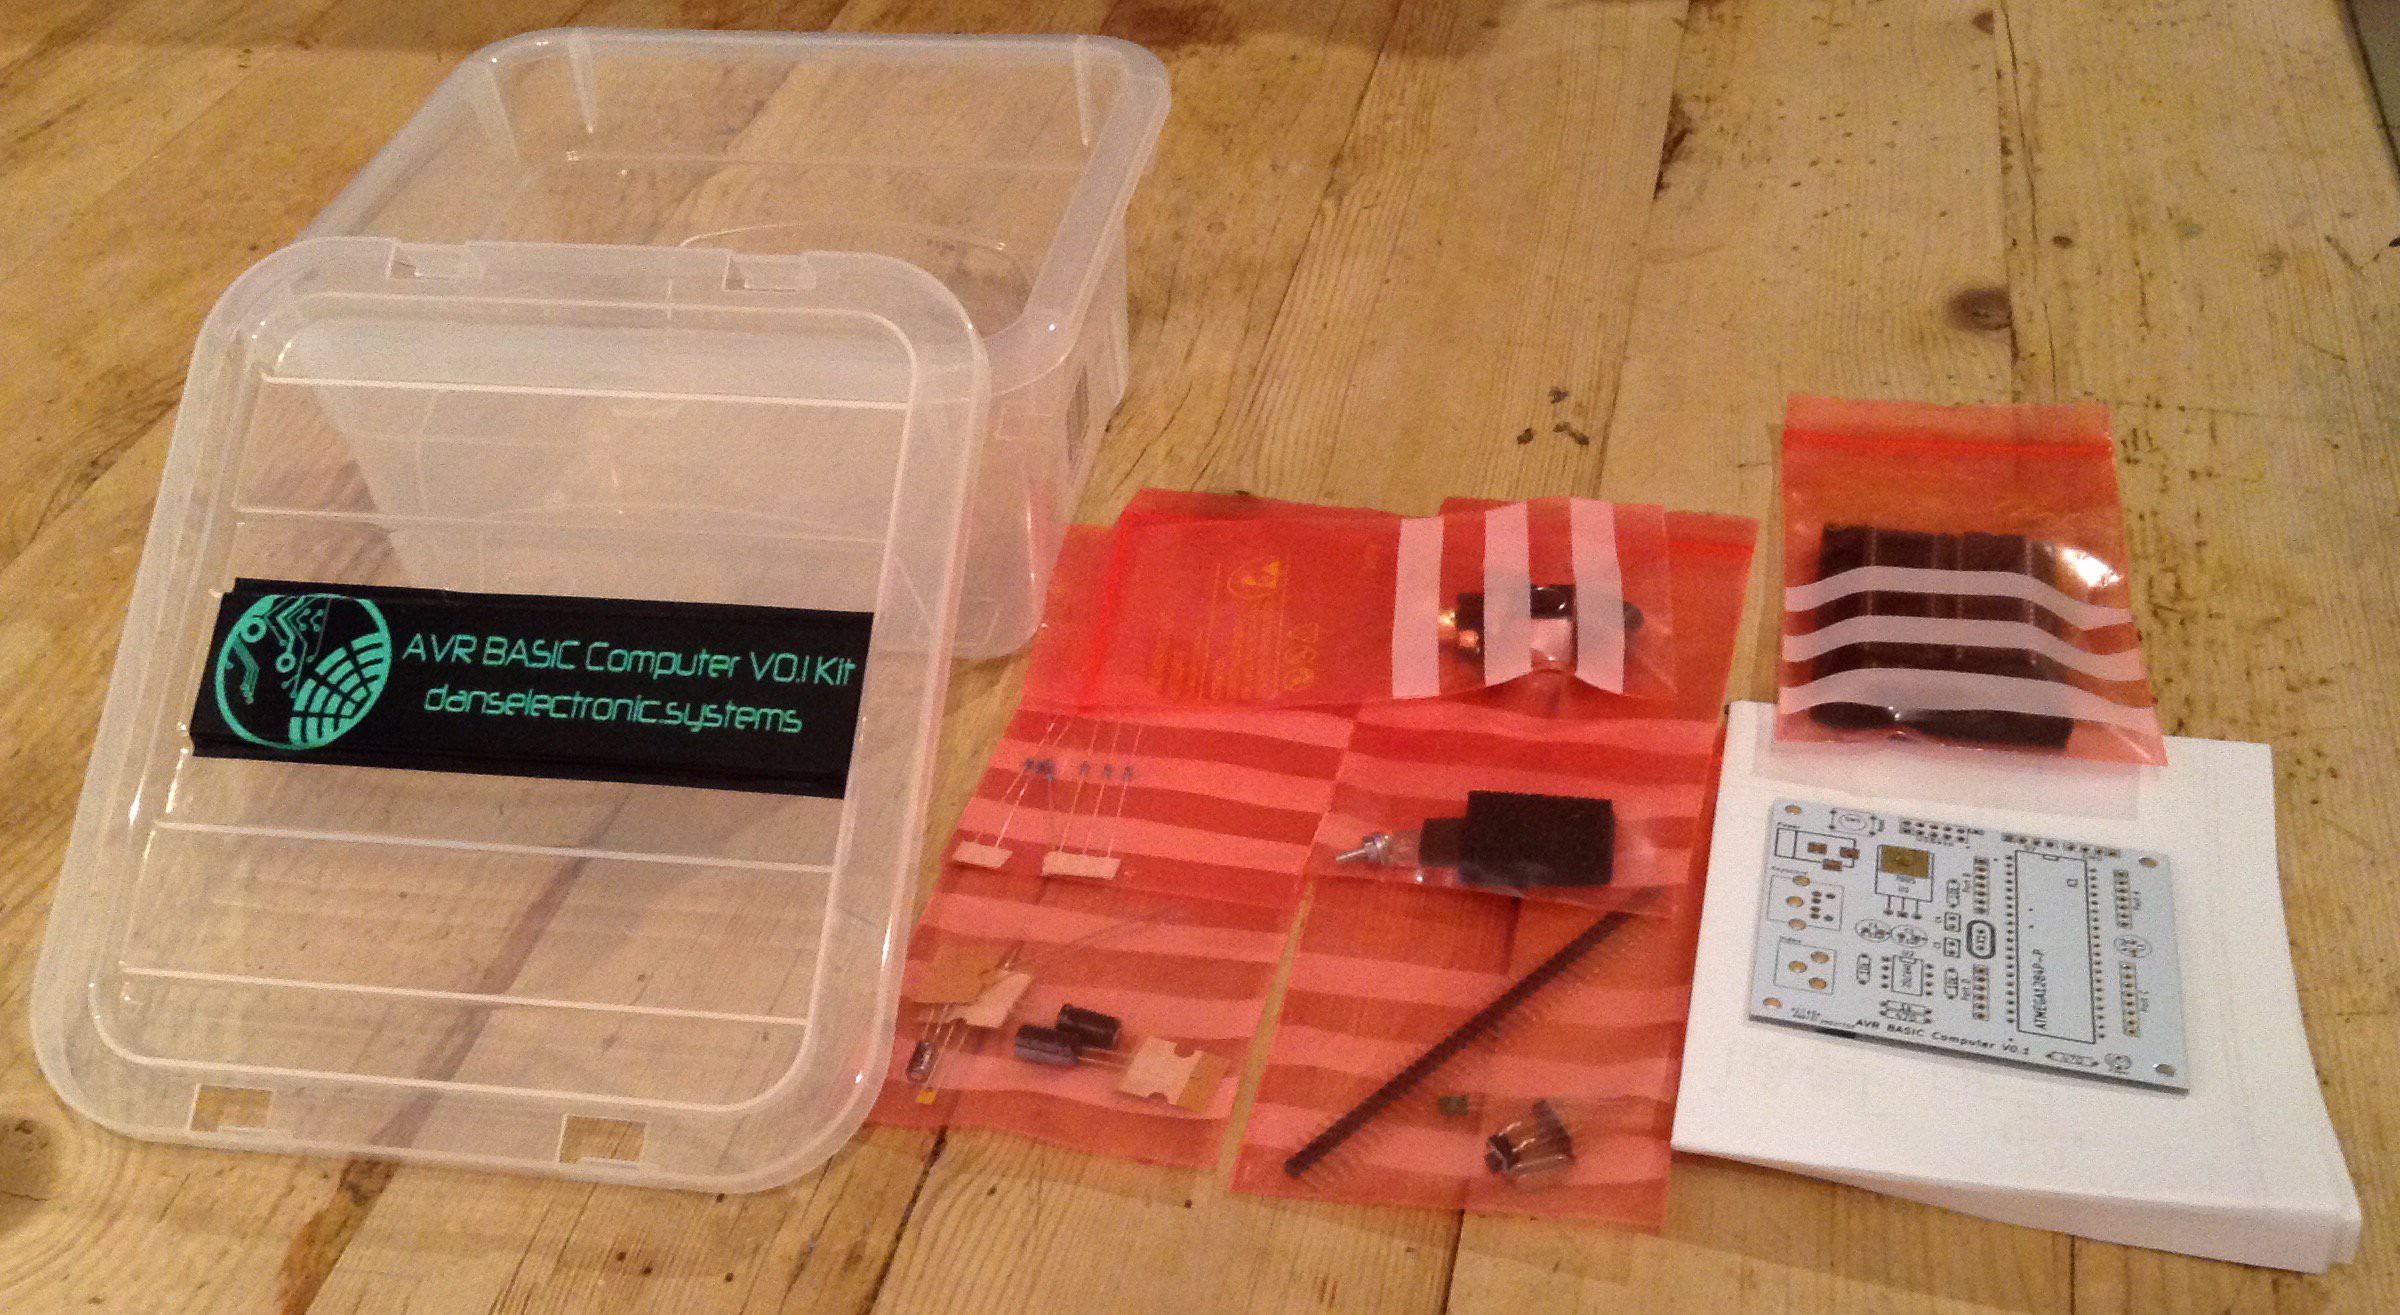
More PCBs and component kits are now available on Tindie. The kits contain all the components required to assemble the PCB to create a fully working computer.
See the links on the left hand side of the page. Additional information can be found on my website: http://www.danselectronic.systems/projects/avr-basic-computer-v0-1/
I currently have 10 kits available and 14 PCBs.
-
New PCBs
12/06/2014 at 20:24 • 0 comments![]()
The design of this computer has been updated and I have PCBs available for sale through eBay (using the link on the left - "Purchase PCBs"); the direct link http://www.ebay.co.uk/itm/121510974344
A new page dedicated to this new computer design has been created: https://hackaday.io/project/3537-avr-basic-computer-v01
This design includes an additional EEPROM IC to allow full size BASIC programs to be saved. The PCBs are white in colour with ENIG finish.
-
New PCBs and assembly
08/14/2014 at 17:05 • 0 comments![]()
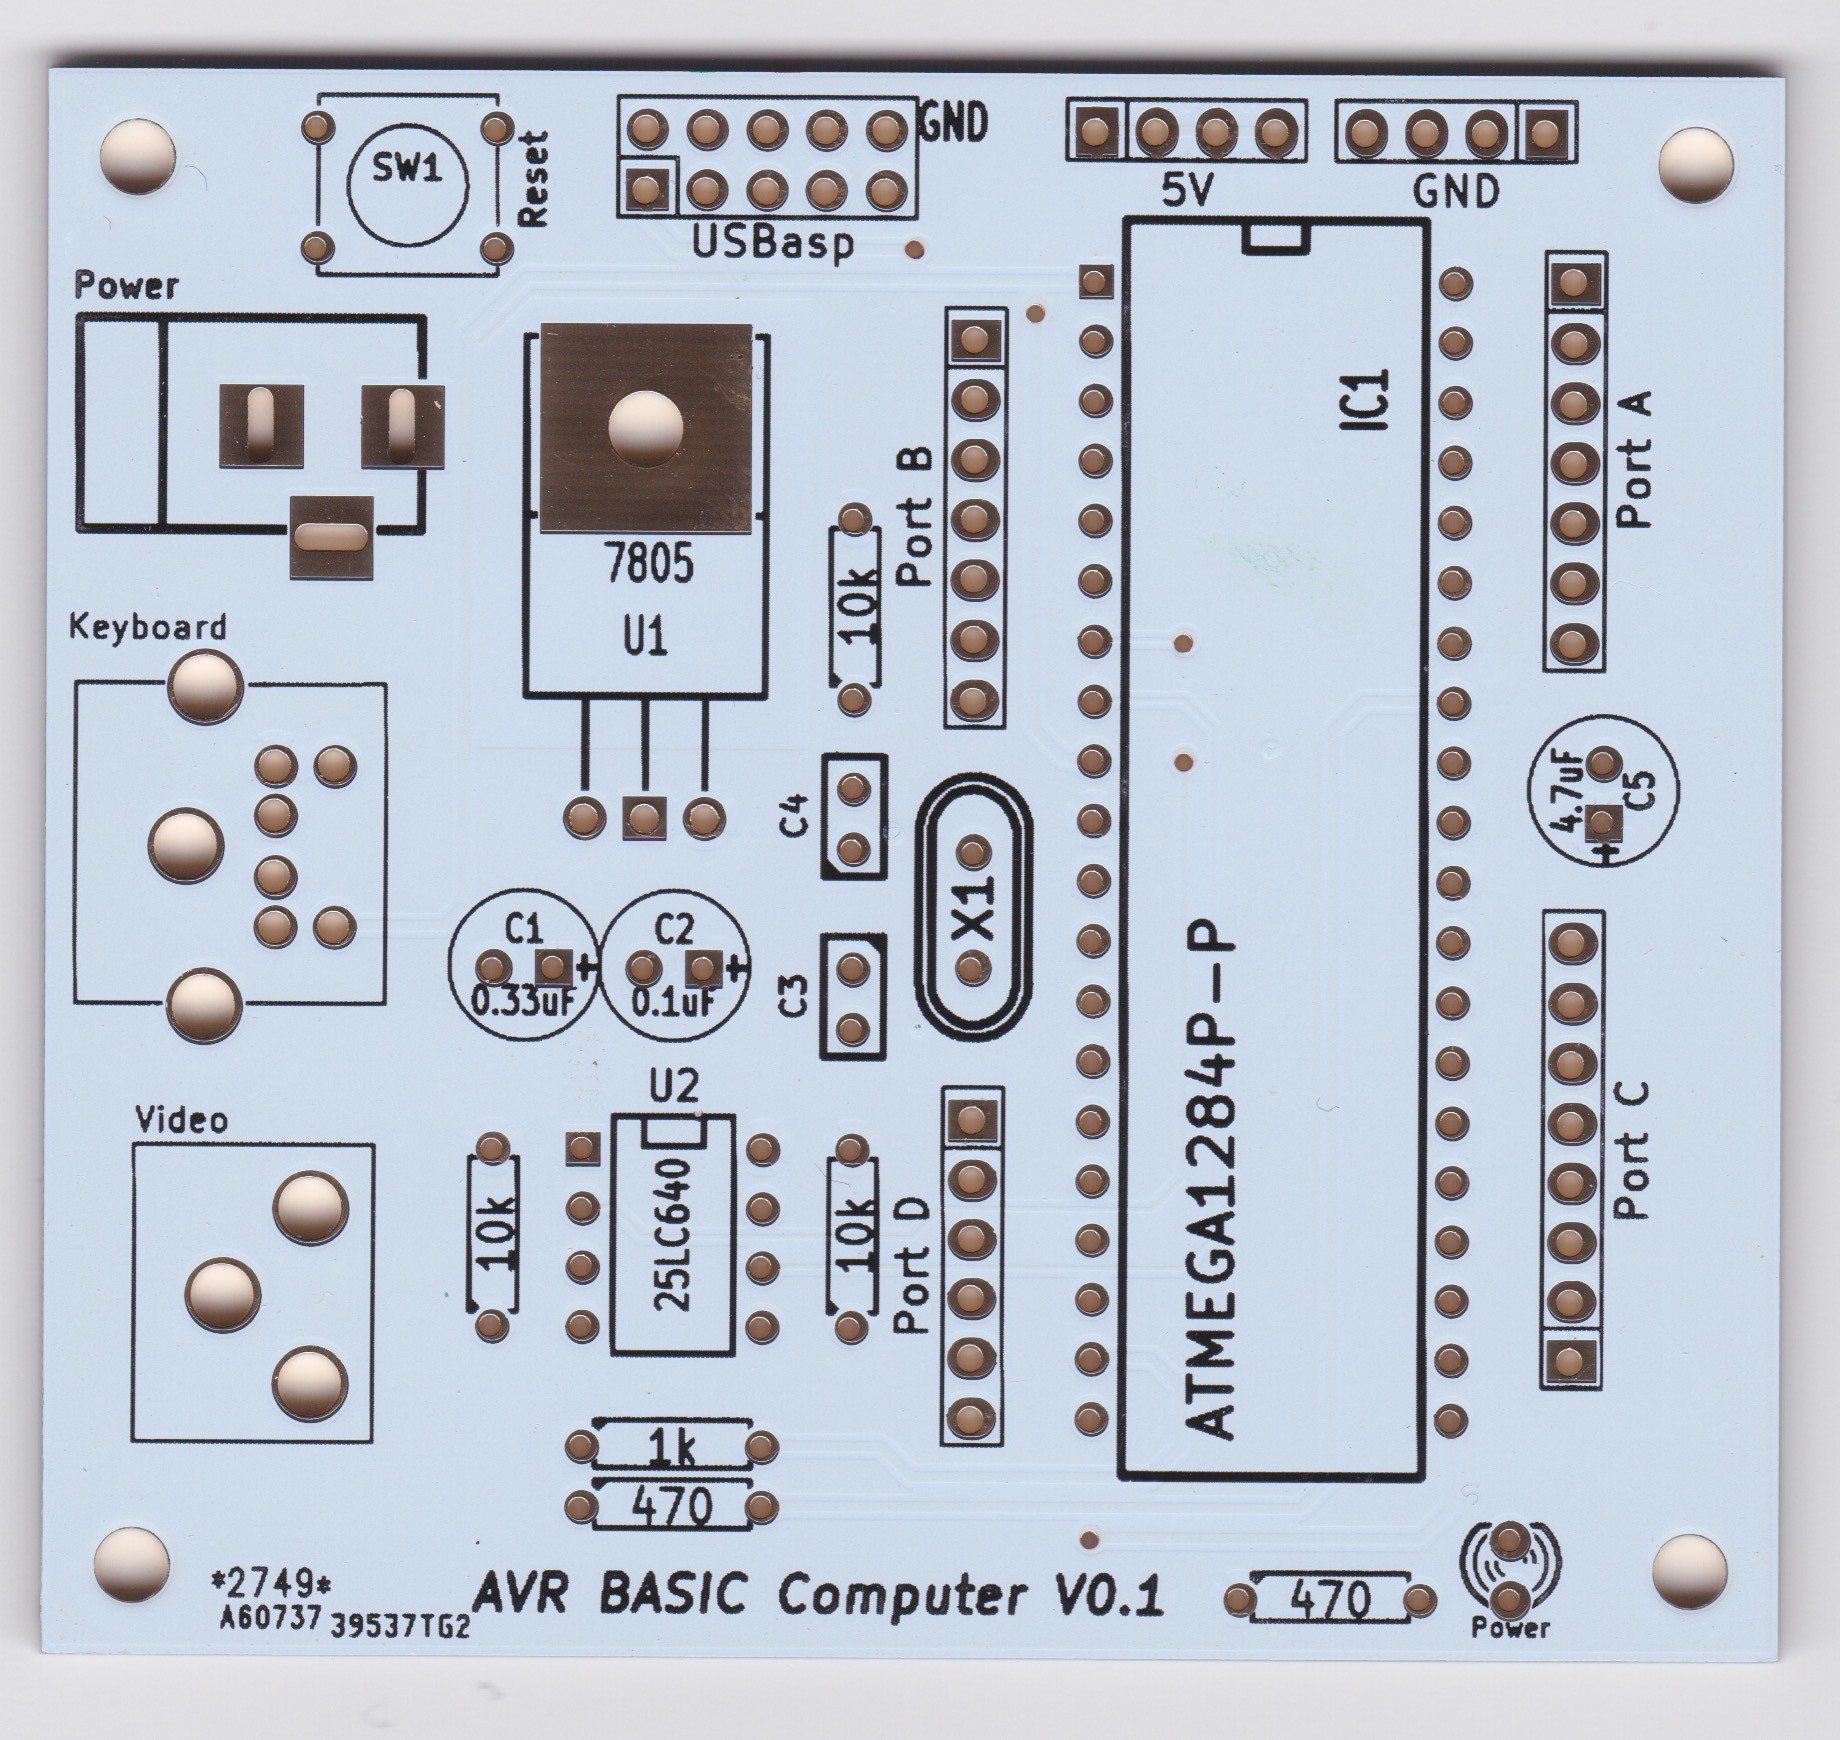
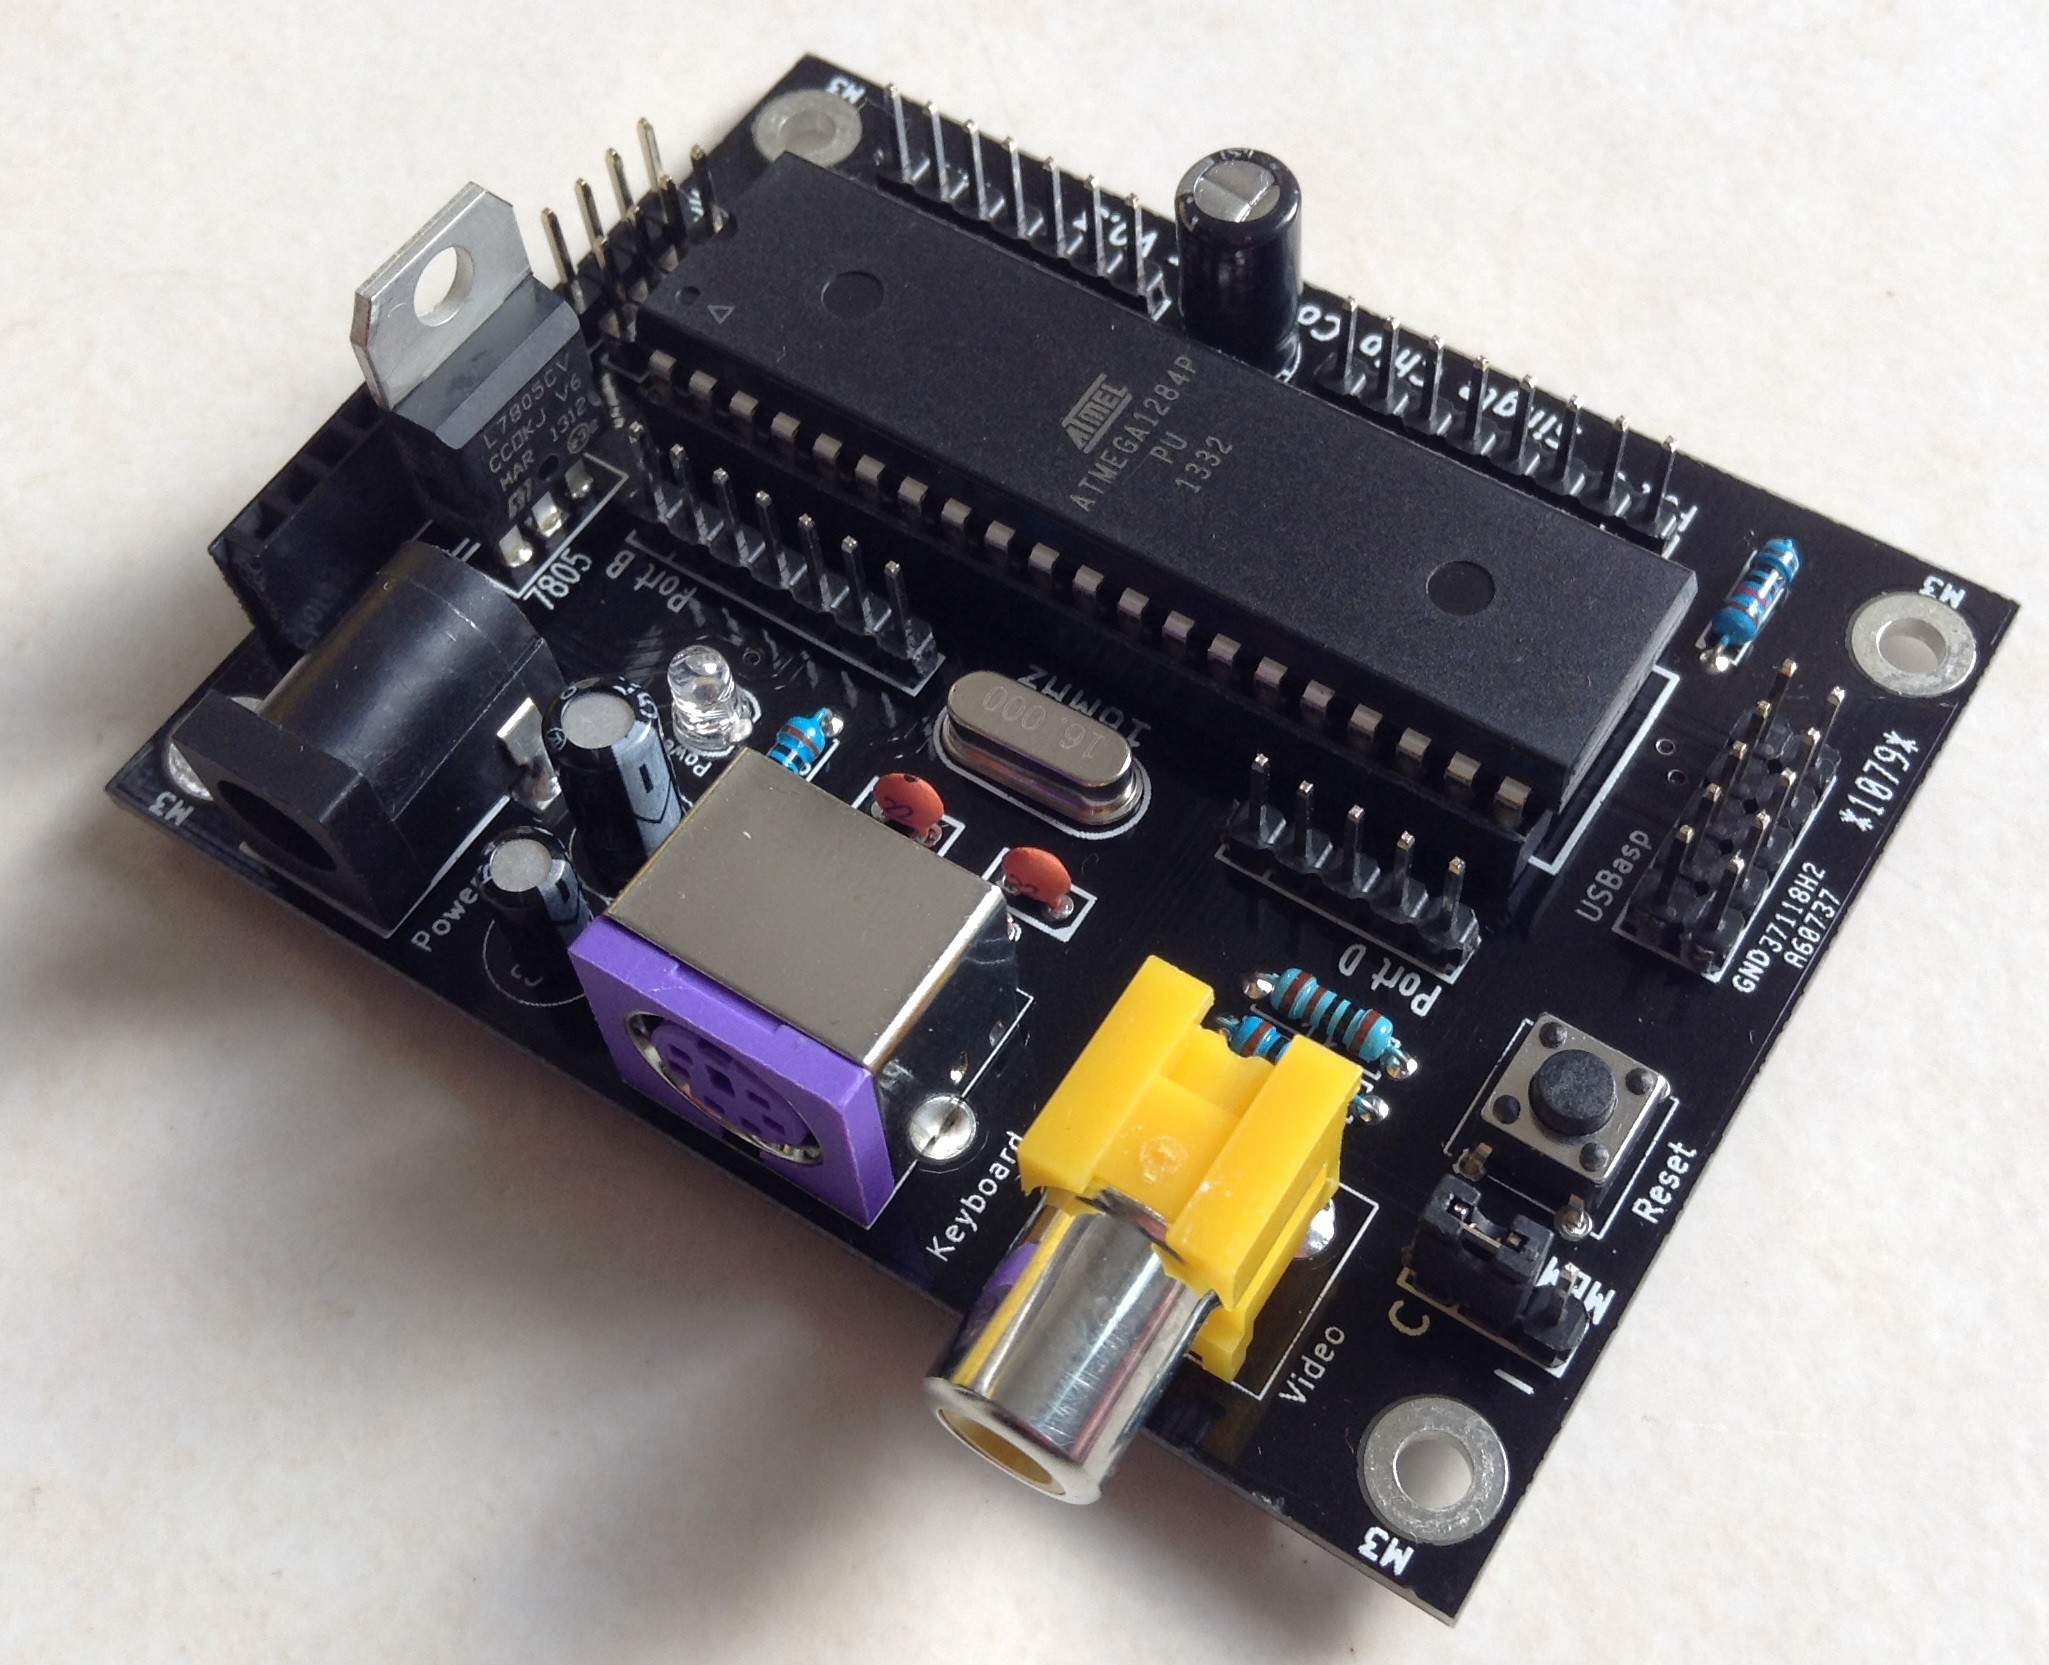
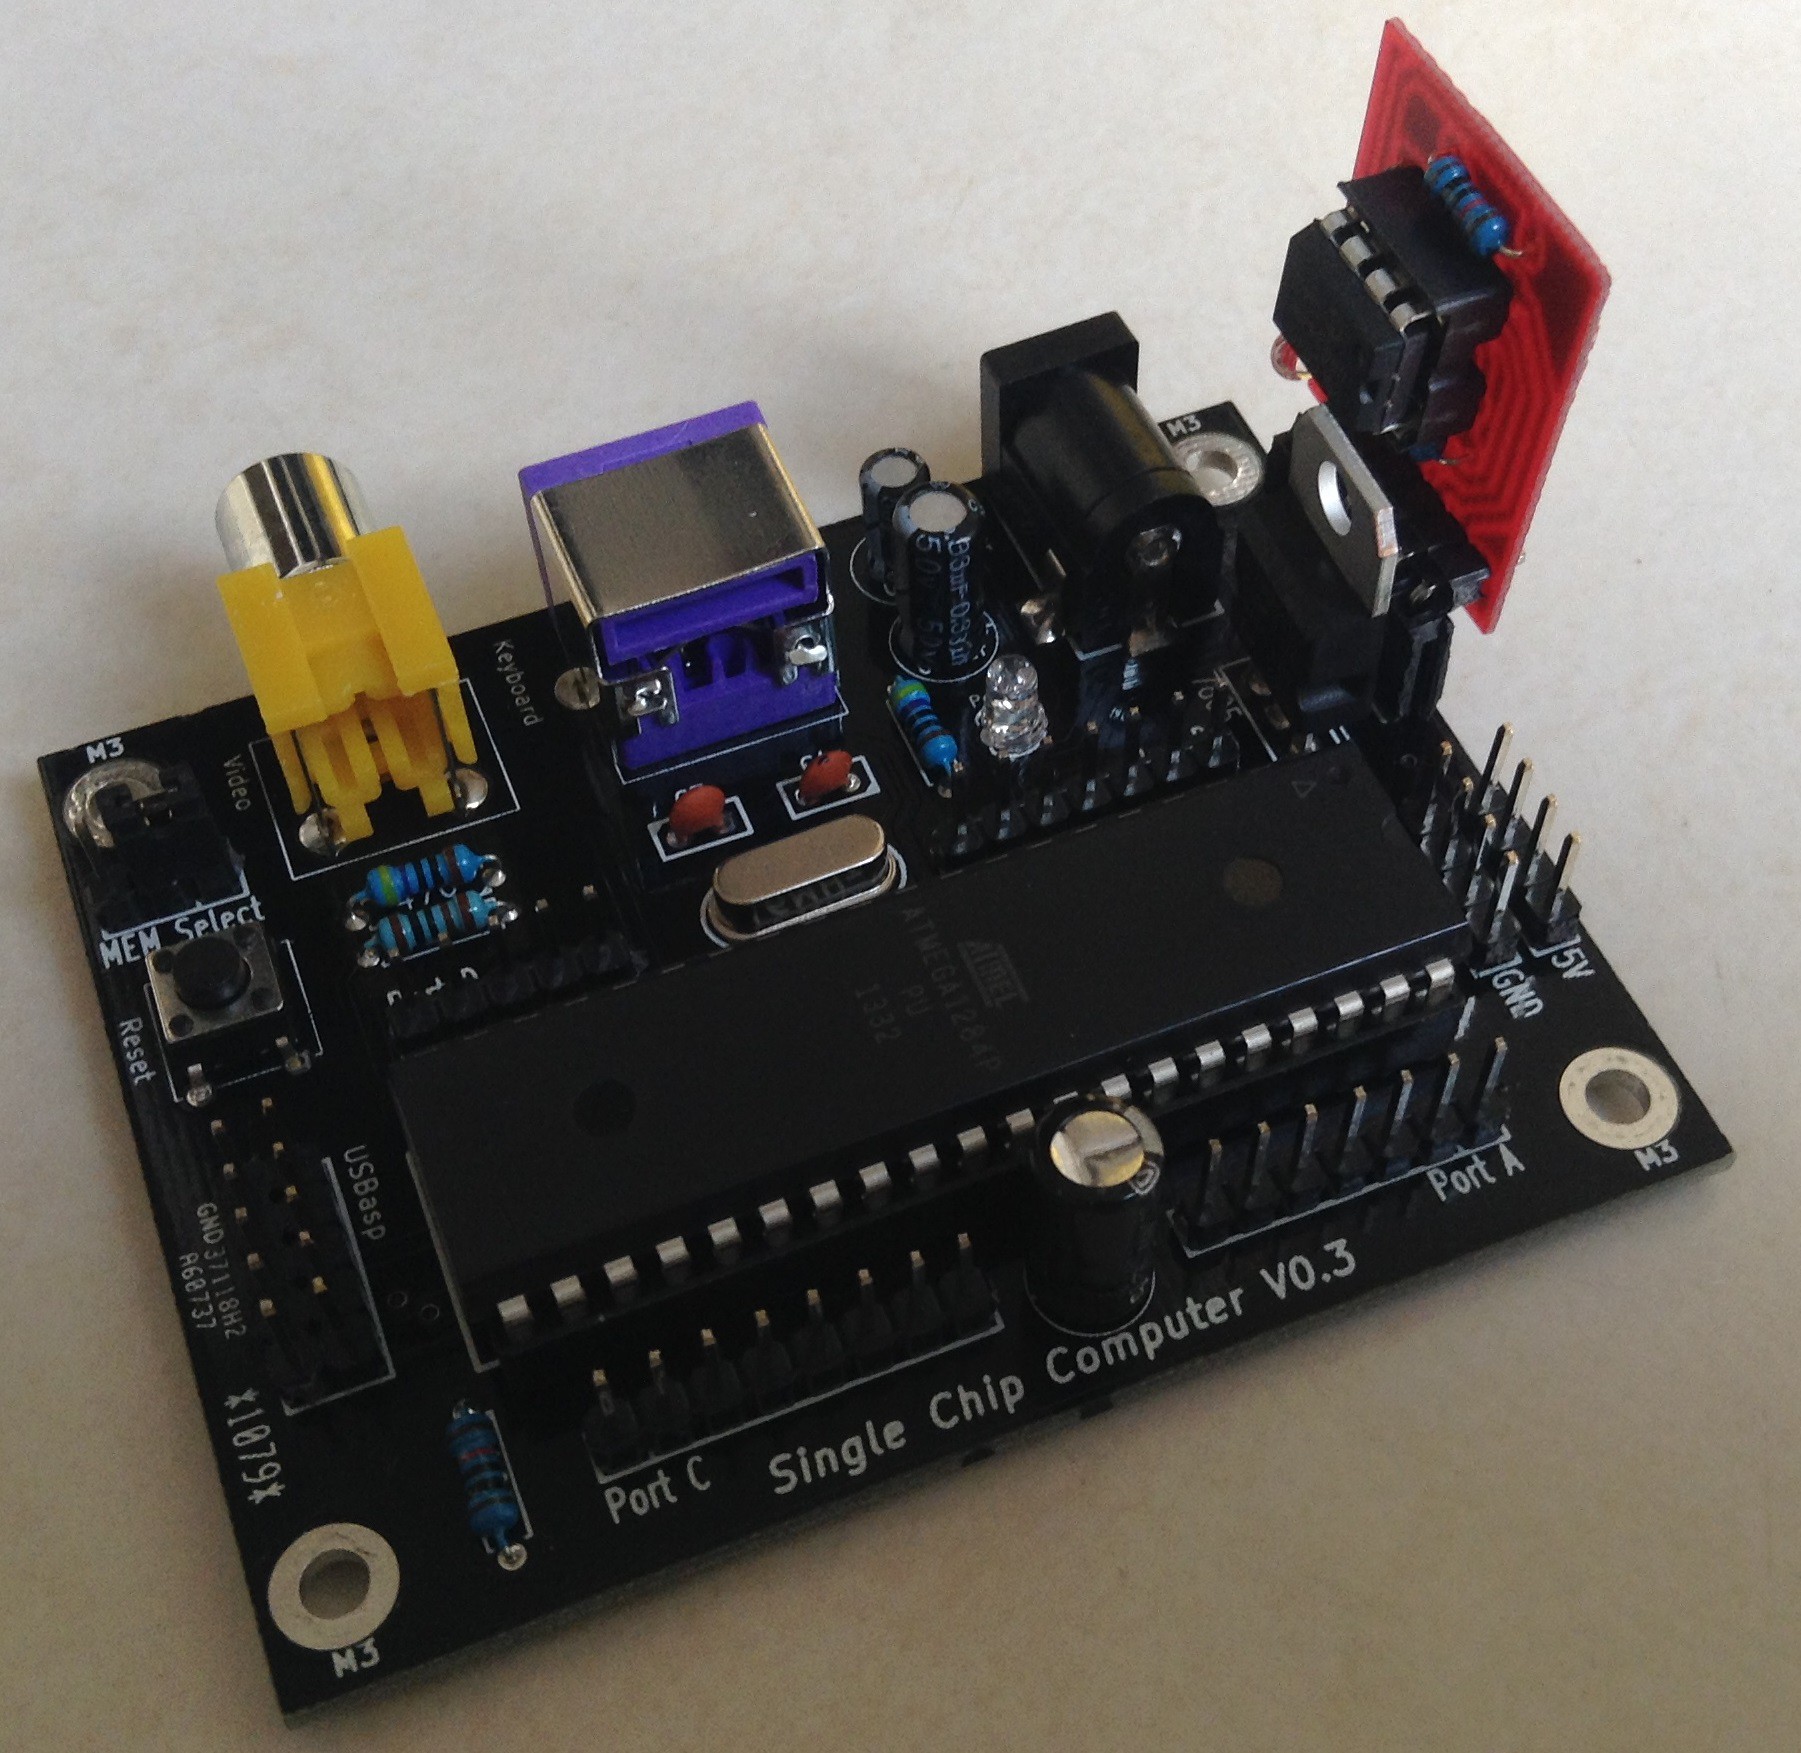
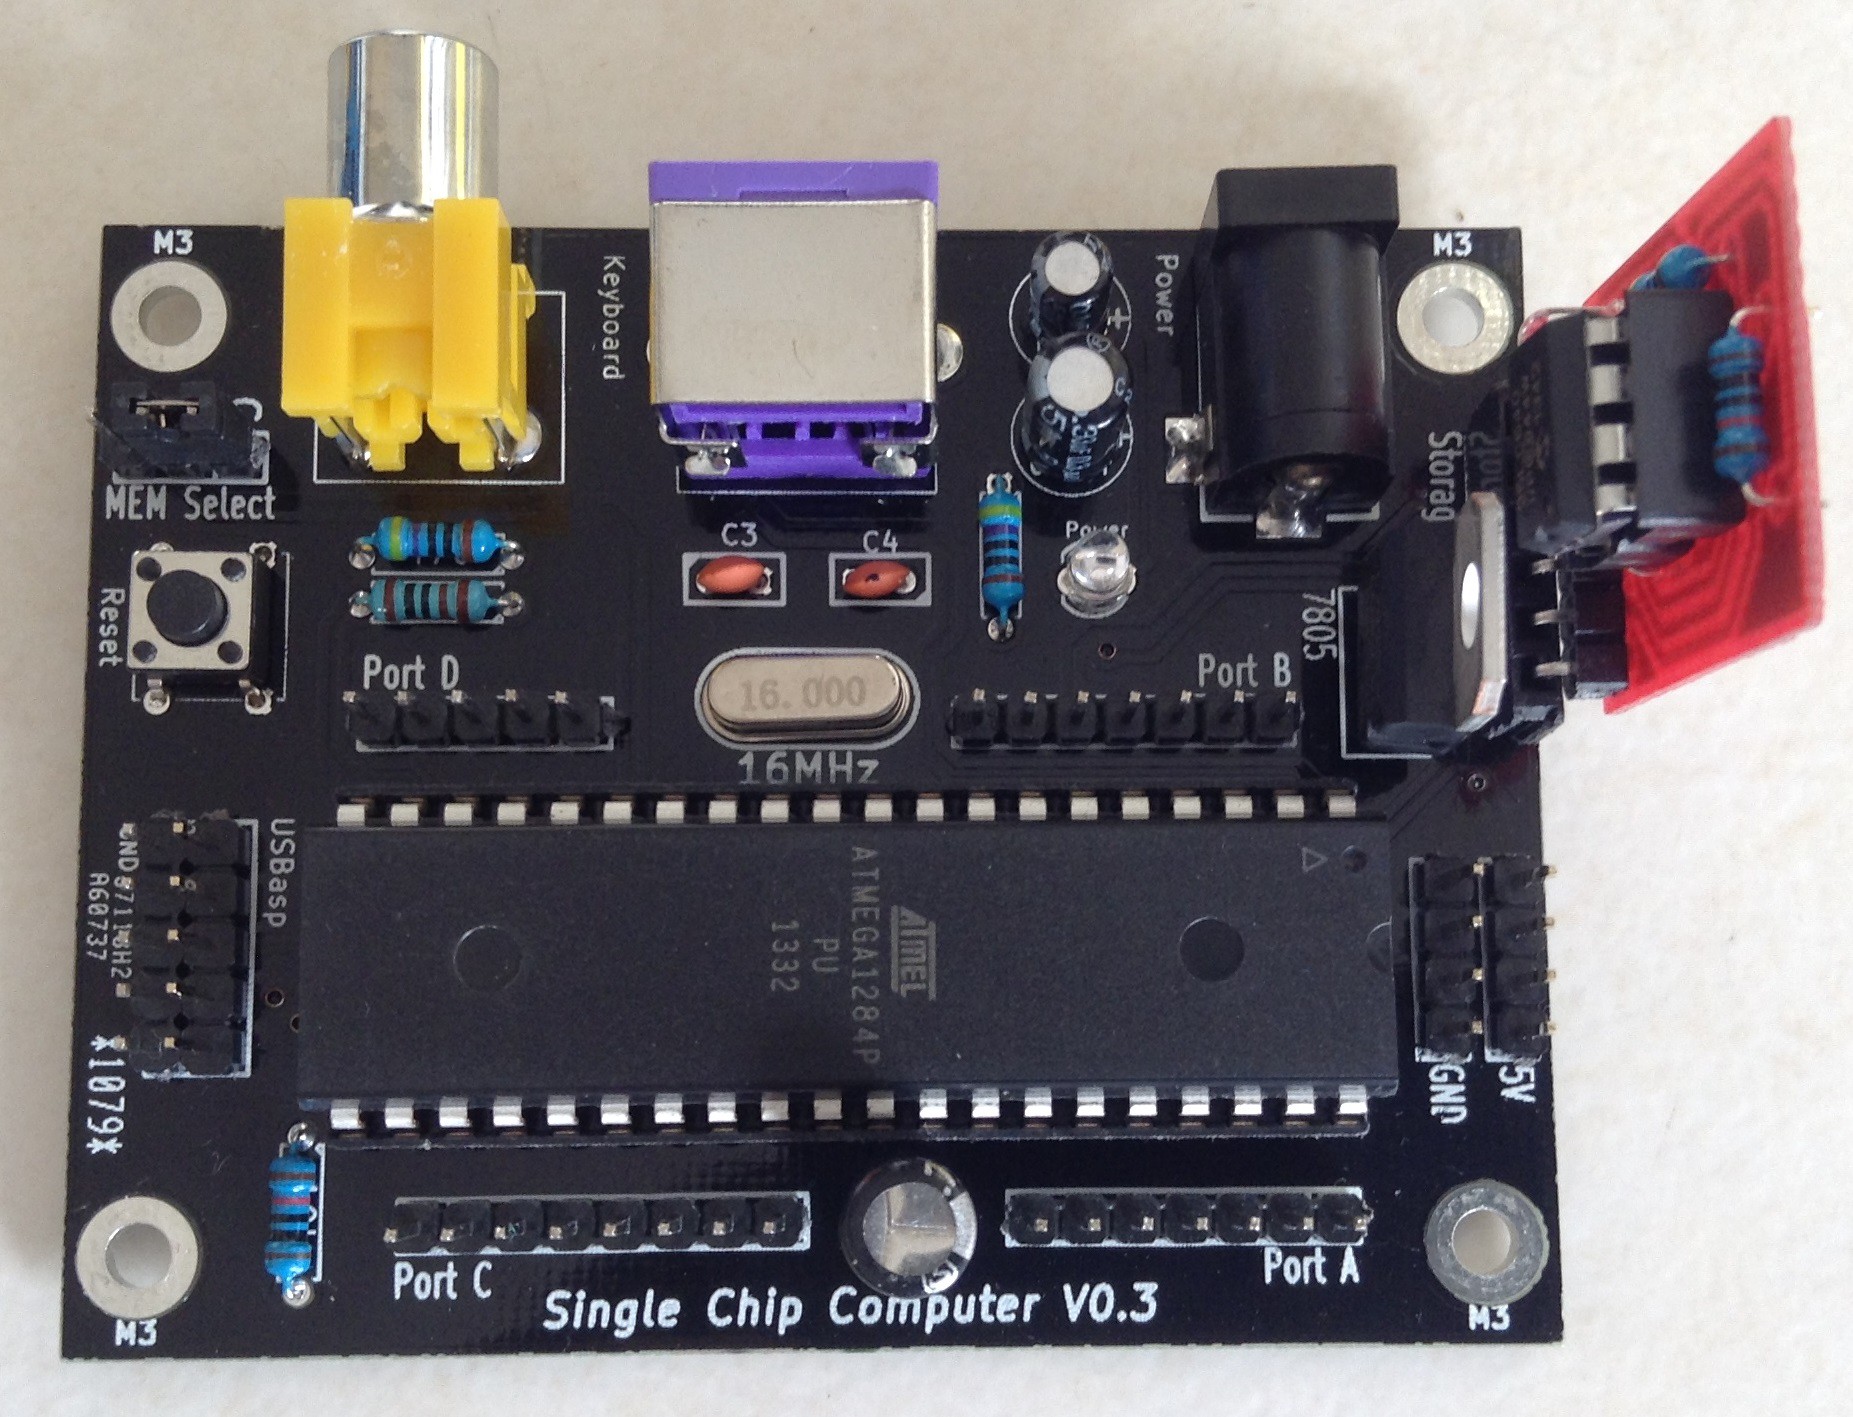
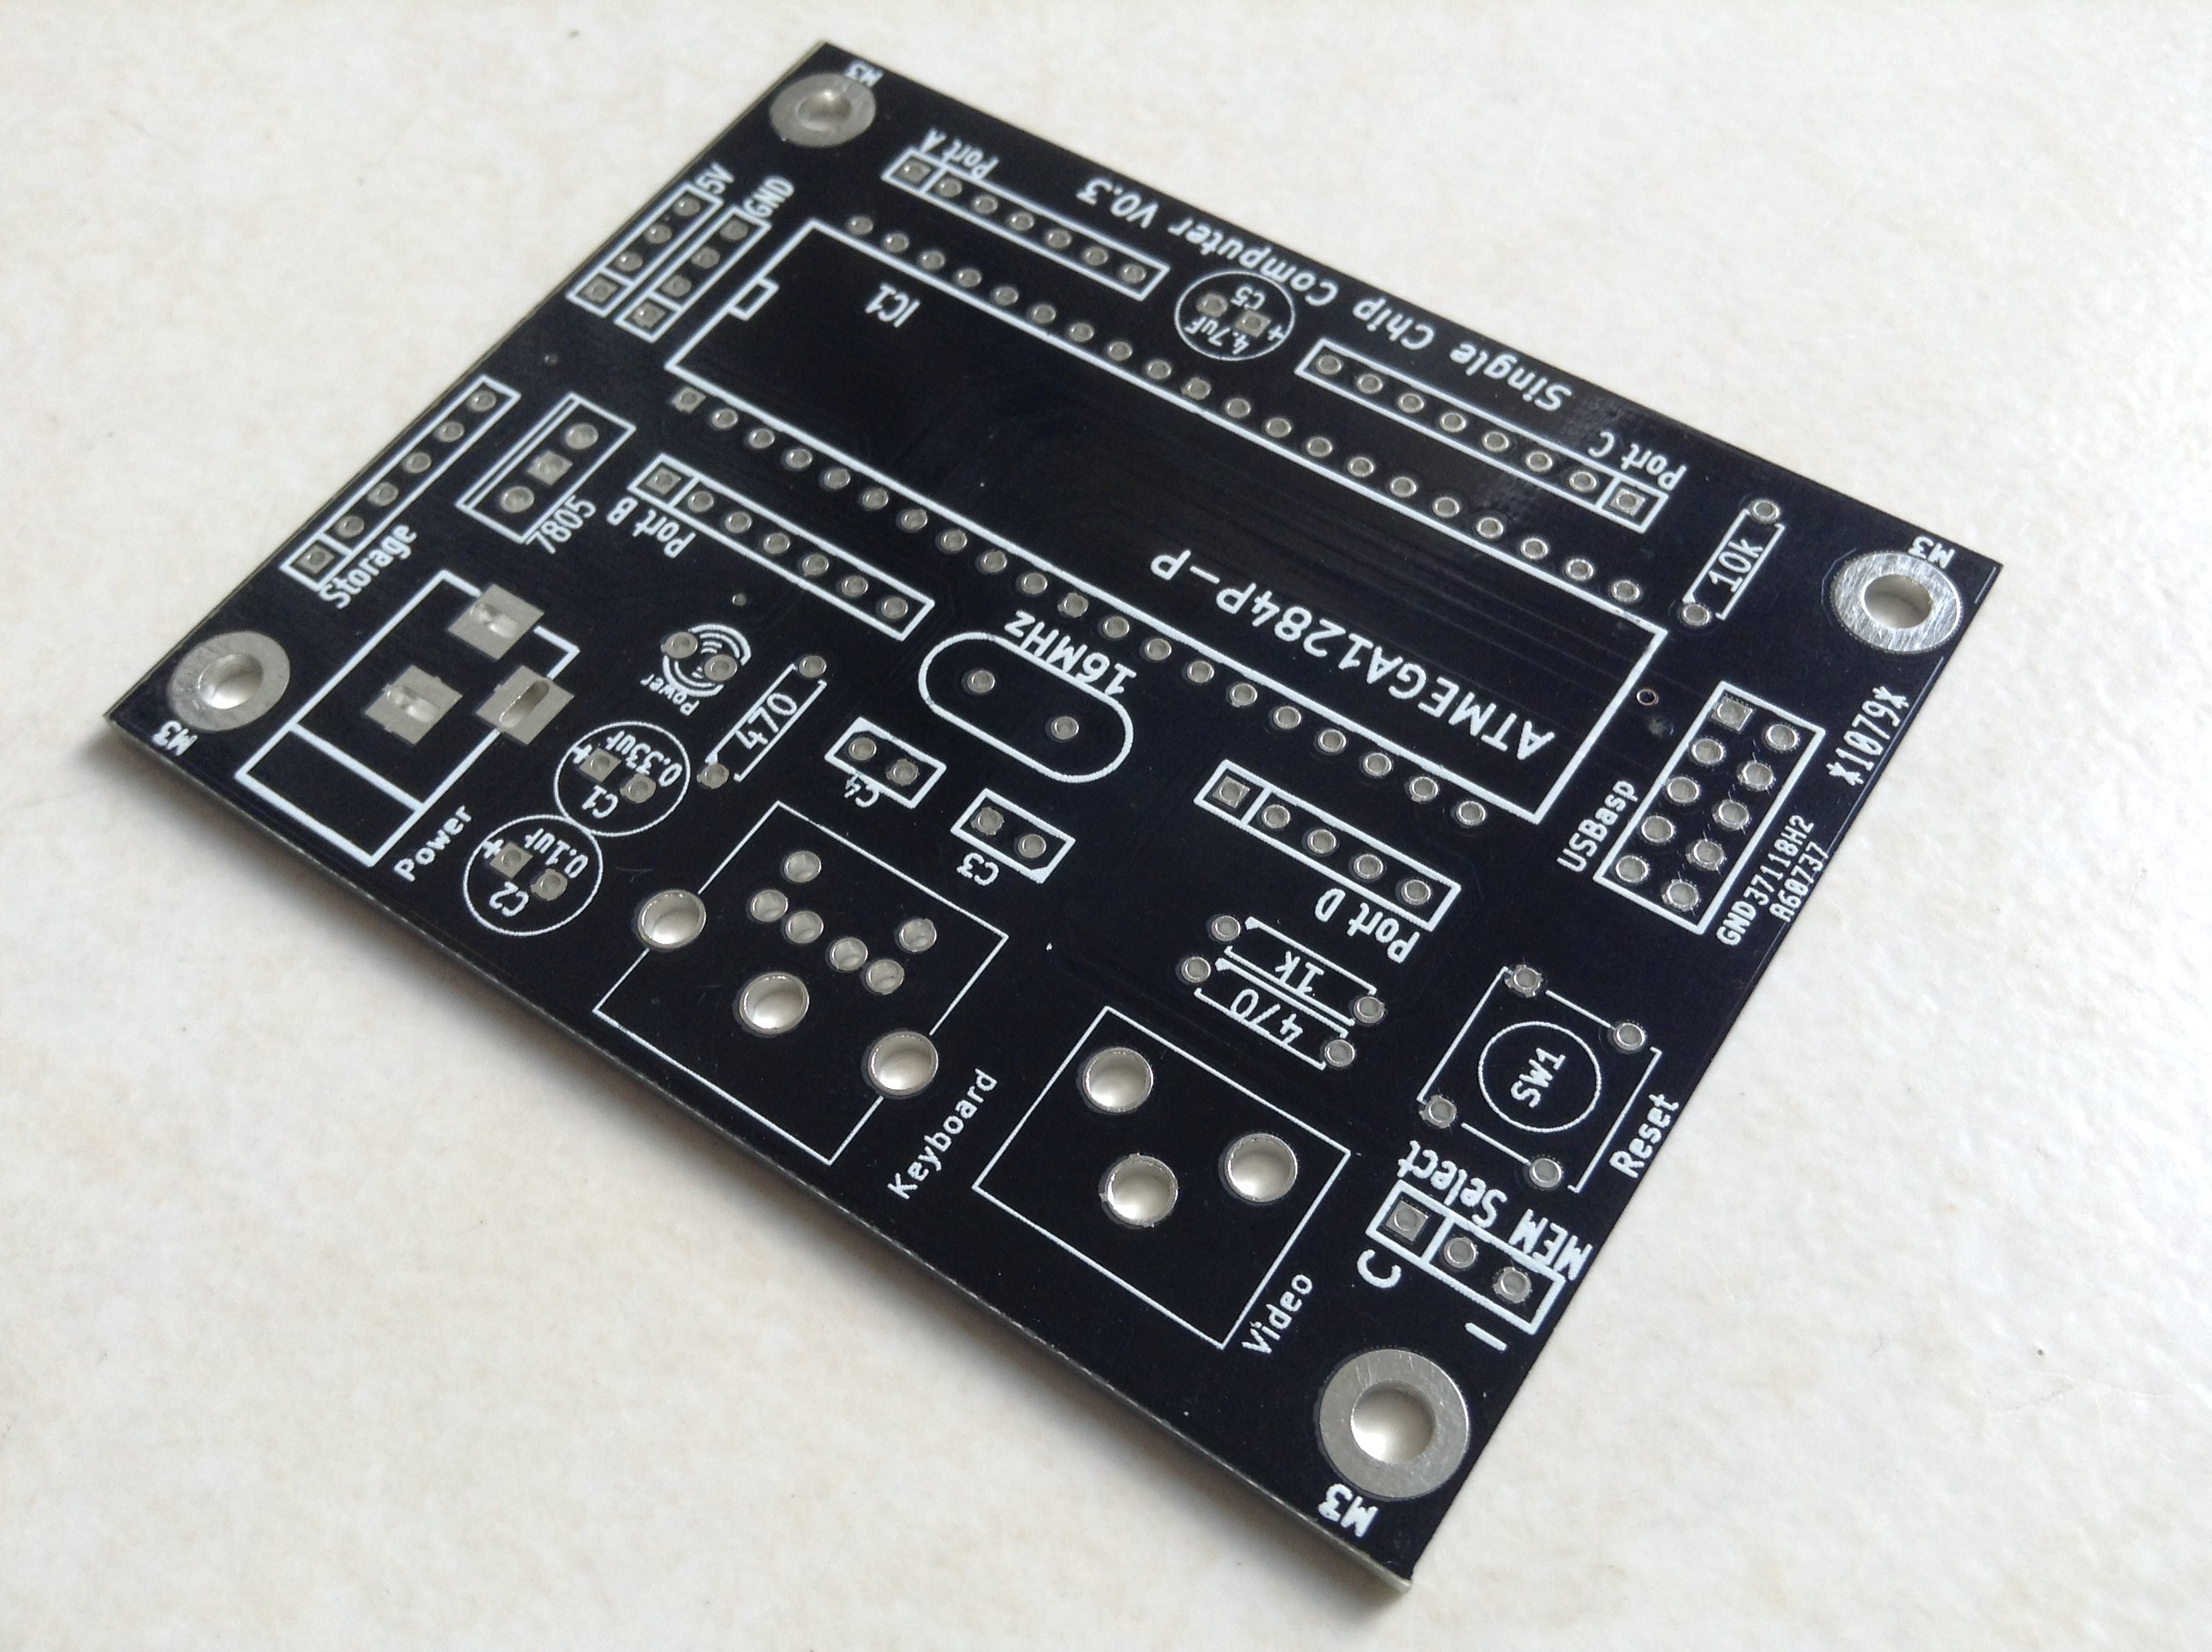
I have received the new PCBs and assembled one of them which can be seen in the above image. A few changes have been made to the design of the PCB compared to the previous PCB including:
- Changing of the naming of the computer (now V0.x - this PCB is v0.3)
- Added a USBasp programming header
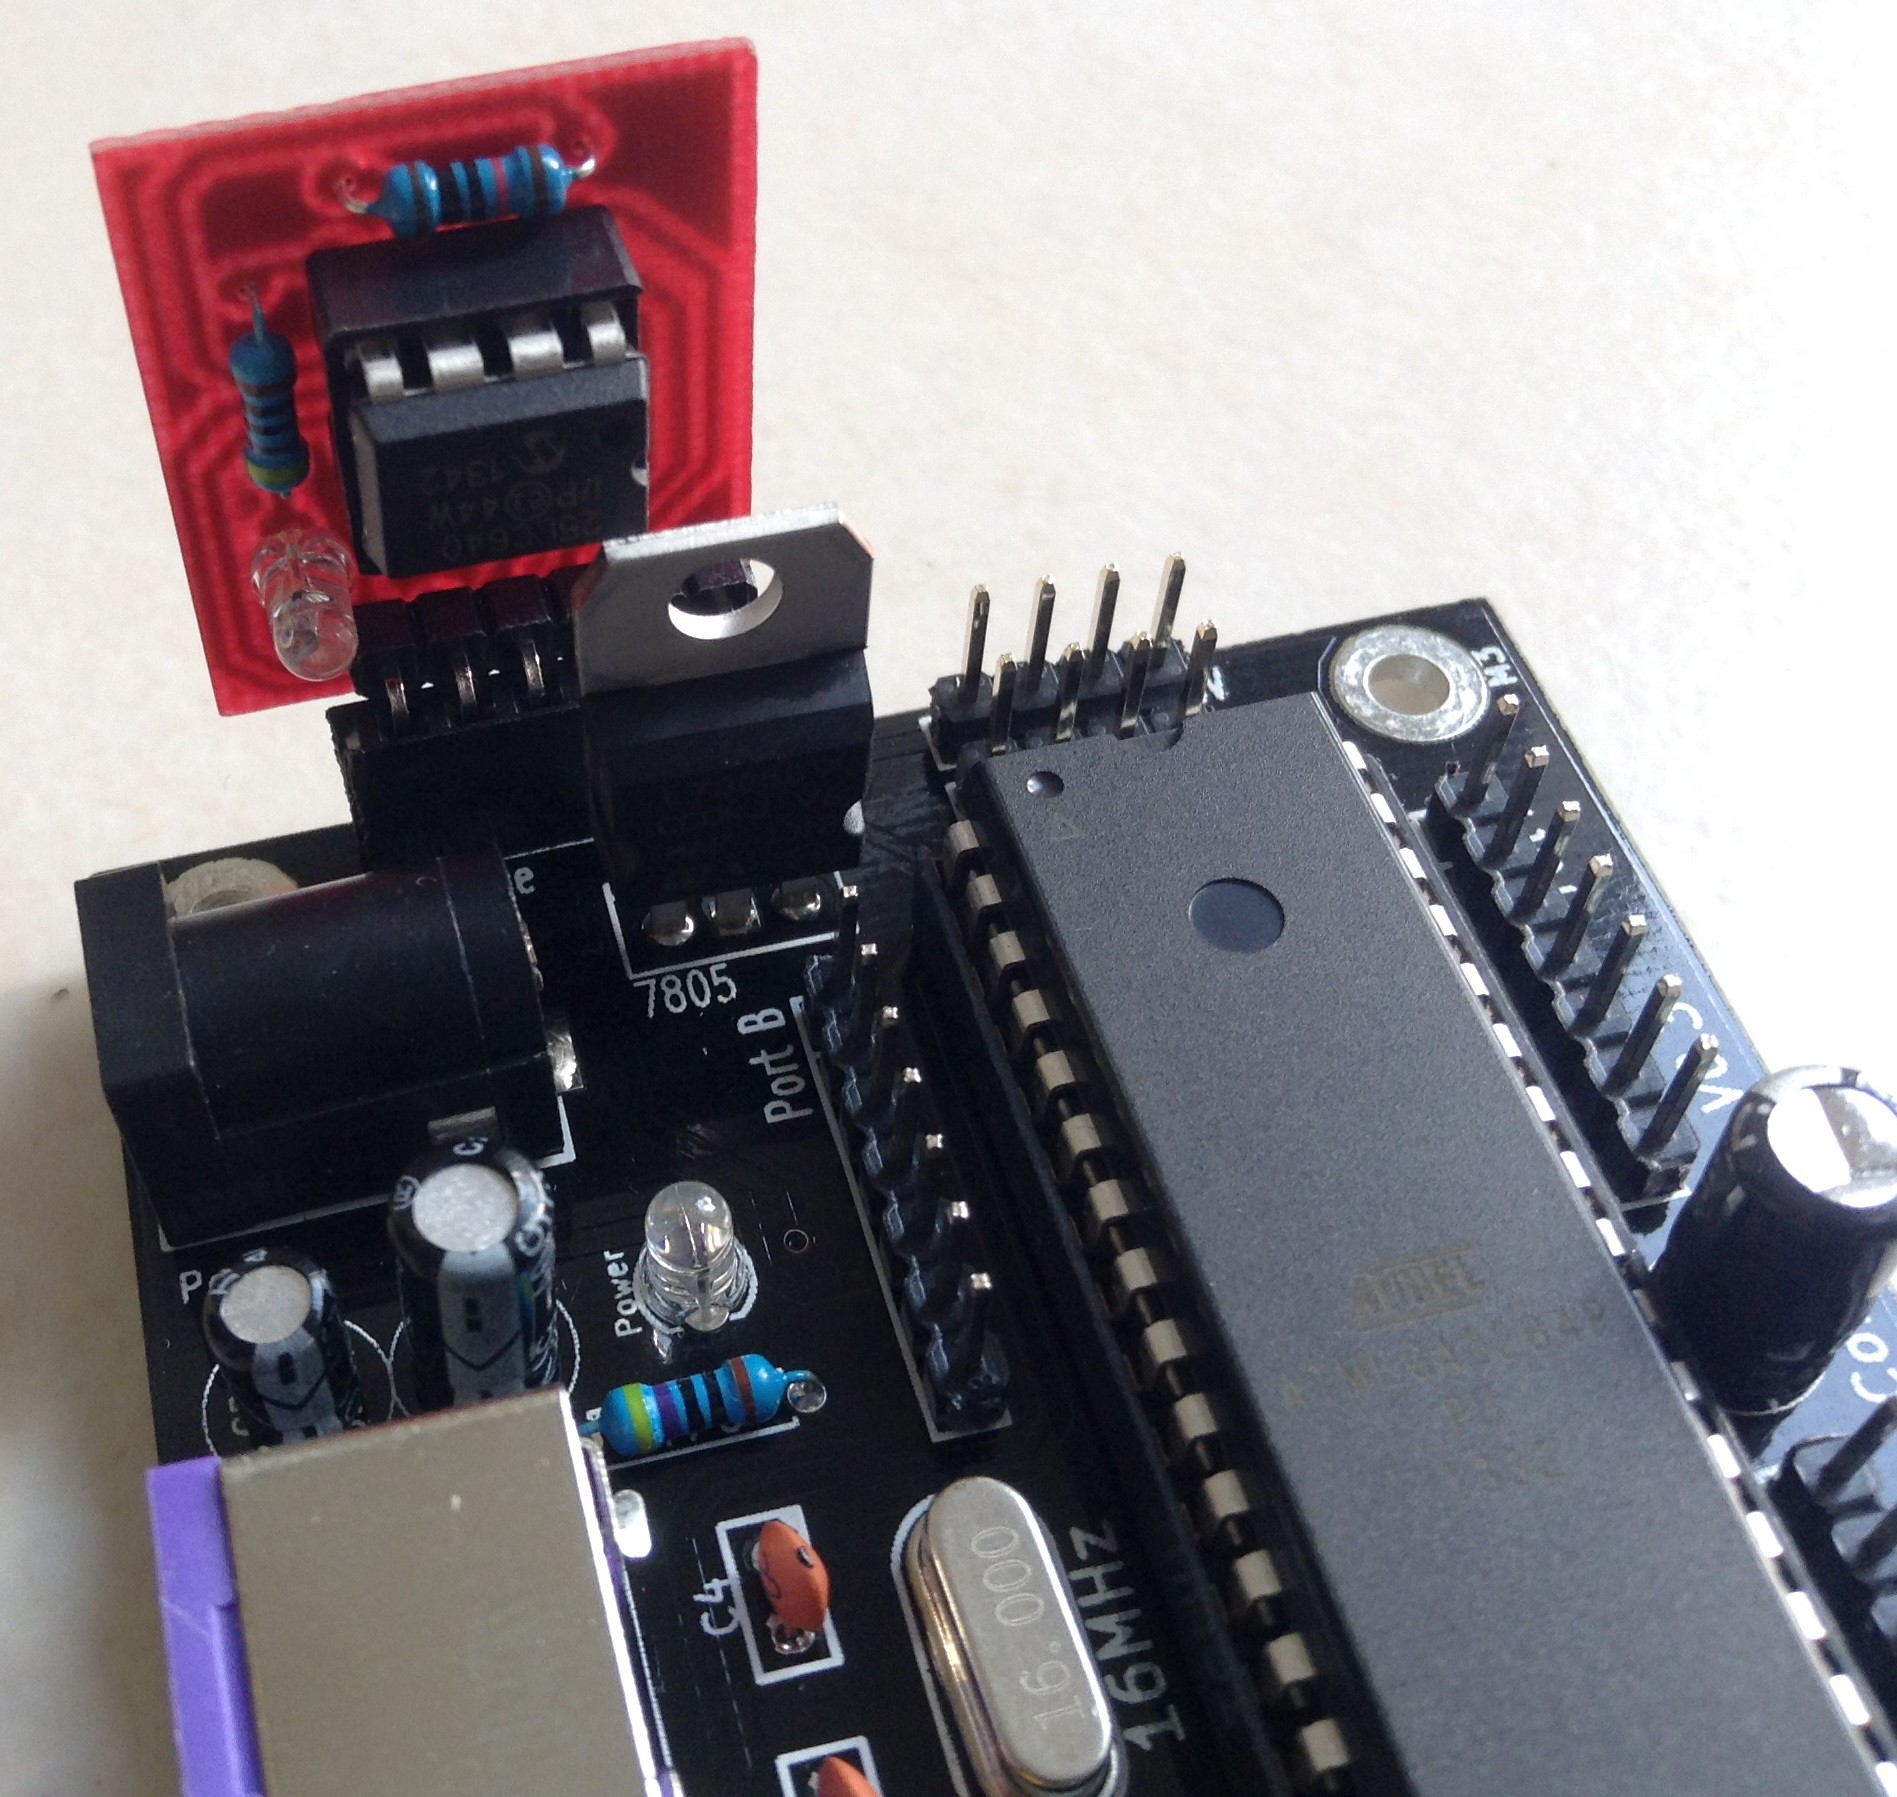
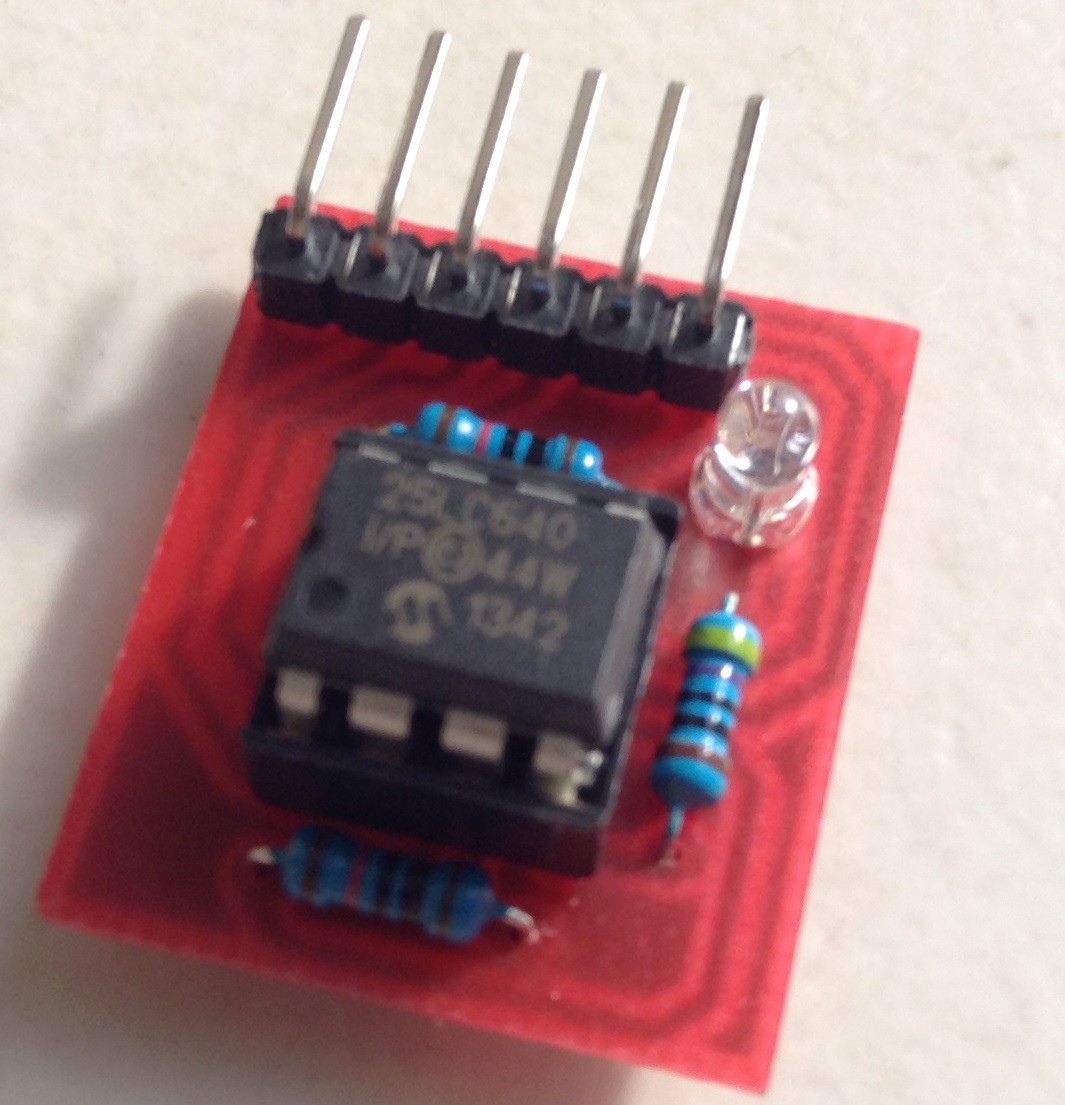
- Added a female header labelled "Storage" which allows a small PCB containing a 25LC640 EEPROM IC to be connected (see below images). A male pin header labelled "MEM Select" allows the user to select between the internal and external EEPROM for saving BASIC programs to. This feature was added to allow larger programs to be saved as the ATmega 1284P only has 4KB internal EEPROM.
- Mapped all GPIO pins which are not in use to male pin headers (except analogue reference).
- This PCB was also designed in KiCAD rather than Fritzing.
![]()
![]()
![]()
![]()
![]()
![]()
![]()
The remaining PCBs have been put on eBay and can be found at the following link:
I have started a new HaD projects page which focuses only on this new PCB (single chip computer V0.3); this new page will contain a link to the firmware, the schematic, some details and possibly more. The following link is for the new project page:
https://hackaday.io/project/2428-Single-Chip-AVR-BASIC-Computer-V0.3
-
More PCBS Ordered
07/28/2014 at 12:17 • 0 commentsI have just ordered some more PCBs for the single chip computer and added a few new things such as a USBasp programmer header, a few more GPIO pins and a header to allow a connection to a small PCB containing a 64Kbit EEPROM. I will be putting these PCBs up on eBay once I receive them.
-
Taking this project further
07/14/2014 at 18:52 • 3 commentsI would like to take this project further by adding more features to the computer and would like to get the communities opinion on the sort of features which should be included in a future version. Adding more features most likely means moving away from a single AVR chip so the computer would have to be called something else. I was thinking about changing the language which is run on the computer to Bitlash (rather than TinyBASIC) as Bitlash allows custom commands to be added fairly easily and hence makes it easy to add additional hardware. The following list shows the possible features which could be added so if anyone has time to let me know what they think (should they be included or not etc), I would appreciate it:
A) running Bitlash instead of TinyBASIC as it seems much easier to extend Bitlash compared to TinyBASIC
B) expanding SRAM of the computer by adding a 23LC1024 (128KB) SPI SRAM IC - the entire SRAM IC would be available to the user for storing bytes (not for storing programs created with BASIC or Bitlash). May even be possible to add a SIMM memory socket (such as via another 1284P, a 328P or IO expander).
C) expanding program storage using an EEPROM IC / SD card (downside with the SD card is soldering a surface mount socket at home and the addition of the extra hardware including a 3.3V regulator, level shifting and the socket)
D) some form of networking such as Ethernet (using an ENC28J60), RS485 or RS422
E) moving video generation to a separate 1284P to give the main 1284P maximum SRAM for writing programs (offloading the video buffer to a separate AVR). I would like to stick with TVout as the hardware is simple and the library is easy to use (I was looking into Nick Gammons VGA video generation sketch for the Arduino but the resolution is too low - if this could be increased it would be something to consider).
Thanks in advance for any comments.
-
Thanks for the support!
07/12/2014 at 14:17 • 0 commentsI have sold all the PCBs which I put on eBay so would just like to say thank you to everyone who purchased one. I appreciate the support you provided by purchasing a PCB :)
-
New PCBs on eBay
06/17/2014 at 13:59 • 0 commentsI have put the remaining new PCBs up on eBay if anyone is interested in them. The following address is for the listing:
-
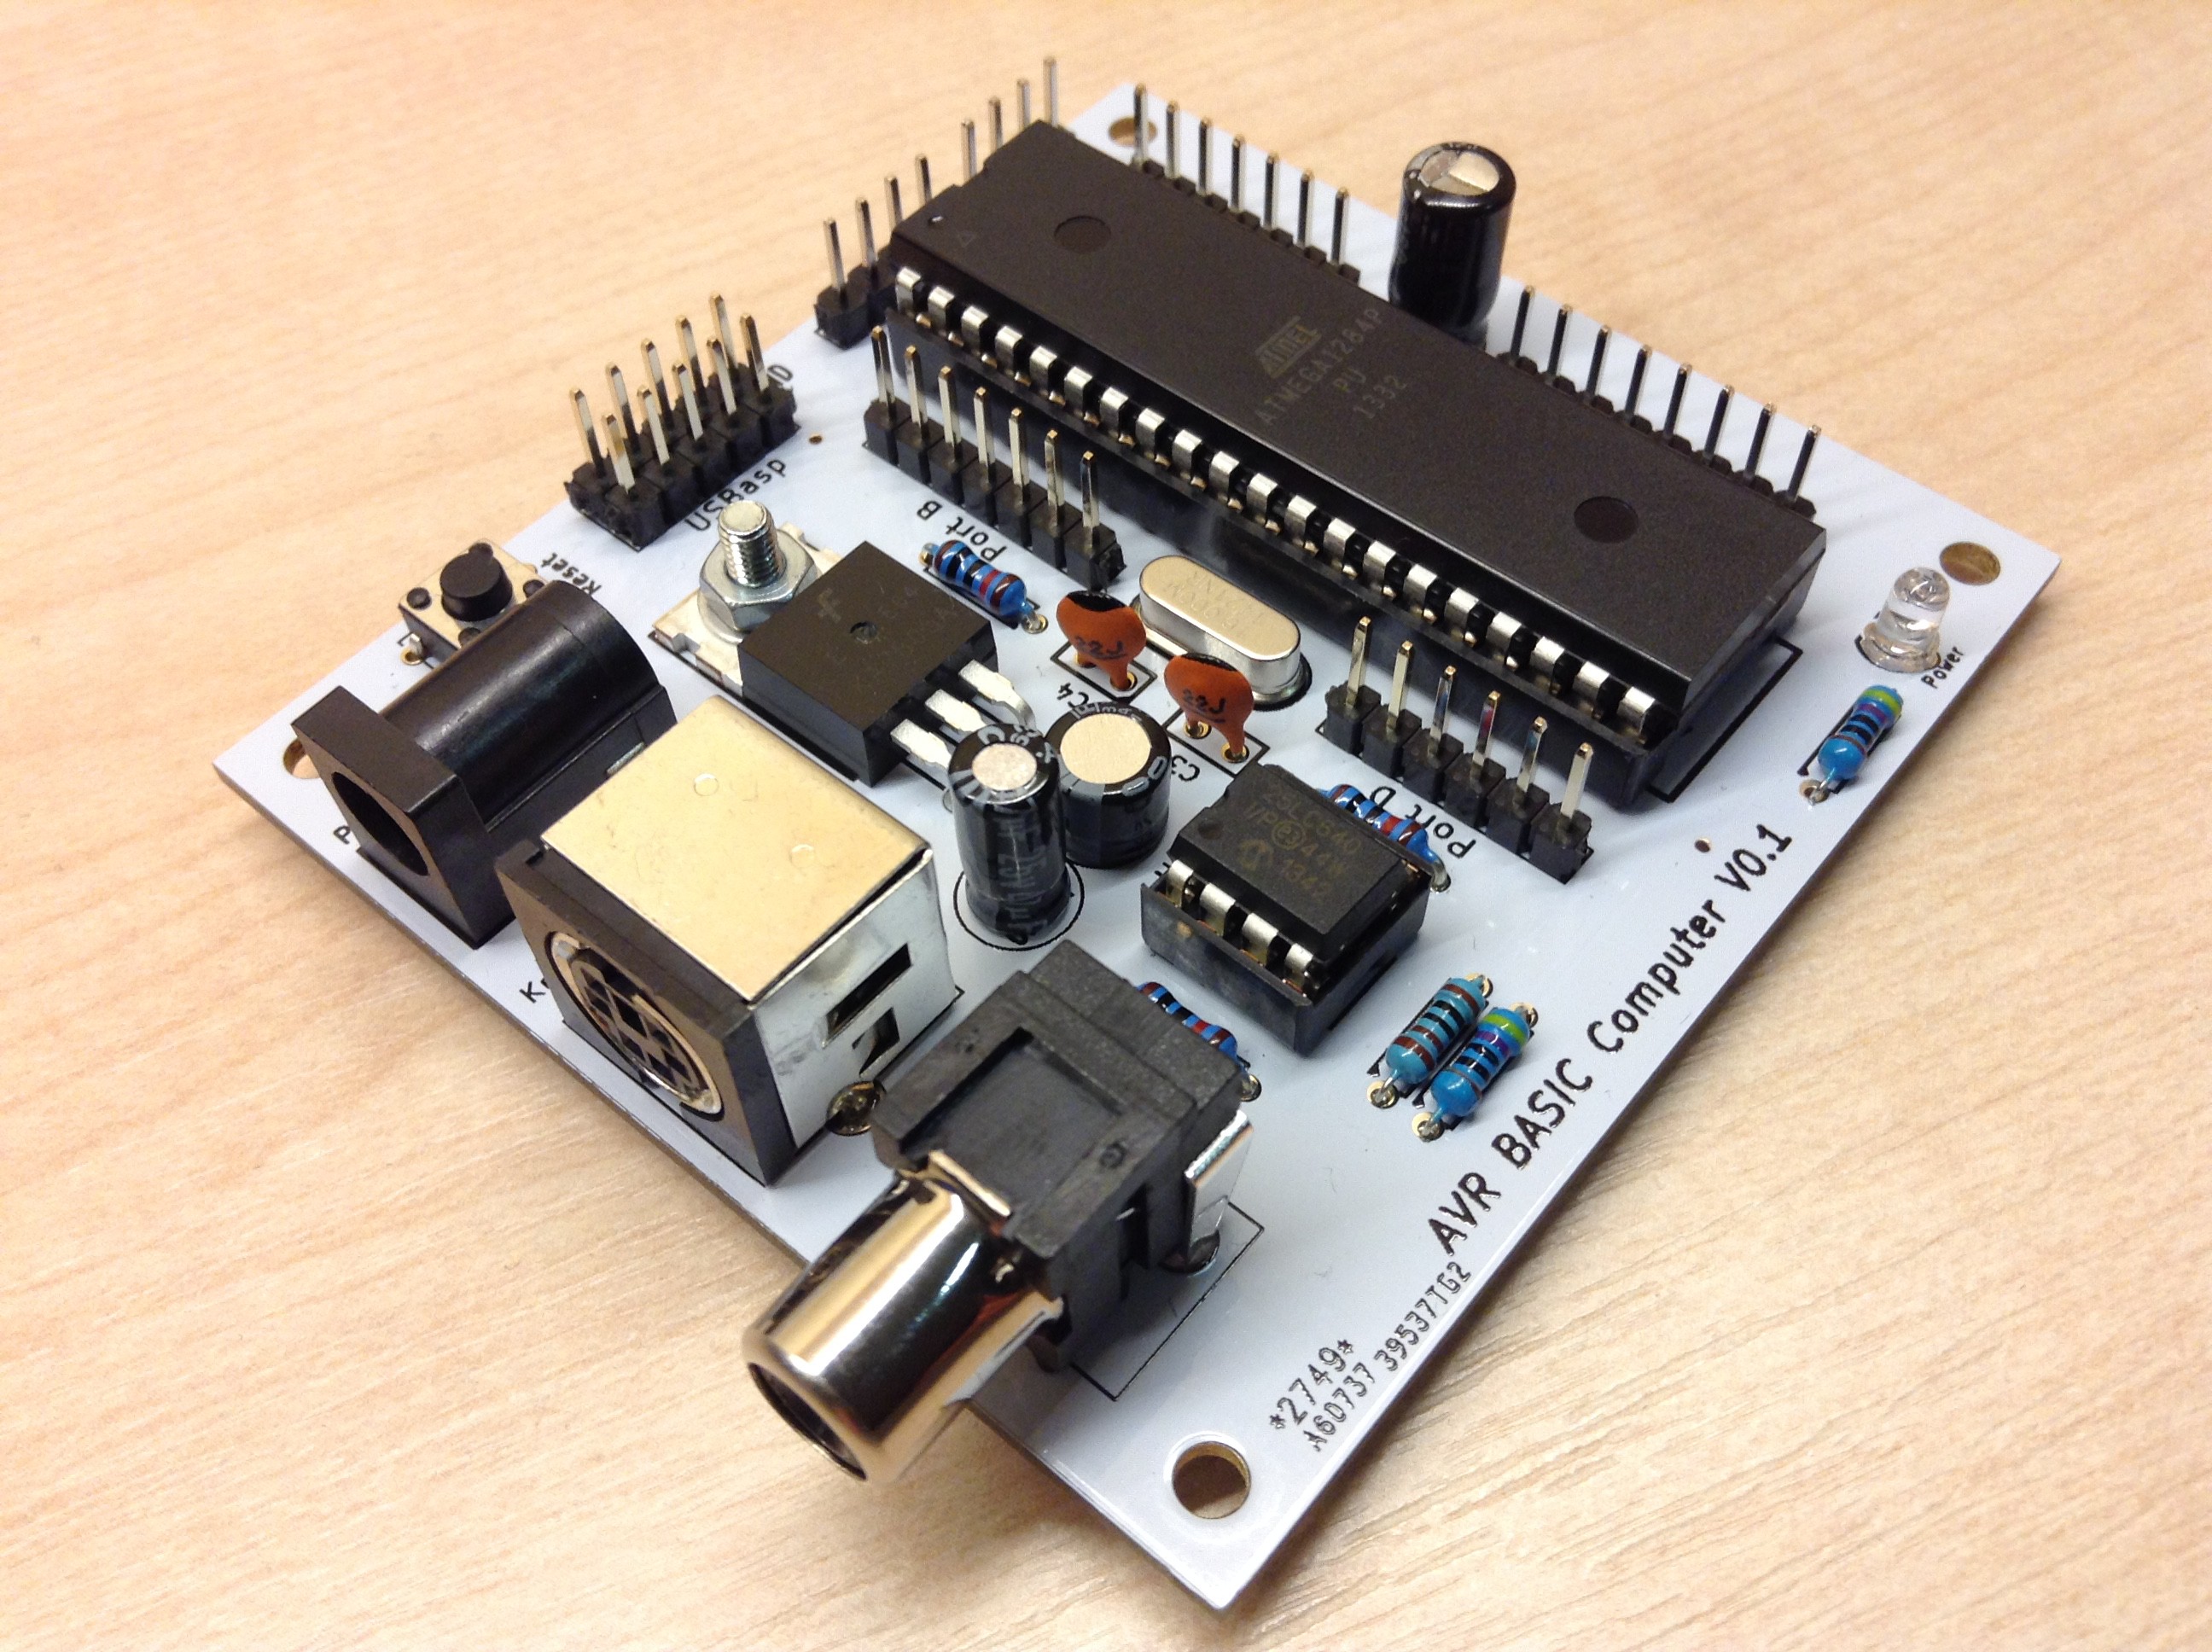
Assembly of new PCB
06/16/2014 at 18:48 • 1 comment![]()
![]()
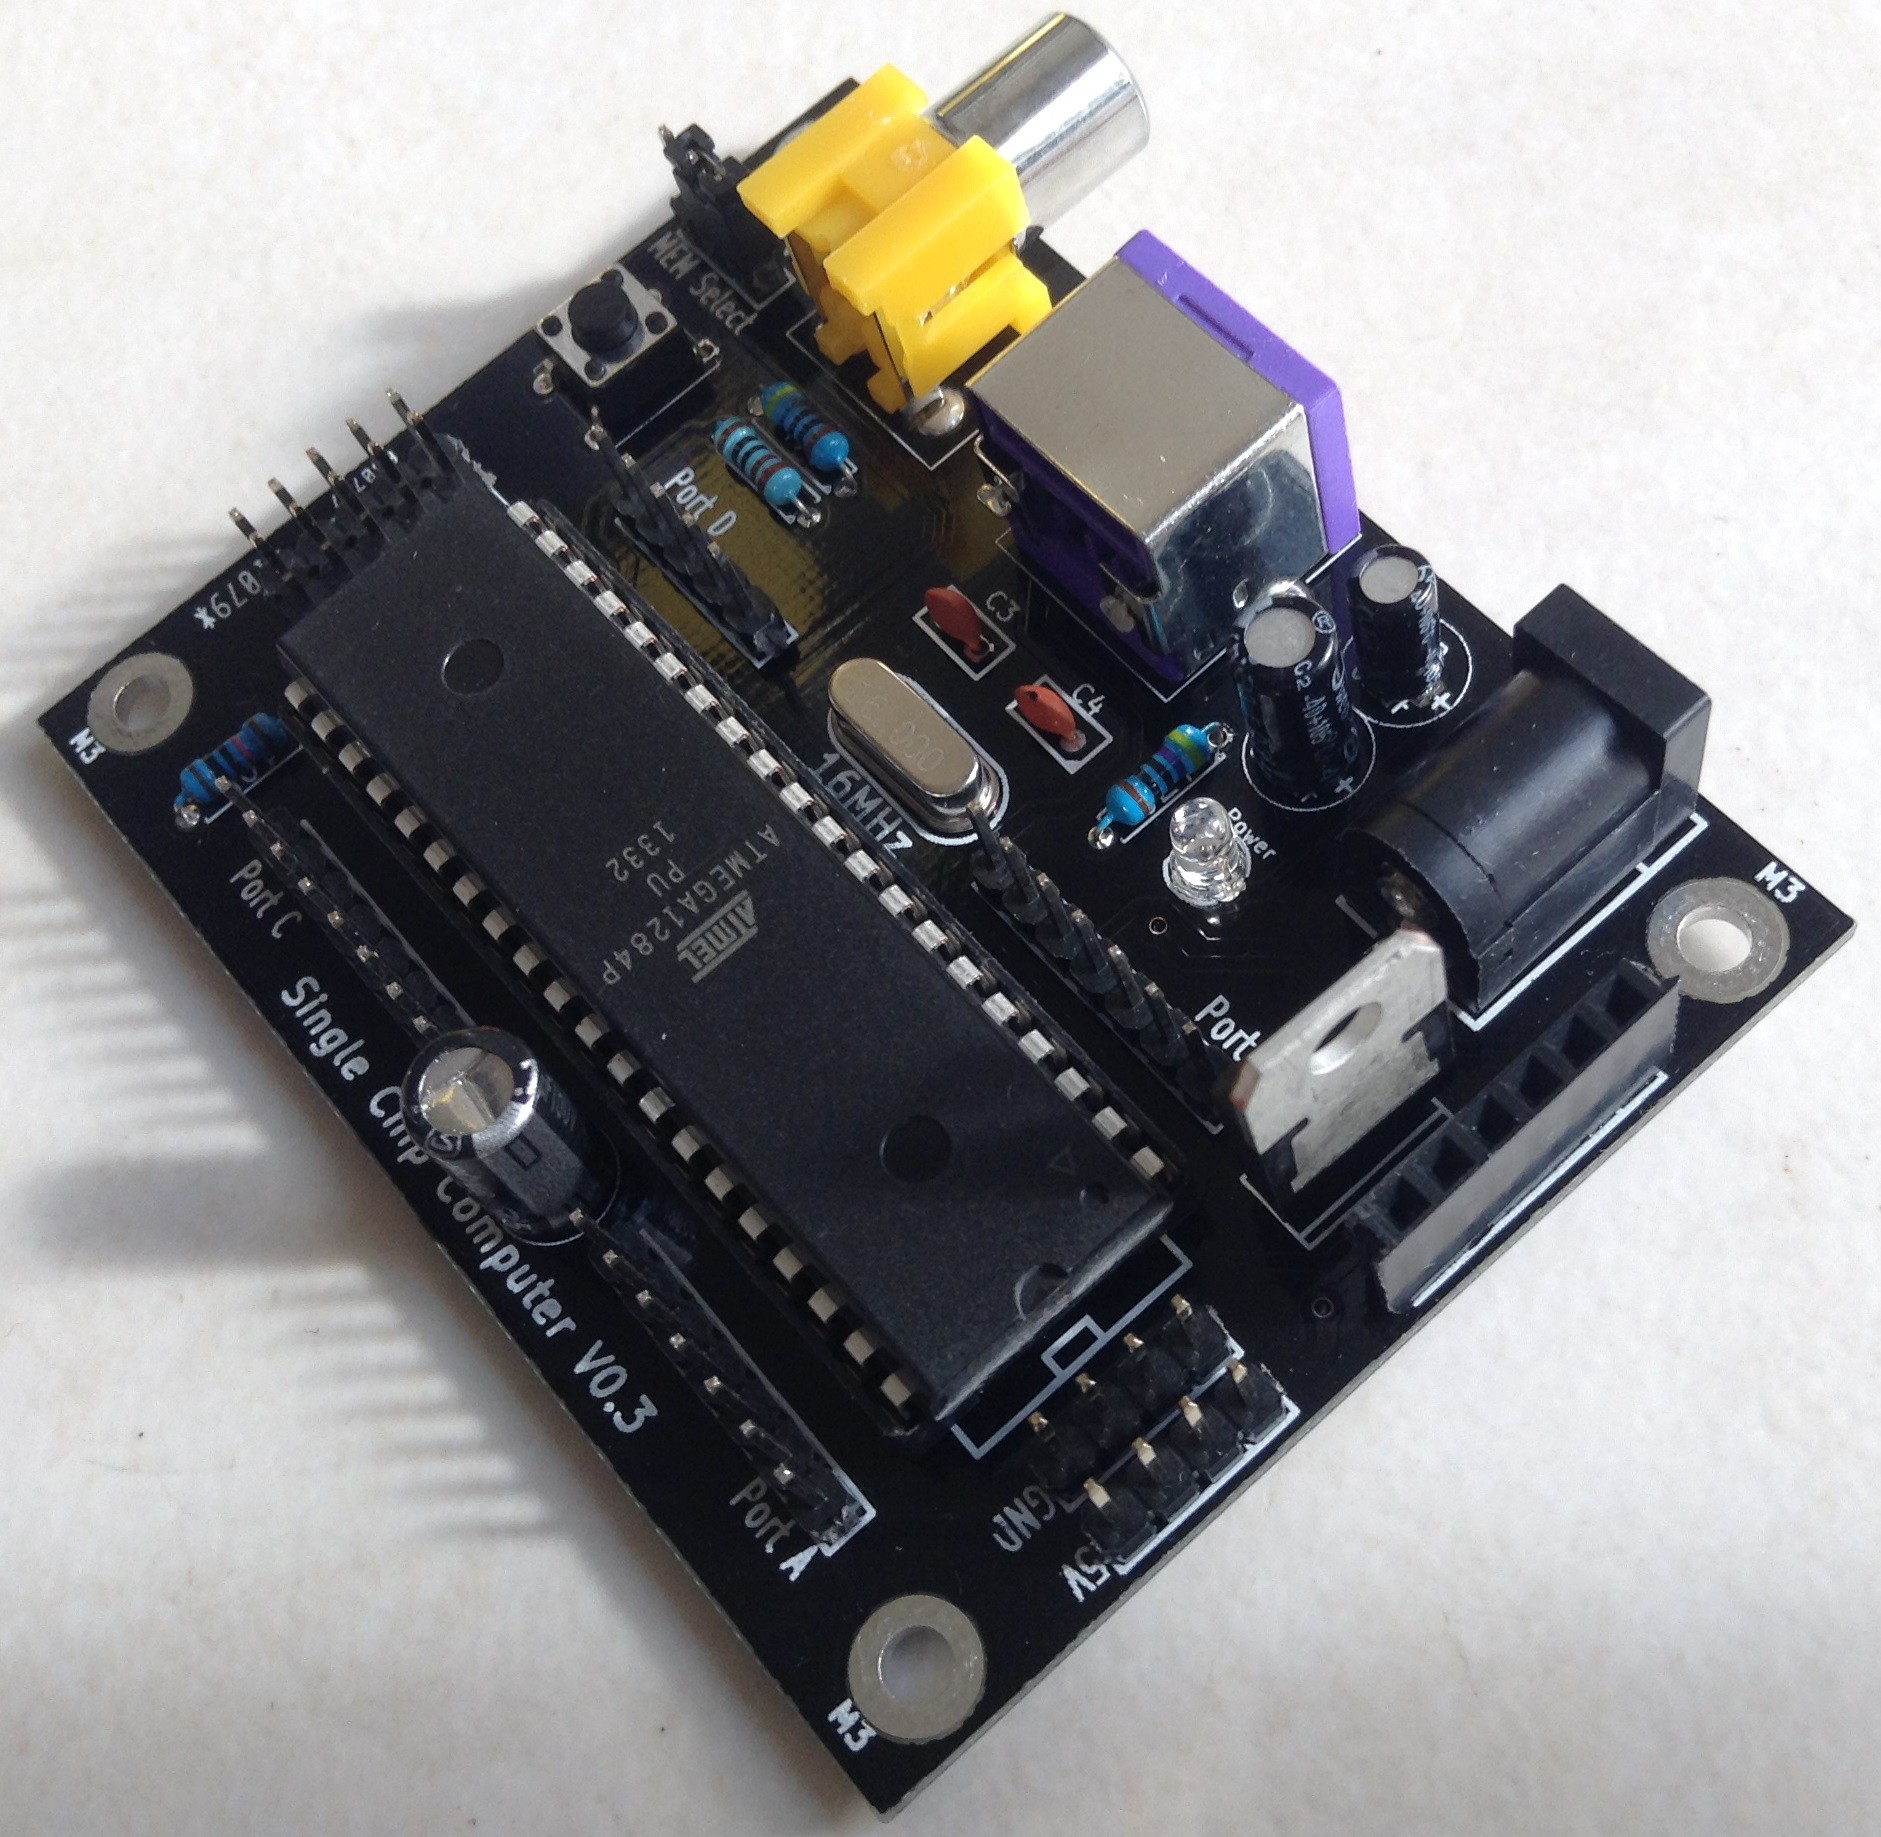
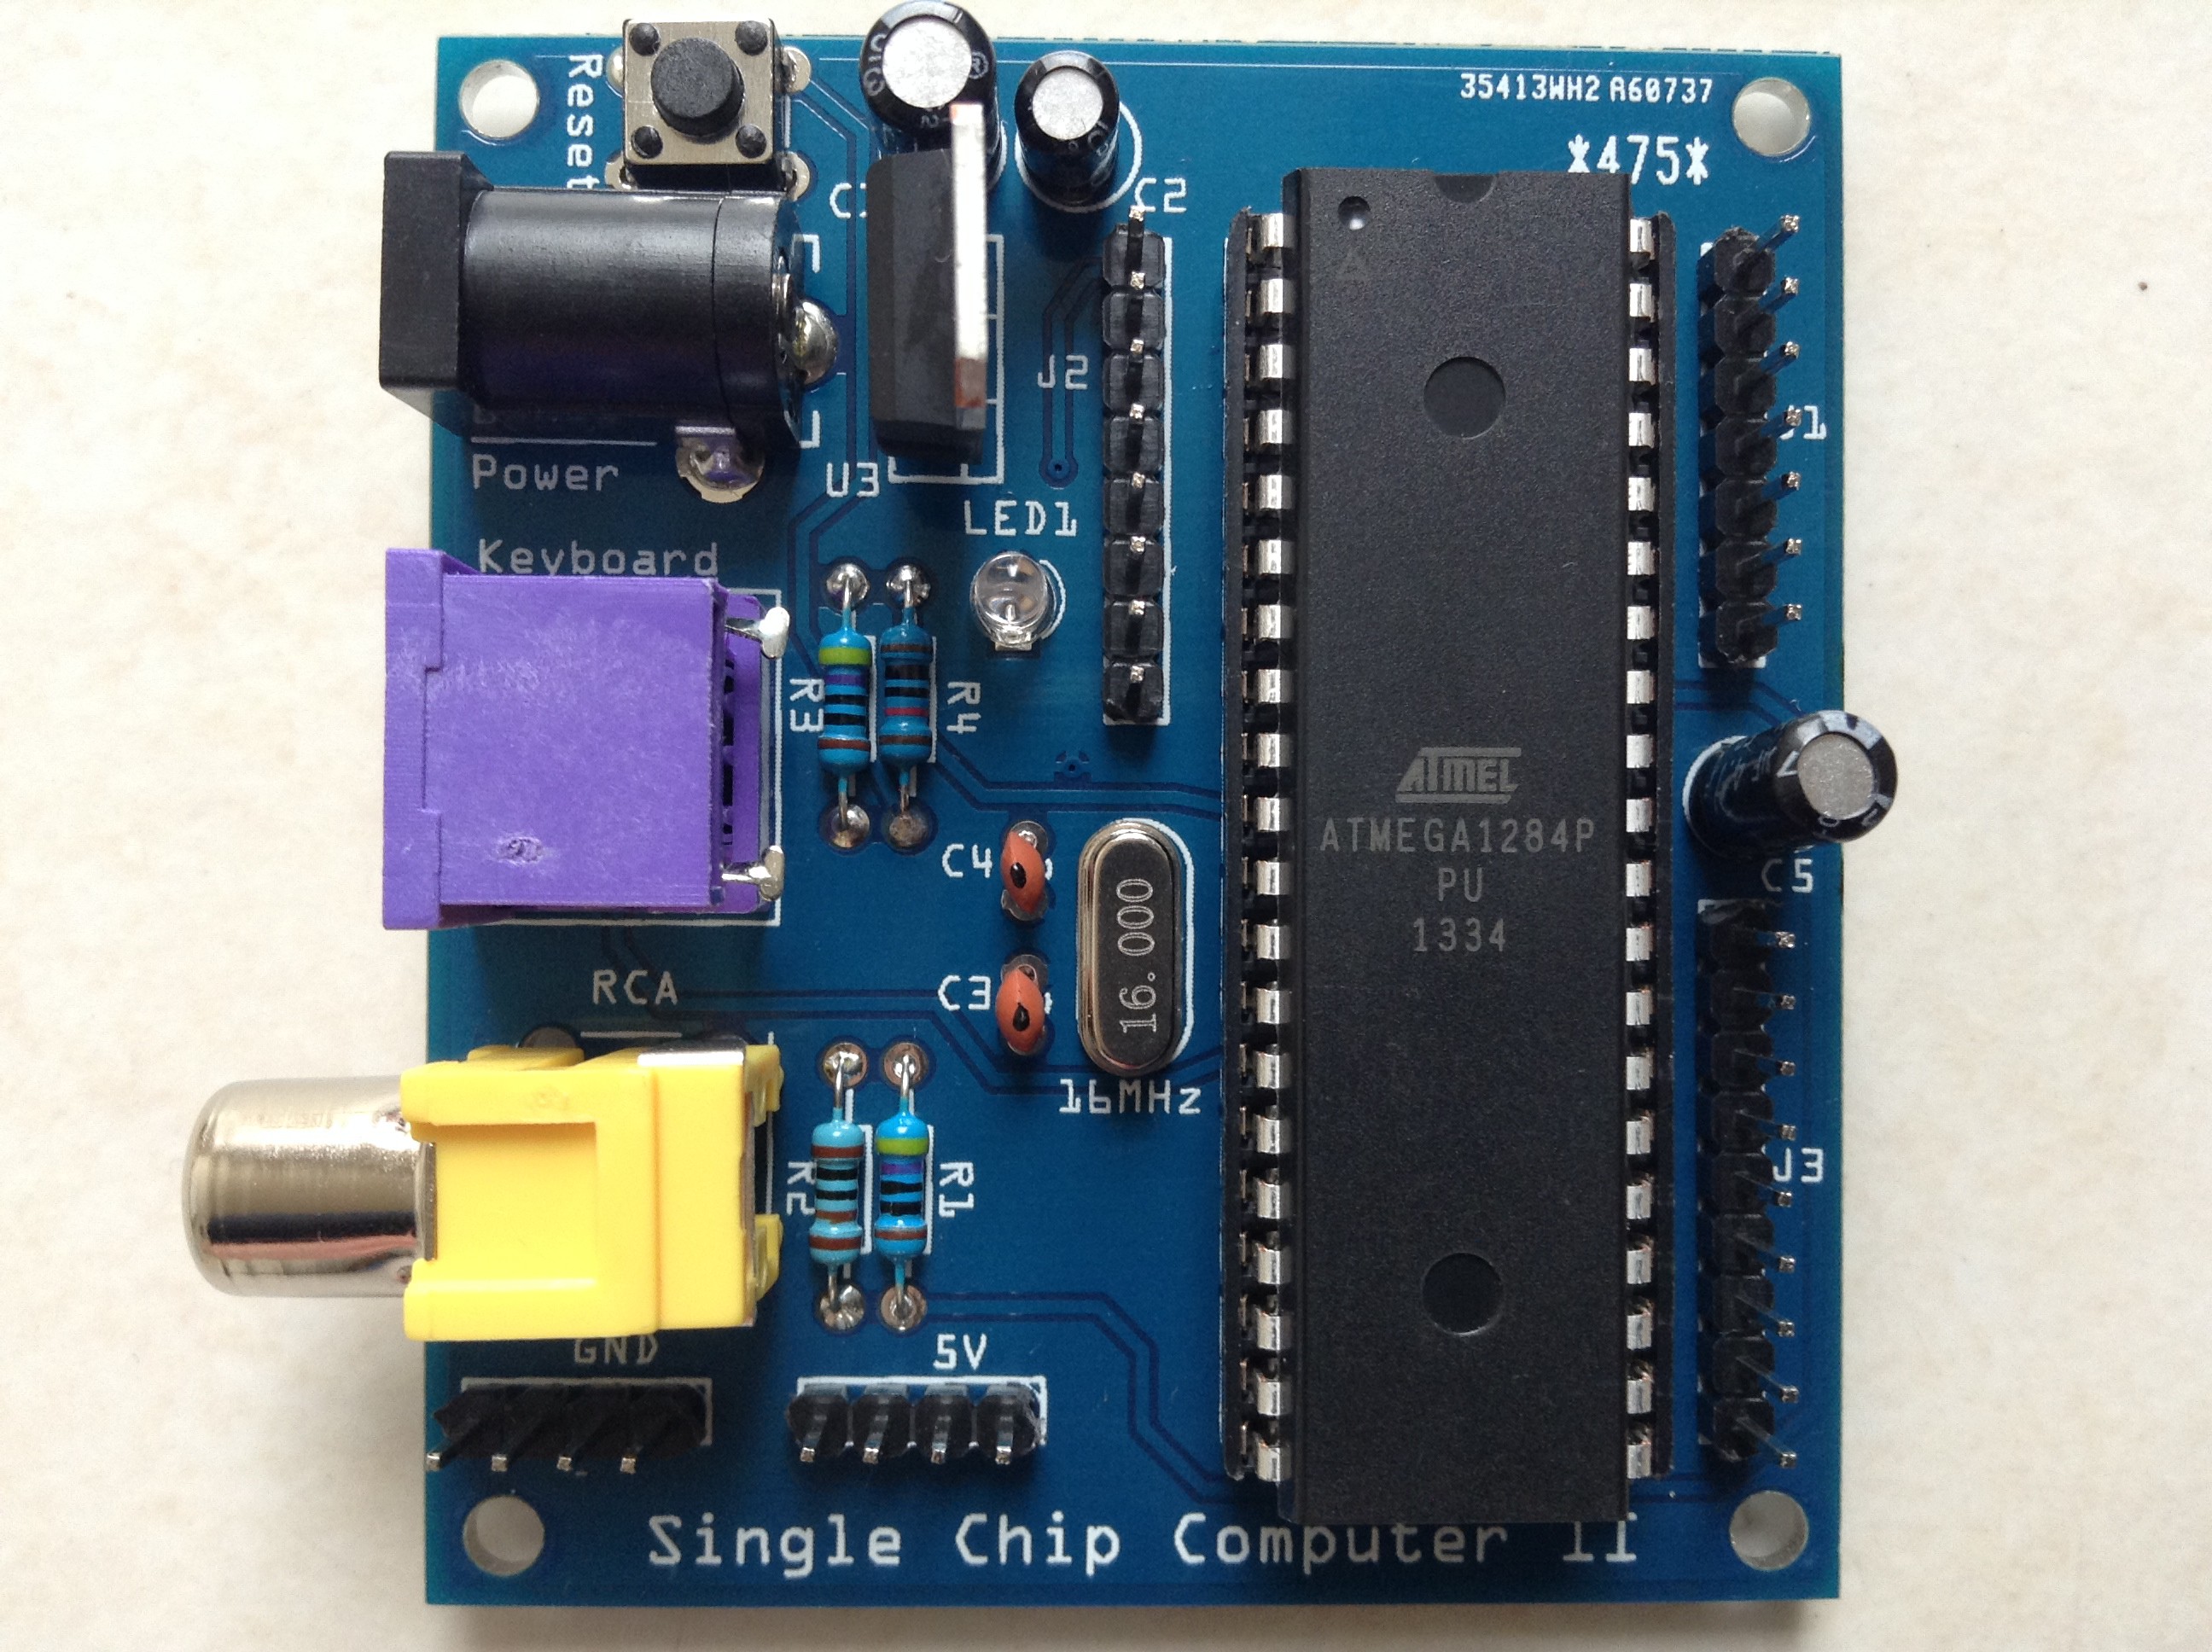
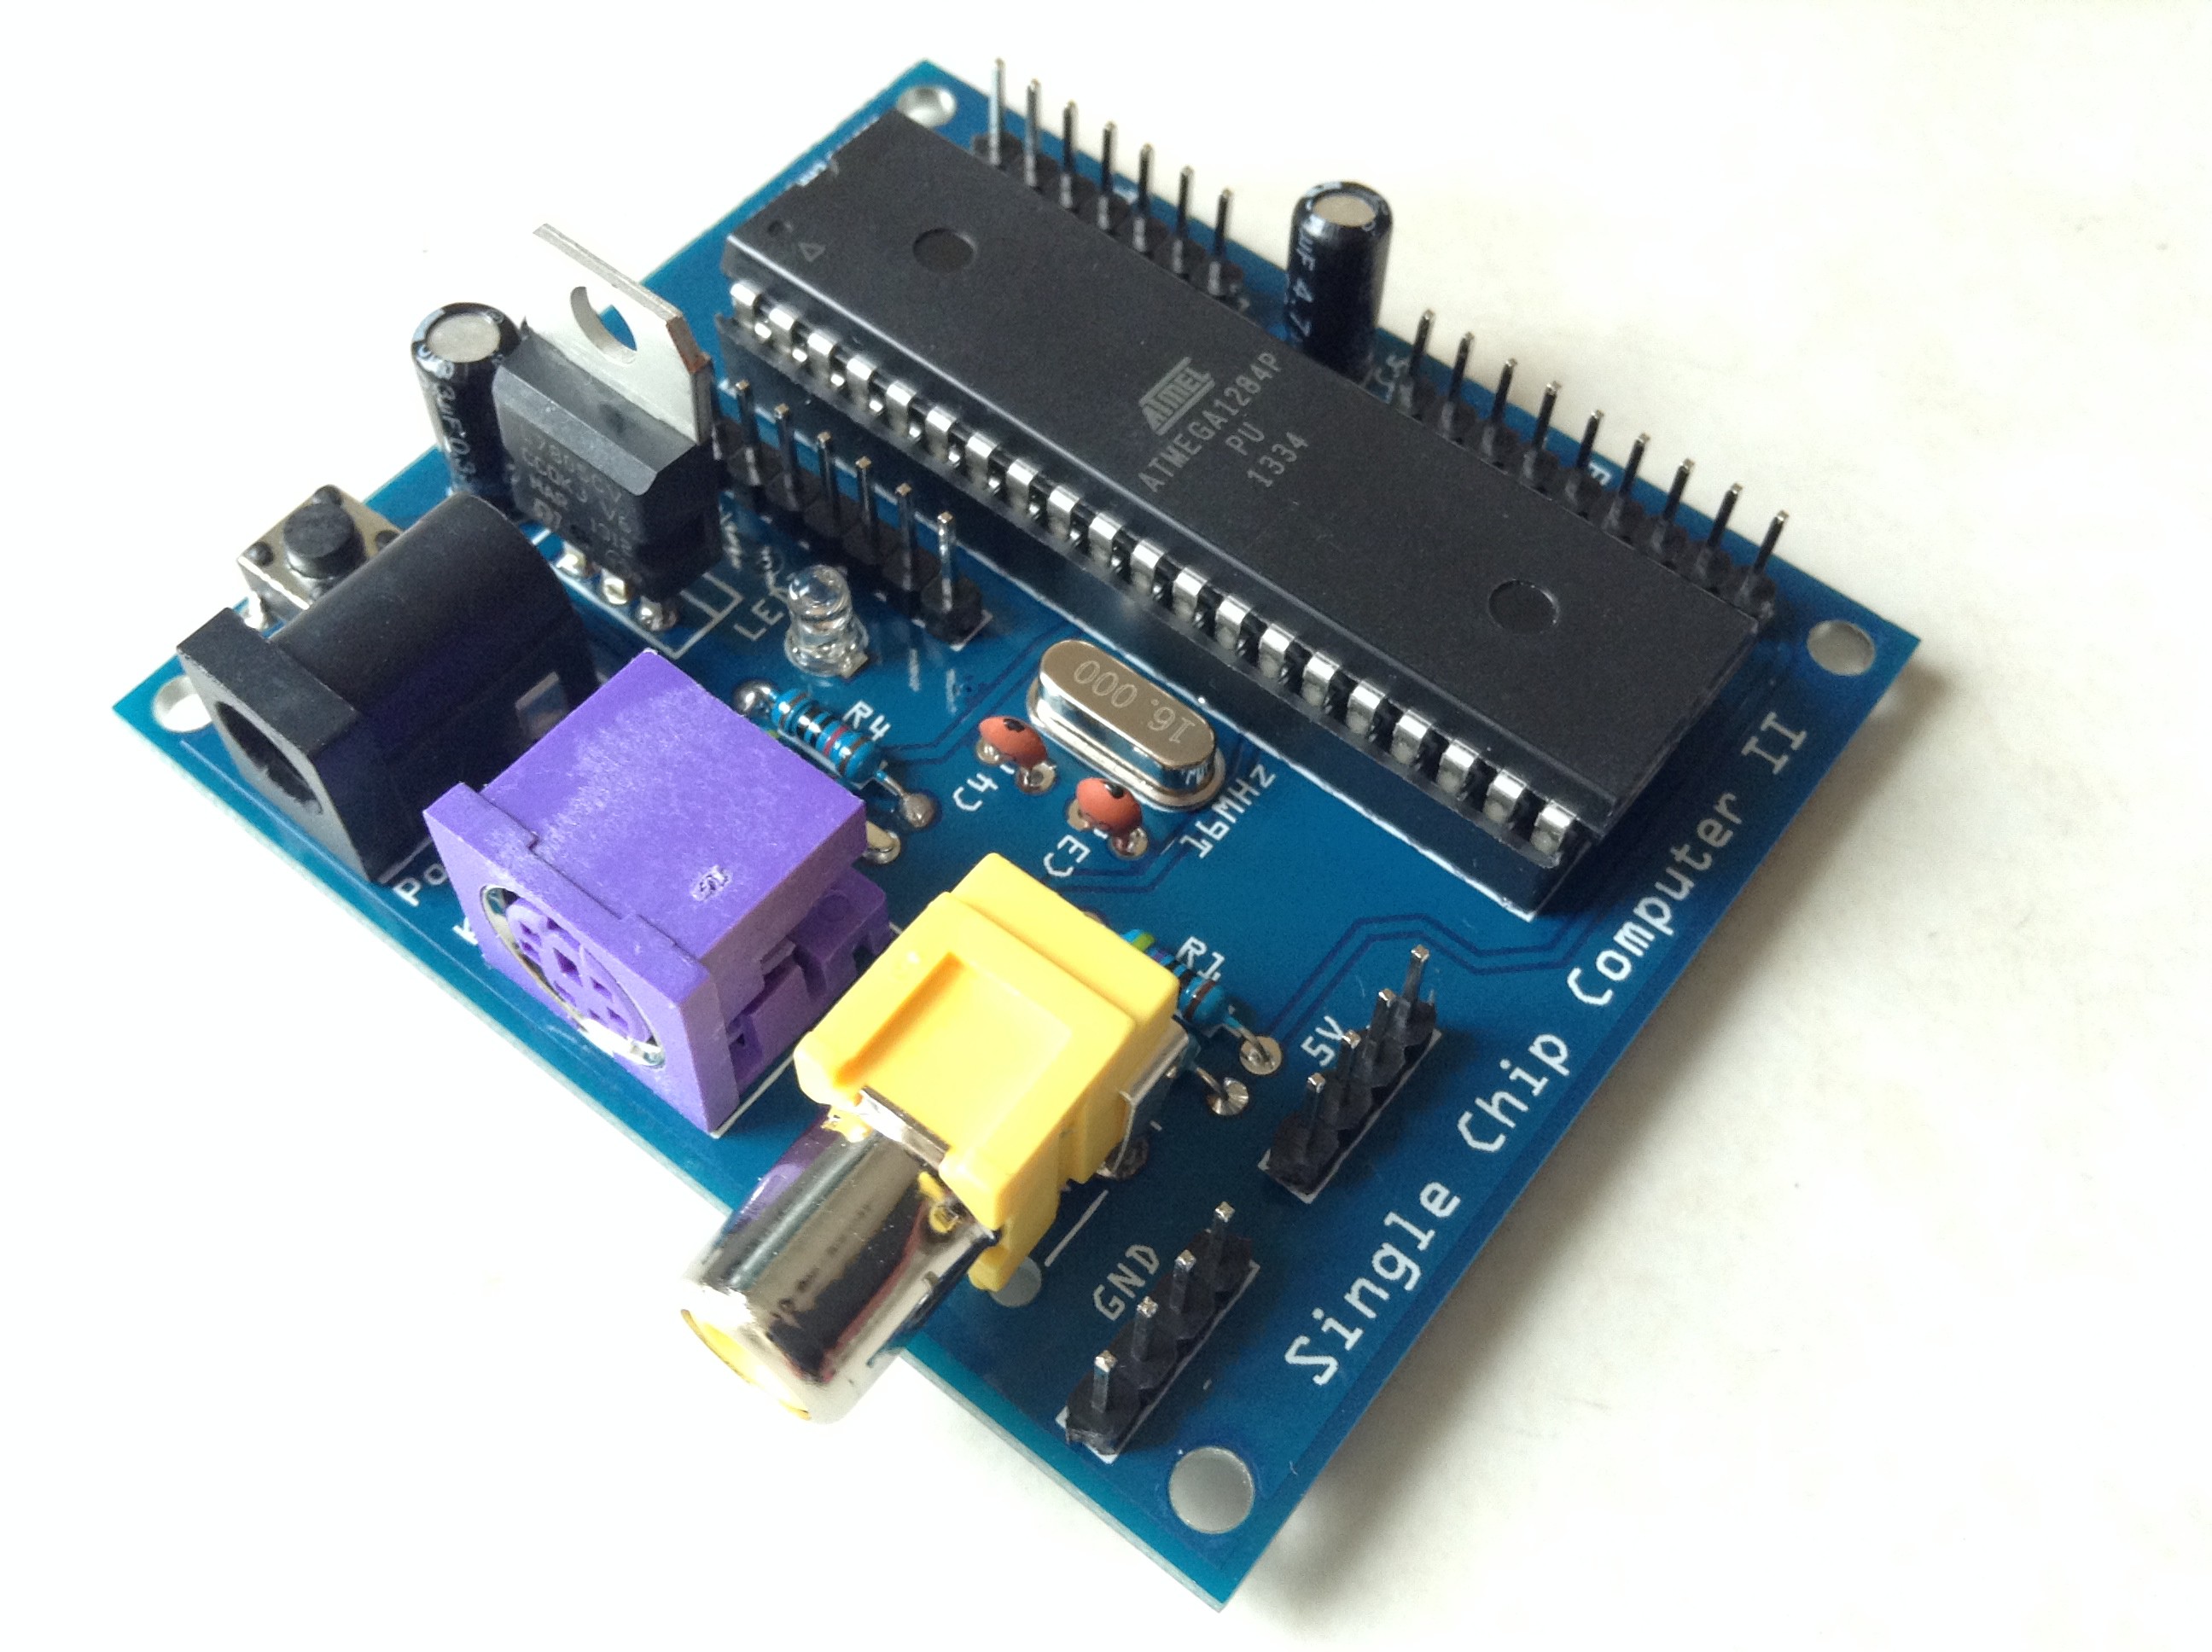
Today I assembled one of the new PCBs and it works as expected. With this PCB, I used male pin headers for the IO pins as I personally think they look better than female pin headers (especially when cutting female pin headers down as they usually leave an untidy edge). When testing IO pins, I found pin 1 of the AVR (although mapped to a pin header) cannot be used for GPIO as it is in use by the keyboard (this is something which could be addressed in a later version of the PCB). I have also changed the main image of this project to the new PCB.
-
Arrival of new PCBs
06/12/2014 at 21:03 • 1 comment![]()
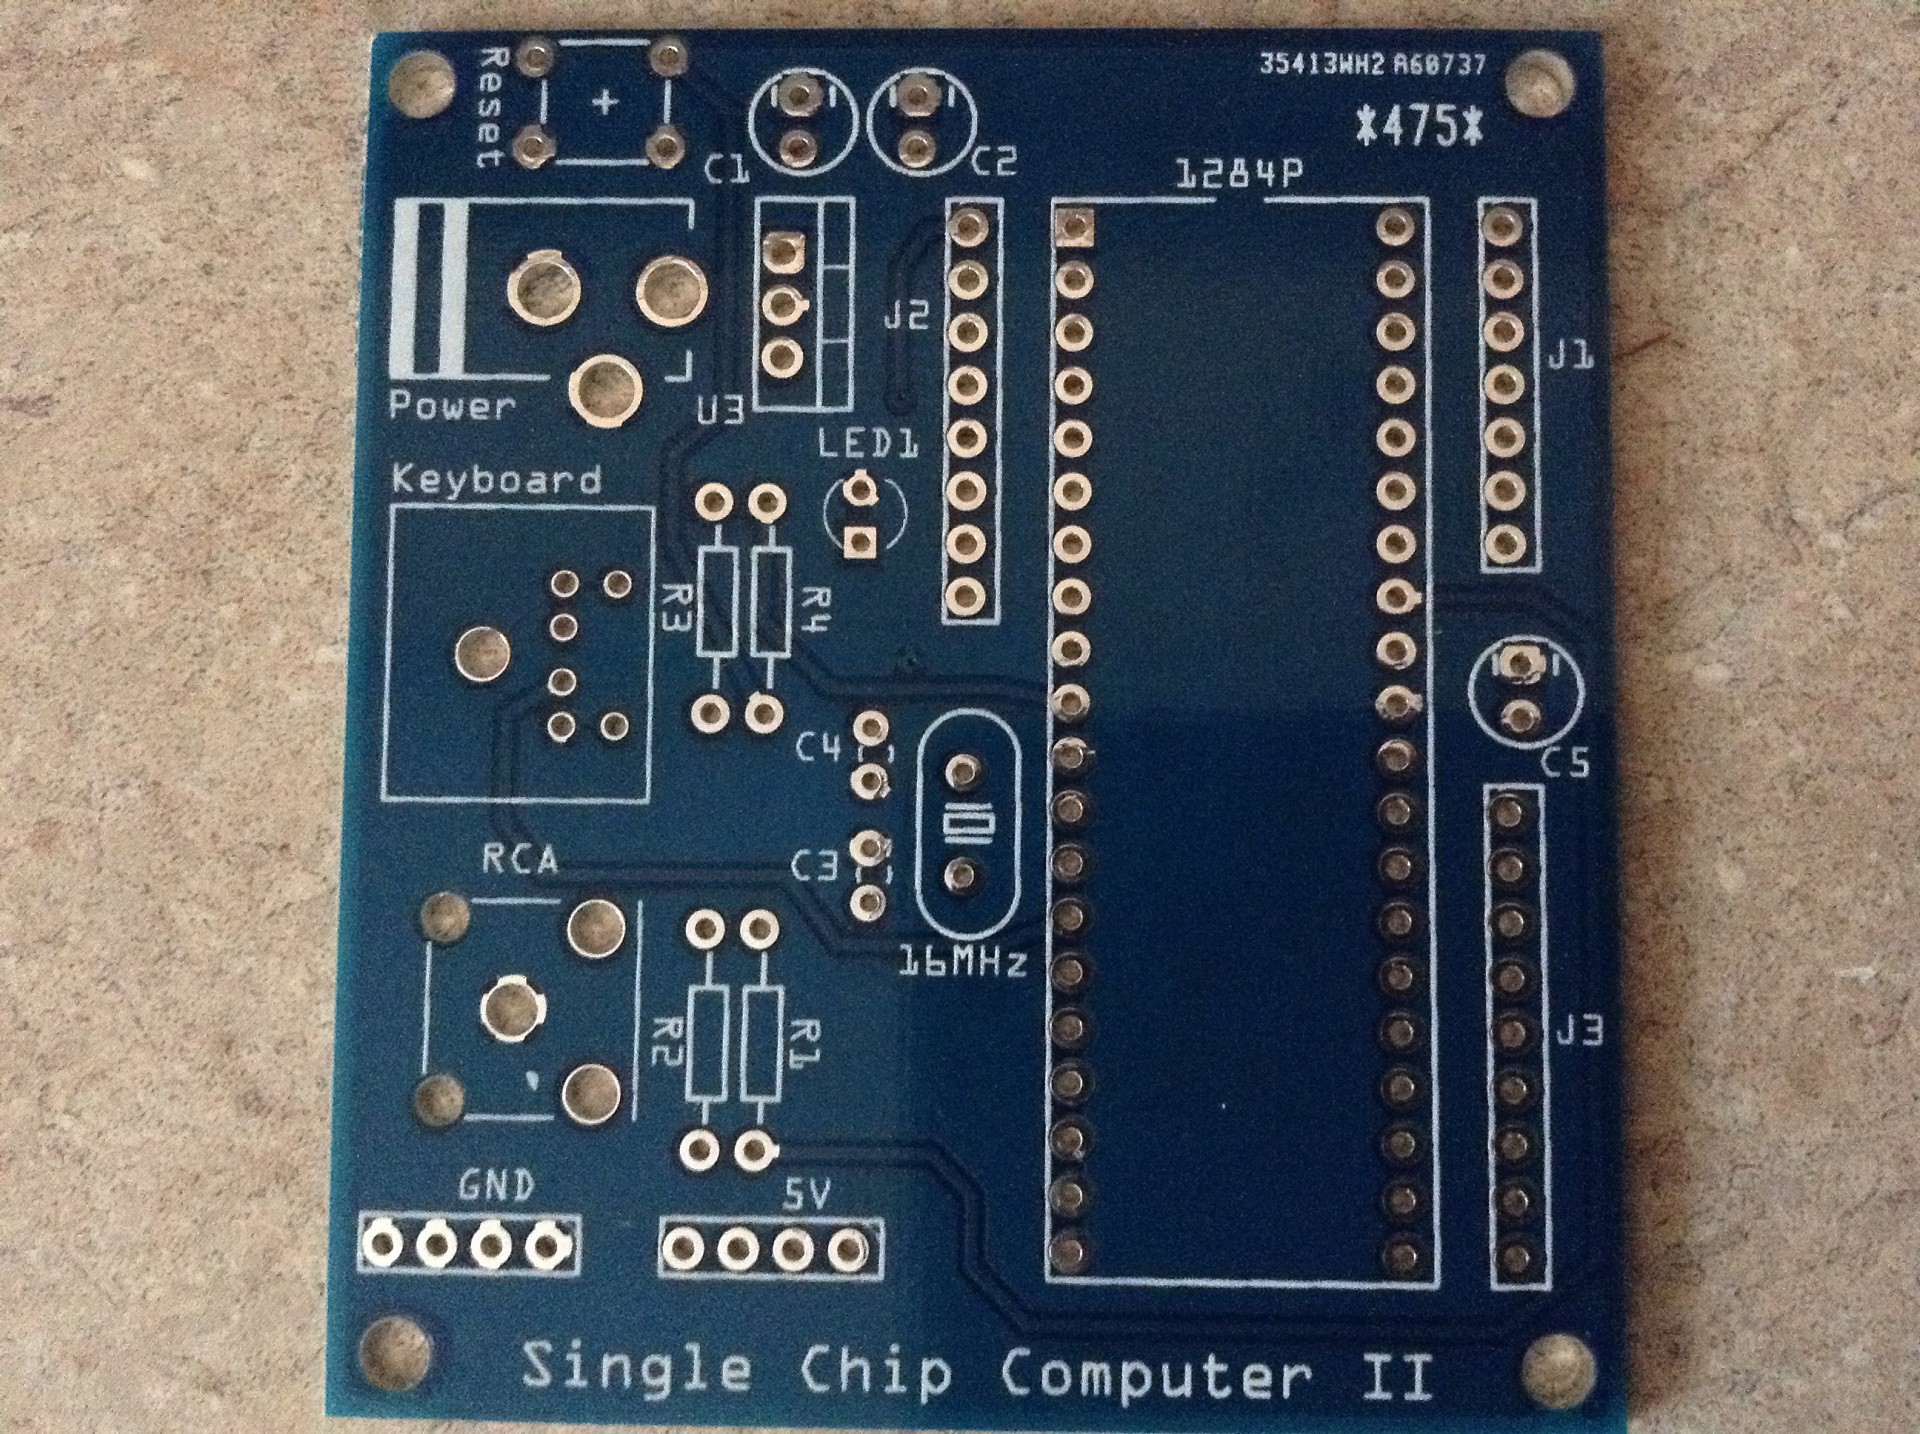
Today I received the new PCBs in the post which I previously ordered from DirtyPCB. They look great and I will be assembling one of them in the next few weeks. As I have ten of these PCBs, if anyone is interested I may put a few on eBay.
-
Updated design (version 2) sent to be manufactured
05/28/2014 at 21:35 • 2 commentsAfter seeing the HaD post regarding DirtyPCB, I updated the design of the single chip computer (added a reset button, removed the jumper parts, added a capacitor across the AVR supply pins, moved some components closer together etc as shown in the PCB layout below) and sent the files to DirtyPCB. I am currently awaiting the arrival of the PCBs.
![]()
Single Chip AVR BASIC Computer
A computer running the BASIC programming language, generating composite video and reading PS/2 keyboard input using a single AVR.