Hopperpop
-
Additional features
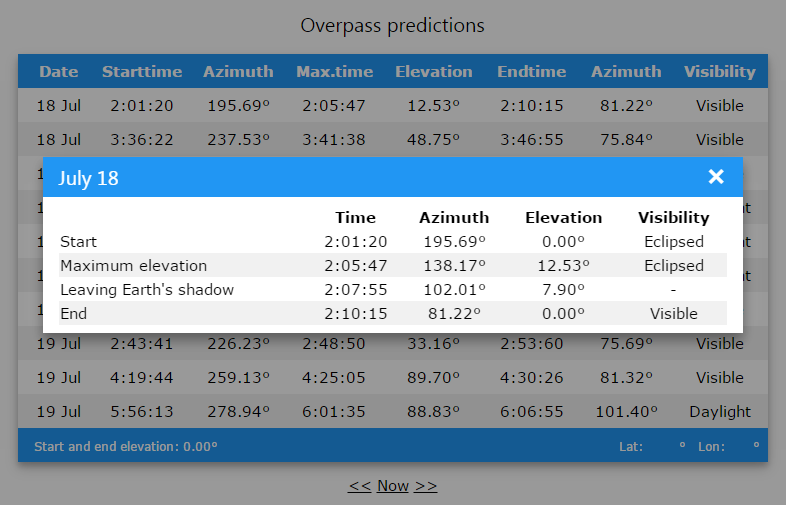
07/17/2016 at 15:55 • 0 commentsI added some extra features that I always wanted to add. The first one is showing more information for an overpass. Every row in the old table is clickable, and opens a new window with additional info.
![]()
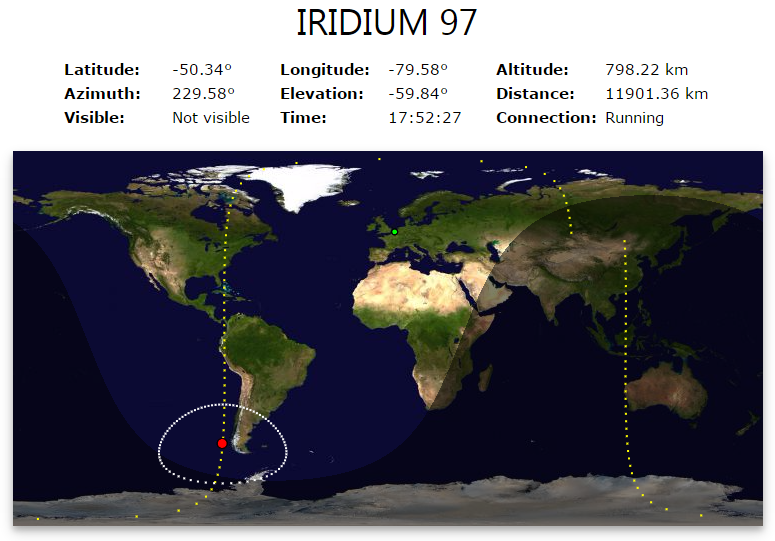
The second new feature is the orbit of the satellite on the world map. The orbit shows one revolution of the satellite around the earth. Every point is on a fixed time interval. This helps in understanding the deformation caused by the map projection.
![]()
-
Workshop
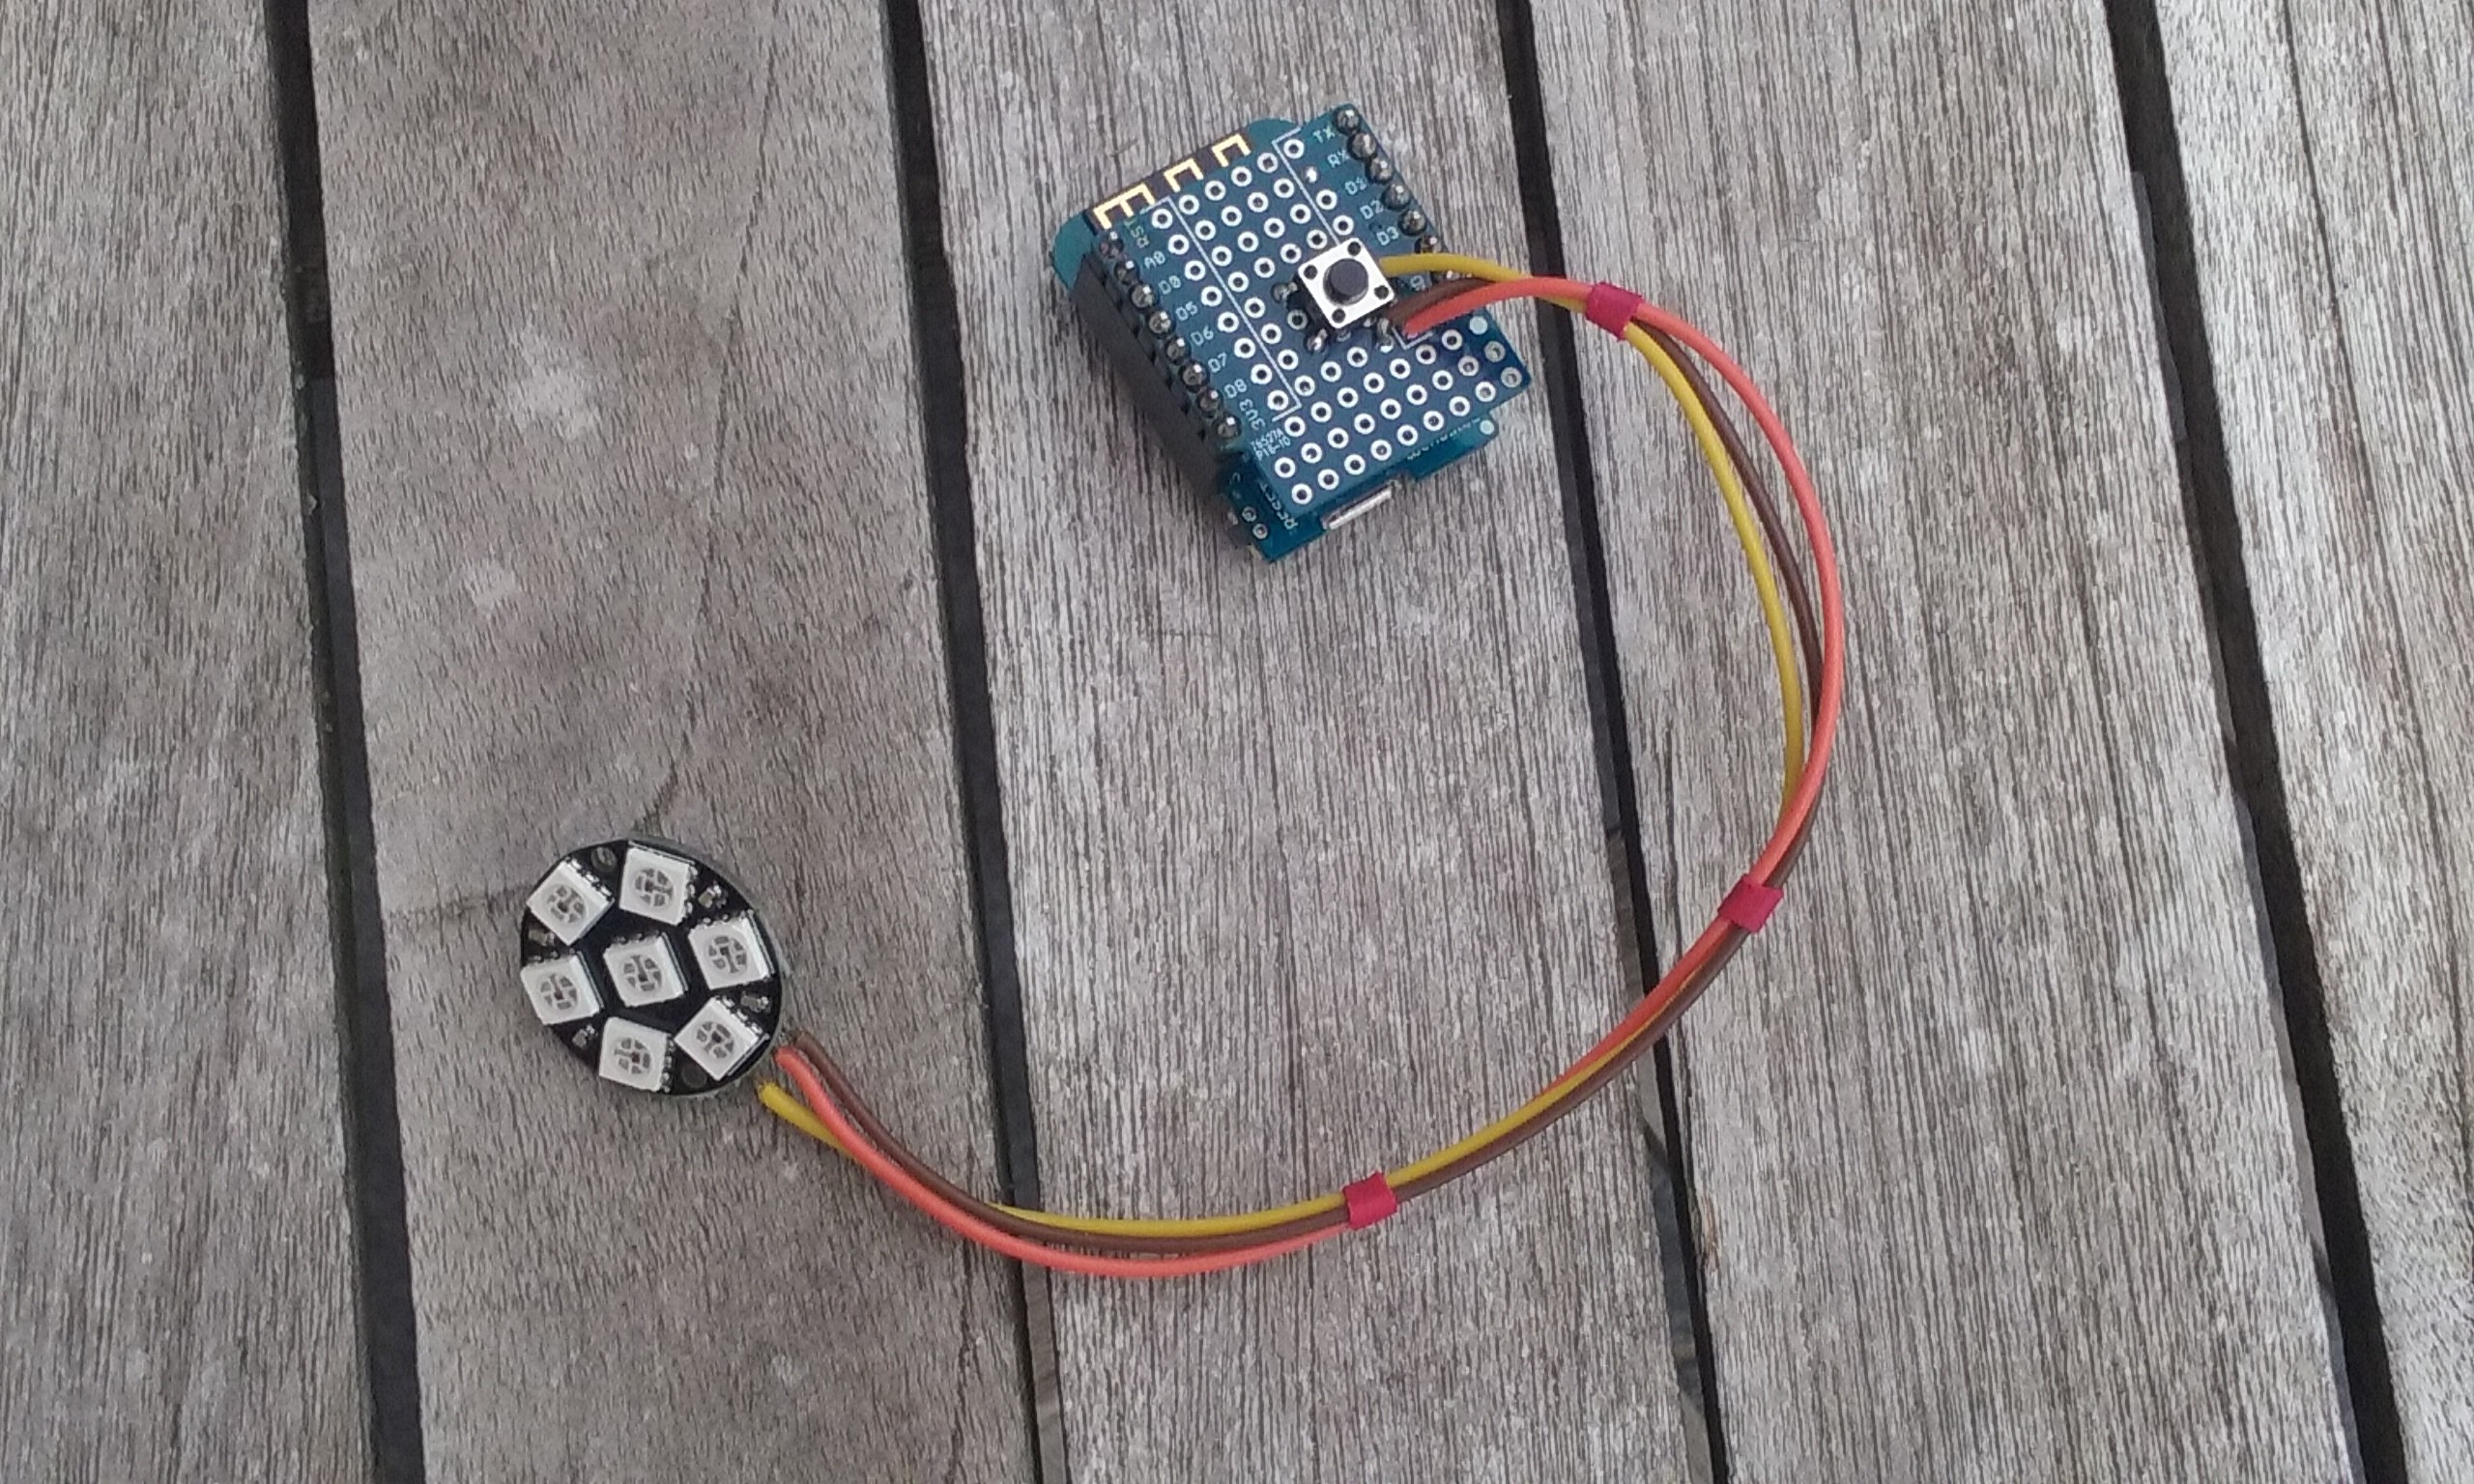
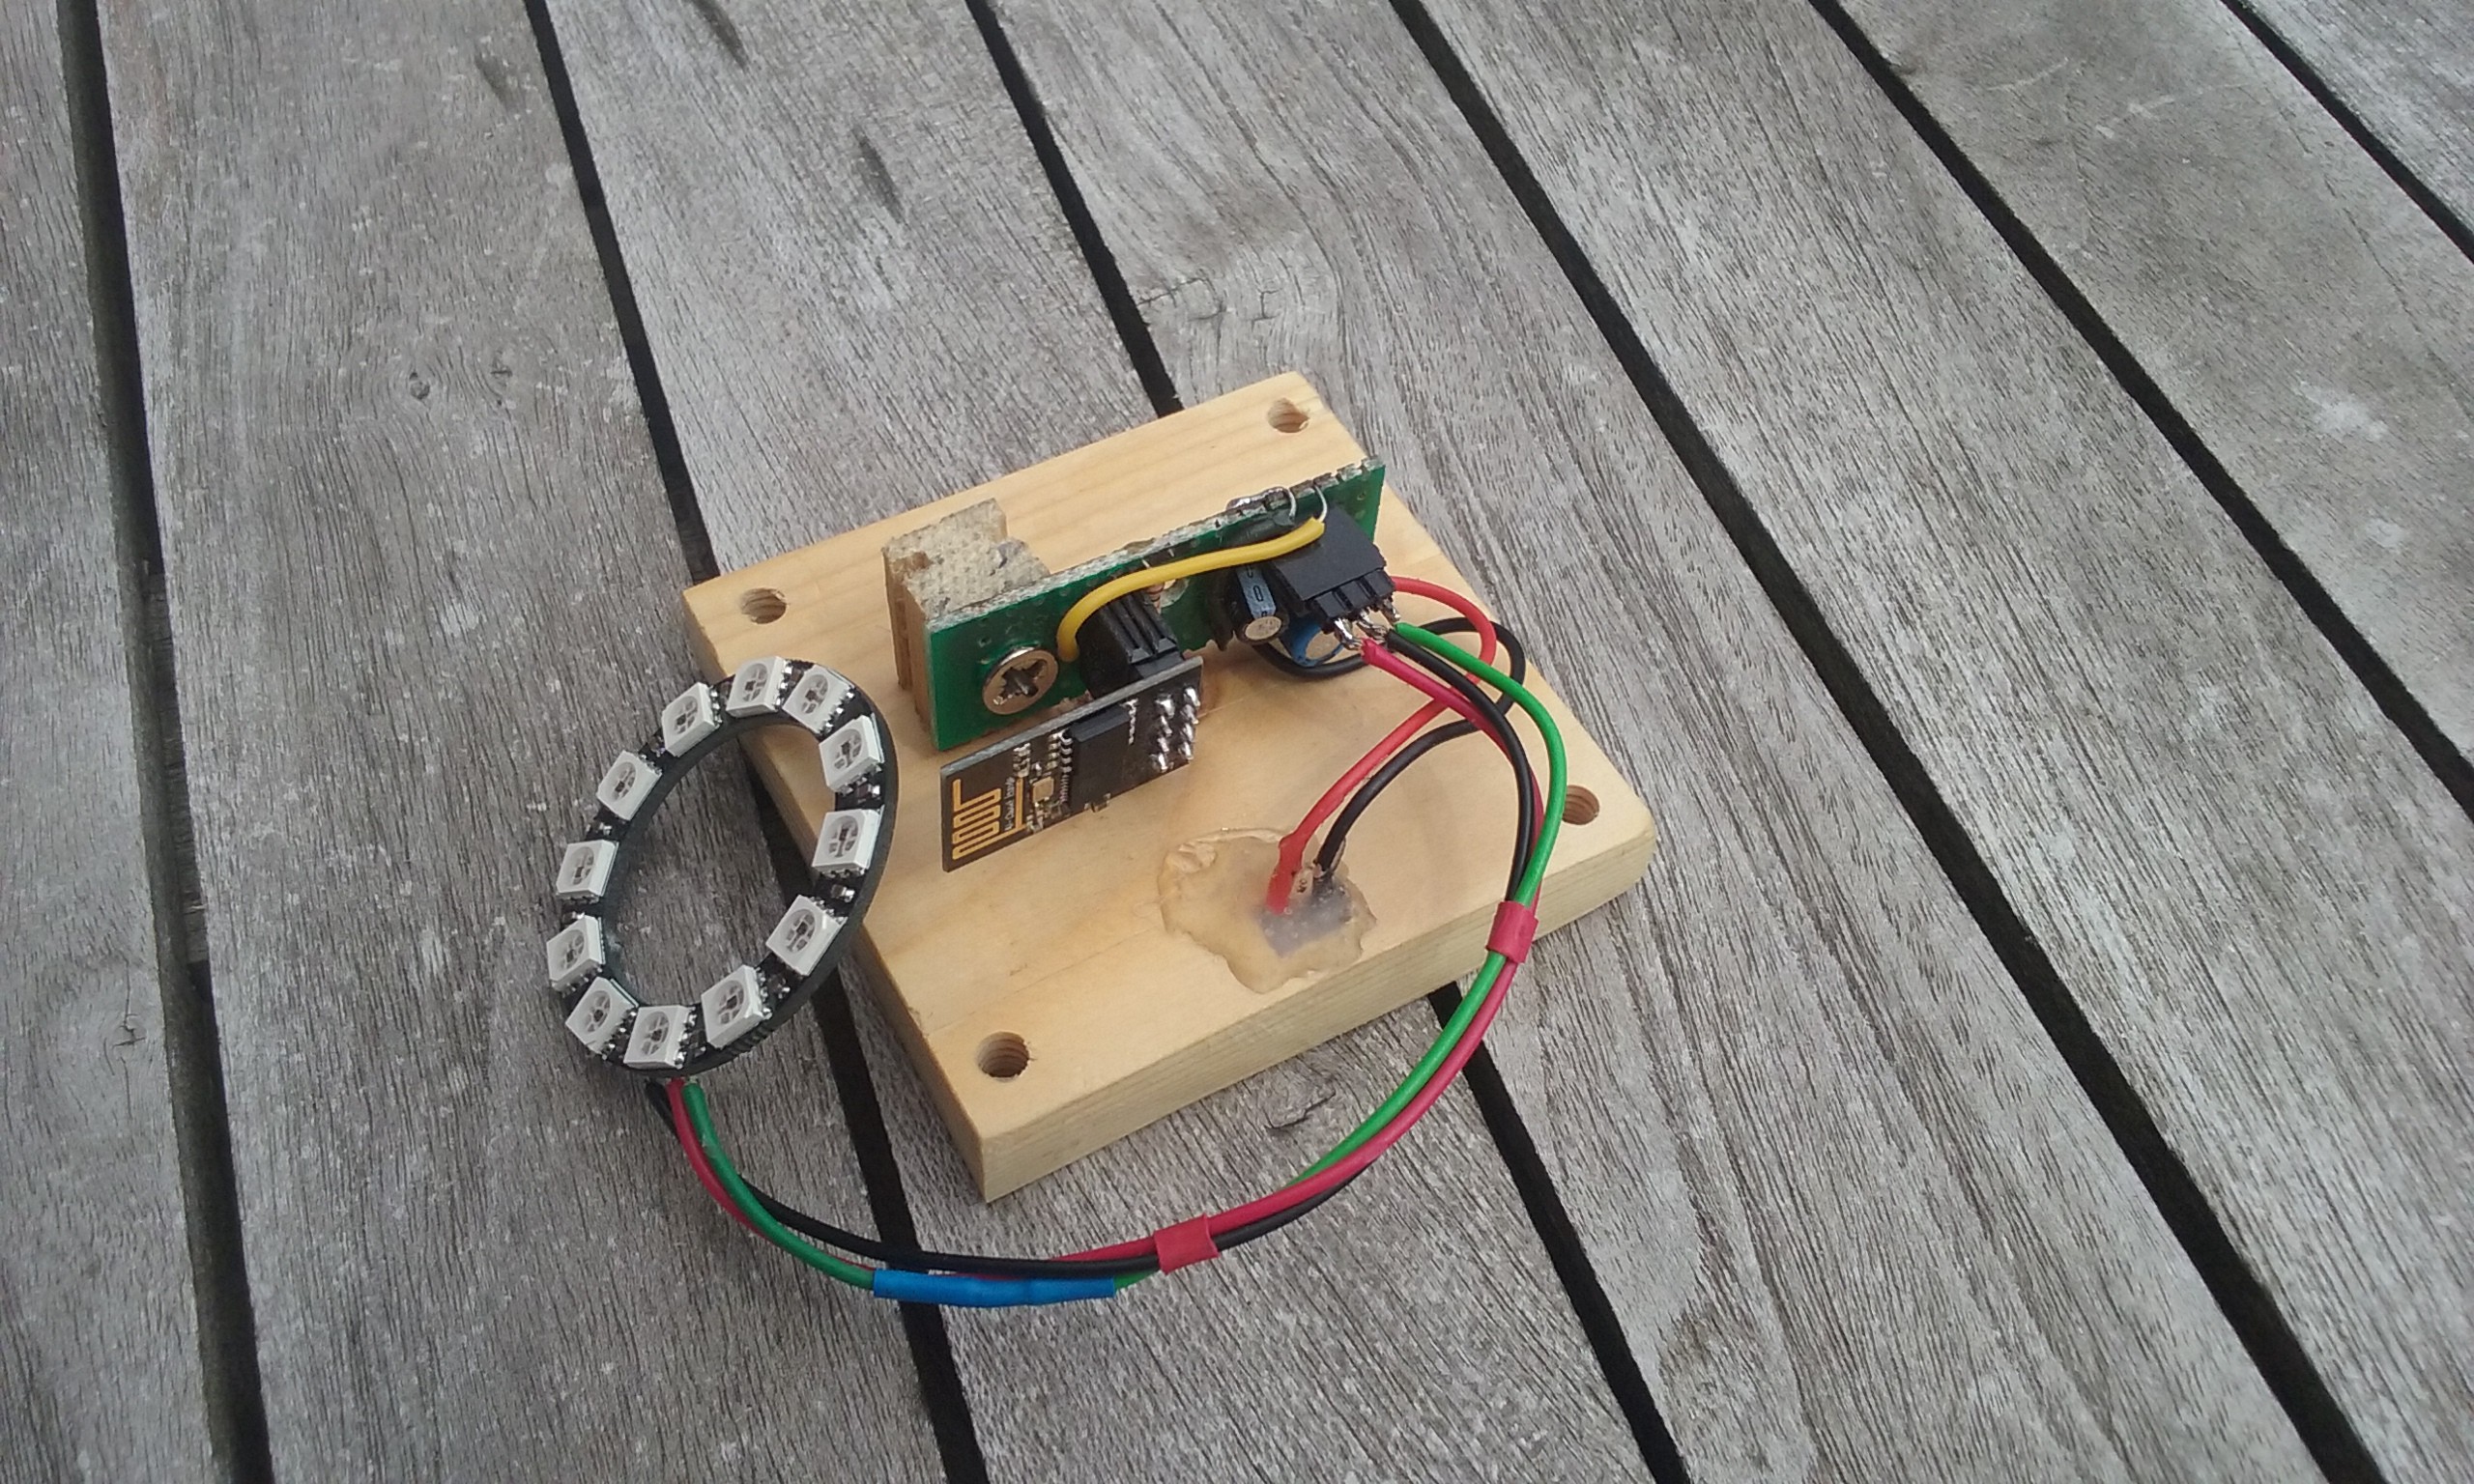
07/10/2016 at 20:14 • 0 commentsThere is a reason why I kept the hardware as simple as possible. I'm planning to do a workshop next month with some youngsters where everyone will make there own Sattrack. Most of them have never done something with electronics, so everything needs to be simple as possible.
Instead of using the ESP-01, I bought some WeMos. Those board doesn't cost more, but already have a regulator and usb port on board. Additional I bought a matching prototype pcb where they can add an additional button. This button is for resetting the configuration settings. That way they don't need to reprogram it if they lose the password to acces the settings. My initial thought was to also add a level shifter with a 2N7000 mosfet. But because it's works stable without, I removed that part to make it more simpler. I will leave it optional for the people who wants.
![]()
I stilt don't have an idea on how I will make the casing with them. I will probably let them make something out of cardboard and other easy to use materials.
-
Casing
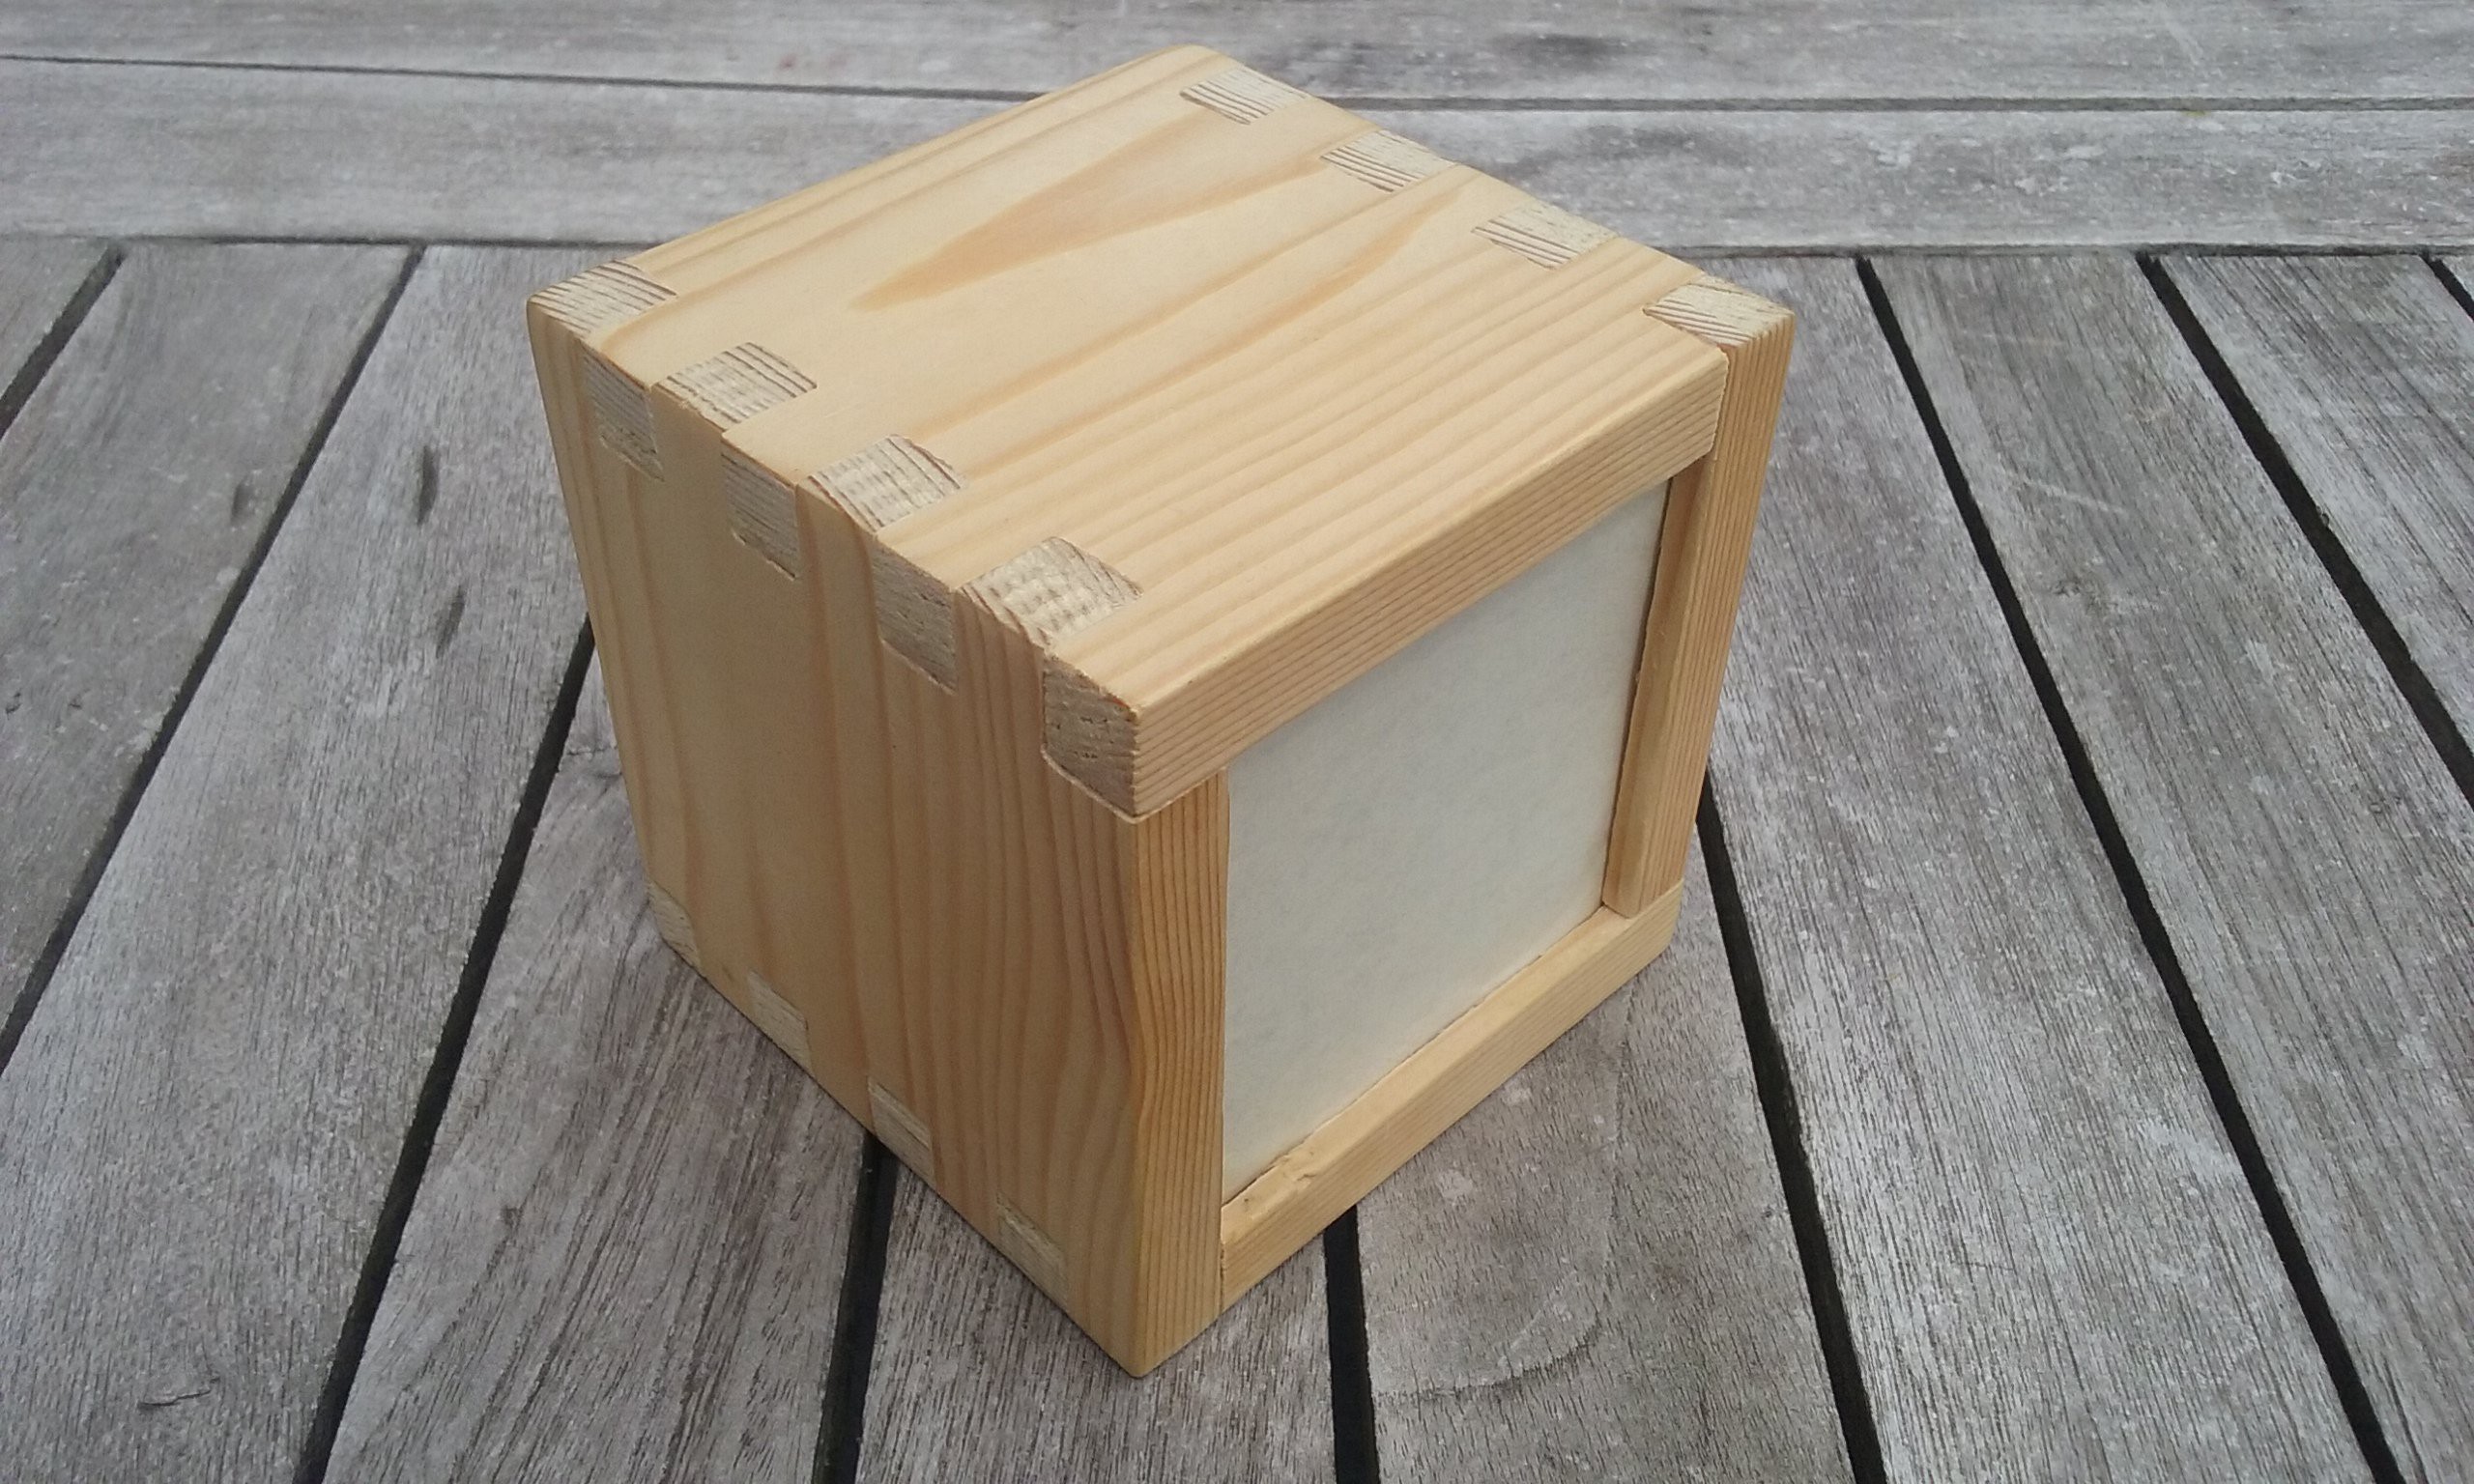
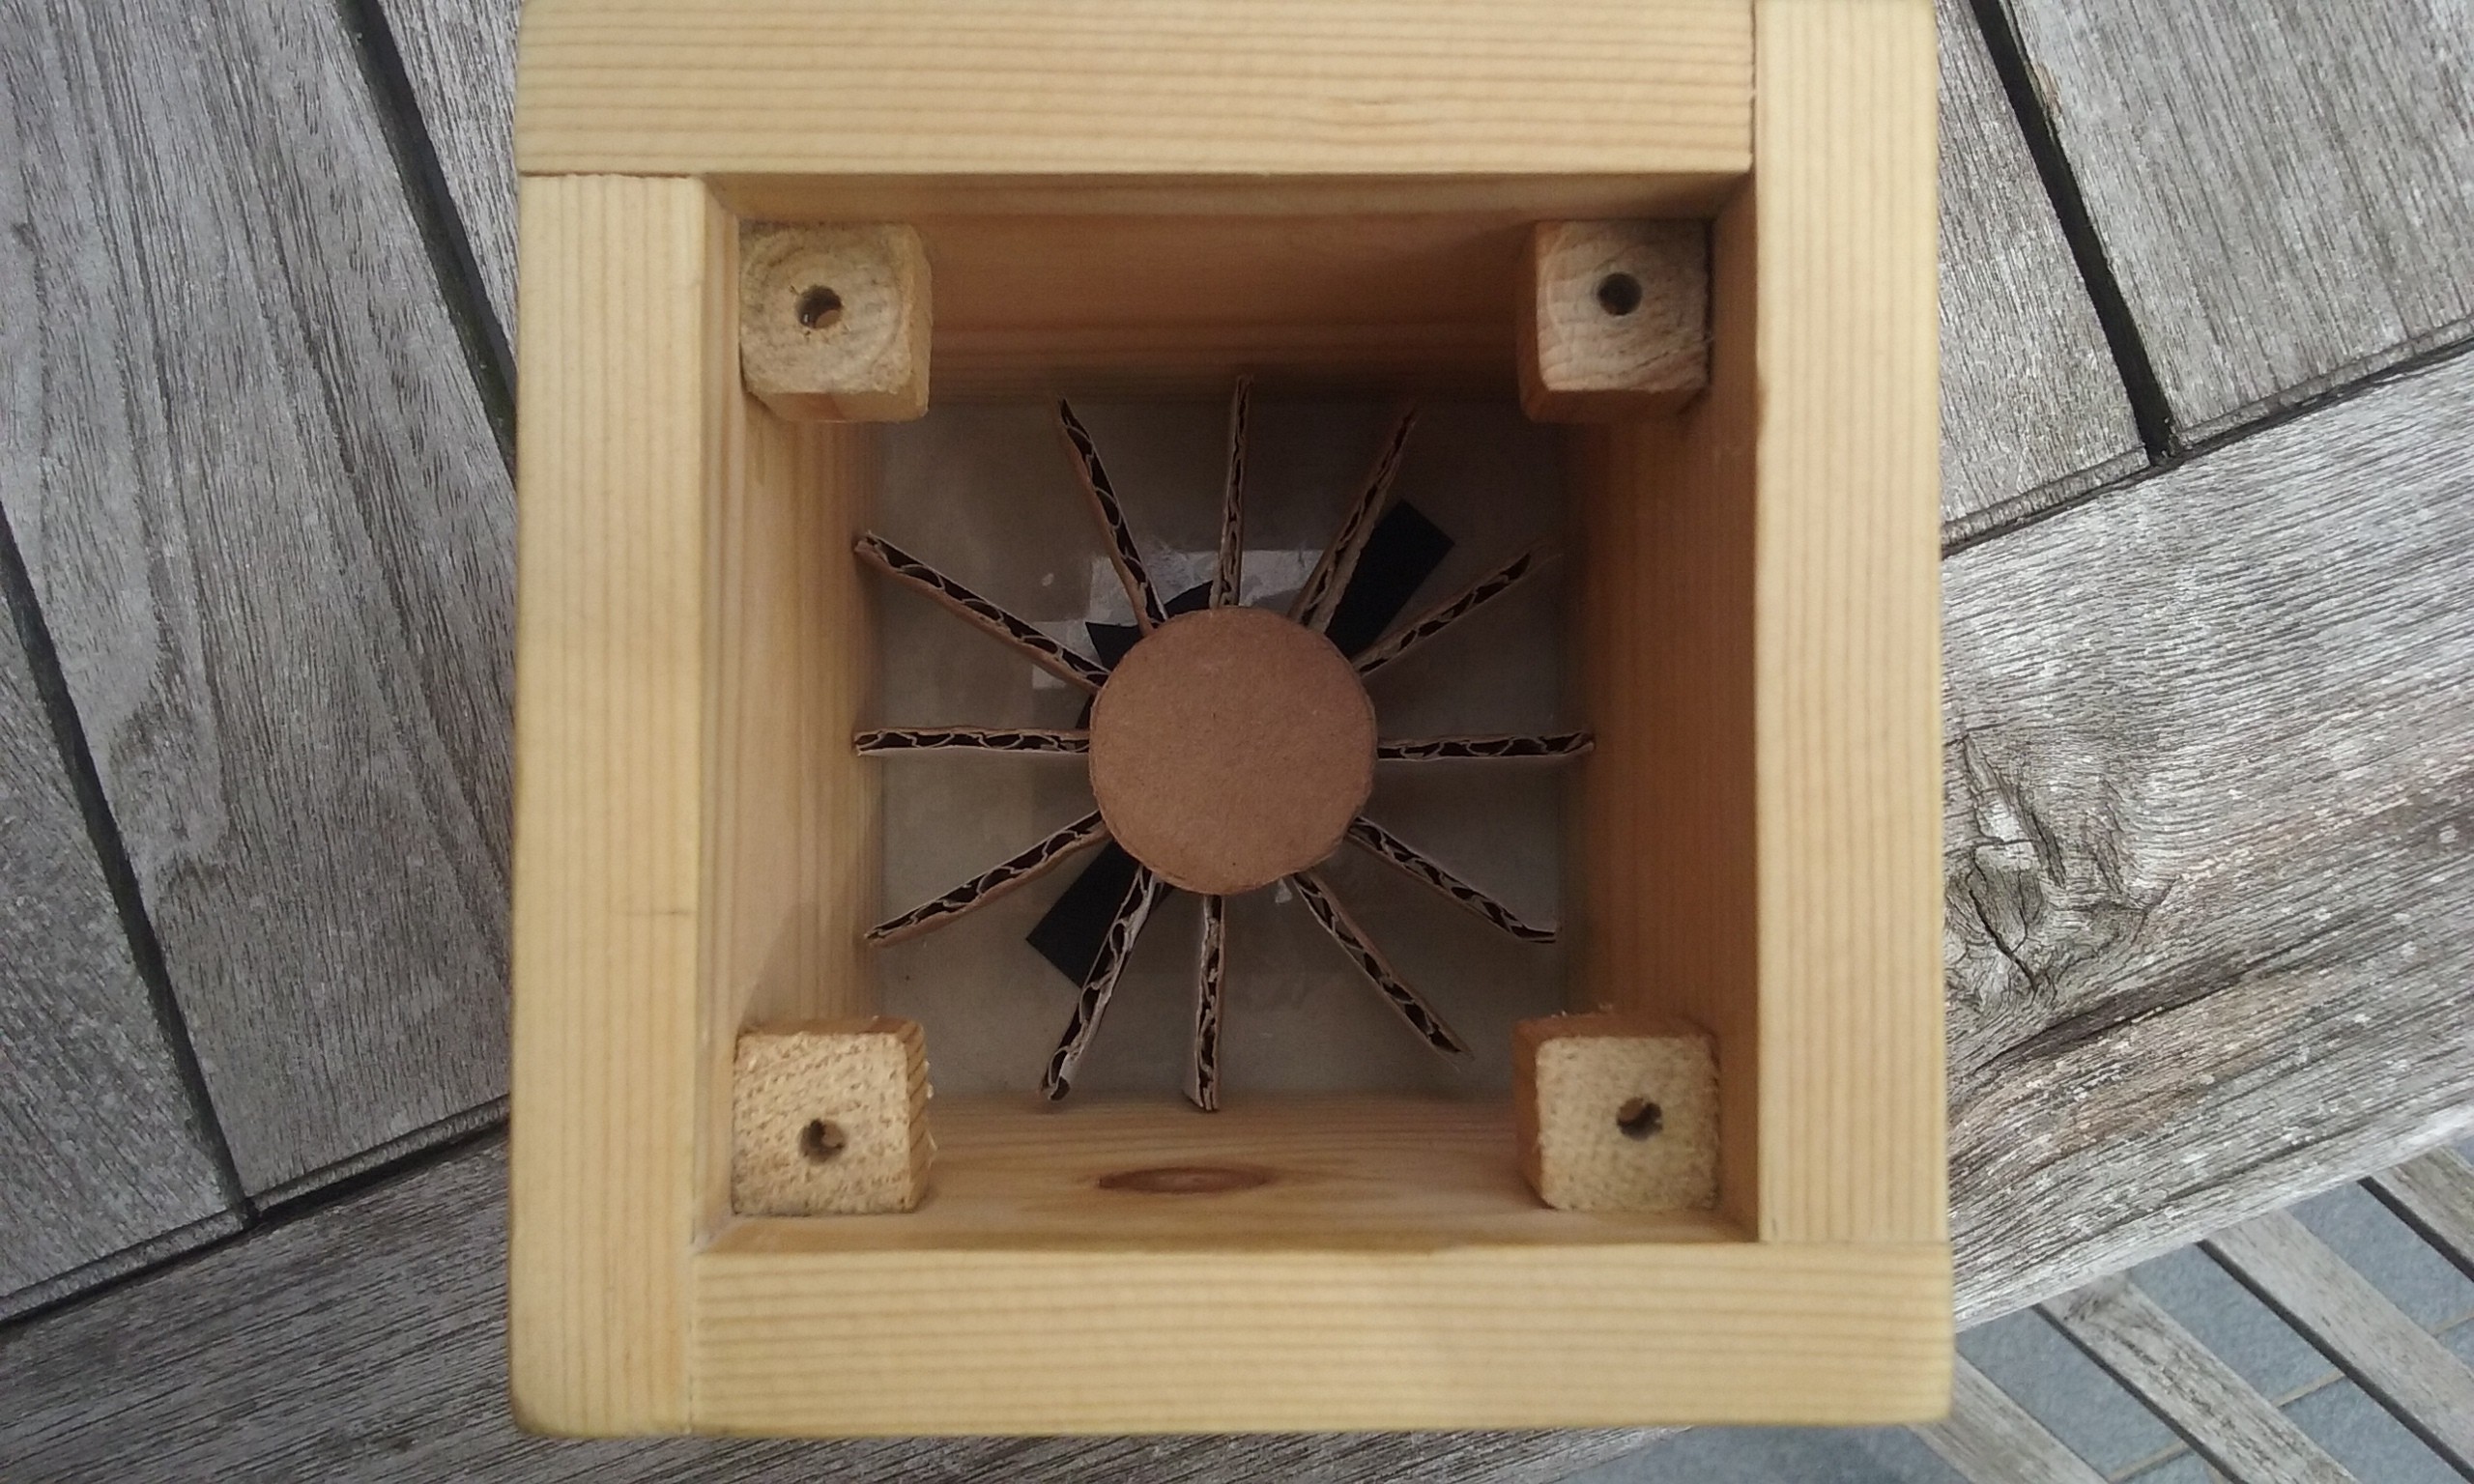
07/10/2016 at 19:39 • 0 commentsThe casing is made from scratch. I started with making four 9x9cm planks. Then I printed some patterns out and taped them to the edges to make some finger joints. I mounted my jigsaw upside down and added a plank so that every cut is equally deep. The next step was to remove all the black parts.
![]()
Everything fitted very well from the first time. I didn't expect that. The front is some plastic with an extra layer butter paper. I didn't found anything better at that moment.
![]()
The electronics are mounted on the backside.
![]()
On power-up the ESP shows some animations until it's ready for use. I added some separation planes inside to set apart the individual pixels, and make the animation beter visible.
![]()
The backside with de mini-usb power connector.
![]()
-
Webpage
07/10/2016 at 18:51 • 0 commentsWith all those calculations running it the background, I needed a way to display all the gathered information in some proper form. I also needed a way to configure the device. The solution, a web server running on the ESP.
The construction of the site wasn't done in one evening. It was a collection of small improvements over some months. This was because I never build a site before and it also took some effort to let it run smoothly on the ESP.
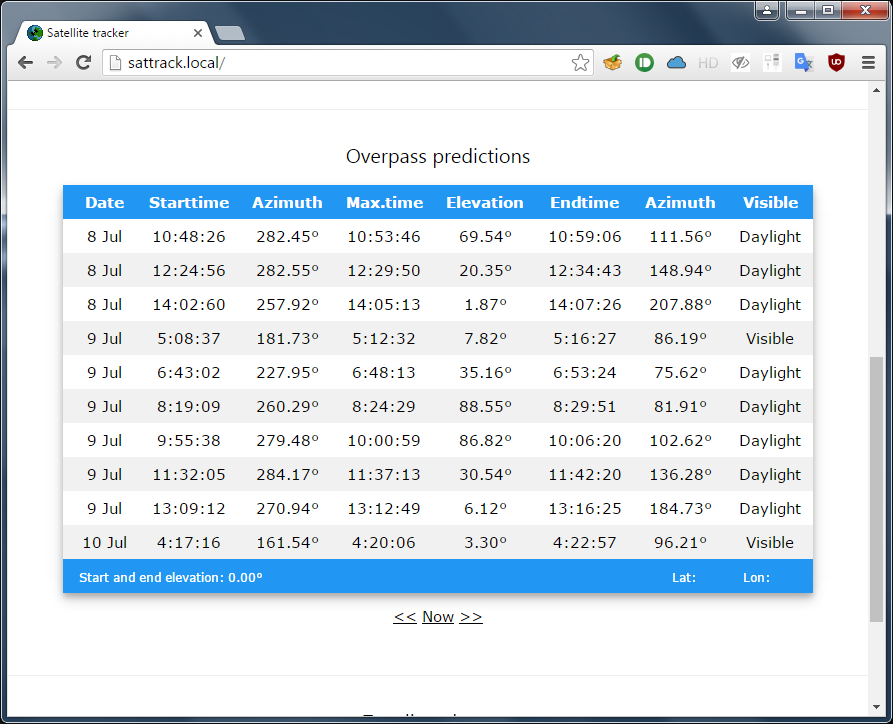
The first thing I added was a table with the next 10 overpass predictions. The ESP calculates the first 10 overpasses on startup, and keeps them in memory. When an overpass ends, it calculates a new prediction and add it to the list. I later added two buttons below the table to request more predictions (past and future). These predictions are calculated on the fly, so the ESP freezes for 1 à 2 seconds to do the work.
![]()
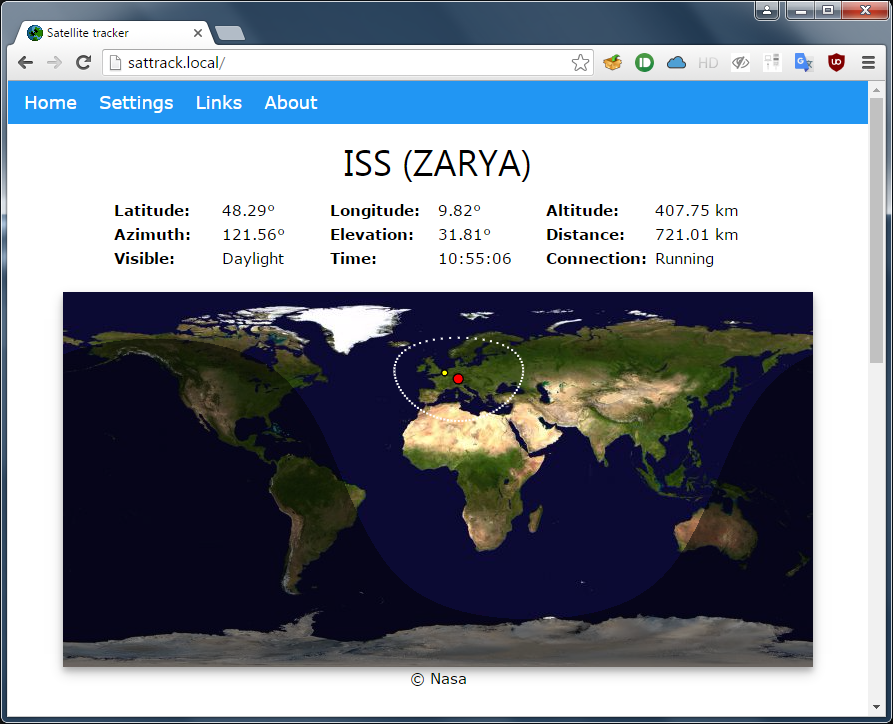
After that I added a web socket for showing the current satellite position. The ESP was capable of running one client at 100Hz (this while it constantly recalculates the satellite position). In the current program is the refresh rate limited to 30Hz because more isn't really useful.
The position is also displayed in real time on a world map. It's an equirectangular map projection so that it's easy to translate latitude and longitude to map coordinates. Then I wanted to add the satellite footprint. That's the region where the satellite is overhead. But drawing circles on an equirectangular map isn't that easy. I came up with my own formules for doing this after some trial and error, and added them in javascript. I found GChristensen script to show the day/night on a map, and added that to my project.
![]()
The red dot is the satellite, the yellow dot the location of the observer.
I still have some plans in improving the website. Drawing the orbit on the map could be useful, and I still need to add the time when the satellite enters/leaves the earth shadow.
-
The start
07/10/2016 at 15:56 • 0 commentsThe initial idea was simple: recreate this project, but with the cheaper ESP8266 Wifi-module. The ESP would catch the rise and set time of the ISS for a given location from open-notify.org , and turn some leds on when it's overhead. This was easily done but the API didn't tell anything about visibility or elevation of the overpass.
After I saw the video from Grady Hillhouse, I decided to implement the SGP4 model. I wasn't sure if the ESP was capabel of doing all those calculations, but after some tinkering around I got it working. Without any additional features the ESP can calculate around 300 satellite positions per second (at 160MHz).
With the information I found on Celestrak, I was able to write an algoritme for predicting overpasses. Calculating 10 overpasses takes around 1-2 seconds. After that I added some code to determine if the satellite is in the earth shadow or not. You can't see a satellite if it's eclipsed. So letting the user know if it's visible or not, can prevent a nightly walk outside to see the ISS passing by.
If you want to know the details on how to predict overpasses, I suggest reading the articles on Celestrak. I won't be able to explain it better.
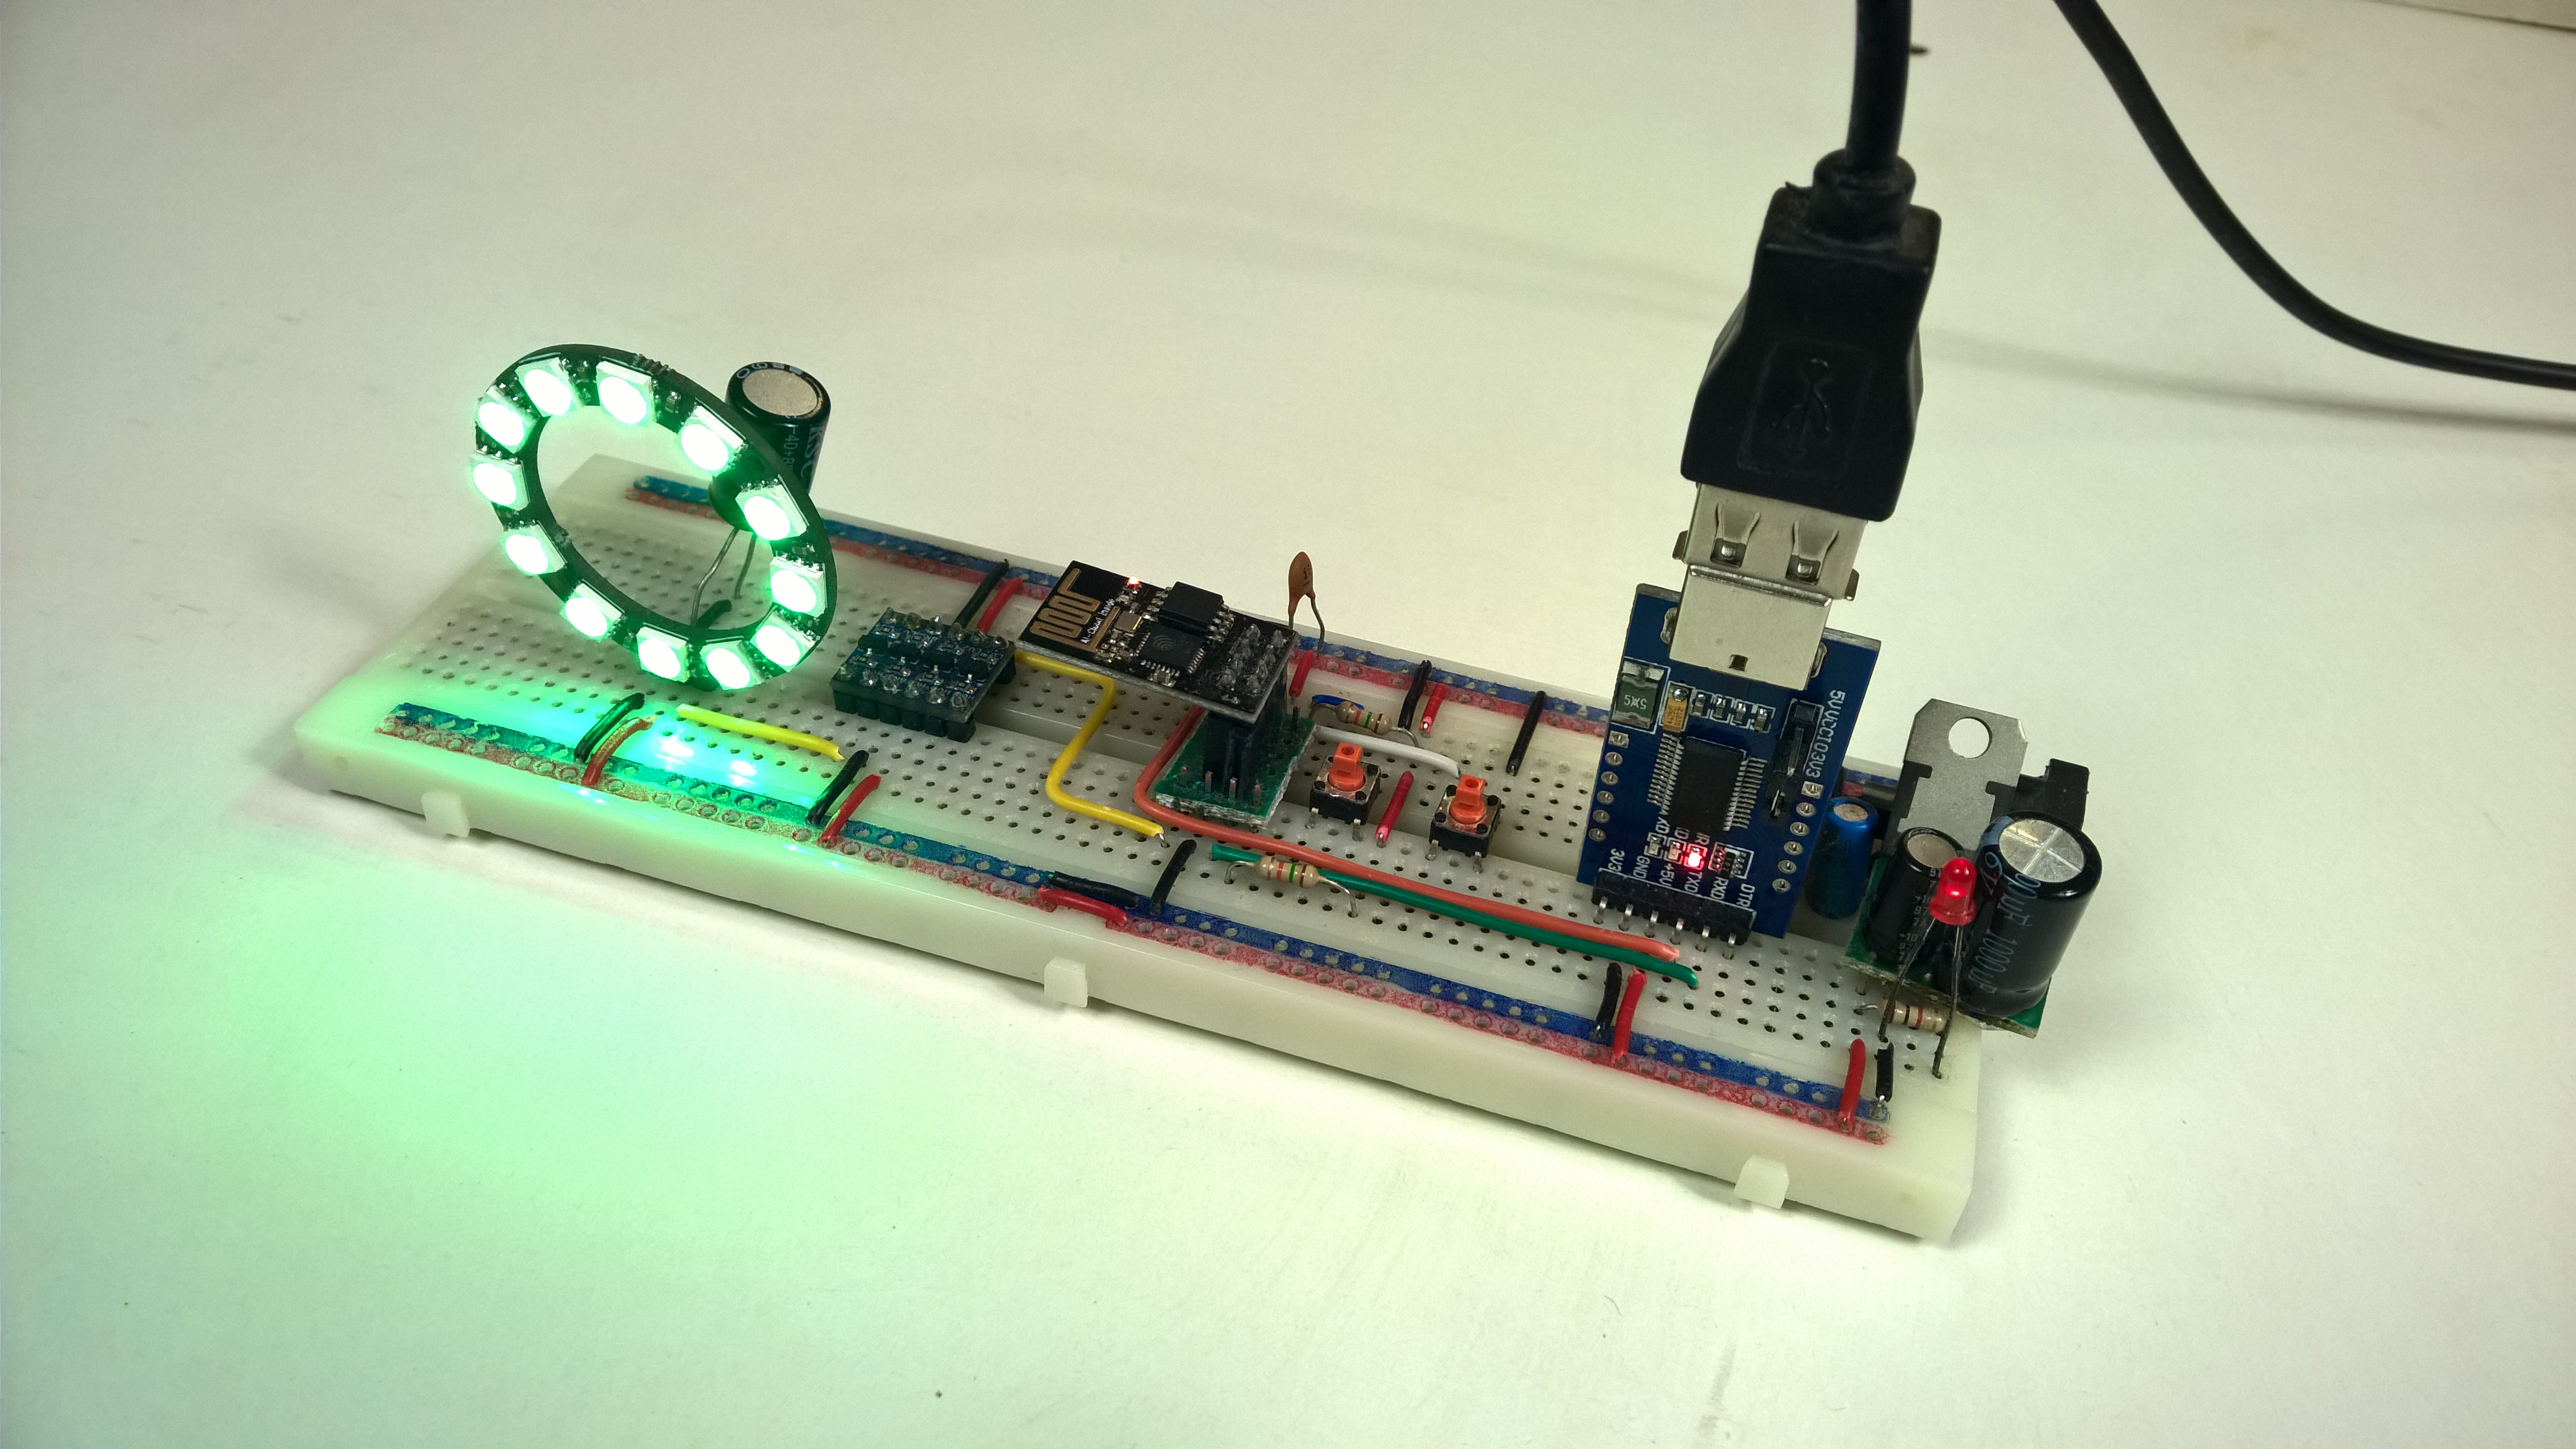
On the hardware side, there isn't much to see. You just need an ESP8266 with a power source and some WS2812b connected to GPIO2. I first used a level shifter between the LEDs and ESP because I wasn't sure if it was stable enough. But after trying without, I removed them.
![]()
ISS overpass indicator
Lamp that warns you when a satellite, like the ISS, is overhead.