As an electrical engineer , I enjoy monitoring all electricity variables, locally and remotely . And this is one of my humble projects that i would like to share.
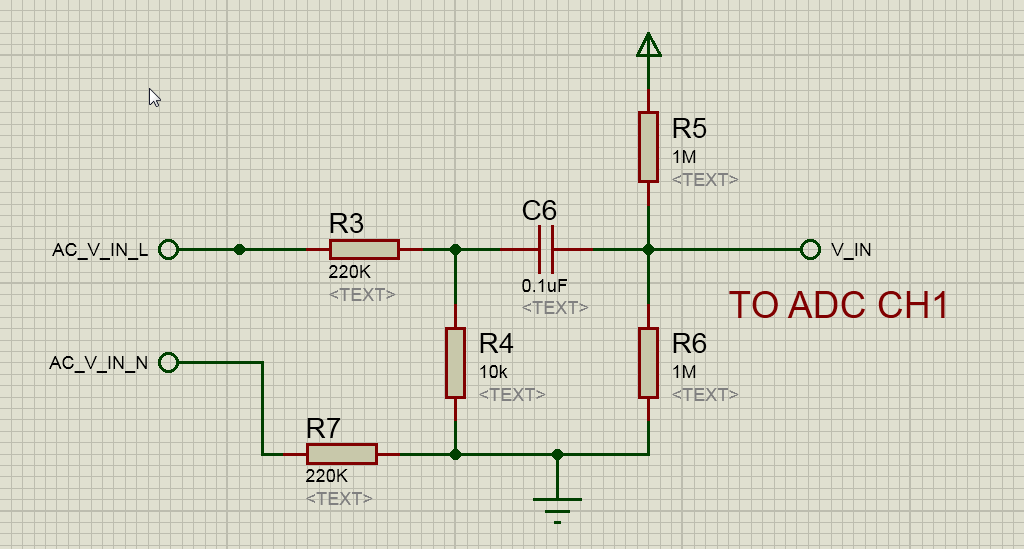
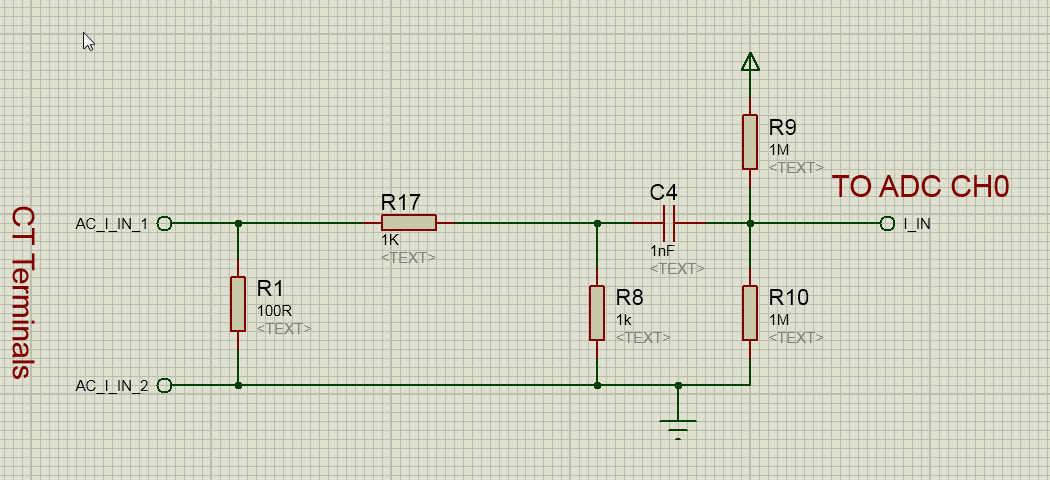
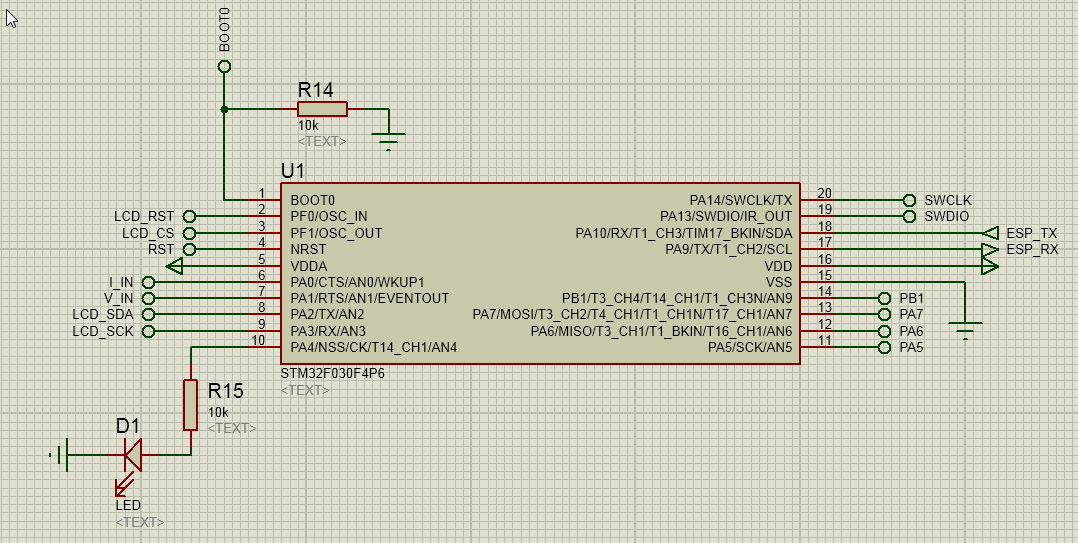
The circuit is very simple that uses an STM32F030F4P6 Microcontroller, LCD, ESP8266 and a few SMD resistors and capacitors. the basic idea of measuring AC voltage is to downsize the AC waveform using a resistor ladder , then DC-filtered and finally DC-biased to eliminate the negative part of the waveform by adding a dc voltage then enters to one of the ADC channels. the same principle applied to the current measurement except that I use a current transformer here (75/0.1 A) and a shunt resistor (100 ohm) across the CT terminals to convert the current into AC voltage then measure it using the same way described in voltage.
Current Front end:
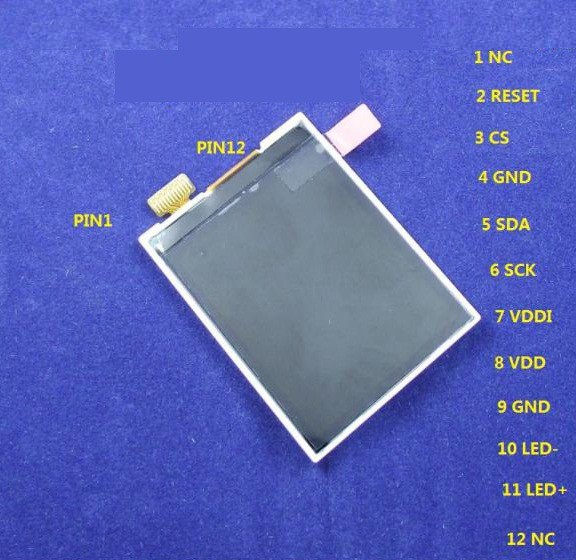
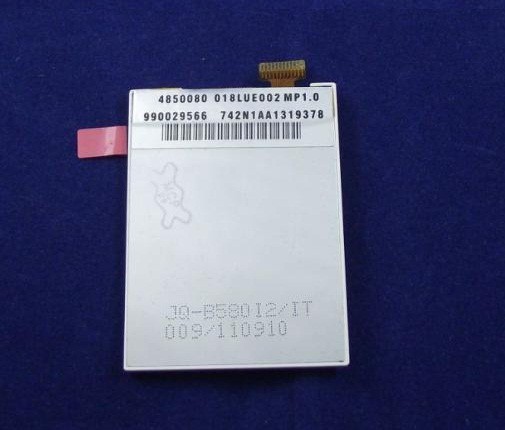
I used an LCD screen that's widely available for the very popular nokia low-end phones like Nokia 101, Nokia C1-00 , X1-00 and similar because it's very cheap ( about $1.5 in the phones repair shops in my country , Iraq) and it needs only 4 GPIO's to drive and the most important thing is that it doesn't need any connector and can be soldered directly to the pcb.
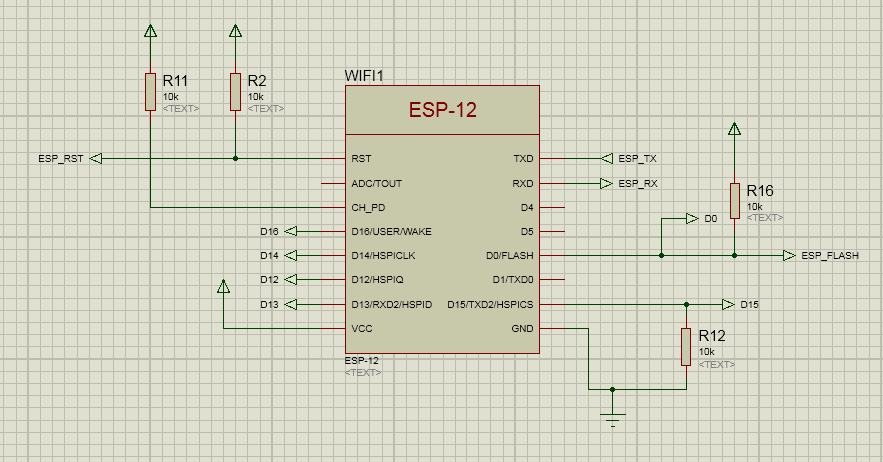
The ESP8266 module I used is the ESP-12 module with a jeelab/esp-link firmware and it's connected to the STM32's USART1 to transmit measurements and receive commands (like turning a relay ON or OFF since the board has a 4-GPIO's that can be used for this purpose) and the esp-12 is configured as STA mode (connected to my home's router)
as shown below:
The MCU part schematic:
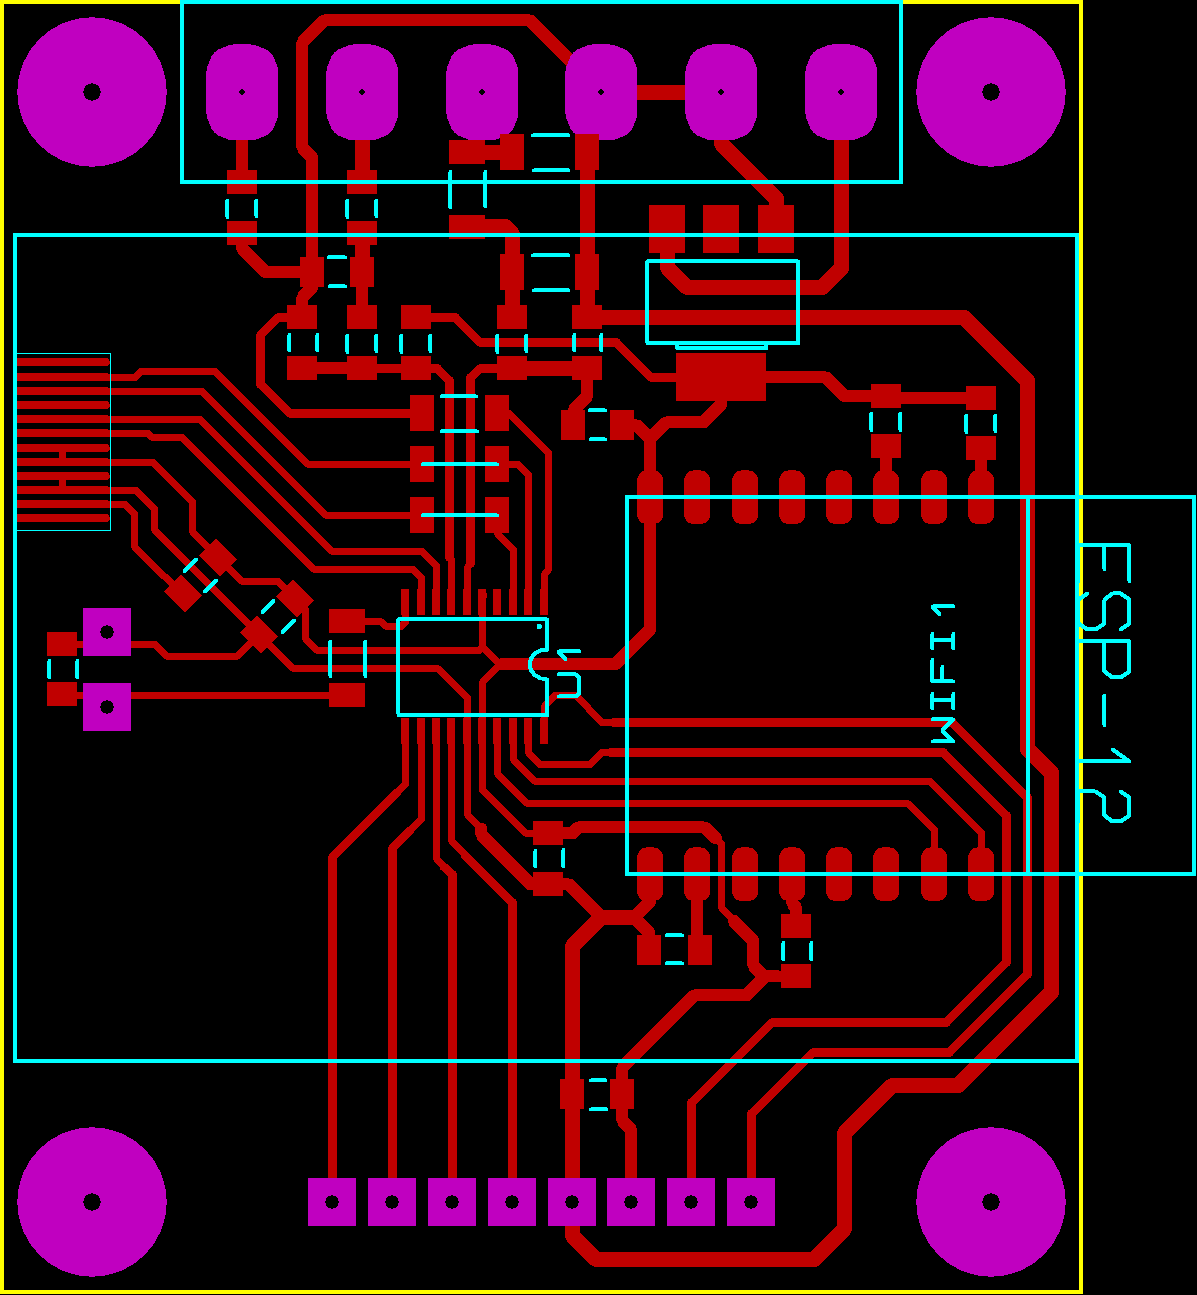
and this is the final pcb design (Using proteus):
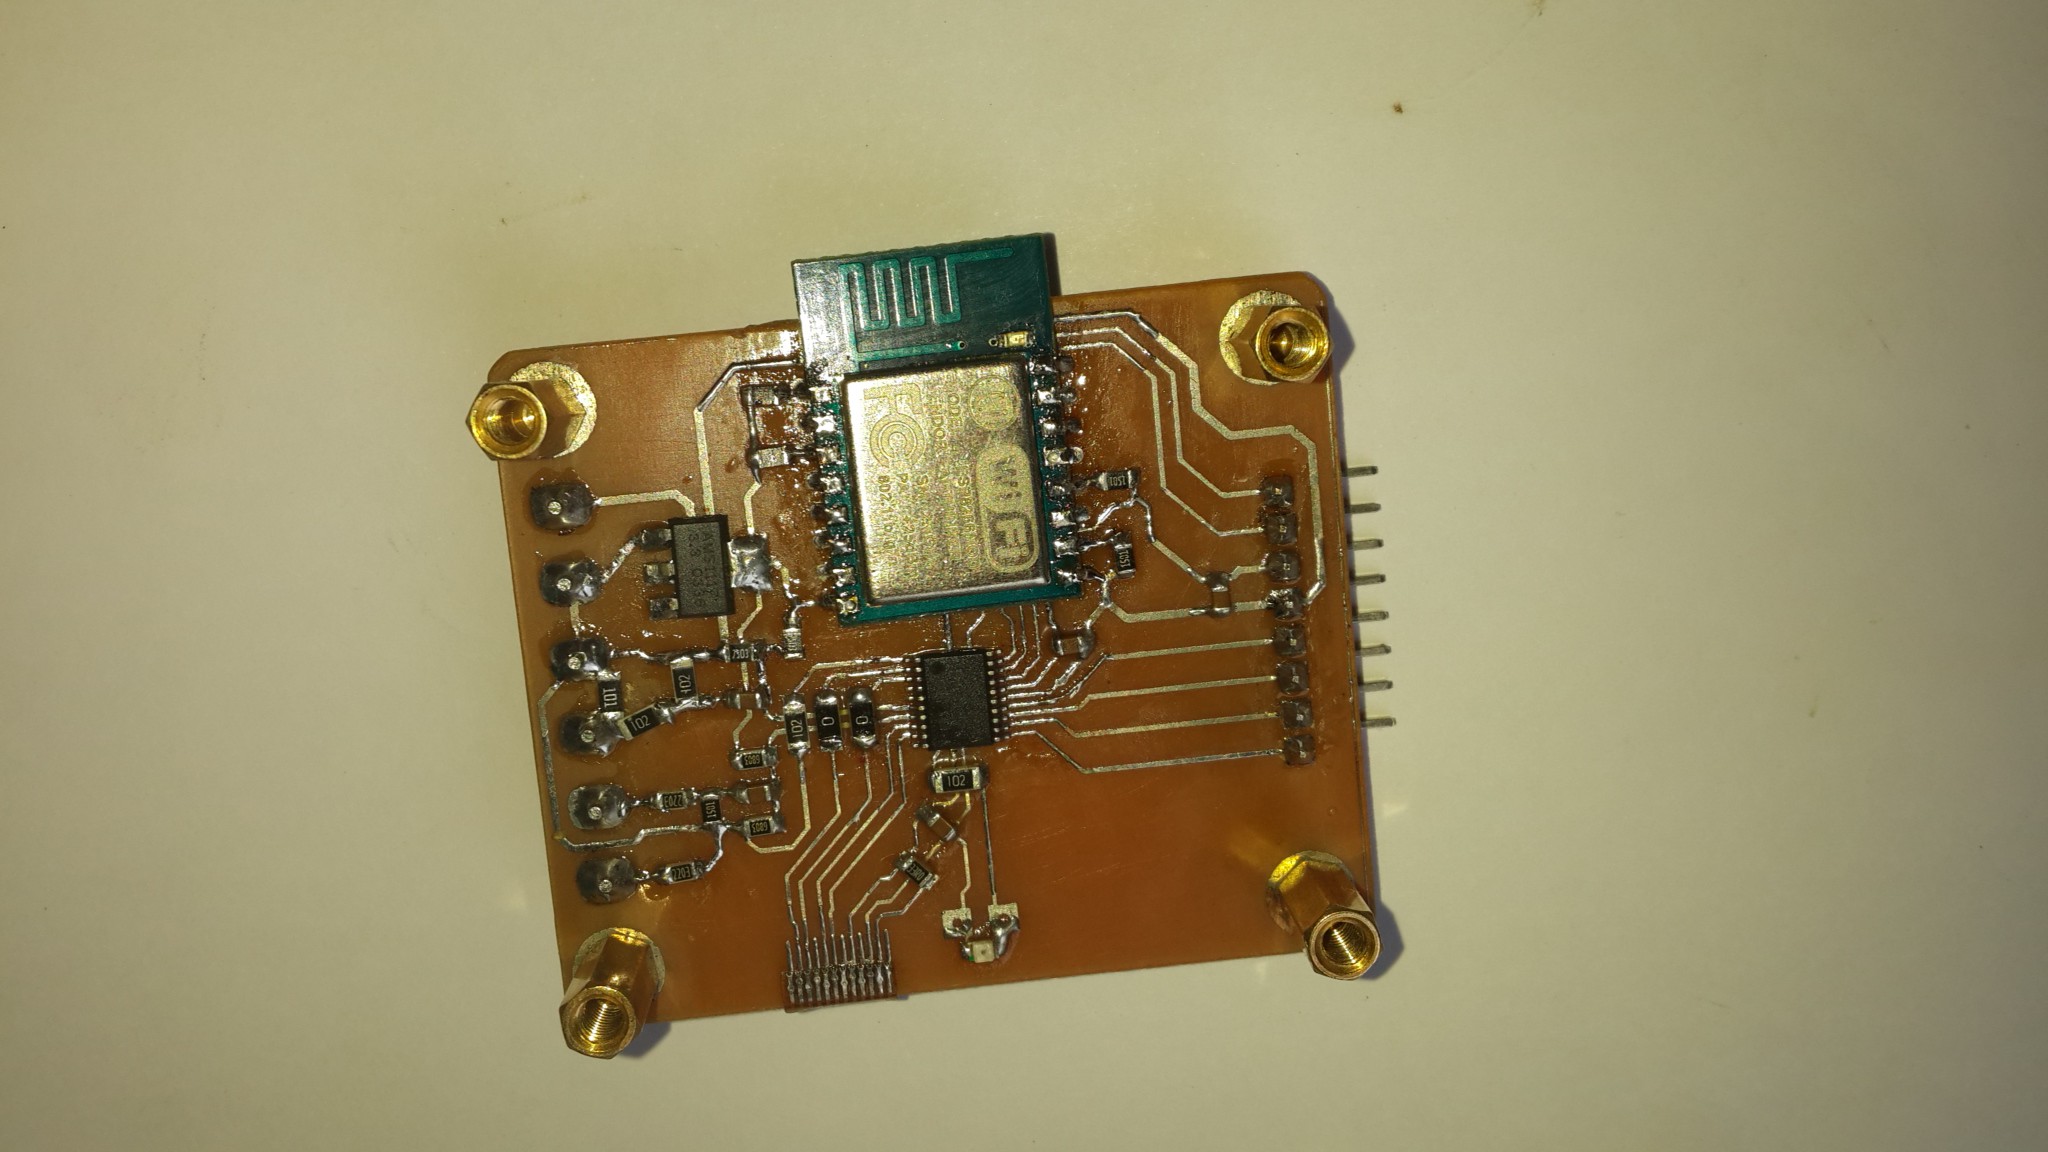
I used toner transfer method to make the pcb and this is the final result after placing components:
I'm using the free CoIDE to program the STM32 and ST-Link clone available from Chinese online sites to download the code to the microcontroller.
Android App;
I'm no expert in programming especially Android so I made a very simple app ( Version 0.0001) that connects to the TCP server ( ESP8266) ,reads and displays the variables and also Calculates the capacitor needed to make the power factor equals to 1.0. Here is a screen shot of the app:
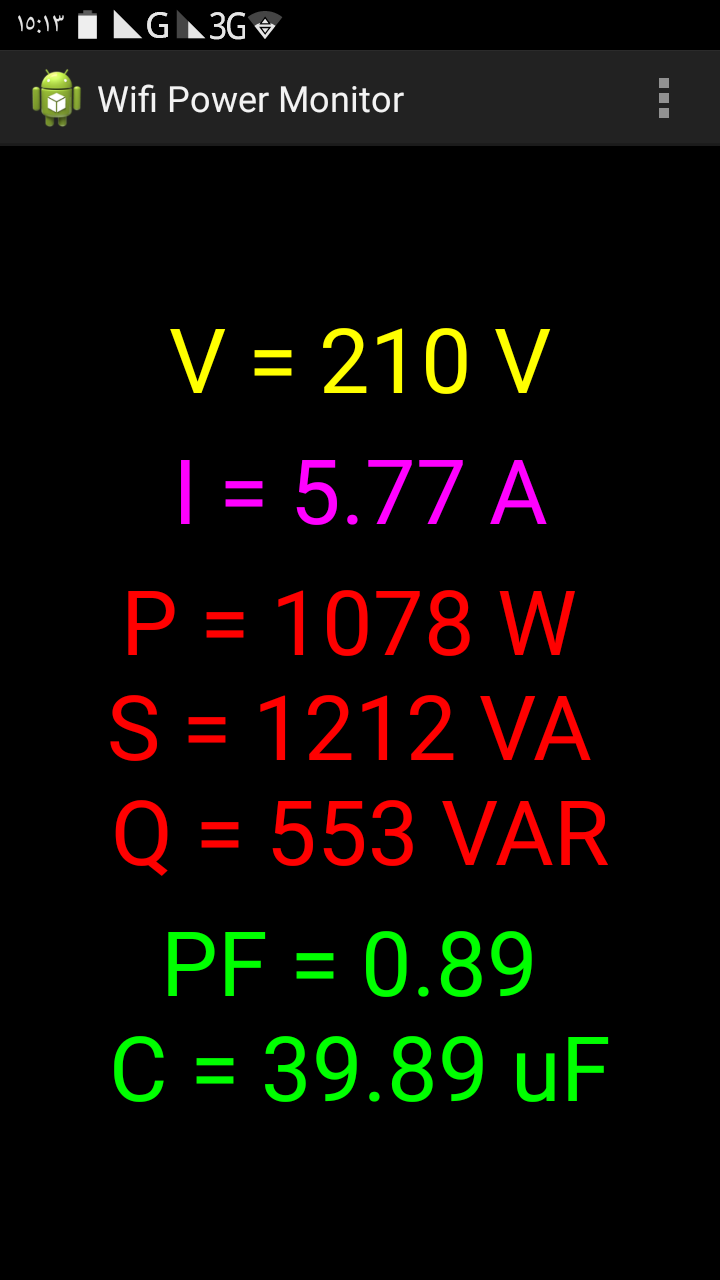
I'm planning to further develop the app and the firmware of the board to add over-current and over-voltage functions and use the exposed pins (4 GPIO's from the MCU) to control 4 relays for home automation .
Source files (mcu):
Source files (Android app):
Android App ( .apk ):
PCB and Shematic ( Proteus design file ):


This is great. Can you share how to connect the monitor to the esp8266 and its library