Vinch
Vinch-
Board v0.4: done!
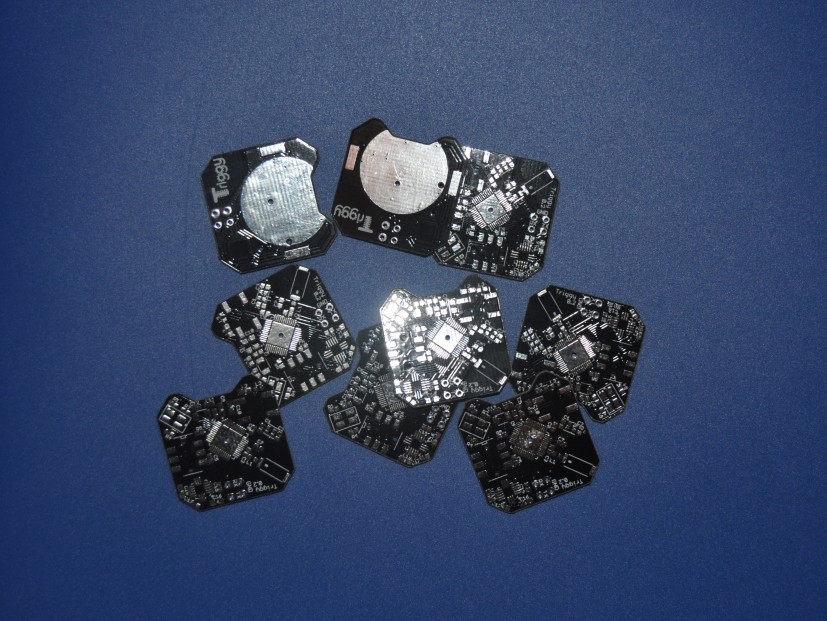
07/22/2018 at 20:06 • 0 commentsThe new revision of the Triggy Node has been built and verified to be functional today. Reminder: a new revision was required because the magnetometer MEMS MAG3110 was no longer fabricated. So I decided to use the LIS3MDL which works perfectly. It is also the lowest power consuming among the 3 magnetometers I experienced.
Schematic has been added in the git repo.
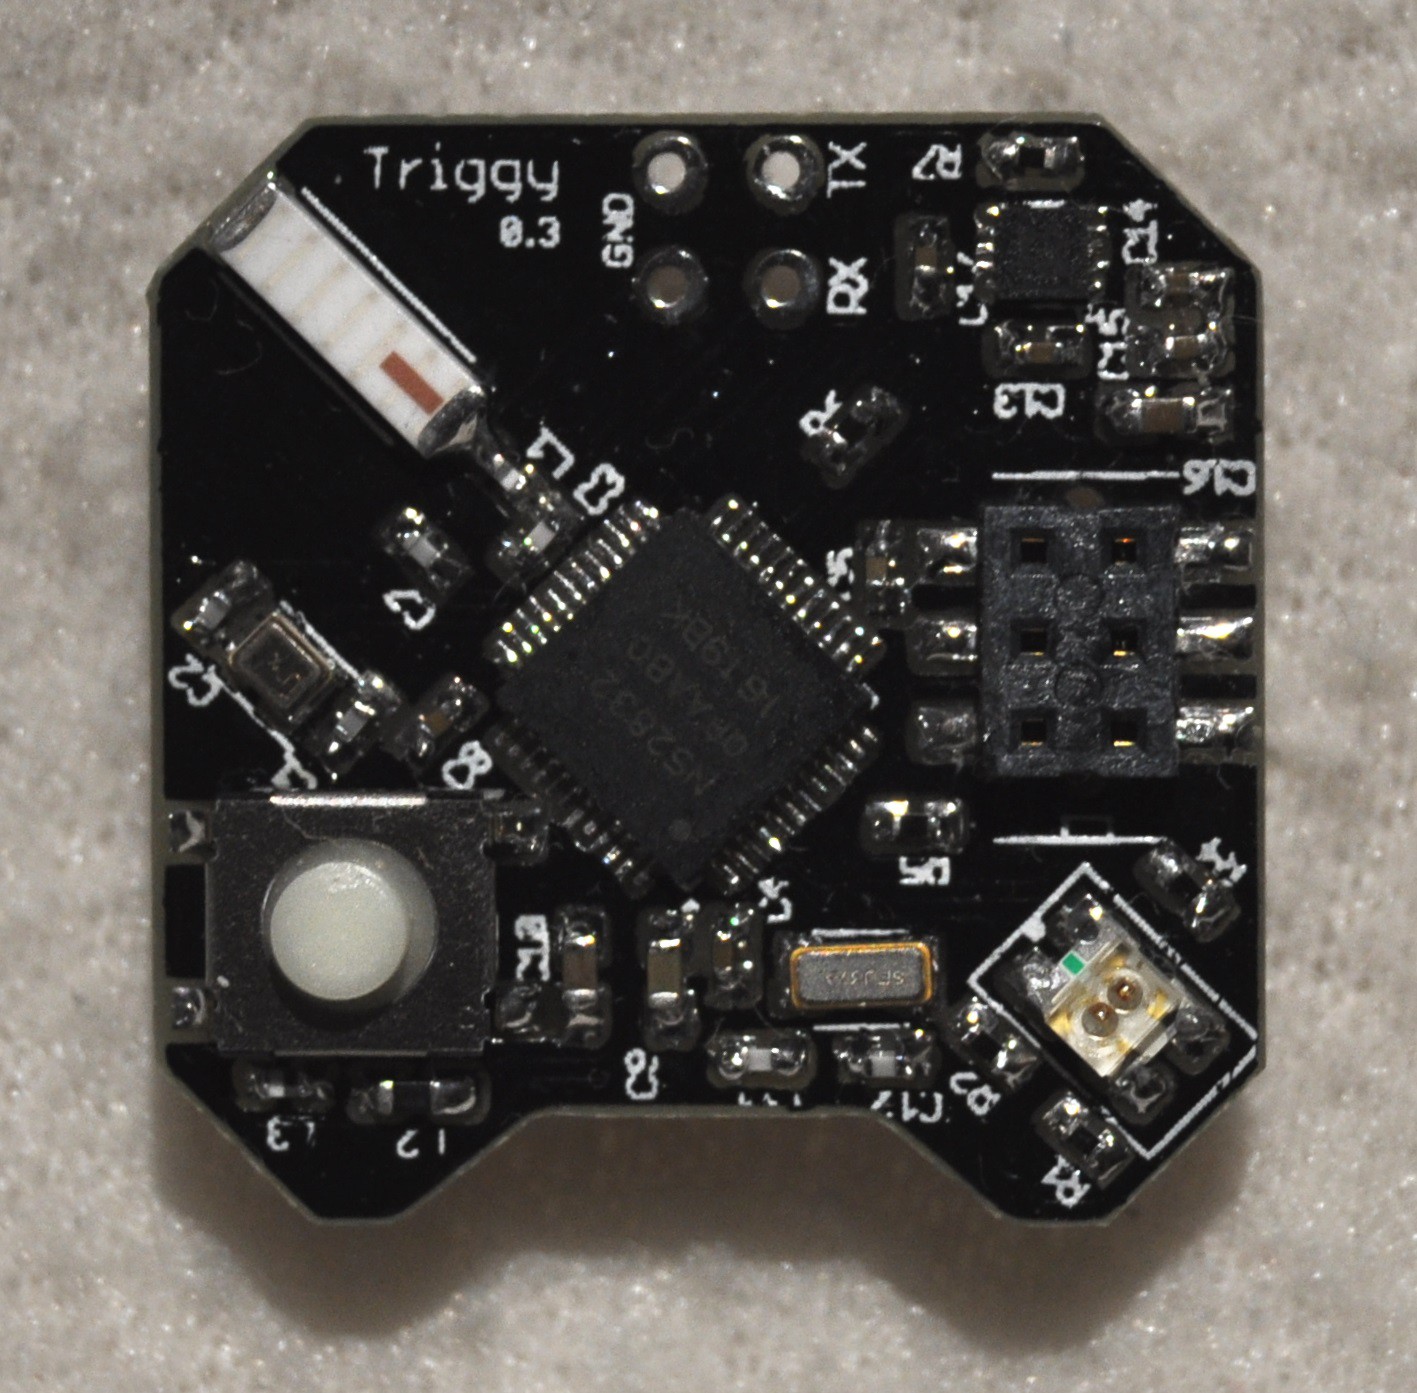
As seen on the picture below, the design is very close to the 0.3 version, only the part around the magnetometer has changed.
![]()
-
Toward a new board revision
06/07/2018 at 14:59 • 0 commentsThe world of electronic components is evolving quickly: new chips appear, older ones disappear... I've recently discovered that the magnetic sensor (again) used in the version 0.3 of the board, a.k.a. the MAG3110, is discontinued. So I had to find a new component to replace it, otherwise no new board could be built. The most obvious choice was the LIS3MDL from STMicroelectronics. Not a big deal as not very different, but now I have to redesign the board and have it fabricated.
I'll post a new log when all this is done.
-
Usages Collection 5-9
05/13/2018 at 13:19 • 0 commentsFive new Triggy usages have been added in the Files section. These usages are:
- Intrusion detection and logging system
- Thermometer with recording function
- Emergency SMS
- Fridge/freezer door alarm
- A handy reminder
-
Usages Collection
03/24/2018 at 13:55 • 0 commentsAt first glance it can be difficult to figure out what can be done with Triggy. However this project is really focused on usages and possibilities to offer a solution in a lot of embarrassing situations. Consequently, I started to create a booklet gathering use cases I've identified. It will take time to describe all of these use cases, but as a first step I've put the first 4 usages in the Triggy_Usages_1-4.pdf document (in the Files section). These usages are:
- Smart doorbell
- Automated vibrate/mute
- Anti-theft alarm (for things)
- Where is my phone?
More to come. Good reading.
-
Triggy Hub Android application
12/15/2017 at 15:08 • 1 commentI've been working on the Android app for a long time now, as the workload to embed all the features I wanted is quite heavy for a software team of ... 1 guy.
Finally, I believe that today the app development reached a step where it is decently functional (even if a lot more testing is required) and it is graphically quite satisfying to me.
Let's summarize what can be done with this app:
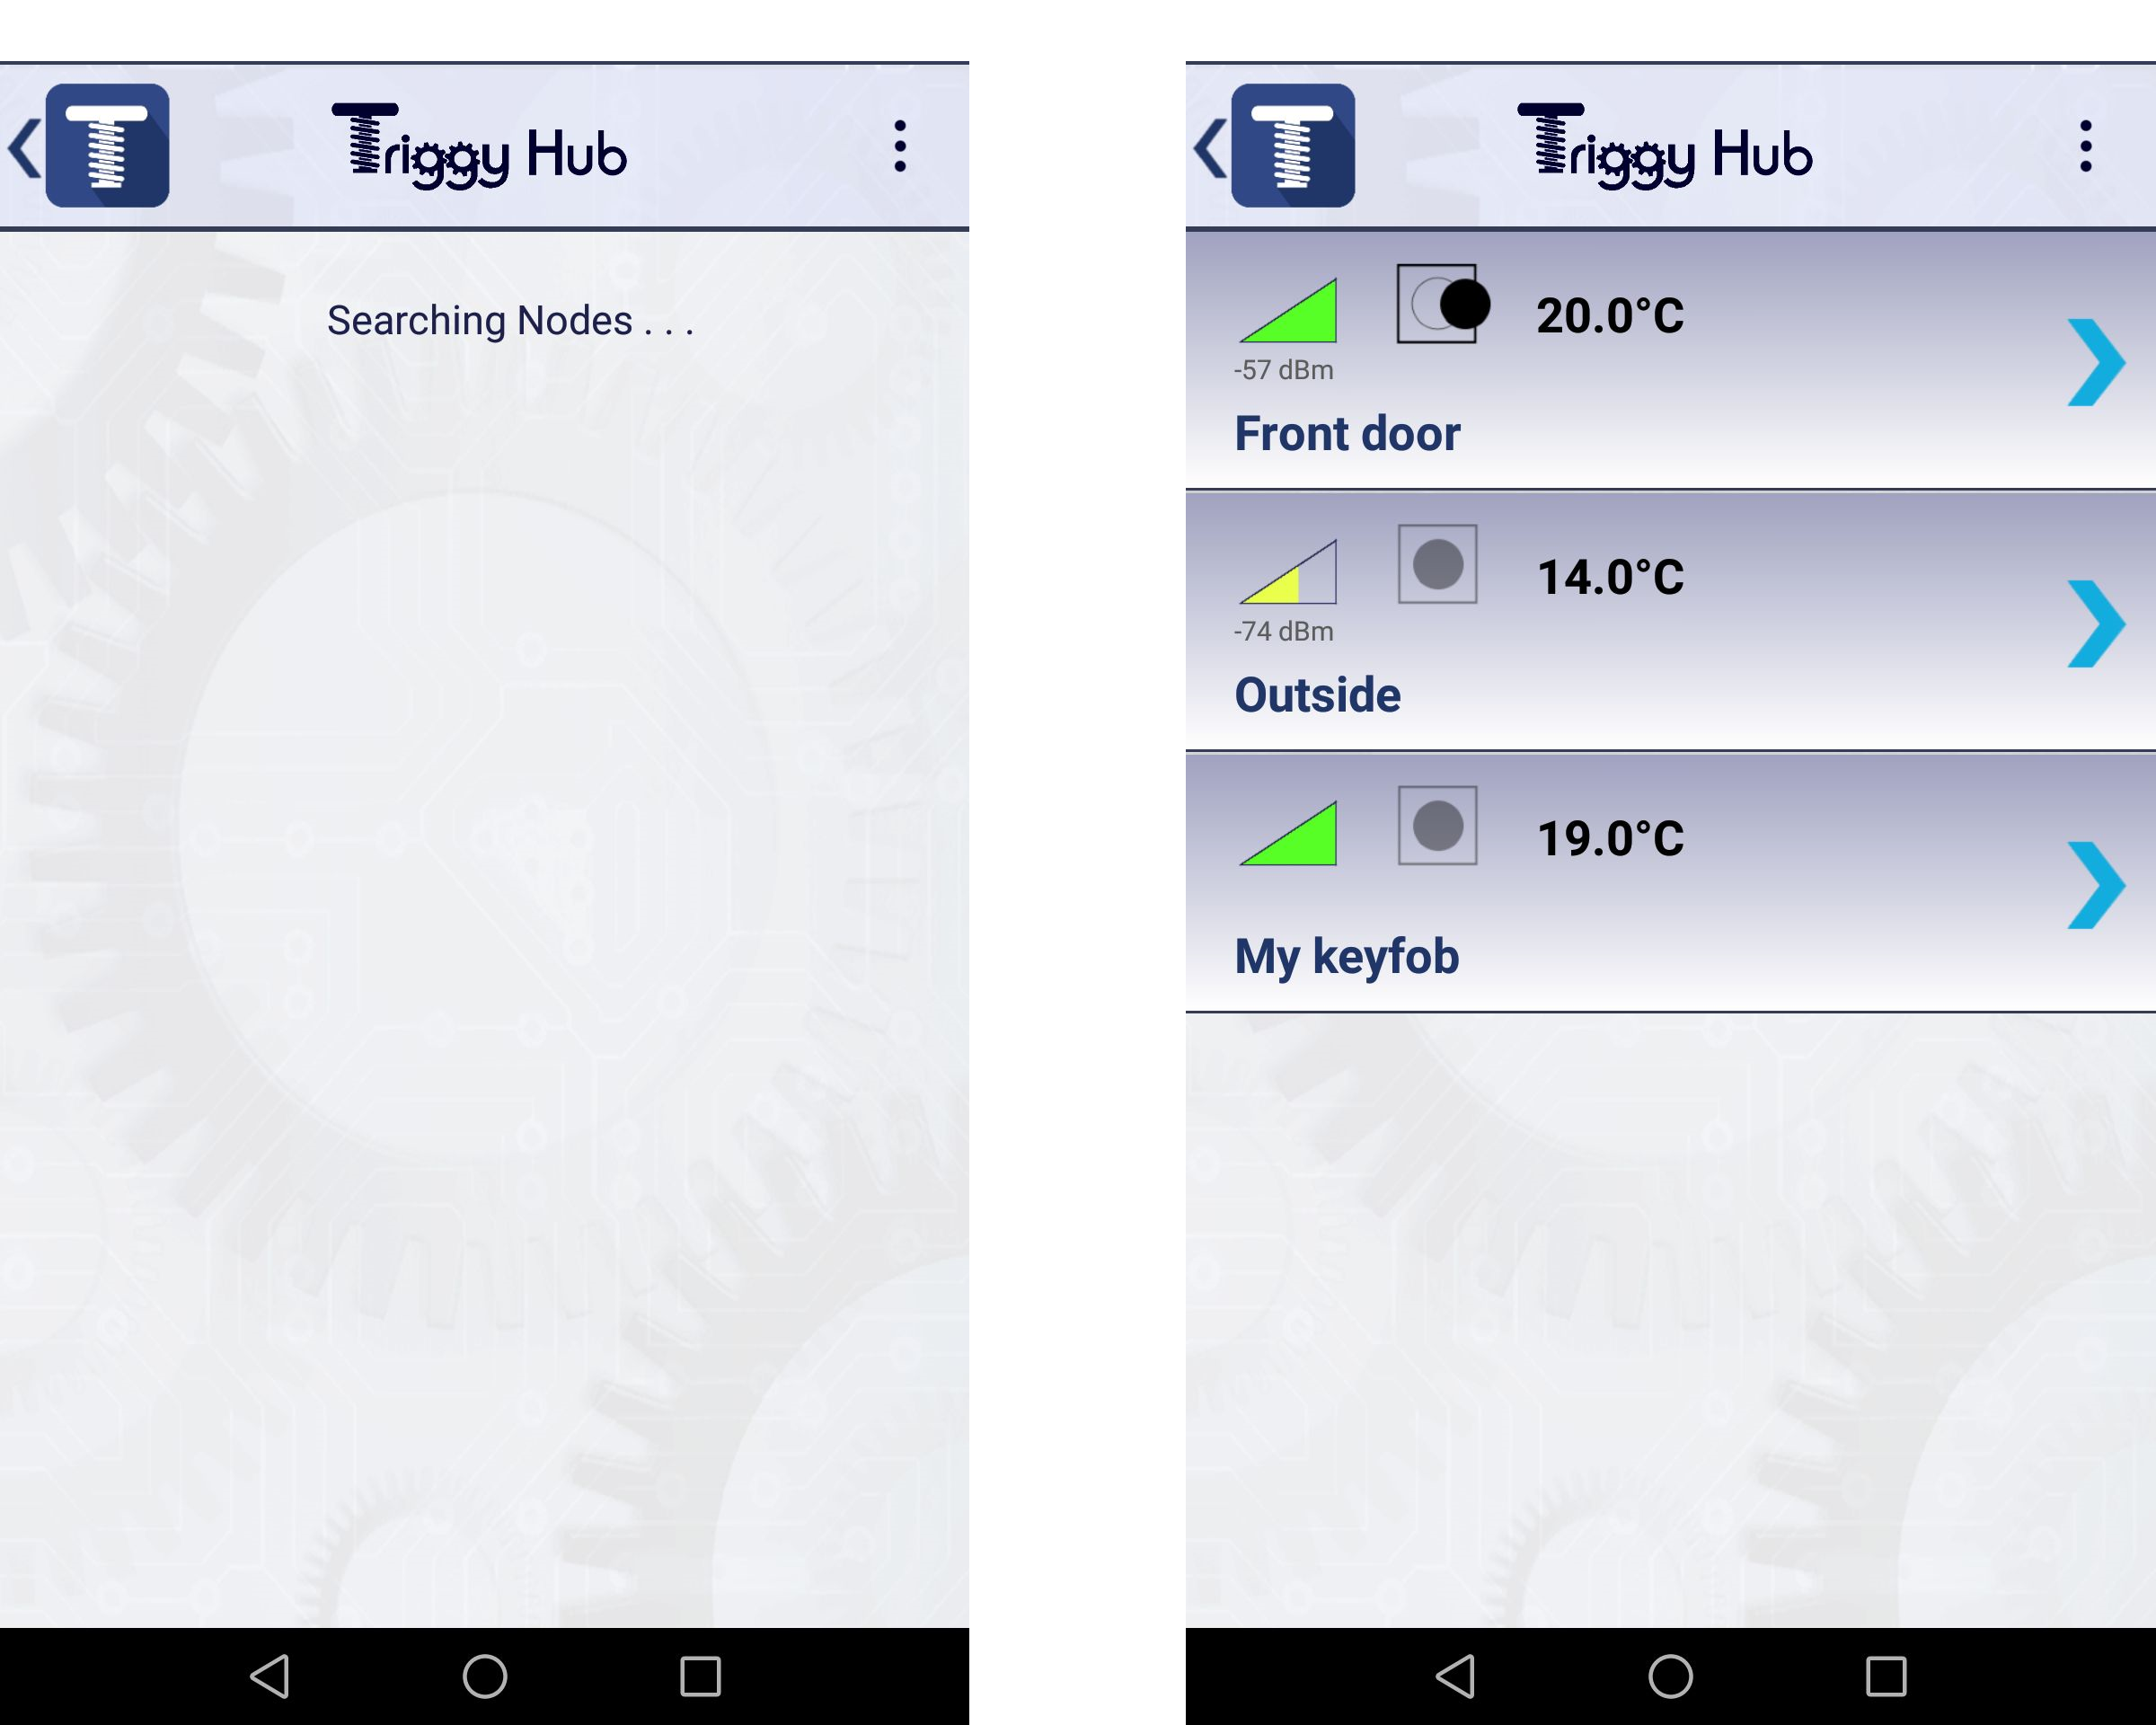
1. Find and list all nearby Triggy Nodes. Some information about the status of each node is provided on the main screen: device name, RSSI/proximity, temperature, displacement status. Below a screenshot with 3 Nodes already configured:
![]()
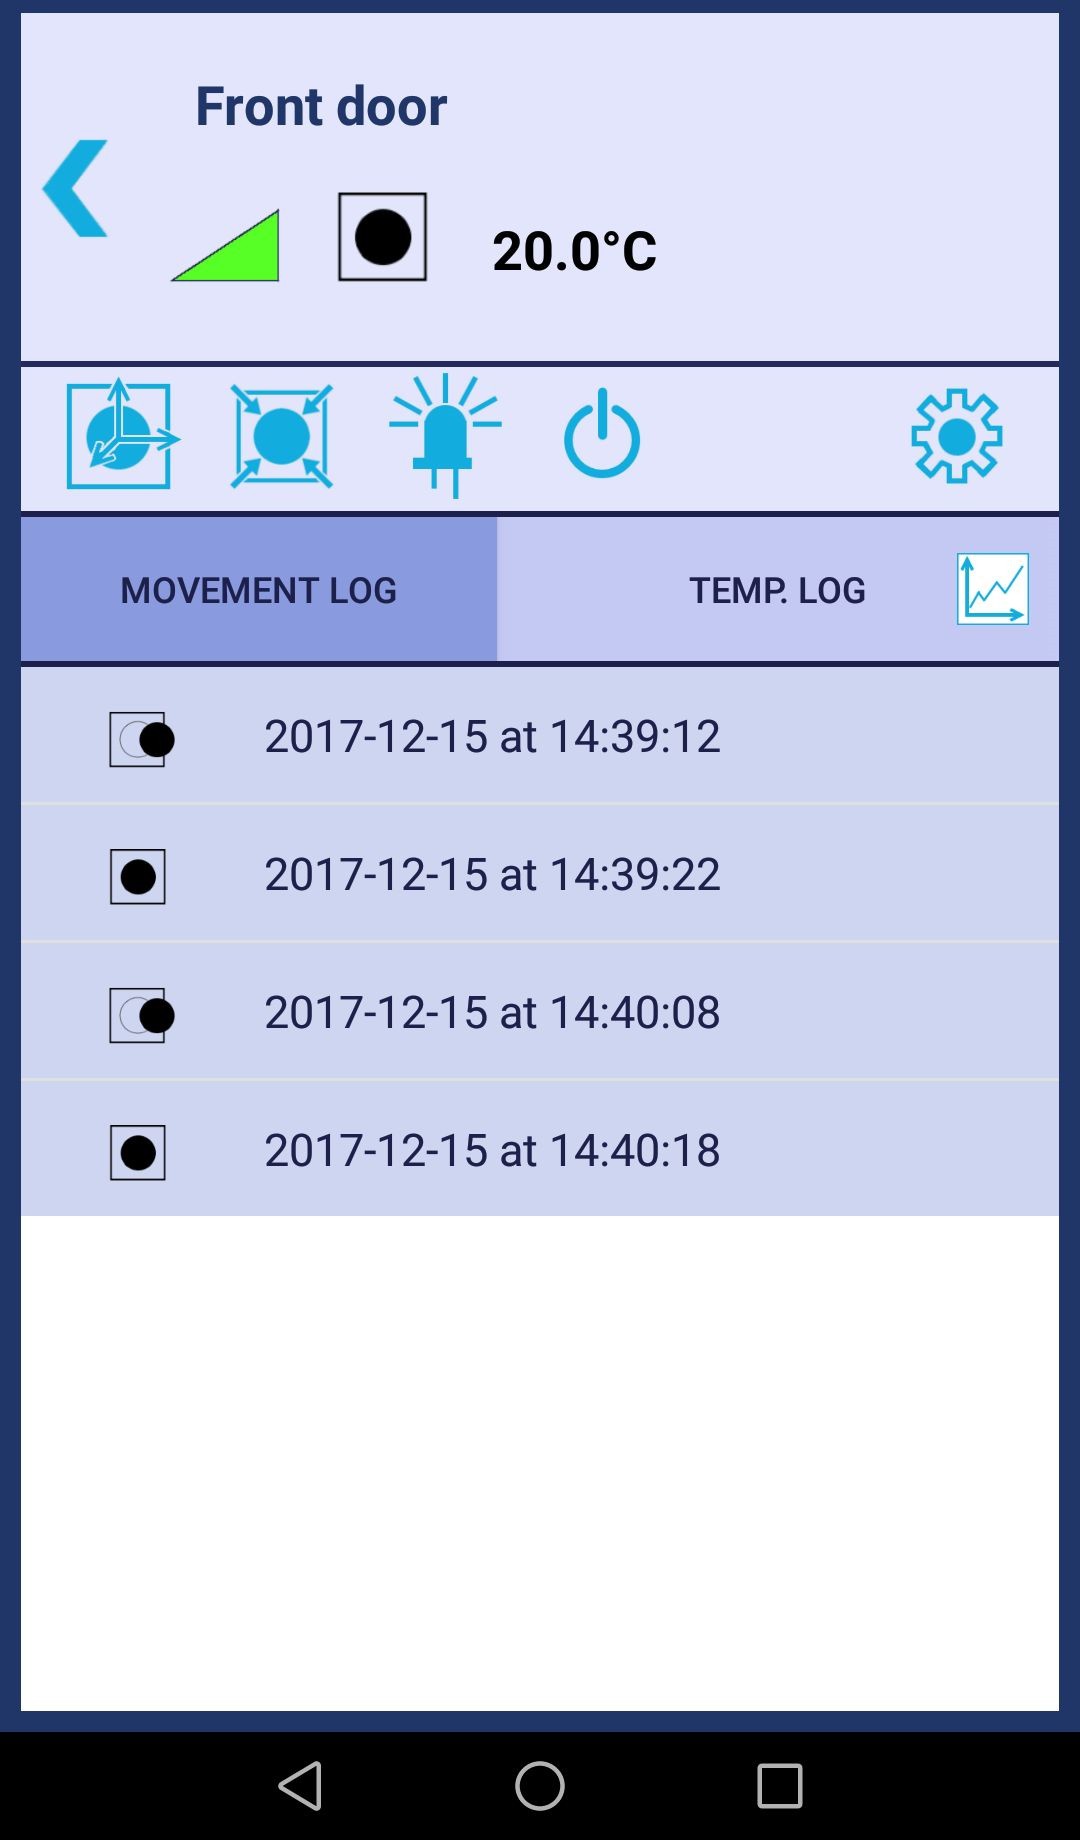
Main screen a) Searching Nodes b) 3 Nodes found 2. Each Node can be accessed more deeply by clicking on the right arrow. This brings the Node connection screen where several control and status are available:
- Sensors status
- Enable/disable/reset position for displacement tracking
- Make the led blink to identify the Node
- Shut it down when not used (no battery removal required)
- Access the Node configuration
- Temperature and displacements logs
![]()
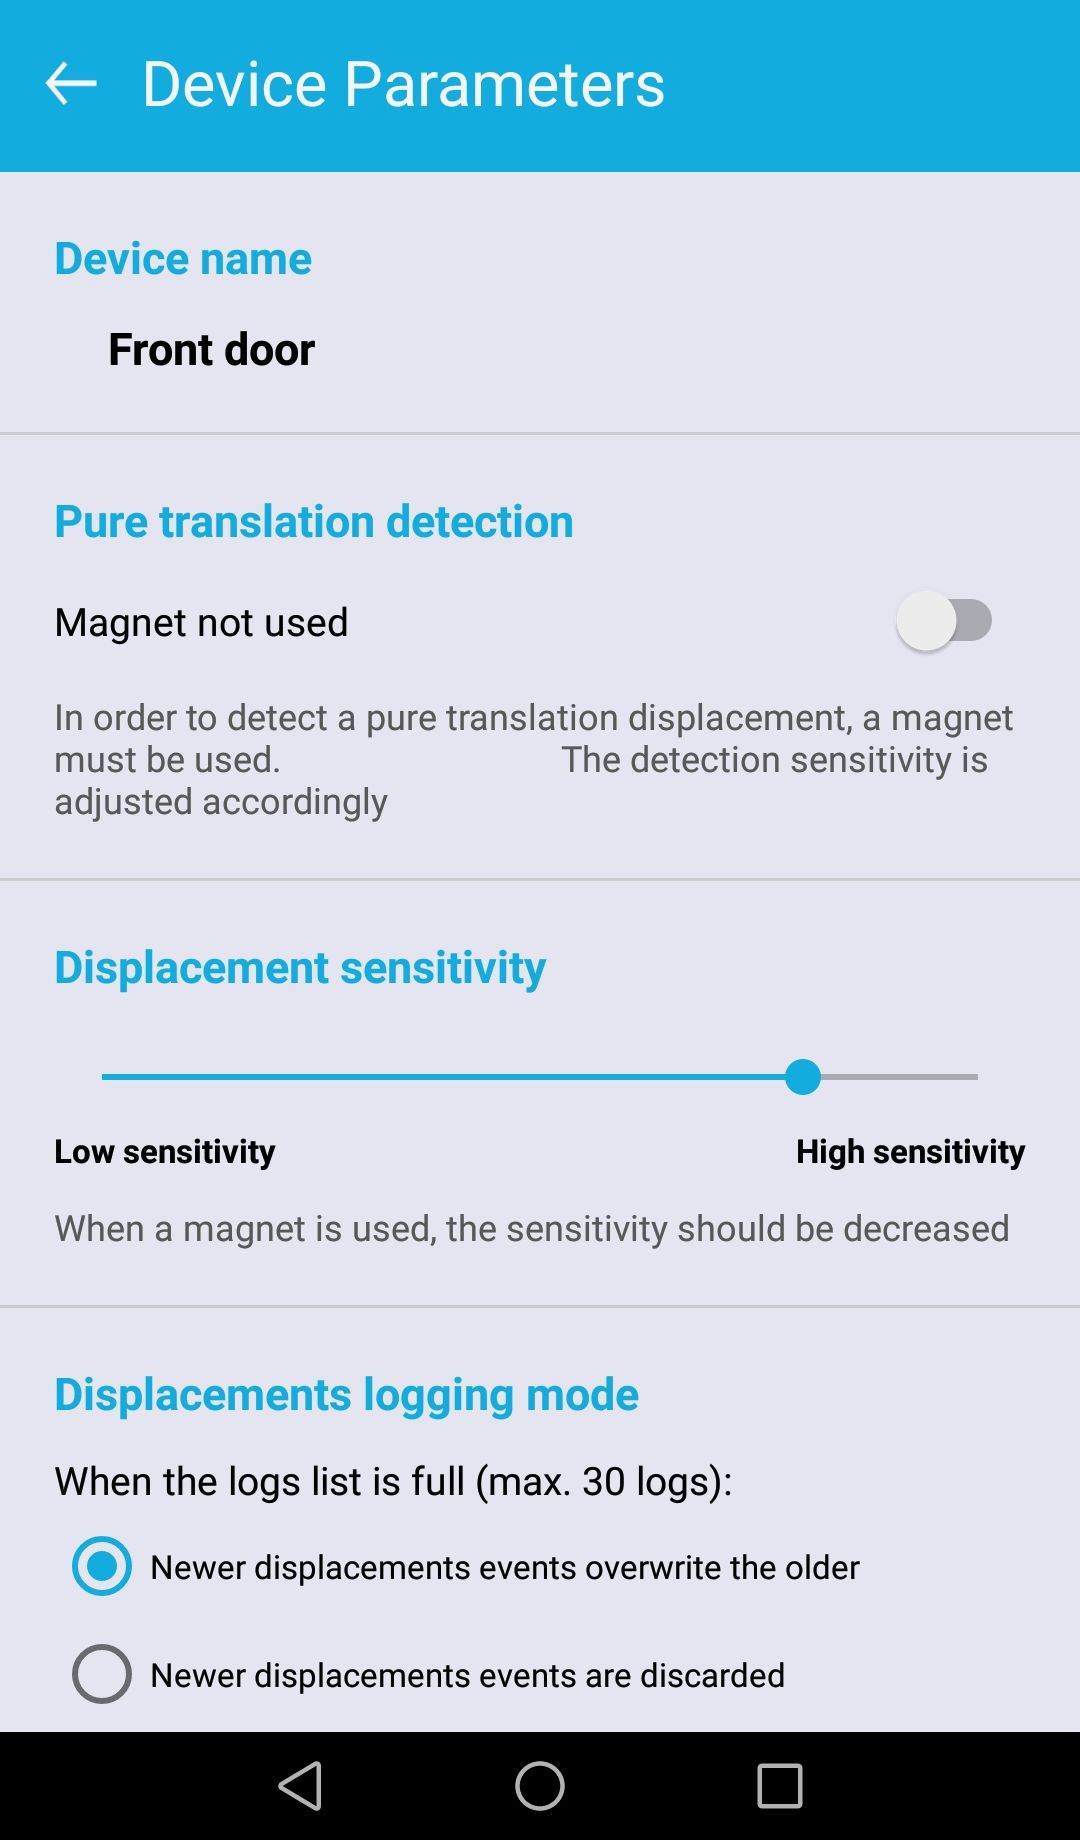
Connection screen, movement log shown 3. Node Configuration screen allows to adjust some parameters of the Node:
- Device name
- Displacement detection sensitivity
- Temperature compensation
- Exclusive link: only this Android phone/tablet can see/connect this Node when enabled
![]()
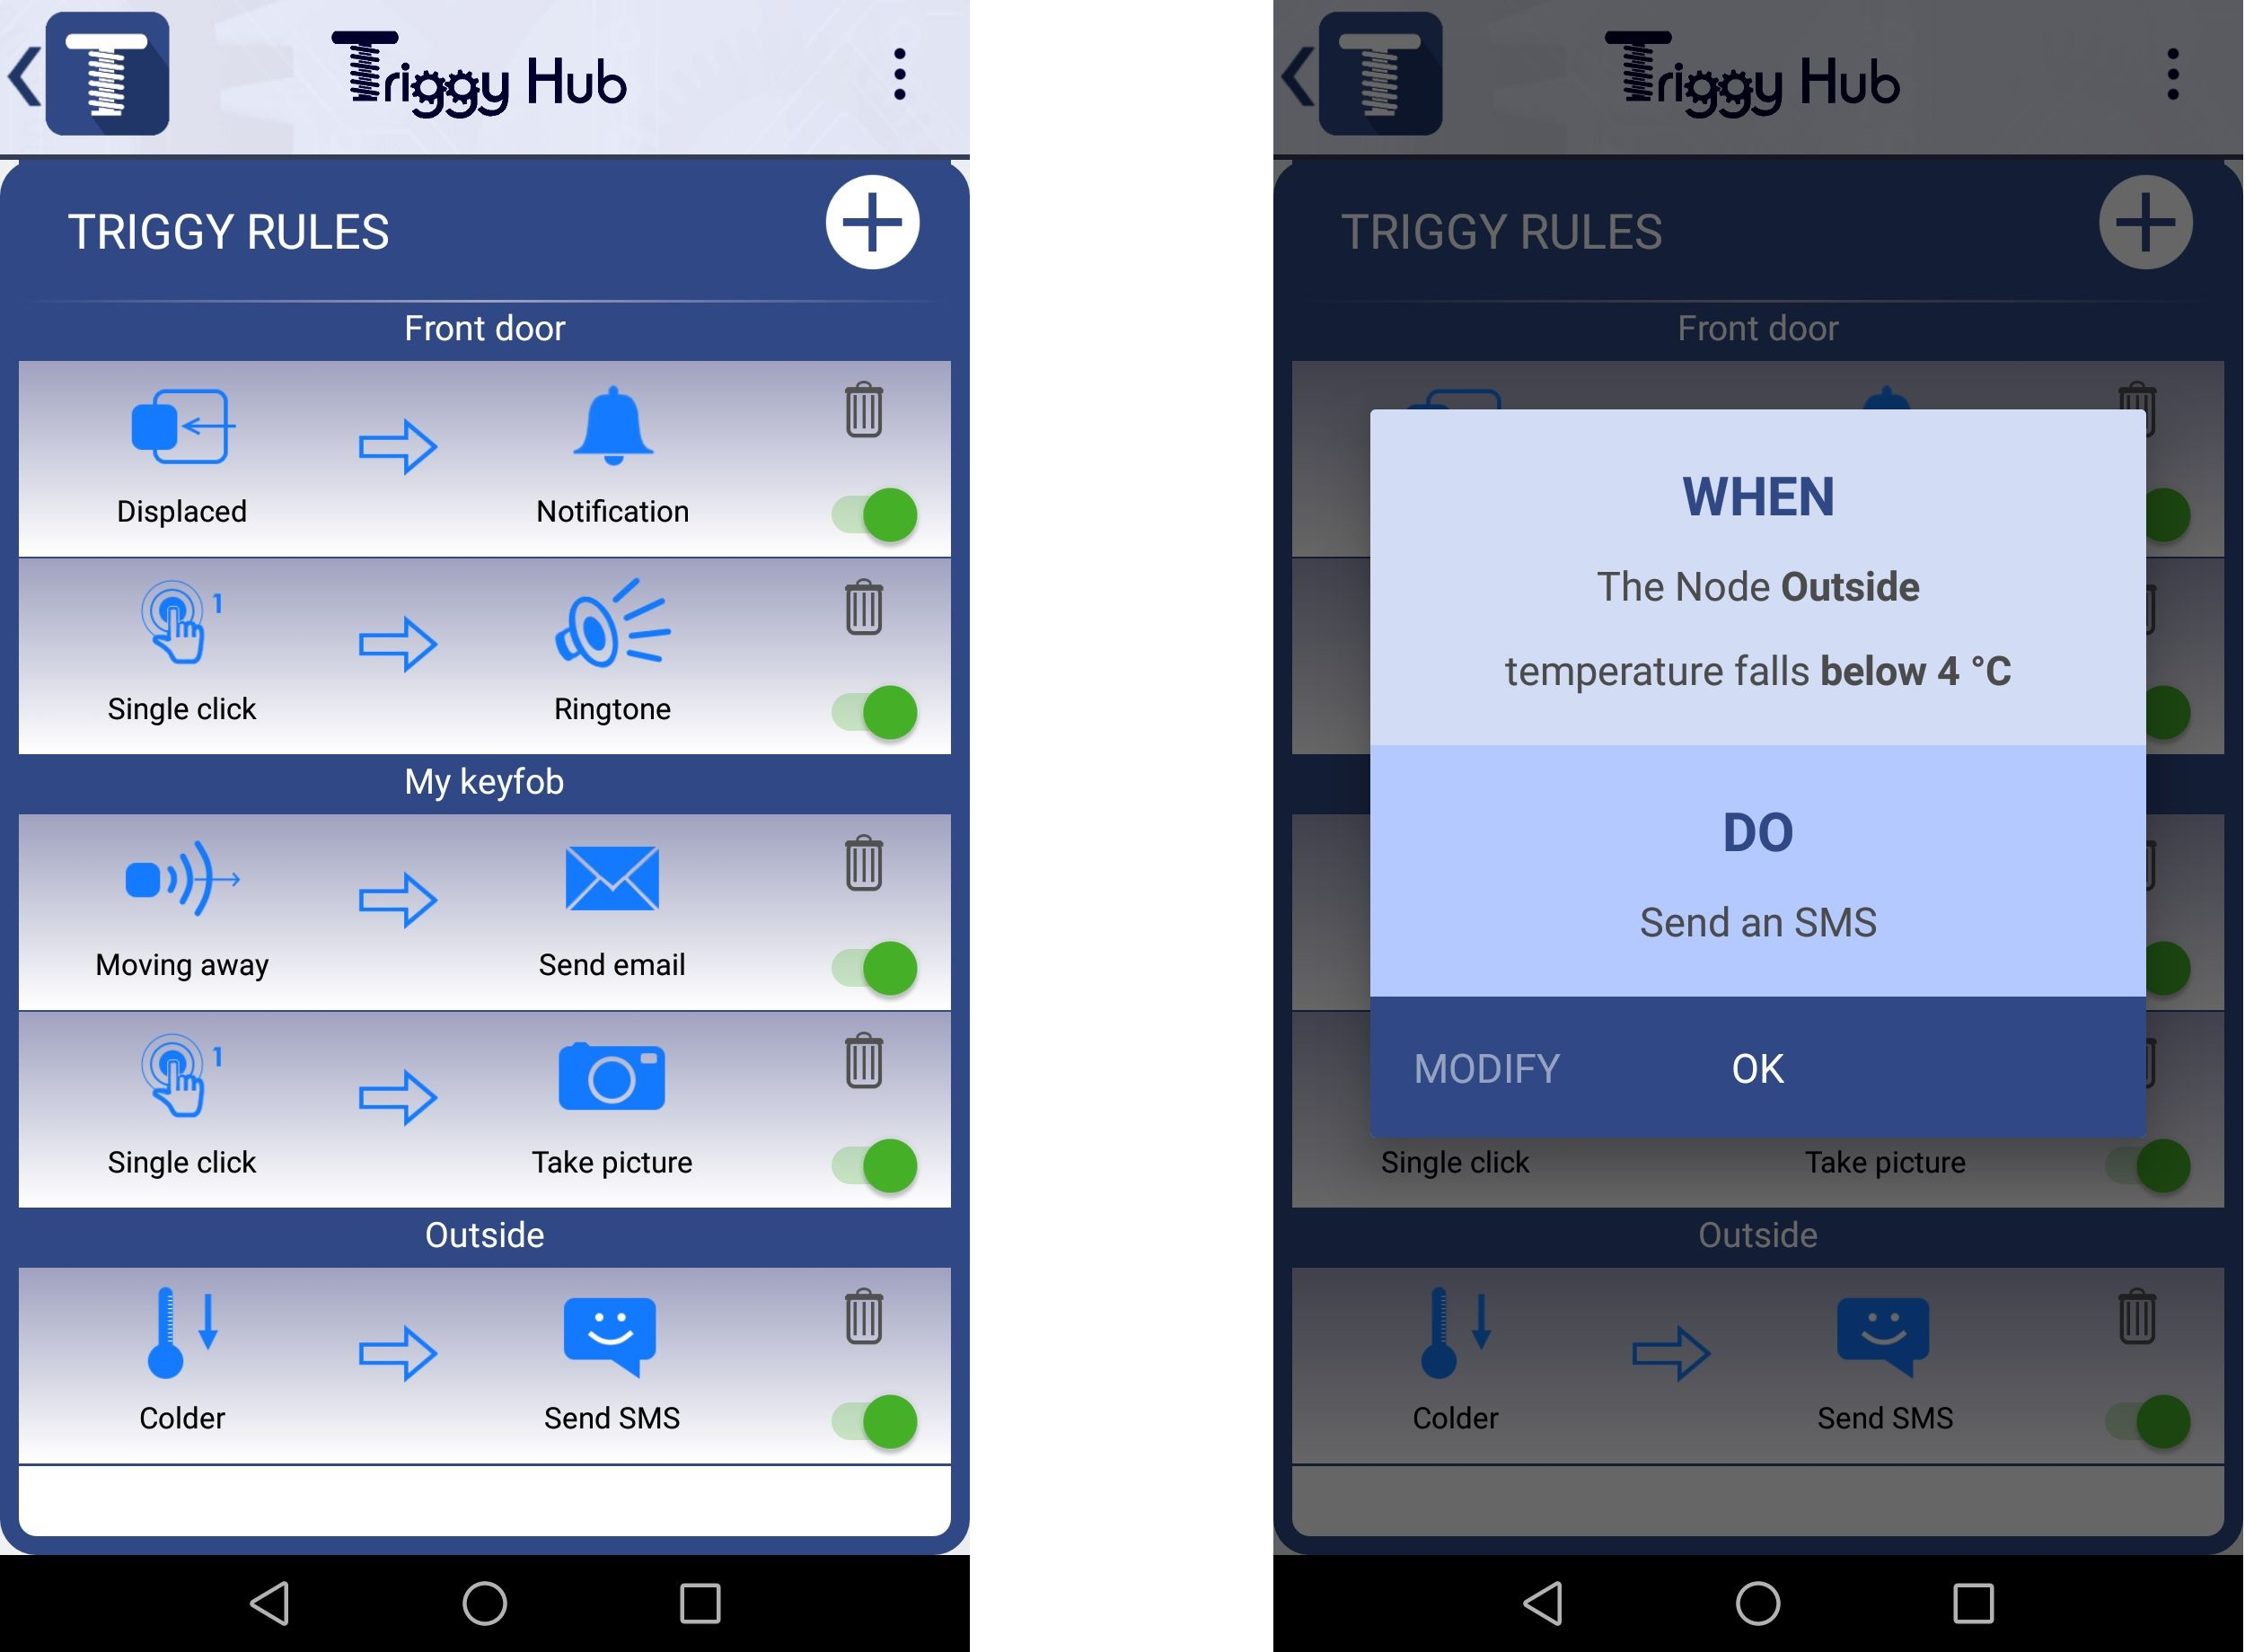
Node configuration screen 4. Back to the Main screen, clicking the app icon brings the Rules List pane. This provides information about currently created rules. Recall that rules allows to trig actions from the sensors state change. Each rule can be deleted, enabled/disabled or modified. Also when clicking on a rule, a summary of what it does is provided.
![]()
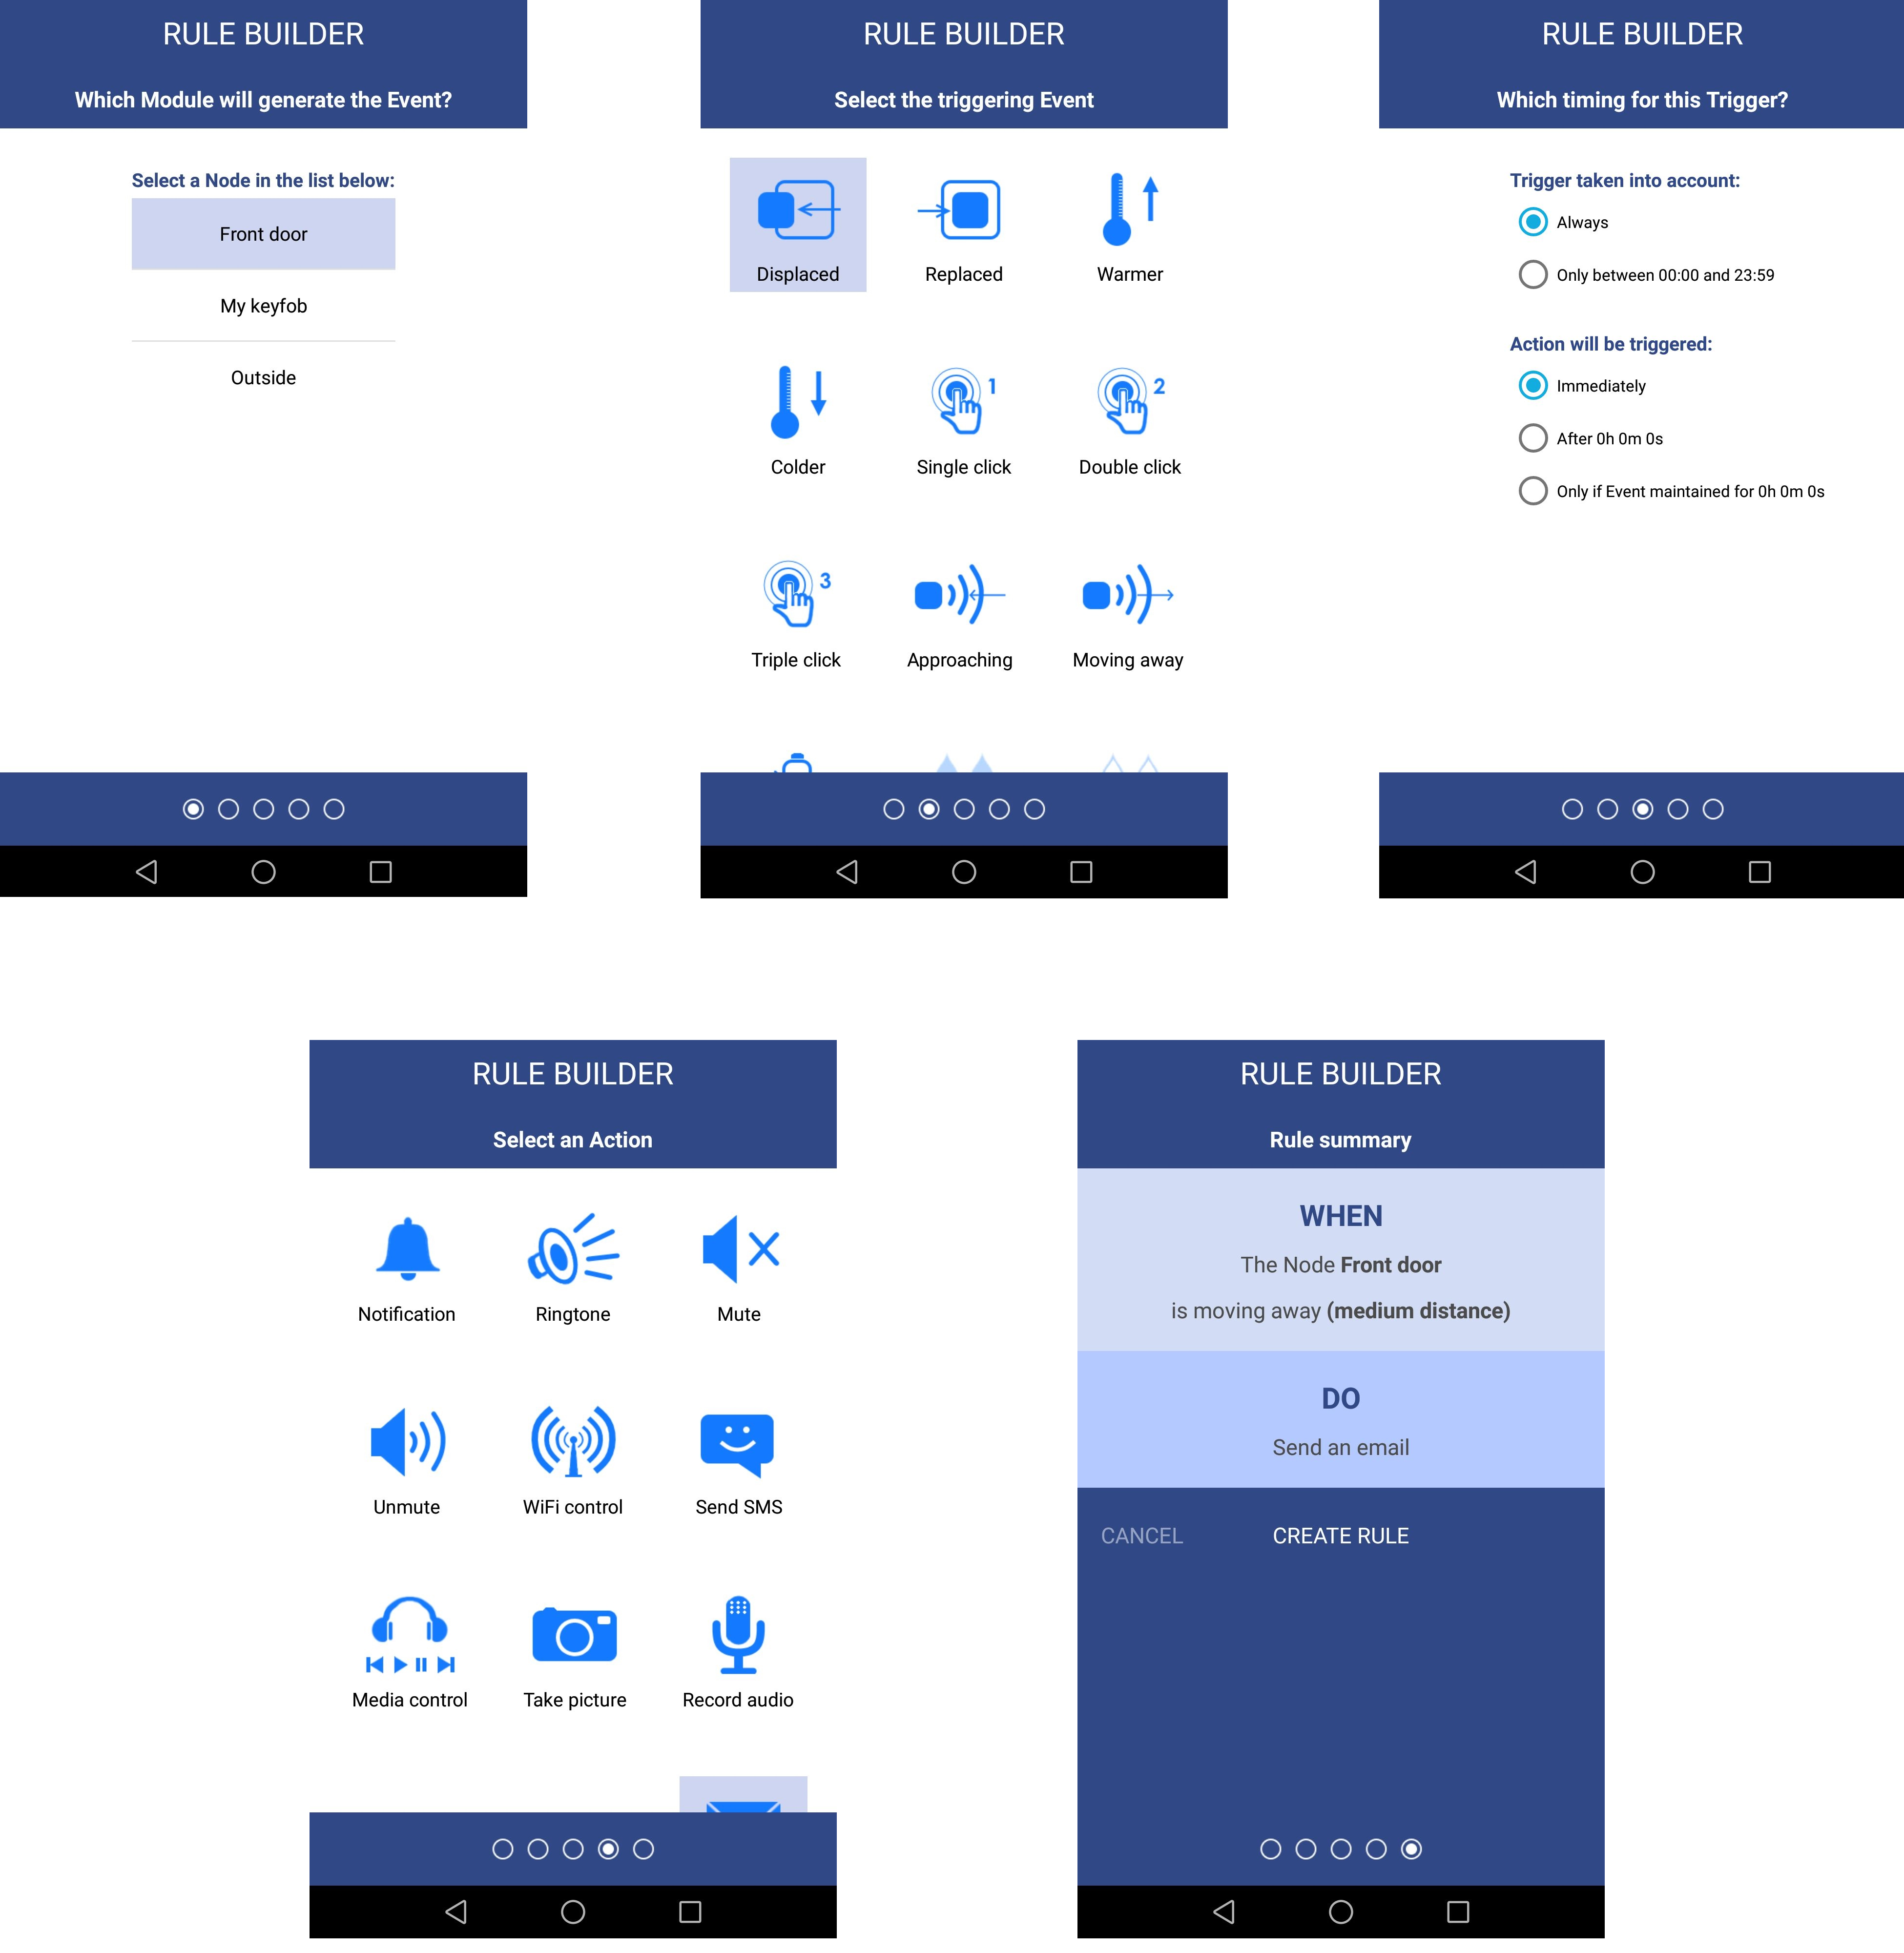
Rules list and rule summary 5. The Rule Builder is where a new rule can be created or existing rules can be modified. Building a rule is done in 5 steps:
- Node selection by its name
- Choice of the trigger (the event which will trigger the action)
- Options for timing, allowing to delay the trigger for example
- Choice of the action
- Rule checking / summary
Depending on the trigger and the action chosen, more parameters can be adjusted (thresholds, options ...)
Below the snapshots for the different steps.
![]()
6. The App Menu allows to configure the main parameters such as IFTTT and email accounts, options and so on ... This part still needs to be finalized.
Most of the triggers and actions are functional. I've already created many rules to be used in real situations, so I can say that is works! This version can be considered as an alpha, a significant amount of development is still required for a release, but at least, I can used it for alpha testing.
Major missing functionalities:
- Create a service to have the app working on background without being kill by Android
- Triggers for the expansion board (light level + water/moisture detection)
-
Board version 0.3: LSM303D replaced
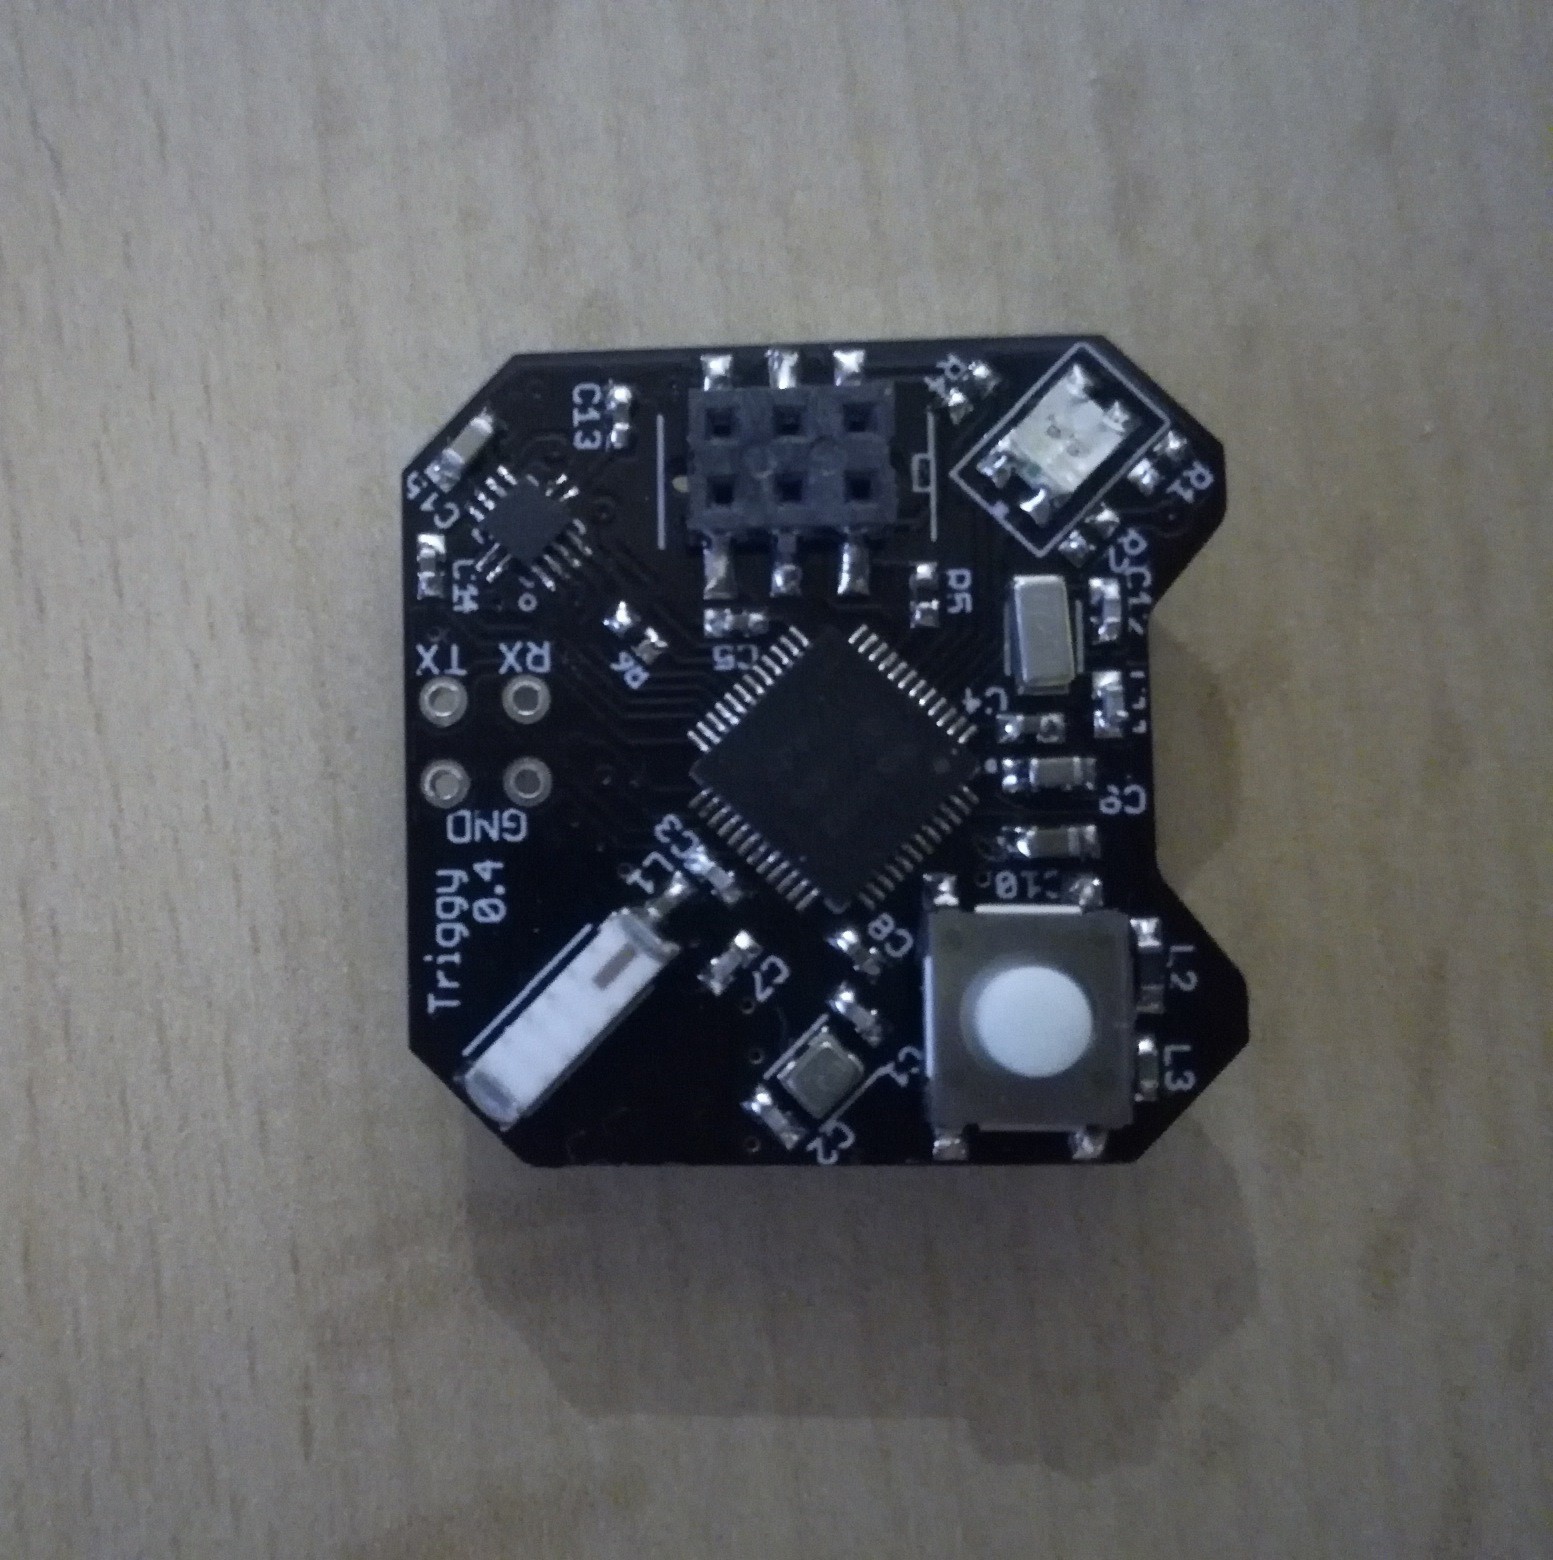
11/23/2017 at 21:01 • 0 comments![]()
This is the new (last ?) revision of the Triggy Node board. The main motivation for this new board is the unavailibility of the accelerometer/magnetometer, the LSM303D. Since few months, this component was unavailable from any distributor. Lastly it was stated as: "end of life".
Consequently, I had to find another magnetometer sensor component. The LIS3MDL would have been fine, but this part was also unavailable. So I decided to use a popular magnetometer among makers: the MAG3110 from NXP. It is not very expensive and easy to use. Also the package ( QFN) is far easier to solder than the LGA of the LSM303D. The only drawback I see is a slightly higher power consumption in running mode and 2 uA (instead of 1 uA) in standby.
Of course, the capacitors around the magnetometer have been replaced to match the reference design provided in the datasheet. And lastly, the MAG3110 is no longer powered directly by the battery, but instead through a GPIO of the MCU. This allows to save the 2 uA when not using the magnetometer. The rest of the board remained unchanged.
After having updated the firmware, the new sensor is working perfectly.
-
3D Printed Enclosure
08/15/2017 at 21:12 • 0 commentsIt's a new step for the Triggy project: a decent custom enclosure for the board. This plastic enclosure replaces the previous paper-made enclosure. It's less customizable and a bit more expensive but far more robust and gives a finished look. The Triggy Tag can also be safely let outside, e.g. for rain sensing or in the pocket.
This enclosure is the result of several (a lot of) iterations with my personal FDM 3D printer. I used only PLA material for this prototype. The last version (on the pictures below) has been obtained on an SLA printer.
![]() The final enclosure, in black and white versions
The final enclosure, in black and white versions![]() Enclosure is made of two parts. Internal faces view
Enclosure is made of two parts. Internal faces view![]() The enclosure with the board inside
The enclosure with the board inside -
Triggy board v0.2
05/09/2017 at 20:02 • 0 commentsHello everybody,
I made a new version of the Triggy board and I've just populated it with the parts (no change on the part list). Everything seems OK with this new board, in particular the antenna matching which provides correct output power.
Here are the changes versus the v0.1:
- Smaller PCB with corners cut: this new form factor will allow using a more interesting enclosure shape without increasing its size (more information in a new coming log).
- NFC2 pin no longer used as external board GND pin. The NFCx pins of the nRF52832 can be used as GPIOs, but the operation requires to flash some specific bits. Consequently it's easier to use other free pins.
- The two sensors on the external board now have separate GND pins.
- The references of the 32 MHz and 32 kHz crystal have been changed. Their load capacitance being different, I also have changed the associated capacitors.
That's all for now. The github now contains this v0.2 board.
![]()
![]()
![]()
-
Some news
12/13/2016 at 20:17 • 0 commentsSince the decision to create rules directly on the Triggy Hub app, there is a lot of work to do before making everything work. This is a complete new screen to create, and this will take time. The good news: this way of mapping events and actions will improve a lot the usability of the system. Triggering local actions avoids the internet connection requirement while enabling more low-latency automation.
An additional local action I though about is an emulation of a keyboard press. Many applications have hotkeys that can be activated with a physical keyboard. Here we can simply create a rule to emulate any keyboard press. A typical application would be to take a picture from the Android camera app when clicking the triggy module button.
-
Android app changes
11/12/2016 at 08:37 • 0 commentsTriggy Hub Android application is being heavily modified to enrich the possiblities. I wanted to make the system less dependent on IFTTT, for those who don't want to use this service. In fact, most of the time the user wants to be informed of an event (when a door opens, when it rains, when the temperature goes too low etc ...) This can be done with a notification or a kind of alarm. Moreover, notifications could be pushed to other devices with third party applications.
So now it will be possible to create rules (local, not IFTTT) to run on the Android device. When an event is detected, one could decide to send a notification, play a sound, mute/unmute the phone, turn on/off the WiFi (any other idea ?) All this without internet connection required, but of course the phone must be in the BLE range of the Triggy module which generates the event.
Triggy - Sensor Node for Life Automation
A smart sensor Node to trigger an action on a smartphone each time a physical change is detected (temperature, displacement, click...)
 The final enclosure, in black and white versions
 Enclosure is made of two parts. Internal faces view
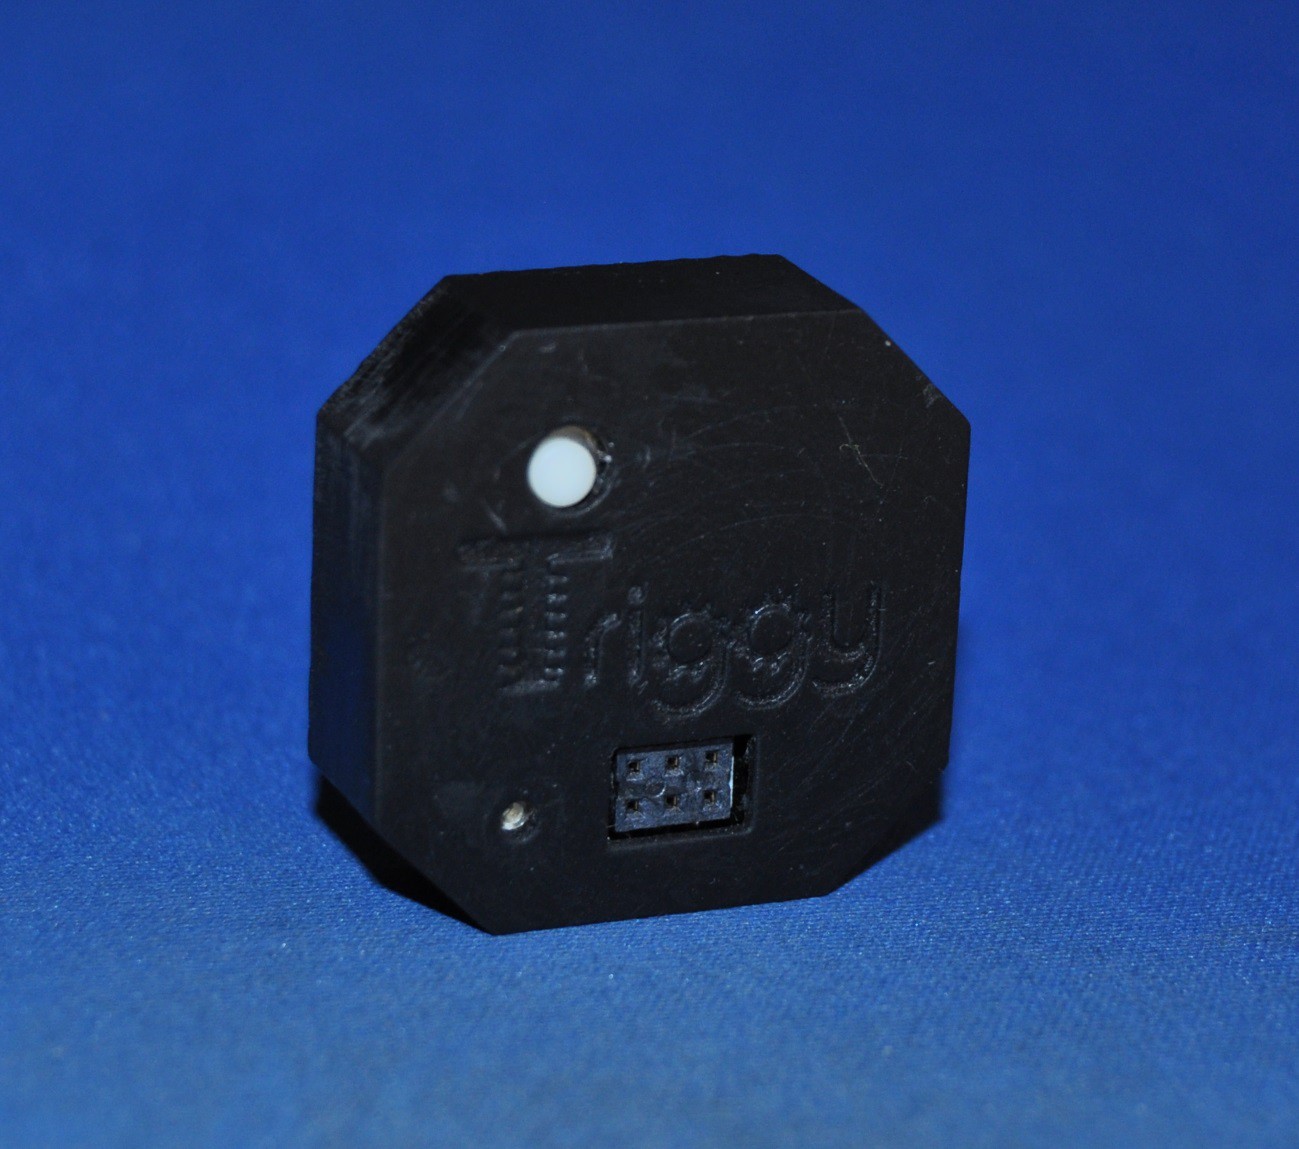 The enclosure with the board inside