RoGeorge
-
- Computer, scan all the wireless codes!
03/29/2017 at 03:47 • 0 comments- Computer, scan all the wireless codes!
- Scanning..., scanning complete.- Computer, read the scanning summary.
- Tested: 8192 codes. Decoded as valid: 213 codes. Decoded range: from 30 to 239.- Computer, why are there more valid codes than the range allows?
- There are 3 duplicated codes.- Computer, list duplicates.
- Listing...
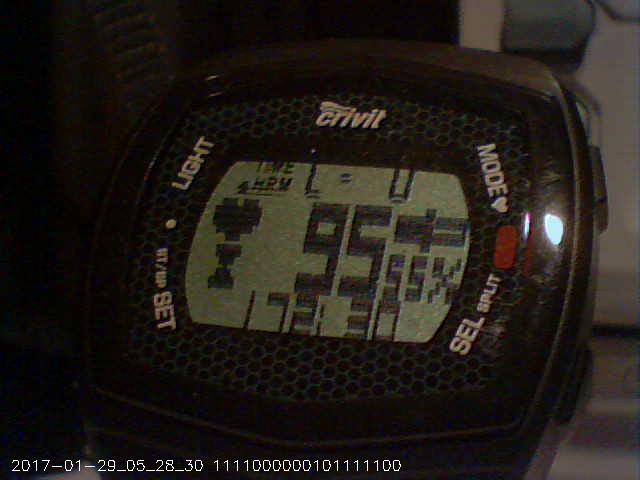
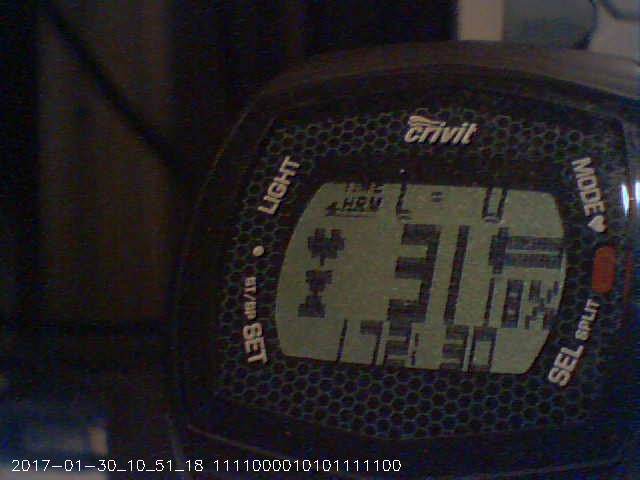
Wireless code:        Should display:     Displays as:
======================================================
1111000000101100110   28                  92
1111000100101100110   92                  92
1111000000101101010   29                  93
1111000100101101010   93                  93
1111000000101111100   31                  95
1111000100101111100   95                  95
Well, it was not exactly like that, but I love the idea: Let a machine do the work for you.
OK, but how it actually was?
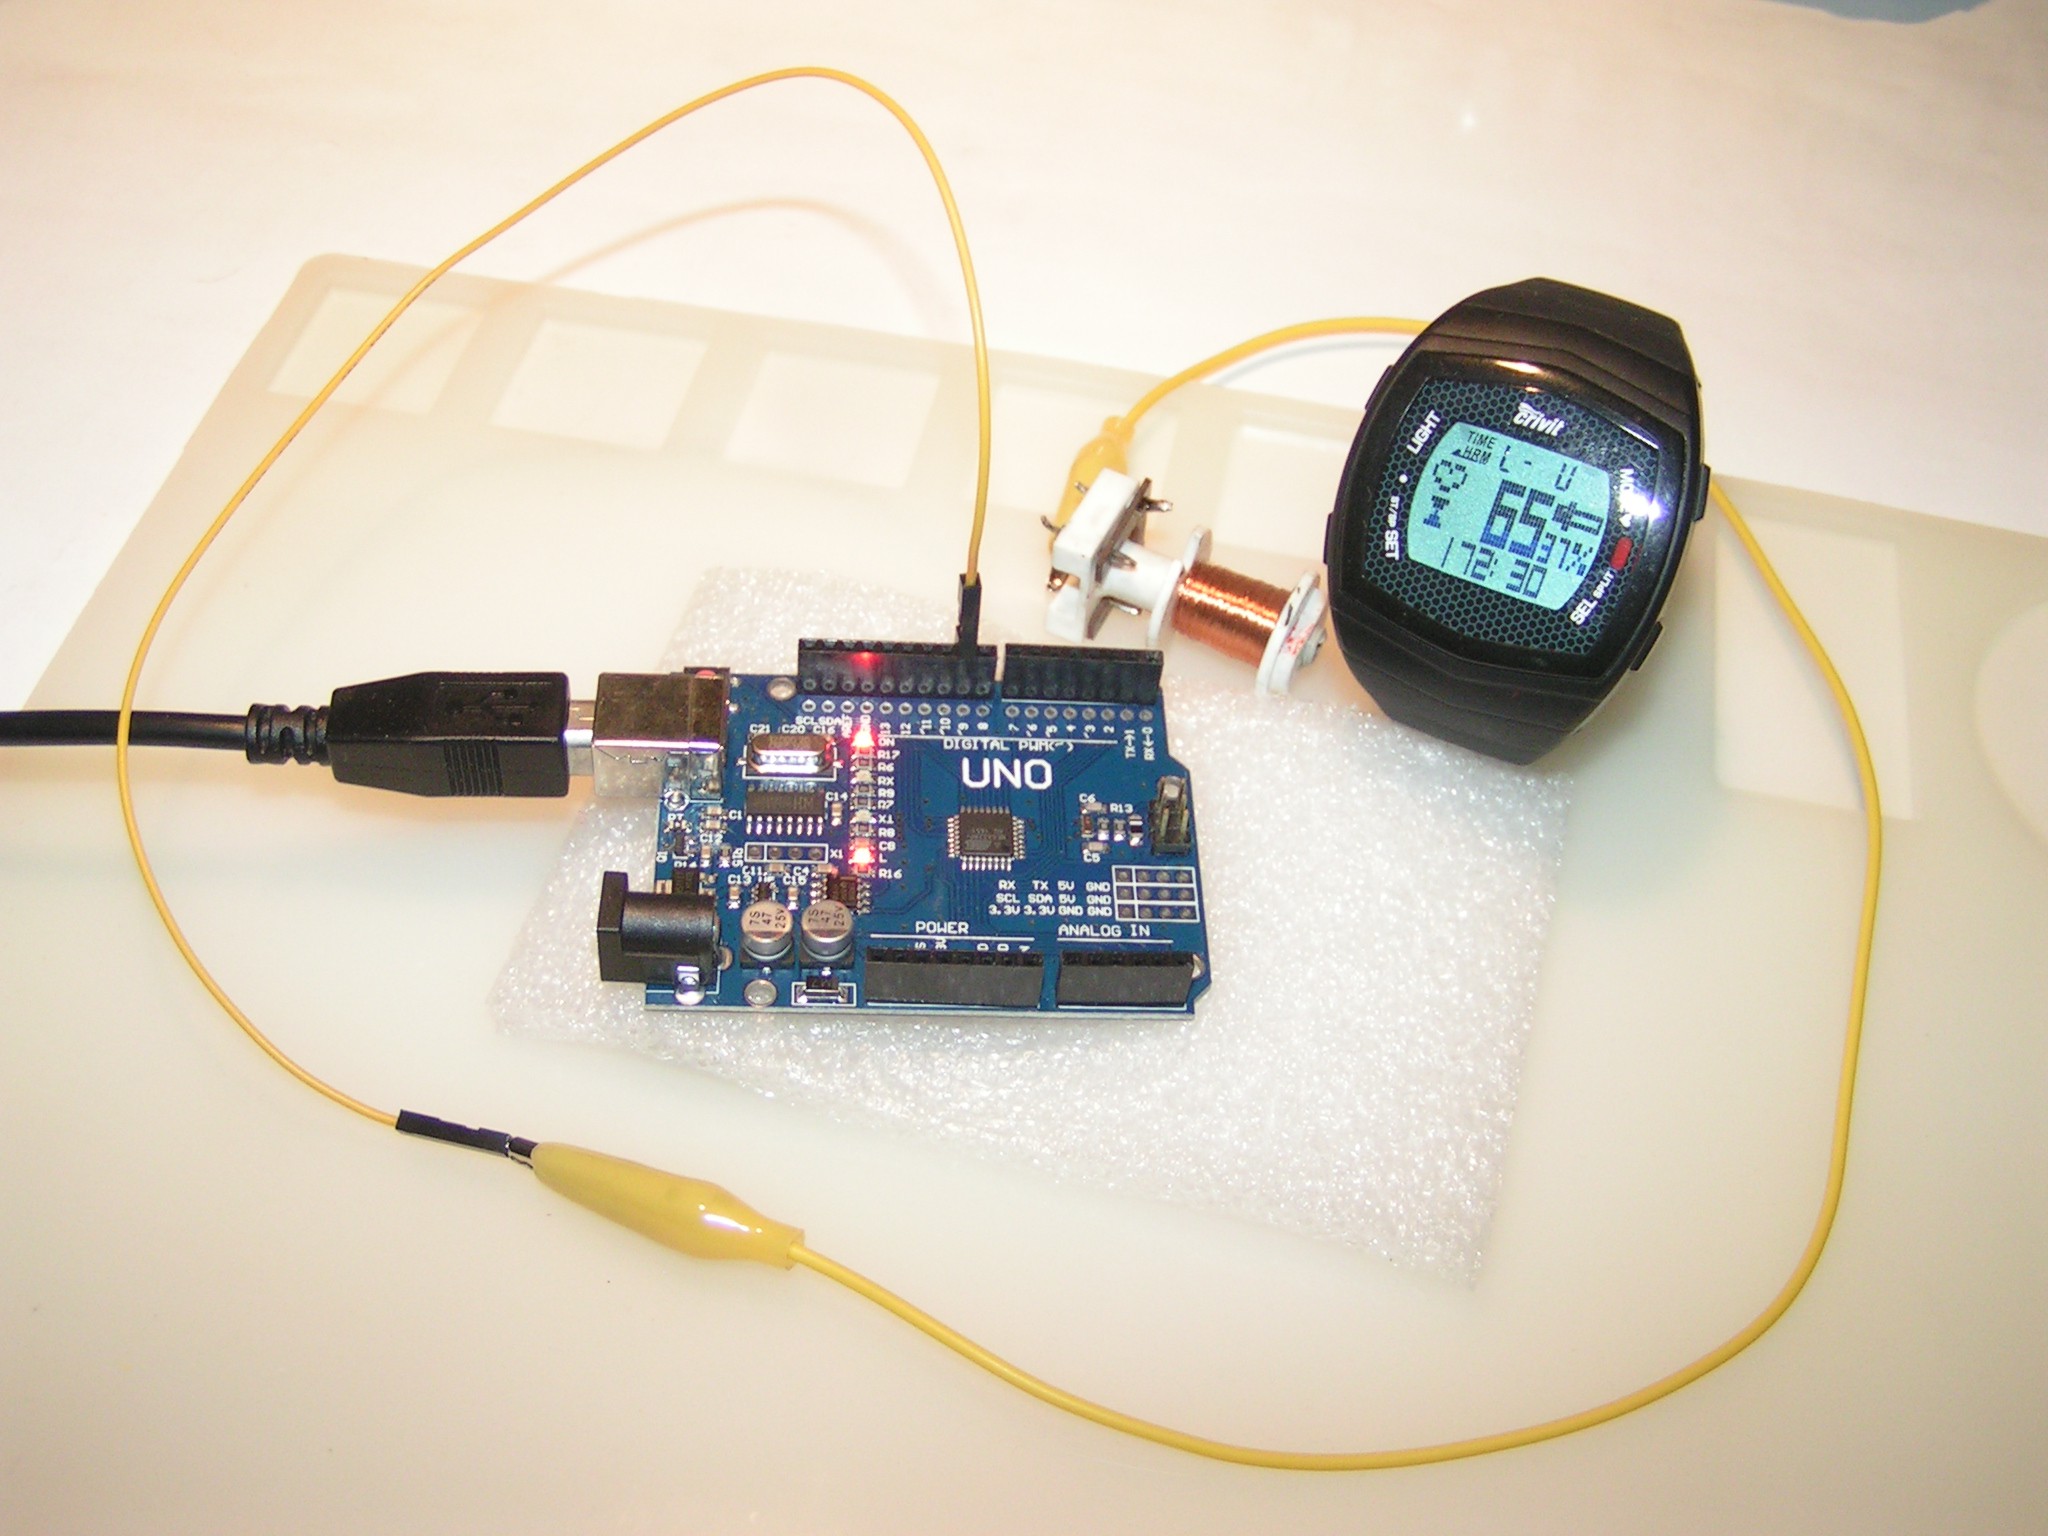
From where we left last time, we already had a computer controlled radio Tx. To test all the possible 8192 codes, we can write a script to Tx all the codes one by one, while looking at the number displayed on the wrist watch.
For a solid radio connection, it would be nice to send first a known working code and confirm the displayed number is as expected, then send a known invalid code and confirm the display shows invalid.
Then, send the code we want to test and read the display.
Now, save the results. Job done.
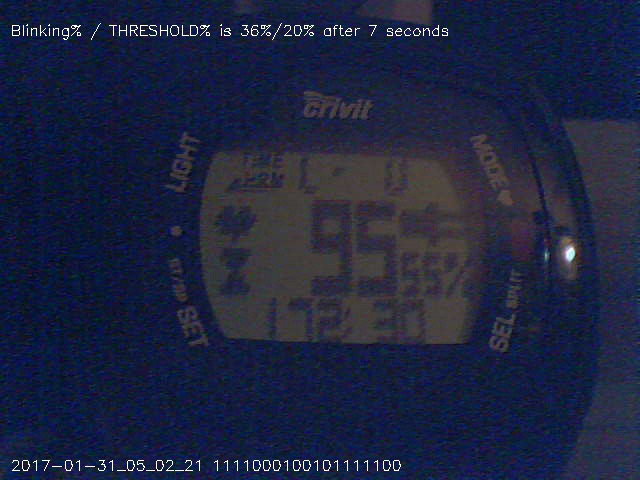
For a computer, the most difficult part is to read the display of the wrist watch, so a compromise was made: No optical recognition of the displayed number, recognize just if the heart symbol is blinking on the display.
If blinking, then we have a valid code, so take a snapshot from the WebCam and save it on the disk. We will look later at all the taken pictures. If not blinking, then the code is invalid, go to the next one.
![]()
Data flow setup:
Python script that parses all the 8192 codes ->
Arduino radio transmitter ->
110KHz radio waves ->
Wrist watch radio receiver/decoder ->
Wrist watch displayed number ->
WebCam streaming the wrist watch display ->
OpenCV video stream preprocessing/filtering ->
OpenCV blinking recognition ->Snapshot save and text logging of the results.
Hardware setup:
![]()
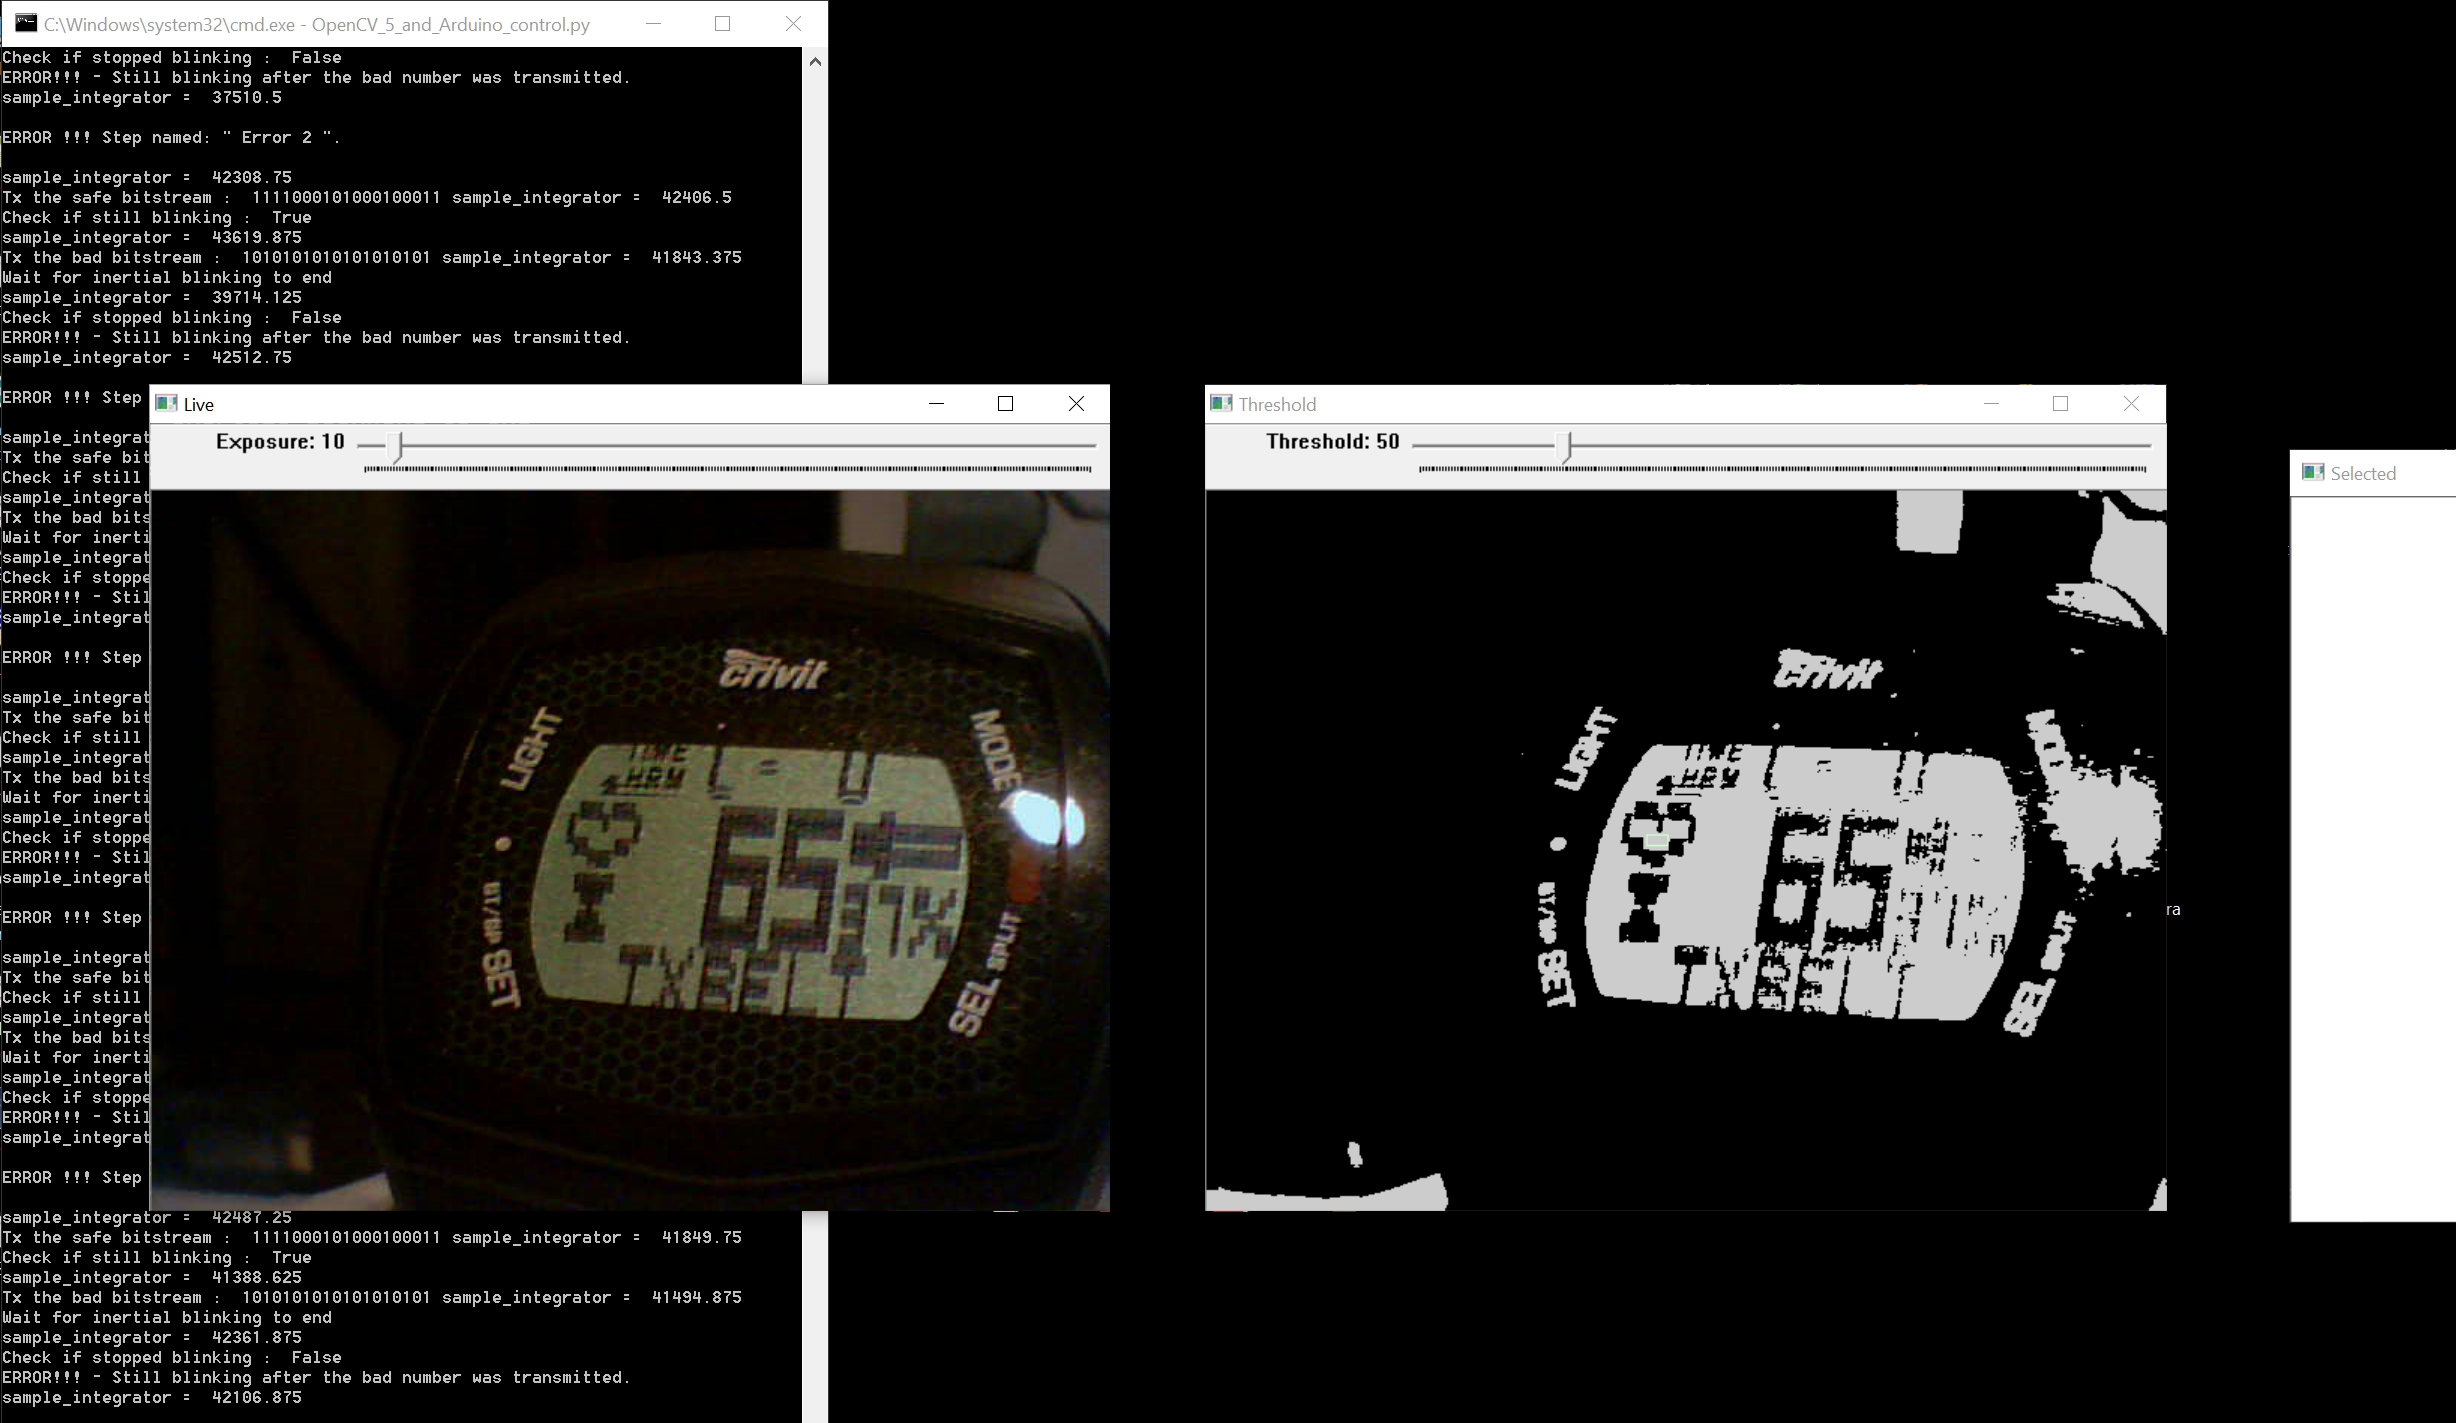
OpenCV and computer vision:
Never did this before, so I went head first. After watching a few OpenCV YouTube tutorials from the sentdex channel - thank you sentdex - it was the time to write some OpenCV based code:
https://github.com/RoGeorge/OpenCV_Controlled_TX_Emulator
# Usage:
#   - plug the USB camera and the Arduino UNO programmed with 'Crivit_ChestBelt_TX_Emulator.ino'
#   - set the 'COM_PORT' number taken by the Arduino UNO
#   - if it's missing, create folder 'captures' near 'OpenCV_Controlled_TX_Emulator.py'
#   - 3 windows will open, 1'st is a color live image, 2'nd a black and white, 3'rd with your selection
#   - put the Crivit HRM wrist-watch in front of the USB camera and set it to HRM monitor mode
#   - in the first 2 windows, adjust the sliders for the camera sensitivity and the black and white threshold
#   - in the 2'nd window, select (by mouse dragging) a blinking area from the blinking heart displayed by the watch
#   - tip: a single point selection (a click instead of a drag) works very good
#   - the selected area will be seen live in the 3'rd window
#   - all the bitstreams written in 'captures/input_bitstreams.txt' will be sent one by one to the radio Tx
#   - the script will look in the 3'rd window if the heart symbol displayed by the wrist-watch is blinking
#   - if blinking, a jpg snapshot will be saved in 'captures'
#   - results will be displayed on the command line, then added to the log file 'captures/working_bitstreams.csv'
#   - NOTE: Do not close the live windows. To exit teh script, press the 'ESC' key.
# Installation:
#   pip install numpy
#   pip install pyserial
#
# to install OpenCV (32-bit) download and unpack, then go to folder
#   'opencv\build\python\2.7\x86\'
#   and copy the file 'cv2.pyd' into folder 'C:\Python27\Lib\site-packages'
#
# To check the OpenCV installation, open Python and type
#   >>> import cv2
#   >>> print cv2.__version__
#   3.2.0
#
This is a print screen taken while adjusting the light and the B&W filter threshold:
![]()
After a few days of automated testing, puzzling results:
The encoding scheme has a limited display range, between 30 and 239, and 3 duplicated codes.
An example for a duplicated code snapshot:![]()
![]()
![]()
![]()
I don't know if this is a bug or a feature, and I must admit that I don't understand how this encoding scheme was designed, but so far it was a lot of fun looking into it.
:o)
-
Testing the encoding scheme hypothesis
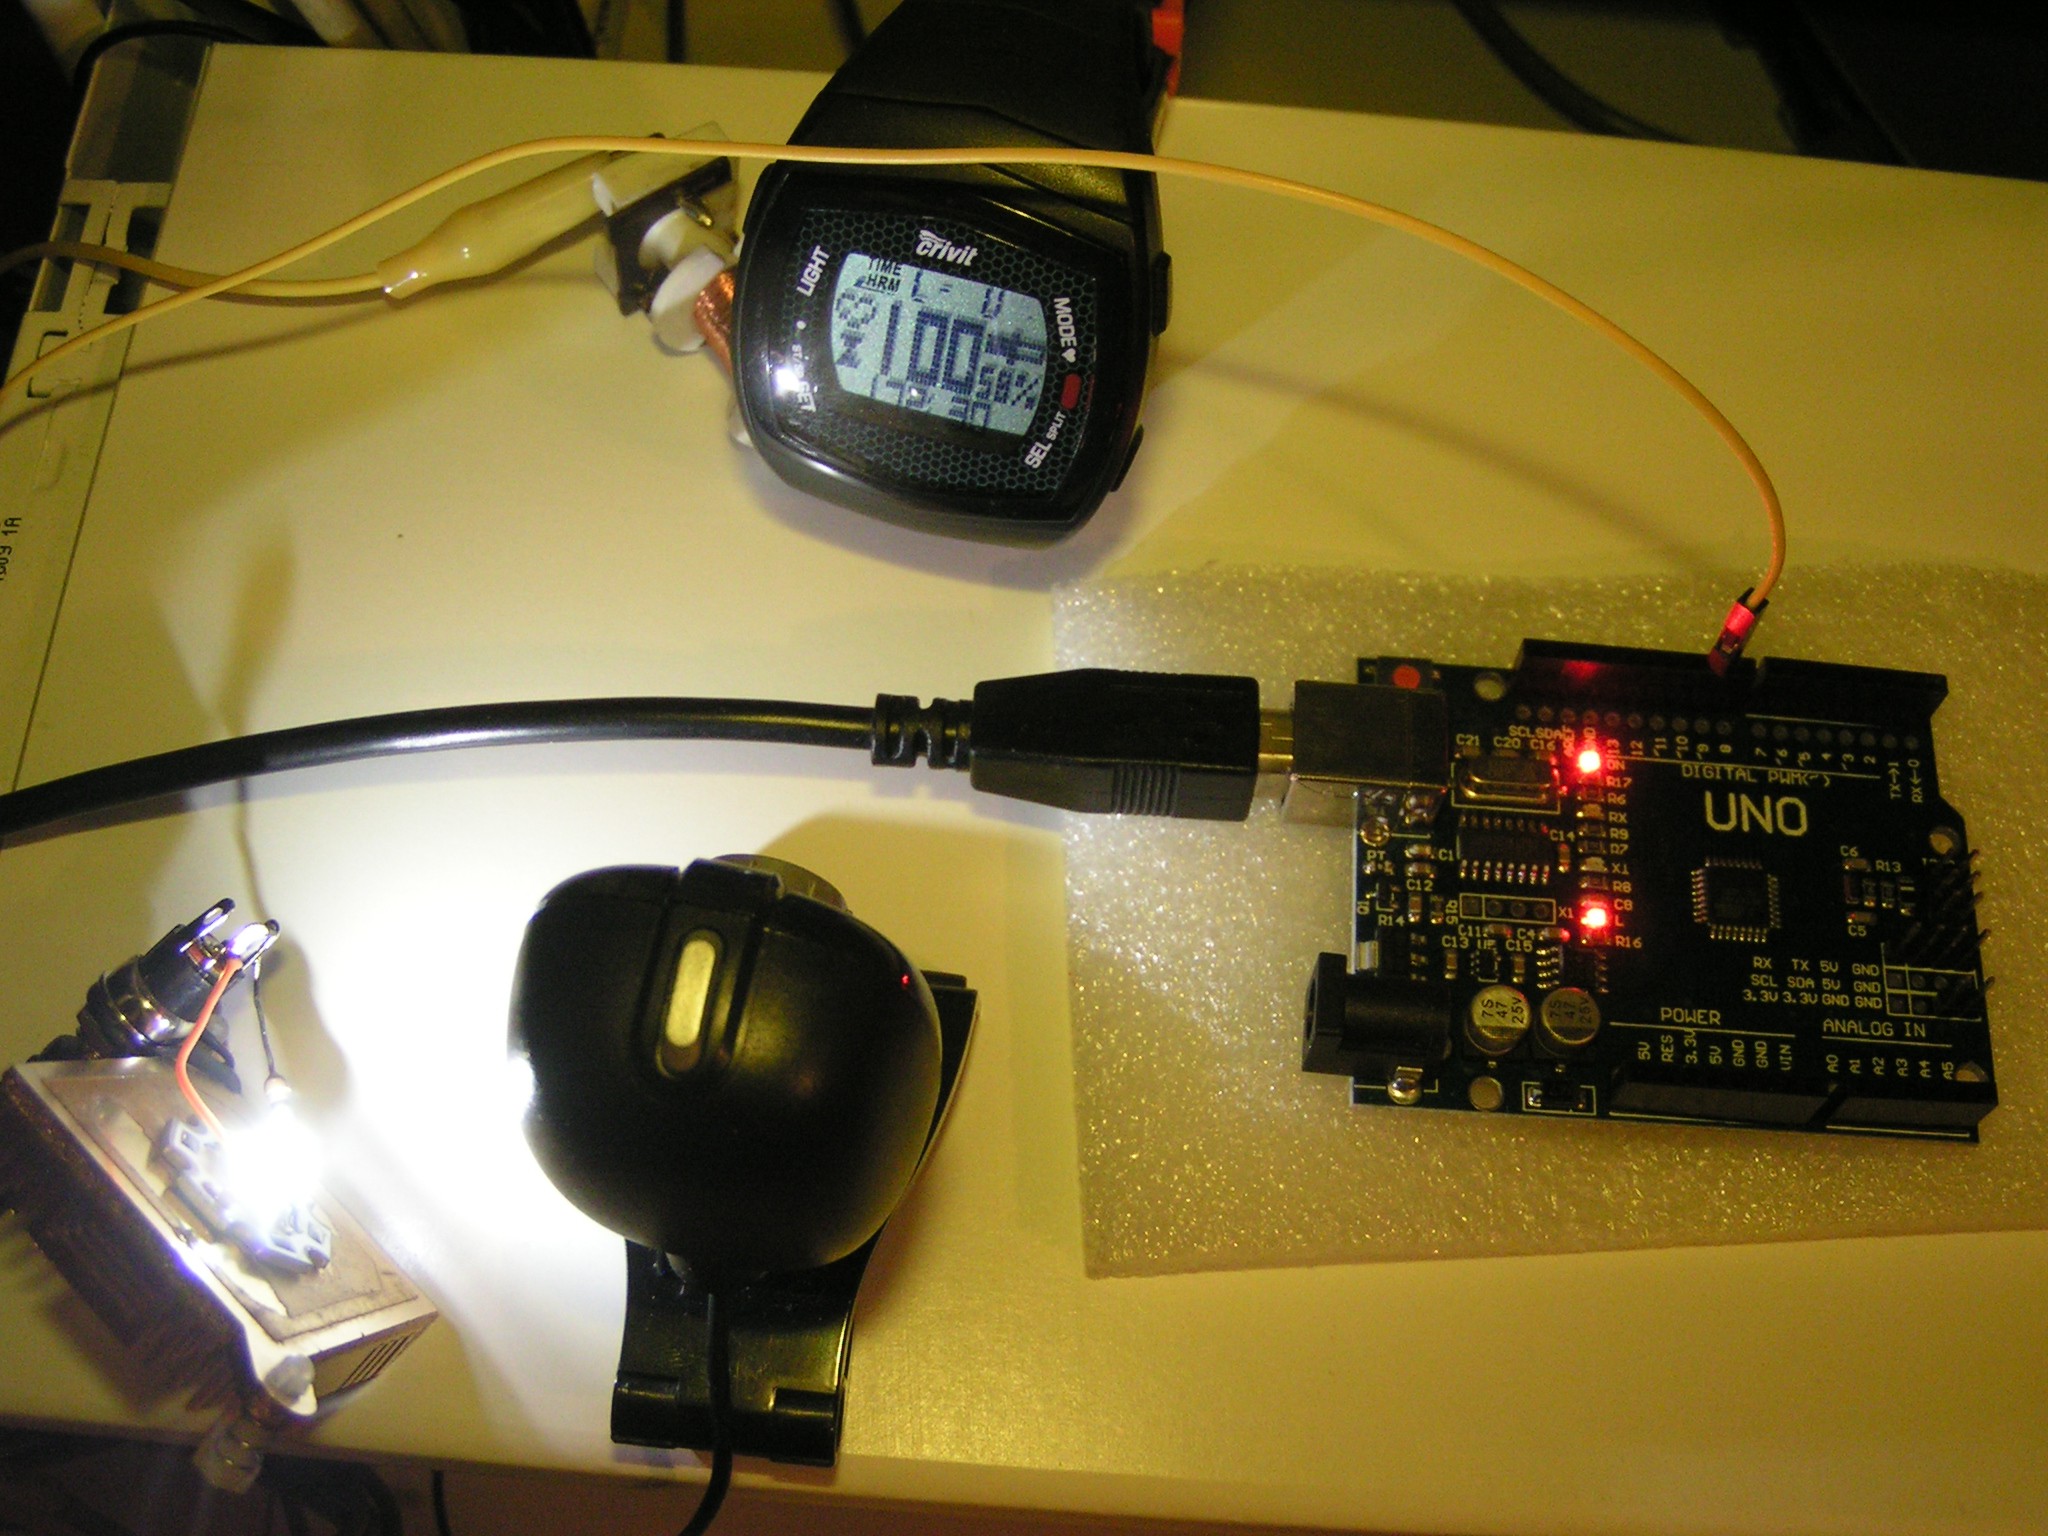
02/16/2017 at 01:22 • 0 commentsA computer controlled radio Tx
First, thank you all for the effort put in reverse engineering the encoding scheme, great job!
Now, it's time to test some more the hypothesis.
To do this, it would be helpful to be able to transmit any code, valid or invalid, and see how the receiver will react. The Crivit chest belt can't do that, so we need to build our own radio transmitter. With a carrier frequency of only 110 KHz, it should be easy to digitally synthesize the entire modulated carrier.
A few lines of code later, it proves out that a simple wire connected to a digital output is good enough as a Tx antenna, and an Arduino UNO is fast enough to generate the carrier, modulate it, and in the same time talk to a computer over the serial port:
![]()
This will allow us to put on air any combination of 0's and 1's that we might want to test.
.
.
New findings
- for an invalid code, the wristwatch will keep displaying the last valid number received, but the heart symbol will stop blinking, just like in the case of no signal
- there is no handshake protocol, so the watch will display any valid code received, even if the chest belt ID is changed. All the following codes were displayed as one hundred:
S 111100 0101000100011
S 111010 0101000100011
S 111001 0101000100011
S 110011 0101000100011
- the total number of bits can vary, i.e. the following codes are both displayed as a valid one hundred:
 S 110011 0101000100011
S 1100100 0101000100011
- so far, the encoding scheme found by @killy.mxi can predict valid codes even for numbers that were out of reach for the original chest belt transmitter. The following codes predicted for numbers between 234..239 were displayed as valid:
1110010010010
1110010011100
1110011001100
1110011010100
1110011100100
1110011111000
Still, for predicted codes corresponding to numbers greater than 239, the blinking heart stops. This might be because the receiver was designed to act like that, but this it's not yet for sure.
Manually typing each code to be tested proves to be useful, but also very time consuming and prone to errors. Since our radio Tx is now able to transmit any codes coming from the serial port, it will allow us to do automated testing. This will be the next step.
Sniff the Wireless Data of a Sports Wrist Watch
Reverse engineer the wireless protocol between a chest belt heart rate monitor and it's wrist watch that displays the beats per minute