Close
0%
0%

Science Tricorder by Olympus Heavy Industries

A multi-mode scanner and data logger based on Adafruit Feather & Arduino

Similar projects worth following
This is a project I've been tinkering with for a couple years now and it actually started out as a non-functional prop. Modeled after the Tricorder devices seen in Star Trek and heavily inspired by similar projects found online. The ultimate goal is to create a functioning handheld sensor platform that can analyze, store and transmit all sensor data collected by the unit.

It’s been a hell of a journey learning how to build this thing, all started when I saw prop Tricorders at Star Trek cons in the mid ‘90s as a little kid. I’d never believe that I’d have one like this if I told past me of it…

I’ll post more as things happen

Planned features and revisions:

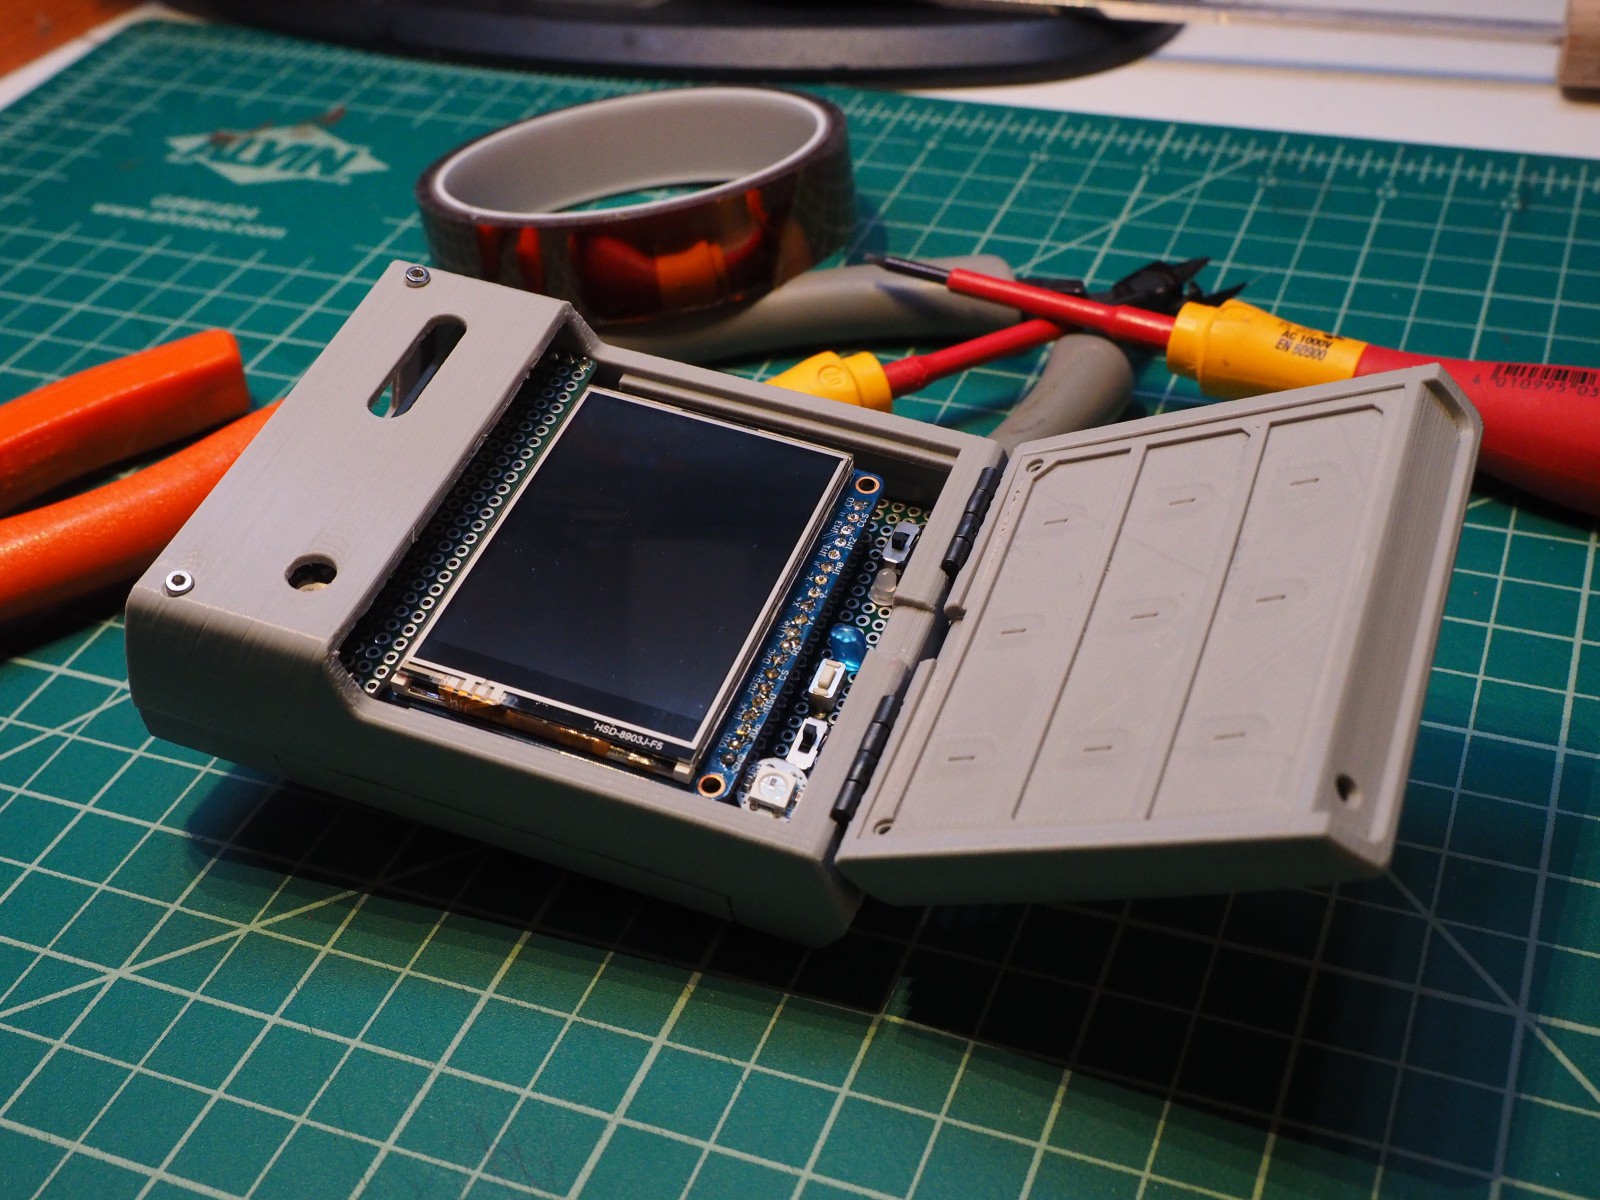
  • V6 (in progress) - 3d-printed chassis with a new mainboard and sensor array board assy to clean everything up and make it simpler to work on. I also need to design labelling for the door control panel and a unit label for the back of the chassis.
  • V7 - Create a new board set (mainboard, sensor assembly) and have the PCBs custom fabricated. This stage will still have the other breakout boards attach onto the mainboard and is primarilly to remove much of the wiring that needs to be soldered in place to make a unit functional.
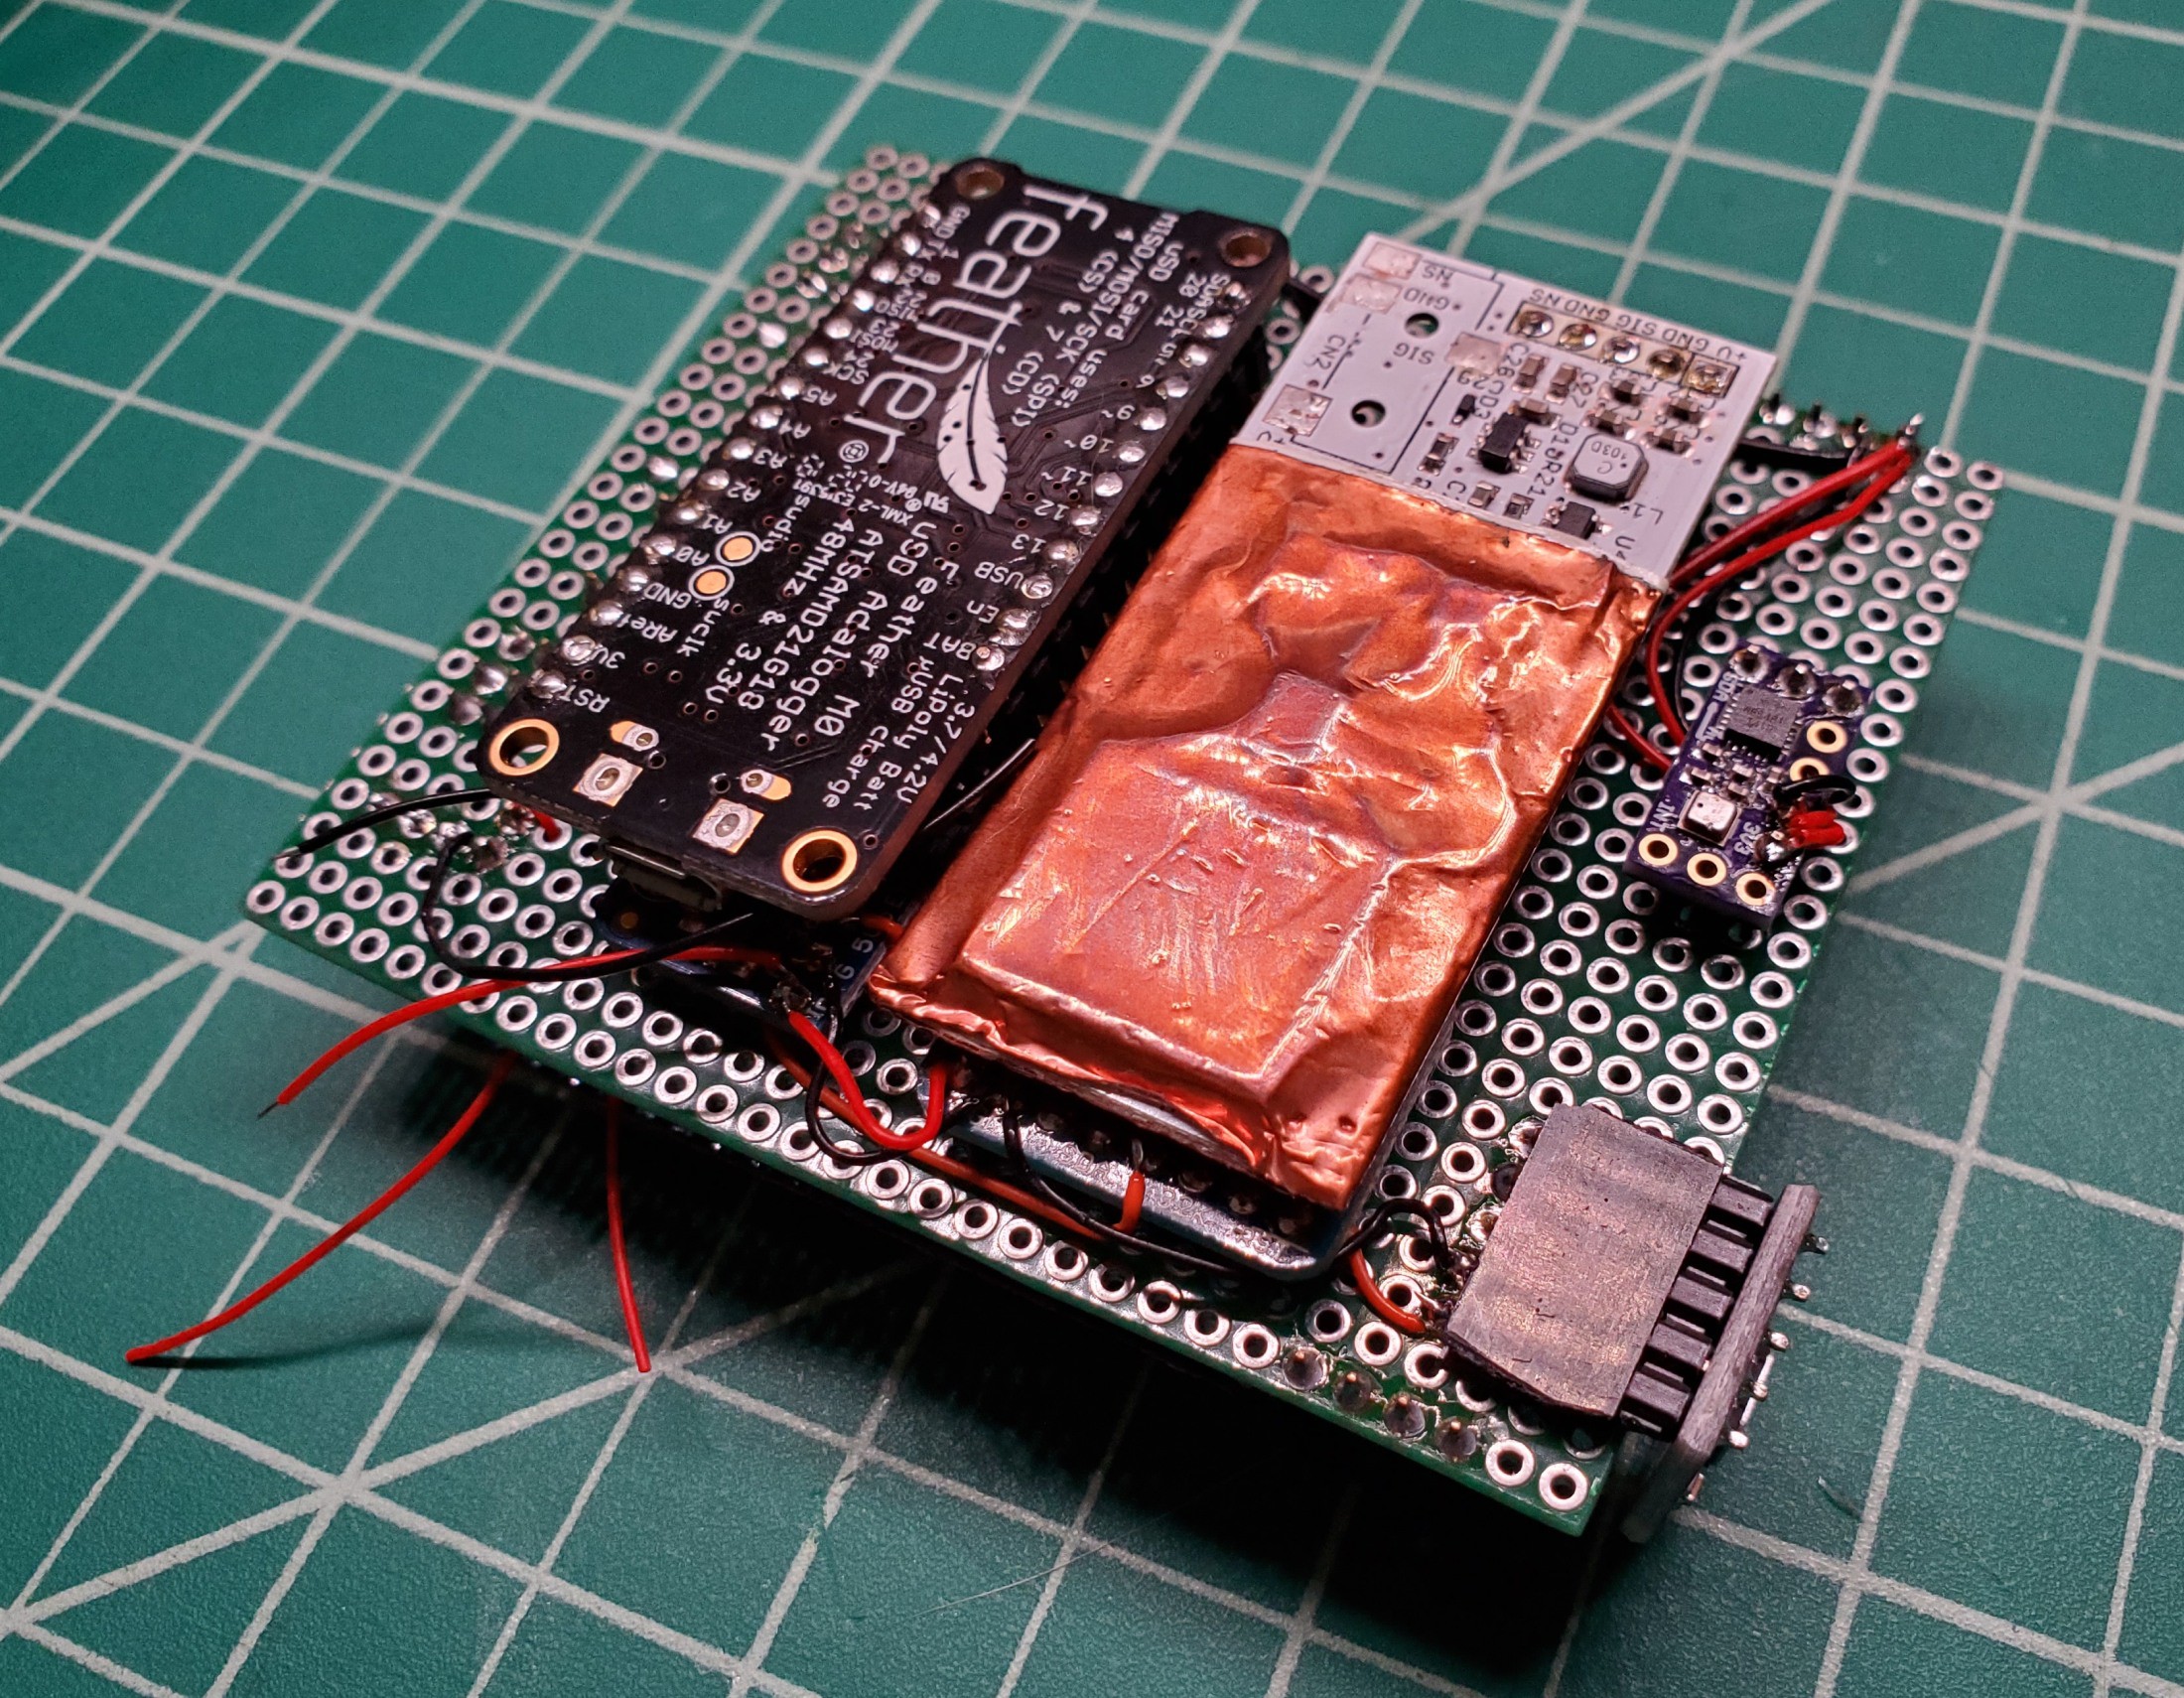
  • V8 - Create another new board set that also removes many of the breakout boards by having the components soldered onto my custom PBCs. A few components like the Feather controller, TFT and RadiationWatch will still be breakouts since I still want a bit of flexibility (or these are too difficult to replicate).

All 3d-print files and PCB designs will be attached to the project page here.

Current scan data points:

  • Atmospheric:    Ambient temperature (averaged across 3 sensors), relative humidity, barometric pressure, Target Temp, GRIDeye temp (8x8 grid of IR thermal detectors)
  • Electromagnetic:    UV Index, IR intensity, RGB Color, Visible light intensity in Lux, UV intensity
  • Radiation:    Gamma/Xray detection
  • Gasses:       Carbon monoxide, Nitrogen dioxide, Ethanol, Hydrogen, Ammonia, Methane, Propane, Isobutane
  • Mechanical:    3-axis Accelerometer, 3-axis Digital Gyroscope, 3-axis Hall Effect Magnetometer

Currently, the Tricorder Version 6 is made up of the following:

This is now the 6th iteration of the Tricorder (the first was a prop build, not functioning), running v.o-10 code.

OHITricorder-4O.10d-forM4.7z

Current code version as of 2022-08-18, for Adafruit Feather M4

7-Zip - 12.29 kB - 08/18/2022 at 06:50

Download

OHI Science Tricorder V6 Chassis - Release ver.7z

The current version of the chassis modeling for 3d printing. This one's also updated with the correct information about the hinges.

7-Zip - 5.24 MB - 02/16/2020 at 20:55

Download

OHI Science Tricorder V6 Chassis - Rev5 NOT FINAL.7z.7z

Rough-draft for the V6 Tricorder 3d-printable chassis, a work-in-progress

7-Zip - 1.96 MB - 08/24/2019 at 04:57

Download

OHI Science Tricorder V6 Chassis - Rev3 NOT FINAL.7z

Rough-draft for the V6 Tricorder 3d-printable chassis, a work-in-progress

7-Zip - 2.55 MB - 08/08/2019 at 02:31

Download

Tricorder Legacy Code (everything up to 4o-v9.rar

This is all of the code that I've written for the various iterations of the Tricorder over the past 2 years. Covers up to 4Ov9

RAR Archive - 79.19 kB - 06/09/2018 at 20:41

Download

View all 8 files

  • 1 × Adafruit Feather M4 Express (https://www.adafruit.com/product/3857) Primary microcontroller for the unit
  • 1 × Adafruit CAP1188 (https://www.adafruit.com/product/1602) Capacitive Touch controller
  • 1 × Adafruit 2.4" TFT LCD (https://www.adafruit.com/product/2478) Display
  • 1 × Adafruit DS3231 (https://www.adafruit.com/product/3013) Real time clock with battery backup
  • 1 × Adafruit TCA9548A (https://www.adafruit.com/product/2717) i2c Multiplexer

View all 15 components

  • Back to coding

    Queadlunn08/18/2022 at 07:10 0 comments

    I've been doing more tinkering with this.

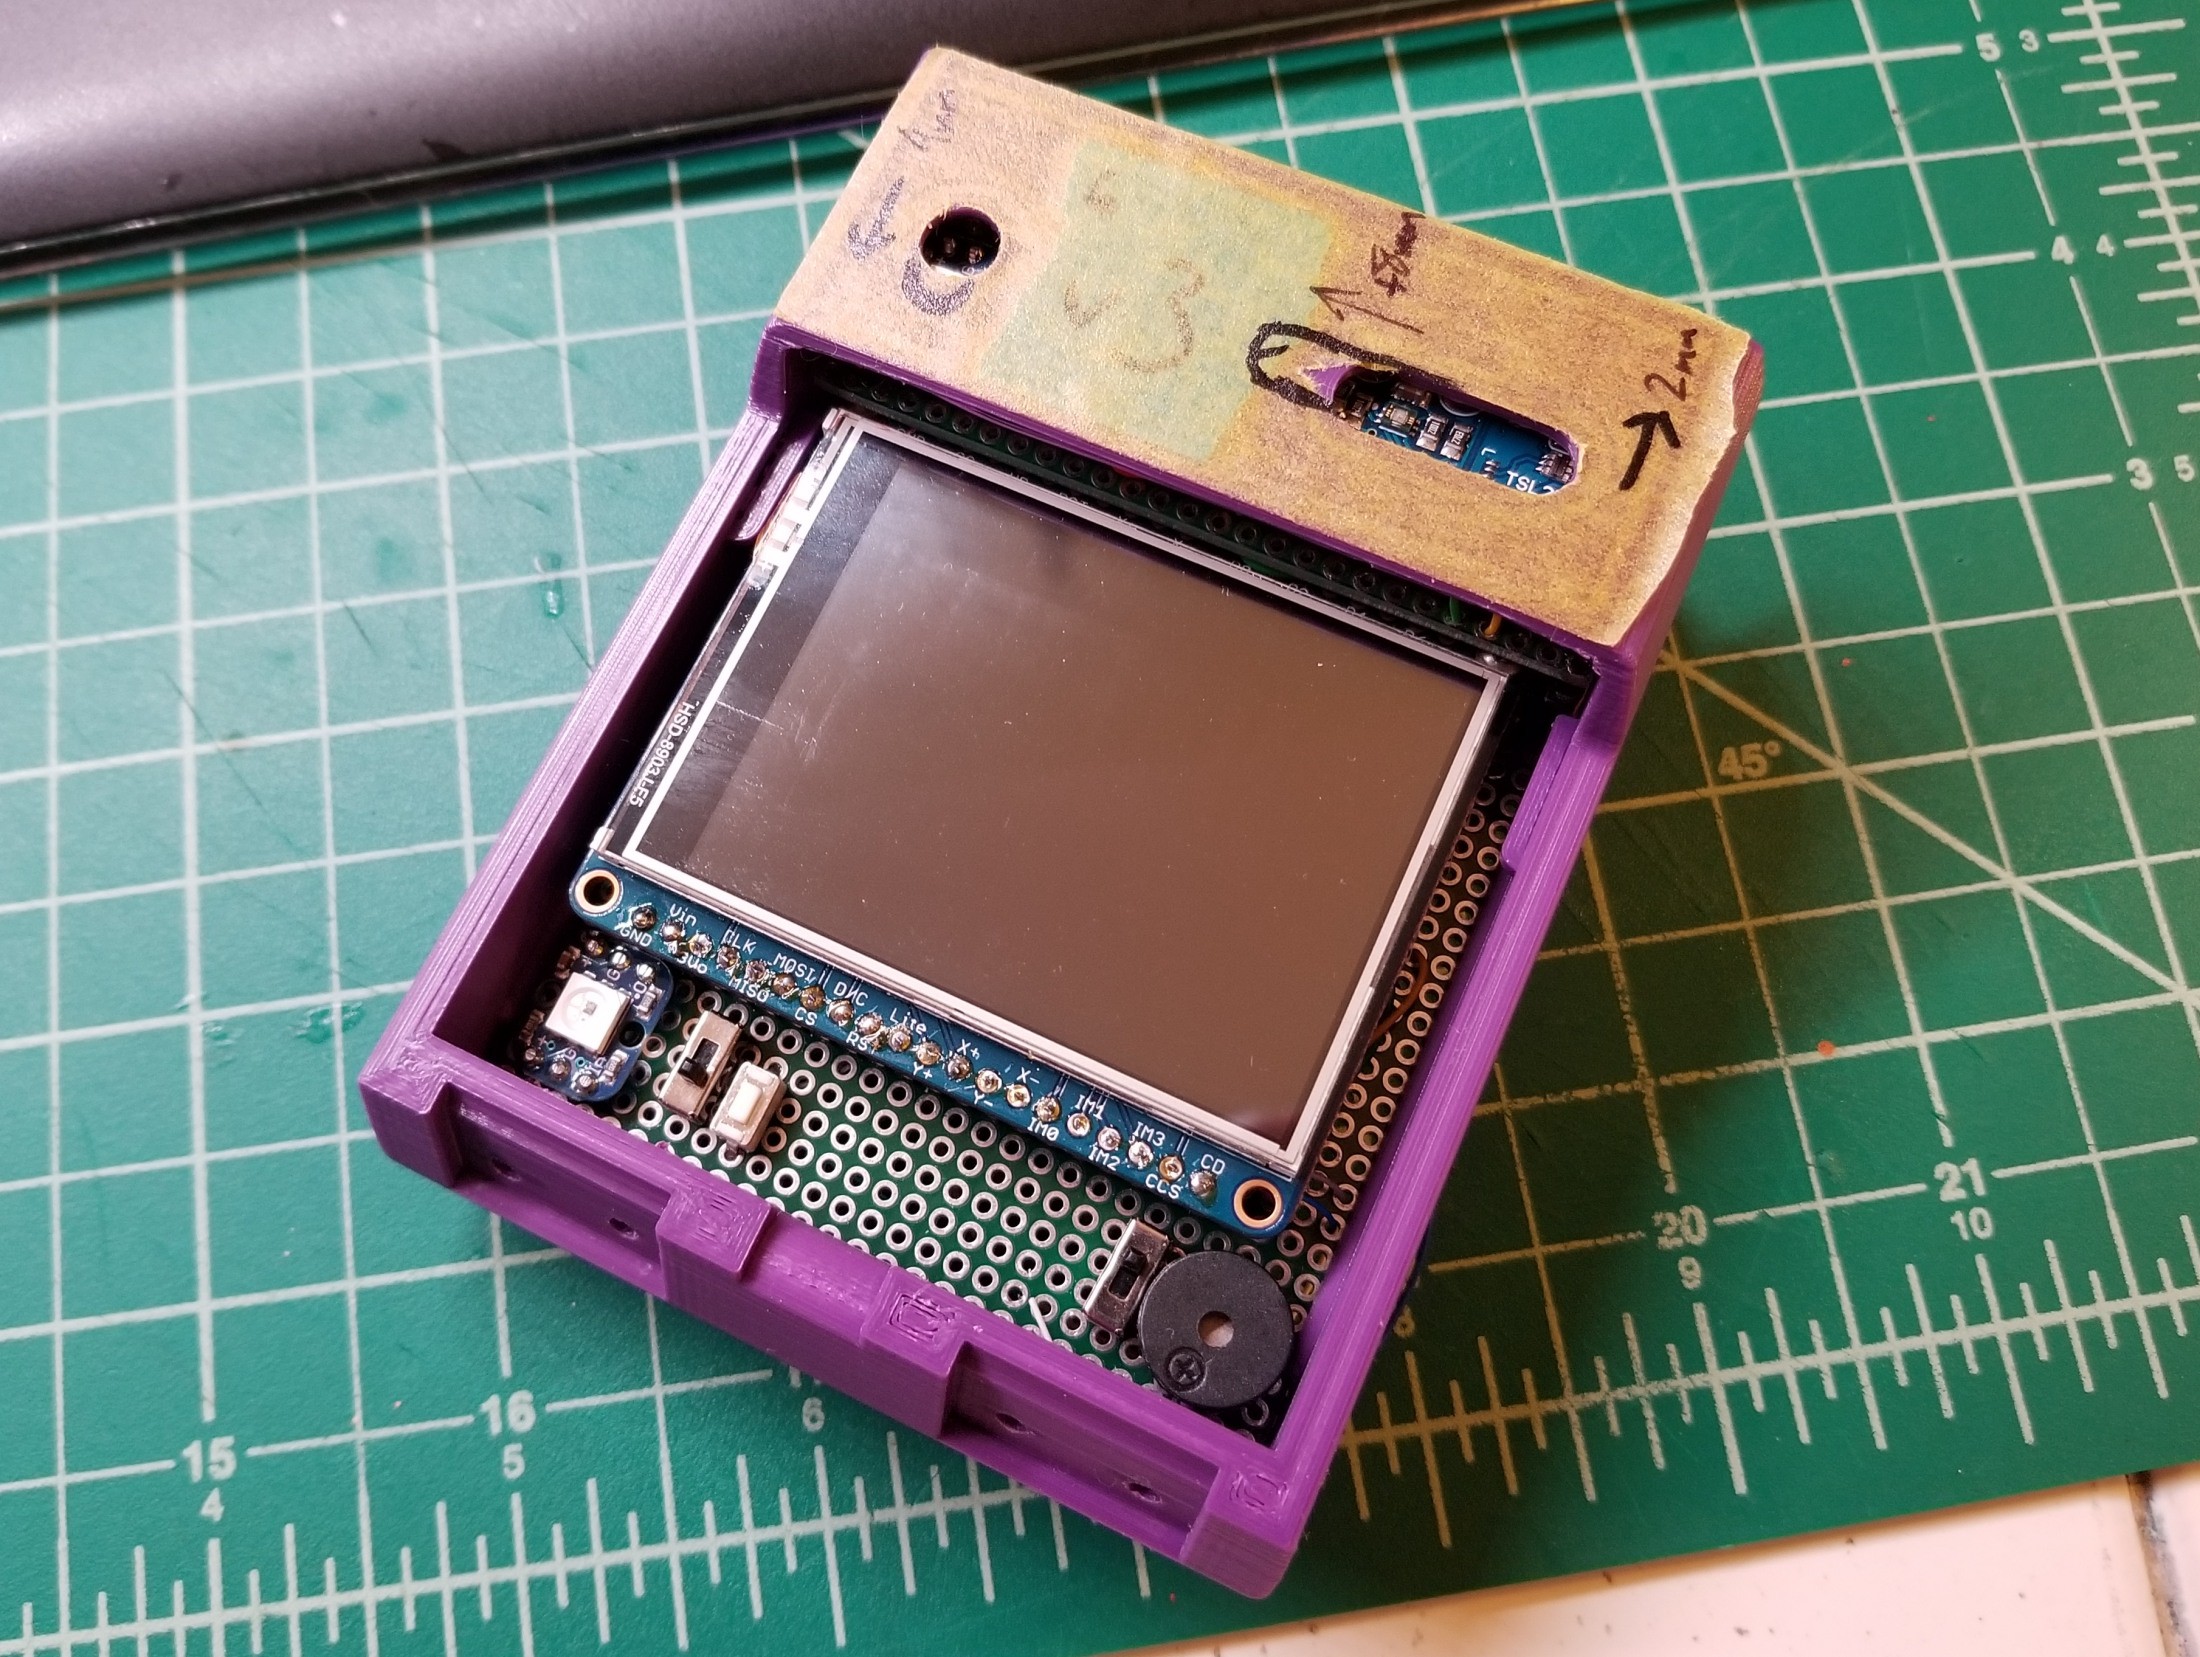
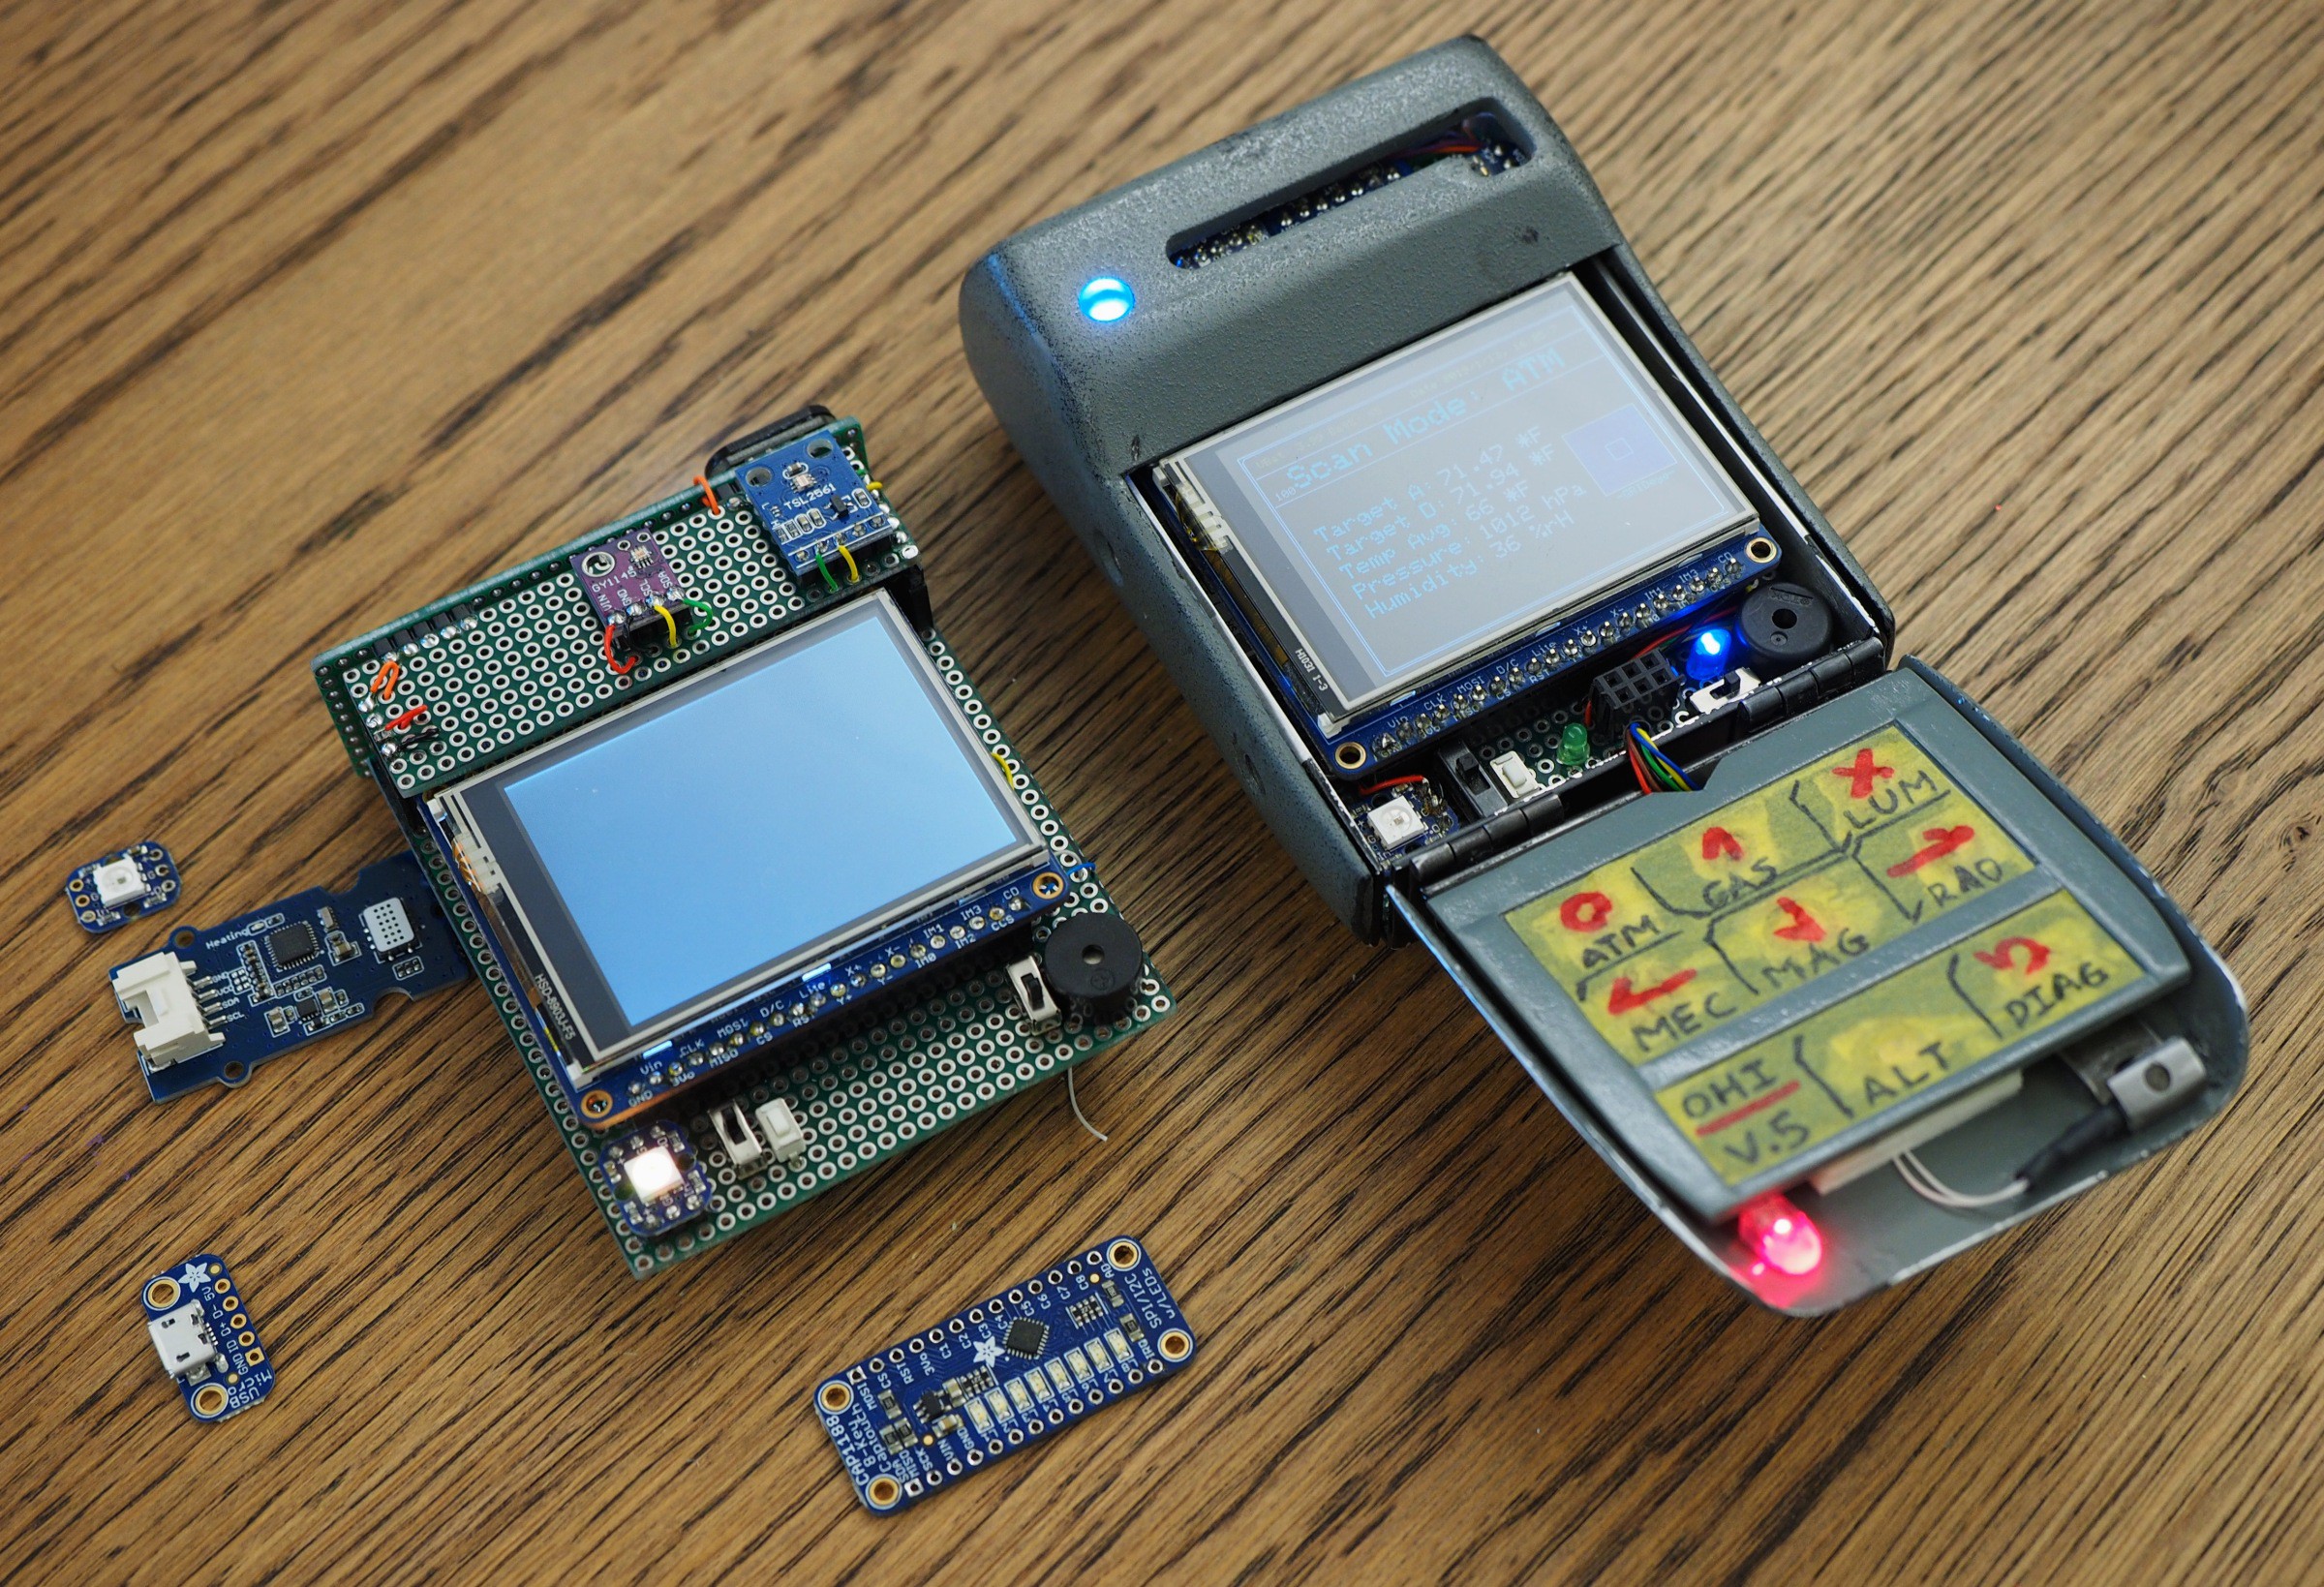
    So, when the project paused a few years ago, I'd disassembled the old v5 Tricorder to begin building the first v6. That's where I stalled out. So for now I've reassembled the v5 with a couple different parts, gotten the code moved ahead a half-step and gotten almost everything working again. The new code's attached to the project "OHITricorder-4O.10d-forM4" and it's running with publicly up-to-date libraries.


    Main hardware changes:

    • Moved from a Feather M0 to a Feather M4. This drastically changed how fast the unit ran and was nearly a drop-in replacement. The only code change needed was for the battery sense pin.
    • Changed out a few sensor breakout boards: BME280 to BMP280, other changes that are just replacement parts but the same part.

    Main code changes are:

    • Updated to get almost all functions working again (component list will be updated to reflect this)
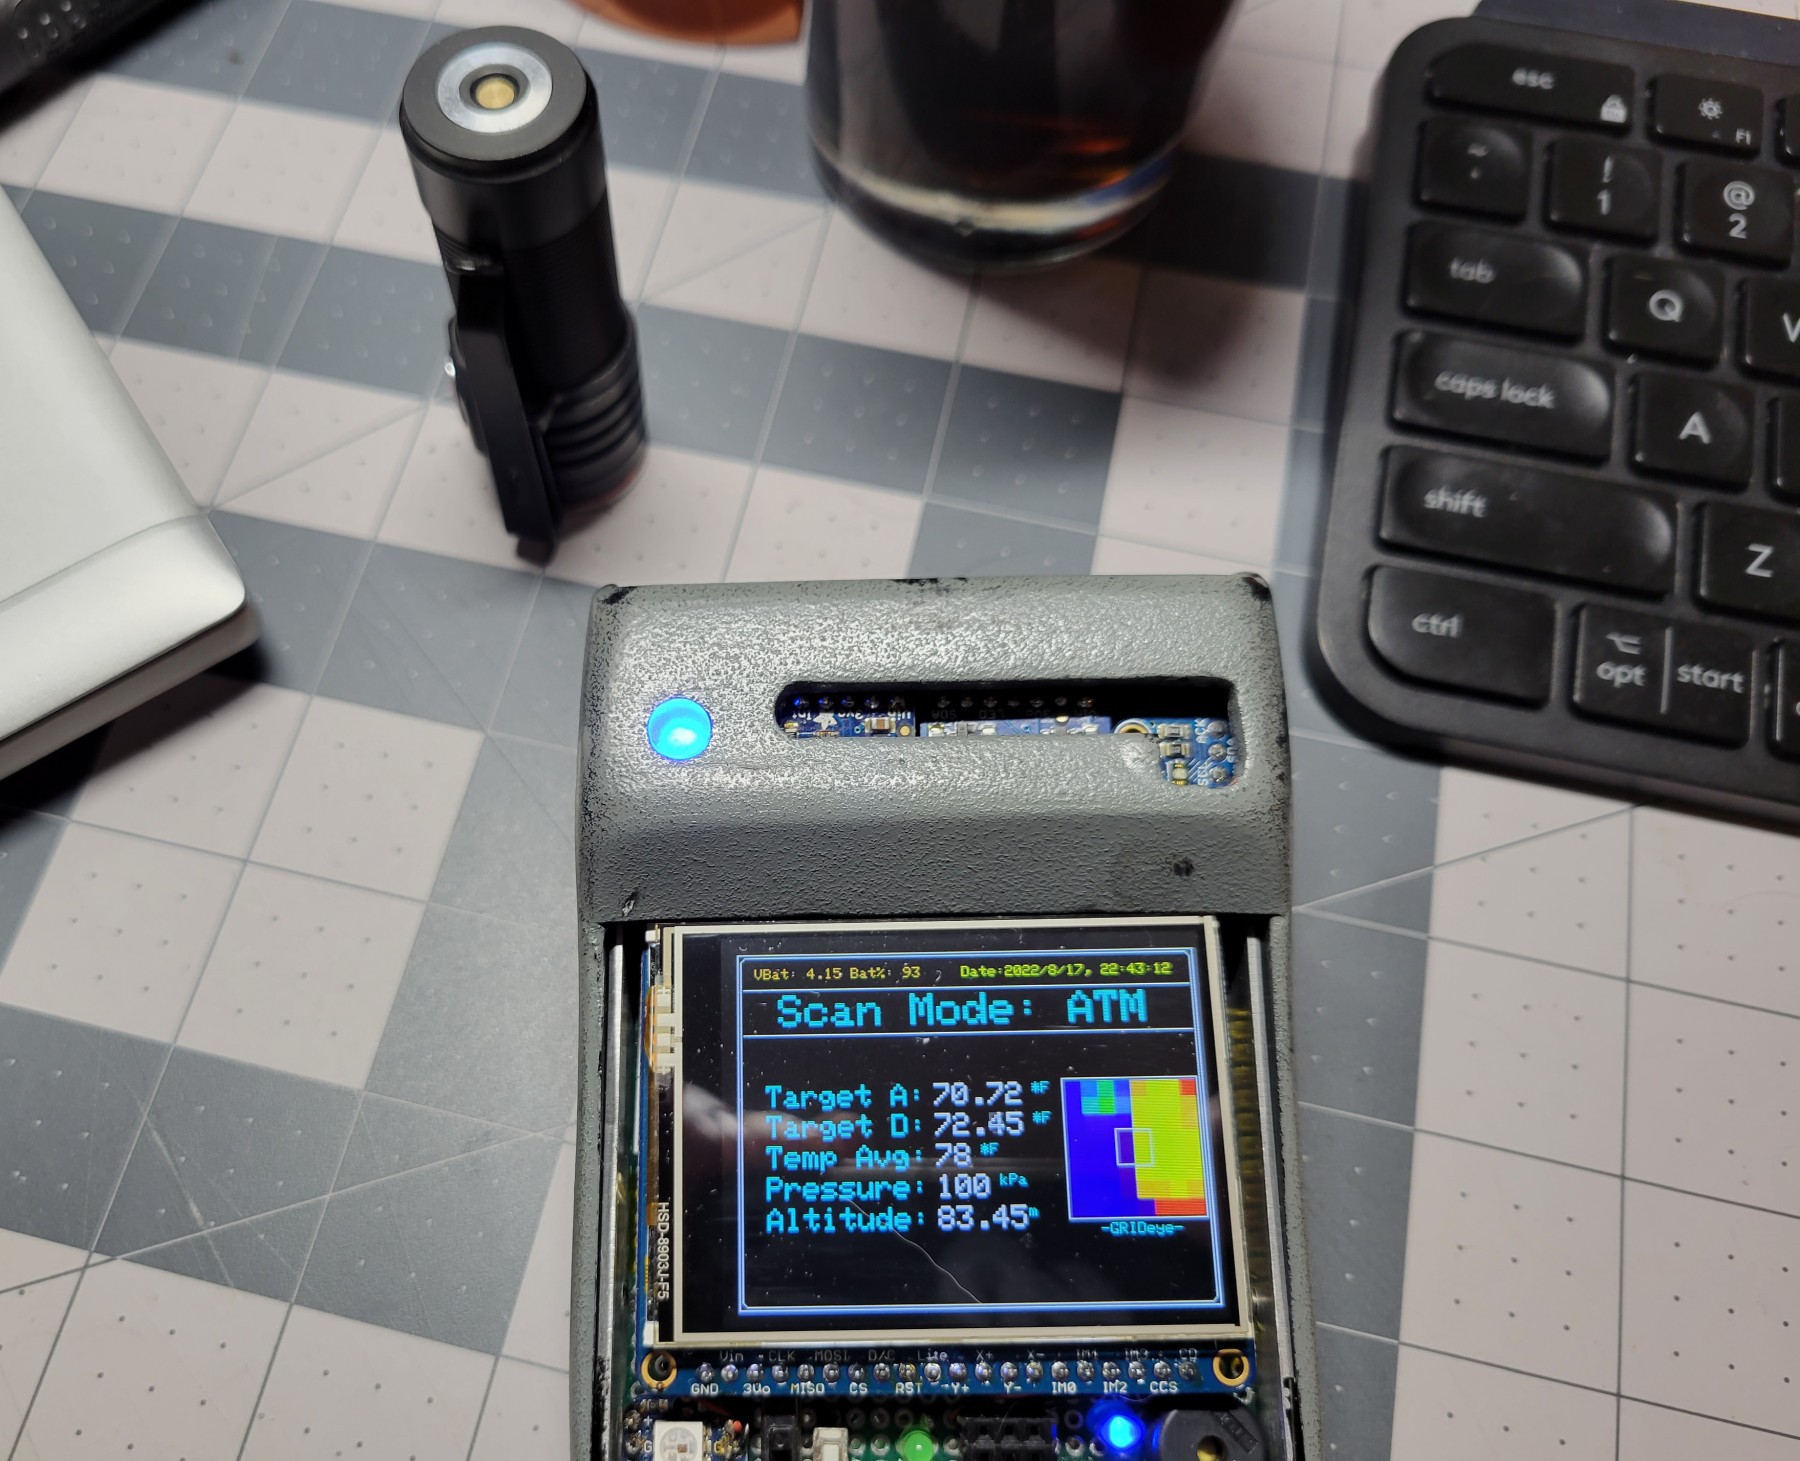
    • Beginning to refine UI, ATM, LUM, MEC and RAD have gotten some work. ATM in particular got some changes so the Grideye can be easily moved or resized if need be. MEC has max readings displayed now.
    • Removed SD card logging for now, since I changed to the Feather M4 Express from the M0 Adalogger there's no wired-up card slot. There's one on the TFT but it needs to be wired in, this is a likely future task.

    I've also been messing with new sensors like the MLX90640 thermal camera (24x32 thermal pixels) and the M4 is plenty fast to run it but I'll need to give it it's own scan mode I think. That sensor waiting for the other ATM sensors kinda makes it a bit rough to use. I'm also looking at how to integrate a BME680 into it, replacing the BMP280. This would add humidity and basic air quality measurement. To do this it'll likely take splitting the current BMP280+MPU9250 breakout into two boards for ATM and 9DOF. Another thing to look at later on.

    I am working on the v6 body still, started a new mainboard to work on but with the heat this summer in my region, and all others :< , so that's low priority. I also plan to make a manual for the v6 (and maybe v5) as well.

    I'll update again when there's enough

  • Resuming progress

    Queadlunn07/25/2022 at 19:40 3 comments

    Hello all!


    I'm not dead and have gotten to pick this project back up after a long time.

    My current work isn't really ready to post, I'm still getting back into the swing of Arduino stuff again. Currently I'm looking at i2c-based IO expanders to consolidate some of the I/O pins on the Feather controller, maybe to allow 8-pin control of the TFT display.

    The new Tricorder is still a to-be-built, I had to scrap the main board I was working on but the sensor array is still partly assembled.

    It'll probably be a while before real updates happen but I still want to make progress on this.

    Thanks

  • Progress! Even if it's a little bit

    Queadlunn02/16/2020 at 21:02 0 comments


    Started to wire the mainboard together, even if slowly. I'm currently working on getting all of the power stuff connected up first, then I'll do the data connections. I plan on getting the mainboard working first, then working on the sensor array assembly. Slow going but it's progress!

    Thanks to Mit Balkens (https://hackaday.io/MitBalkens) for pointing out the correct hinges, I've updated the Thingiverse page and the downloadable model pack here with the correct information.

  • My current to-do list for V6

    Queadlunn11/07/2019 at 16:36 0 comments

    Bit of a lag between updates, sorry. Going to be a bit slow, probably through the end of the year right now.

    My current to-do list:

    • Finish wiring new mainboard
    • Integrate Radiation Watch board
    • Build code for new MICS-6814 gas sensor and it's power regulator (get base 3 gas types working for now, will expand later)
    • Figure out flex cable between main body and door
    • Design labelling for the door panel touchpads and a unit label

  • Good enough to ship!

    Queadlunn10/01/2019 at 04:47 0 comments

    I finally have the 3d-printable design good enough to throw onto thingiverse and here and consider it 'good enough' to fully release.


    (Here's the thingiverse link: https://www.thingiverse.com/thing:3796426 )

    I've got the files zipped up and uploaded as 'OHI Science Tricorder V6 Chassis - Release ver.7z'

    It's pretty easy to assemble, you just need a small handful of hardware besides the internal electronics. Specific parts and notes are in the Readme file.

  • Now in 3d, the Return!

    Queadlunn08/24/2019 at 05:14 0 comments

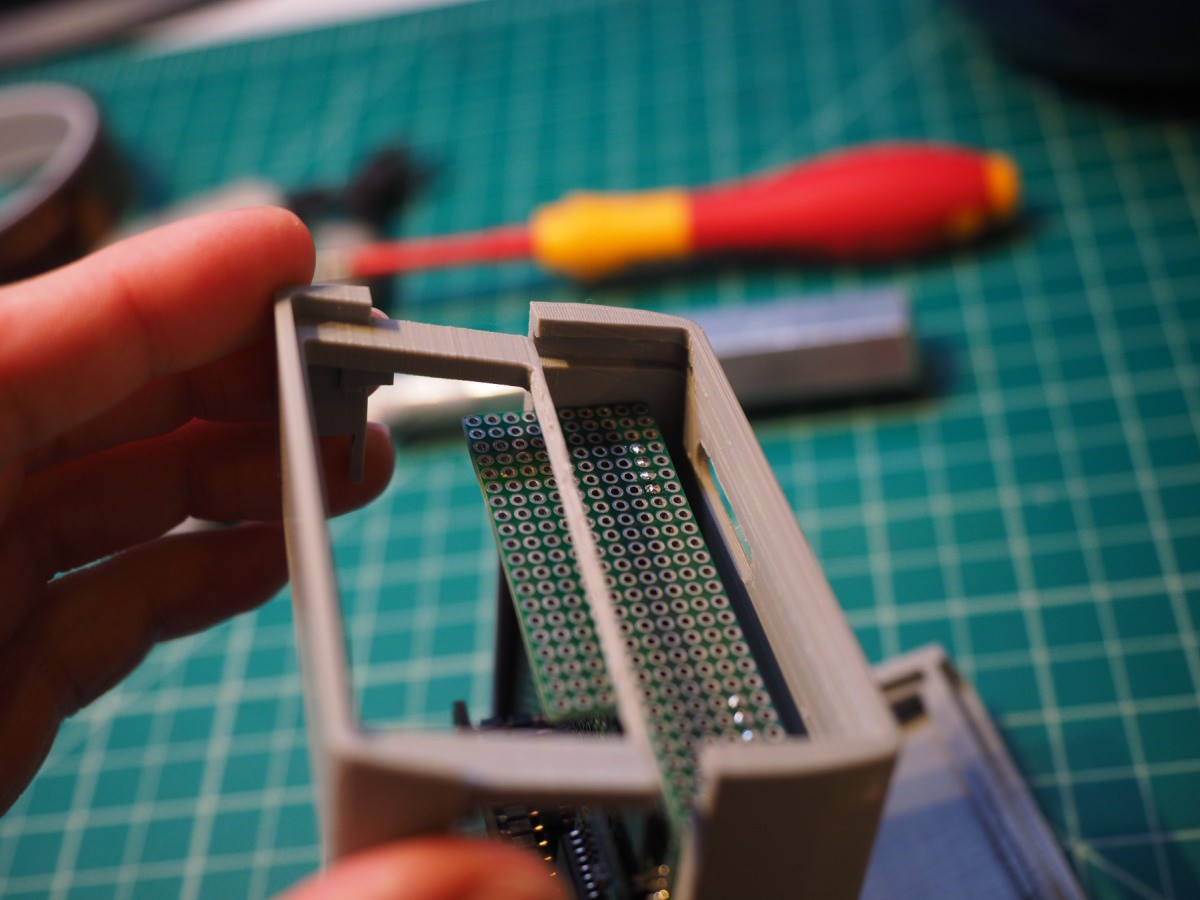
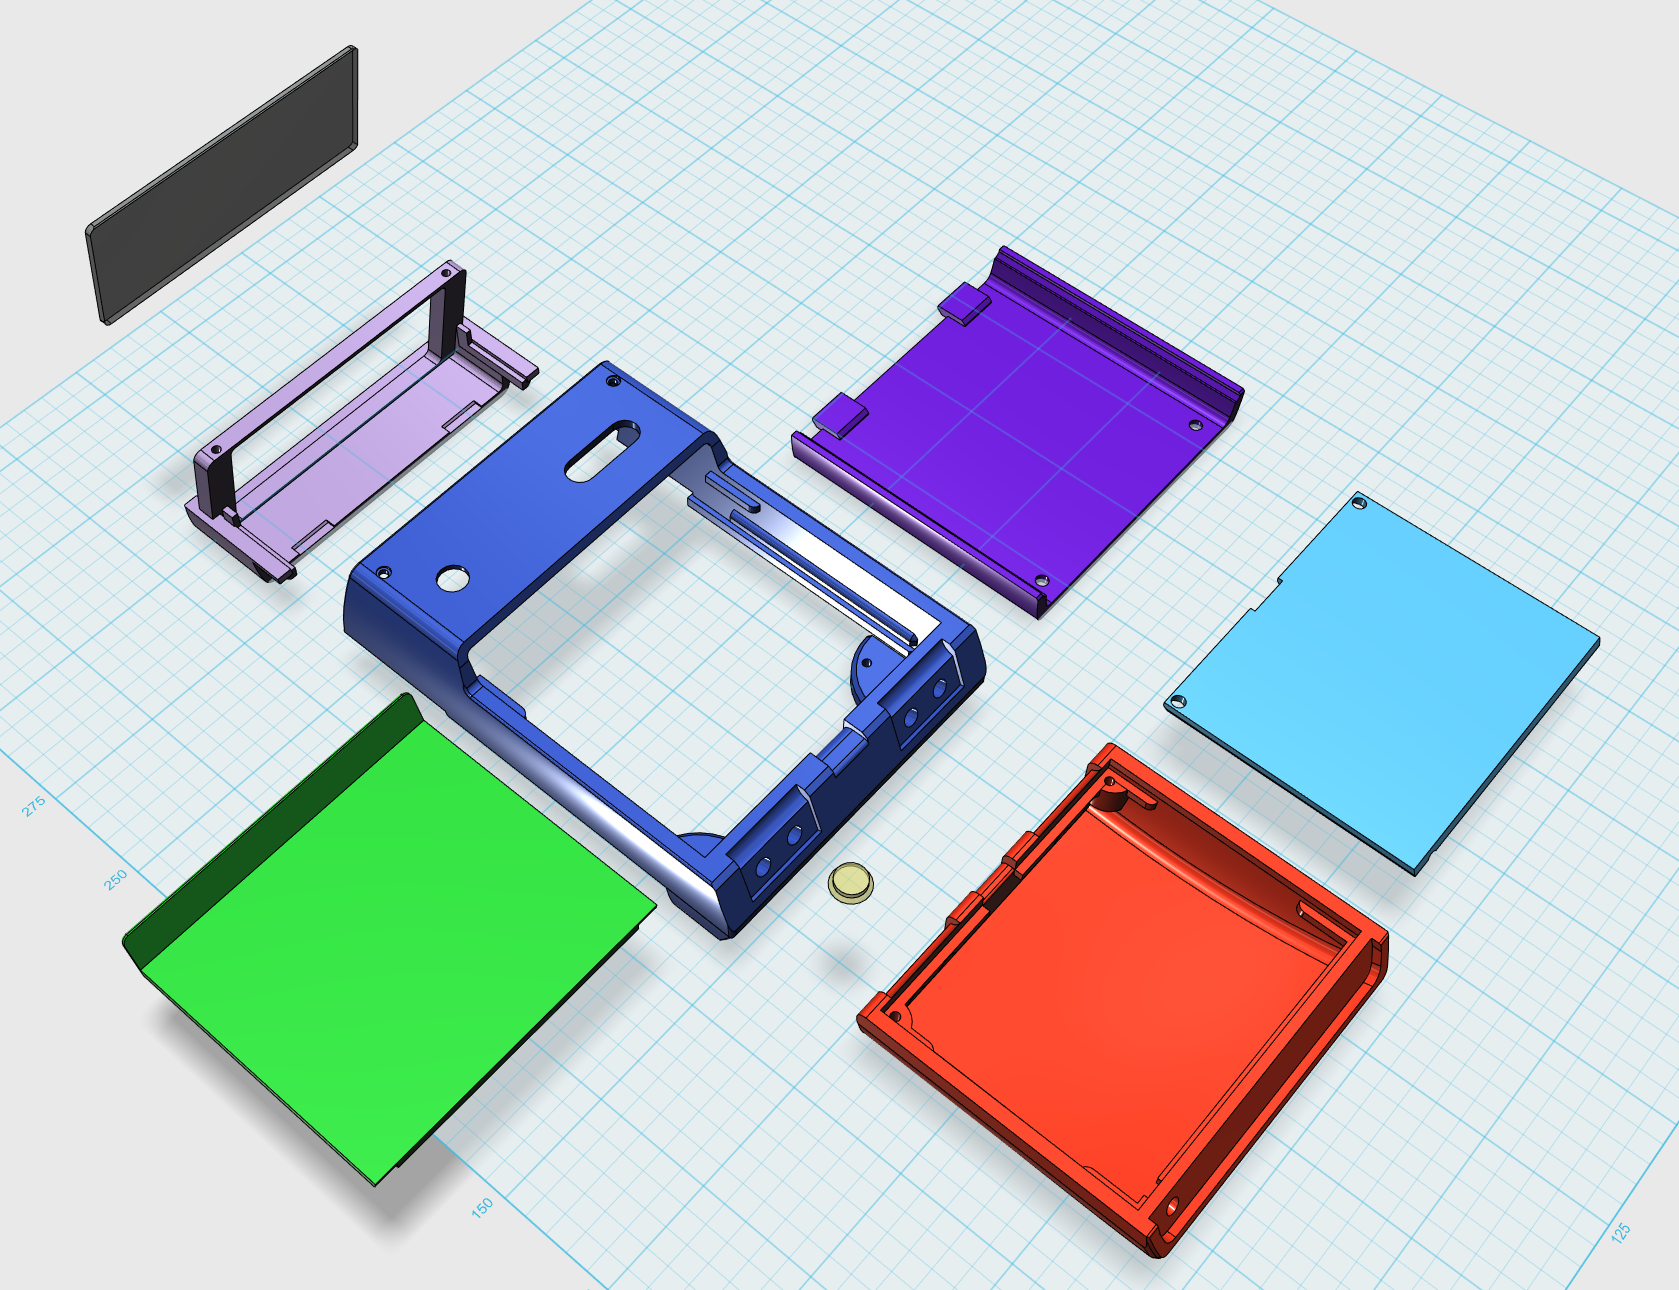
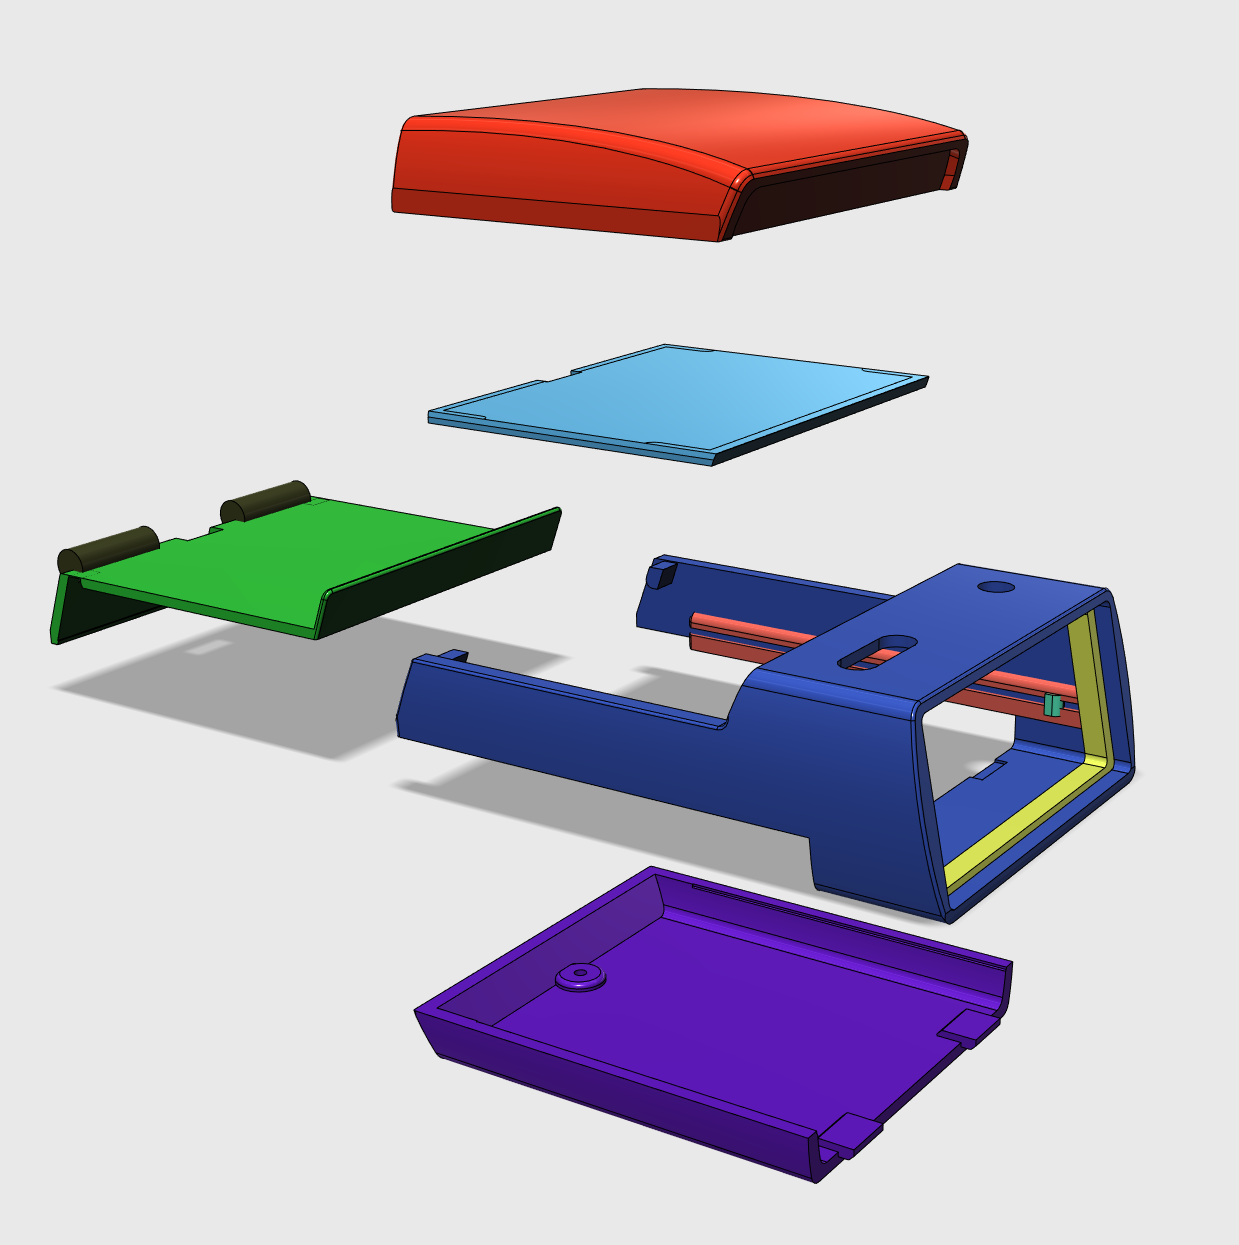
    Gotten a lot further along with the 3d shell, the primary parts are at least mostly done and I'm working on test-printing and fine-tuning stuff now.


    The big things left are getting the interface panels for the body and door further along. The main body panel needs cutouts for the TFT and controls, the door panel needs holes for the capacitive wire.


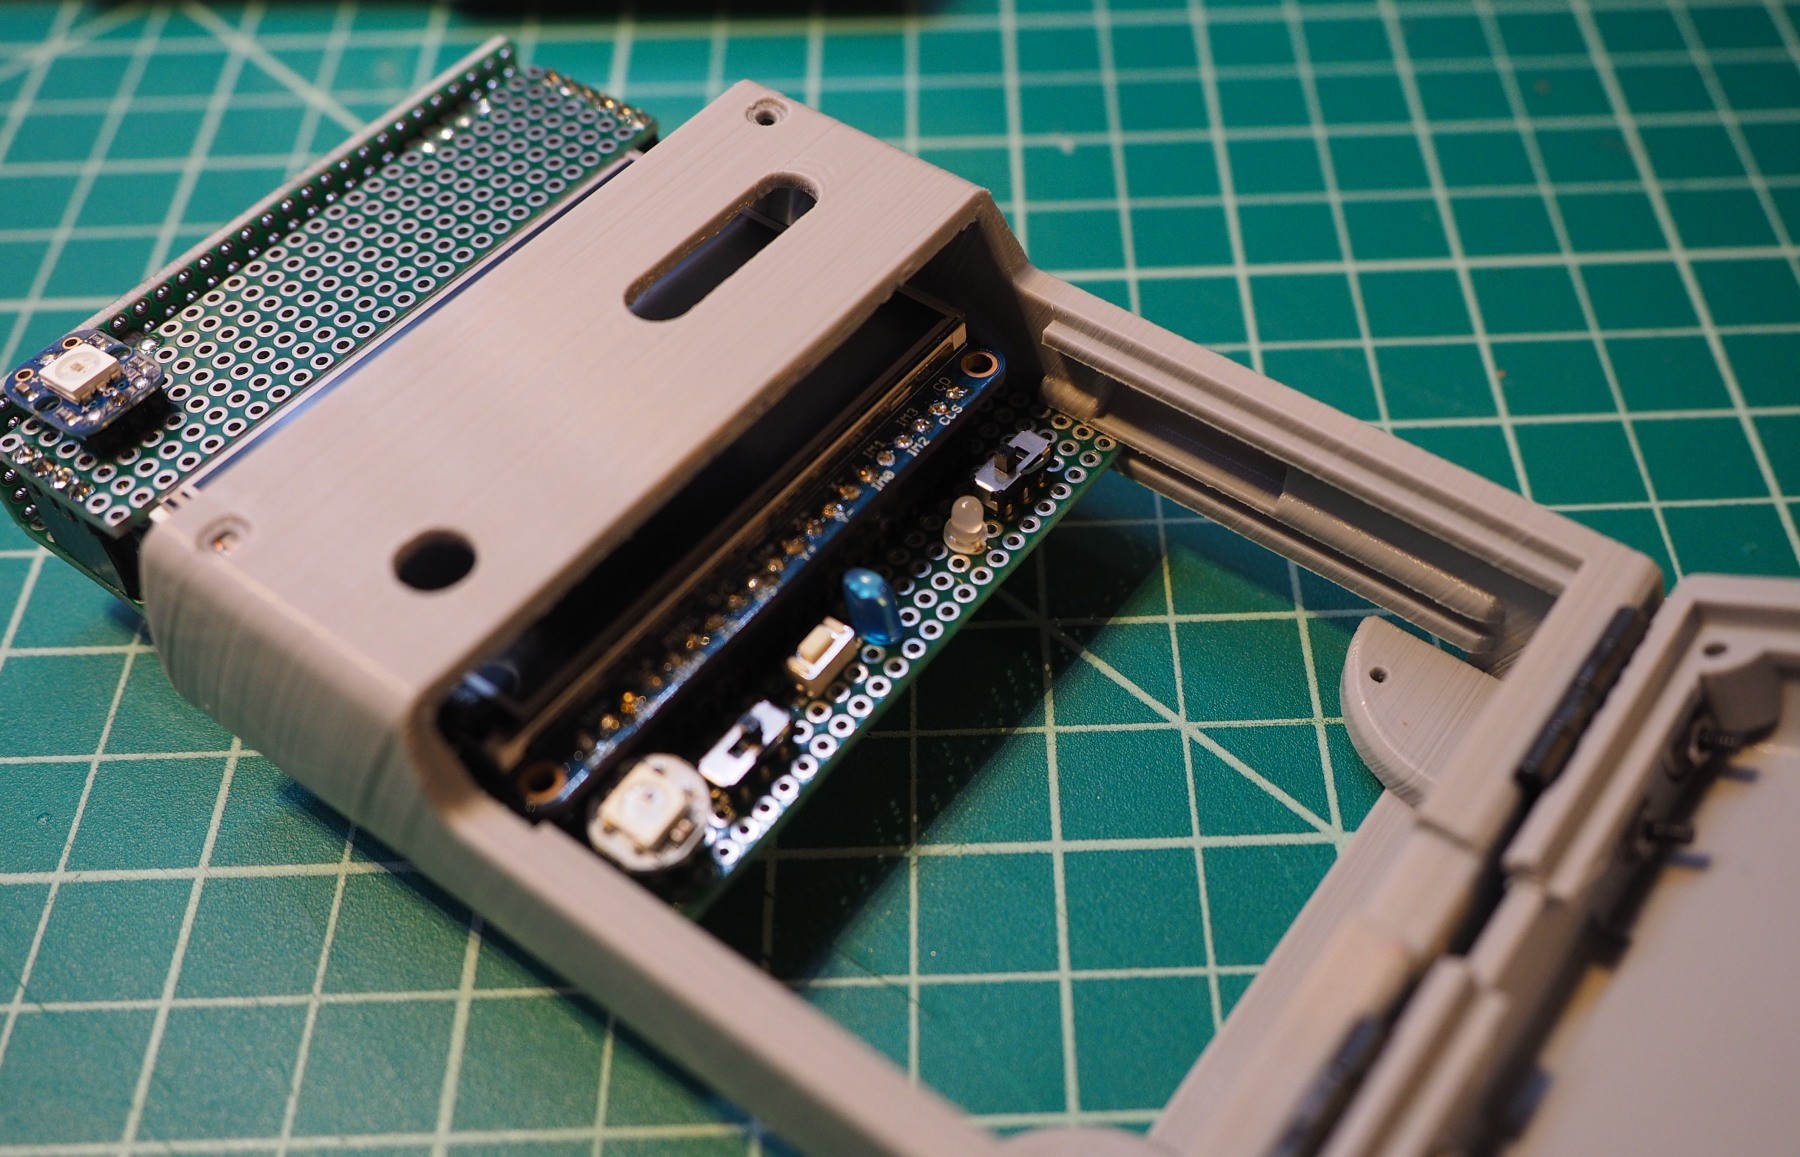
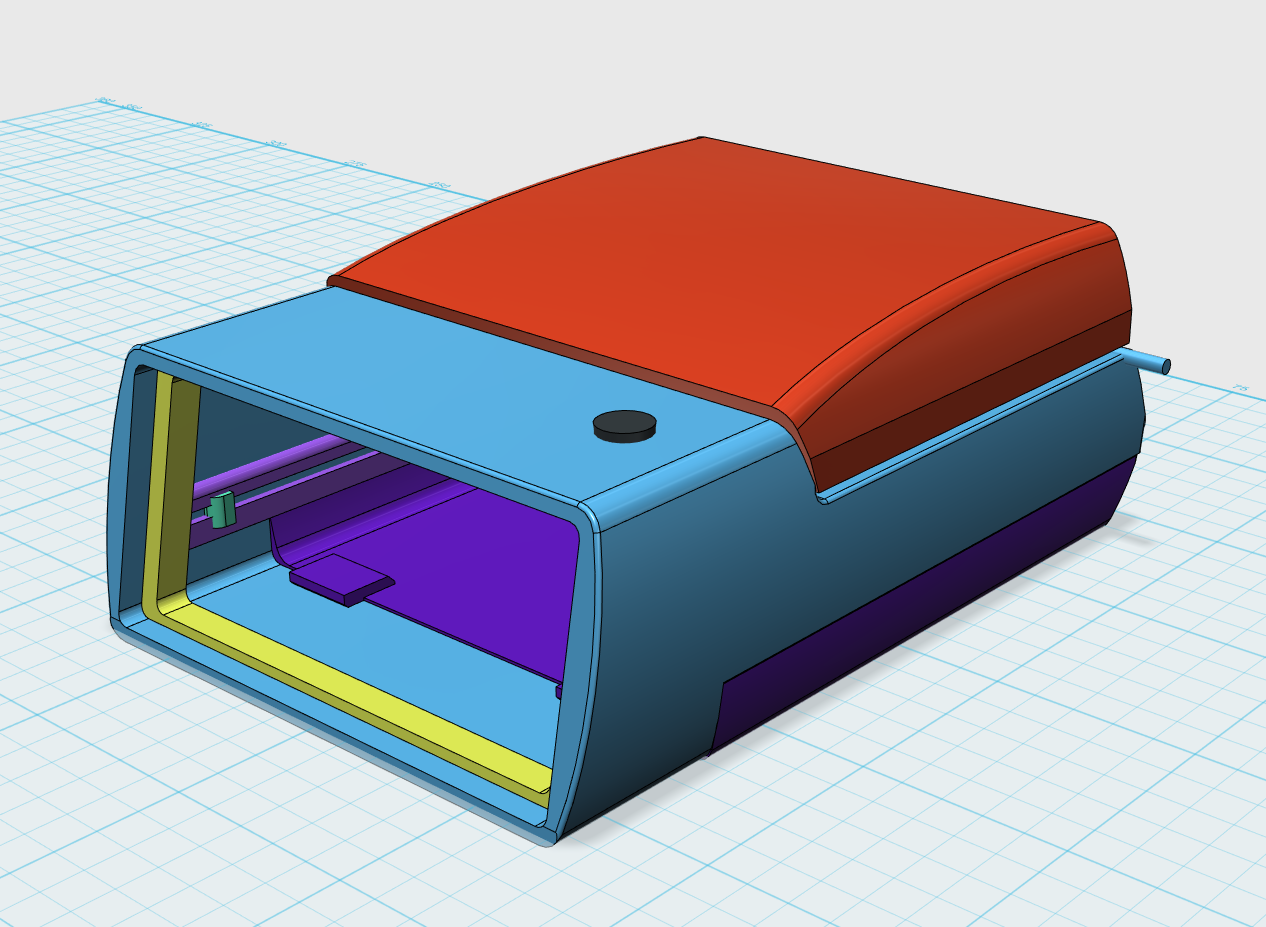
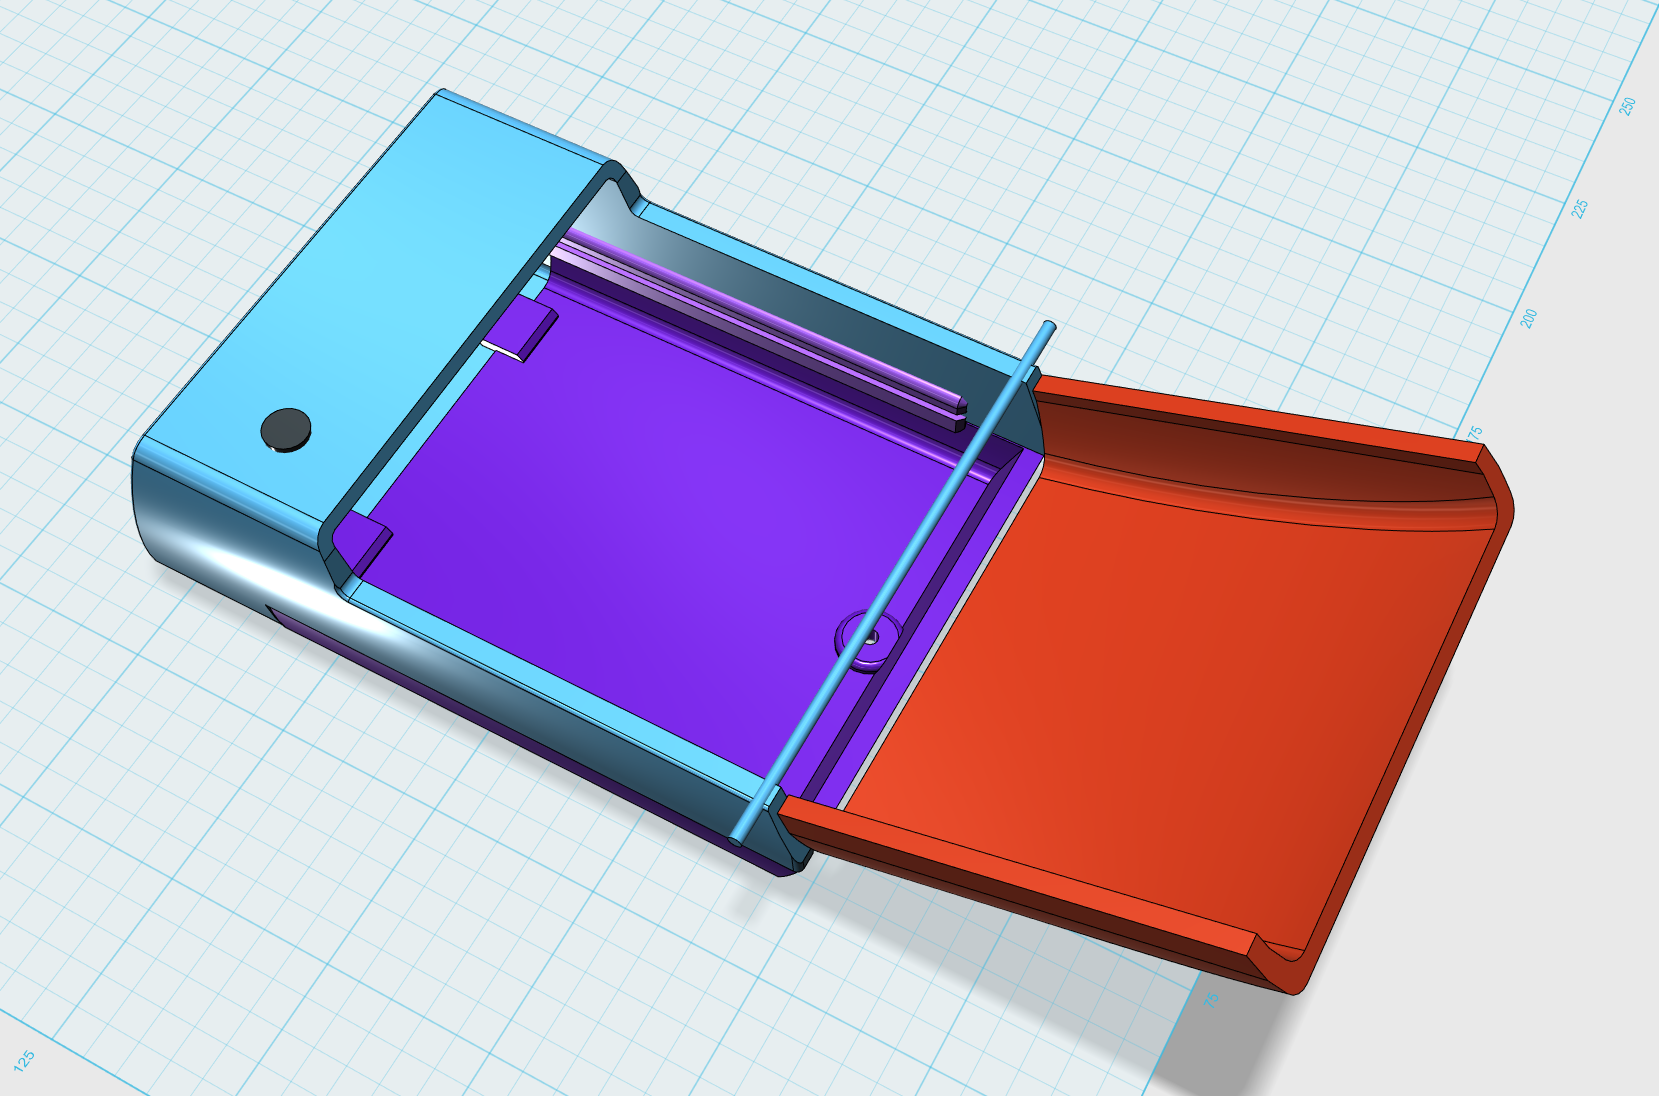
    The mainboard simply slides into the body and the body's under part (violet-colored in the 3d model image) fixes it in place. The desing's working pretty well so far but it does need a lot of tweaking for ease of use and ease of printing.

    Uploaded the current rev of the models as

    OHI Science Tricorder V6 Chassis - Rev5 NOT FINAL.7z.7z

  • And for the rough-draft

    Queadlunn08/08/2019 at 02:35 0 comments


    Added (really) rough-draft files for the V6 3d-printable chassis:
    "OHI Science Tricorder V6 Chassis - Rev3 NOT FINAL.7z"

  • Now in 3d!

    Queadlunn08/07/2019 at 06:15 0 comments

    After quite a while I've started to work on the next version of the Tricorder! I've had the hardware partially built for a while now but I'm starting to get the casing worked out in 3d so I (and anyone that wants to) can print it. It's going to take a lot of work since it's my first 3d design like this. Once I test it out and can make some changes I'll upload an STL and the original 123dx files.

  • More Progress, building Version 6

    Queadlunn01/15/2019 at 05:22 0 comments

    After a long lag I'm working on the hardware for the next version of the Tricorder!

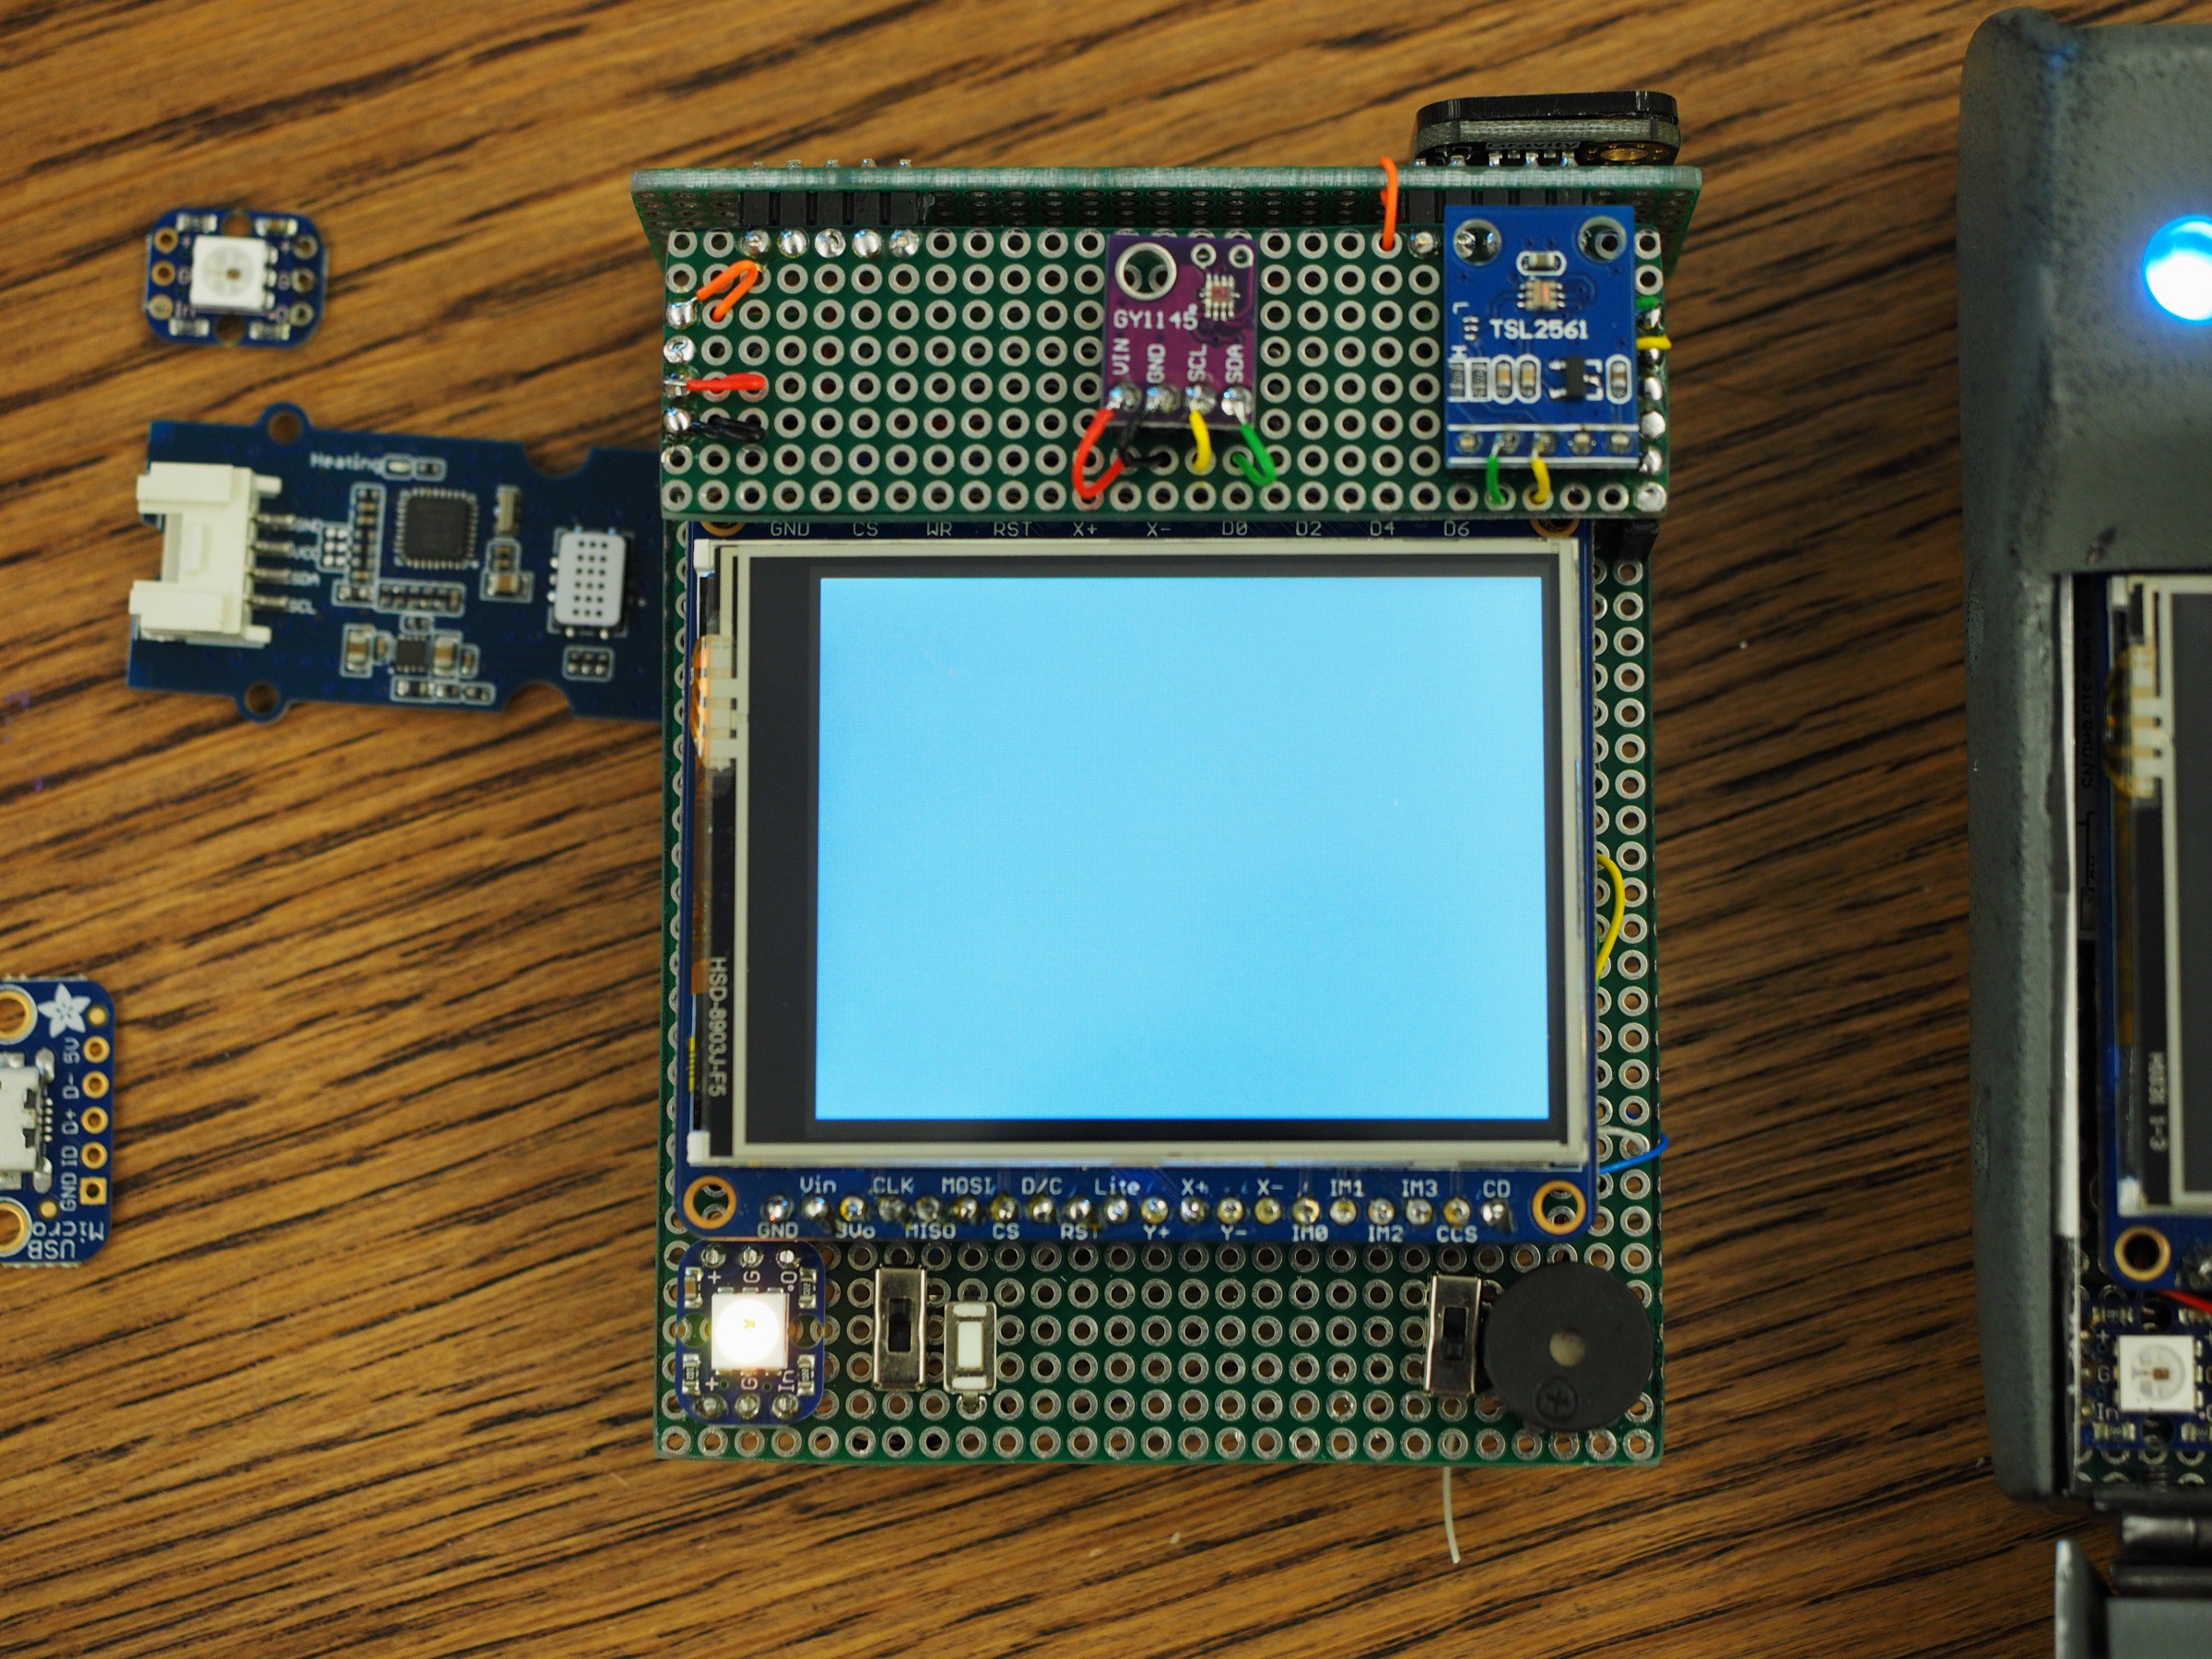
    It's not a huge change from the Version 5 to Version 6, more of cleaning up the current design that the Version 5 ended up with. The soldering work is about half done right now, I still need to finish up the sensor array, additional sensors and the door assembly.

    The current Version 5 will have some of it's sensors moved to the V.6 (the GridEYE, 9-DOF/ATM, UV sensors) and everything else will be the same sensors in smaller breakout boards.

    Changes with the Version 6:

    • Slightly re-designed, a bit wider and shorter to allow a touch more room
    • Different sensors for:
    •      Gas sensing, got the newer version of the sensor board
    •      LUX, IR sensors replaced with same IC but smaller breakout board
    • This Feather M0 has a Packet Radio for if I make any hand scanners in the future, still unsure of that

    Ultimately I want to keep the older version working, likely remaking the casing so I can fit bulkier sensors into it (like the shape of the TNG Medical Tricorder). Since both will be using the same Feather M0 boards I also want to write one firmware that will work on both units if possible.

    Right now I'm focusing on the hardware and will resume on the code afterwords.

  • Code updated to v10, a bit of work done...

    Queadlunn06/04/2018 at 22:58 0 comments

    Small update- Got a bit of work done on the code today, expanded the Radiation scan mode's functionality. Now it shows avg pulses/second, avg pulse strength (in uSv/h) along with the last pulse detected.

    Part of this was making a timer based off of the RTC to count how long the scan mode has been on, this could be useful in other modes later on as well.

    I also got a bit further on in building a framework to allow a more interactive UI. The ultimate goal is to have the ALT button switch the button pad's functionality to that of a D-PAD along with Confirm, Cancel and Back. This'll give me a lot more to work with, like highlighting scan elements or using a menu structure. A lot of work to do on this however...


    The updated code has been attached to the project, v10.

View all 11 project logs

Enjoy this project?

Share

Discussions

josh034 wrote 10/30/2019 at 02:31 point

I was wondering if there are any other components needed besides the 16 you have specifically listed? I'm going to start gathering the parts a bit at a time and I don't want to miss anything. 

  Are you sure? yes | no

Queadlunn wrote 10/31/2019 at 23:20 point

The parts list in the article, with the addition of the parts list from the 3d-print readme should be 90% of the stuff needed aside from wiring and miscellaneous headers and such I think.

  Are you sure? yes | no

josh034 wrote 10/04/2019 at 03:41 point

I like the new case. It's a very neat, clean design. =)

  Are you sure? yes | no

josh034 wrote 10/03/2019 at 02:51 point

 Is the magnetic reed switch there to be an option for the power switch used in the earlier designs?

  Are you sure? yes | no

Queadlunn wrote 10/03/2019 at 04:26 point

In the v5 design there's a main power switch and a magnetic reed switch. V6 will have the same thing when I get it's new electronics soldered together.

  Are you sure? yes | no

josh034 wrote 09/16/2019 at 20:54 point

Thank you for responding so quickly. Again, sorry for so many questions. But the assembly guide would answer these. I should have waited for that. You have been very gracious in your replies. I will ask this, as it won't be in the guide. Do you plan on selling these in kit form, or anything like that? Now I will have patience and await the assembly guide. 🙂

  Are you sure? yes | no

Queadlunn wrote 09/17/2019 at 06:20 point

Not at this time. Maybe in the future, when I have my own PCBs designed but even then they'll take a good amount of soldering work to get operational.

  Are you sure? yes | no

josh034 wrote 09/16/2019 at 20:33 point

I have a three questions, if you don't mind. In the picture of an up close view of the screen with the system in ATM Mode, what is Target A and D? Is there a B and C somewhere? The other question is, is there anything under the keyboard, other that wires?  I couldn't decide, from looking at all the pictures, but I am guessing not. The last is about the carbon fiber in the 3d printing. What are the qualities of that particular material? Is it wear resistant, holds up to impact, etc? Sorry to have so many questions. But I really want one of these. And I'm trying to understand it all, but I have zero skills in electronics.

  Are you sure? yes | no

Queadlunn wrote 09/16/2019 at 20:44 point

ATM Target sensor A is an Average of the center 4 pixels of the GridEye sensor (an 8x8 thermal IR sensor), sensor D is the MLX90614, a Direct measurement.

Under the key panel is the Adafruit CAP1188, the wiring going from the Door assy to the main body is 2-wire 12c, an interrupt for the capacitive controller, +v and Gnd.

Carbon fiber PLA is, I'm assuming, the strongest material that my printer can work with in its current state. If I could print in ABS, Polycarbonate or other more resilient materials I probably would have gone with those.

I'll be doing another iterative chassis print and I think it's close to complete for this version. At that time I'll probobly do a write-up/guide covering assembly. The chassis is designed to be easy to assemble and doesn't require specific boards aside from the mainboard being a specific size and the capacitive breakout PCB (this could be changed too, with a bit of work). It'll likely require soldering work no matter what but the actual internals could be simplified a fair amount, at that point it'd just take minor soldering and changing the code.

  Are you sure? yes | no

josh034 wrote 09/13/2019 at 17:02 point

So it won't be that heavy. That would be easy to skip into a backpack or pocket if needed.

If I remember, you said somewhere you were going to finalize the printed material in carbon fiber?

  Are you sure? yes | no

Queadlunn wrote 09/13/2019 at 17:26 point

I'm going to print the final chassis assembly for the v6 unit with carbon fiber PETG or PLA, something like this:

https://www.matterhackers.com/store/l/3dxtech-carbonx-petg-3mm/sk/MKJ2V47R

I haven't used carbon fiber-filled print filament before but it should be fairly easy to tune my printer to work with it, I've already got an upgraded hotend and hardened nozzle installed.

  Are you sure? yes | no

josh034 wrote 09/12/2019 at 15:48 point

Understood. I knew from looking at the pictures space is at a premium. And speaking for myself. I like the current clam shell style. I would use it as an EDC device, so the clan she'll would be protective without an extra case. That does bring up a question. What is the weight of the two models you have: the green metal one vs the 3D printed one?

  Are you sure? yes | no

Queadlunn wrote 09/13/2019 at 05:49 point

The v5 Aluminum and ABS chassis one is 272g.

The v6 PLA-printed chassis is 190g but still missing some internals. This will be printed with different filament for the final build so maybe around 220g?

  Are you sure? yes | no

josh034 wrote 09/12/2019 at 02:06 point

Would you need to make major changes to  the design to accommodate the other two? And would you need switch to a D-pad style of controller? I ask that because I'm not sure where you would add another button to the current design.

  Are you sure? yes | no

Queadlunn wrote 09/12/2019 at 06:22 point

Physical space is always an issue in this design for the actual sensors. For the controls I do plan on moving away from the simple press-of-a-button mode switching to some semblance of a button-controlled UI but that's well down the line right now.

  Are you sure? yes | no

josh034 wrote 09/11/2019 at 17:38 point

Would it be possible to use one of the sensors for lightening detection?

  Are you sure? yes | no

Queadlunn wrote 09/11/2019 at 17:53 point

It's one that's been on the list of 'possible additions' I've had for a while now:

Lightning Flex Module (RF) - https://www.tindie.com/products/Fyberlabs/lightning-flex-module/
Magnetic Imaging Tile - 8x8 - https://www.sparkfun.com/products/14652
Adafruit Ultimate GPS Breakout - https://www.adafruit.com/product/746
Adafruit SGP30 Air Quality Sensor - https://www.adafruit.com/product/3709

The magnetic imaging tile is likely too much for this project in processing needs and physical size, and the GPS would likely be too large. The other two might work out later on though.

  Are you sure? yes | no

josh034 wrote 08/29/2019 at 14:57 point

Thank you for your answers. Sorry for all the questions. 

  Are you sure? yes | no

Queadlunn wrote 08/29/2019 at 18:46 point

No worries, I'm glad to answer questions about the project!

  Are you sure? yes | no

josh034 wrote 08/29/2019 at 14:05 point

I like your design.  I am anxious to see your design come to completion. 

Is it possible to upgrade the sensors and software without starting over from the square one?

  Are you sure? yes | no

Queadlunn wrote 08/29/2019 at 14:48 point

Upgrading should be fairly easy once a unit is completed. Since I'm currently designing the electronics around pre-made breakout boards for most components all that's needed to change/upgrade a sensor is to wire it in and update the Arduino code with what the new components need to do. Upgrading the Adafruit Feather also should be pretty easy as long as the microcontroller itself is the same, otherwise the pins would need to be updated and code changed to work properly. Some core components like the i2c multiplexer and clock will (eventually) be soldered to the mainboard whenever I can get my own PCBs designed.

  Are you sure? yes | no

josh034 wrote 08/29/2019 at 14:00 point

Ok. It sounds like the 3d prints will be pretty good too. Like I said, for myself, this would be an EDC device. So durability would be important. But it sounds like that won't be too bad. And if the circuit board stayed in place from an approximate 1 meter drop, then that is half the battle.

  Are you sure? yes | no

josh034 wrote 08/29/2019 at 00:39 point

I was thinking of this as an EDC item. So water resistance, or lack thereof, would be important. Another question is durability? Have you used one of your builds enough to know if that would be an issue?

  Are you sure? yes | no

Queadlunn wrote 08/29/2019 at 04:02 point

The older aluminum/abs casing is pretty sturdy, it's been carried around for a couple years in the bottom of bags and dropped a meter or so a number of times and seems pretty resilient.

The 3d-printed casing I'm working on I don't really know yet. I'm doing my best to design it for strength (and will print it with carbon fiber+PLA for the final version) but can't test it yet.

  Are you sure? yes | no

josh034 wrote 08/28/2019 at 21:15 point

Have you done anything to make the device water resistant?

  Are you sure? yes | no

Queadlunn wrote 08/28/2019 at 21:52 point

Not yet, I could probably seal off most of the body and door assemblies but many of the sensors need unobstructed exterior access (or to figure out non-impeding glass shields). For now I'm going to harden the casing to make it fairly resilient but maybe at a later point I might look at sealing the design up.

  Are you sure? yes | no

Tim Rightnour wrote 08/16/2019 at 15:48 point

I like the idea of averaging 3 temperature sensors.  How does that play out in practice?  Do they diverge alot?

  Are you sure? yes | no

Queadlunn wrote 08/24/2019 at 05:17 point

It's usually pretty close to accurate from what I can tell, though letting the tricorder acclimatize for a bit is the best way for it's internal temp sensors to get an accurate average. When I need a quick check I usually use the non-contact IR temp sensor and point to something metal at about hip-level.

  Are you sure? yes | no

Daemon informatica wrote 08/07/2019 at 13:06 point

Did you know there is (or used to be) a project where people are challenged to build medical tricorders to detect / diagnose symptoms and deceases? ^_^ Quite a monetary incentive too, if I recall correctly..

Nice work. I've been messing around with ideas to build one myself, but mostly because I once got a medical tricorder prop somewhere in the past, and been meaning to extend it with actual hardware.

  Are you sure? yes | no

Ken Yap wrote 08/07/2019 at 15:10 point

>detect / diagnose symptoms and deceases

As in "He's dead Jim"? 😉

  Are you sure? yes | no

Queadlunn wrote 08/07/2019 at 17:00 point

I would like to build a medical tricorder at some point, but I don't trust my skills enough to use something for critical needs like anything medical, sadly...

  Are you sure? yes | no

Ken Yap wrote 08/07/2019 at 04:23 point

Hahaha cute 👍. You also need to make one of those cylindrical flashers used by Bones for body scans. That one doesn't need to do anything but flash and make a woo woo sound.

  Are you sure? yes | no

Queadlunn wrote 08/12/2019 at 16:53 point

I did make a hand scanner at one point, just some neopixels that were triggered by a cheap magnetometer:

https://ohicosplay.tumblr.com/post/161560143234/queadlunn-heres-something-i-put-together-today

  Are you sure? yes | no

TheotherMike wrote 02/11/2019 at 16:33 point

Not bad! Unfortunately I was never able to finish my own one. I´m still not sure about the basic strategy how to build it. You´re using a µC with on board radio, that´s useful in the long term I think. I also thought of using only limited amount of sensors within the main unit which might give long runtime, small size and weight. Using LoRa etc. one could shift all heavy duty sensors out to accessorie units... 

  Are you sure? yes | no

TheotherMike wrote 02/11/2019 at 12:09 point

Hah, cool Project ! I found it because of your comment on another tricorder build... ;-)

You really have a hell of a lot of sensors in tis package.

How Long can it rum from batteries?

  Are you sure? yes | no

Queadlunn wrote 02/11/2019 at 16:13 point

The current version will run for about 3 hours on the 500mAh battery. The newer version will hopefully have a 700 mAh battery though which should make it run a bit longer.

  Are you sure? yes | no

Similar Projects

Does this project spark your interest?

Become a member to follow this project and never miss any updates