-
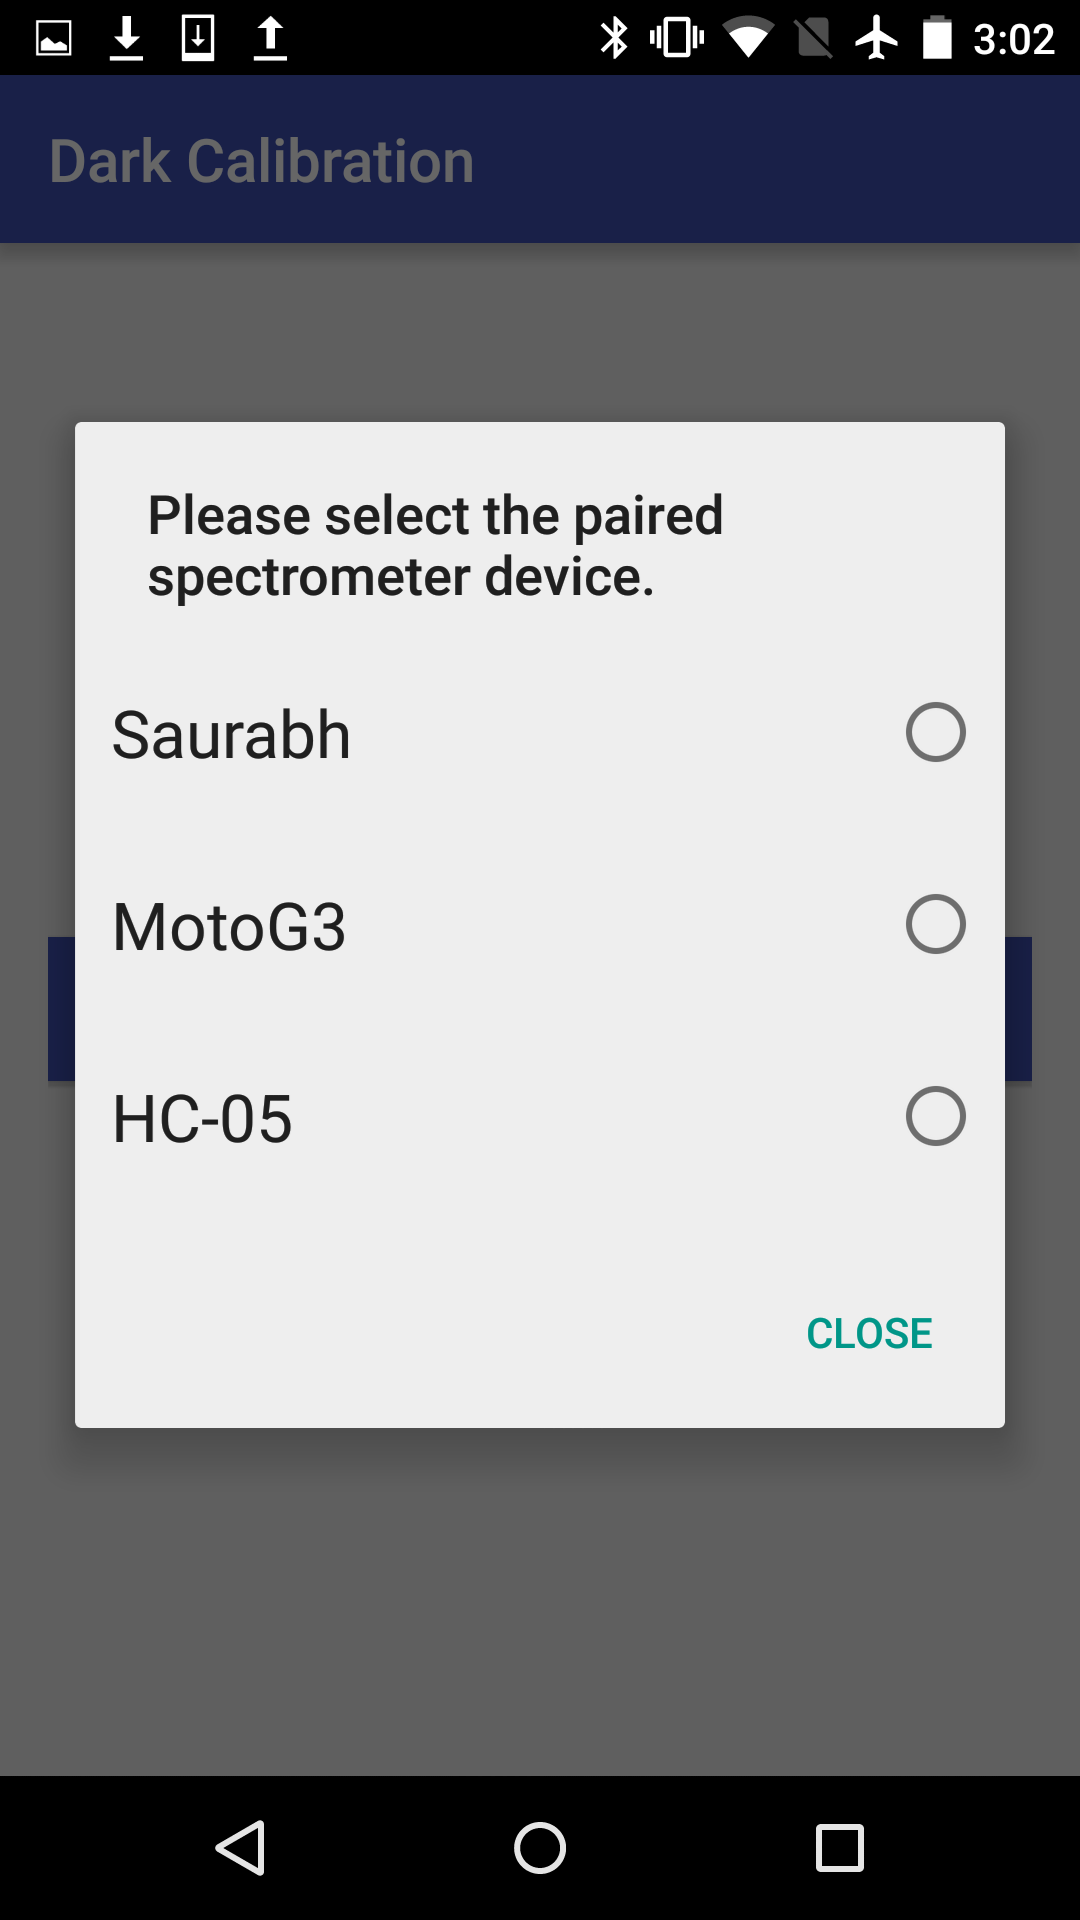
App Update: Added option to select which Bluetooth device to connect to
10/10/2016 at 09:42 • 0 commentsIn this app update, we have added the option for users to select which device they want to connect to, so that the app can connect to any device, irrespective of the name of the Bluetooth module used with the spectrometer.
A standard dialog with a simple list was used to achieve this trivial but much needed feature as users could previously only connect to devices named "HC-05". The update increases compatibility to any Bluetooth module irrespective of its model, make or name. The code changes can be found here on the commit log on GitHub.
![]()
-
Measuring fruit ripeness
10/02/2016 at 09:33 • 0 commentsWe have successfully used the device for non-destructive testing of fruit ripeness. Ultra-Violet (UV) fluorescence from Chlorophyll present in the skin of three different kinds of apples - Red Delicious, McIntosh and Empire was measured over the period of 11 days. The data collected showed strong correlation with the ripeness measured by a penetrometer.
There are lot of interesting applications for such a portable device. Imagine carrying such a portable device when you next visit a supermarket, that helps you buy perfectly ripped fruits. Our work is published in Scientific Reports and you can read it in detail here.
![]()
Illustration of the device checking for fruit ripeness.
-
Building the Android Application
10/01/2016 at 18:02 • 0 commentsWe wanted the Android application to be compatible with as many Android devices as possible, so we ensured we only used features that were compatible with all devices running Android 2.3.3 or higher. This corresponds to 98.5% of Android devices. We also used Bluetooth 2.0 over BLE to ensure that maximum number of devices are supported. Using BLE would have reduced the percentage of supported devices (Based on statistics at the time of writing. Latest statistics can be found here).
Android Studio IDE was used to develop the application using the target SDK as Android 5.0 (SDK 21) but using only APIs that are supported down till Android 2.3.3 (SDK 10). The app was build incrementally by adding modules, starting from a basic skeleton for the overall app and then developing individual modules. The modules were refined as the app was built.
The overall architecture of the app consists of following modules with some overlap between modules:
- The driver routine: This consists driver routines for the app so that app can initialize and move ahead to appropriate parts of the app based on user inputs.
- The camera activities: To capture images of the objects being examined using the phone’s camera and save them onto local storage.
- Bluetooth activities: To pair with the spectrometer over Bluetooth and to trigger the reading of data from the sensor. Once the data is received, it is cleaned, visualized and stored.
- Visualization: To visualize the data received from Bluetooth and present it appropriately in the form of a plot so the spectrum can be observed.
- Database and data export: To store the spectrometer readings, images and to allow the user to exported the stored data to an excel file for further analysis.
-
Designing the housing
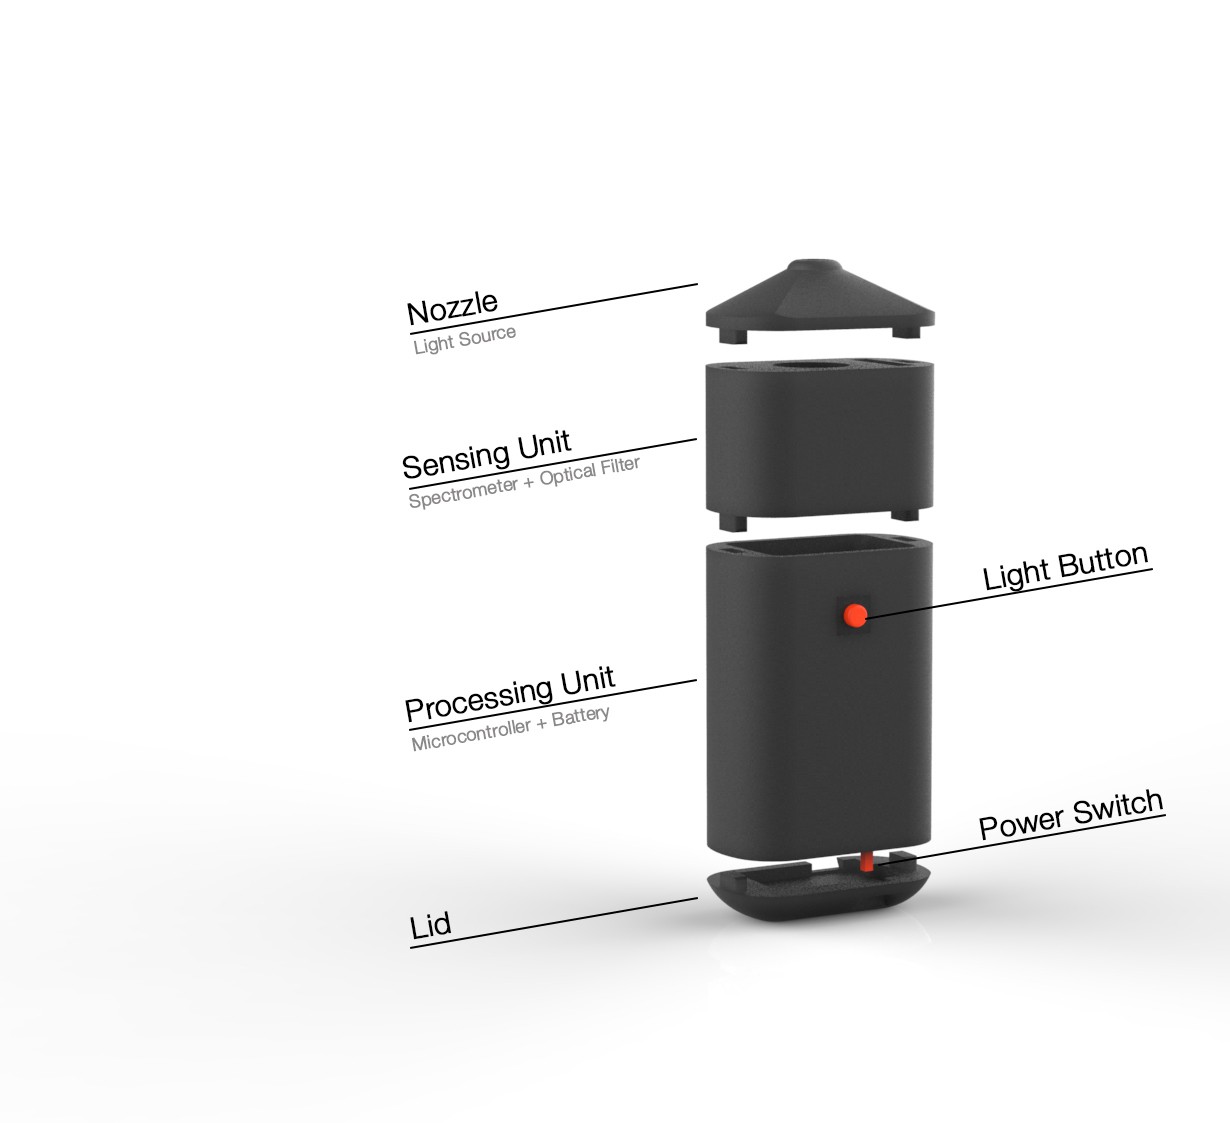
09/28/2016 at 18:58 • 1 commentConsidering the DIY nature of the build and need for constant modifications, we came up with a modular design for the housing. It’s small, everything fits neatly and at the same time gives easy access to different sections of the device for modifications. The device is split into four different sections -
1. Nozzle - This section houses the excitation source, LED.2. Sensing Unit - The spectrometer and the optical filter sits in this section.
3. Processing Unit - It houses other main electronics which includes the microcontroller, bluetooth module, battery, and the buck booster.
4. Lid - There are no components in this section, once removed it provides access to battery connector for charging.
All the sections easily press fit into a neat little device that looks good and can easily be carried in a pocket. :)
![]()
All the design files can be downloaded from the ‘files’ section of this document. The files are available in ready to 3D print .stl file format and also in neutral file format for easy modifications! The parts designed are optimised for 3D printing and there is a file named ‘preferred_print_orientation’ that shows orientation of the parts on print bed while printing. -
Building the Electronics
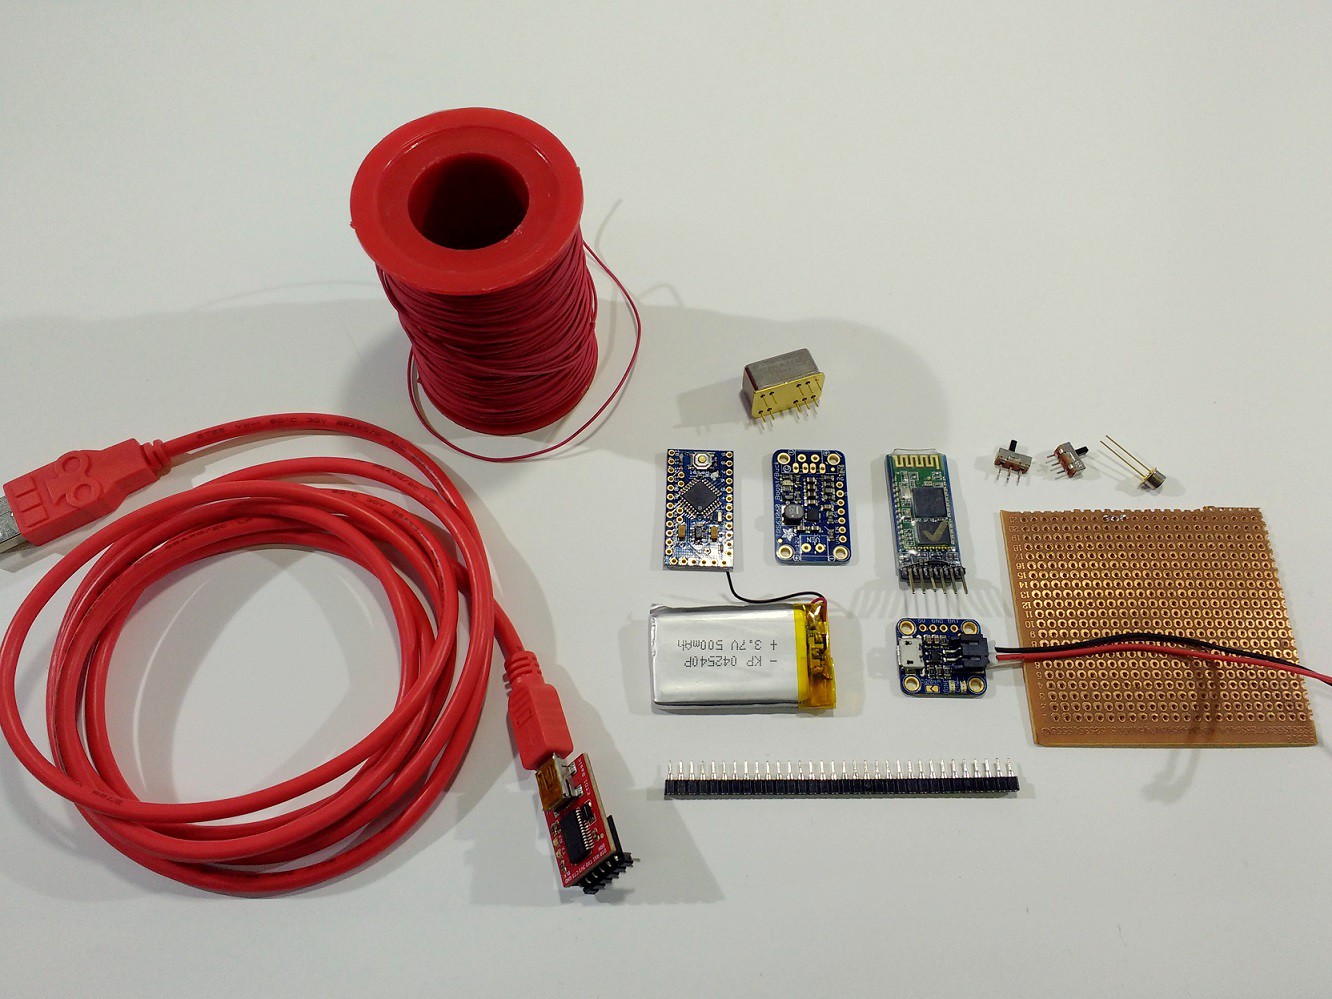
09/28/2016 at 09:47 • 0 commentsWe wanted the device to be easily replicated by people and extend its capabilities and so in that effort we have build it using easily available modules. The list of materials is available in the components section.
![]()
All required components
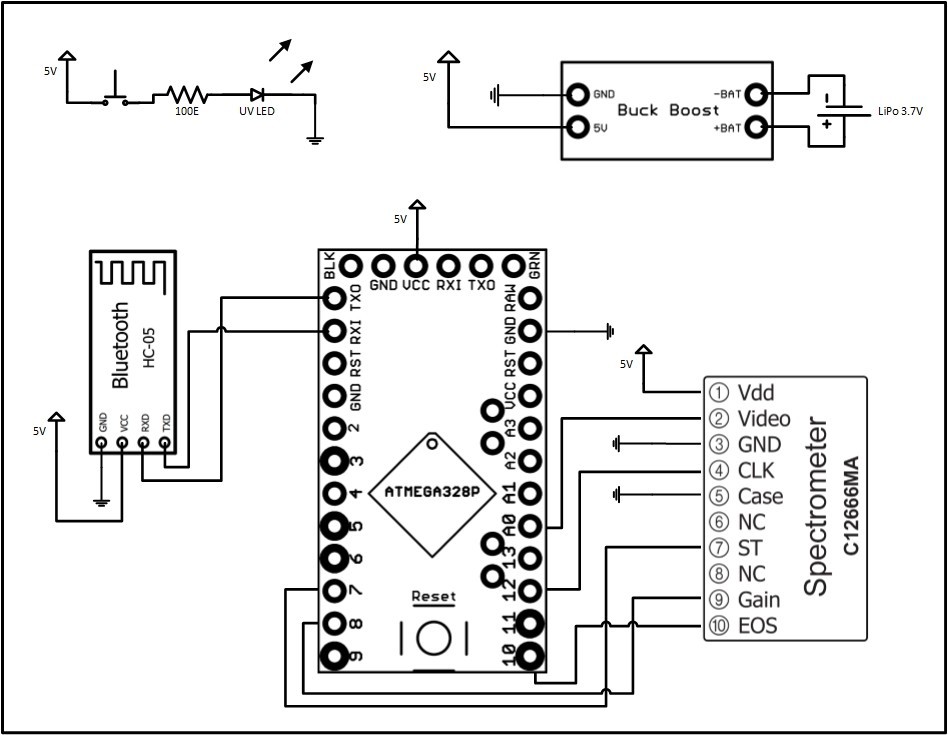
Connections of all these modules can be found in the circuit diagram attached below.
The modules used have all their PCB design files easily available for someone who wants to build a single PCB board that houses all the components used in the device. This can easily be done by someone with skills of PCB designing and fabrication. It is totally optional and not at all required for building and testing the device. Complete build instructions will be updated soon.![]()
-
Developing the socket for C12666MA spectrometer
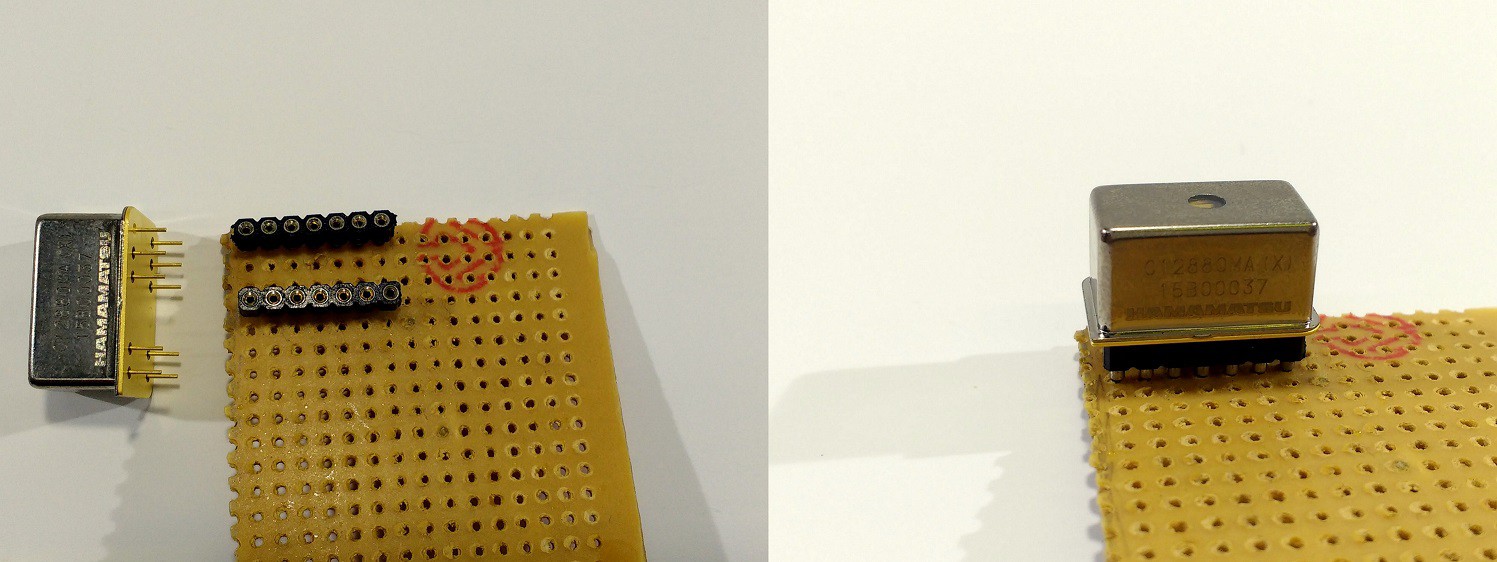
09/27/2016 at 18:44 • 0 commentsC12666MA is a sensitive module and it will be good to avoid direct soldering to the pins. Making a socket is easy and prevents chances of any damage to relatively costly spectrometer module.
As the pins on C12666MA module are round, so for good electrical connection round female headers should be used (Link for reference - https://www.sparkfun.com/products/743). And you will also need a small piece of Perfboard (ref ) and after soldering the headers it should look something similar to the image below.
![Socket]()
Extra perfboard should be removed for proper assembly in the housing.
WiSci: Wireless Spectrometer
Portable Wireless Spectrometer that lets you explore the world around you.
 Akshat Wahi