Myles Eftos
-
Modelling and Printing the Mold Master
05/28/2018 at 10:57 • 0 commentsInitially I thought about mounting the electronics in the back of the H, trying to fit everything in the footprint of the mold. But if I could get lights on the back, there would be some cool effects I could achieve. To get a consistent glow, the LEDs would need to be wedged in the middle of the H.
This did make mounting the PCB difficult though. I decided that I would mount the H on a small plyth that would house the electronics.
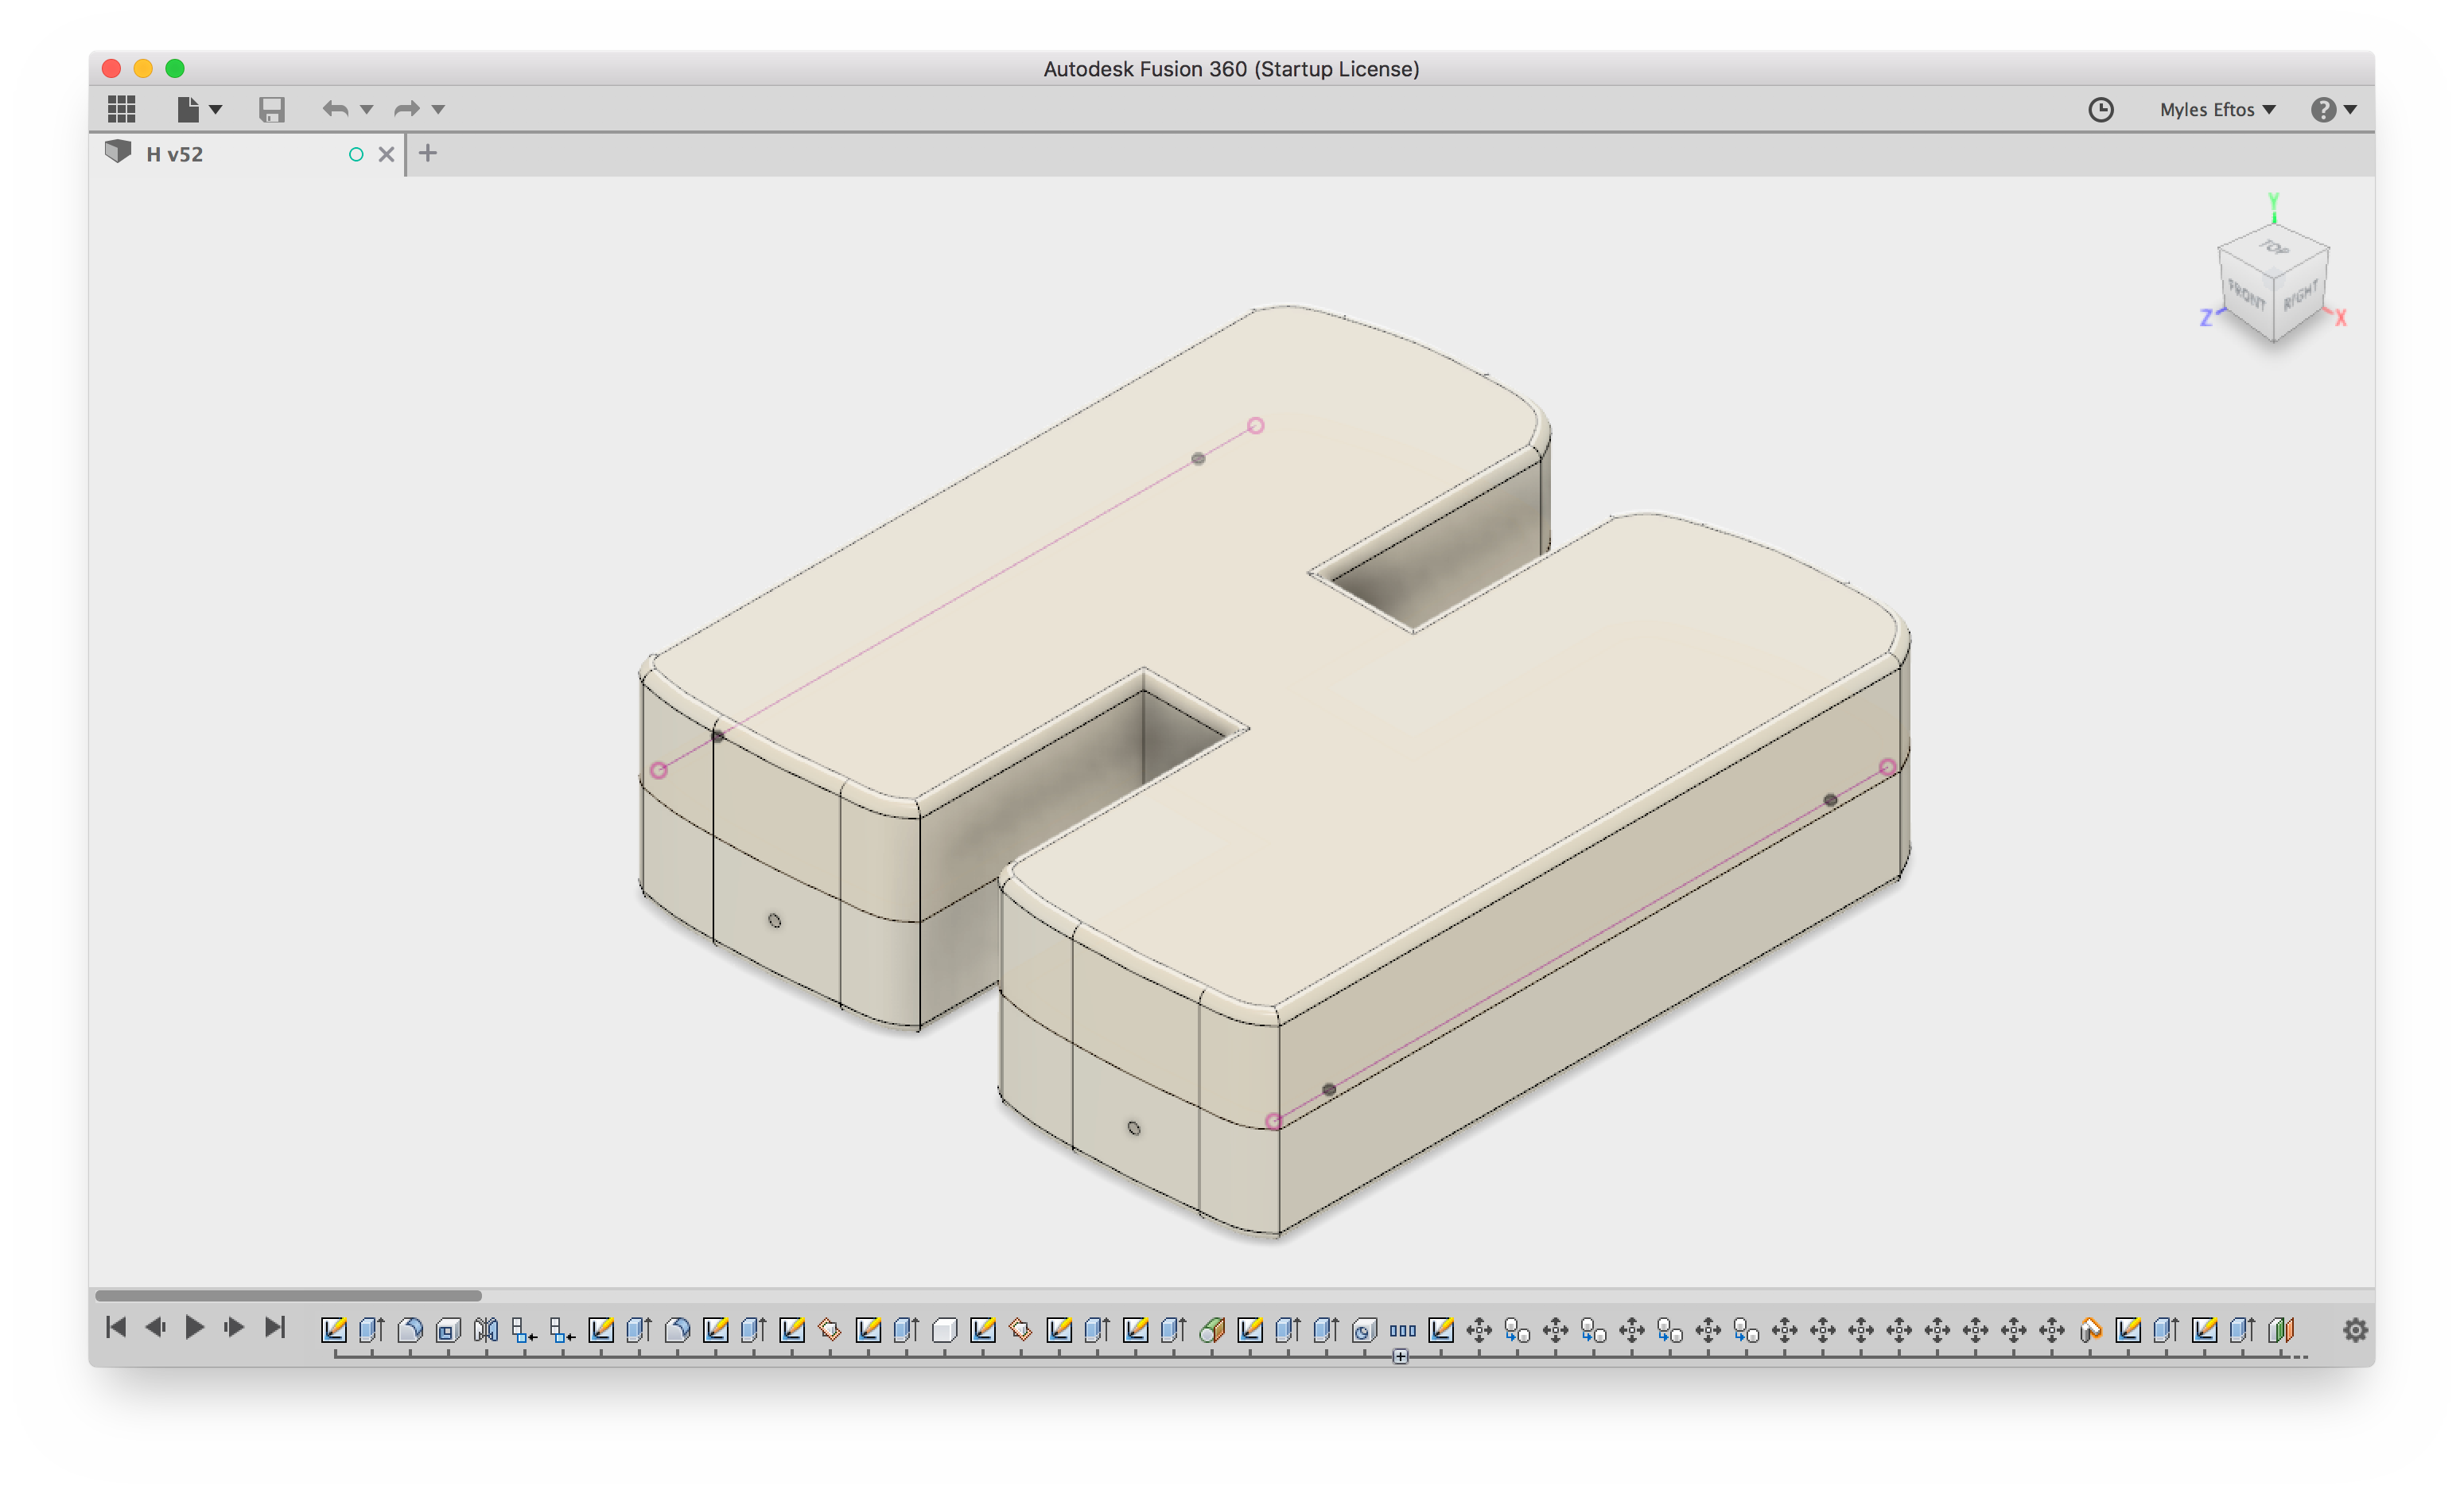
Autodesk Fusion 360 can extrude type, so all I needed to do was pick my type face. I wanted something childlike (not Comic Sans) so I went with Titan One.
![]()
Next, shelled, then mirrored to form the two halves. I added some alignment holes, to make gluing easier and finally created some nubs that will act as anchors for the plyth. The nubs were printed as separate parts so I didn’t need to print supports.
Printing
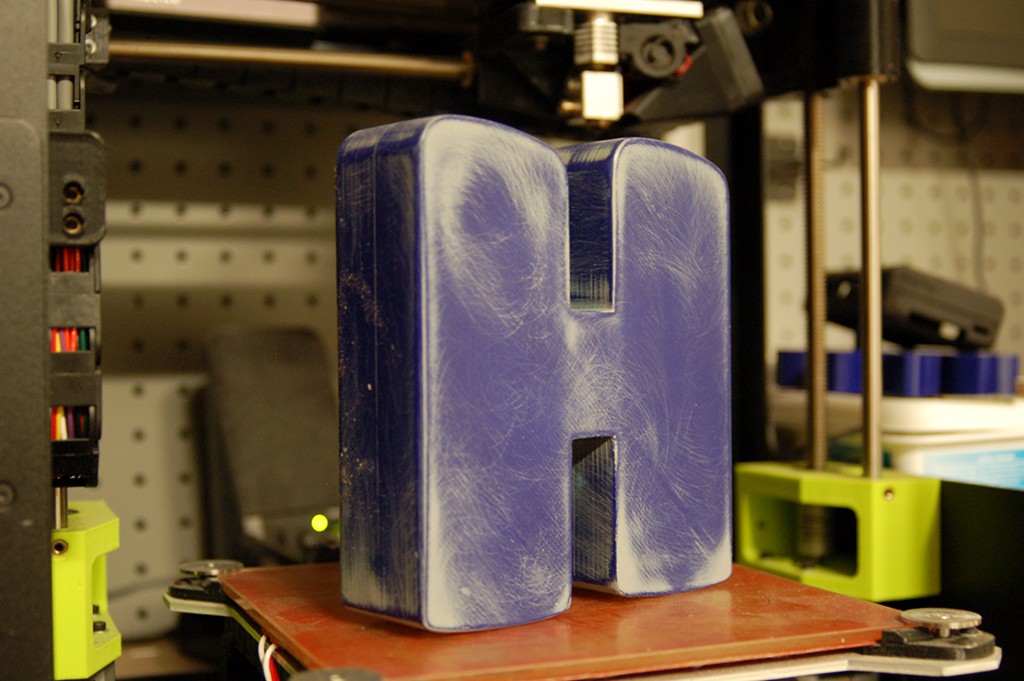
Each of the two halves took around 2 hours to print. Of course, because of how FDM printing works, the result was pretty streaky. The silicon I had literally talks about how fine detail it is, so I would need to do something about the streaks.
My dad used to make scale model aeroplanes, and I always remember him filling the joints with wood putty and then sanding to get a smooth finish, so I thought I would try that.
It turns out the gaps were just too big, and using a water based putty while wet and dry sanding meant the putty would come off.
Next I tried an auto sealer that was supposedly sandable. This didn’t work either because it was too rubbery.
At this point I spent AGES wet and dry sanding, starting at 80-grit and worked my way up to 240 before I found out about auto primer/filler.
This stuff is designed to cover up small scratches in car body work, and is sandable, allowing you to get a really smooth finish.
I did two coats, and sanded with wet and dry, 400 grit, and then a final coat before finishing with an 800 grit. It worked really well. It also saved a lot of time – sanding to a smooth finish is hard.
![]()
-
I need a translucent H
04/14/2018 at 02:39 • 0 commentsMy first thought was to try the usual places to see if there was something I could buy off the shelf. There was a few places that sold acrylic signs that would have been suitable, but they weren’t quite what I was looking for. I really wanted a completely milky white H with the LEDs embedded in the middle.
Well, I have a 3D printed, could I do something with that? I went in a hunt for translucent white filament. It turns out (for reasons I will discover later) that isn’t a thing. Odd.
I picked up some light blue translucent filament and did a small test print, but the print came out really streaky. Not what I wanted.
Then I remembered reading about resin casting. What if I could print a master, cast a mold in silicon, then cast the whole thing in resin? A quick Google for some tutorials and it sees plausible - in fact a bunch of people embed LEDs for cos play jewellery.
The problem is, all the examples I see are clear. You can get pigments to embed in the resin, but a white translucent one alludes me. Hmmm.
At this point I decided to go in to the local Barnes (a store that specialised in casting and other craft stuff) and had a chat with the staff. Apparently white translucent is really hard. The lady I spoke to thought that I might be able to get the effect I want by using a really small amount of pigment. Like, really small (she says that fully opaque happens at about 2%).
I buy a starter pack which has the 500mL of pink silicon, 500mL of resin and a bunch of measuring cups, containers and stirrers. I also bought some modelling clay and some spray on wax as I needed to make a two part mold. Unfortunately, this stuff ain’t cheap - all up it cost me $150.
Now to make the master…
Hugo's Nightlight
Long before Hugo was born, I had hatched a plan to build him a nightlight. I ordered a tape of WS2812B LEDS and got to work