Joshua Chung
-
BOSI with Android
09/30/2016 at 12:39 • 0 commentsThe Android provides switch interface. More information can be found here at https://support.google.com/accessibility/android/answer/6301490. There is a great guide at https://www.ablenetinc.com/resources/android-accessibility/.
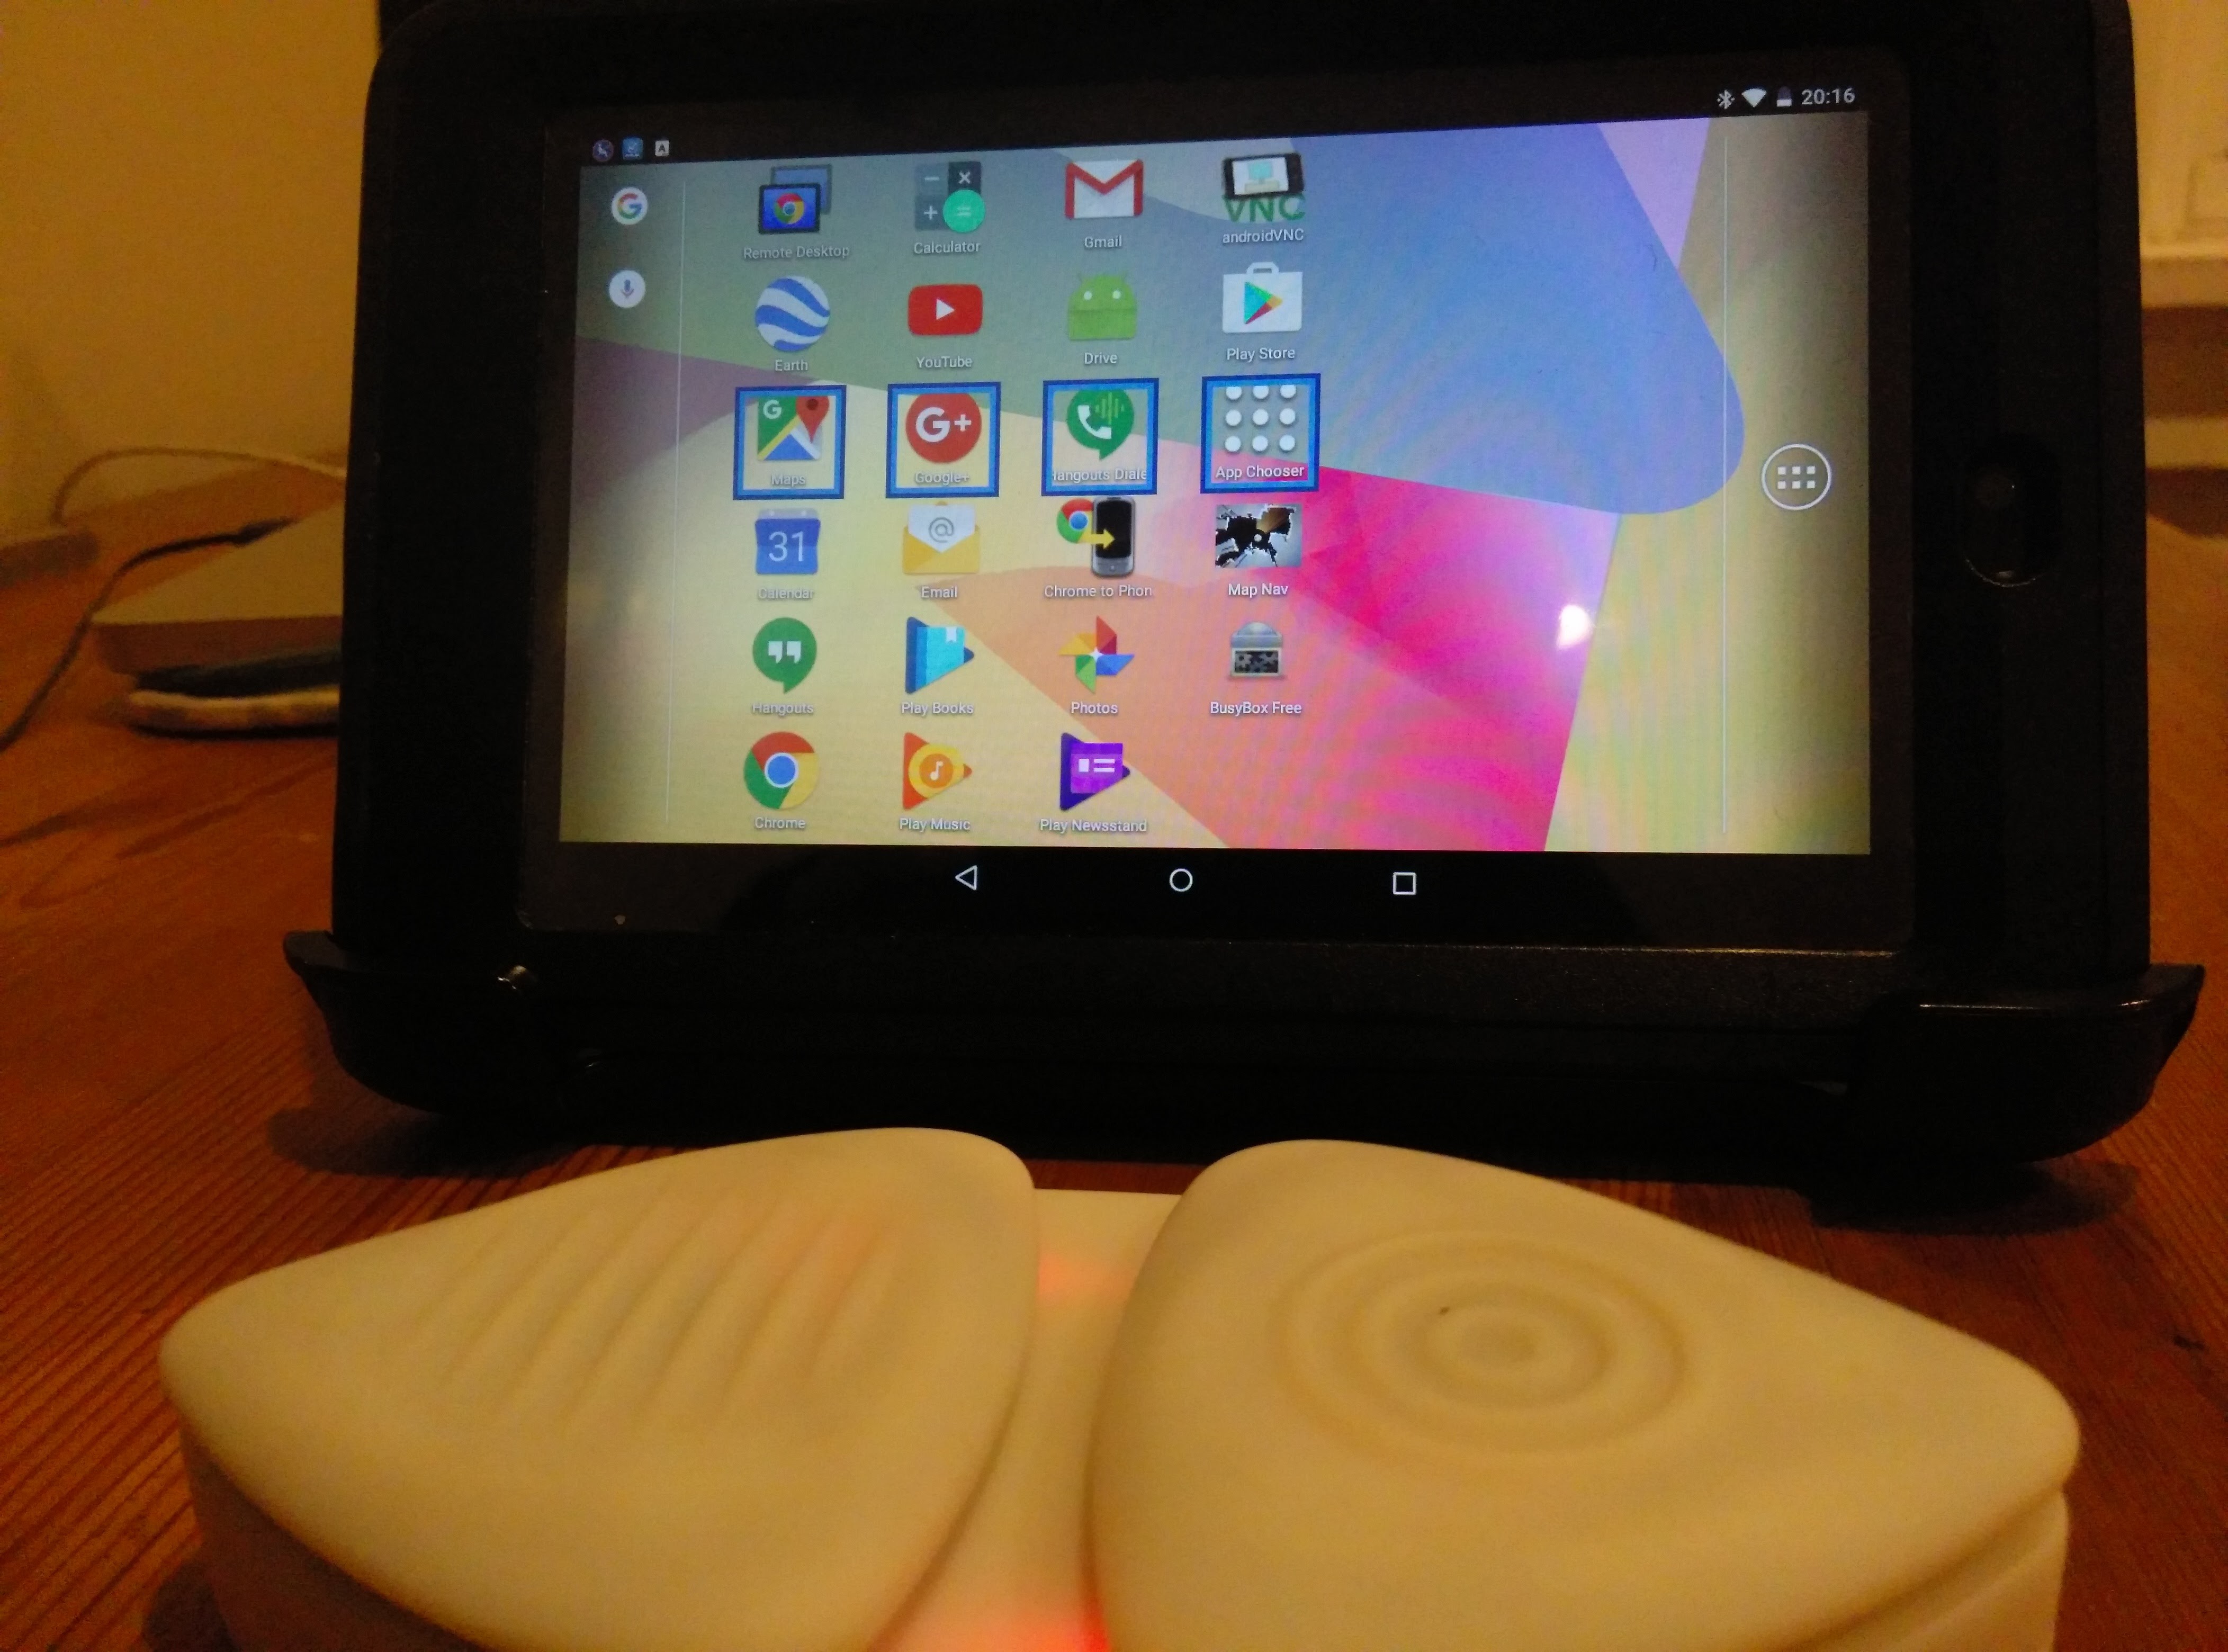
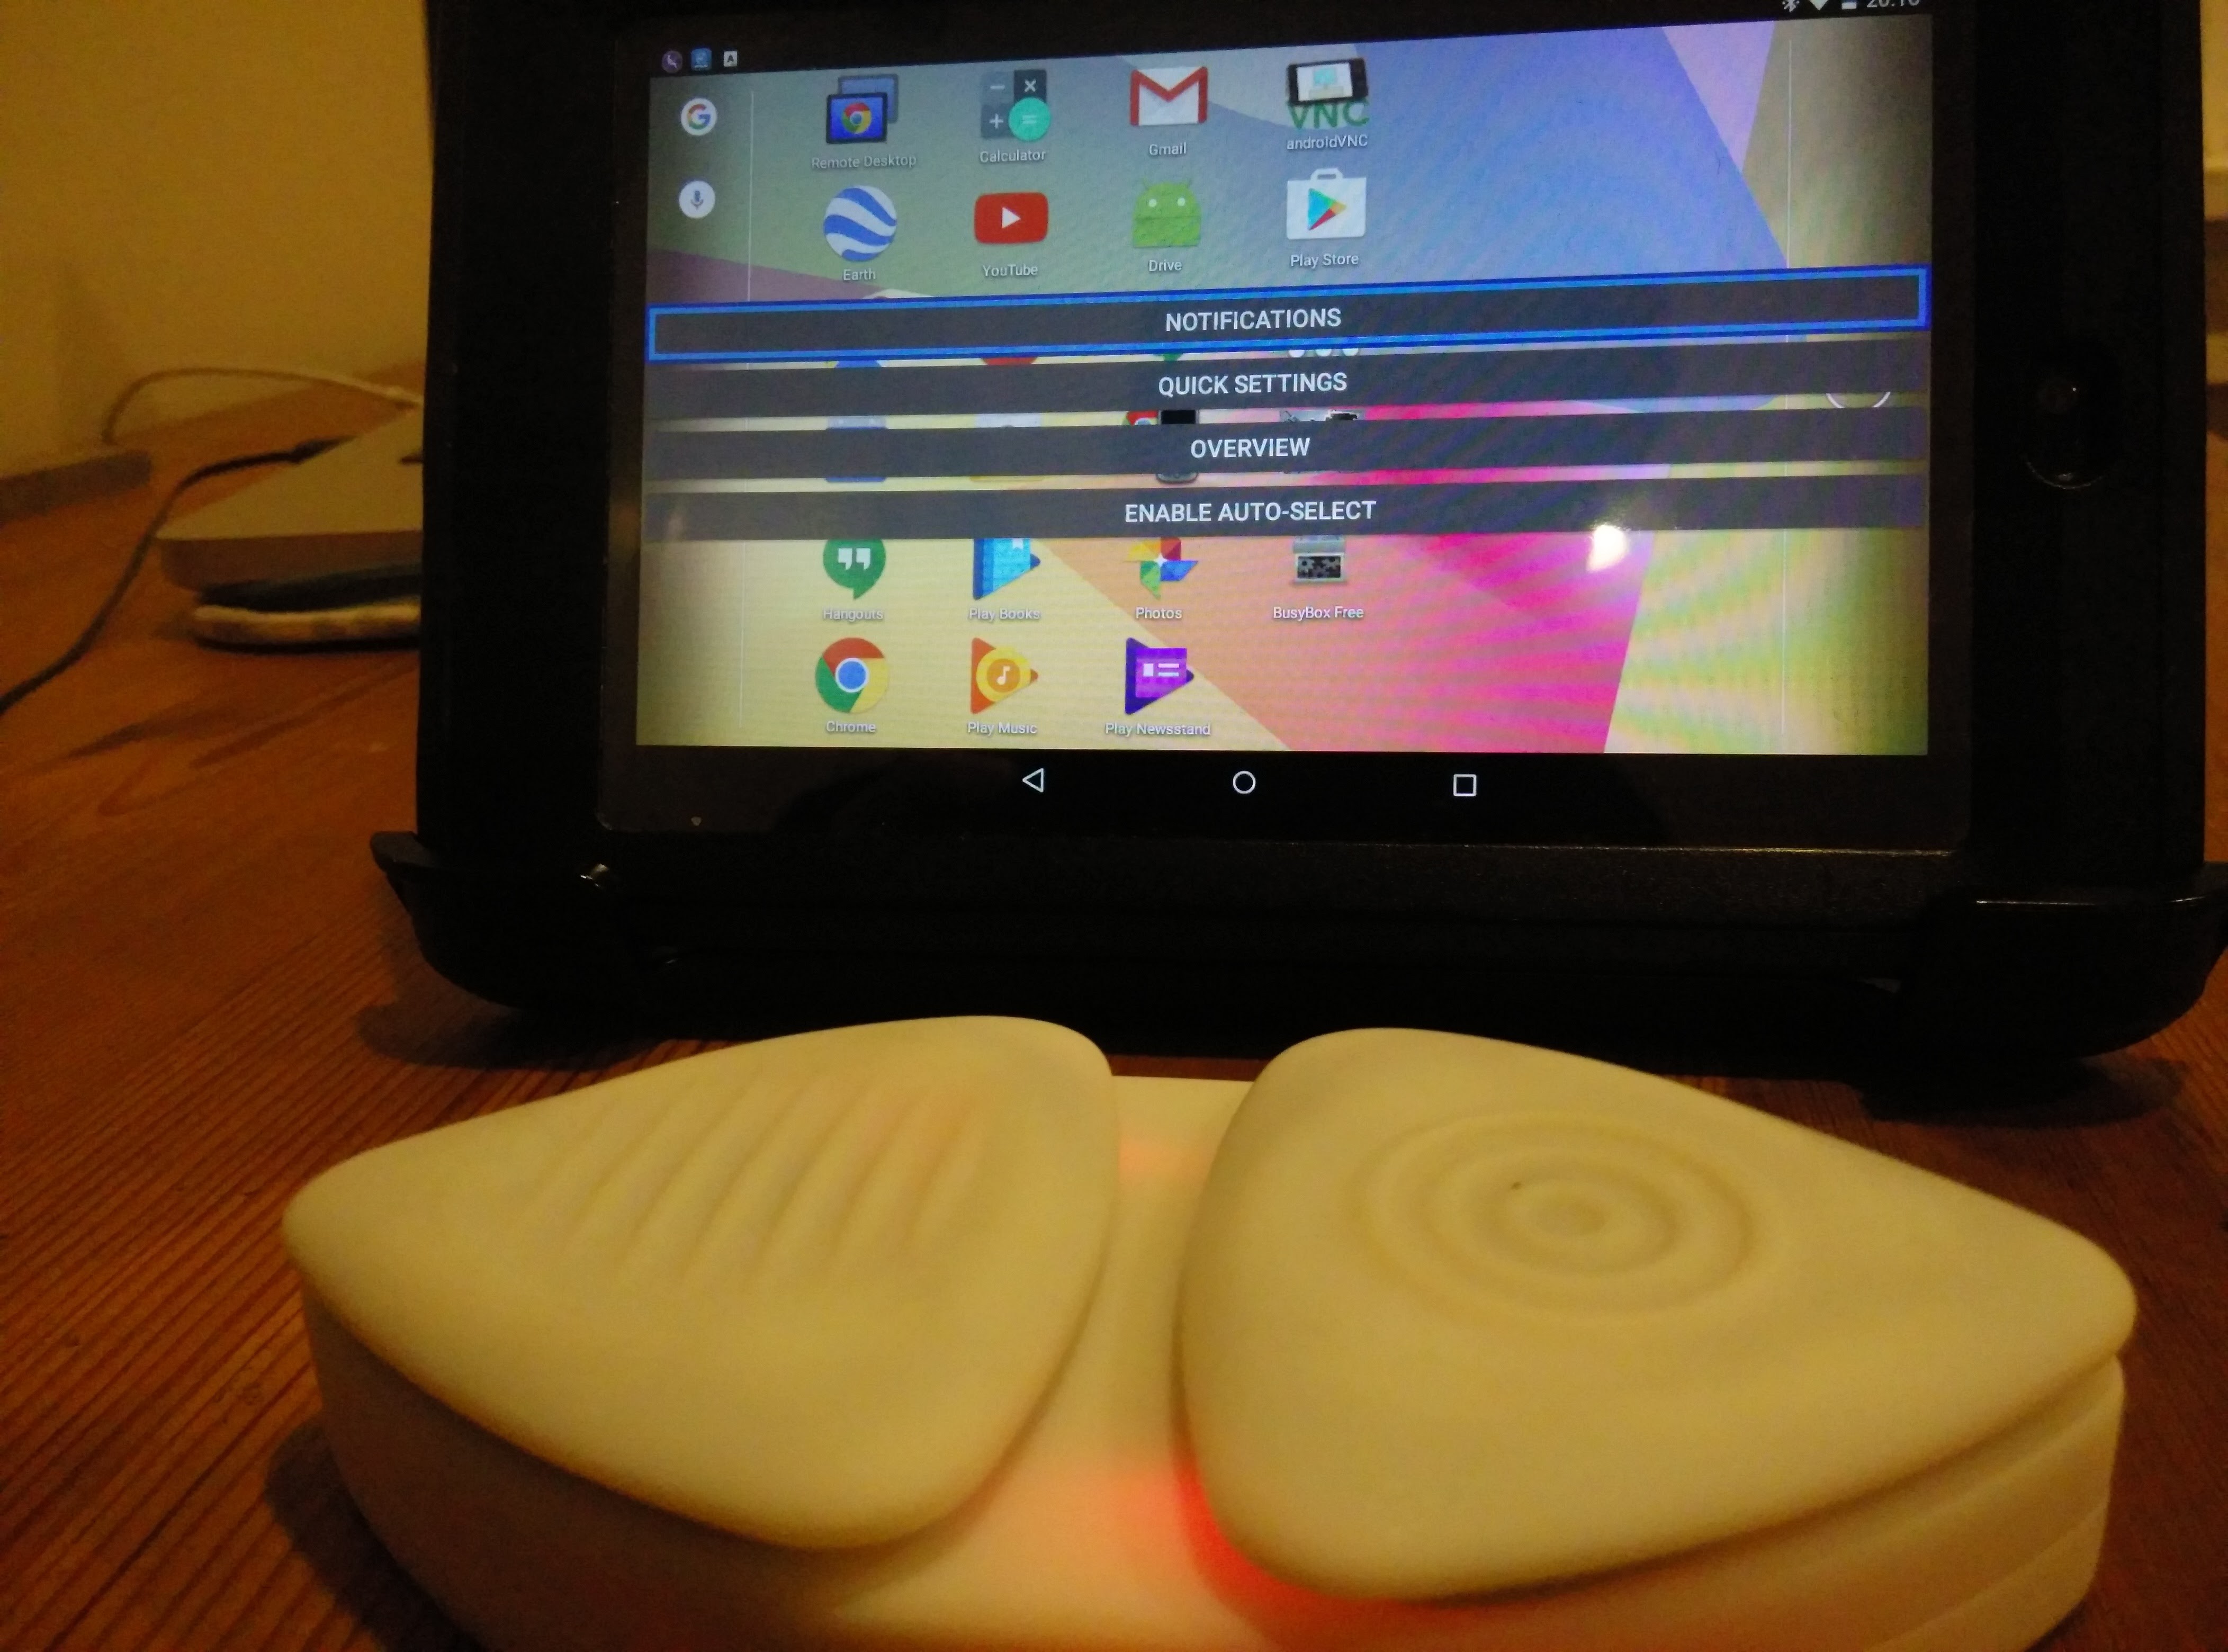
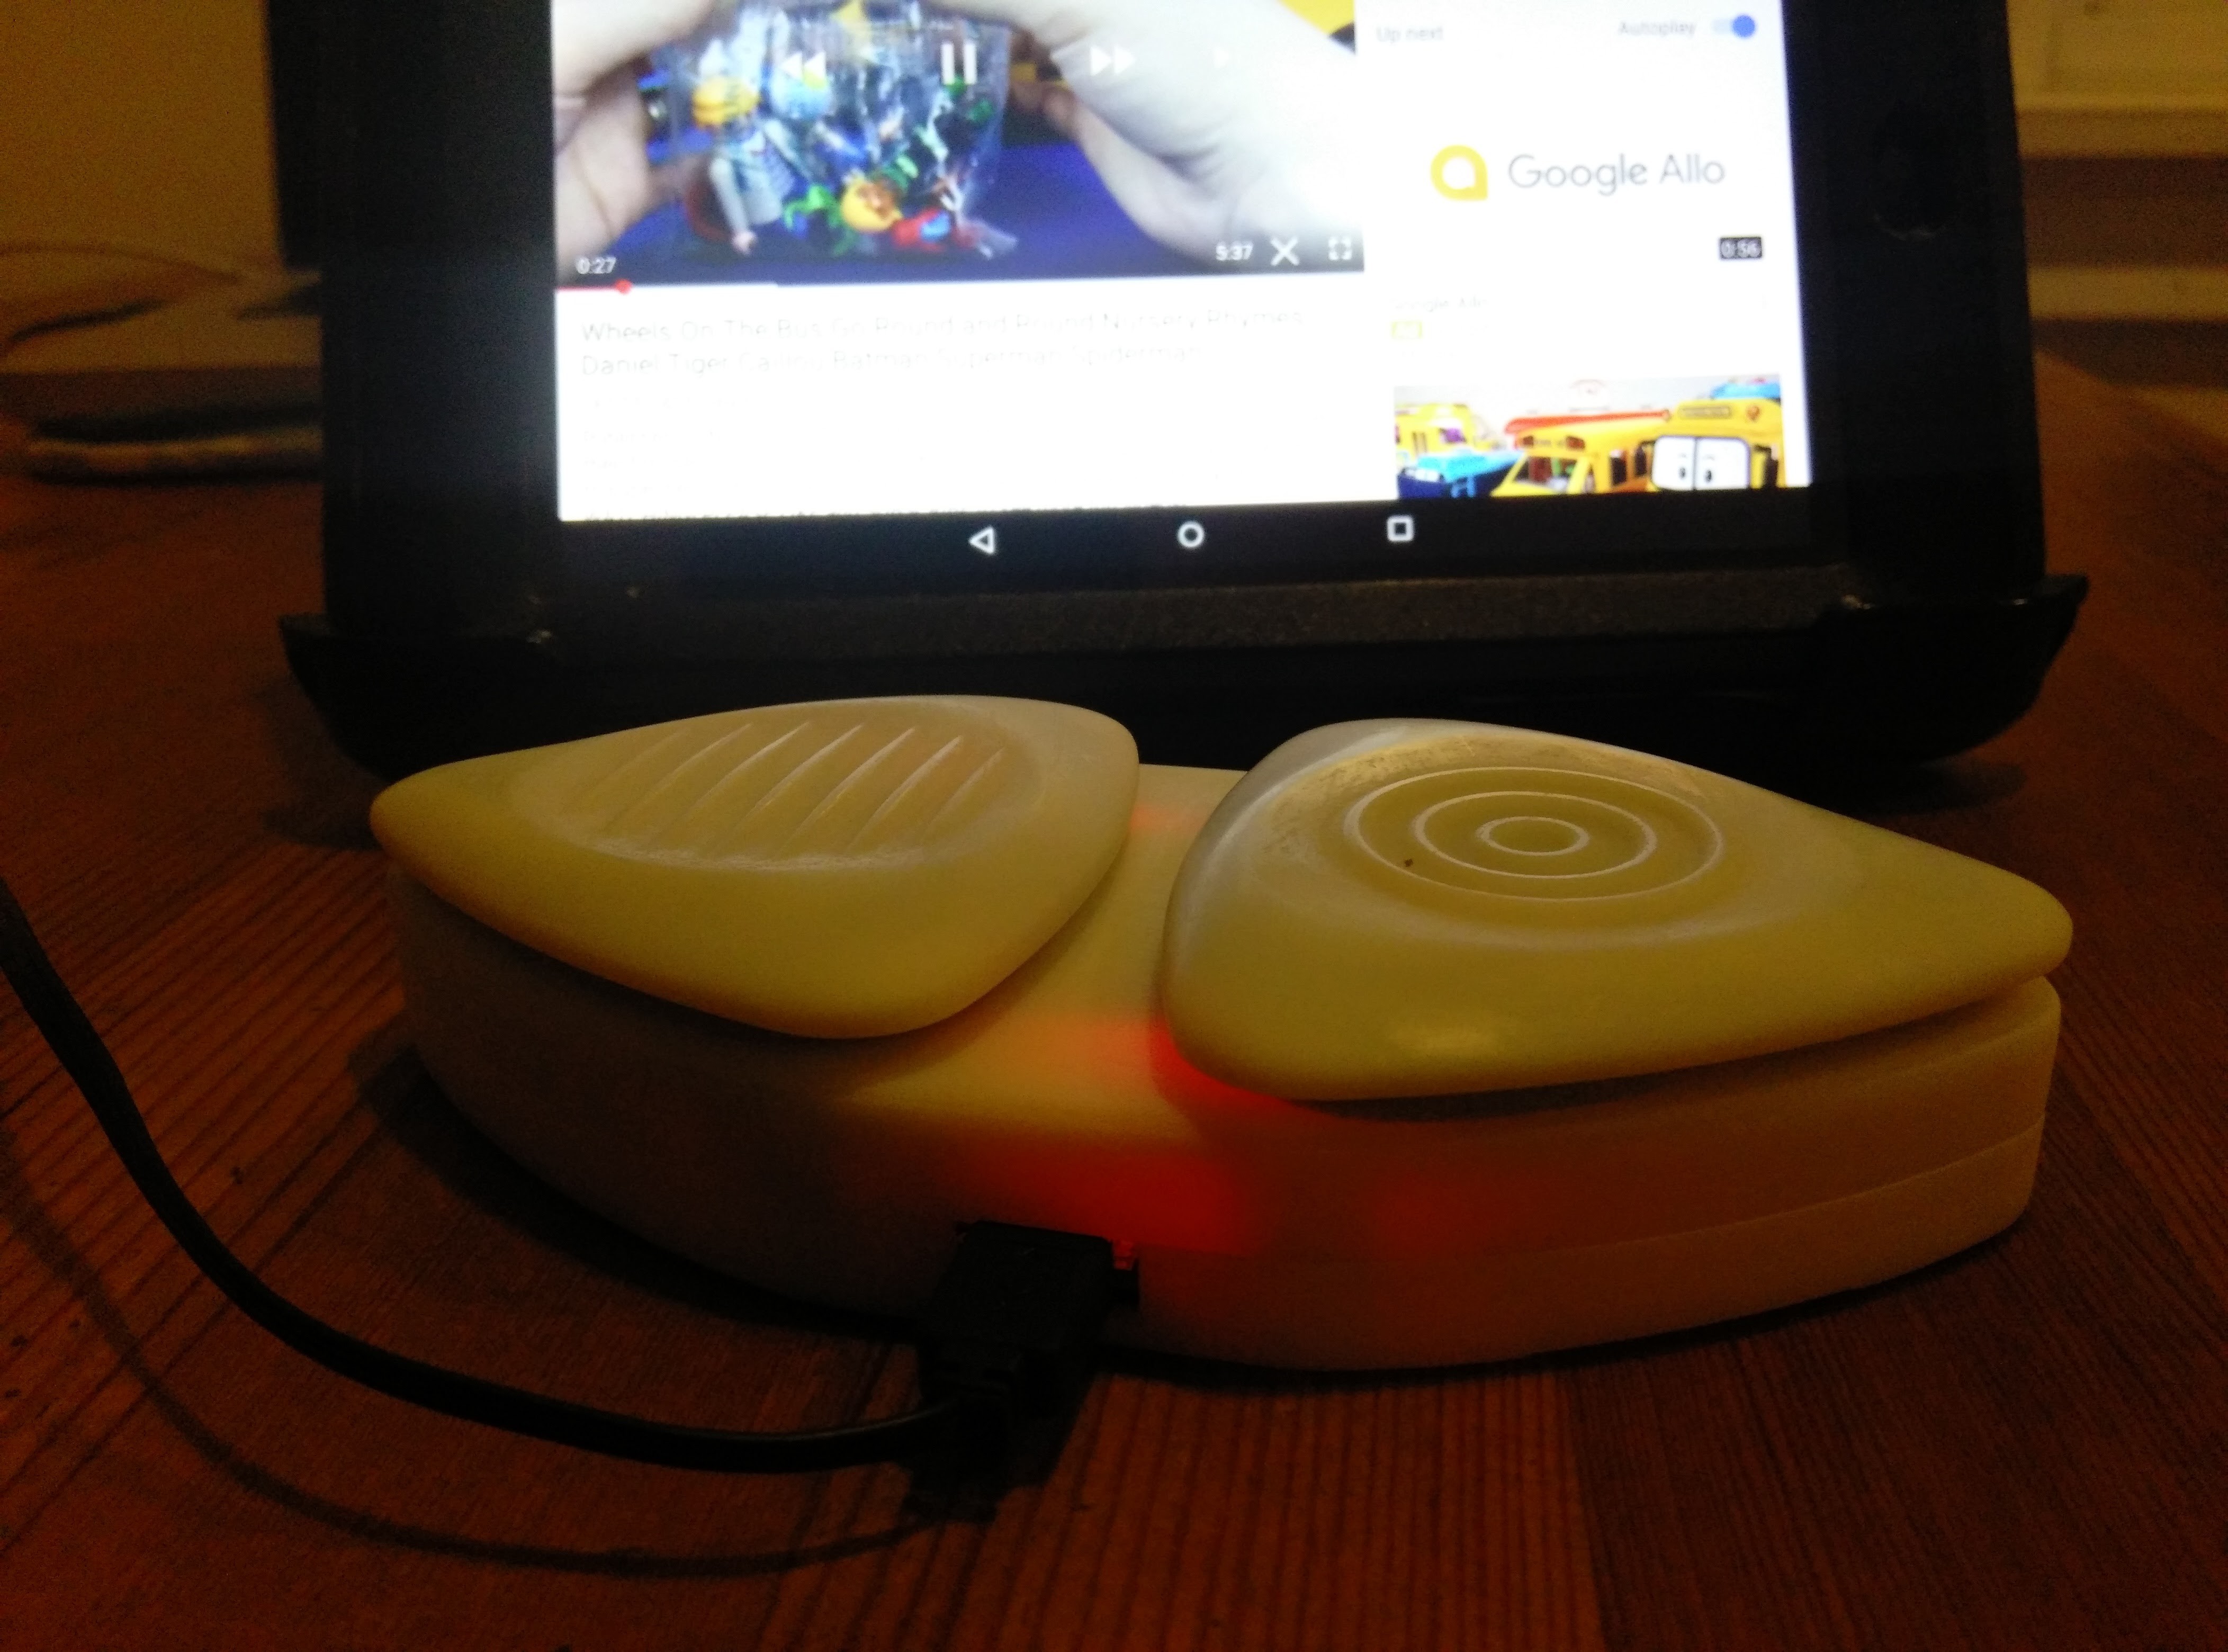
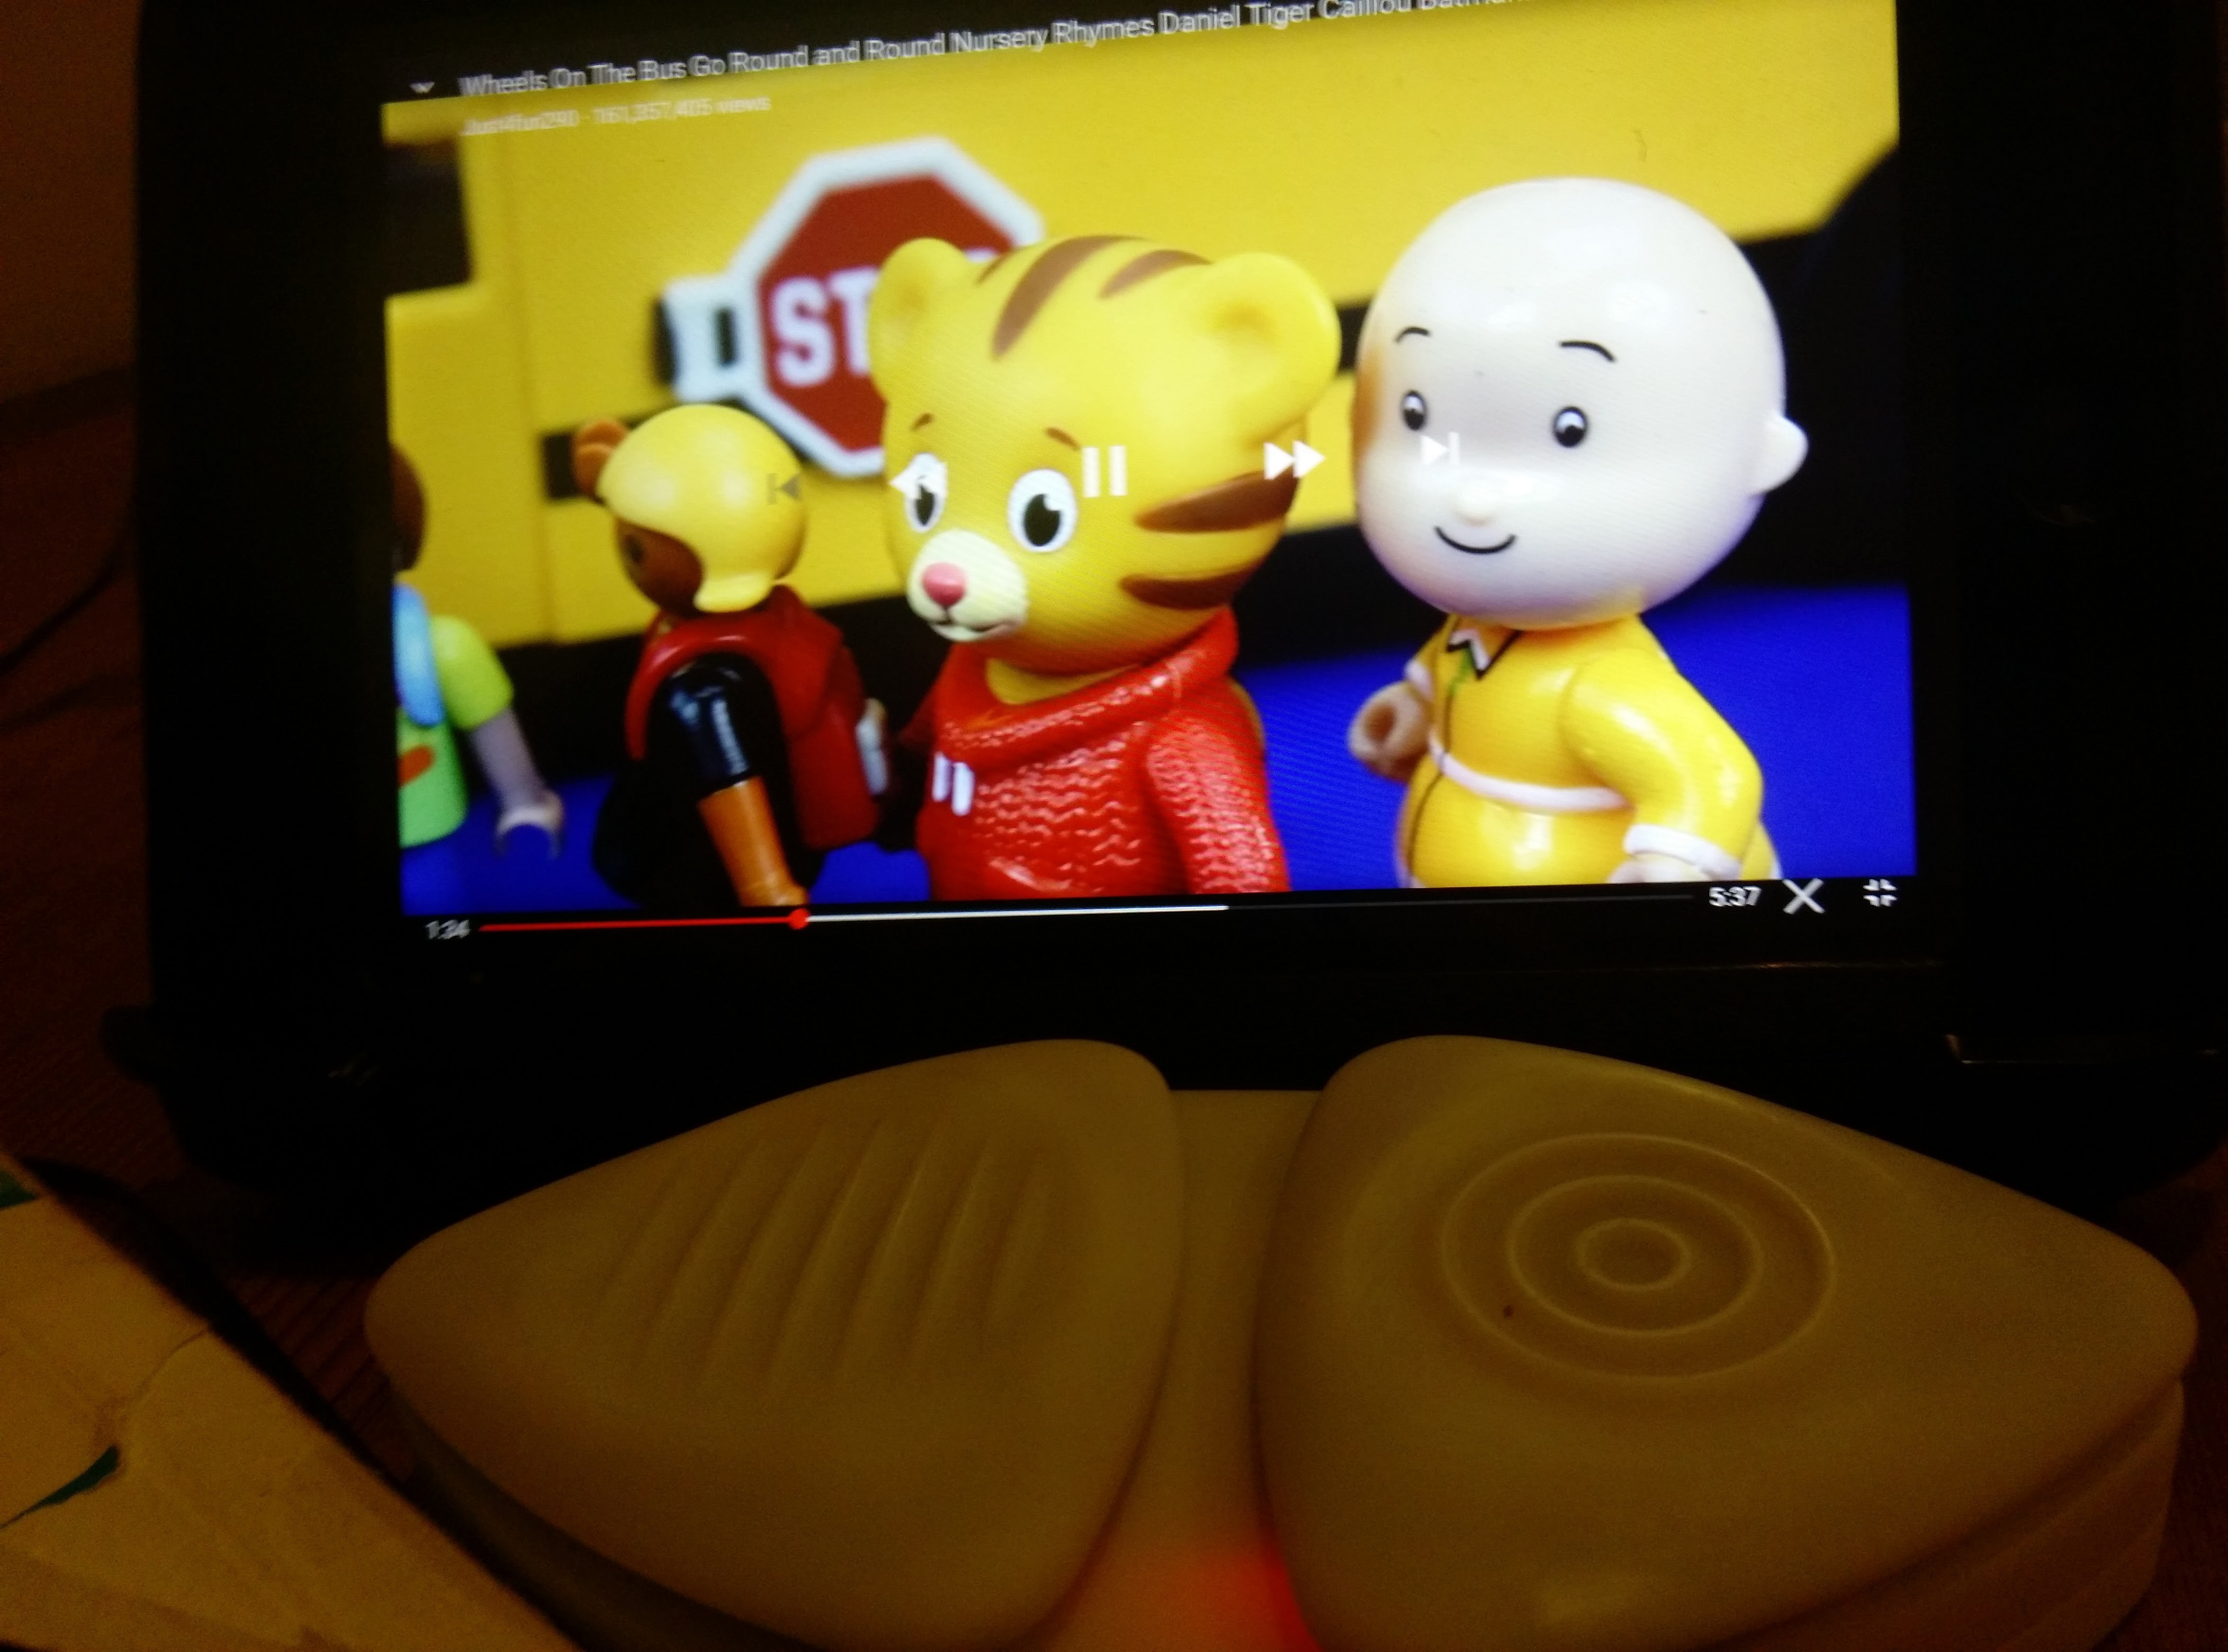
I tried the BOSI on the Android tablet - Nexus 7. The lines button was set to initiate the auto-scan and the circles button was to select.
![]()
![]()
![]()
![]()
-
BOSI on the iOS and Mac
09/23/2016 at 20:24 • 0 commentsiOS
These two instructional videos demonstrated detailed steps of how to set up the iOS to use the switch interface.
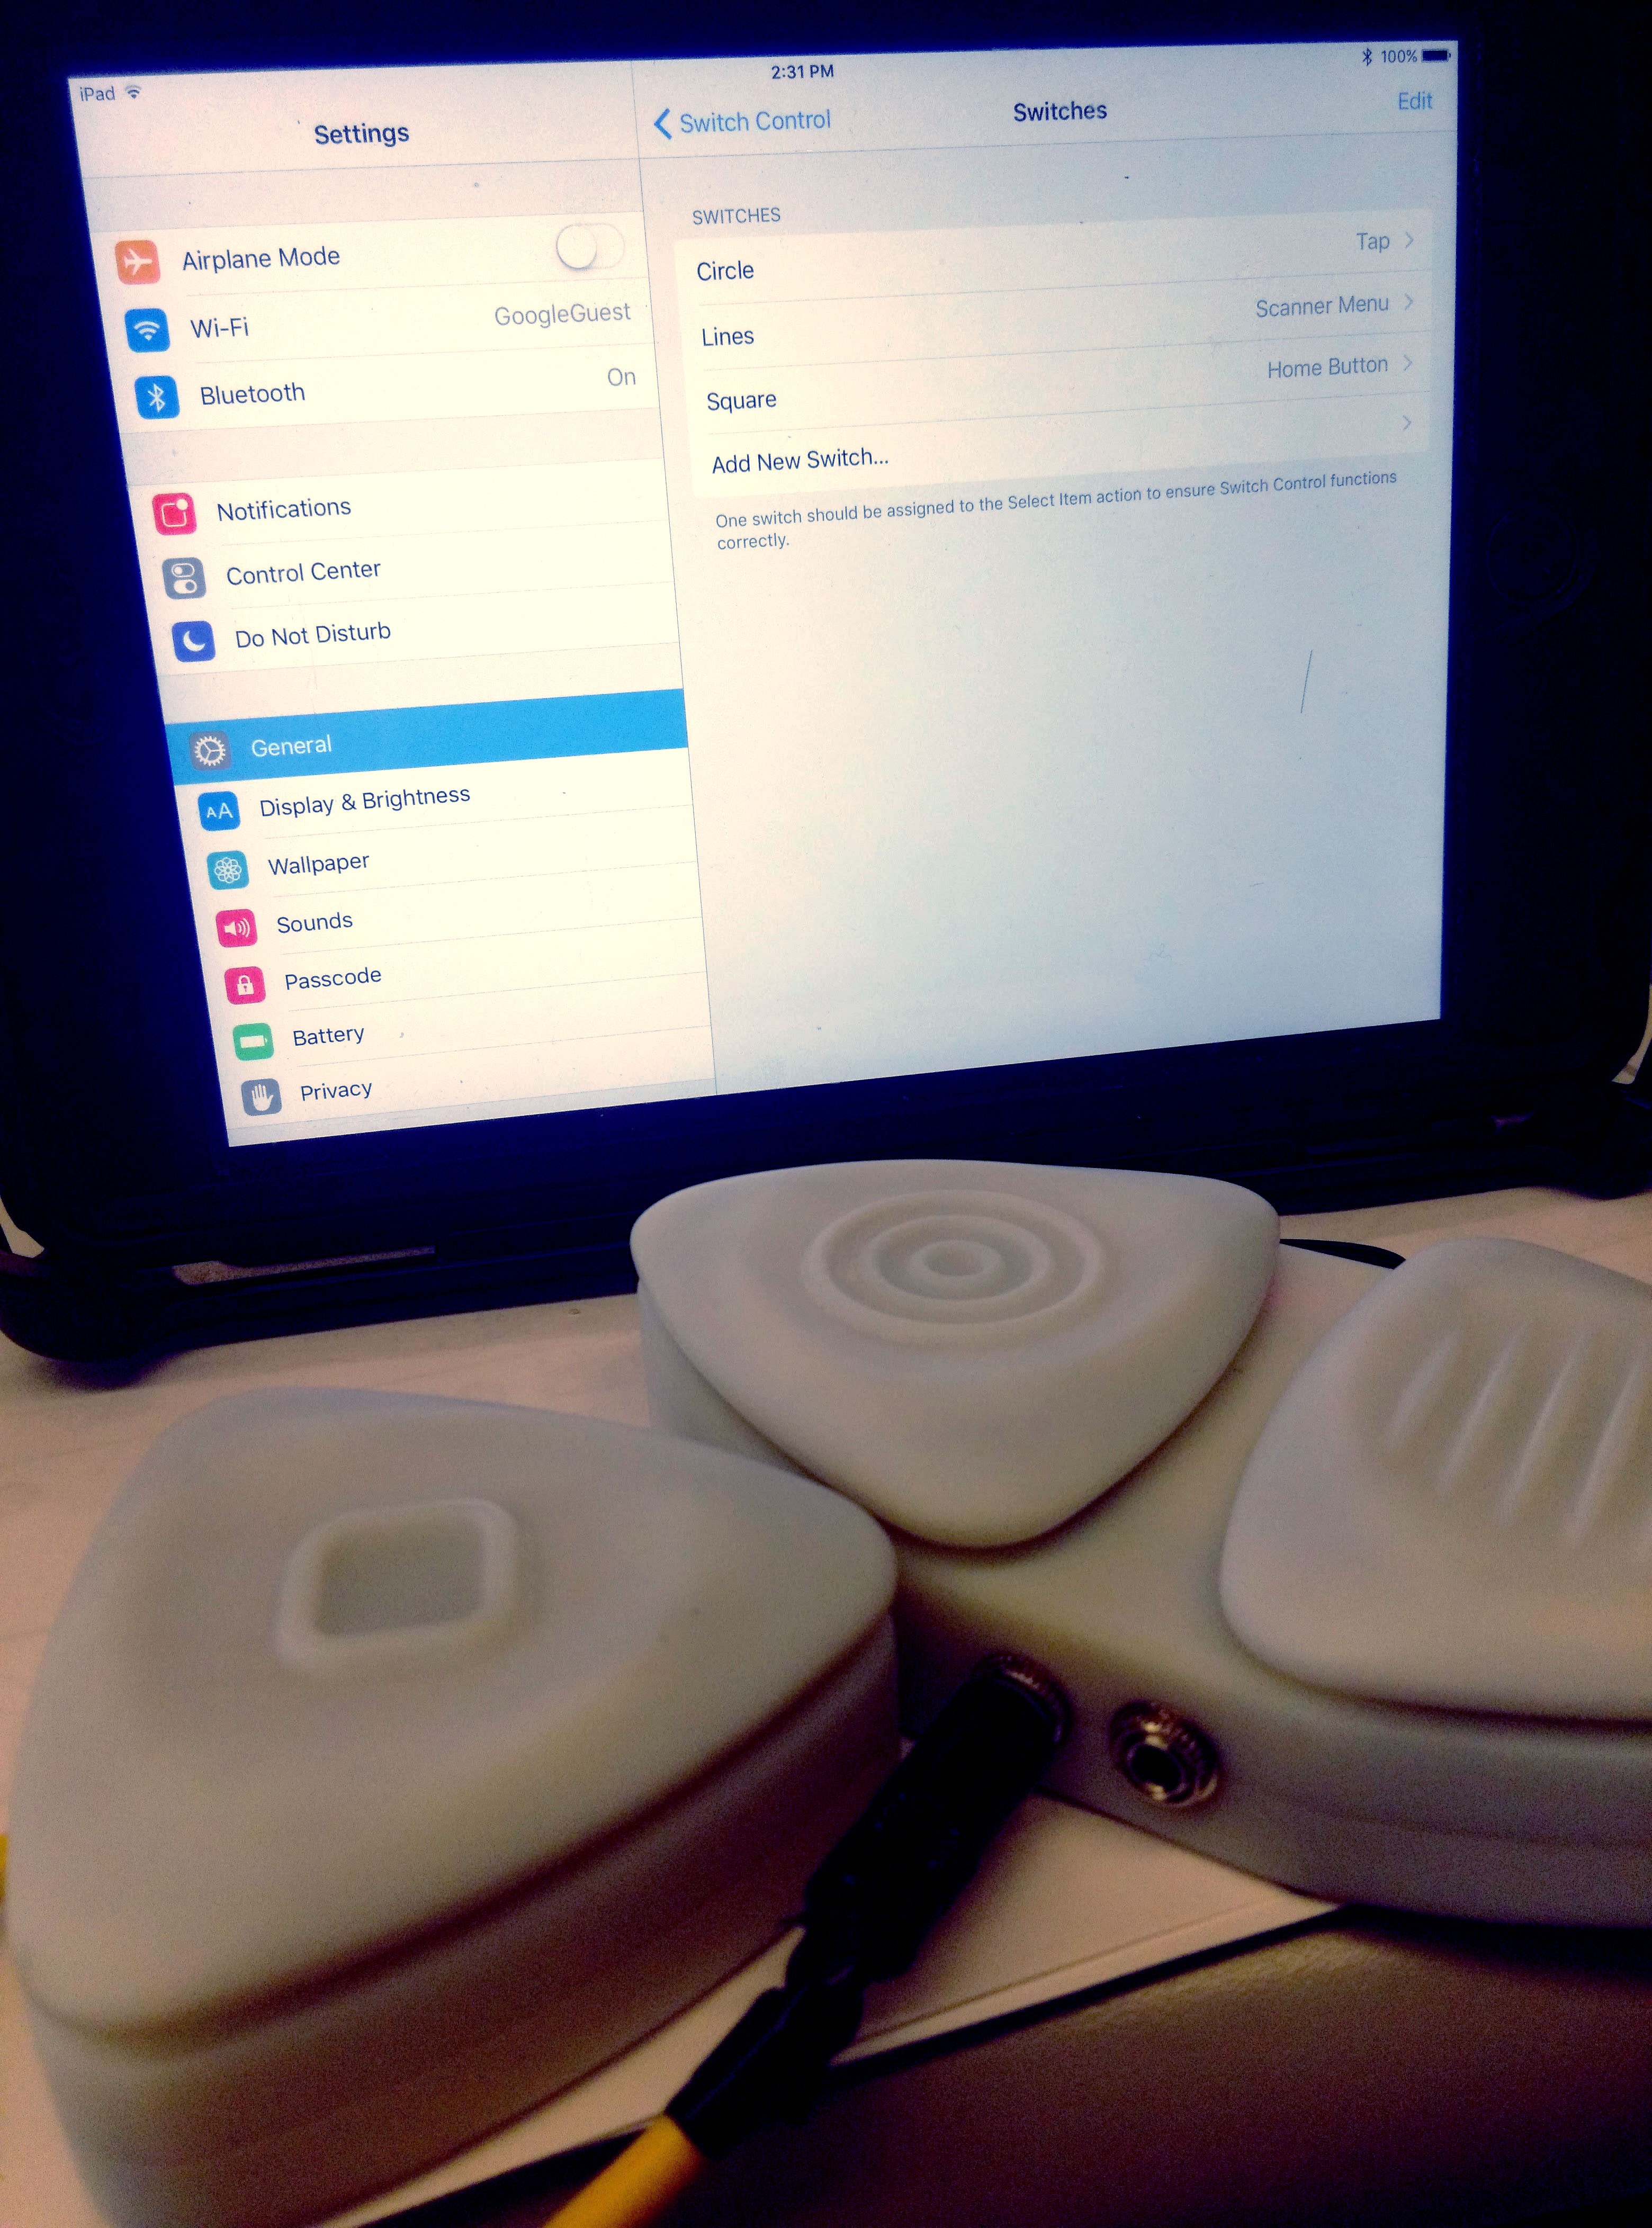
After having connected to the Adafruit Bluefruit EZ-Key from the iOS settings, here shows how I set the button actions. The button with circles was set as the tapping action. The button with lines is set as selection menu and the square is the home button on the iPad. The one-button version with the square button cover was connected to the two-button version through the 3.5mm jack.
![]()
More switch accessible apps can be found at http://www.atandme.com/?p=467.
Mac OS
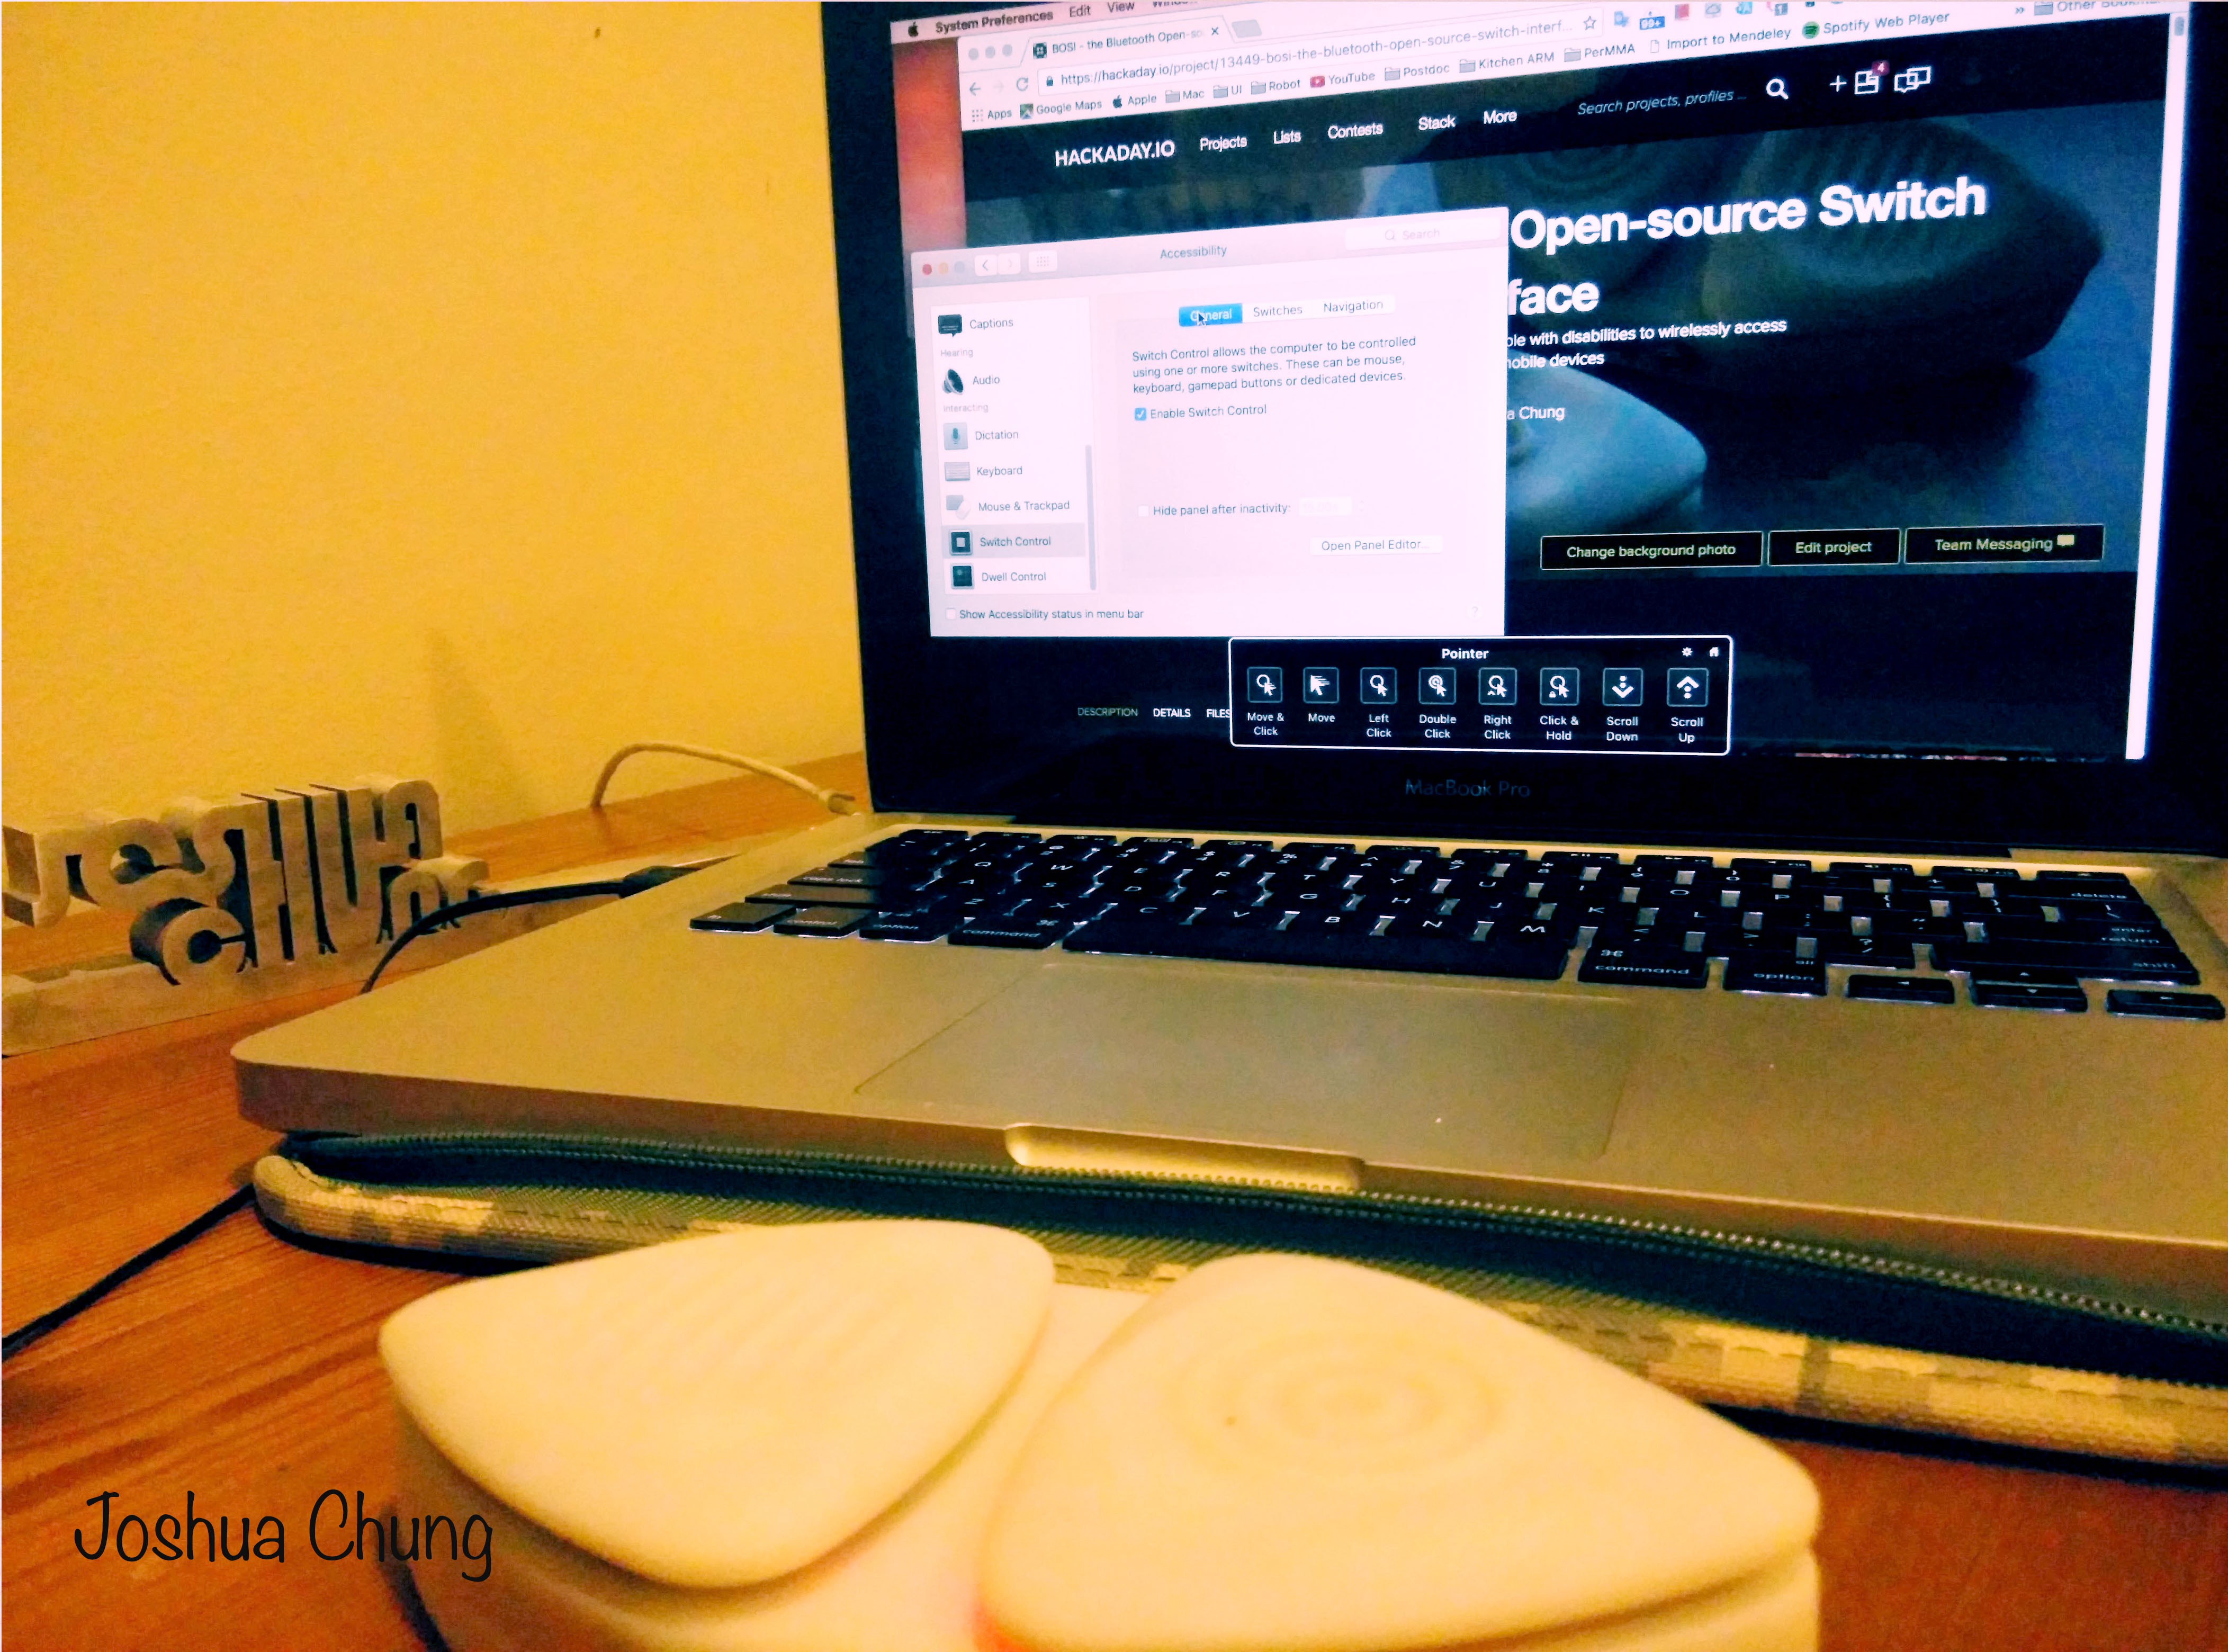
Similarly, the Mac OS, Yosemite, can be also set to use the switch interface in the System Preferences/Accessbility. Here is a video shows how a wheelchair user managed to do incredible work on the Mac. There are a lot of settings and tips that the user can set customized on-screen buttons and frequent used functions to fit user's needs.
For more detail of switch control on Mac OS, the Apple support has the most updated information (https://support.apple.com/en-us/HT202865). I recently upgraded to the Sierra and the BOSI seems working fine with it.
![]()
-
Put Together
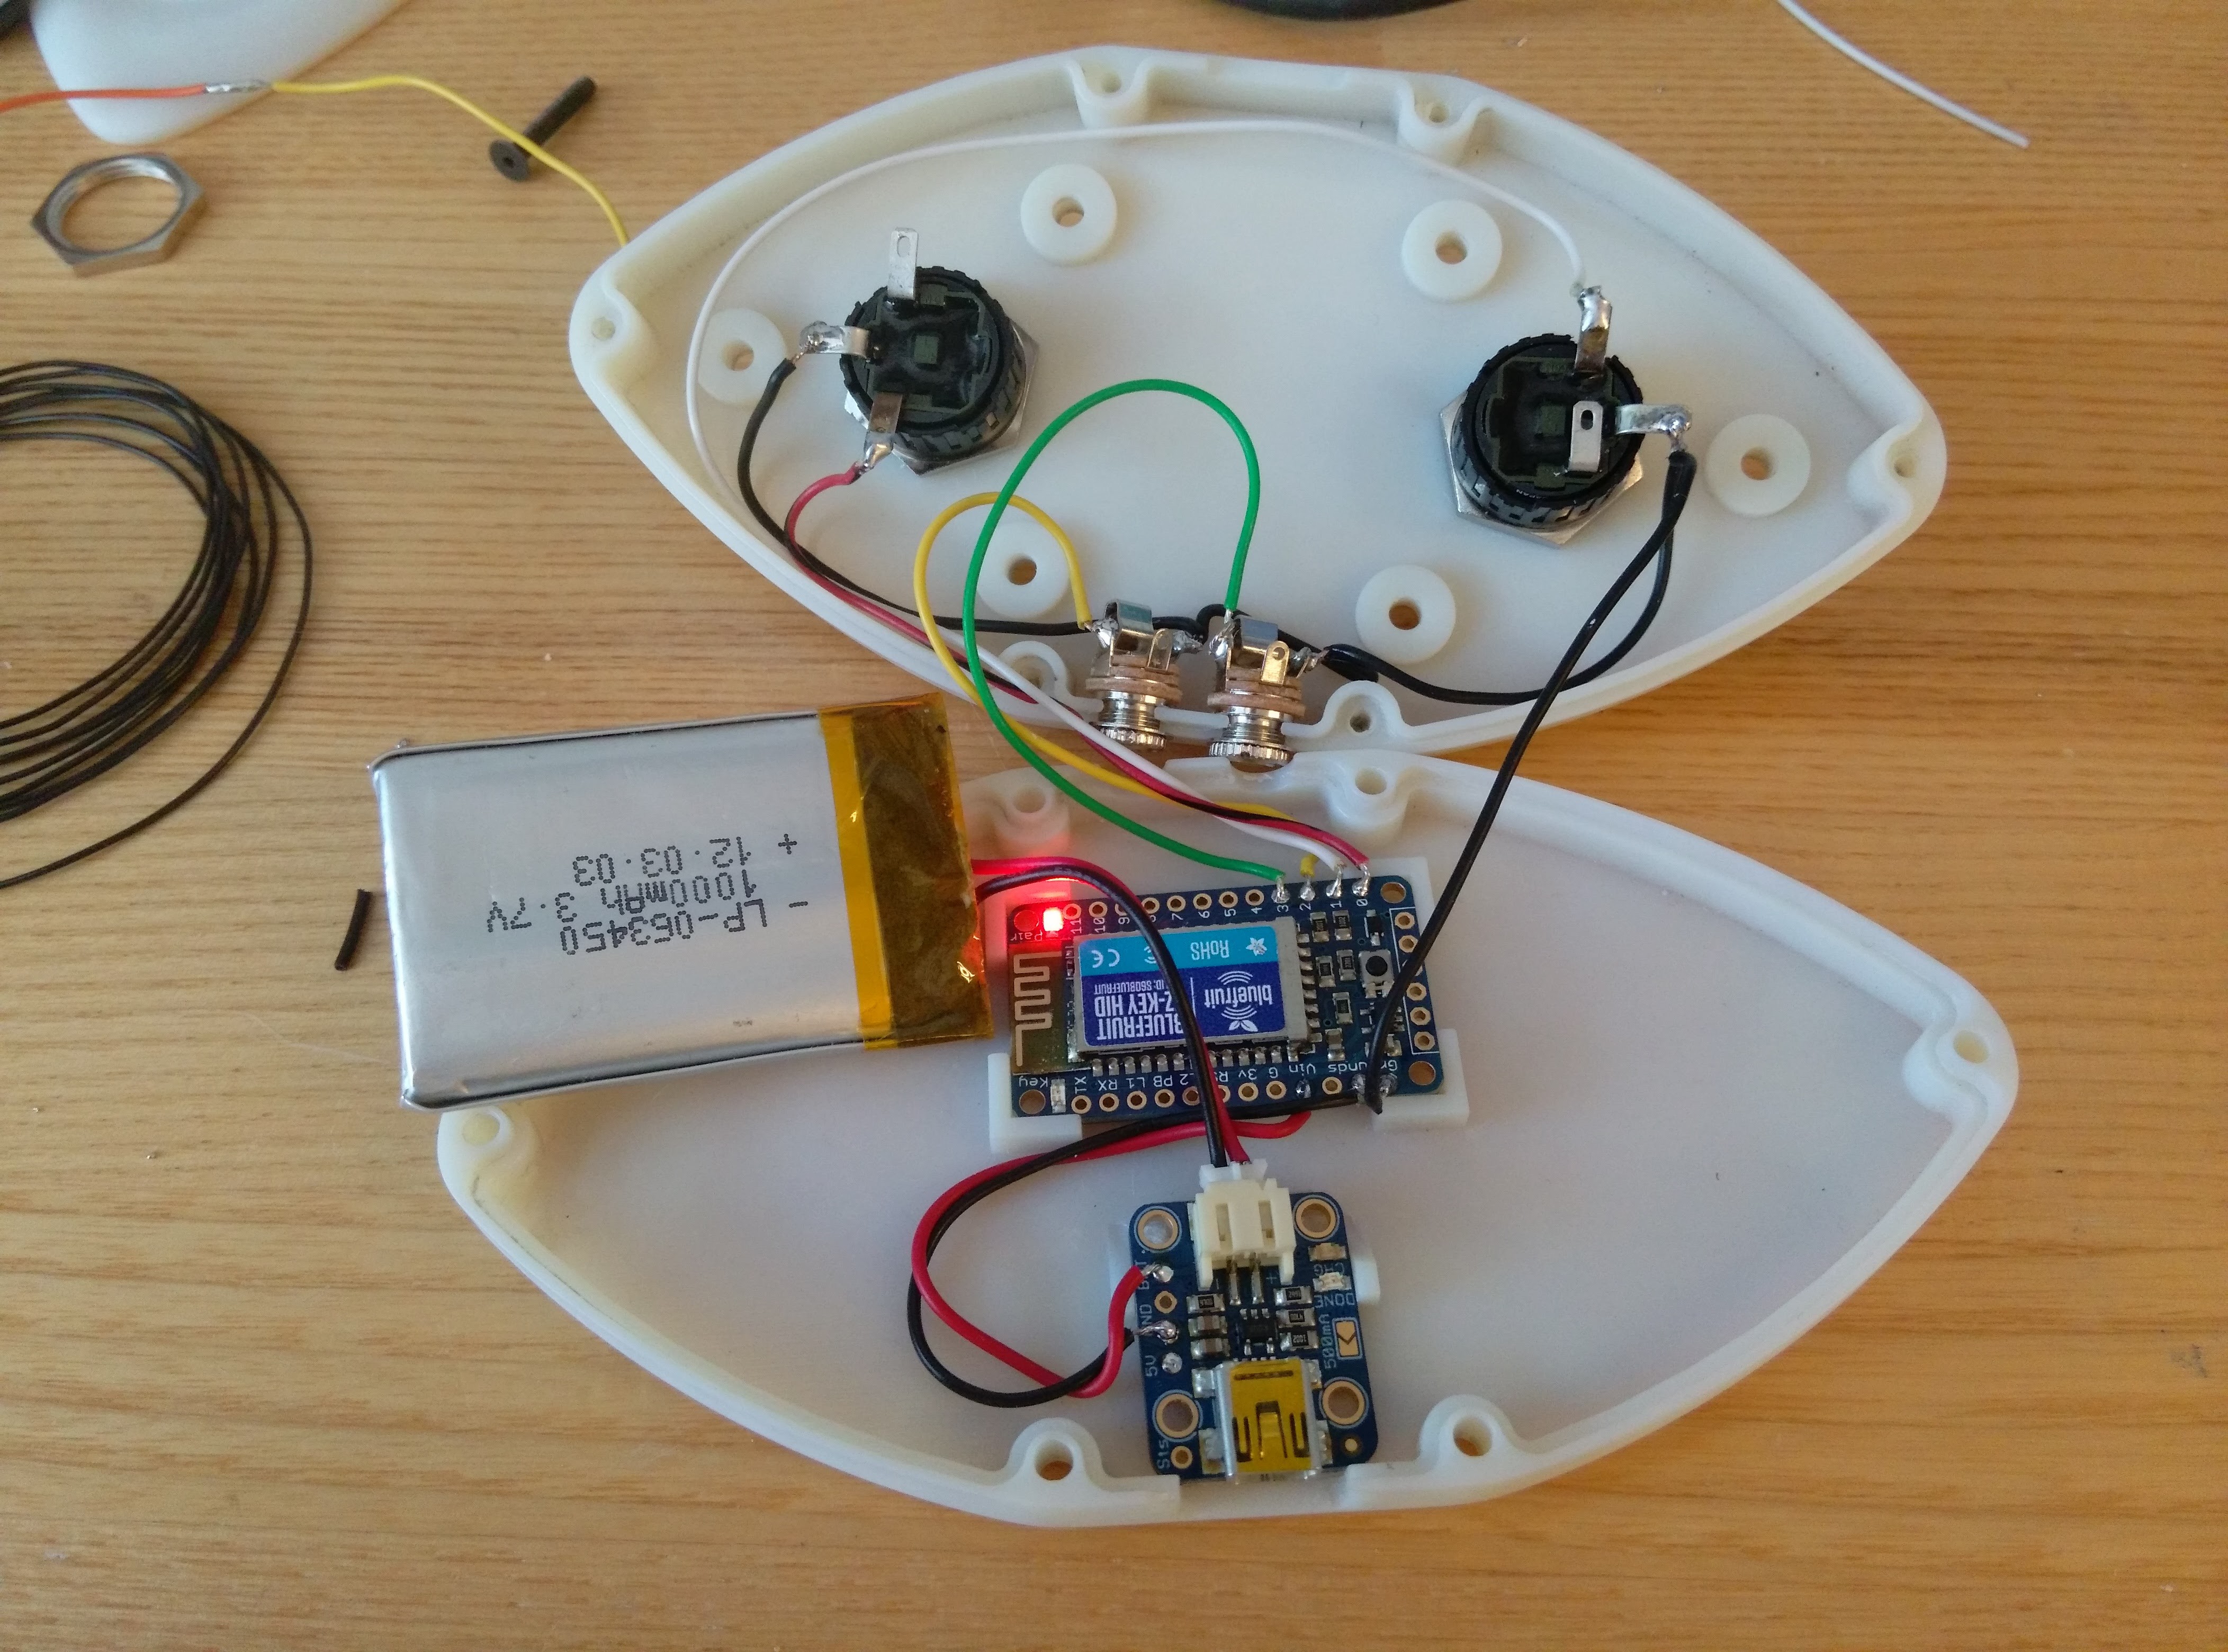
09/23/2016 at 16:26 • 0 commentsAfter cleaned up the 3D printing parts and received the online ordered components, it came to the time of putting everything together to see how things fit or not.
![]()
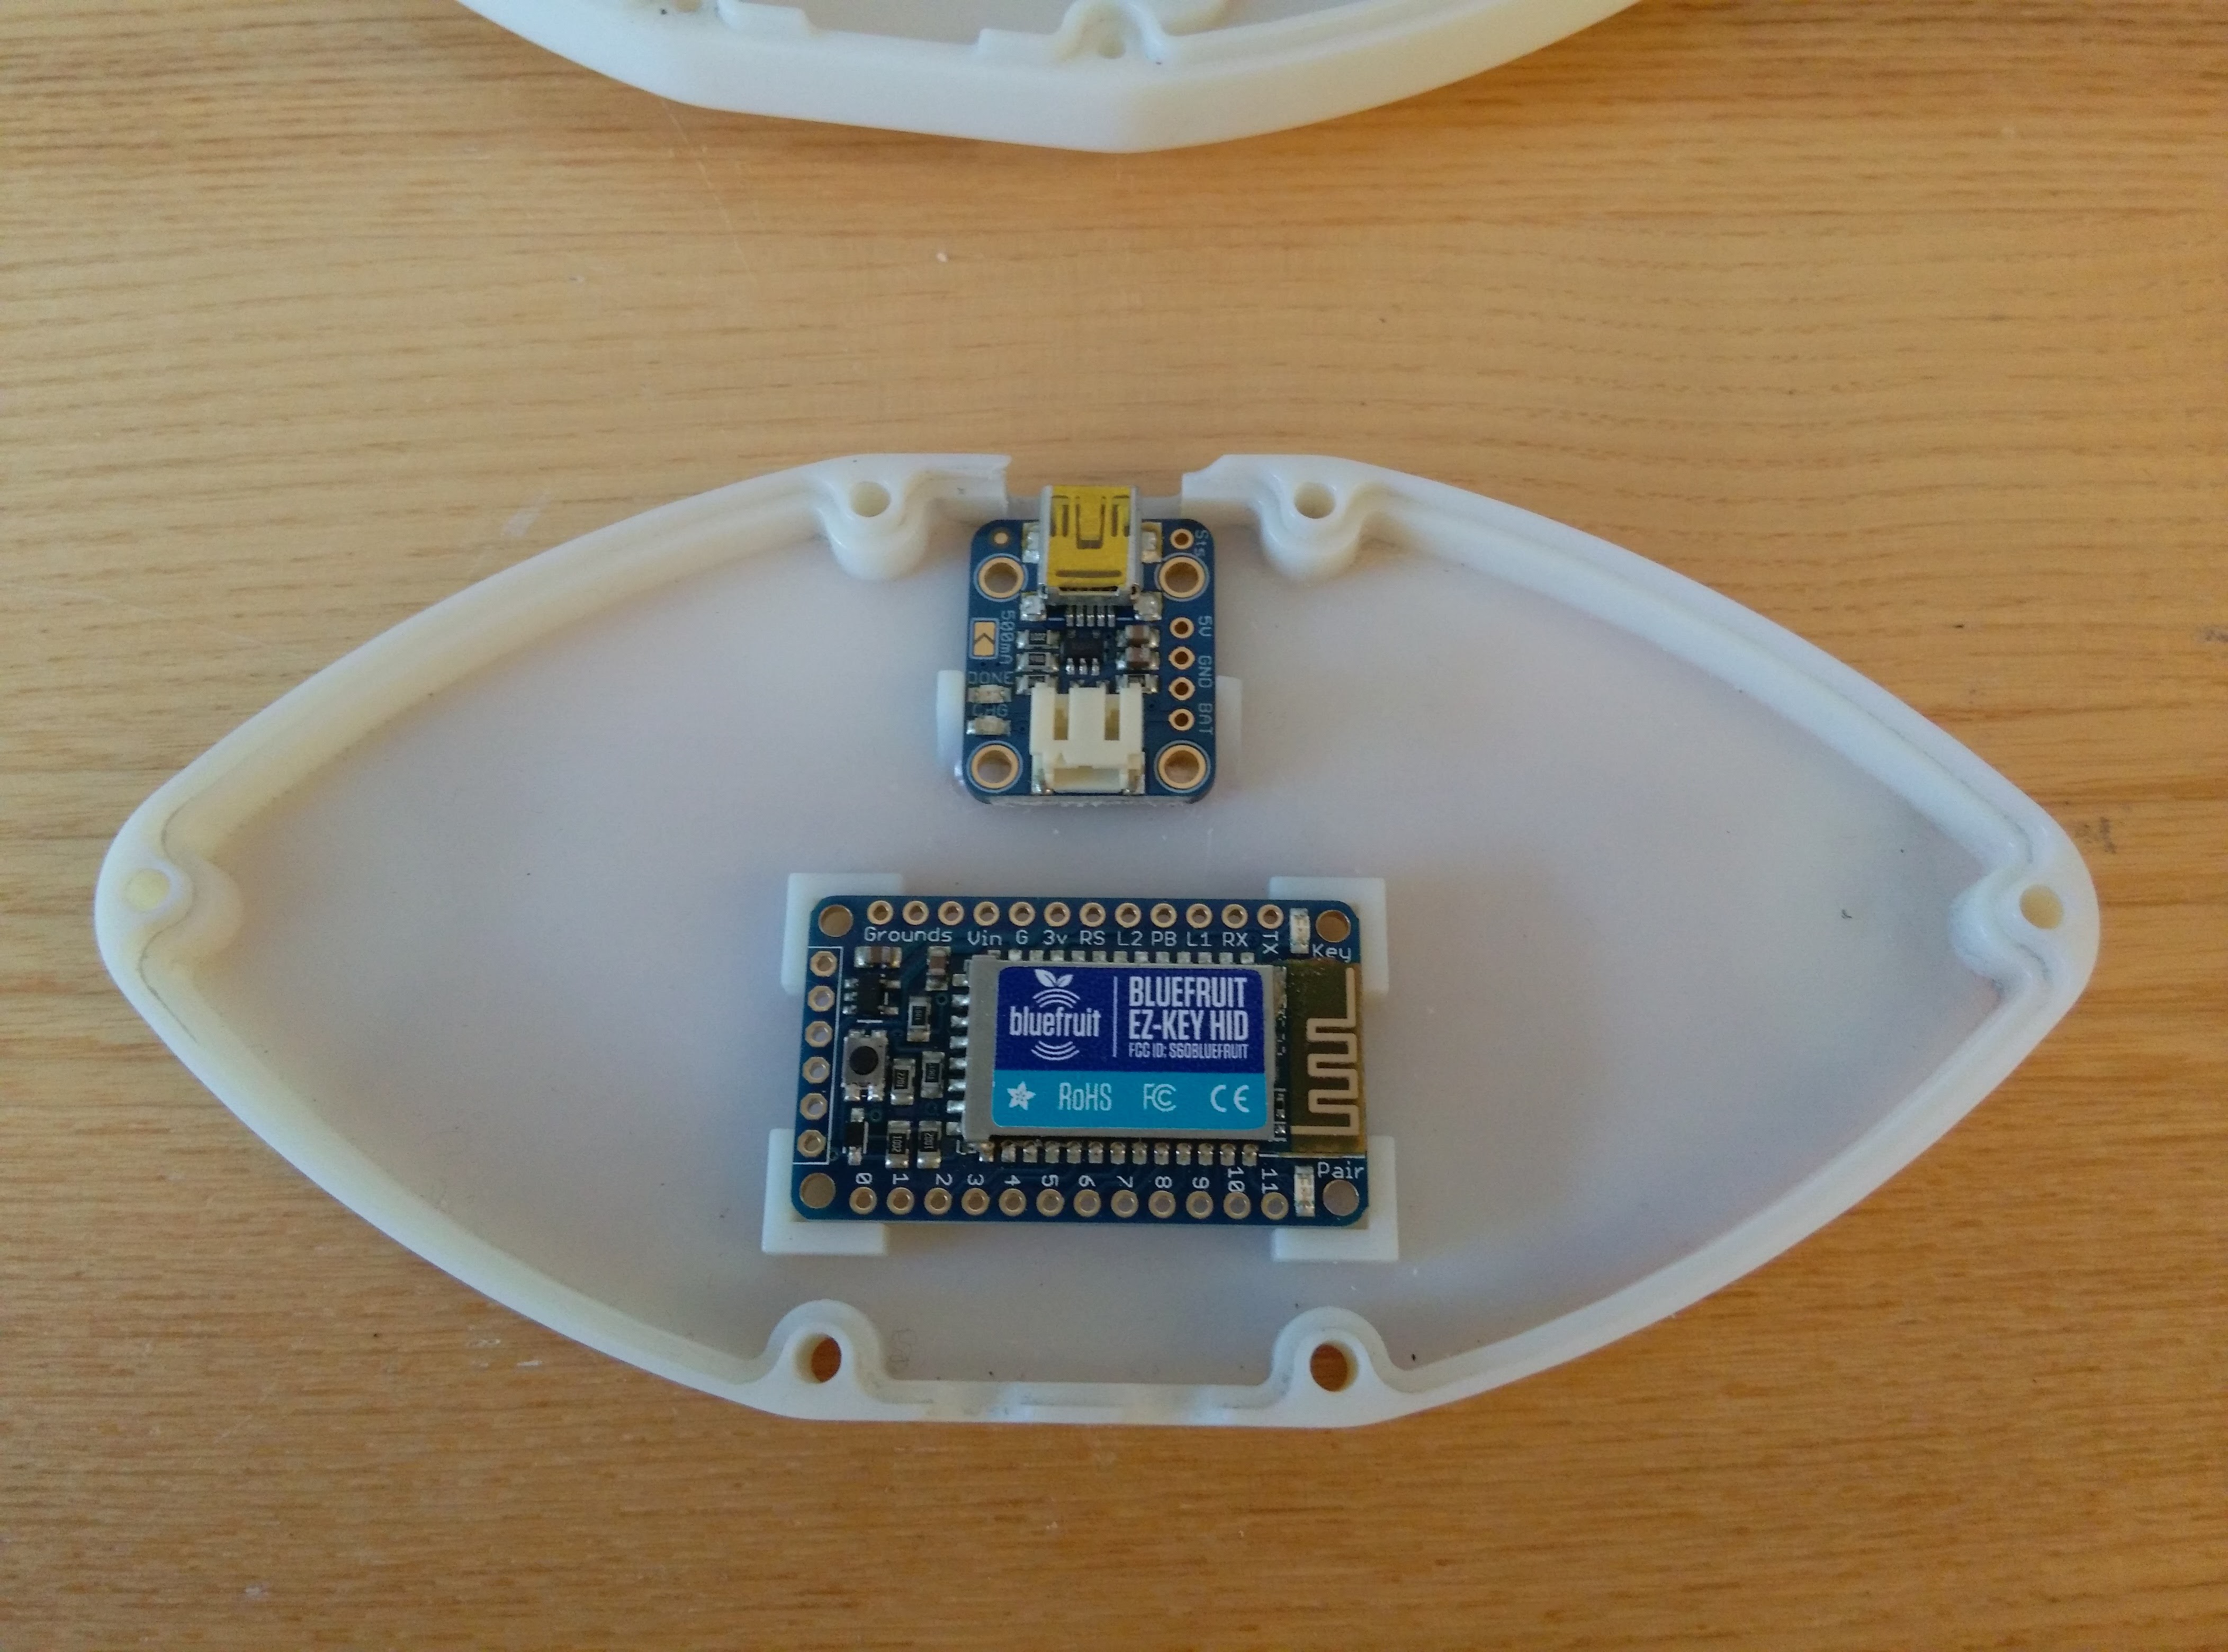
The Bluefruit EZ-Key is really tight-fit to the frame. I have to trim a little to be able to push it in. The charger I got is different than the CAD model I found on the GrabCAD Adafruit parts library. So I just removed the backside and double-side taped the charger to the chassis.
![]()
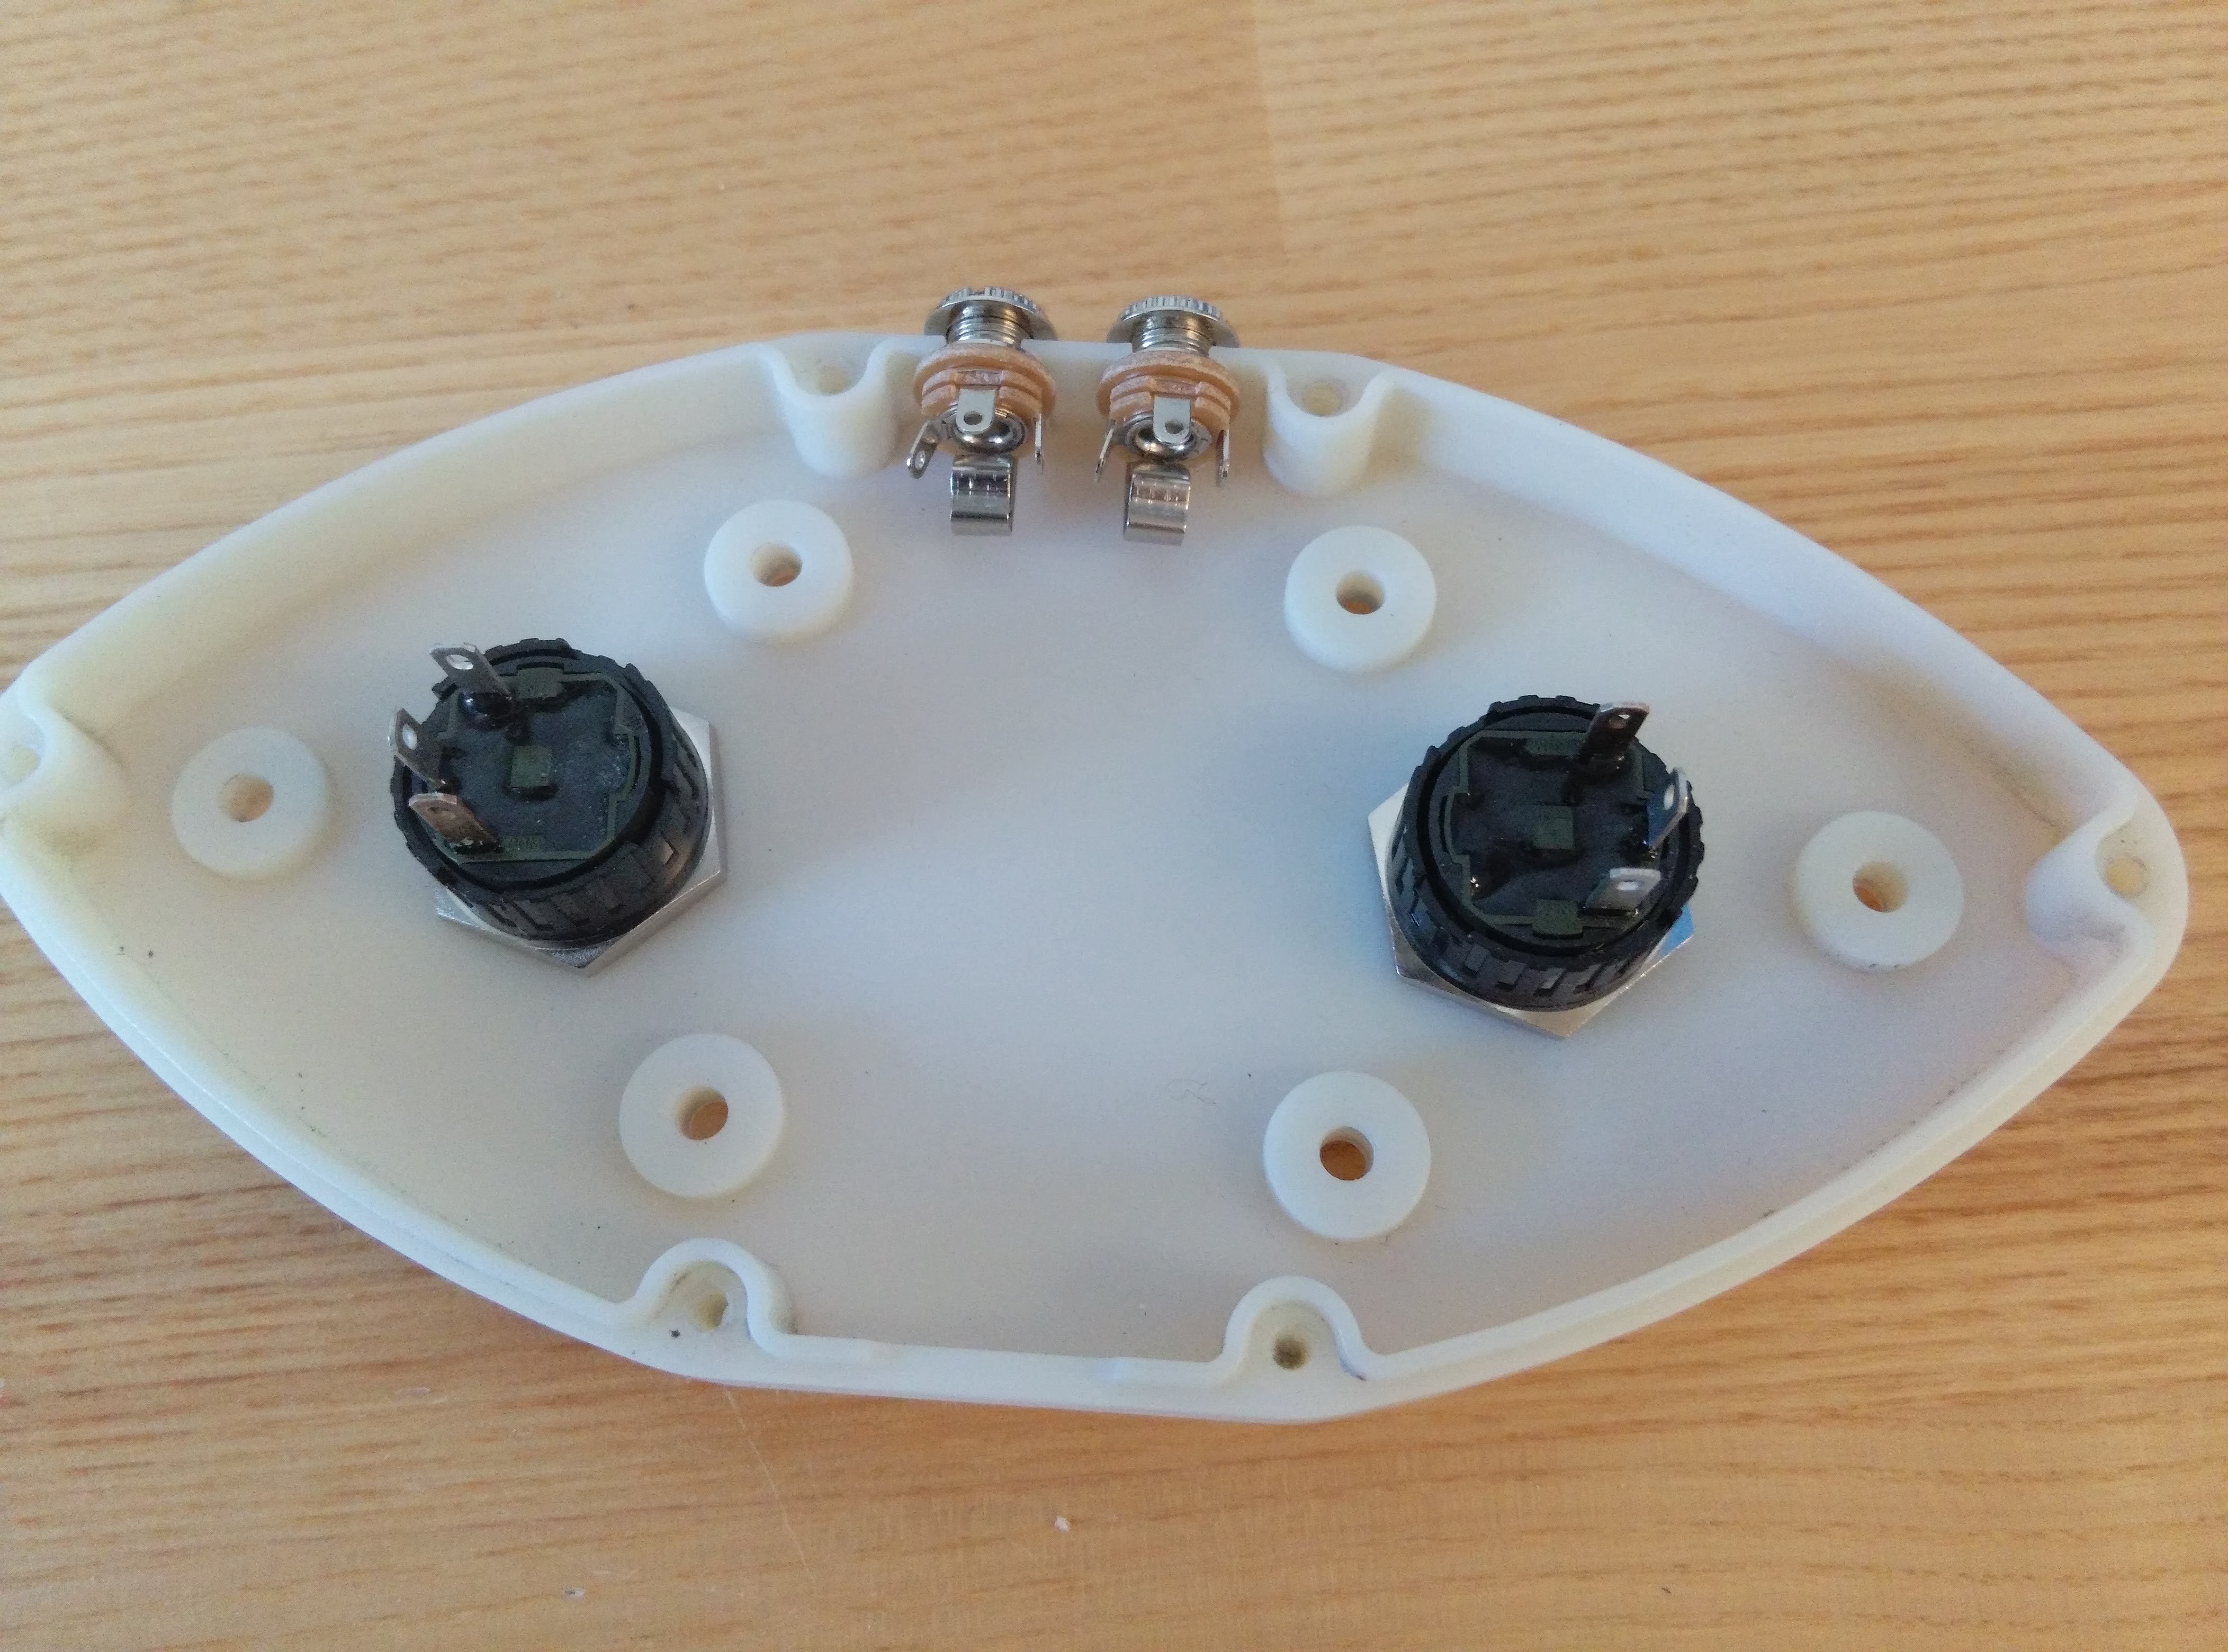
The push button and the 3.5mm jack fit really well. Not much modification had done here.
![]()
![]()
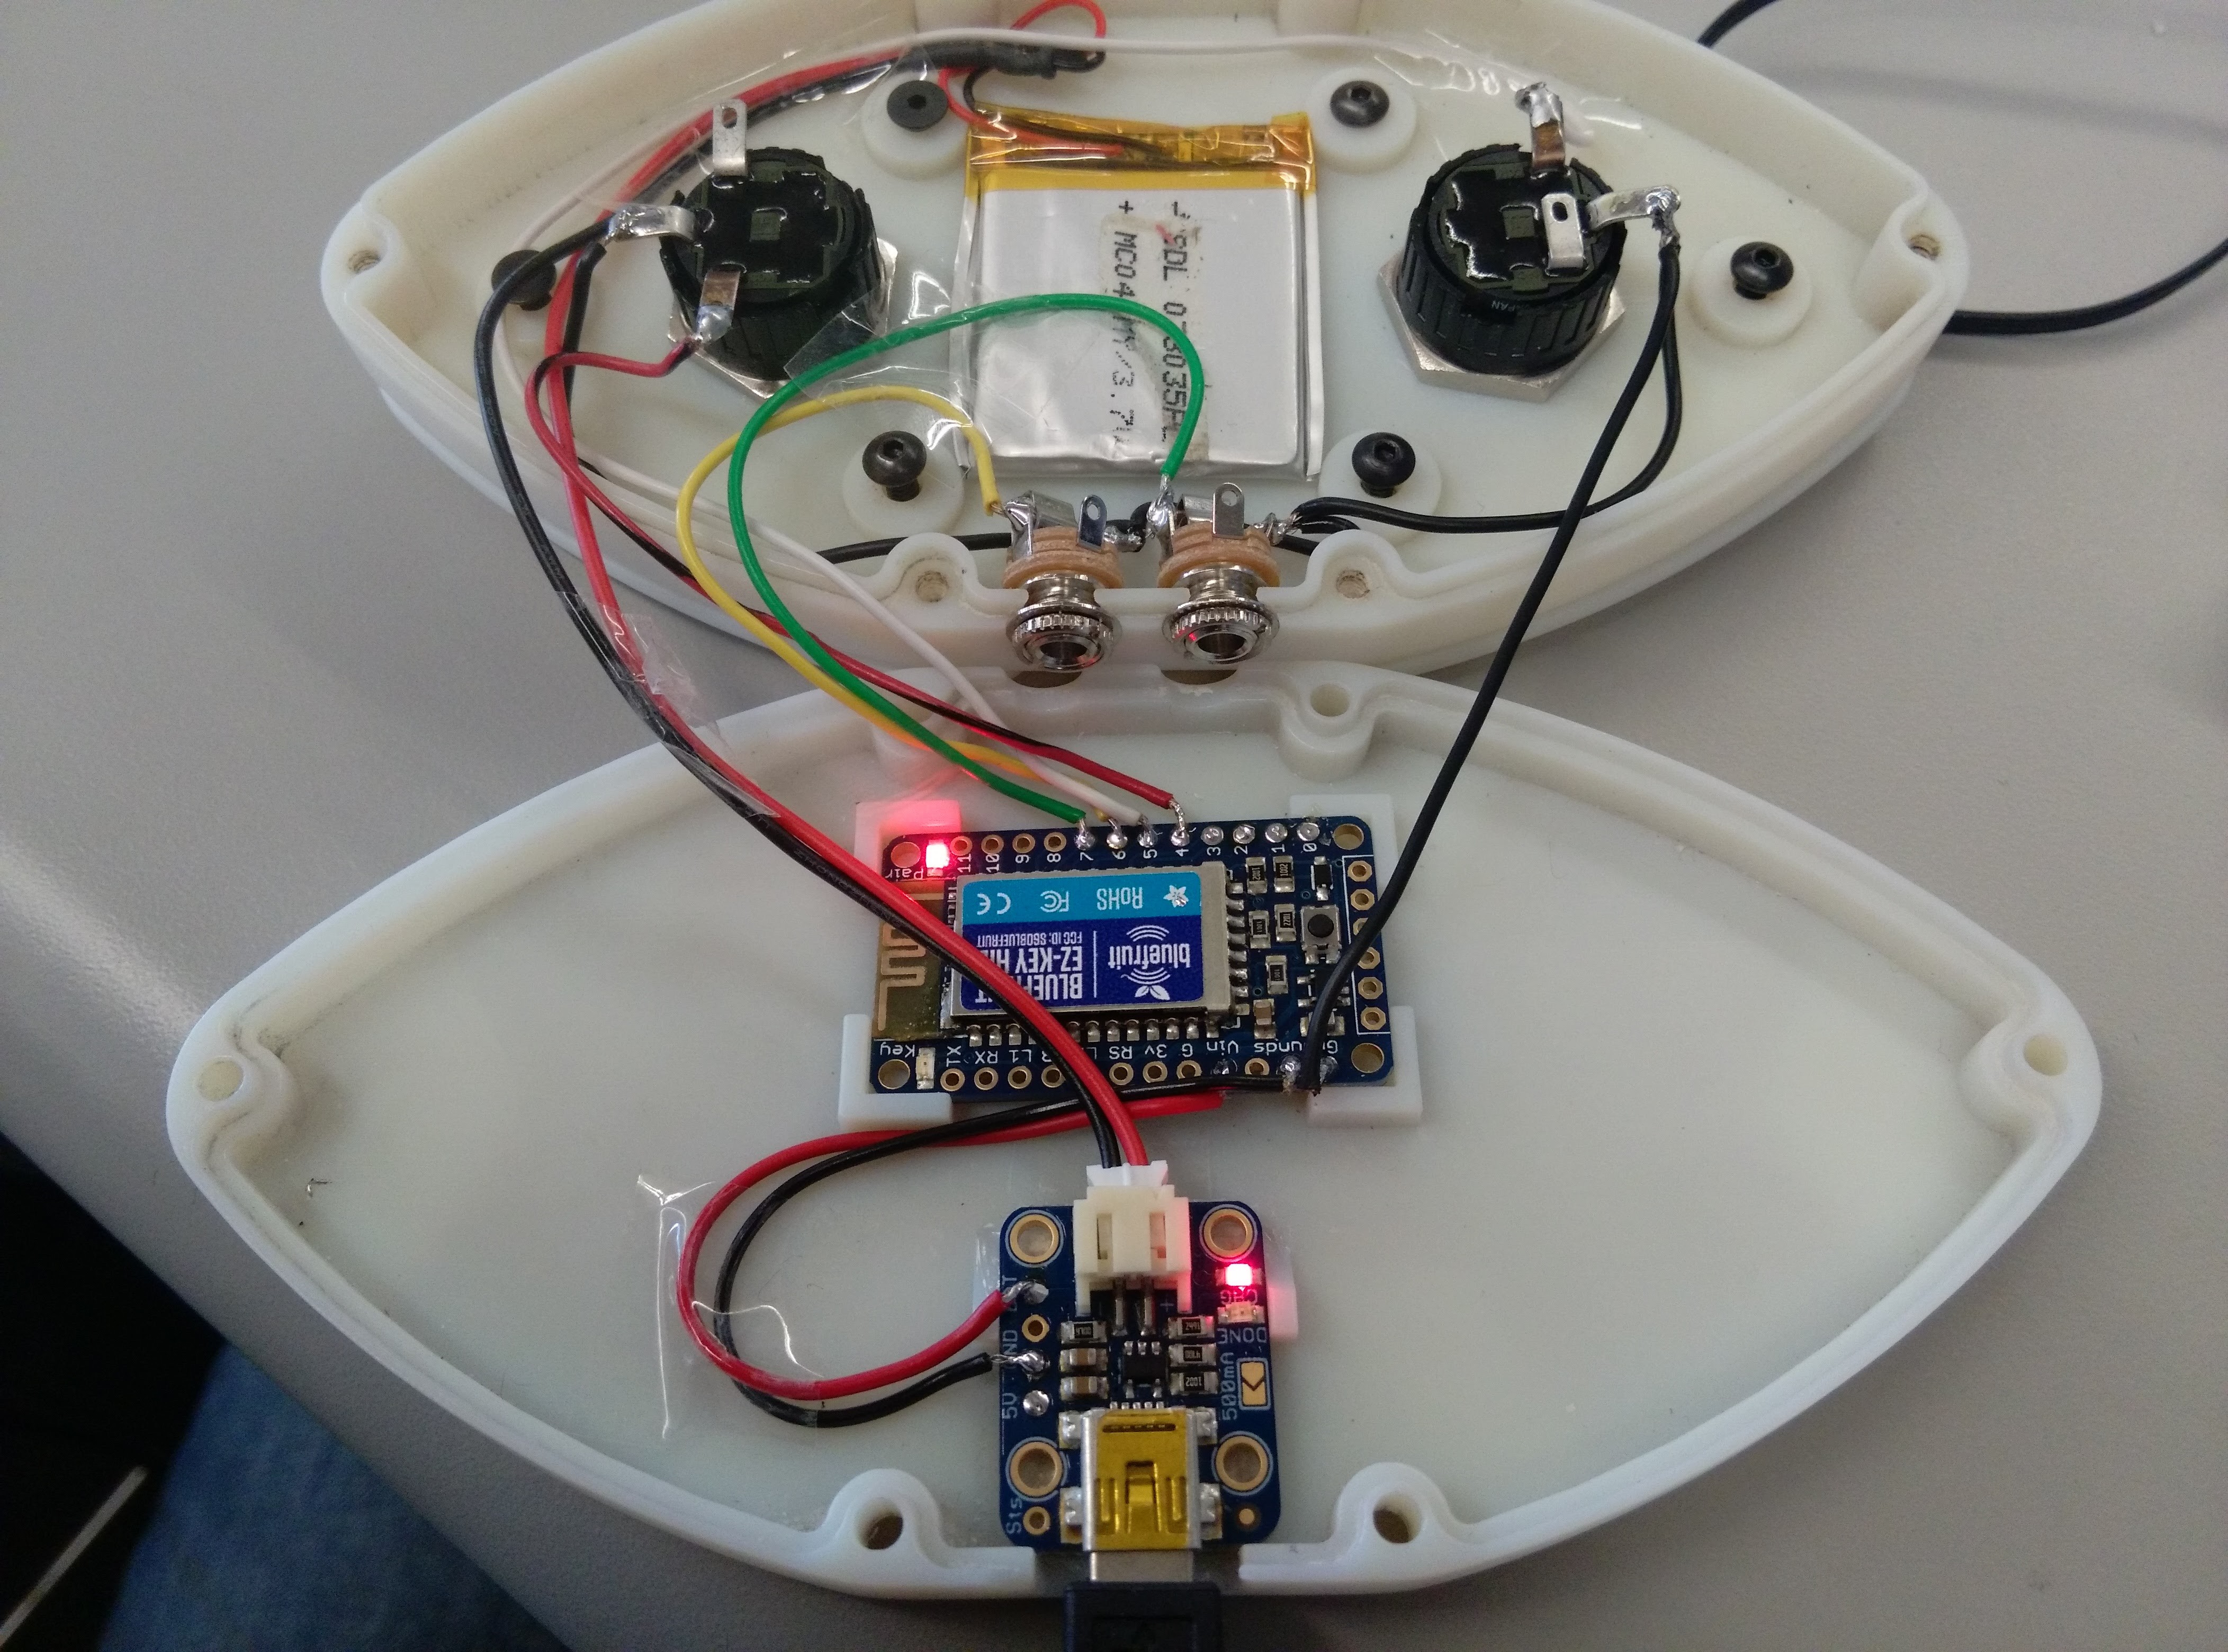
After following the schematic and soldering components together, I realized the Lipo batter I got was too big. So I changed to a thinner battery. I used clear tape to stabilize the wires.
![]()
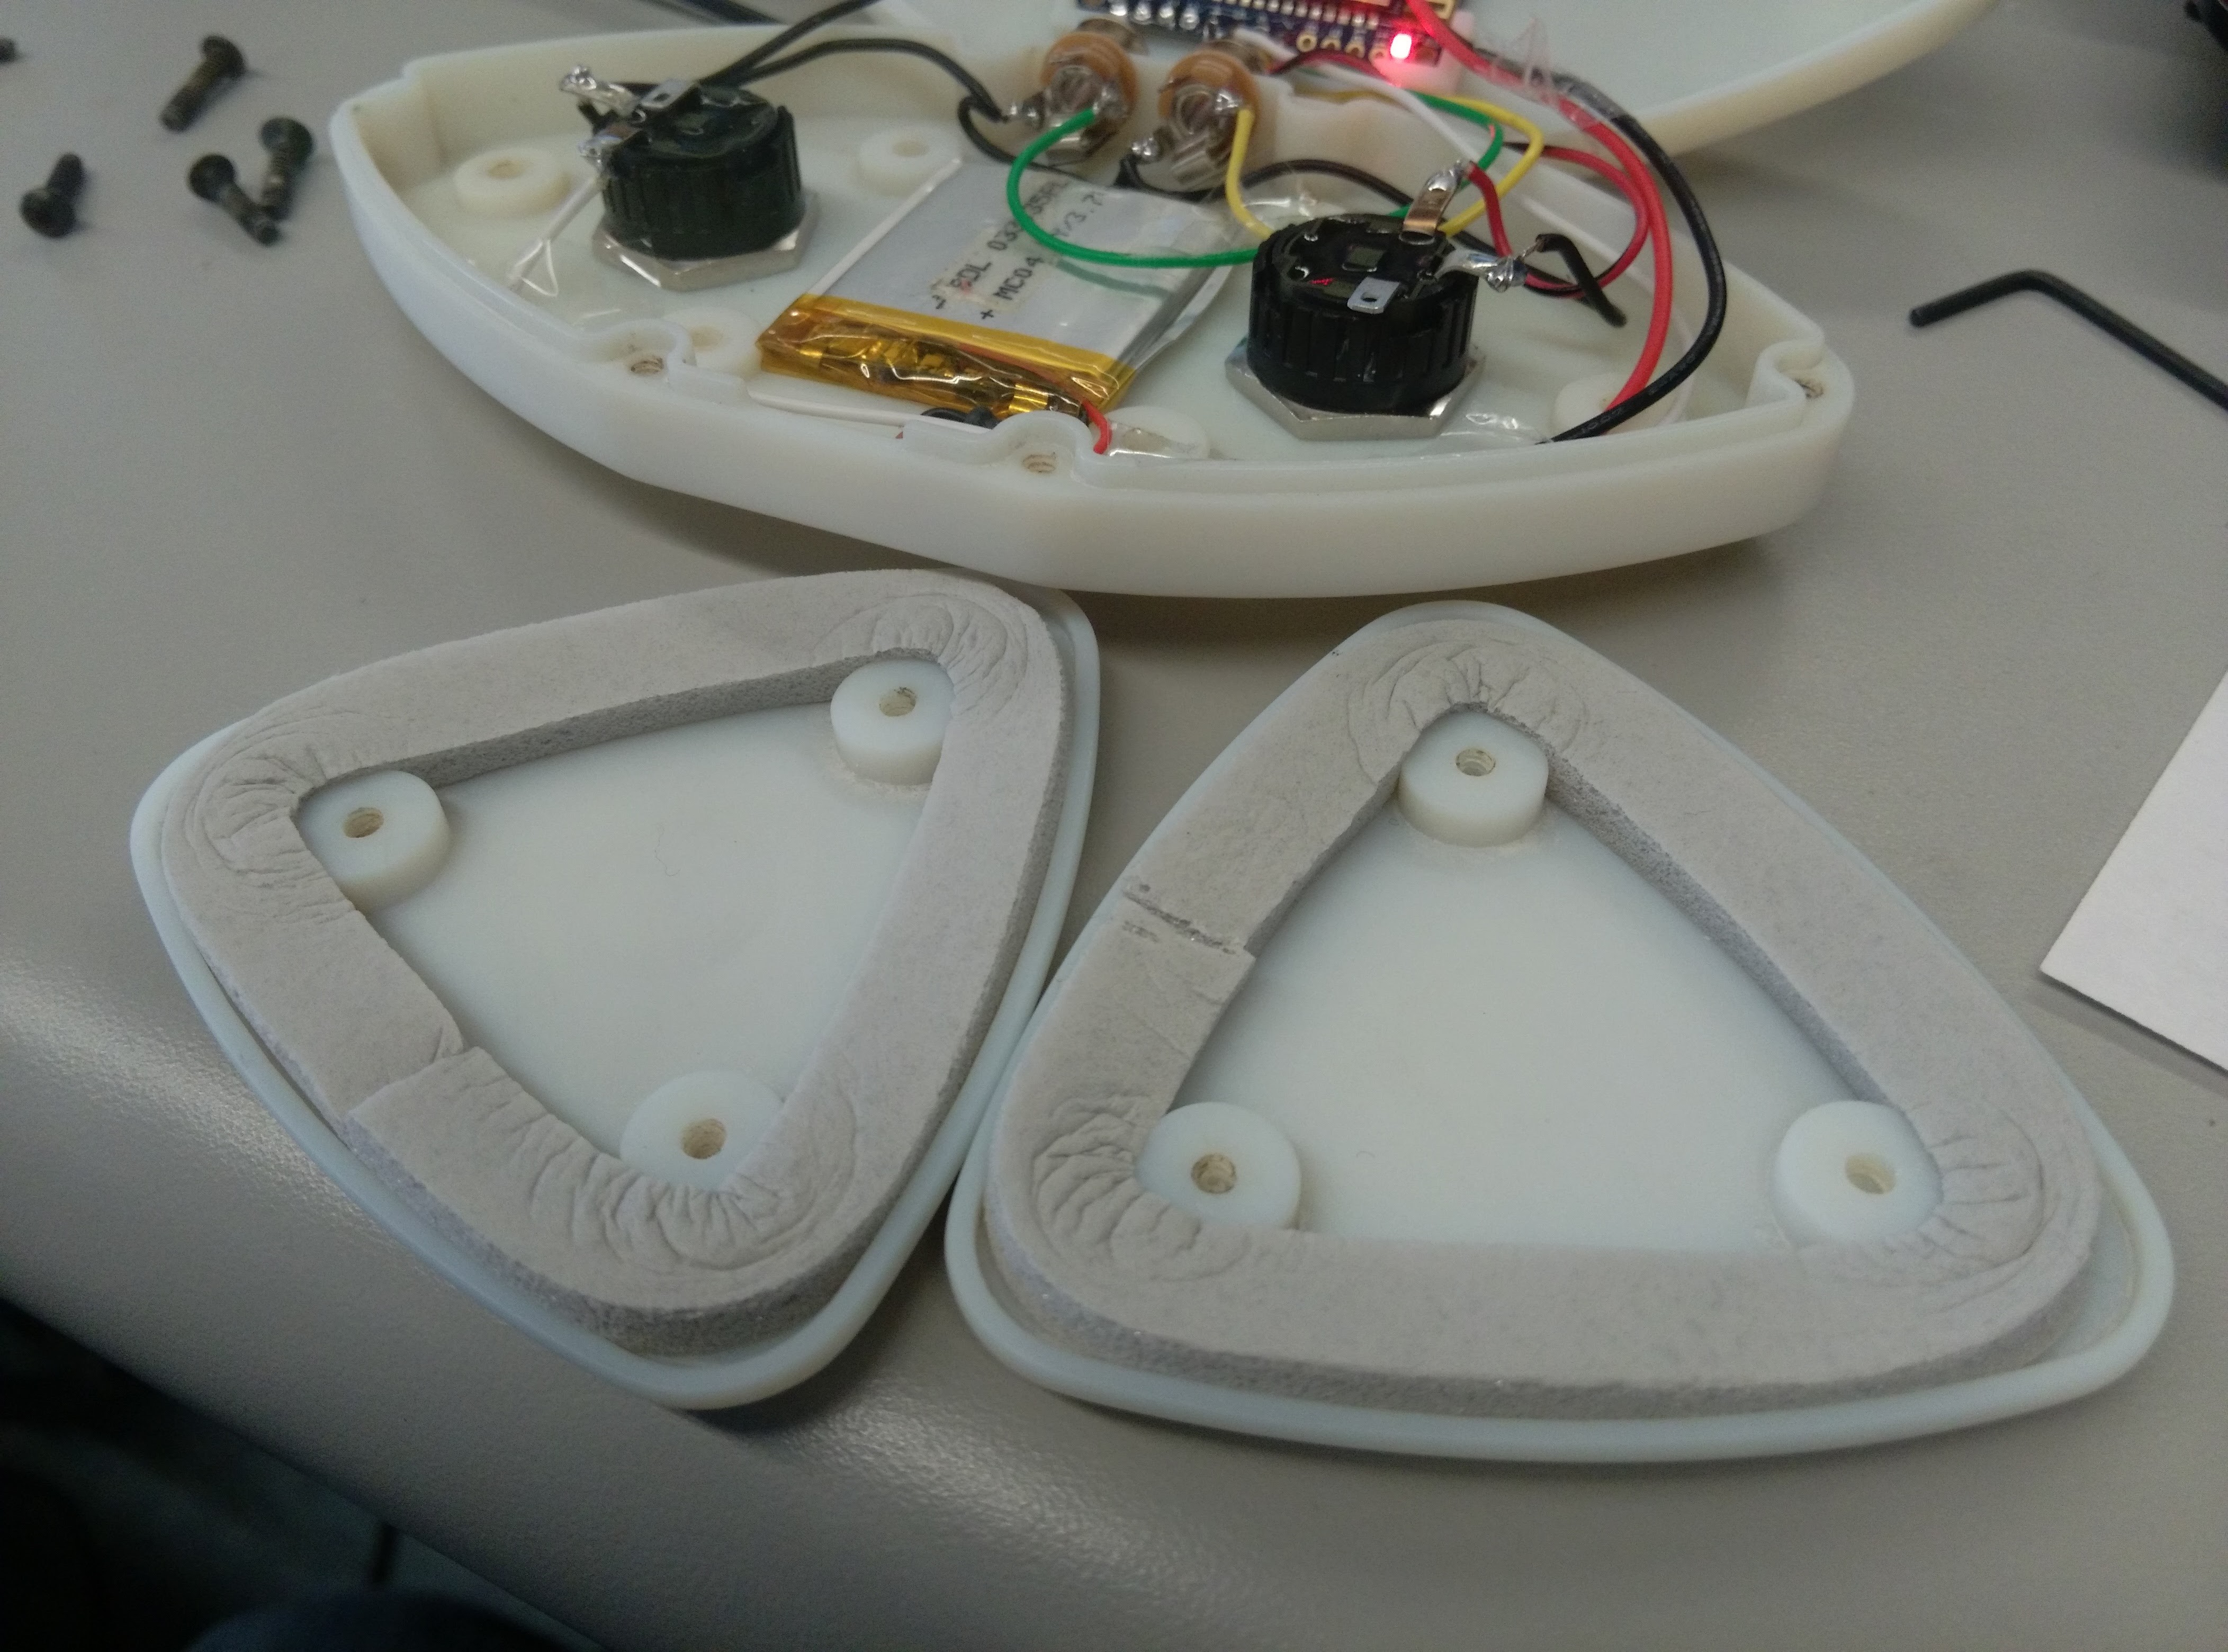
On the back of the button cover, I put some foam from the Home Depot.
![]()
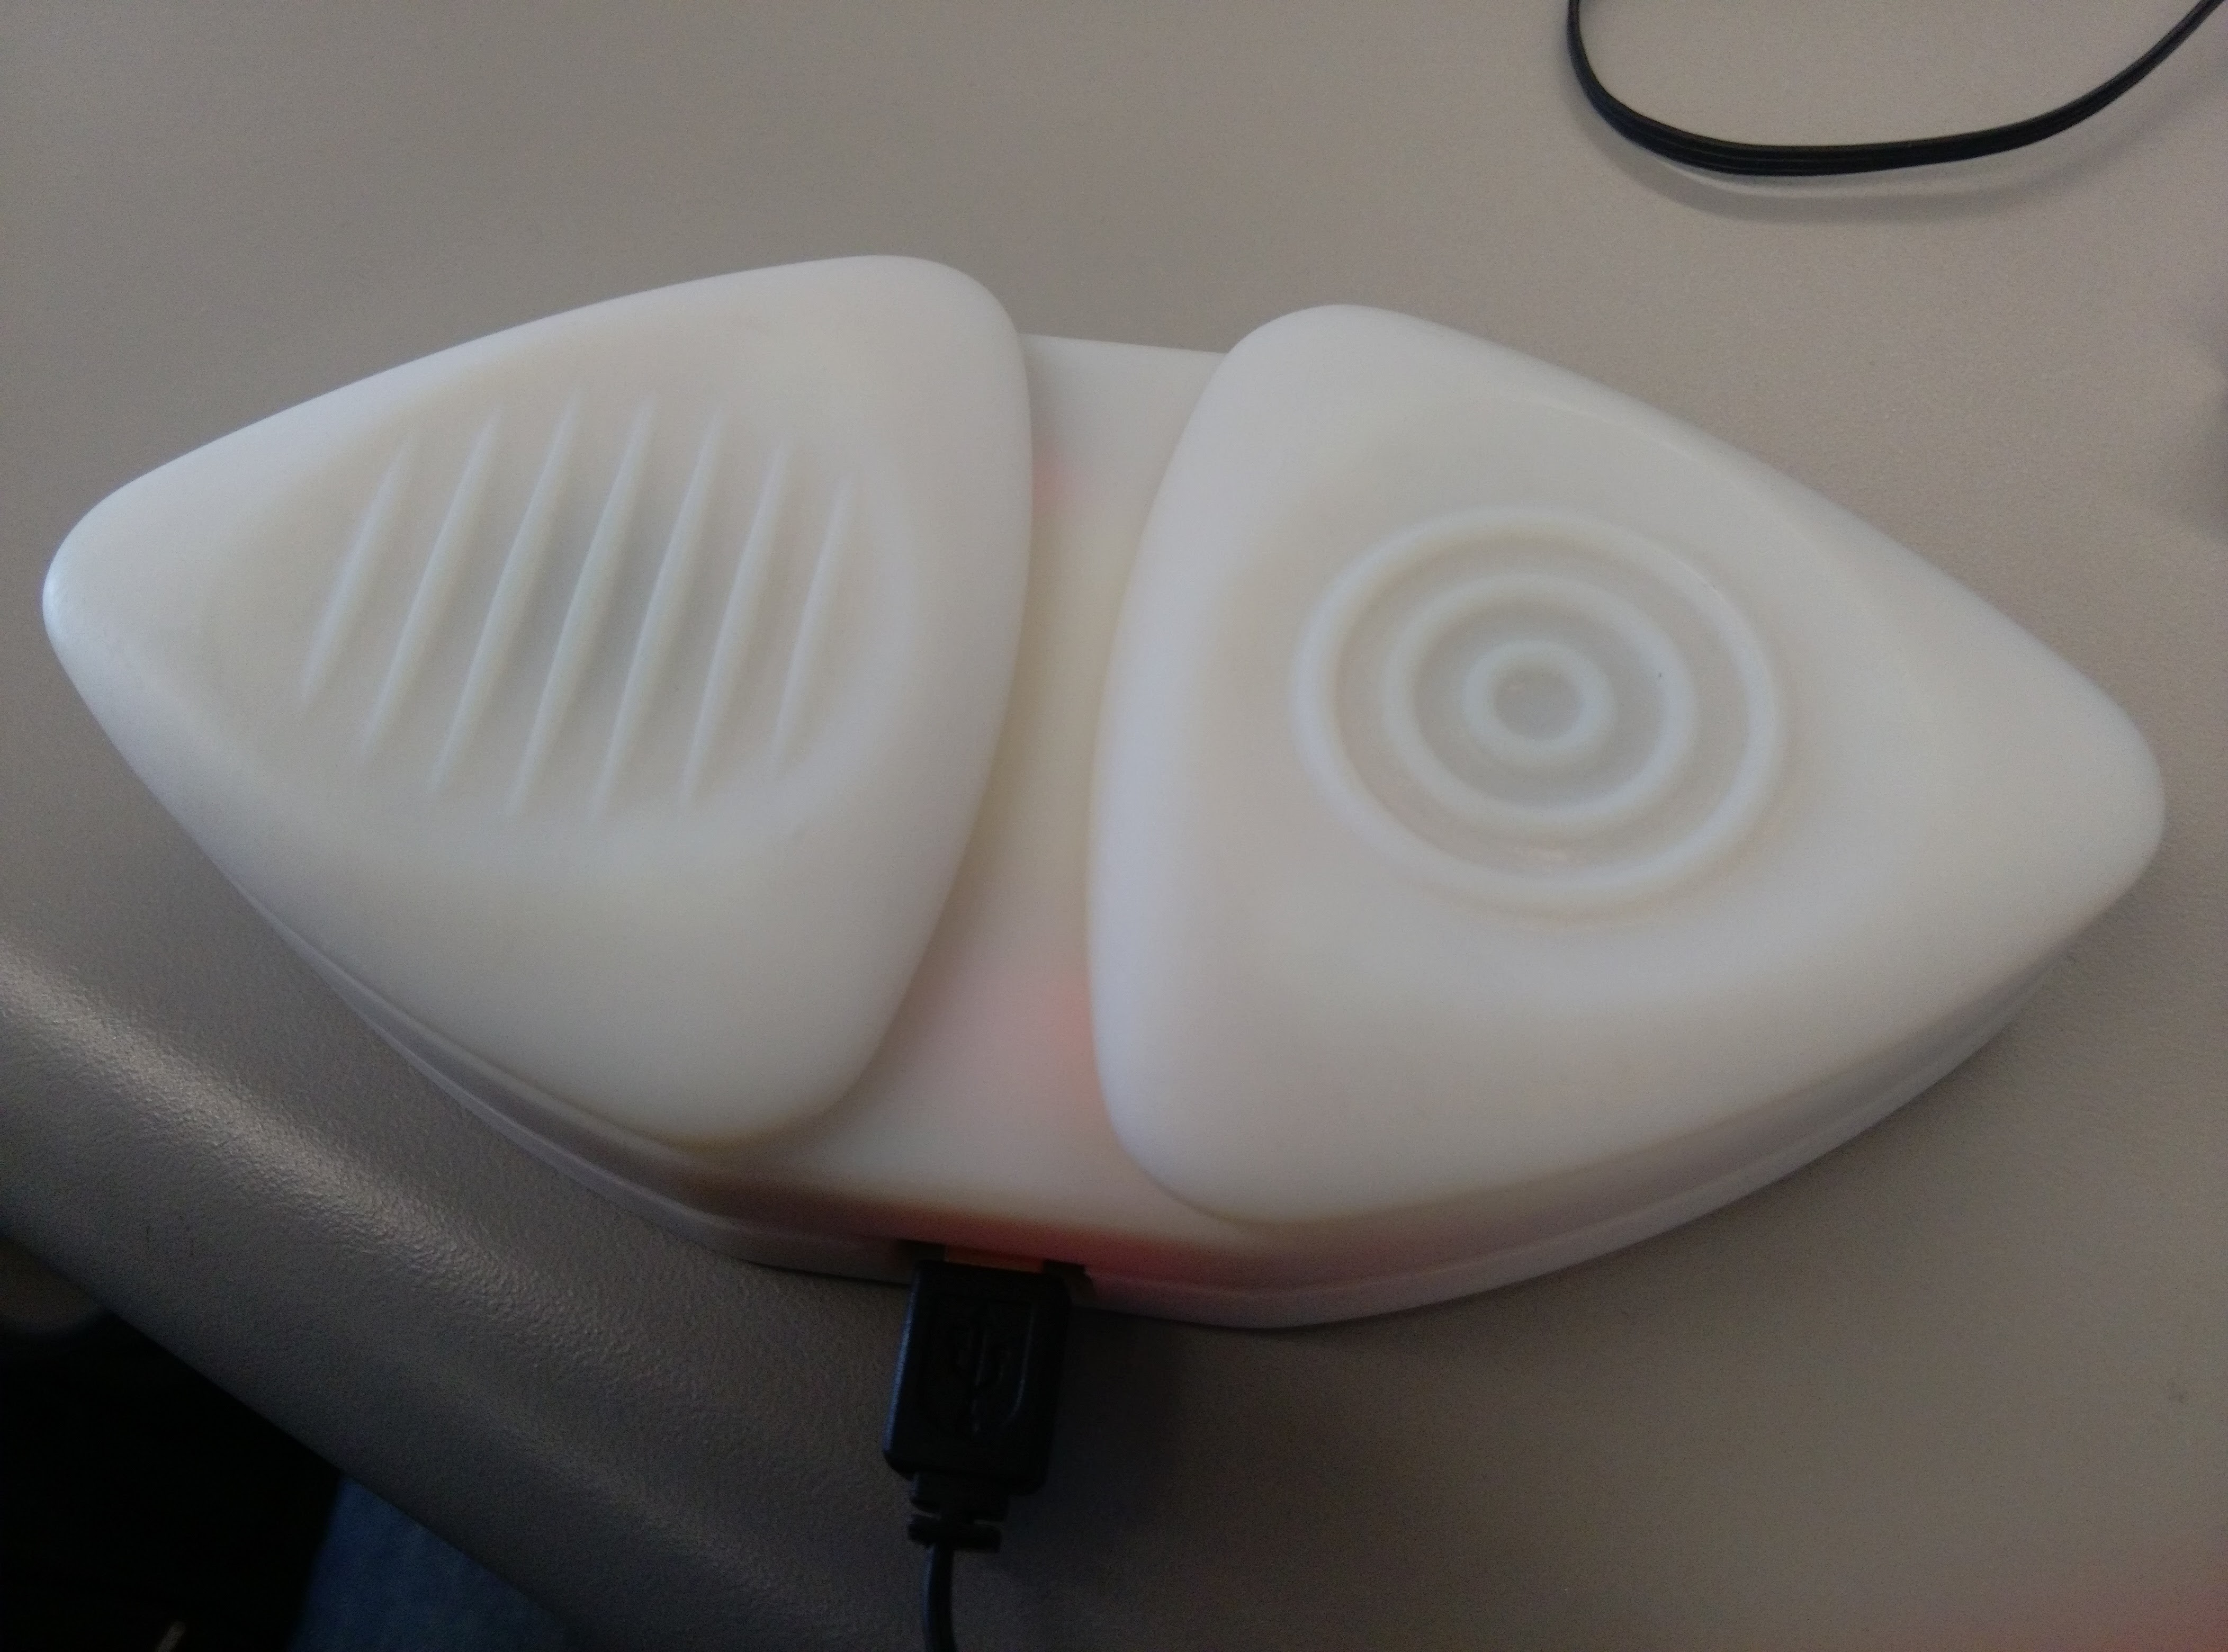
When everything is put in place, it's time to charge the battery and try it out.
-
Make of BOSI
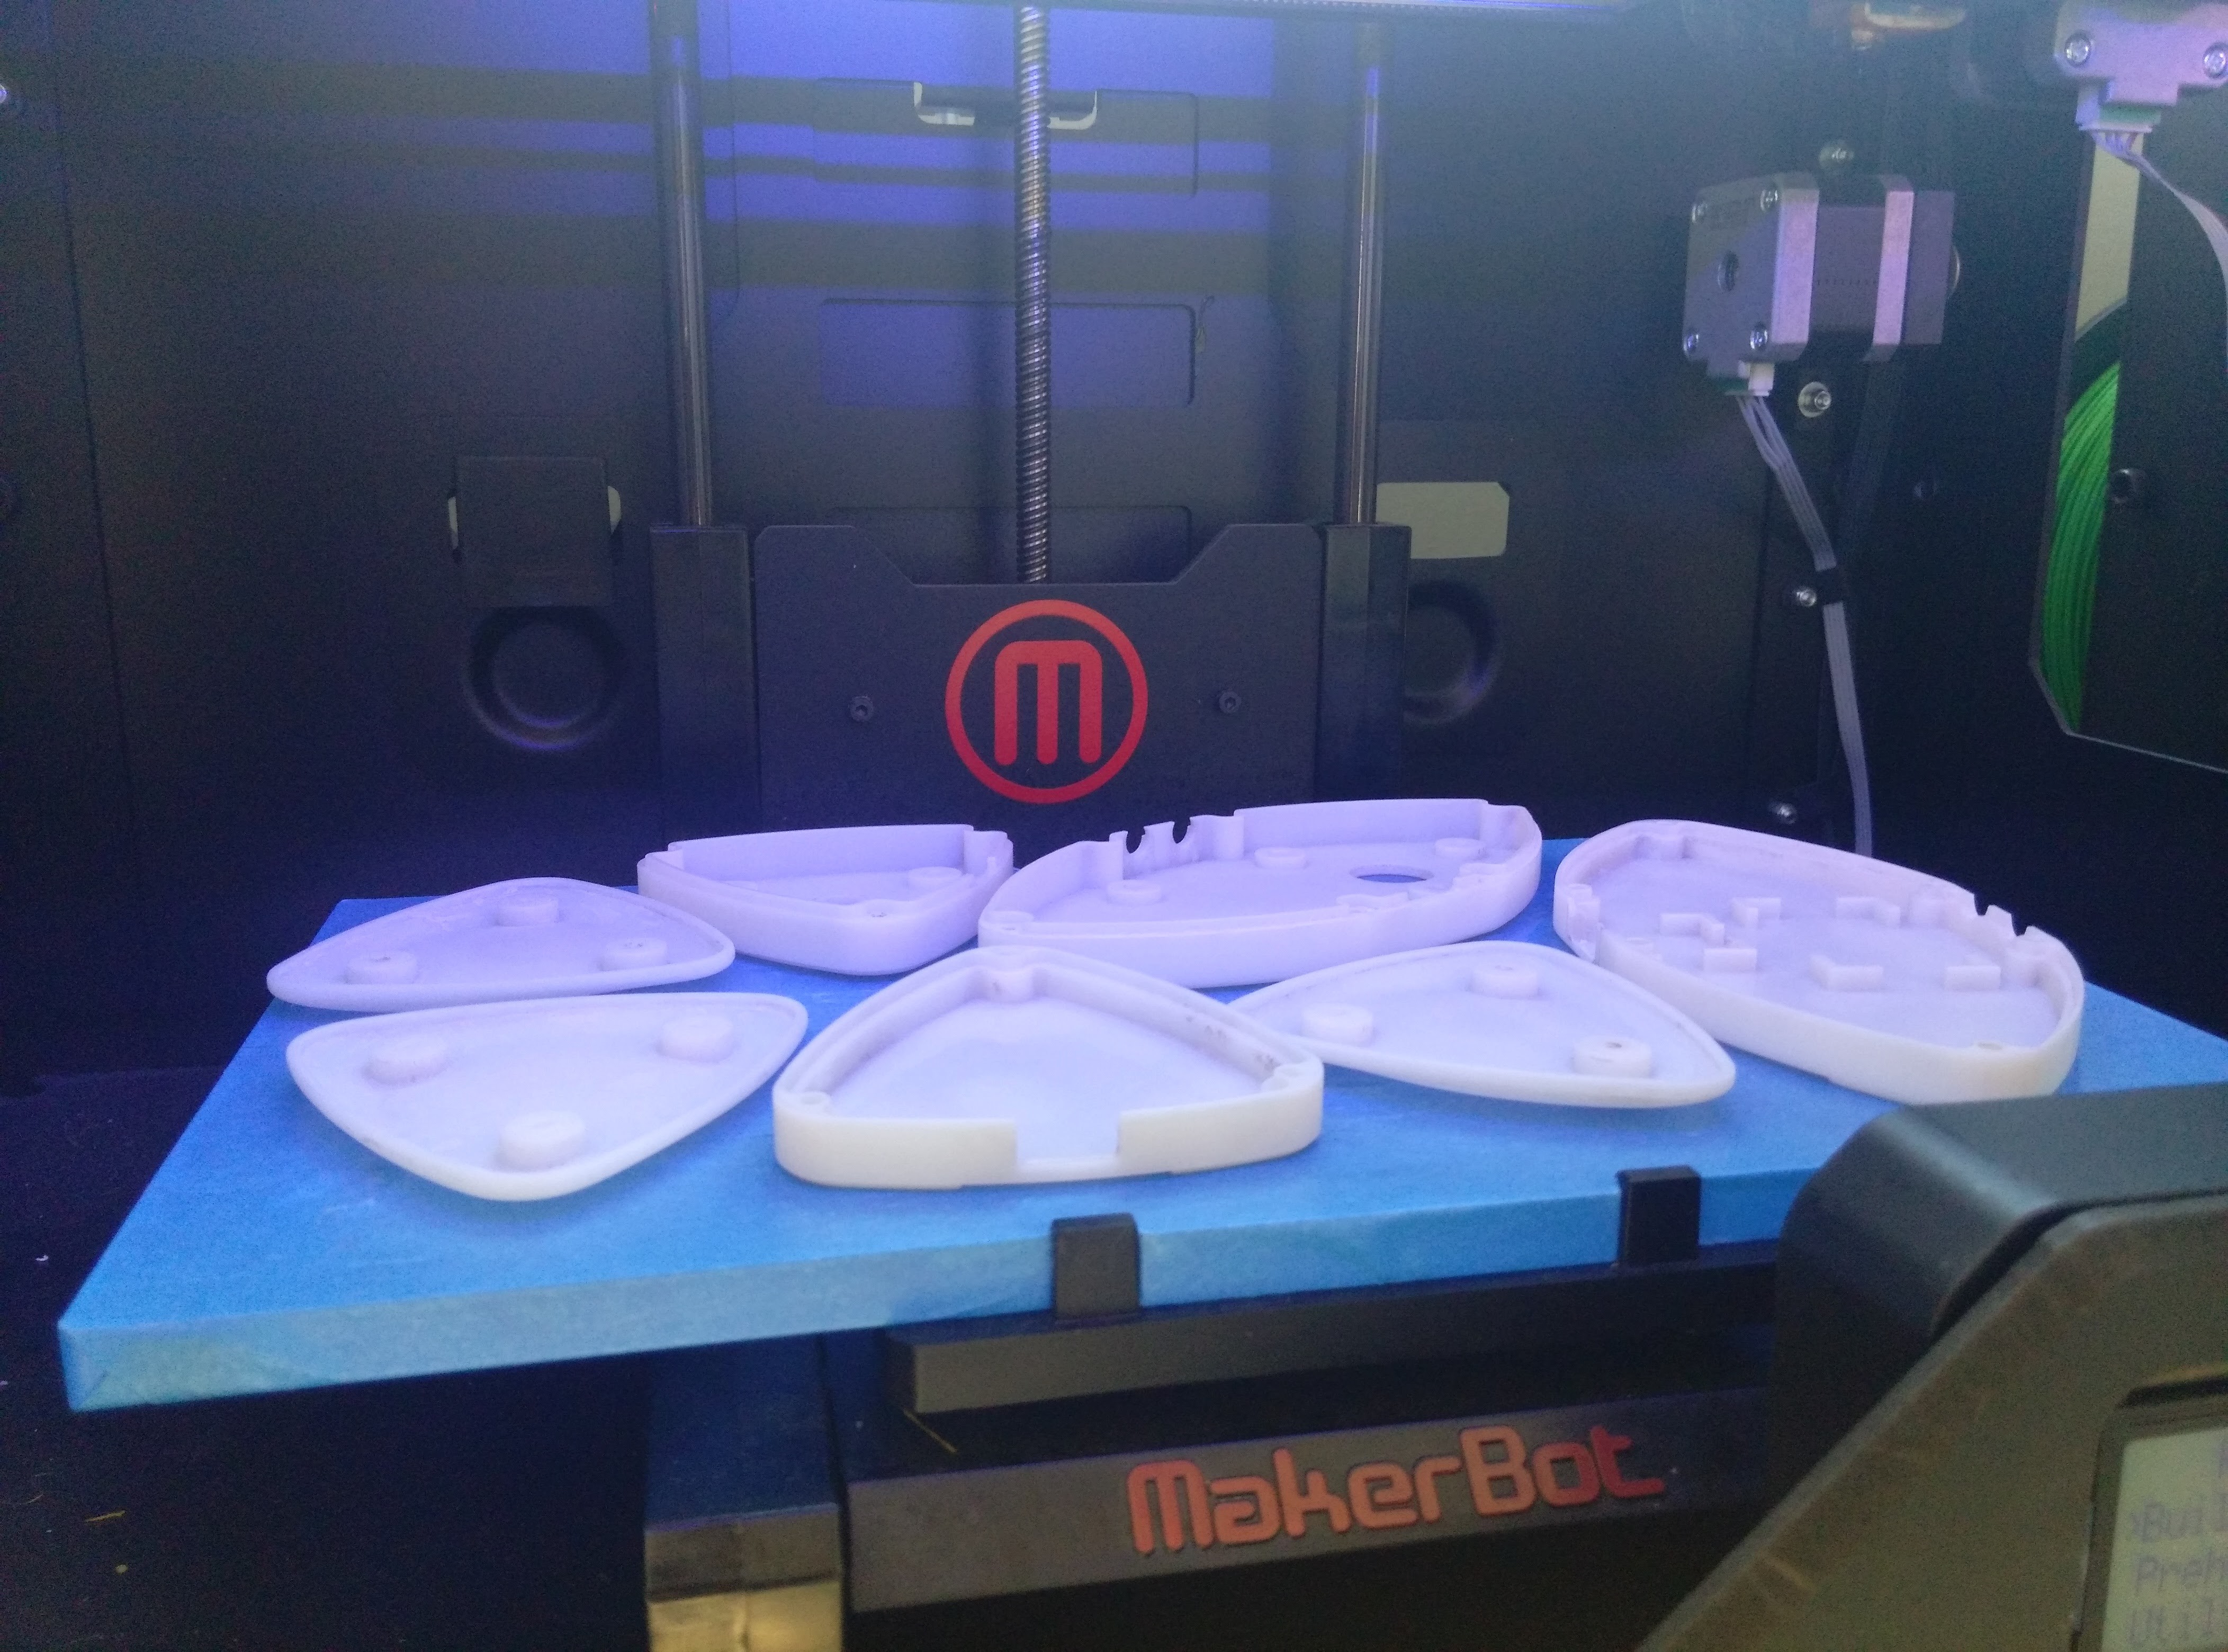
09/23/2016 at 14:46 • 0 commentsThe CAD files were converted to the STL file format and printed out in the 3D printer. The STL files are also in the files in this project.
![]()
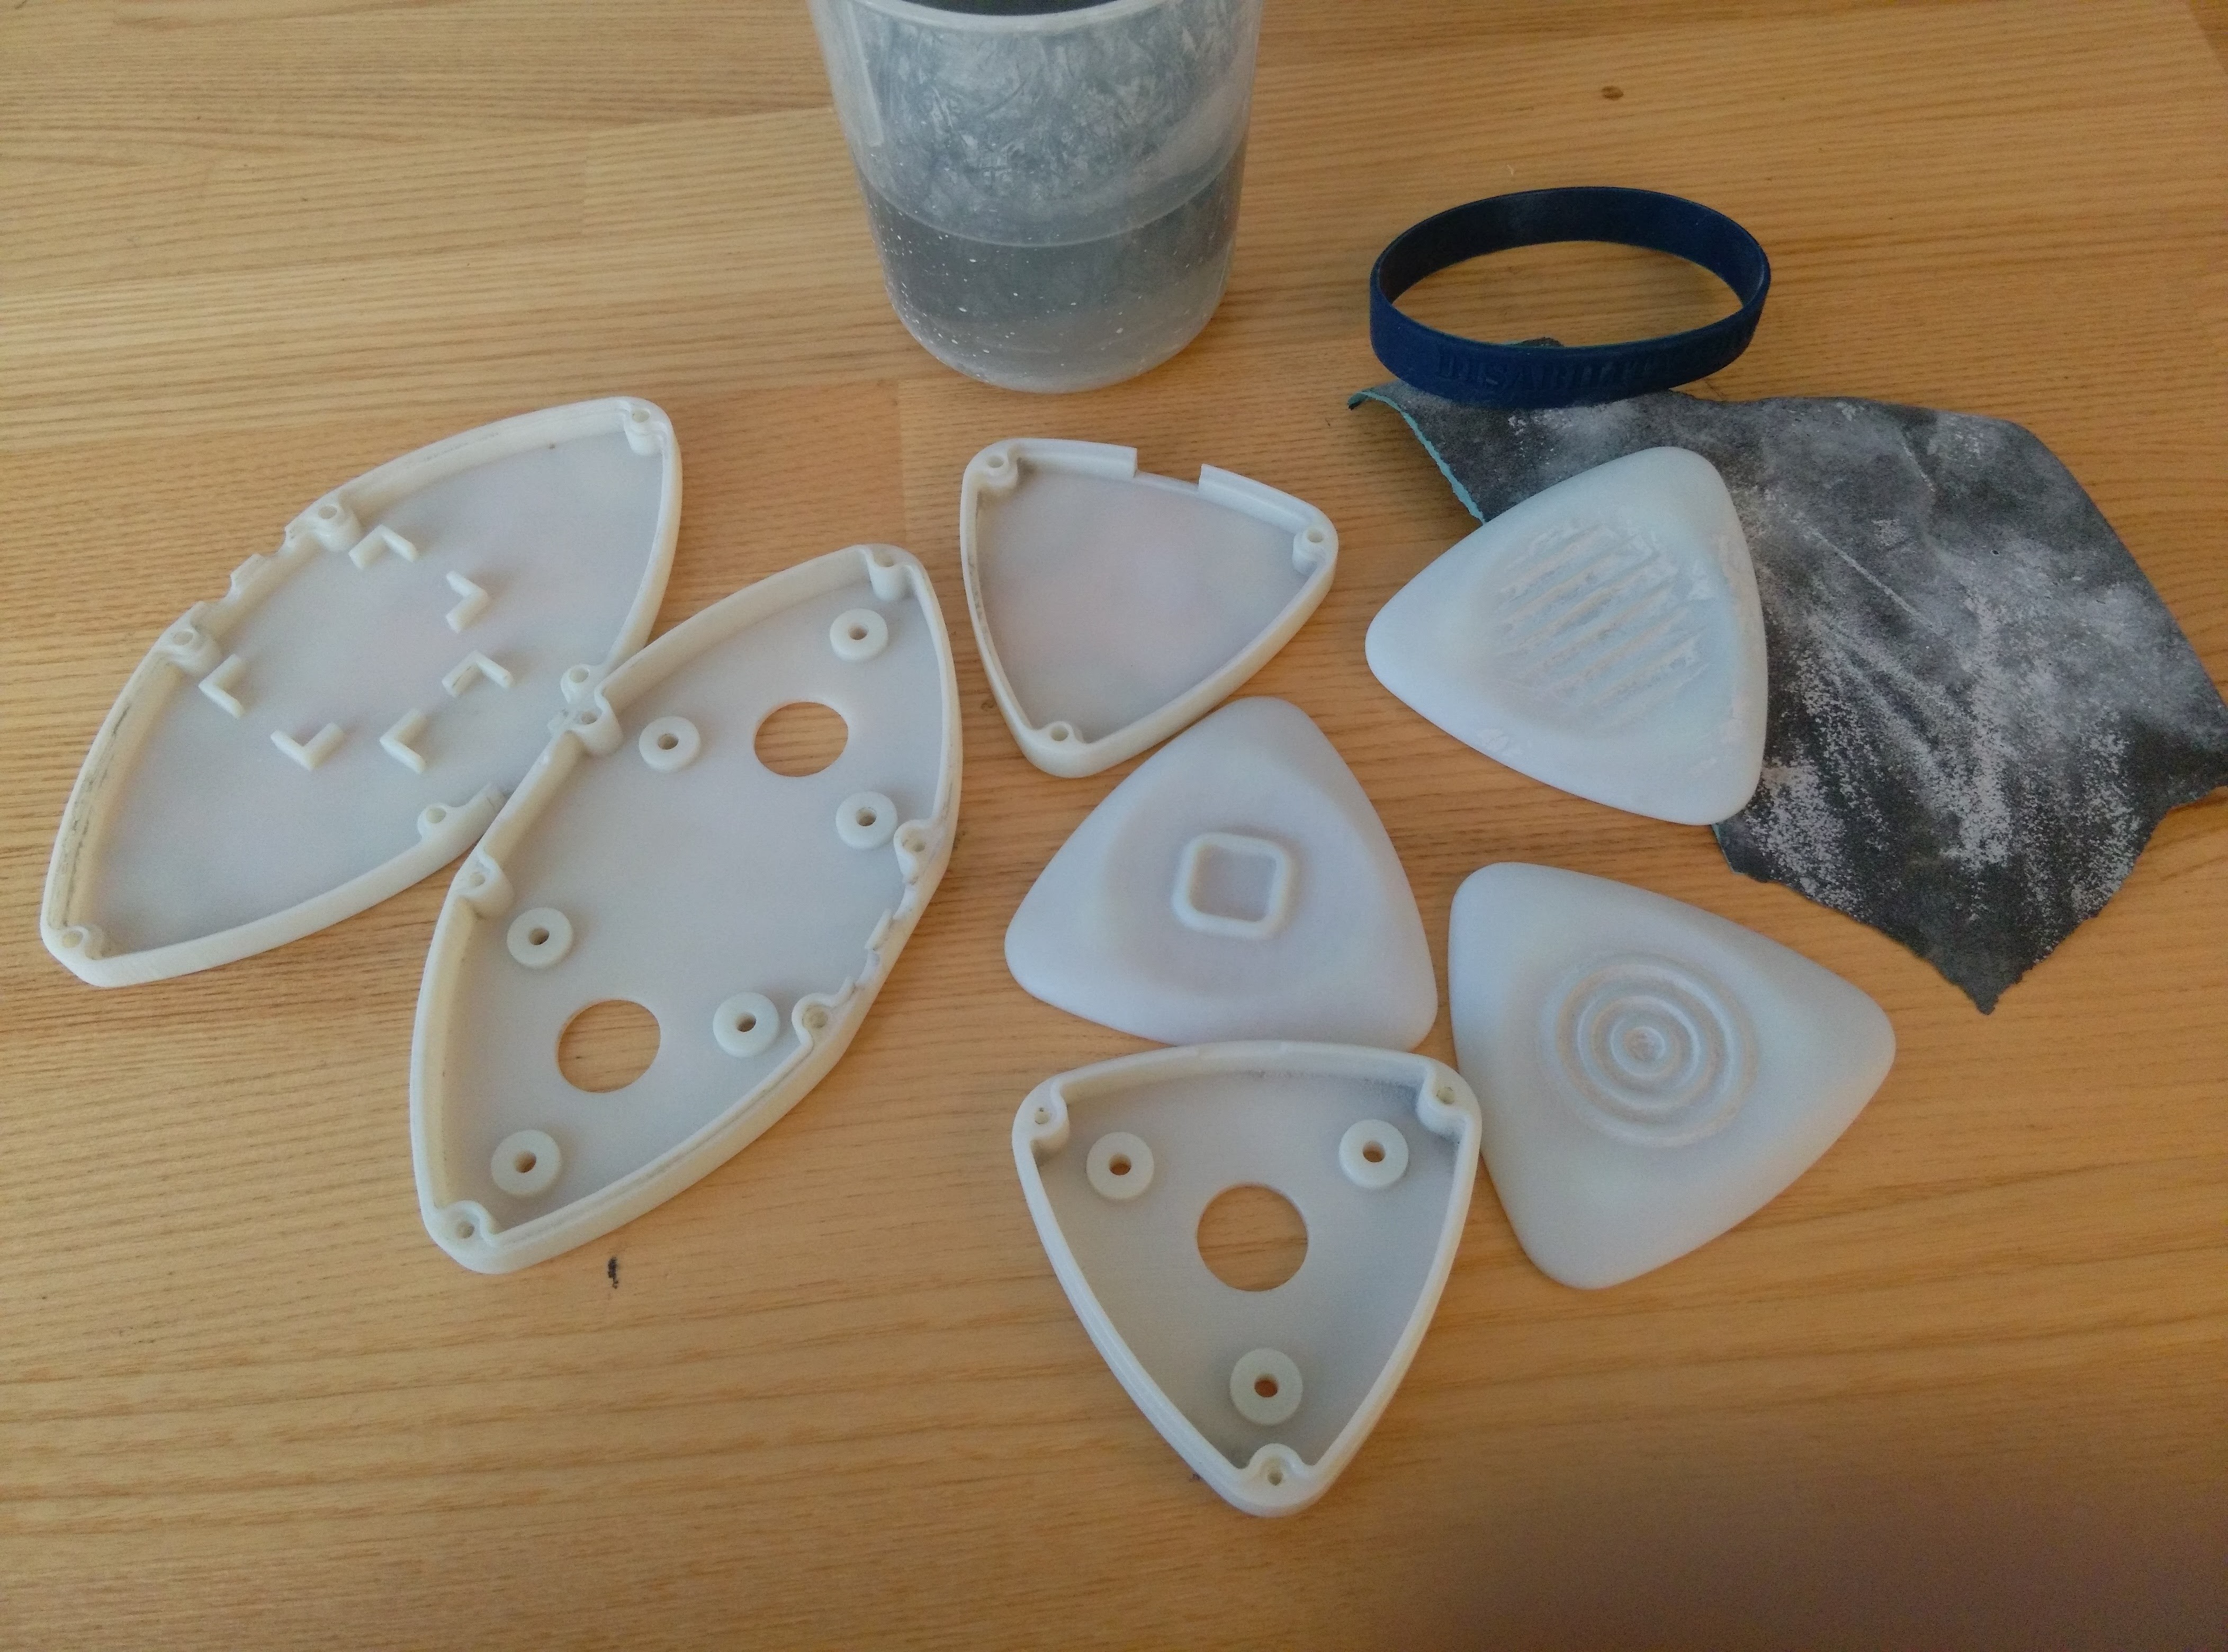
After waiting for hours of 3D printing, the next is to smooth the surface.
![]()
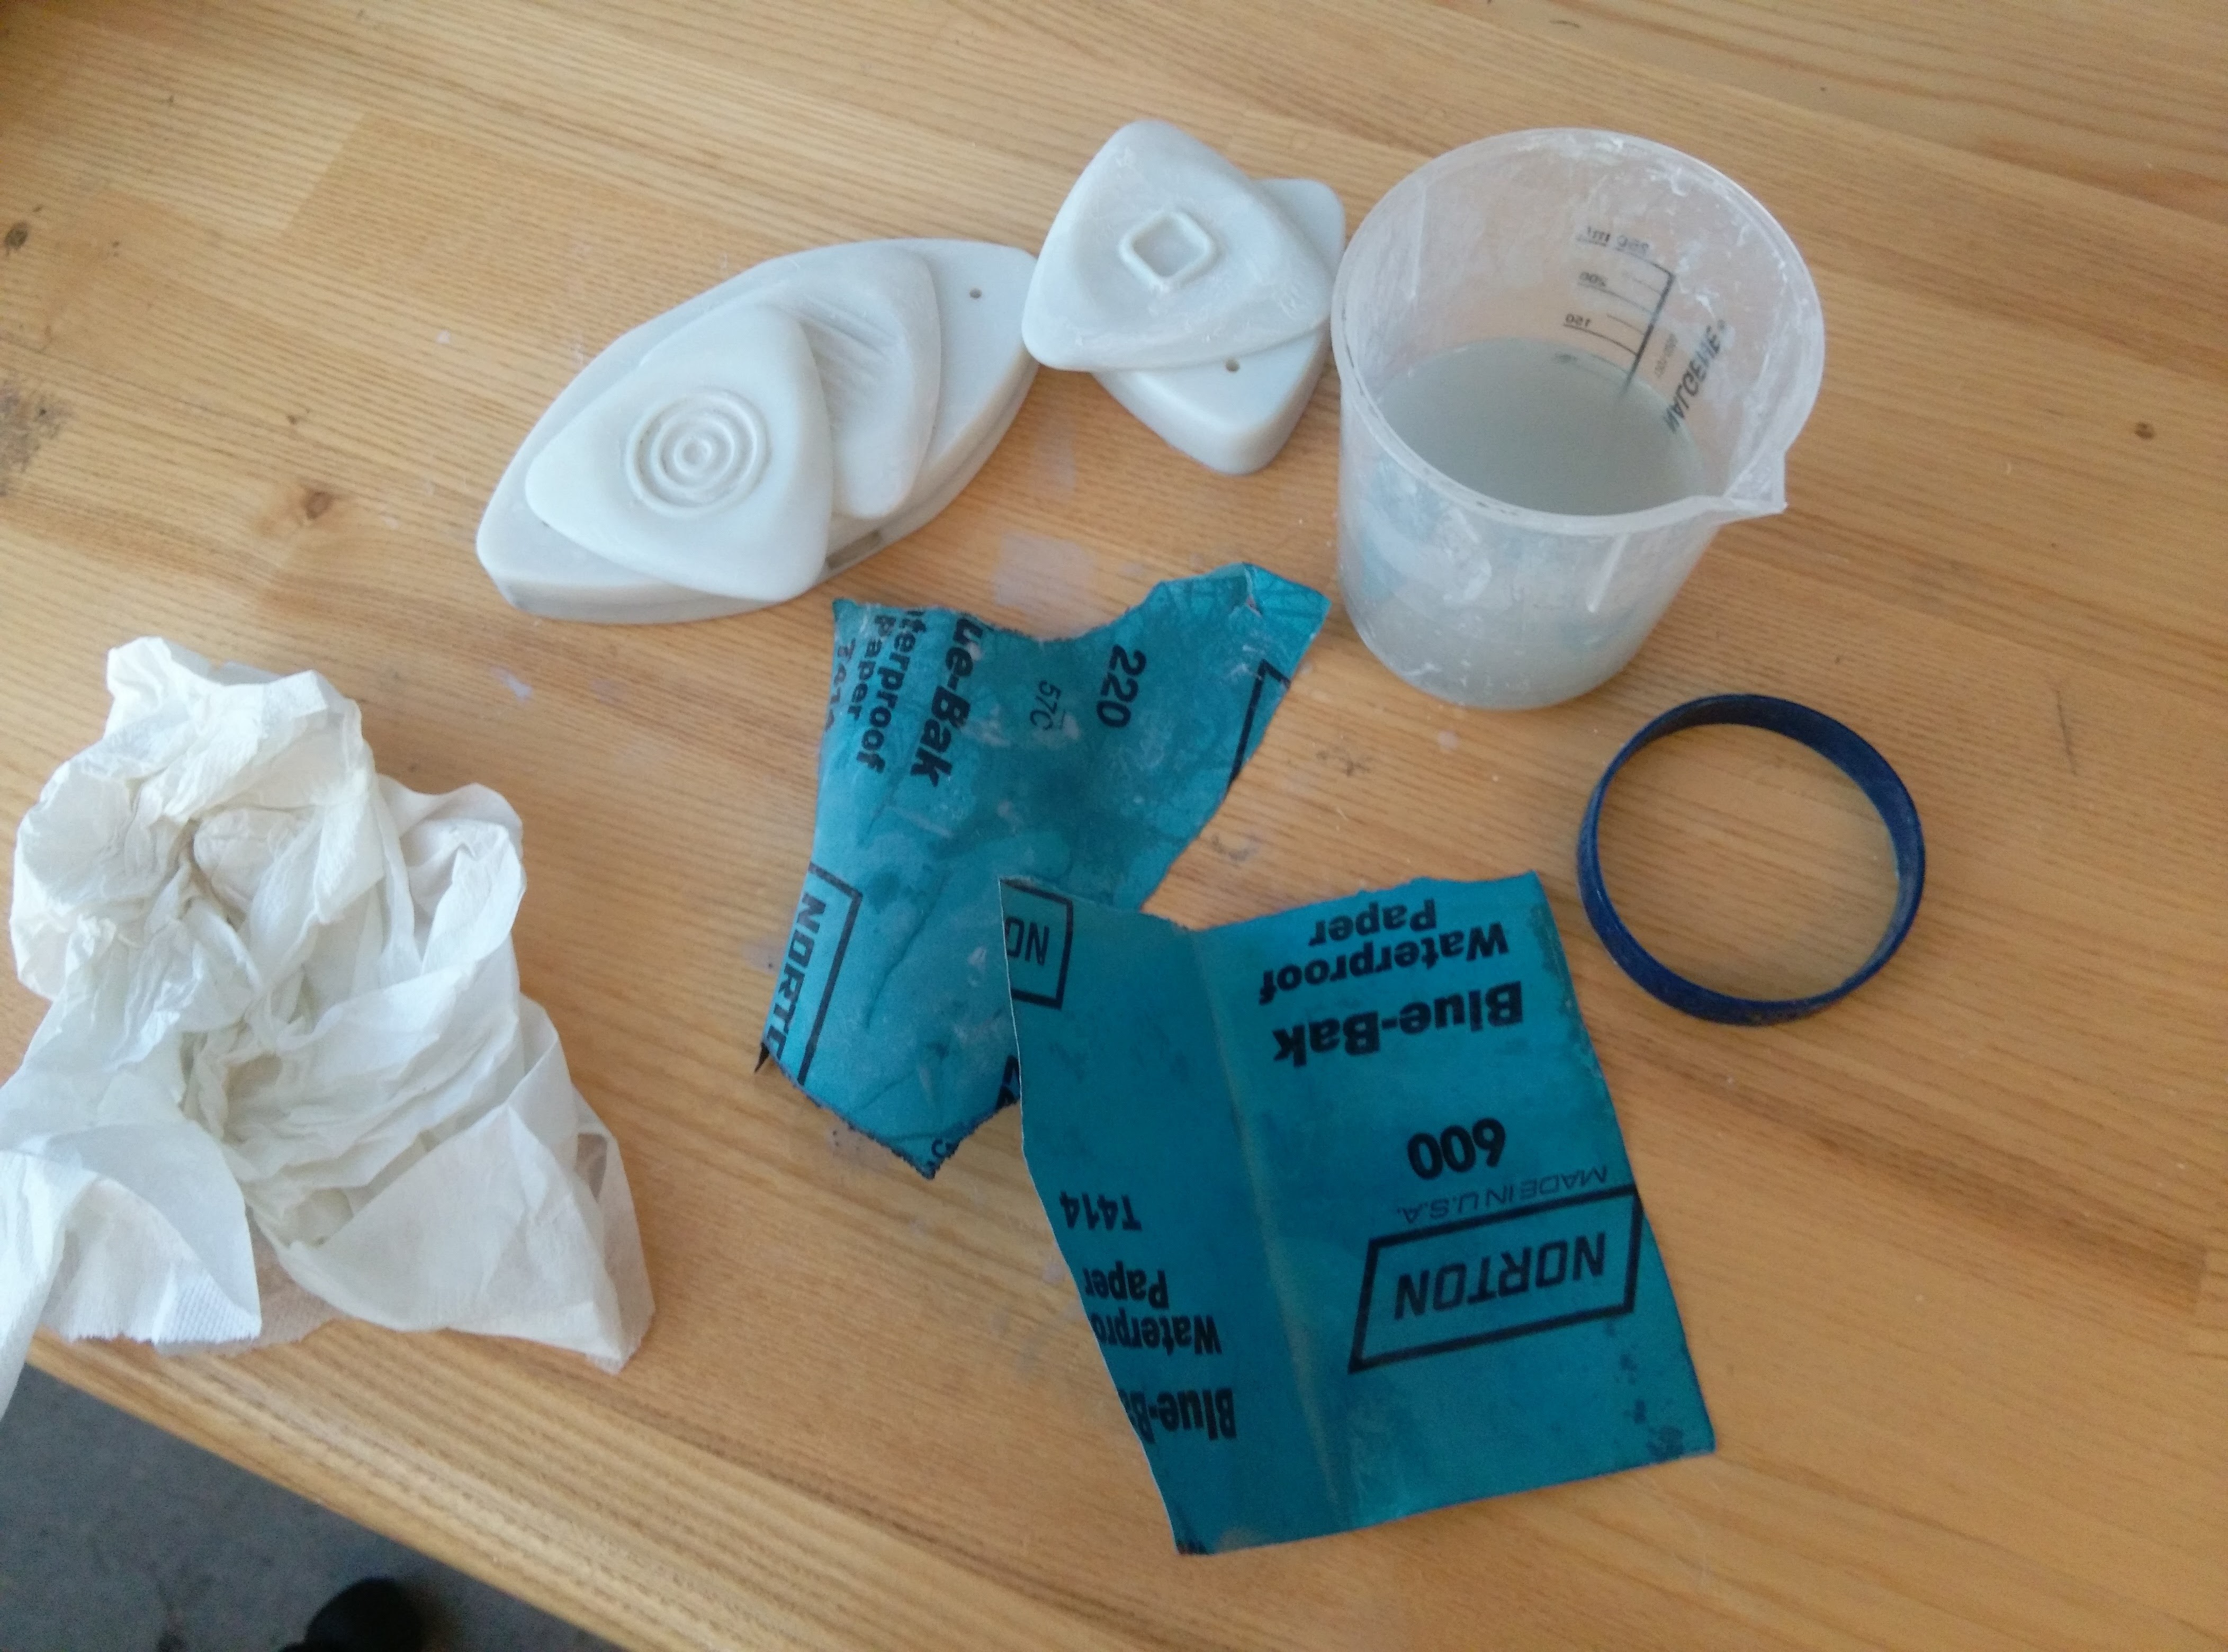
Finally, all parts are done. I used grid 220 initially and 600 for the final.
![]()
Now it's ready to put everything together.
-
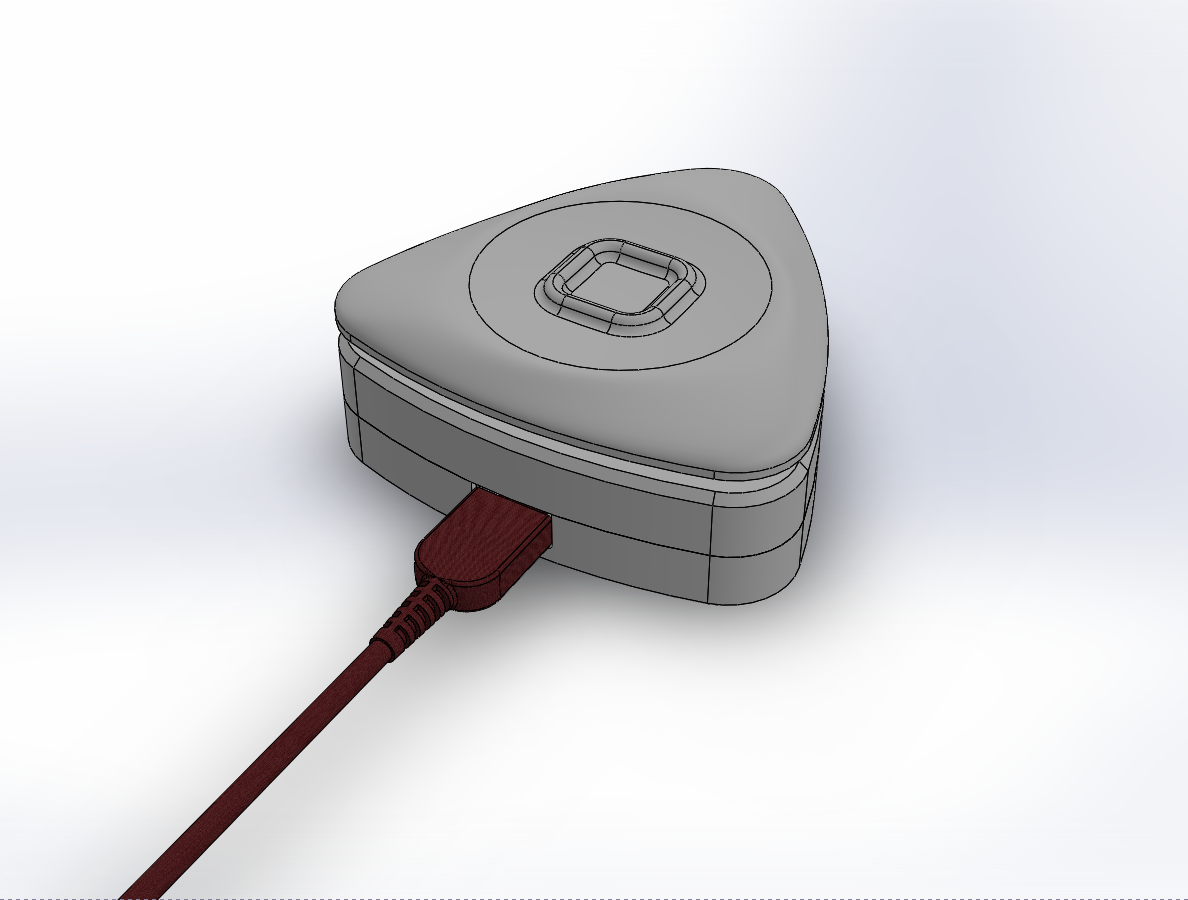
CAD Design
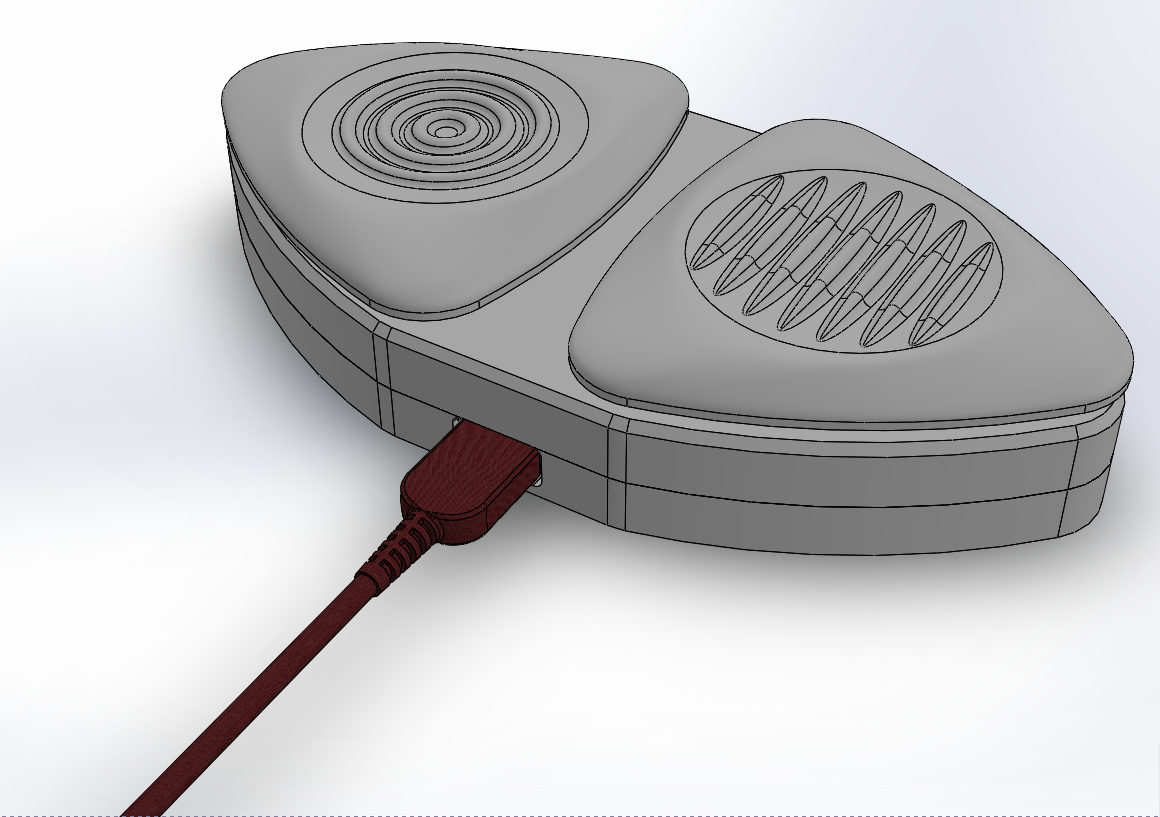
09/21/2016 at 19:26 • 0 commentsI use the Solidworks CAD software to make the switch interface design. There are two different versions: one button and two buttons. The CAD file is also available on the GrabCAD and Onshape for anyone interested in making modification.
Since I use the Lipo battery with a charger for the first prototype. I make a hole on the side for the USB-mini charging connector. I put two 3.5mm jack on the other side for additional switches that have the universal 3.5mm plug, such as sip-and-puff, chin-switch, infra red switch, or EMG switch.
![]()
![]()
I made different textures for the button cover to facilitate the memorization of key functions. In addition, it also helps people with vision impairments to quickly recognize the keys. For example, the linear patterns can indicate menu and the circular button can represent click or selection. The square on the one-button version can be the home/start button. The button covers are interchangeable based on the button functions.
-
System and Schematic Design
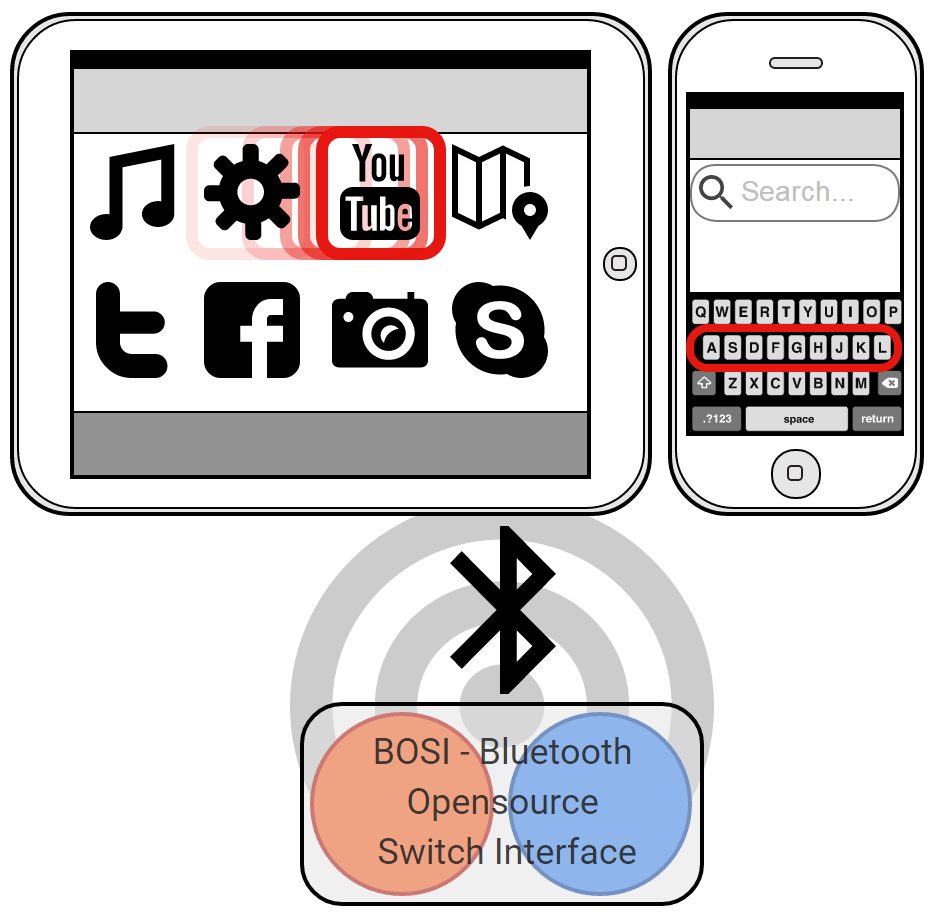
09/21/2016 at 15:53 • 0 commentsThe system looks like a regular Bluetooth device. The BOSI connects to the computer or mobile devices through Bluetooth to control the scanning, switching, or selecting actions.
![]()
Each user is different in muscular functionalities and strength. This electronic design is flexible for up to 12 keys. However, in most cases, one or two keys are enough for using default apps. If using two keys, one key can be set as selection, the other one can be a home/start button or right-click menu.
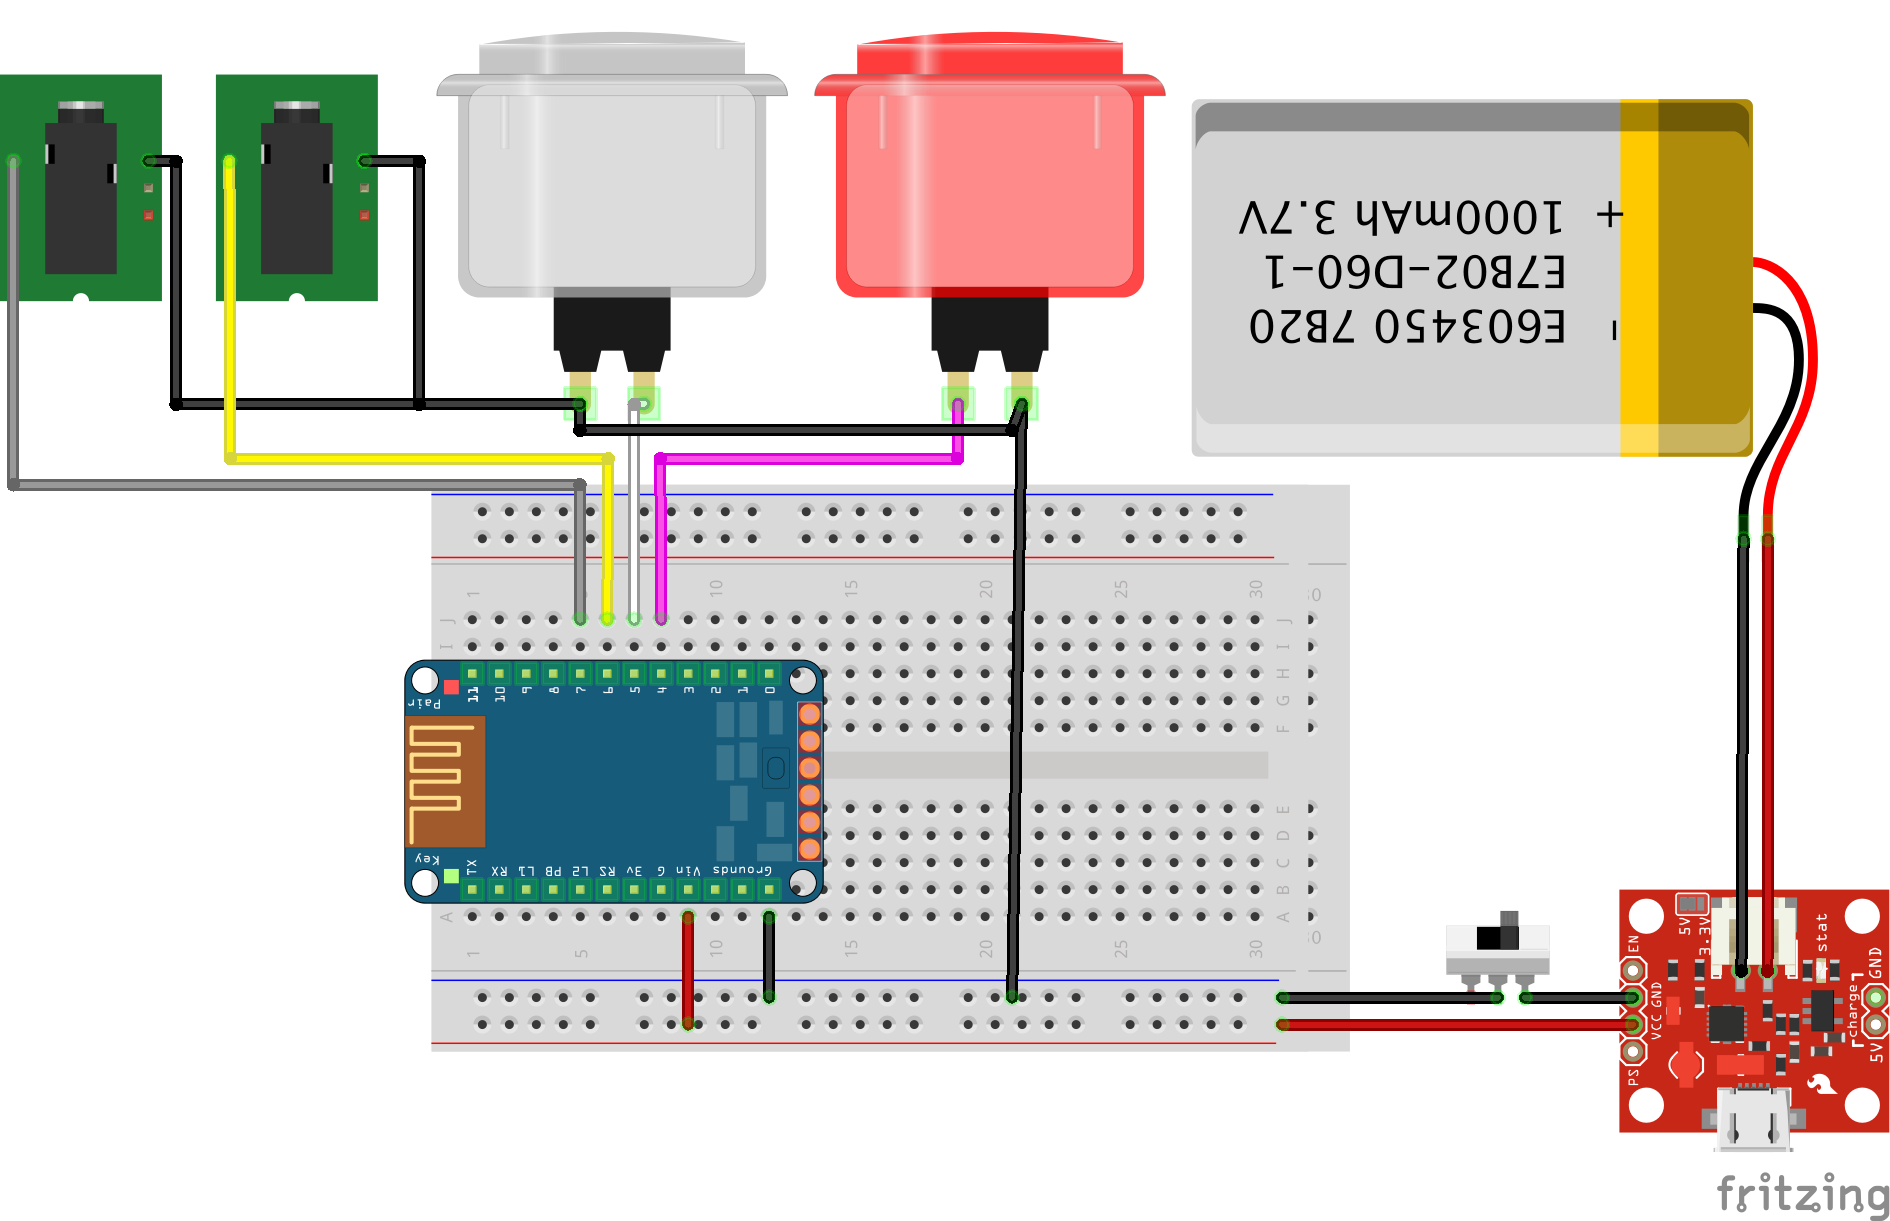
The schematic is made from the Firtzing, an open-sourced electronics design software.
![]()
It includes the following main components:
- Adafruit Bluefruit EZ-Key (Adafruit - $19.95). It is also sold on the Amazon, Mouser, or ebay.
- A battery either Lipo (150mAh - $5.95), 9V (clip - $3.00) or AAA (holder with on/off switch - $1.95).
- One or two switches. I found some old switches from an old machine. It does not have to be exactly the same as I used here. It can be any kind of push button switch. The buttons I found are NKK Switches LP0115CCKW01A (http://www.mouser.com/ds/2/295/lp01_pushbuttons-15697.pdf).
These components are optional:
- Charger if using a Lipo battery (mini charger - $6.95).
- A power switch to turn off power while not using it.
- 3.5mm phone jack for additional switches or existing single switches. I include here to show there are plenty of room for adding more switches to the system. I got these phone jack from the radioshack for $4.49. But it is just $0.50 on the sparkfun.
The total costs only $20-30, which is much cheaper than the switches on the market ($180-300).
BOSI - the Bluetooth Open-source Switch Interface
An open-source switch interface for people with disabilities to wirelessly access computer and mobile devices