-
11STEP 3: Configuring your serial ports and ssh
Back to top
Follow the instructions HERE to get to the the Raspberry Pi Configuration panel.
![pi configuration system]()
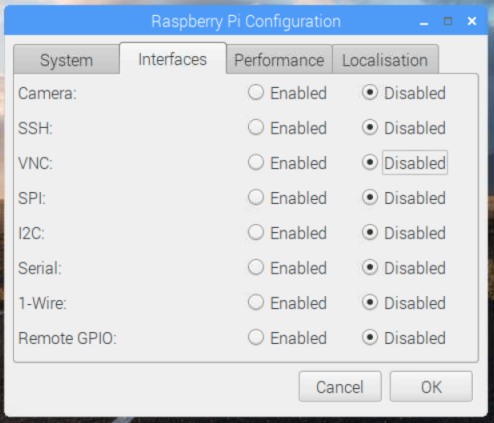
- Navigate to the Interfaces tab.
![pi configuration interfaces]()
- Make sure that the following interfaces are SET ENABLED
Interface Setting SSH ENABLED Serial ENABLED - DISABLE the serial console and enable the serial interface. Open a terminal and type:
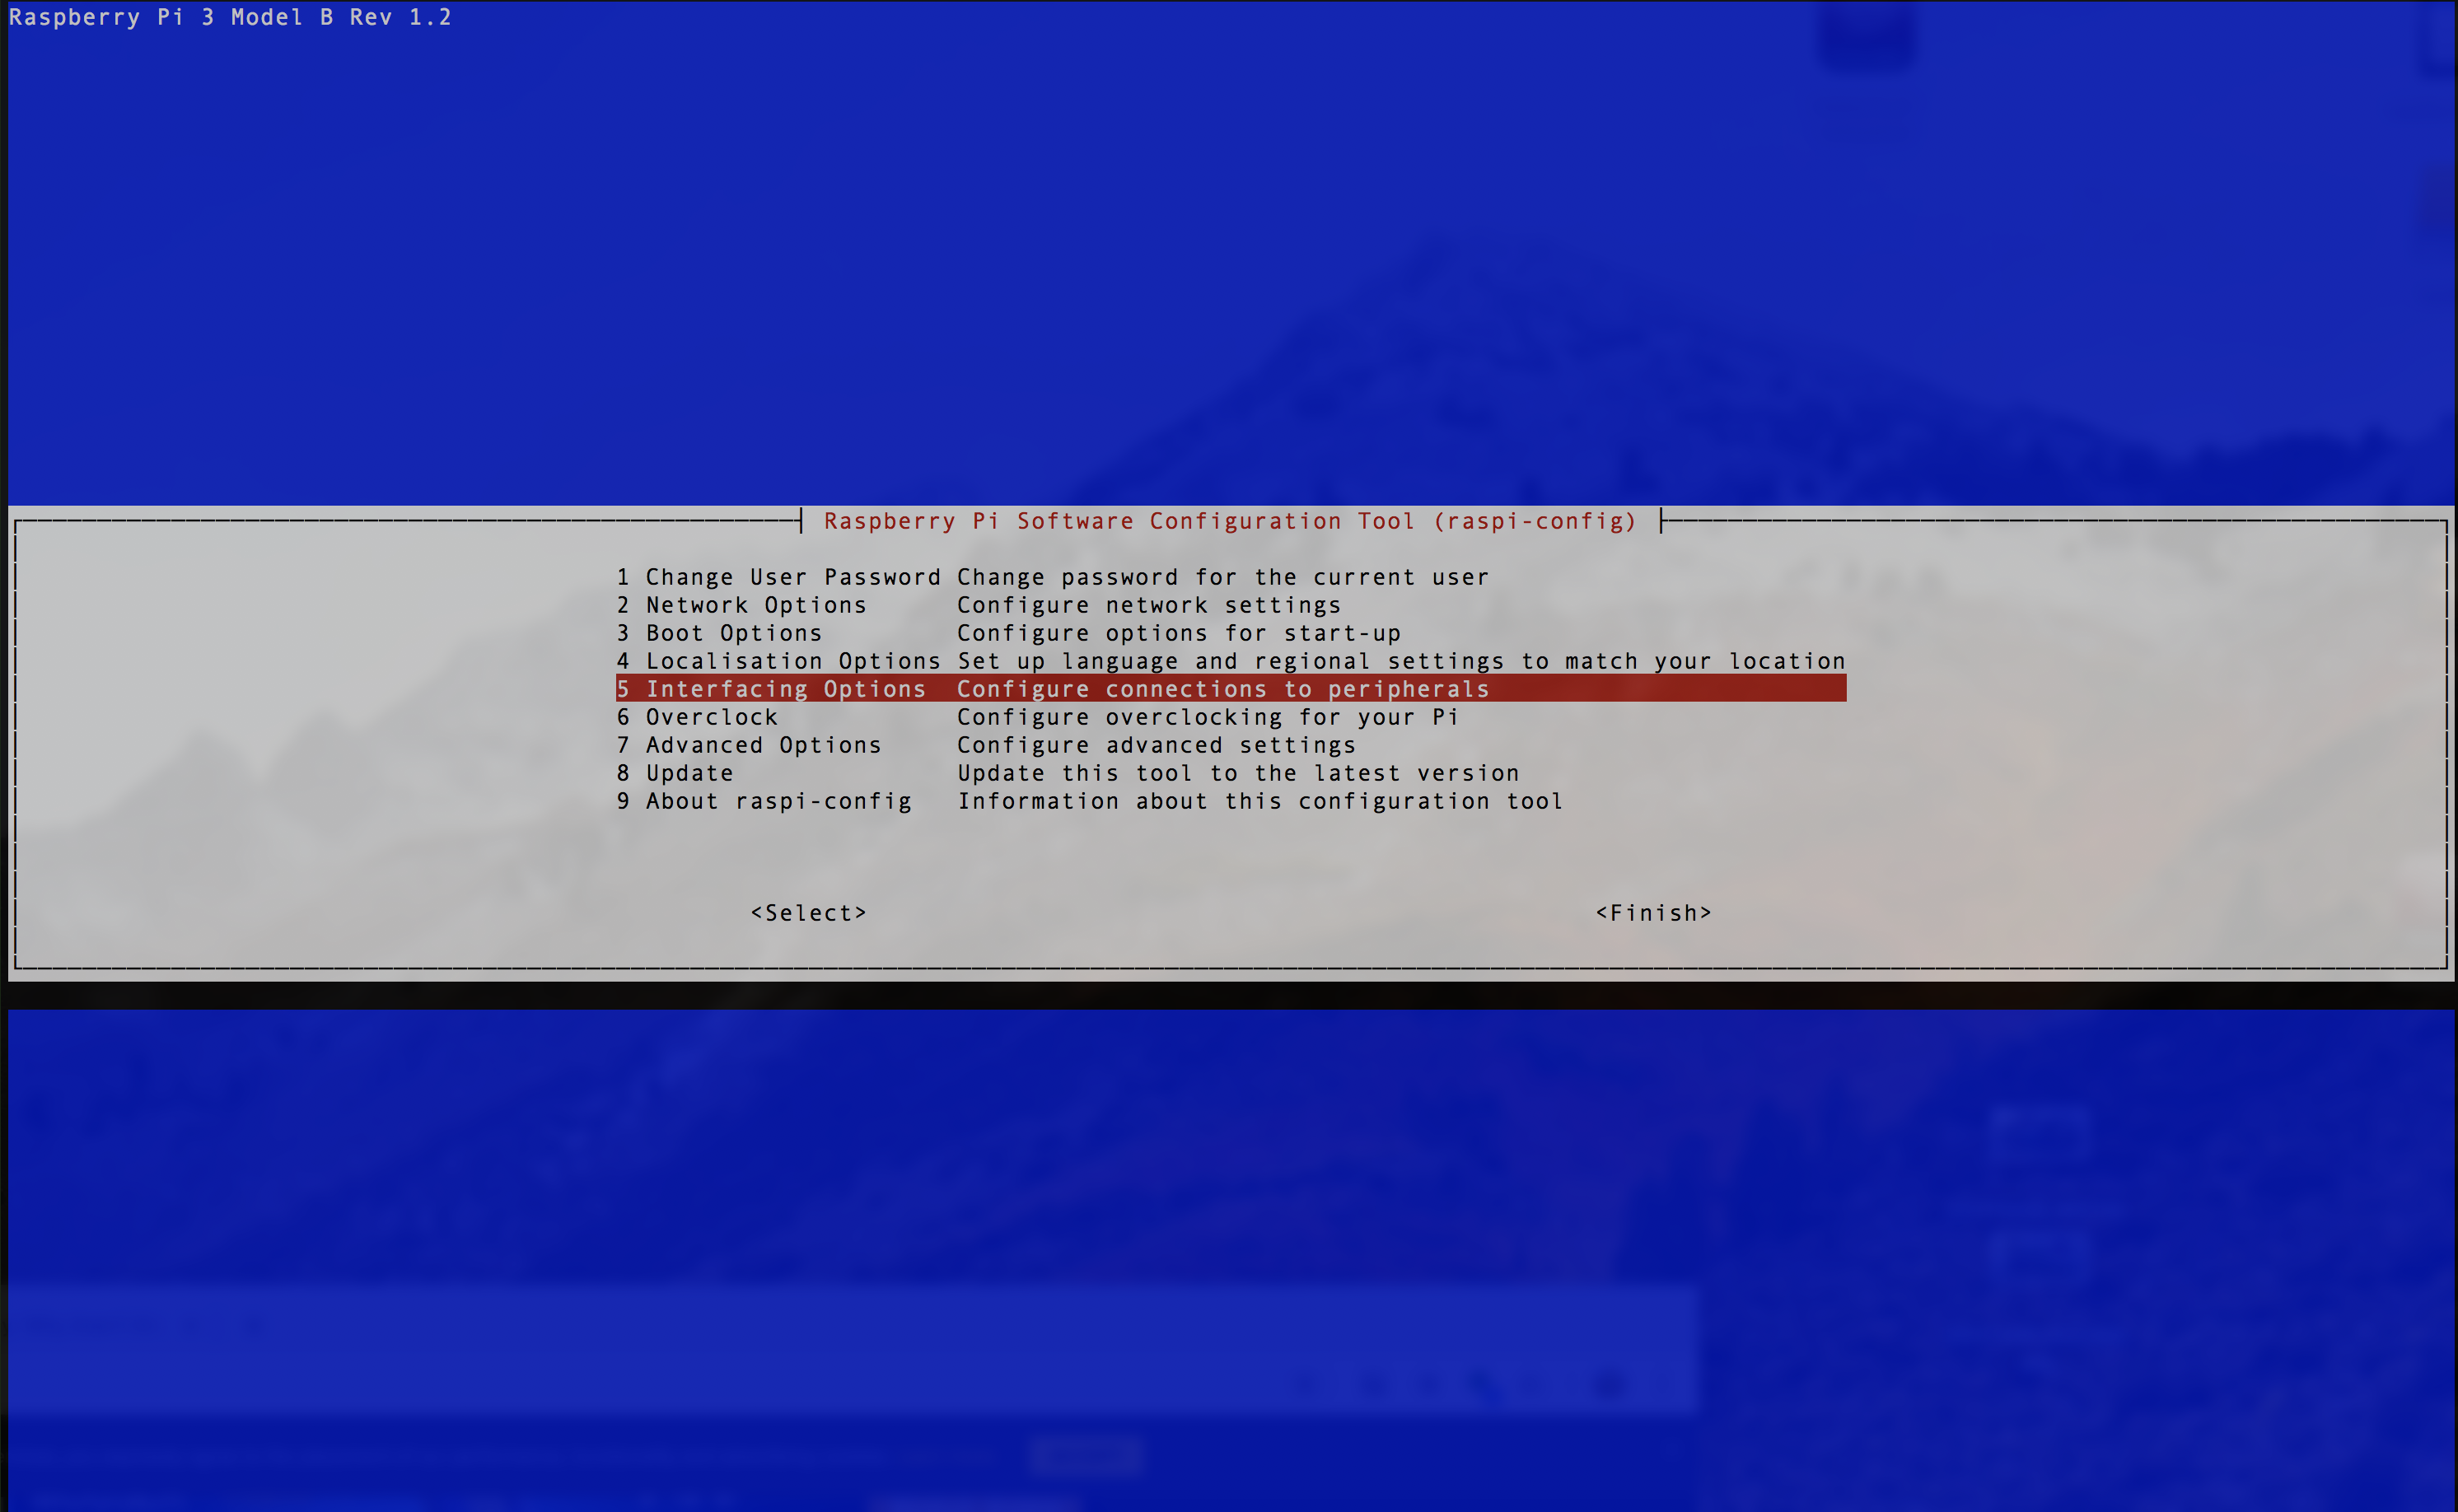
sudo raspi-config![]()
Select "Interfacing Options" ![]()
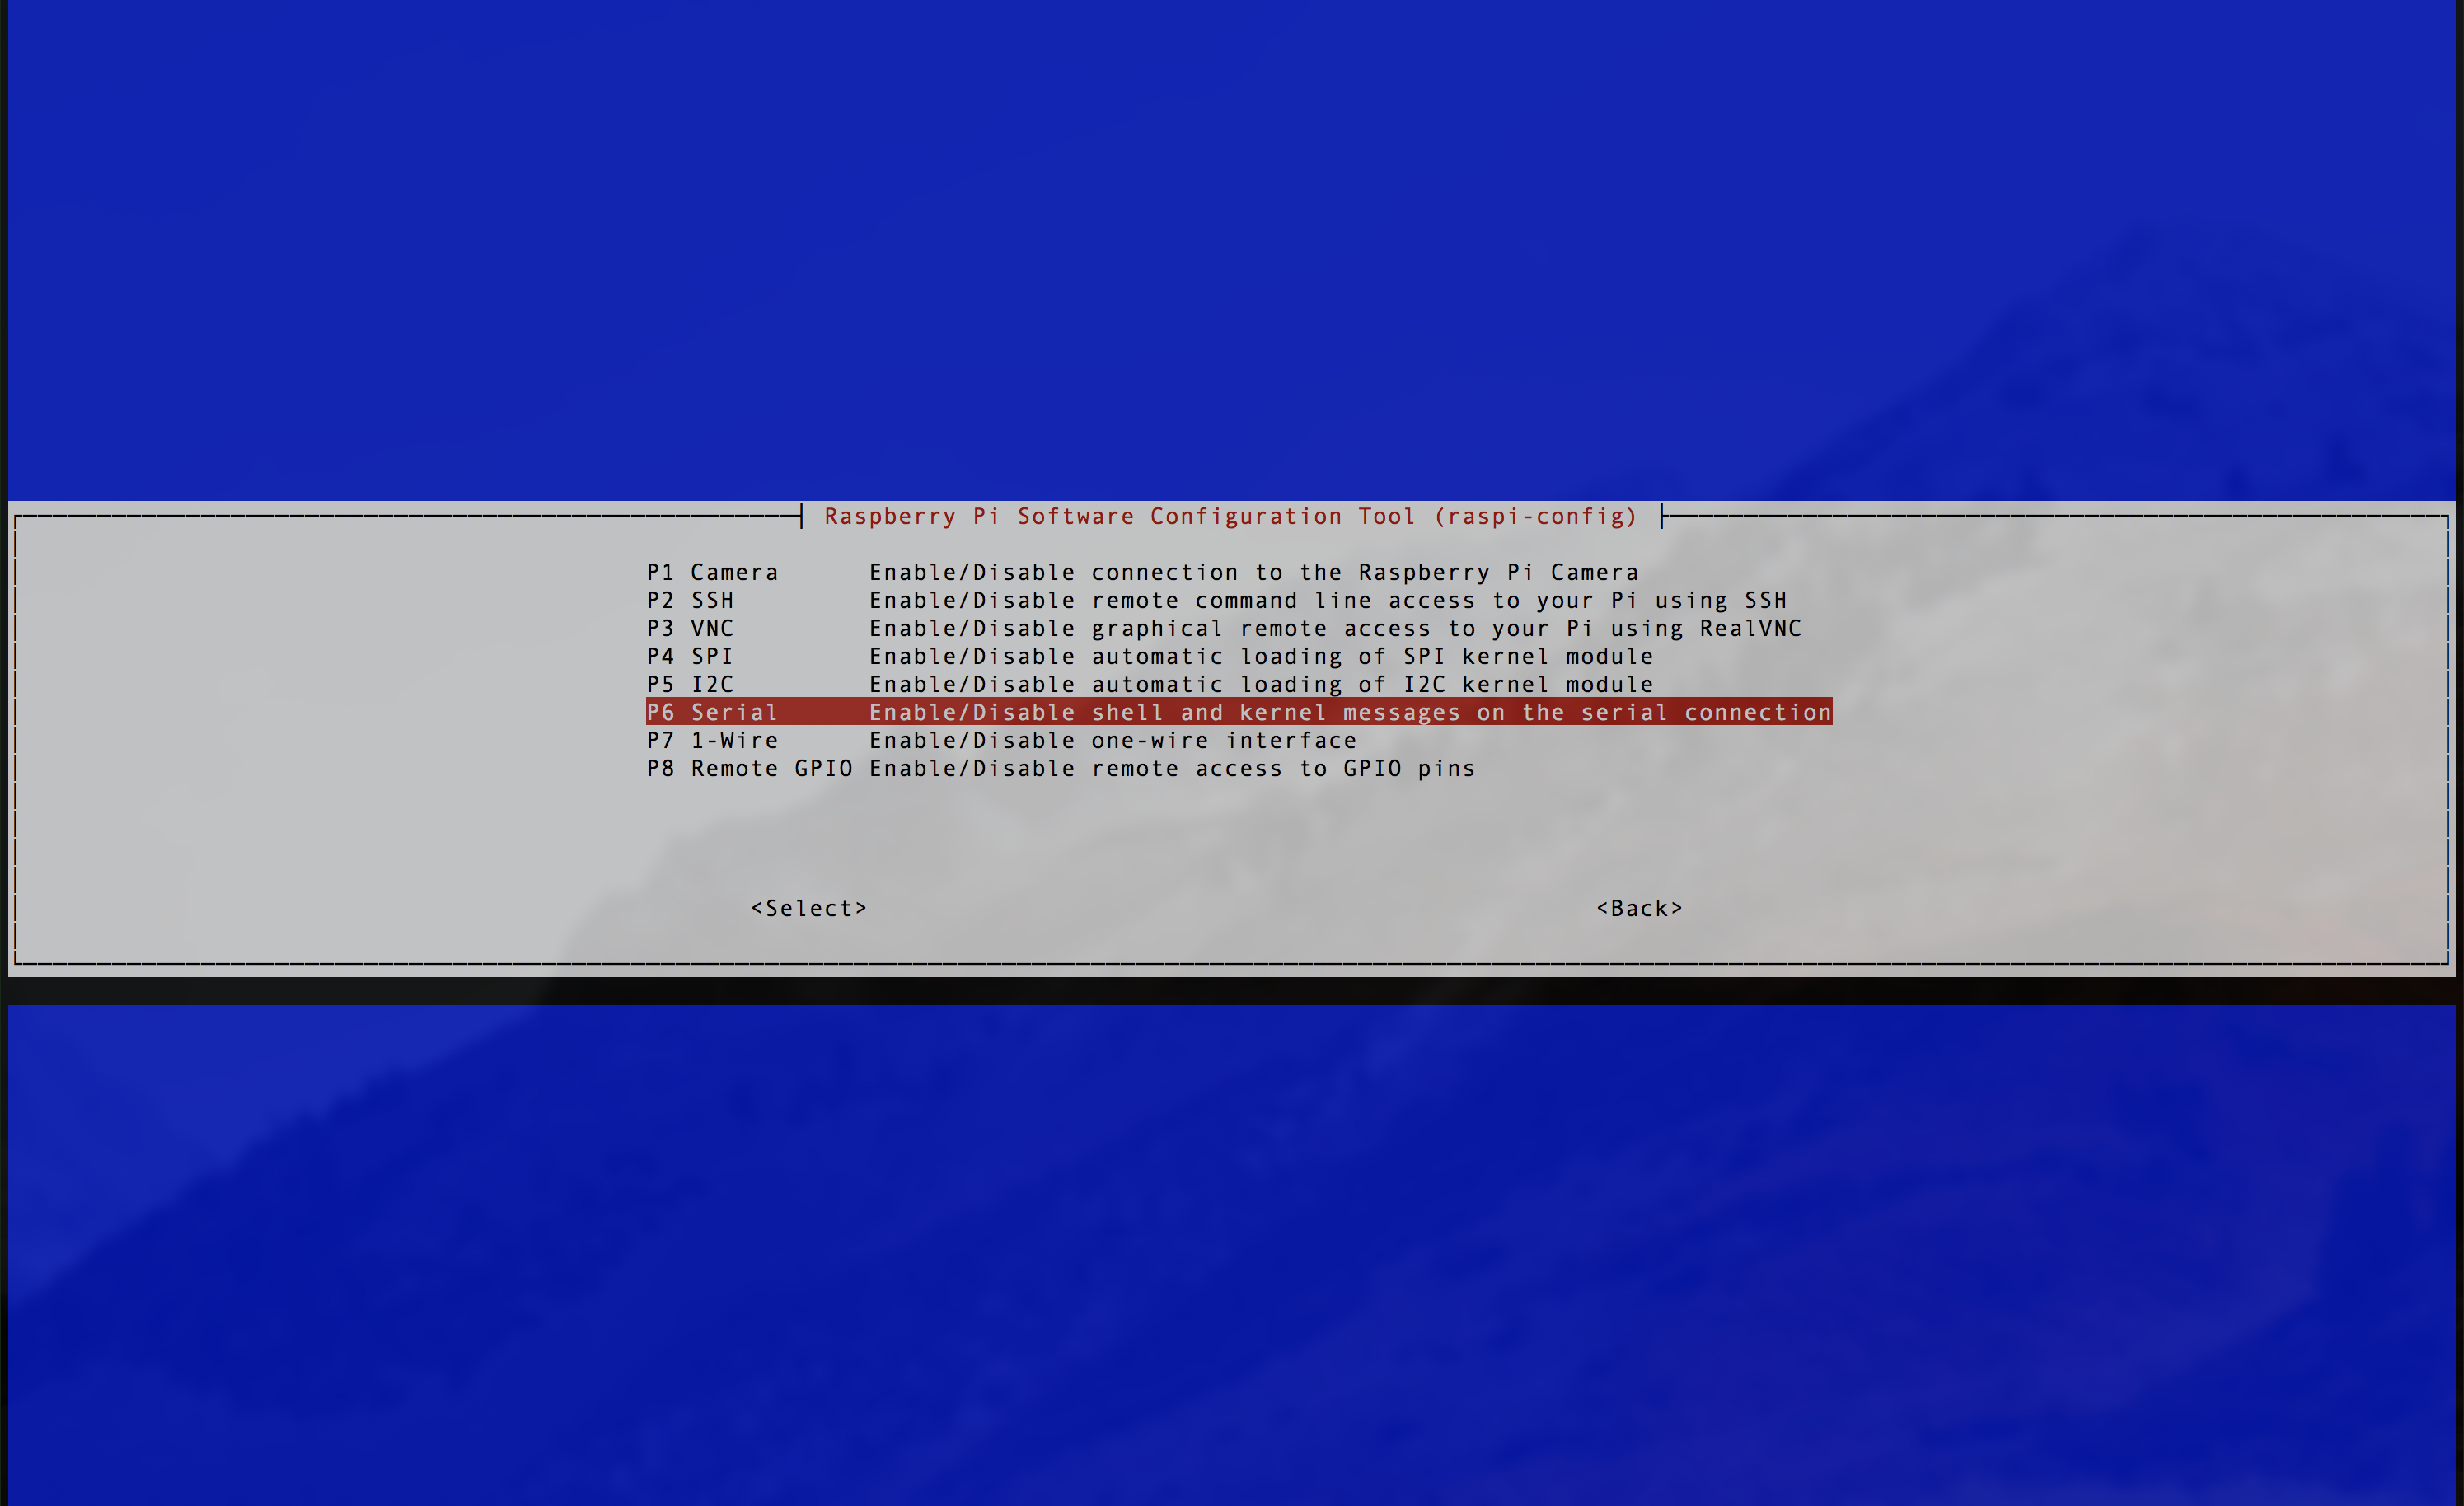
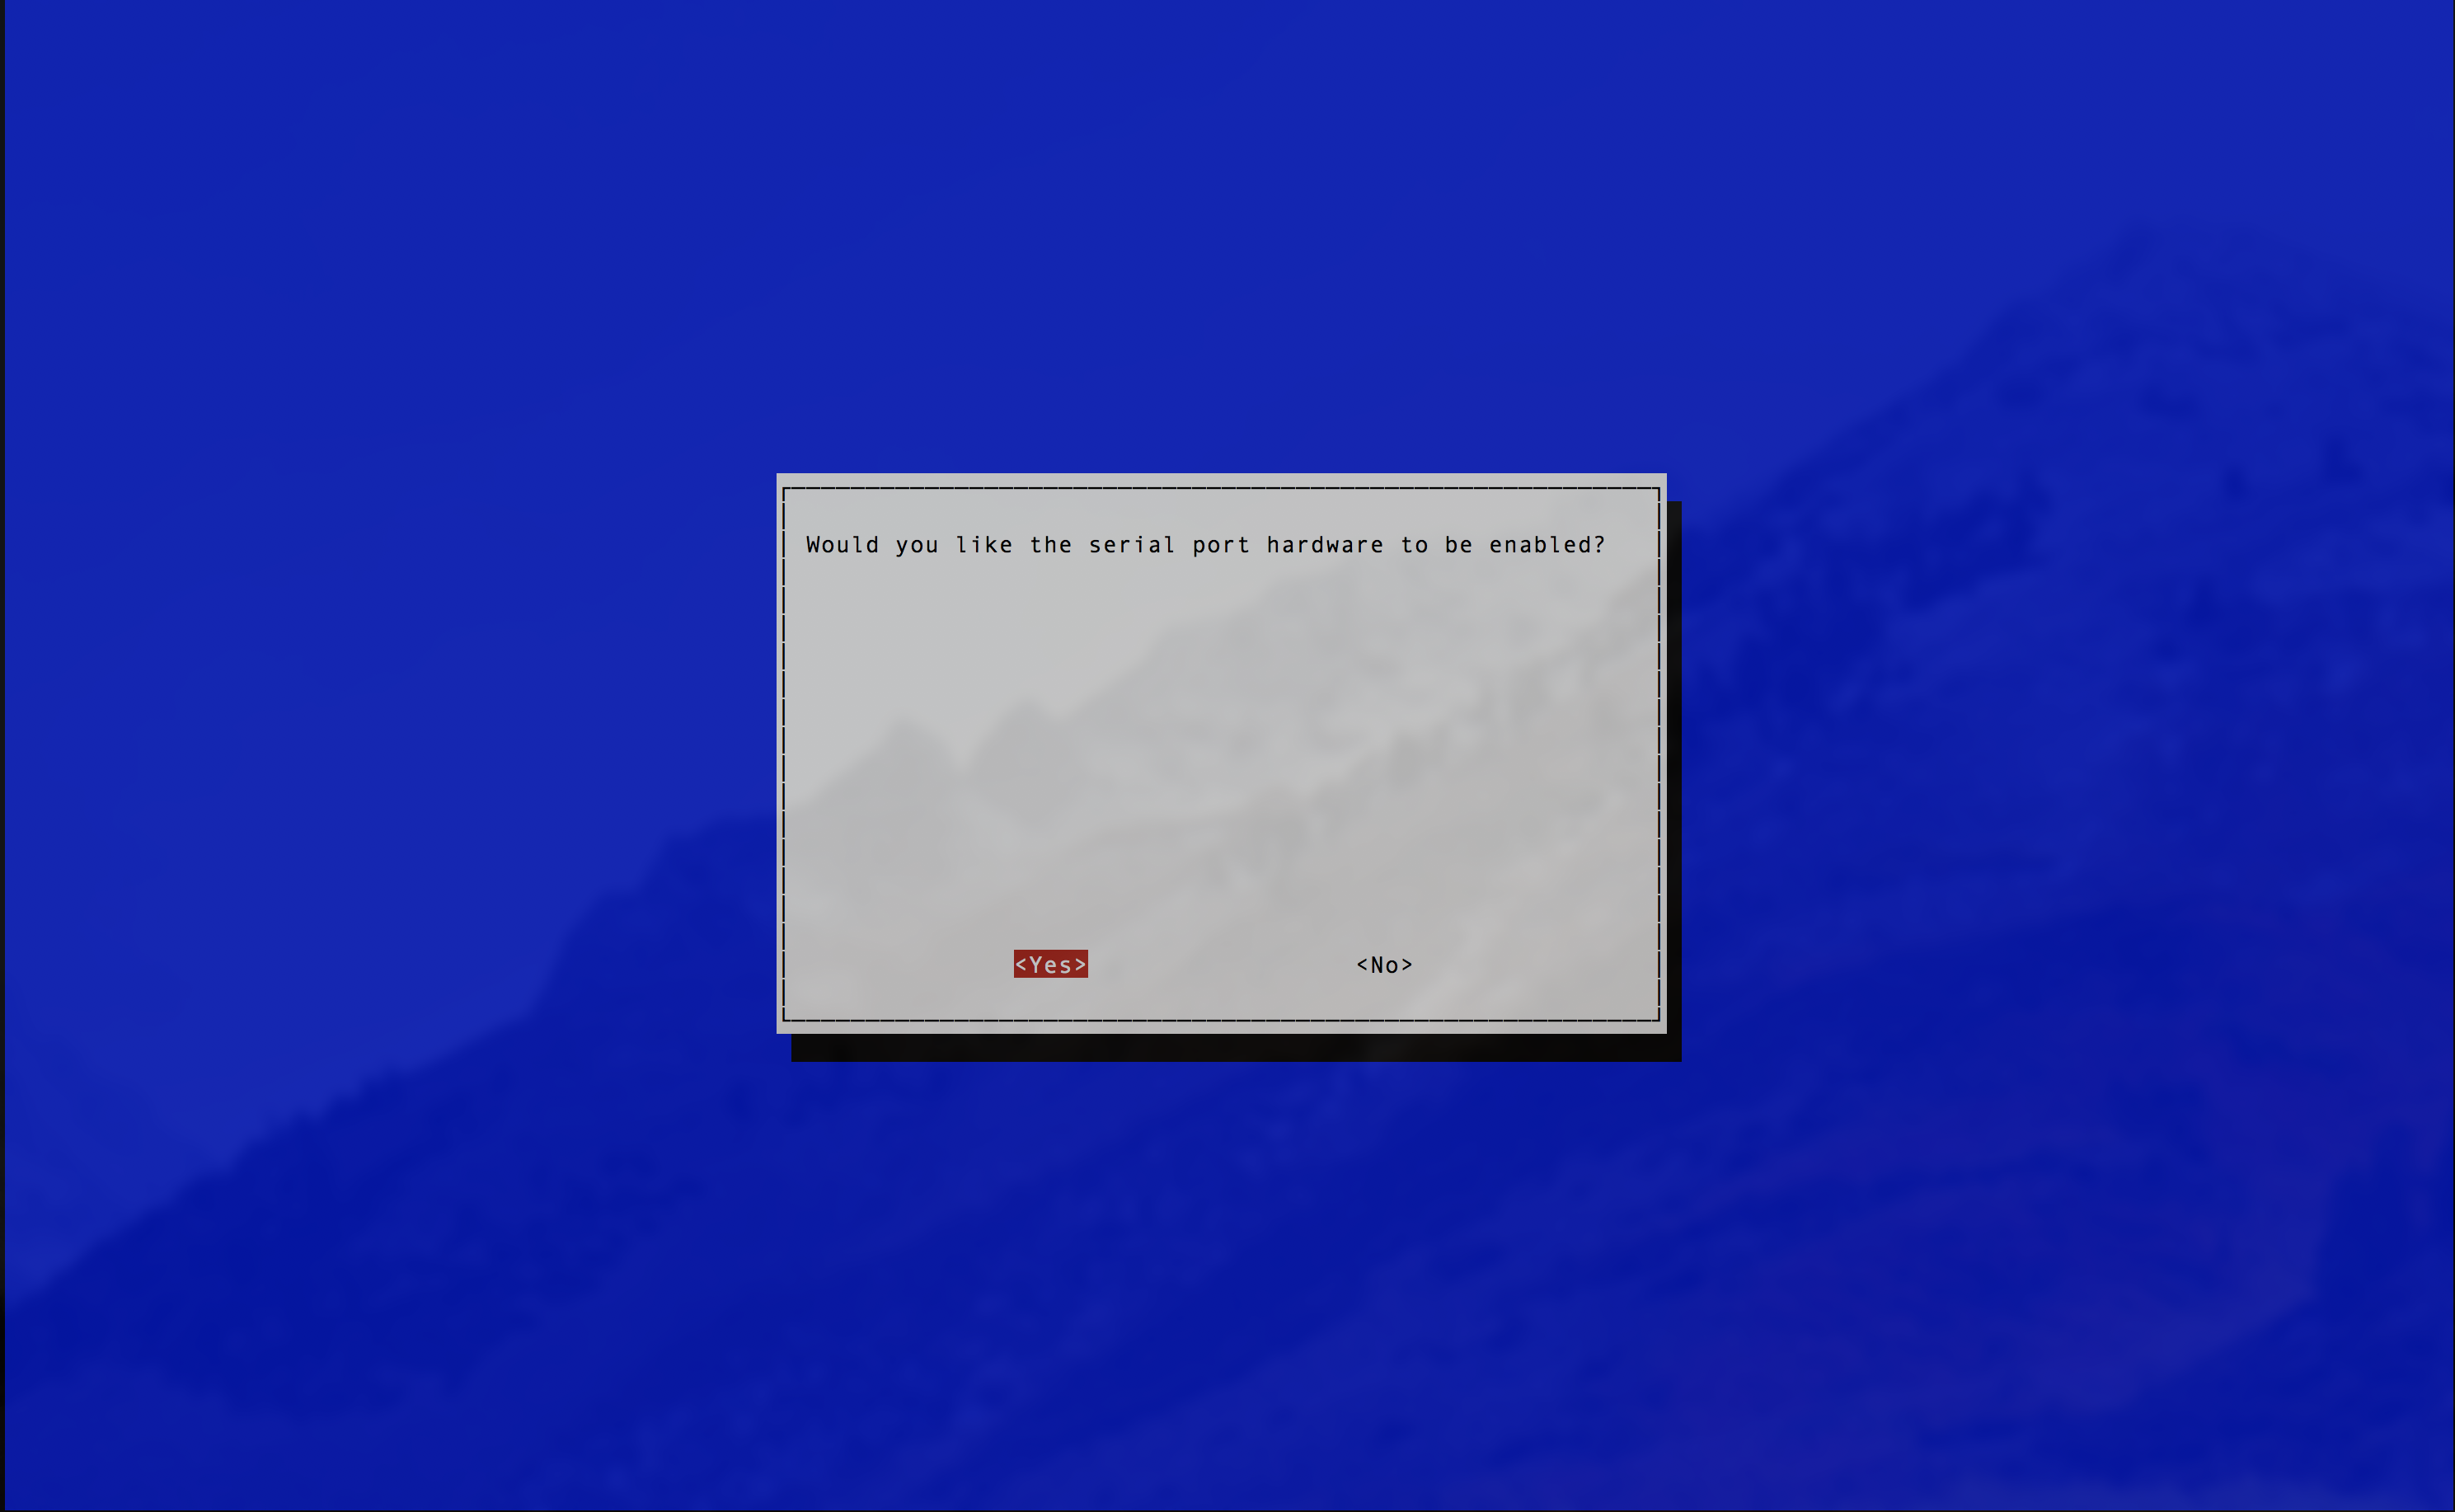
Select "Serial" to configure the serial GPIO pins ![]()
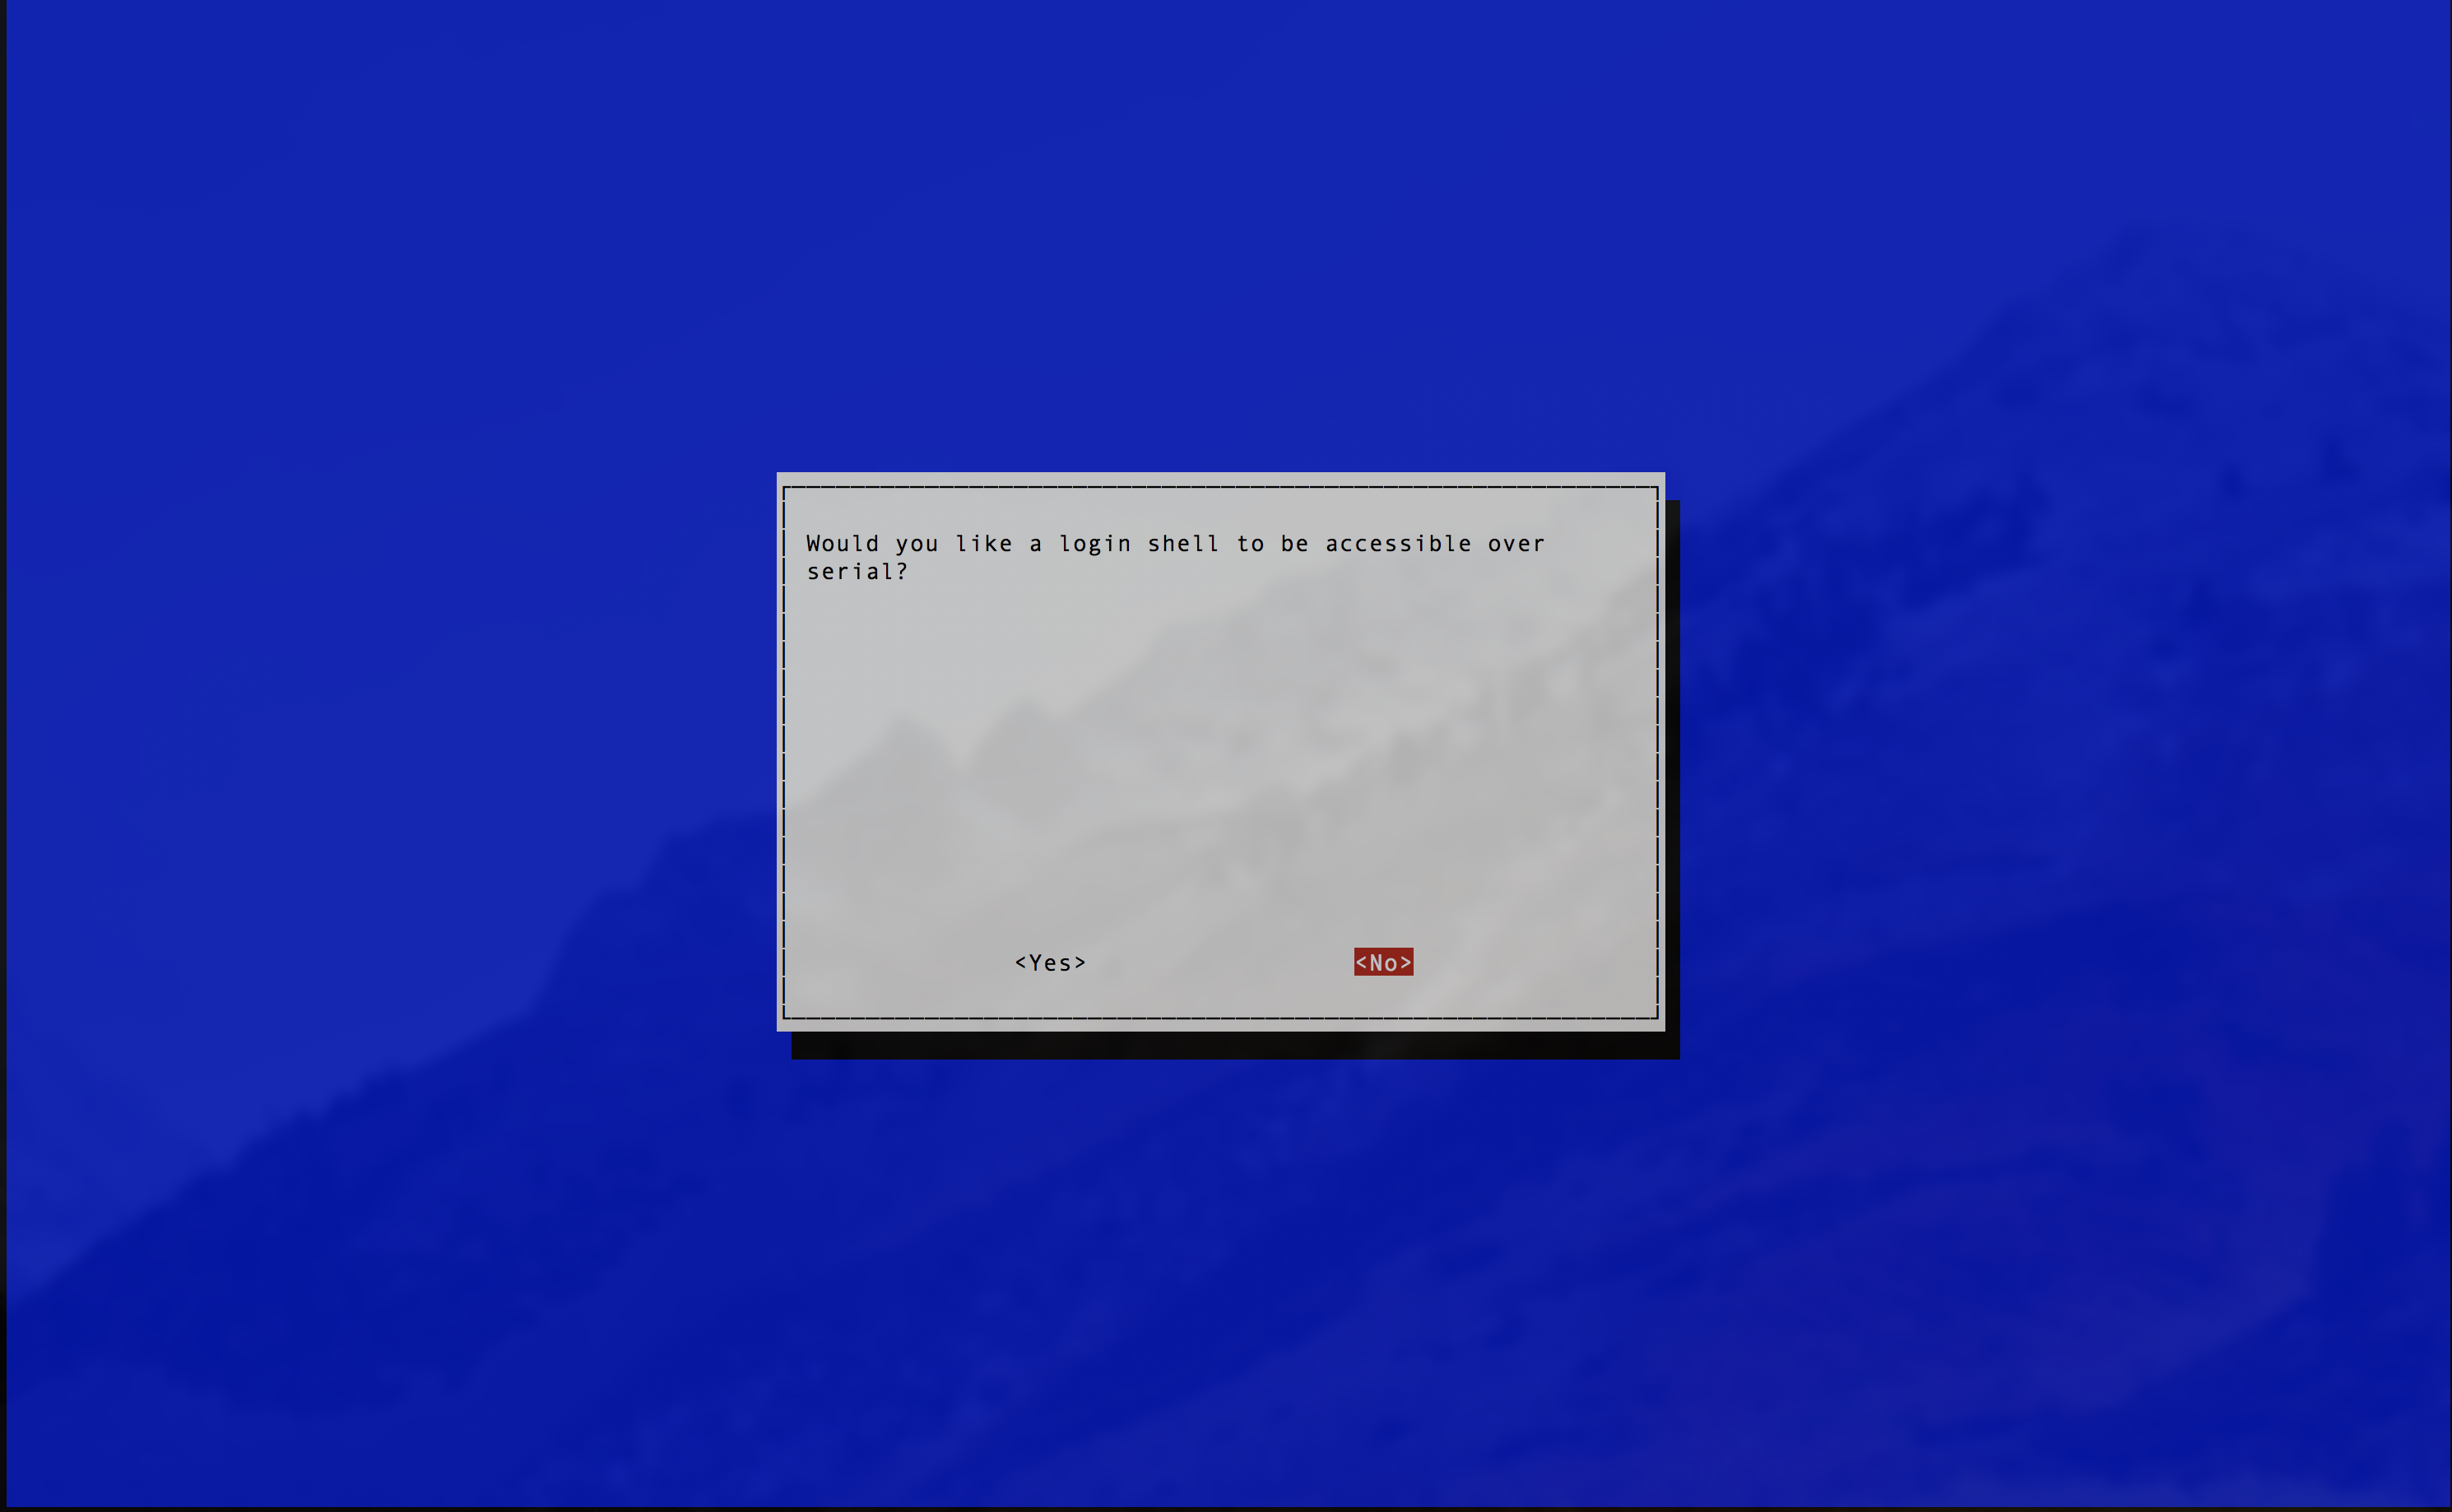
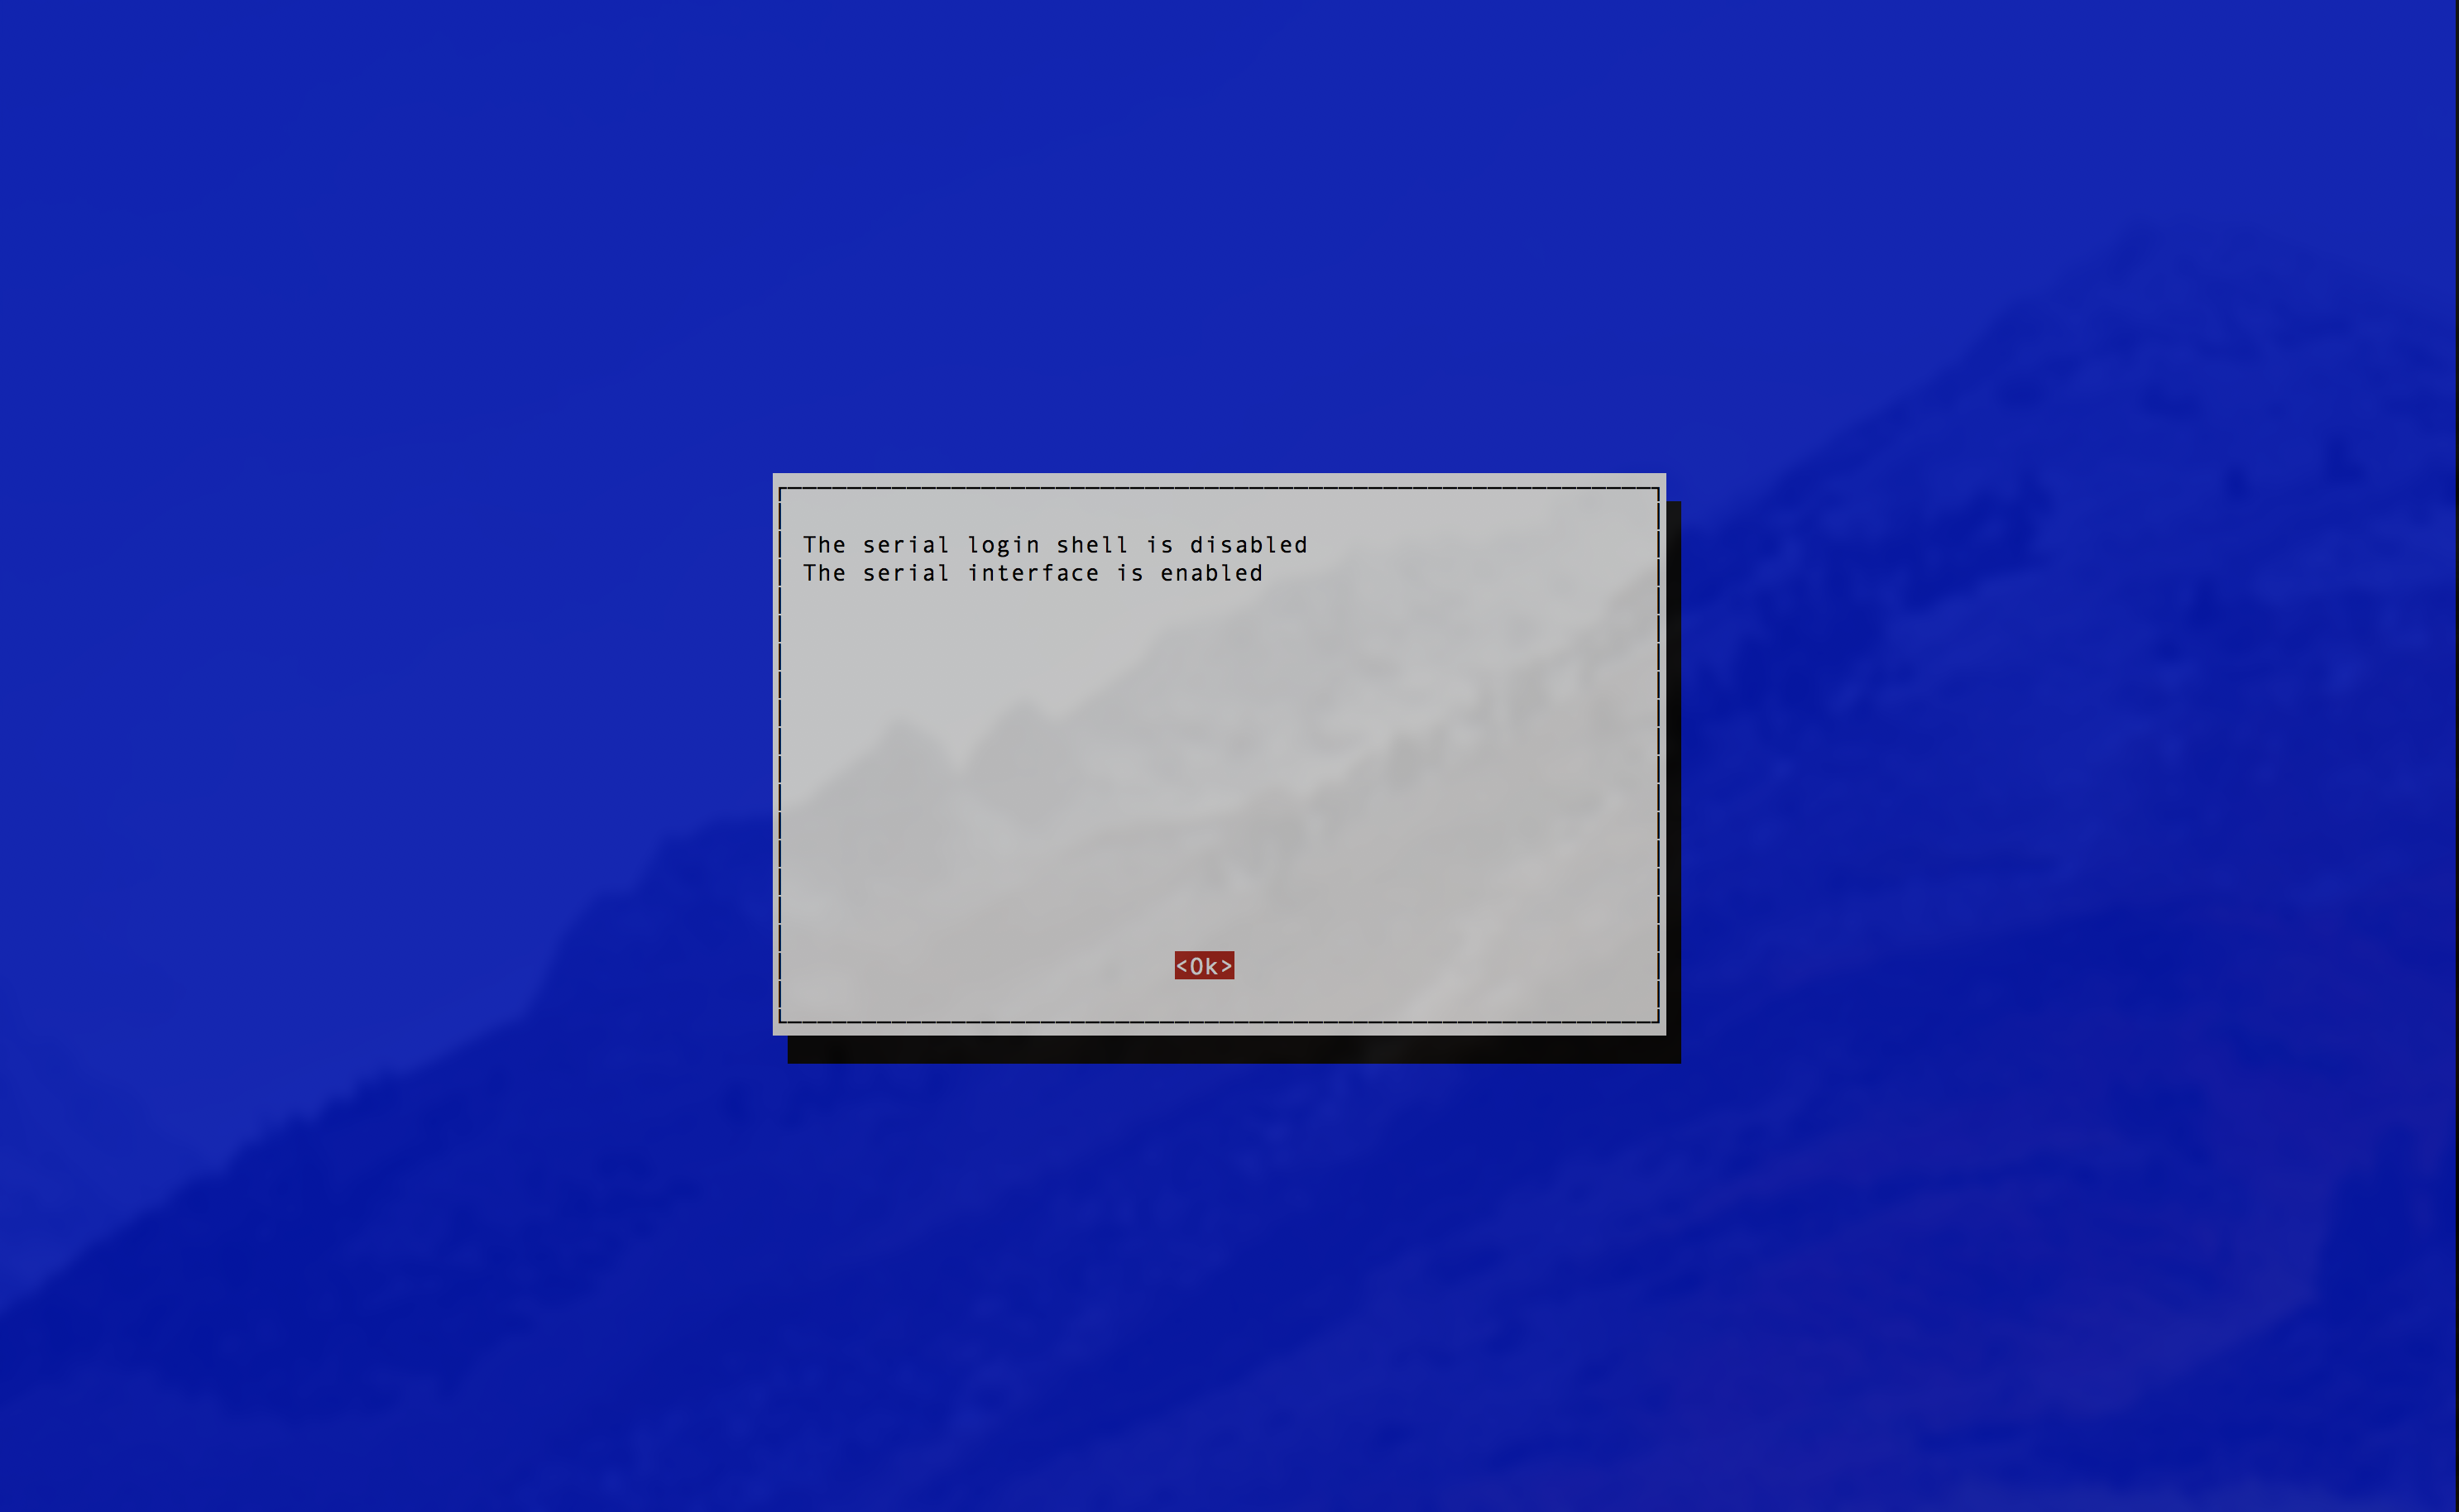
Disable the login shell over serial ![]()
Enable the GPIO serial pins ![]()
Done! On to the fun stuff :) -
12STEP 4: Installing updates and required software
Back to top
DO EVERYTHING AS ROOT I realize this is a security-minded person's worst nightmare. I hope to get user-based contained access down the road.The next couple commands will :
- Update the software on your pi
- Add the yarn dependency management system repo
- Install python3, flask, gunicorn and other libraries and projects required to build and use PR-Holonet
- Install python libraries required to build and use PR-Holonet
curl -sS https://dl.yarnpkg.com/debian/pubkey.gpg | apt-key add - echo 'deb https://dl.yarnpkg.com/debian/ stable main' >/etc/apt/sources.list.d/yarn.list sudo apt-get update sudo apt-get install python3 python3-flask gunicorn3 python3-rpi.gpio\ supervisor yarn hostapd isc-dhcp-server iptables-persistent pip3 install flask-webpack phonenumberslite pycodestyle lint test -
13STEP 5: Installing PR-Holonet
Back to top
Awesome. You are now ready to install PR-Holonet on your Pi!
The first thing to do is to download the code from GitHub:
git clone https://github.com/pr-holonet/pr-holonet-hackaday.gitGreat!. Now go ahead and install to the system. You'll need to be ROOT to do the following steps.
- Create the directories for PR-Holonet :
mkdir -p /opt/pr-holonetmkdir -p /var/opt/pr-holonet/log
- Copy the PR-Holonet code to the directory you created:
cd /opt/pr-holonet/ cp -r ~/Downloads/pr-holonet/holonet-web ./ cd holonet-web- Install all the dependencies for the project using yarn:
yarn installYarn will take a while to install. Make sure your Pi is connected to the Internet for this step. You should be able to see a "node_modules" folder under "/opt/pr-holonet/holonet-web" directory.
- Once done, run webpack (you should be in "/opt/pr-holonet/holonet-web/":
./node_modules/webpack/bin/webpack.js
- Finally, create a link to your configuration file and restart supervisor:
ln -s /opt/pr-holonet/holonet-web/pr-holonet-web.conf /etc/supervisor/conf.d/ service supervisor reload- Done!
The PR-Holonet service should now be running and your Pi should be confgured. Look for the "pr-holonet" wifi access point.
-
14BUILDING THE CLOUD SERVICE
Back to top
This part of the instructions deal with setting up the cloud service for the system. This is the part of PR-Holonet that :
- Activates each ground unit
- Relays the communications between units and between PR-Holonet and the cellular SMS text messaging system
This part of the system setup is not meant for end users, that is, the people who will be using the units on the ground.
Ideally, this infrastructure is setup by volunteer relief organizations or first responders. For each new unit they have to register the Rockblock MK II serial number on their account Rock7 Core services account, assign a phone number using twilio, and register both on AWS. In a perfect scenario, units have been pre-registered and tested so that when a disaster strikes all they have to do is deploy and power on.
-
15PART A: Amazon AWS Services
Back to top
Here you will setup the services needed on Amazon AWS. The instructions assume you are also doing this from the Raspberry Pi, although this is not a requirement.
This system WILL REQUIRE YOUR CREDIT CARD. You do this at your own risk. In my experience, PR-Holonet operates below the thresholds set by Amazon's free tier offering. But any costs associated to your use of an AWS account are your own. This includes making sure you secure your account credentials and making good use of the AWS API. I am not responsible for any misconfigurations of your AWS account for any reason, or cost overruns, or anything else.
Having cleared that up and now that we're on the same page, let's get this system built!
-
16STEP 1: Create your Amazon AWS account
Back to top
Here's a page with information on creating and setting up your AWS account:
https://aws.amazon.com/premiumsupport/knowledge-center/create-and-activate-aws-account/
![Related image]()
Here are some other links to read:
- https://docs.aws.amazon.com/awsaccountbilling/latest/aboutv2/checklistforunwantedcharges.html
- https://docs.aws.amazon.com/awsaccountbilling/latest/aboutv2/billing-what-is.html
- https://docs.aws.amazon.com/awsaccountbilling/latest/aboutv2/billing-free-tier.html
- https://docs.aws.amazon.com/awsaccountbilling/latest/aboutv2/control-access-billing.html
-
17STEP 2: Download and install the AWS CLI tool to create and configure the AWS resources
Back to top
Here's a tutorial on downloading and installing the AWS CLI
https://cloudacademy.com/blog/how-to-use-aws-cli/
Other references:
-
18STEP 3: Make sure your AWS-CLI config file is correct
Back to top
Ensure that your region, access key, and secret access key are correct
[default]
region=us-east-1
aws_access_key_id=<Your key ID>
aws_secret_access_key=<Your access key>
Export the path to your AWS-CLI config file as an environment variable:
export AWS_CONFIG_FILE=[ YOUR FULL CONFIG FILE PATH HERE ] -
19STEP 4: Get the NPM dependencies
Back to top
Assuming you originally cloned the PR-Holonet repository to " ~/Downloads " then do:
cd ~/Downloads/pr-holonet/iridium-to-twilio npm install --prefix=. -
20STEP 5: Configure imeiToNumber.json
Back to top
This file contains a mapping of Rockblock IMEI's to Twilio phone numbers.
This is used for two things:
- checking a message from RockBLOCK to validate that it is actually from one of our devices (preventing spam);
- routing messages from cellphone users (via Twilio) to the correct Holonet device.
This should look something like below. Every time you register a new RockBLOCK, you need to add an entry to this file, and redeploy the AWS Lambda stack.
If you don't know the numbers yet, leave the file blank and continue the guide.
{
    "292487138892290": "+13975658547"
}
PR-Holonet: Disaster Area Emergency Comms
An easy to build, setup, and use emergency communicator for disaster-struck zones with no working power or comms infrastructure.


Discussions
Become a Hackaday.io Member
Create an account to leave a comment. Already have an account? Log In.