-
Some more copies, and some colorful enclosures
07/17/2018 at 19:33 • 0 commentsTL;DR:
![]()
The first manifold was made by my university's machine shop. It turned out great, but professional machining is unnecessarily expensive in this case. Plus, I wanted to learn how to use a mill.
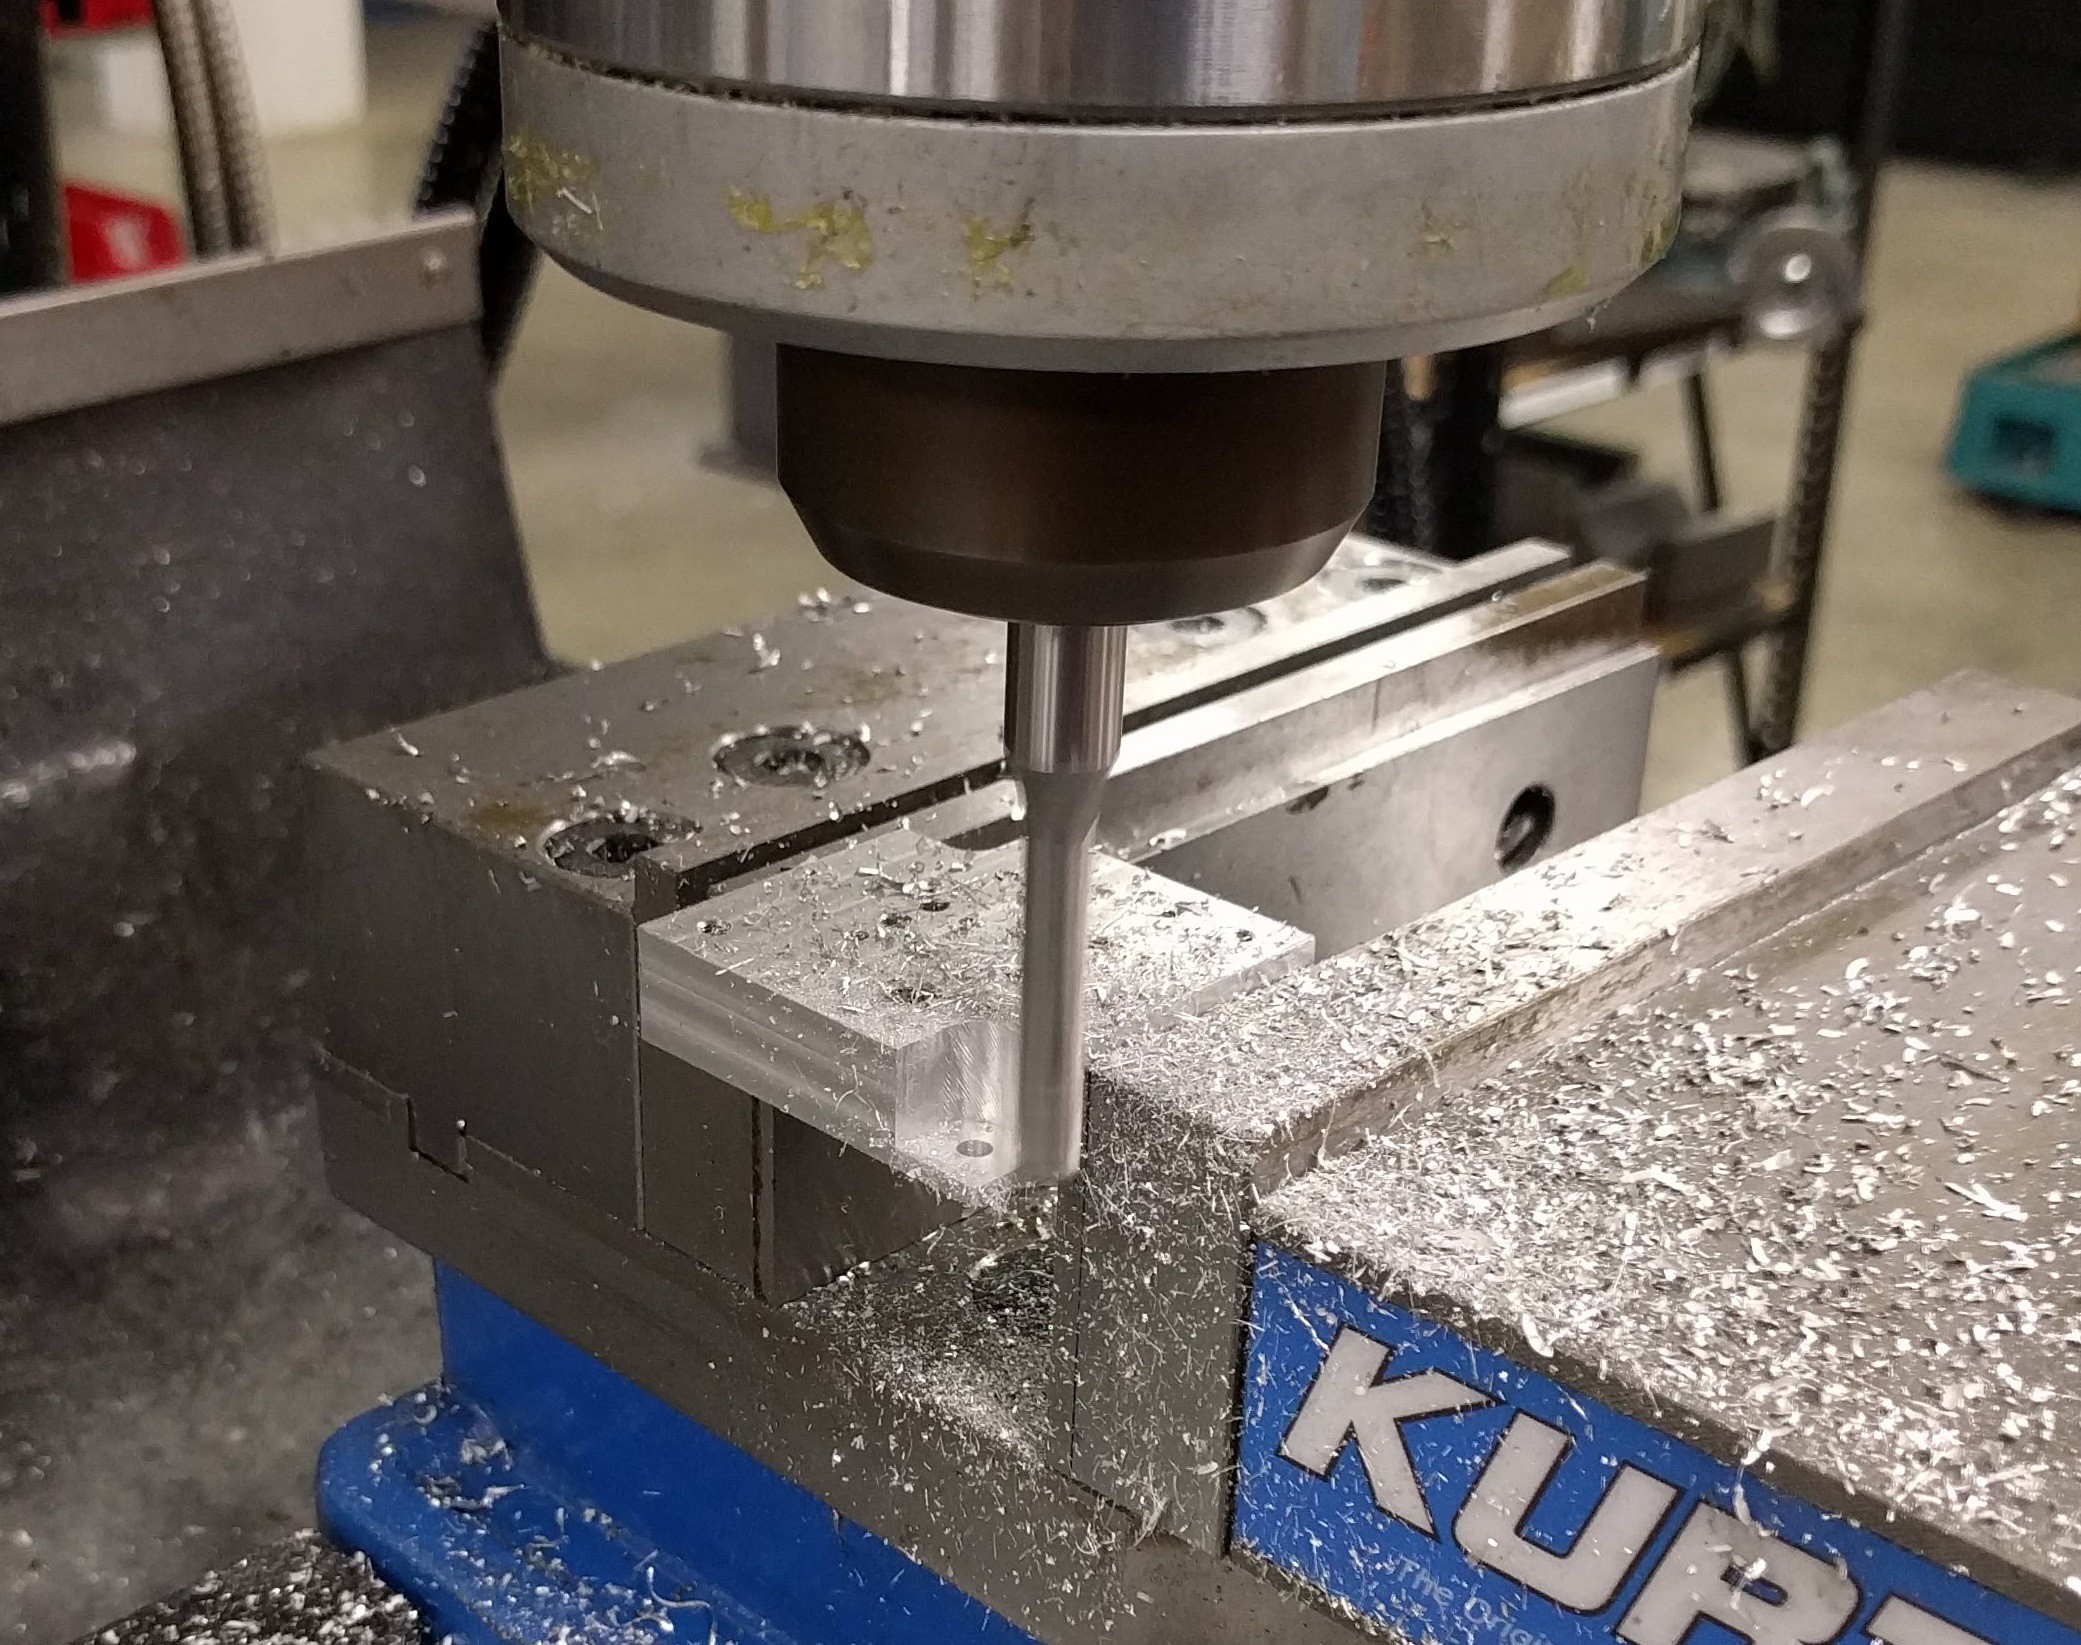
So a few weeks ago, I got training on the mills at our makerspace, and started on the process of making my own manifolds. Here are a few pictures of the process.
It starts with a stock piece of aluminum, which is cut on the horizontal bandsaw (not shown) and milled down to size.
![]()
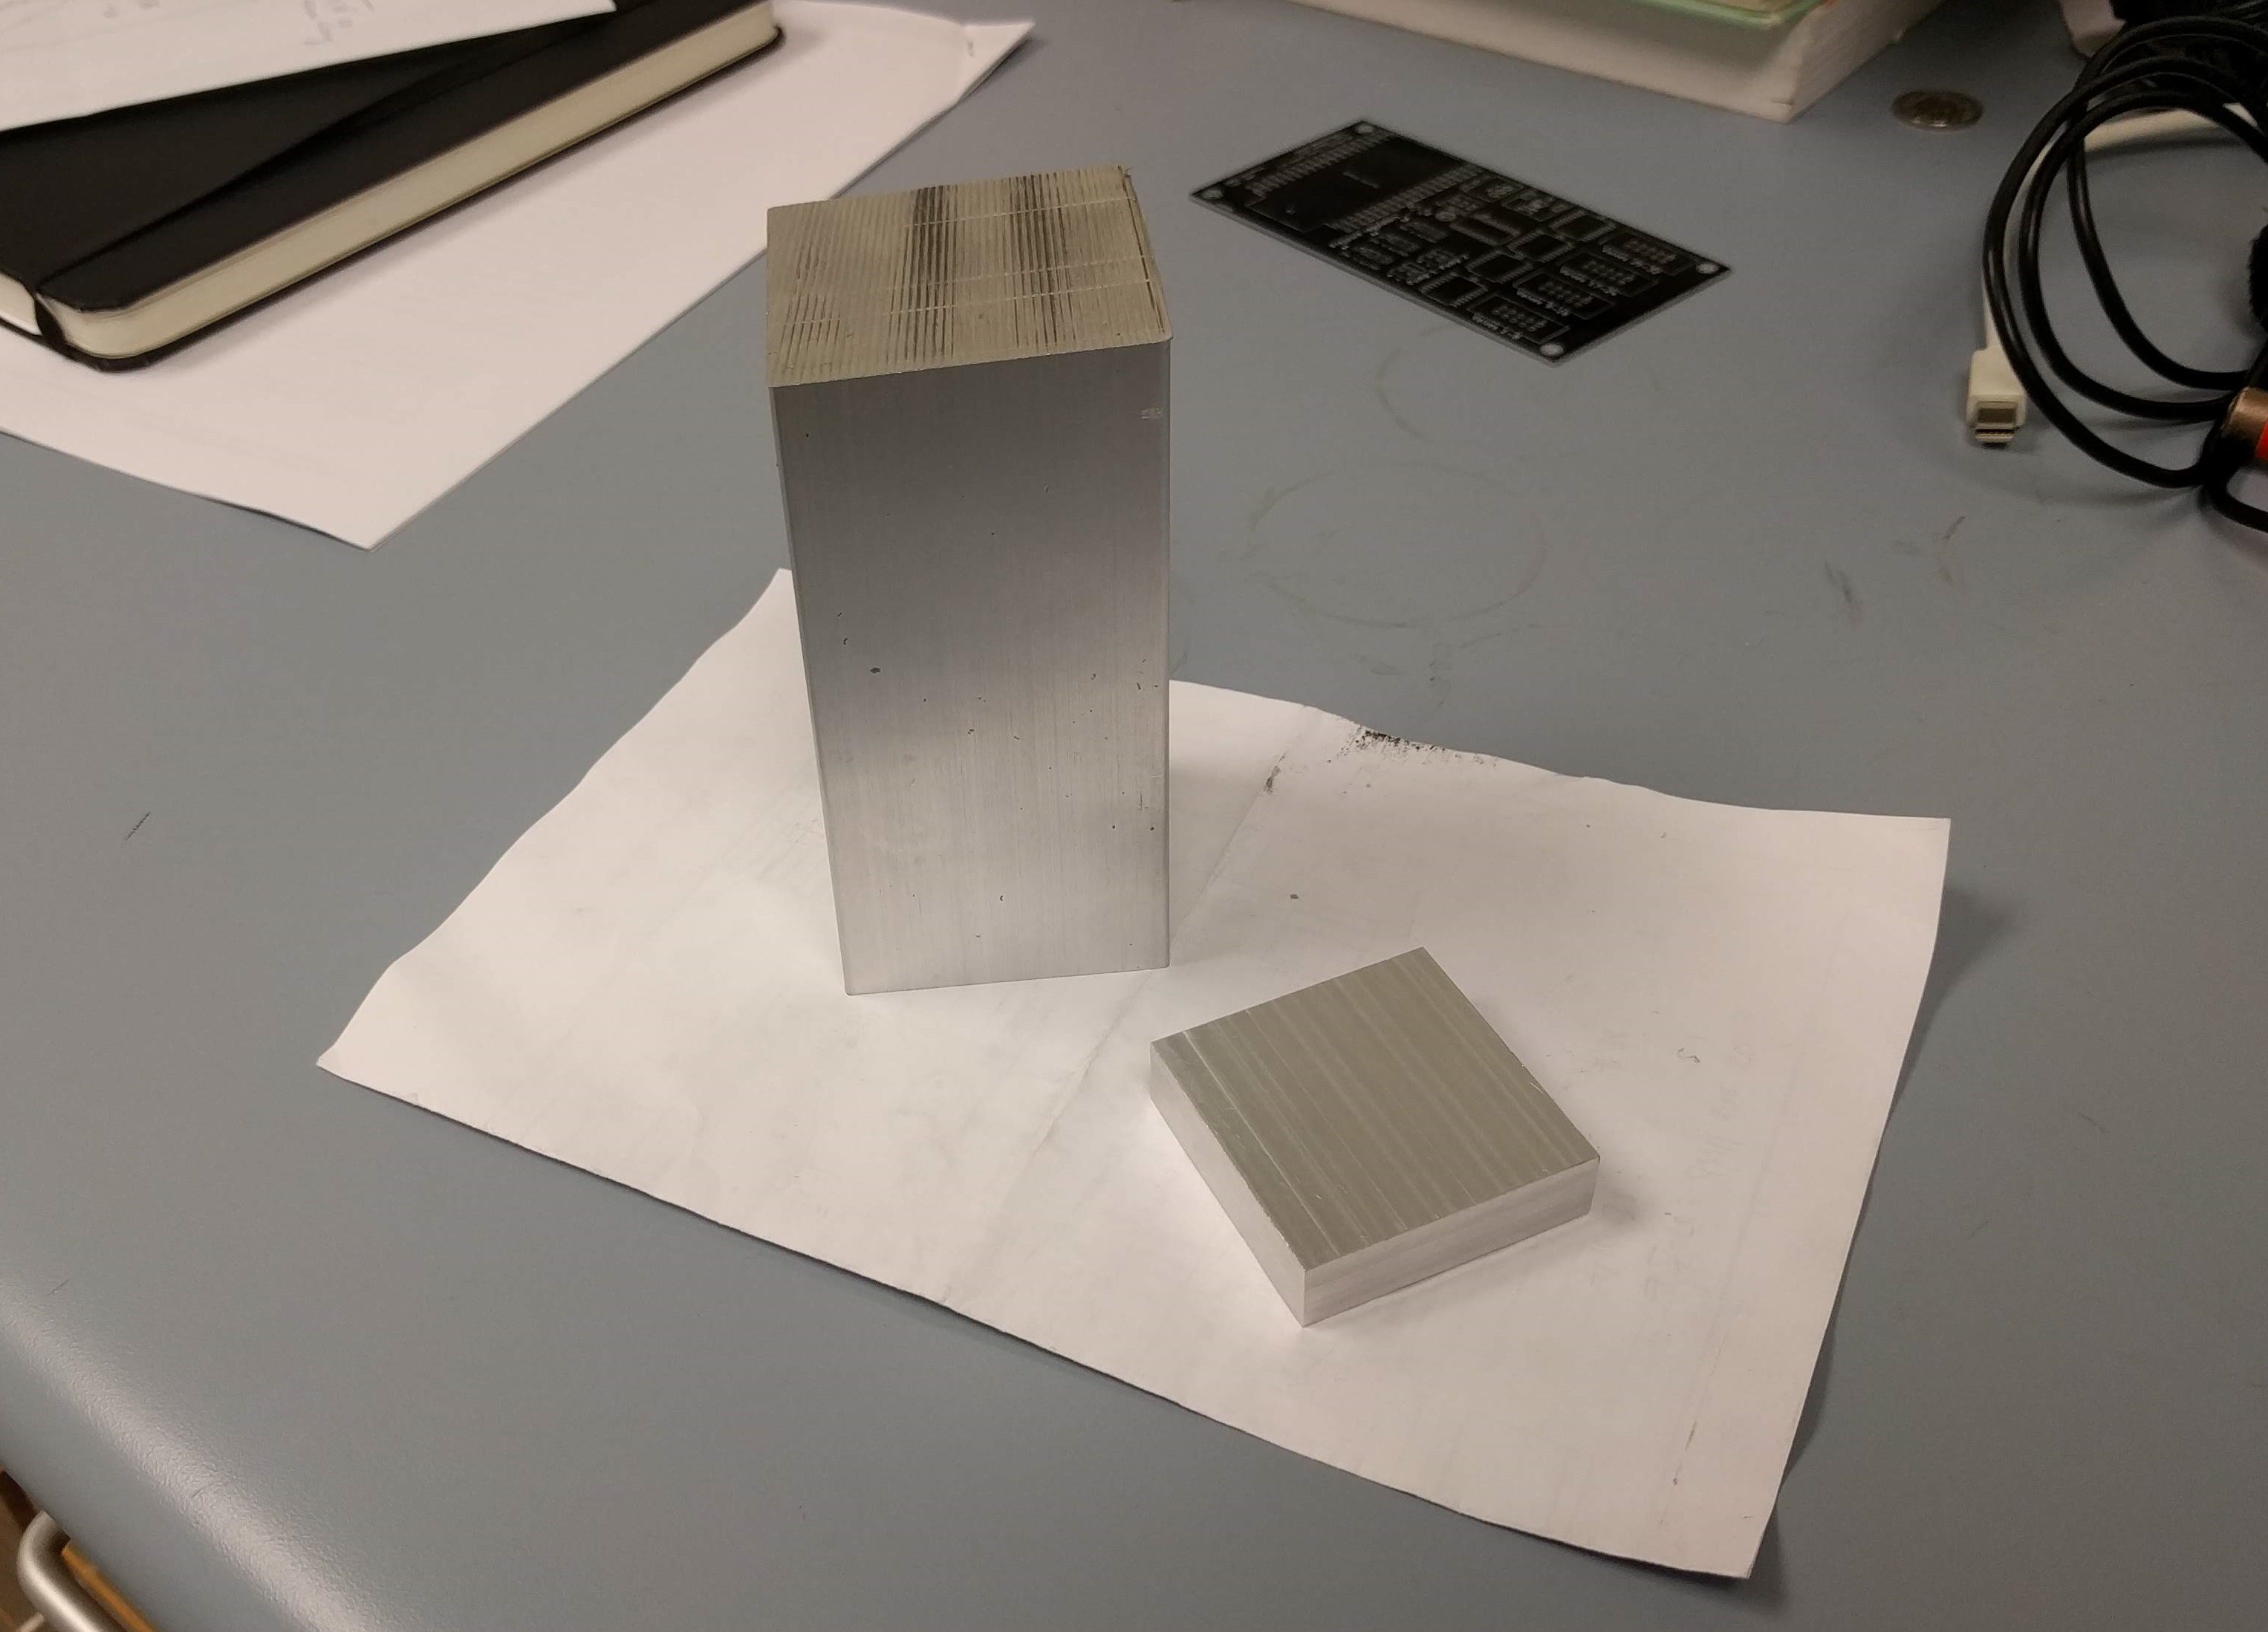
After this stage, I have a perfectly-sized (to within 50 microns or so) block of aluminum. Here it is, with the stock it came from:
![]()
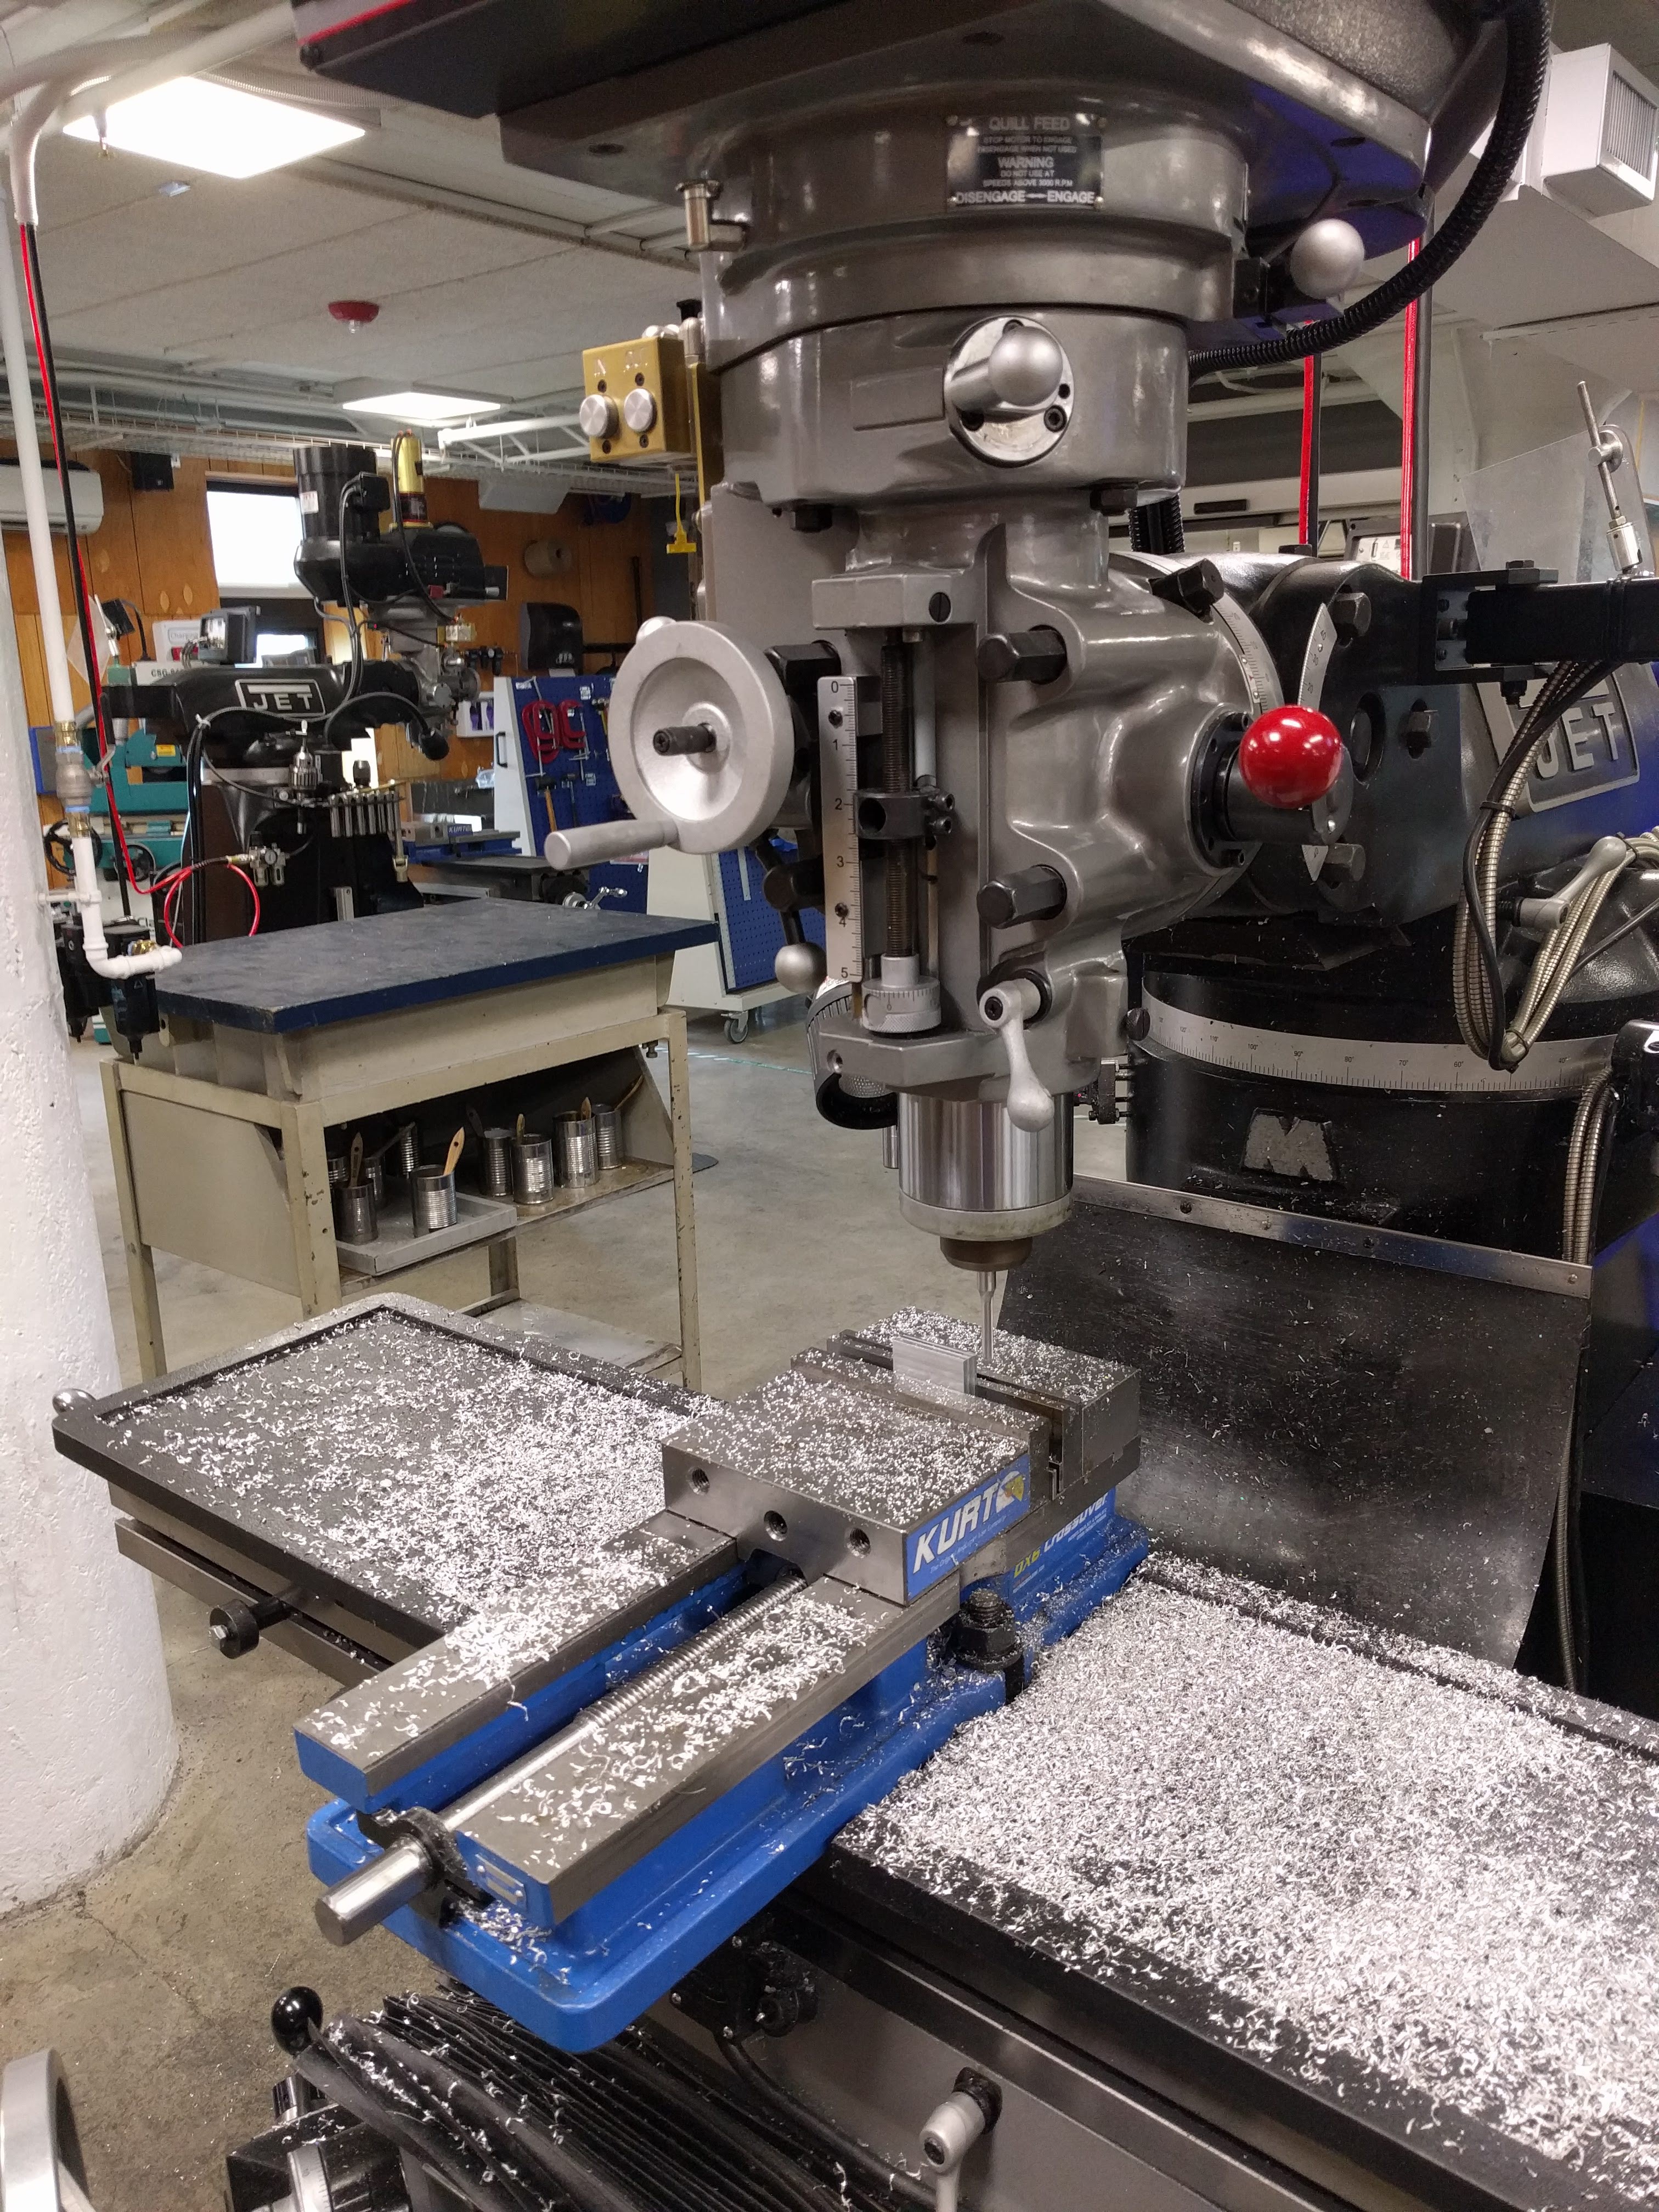
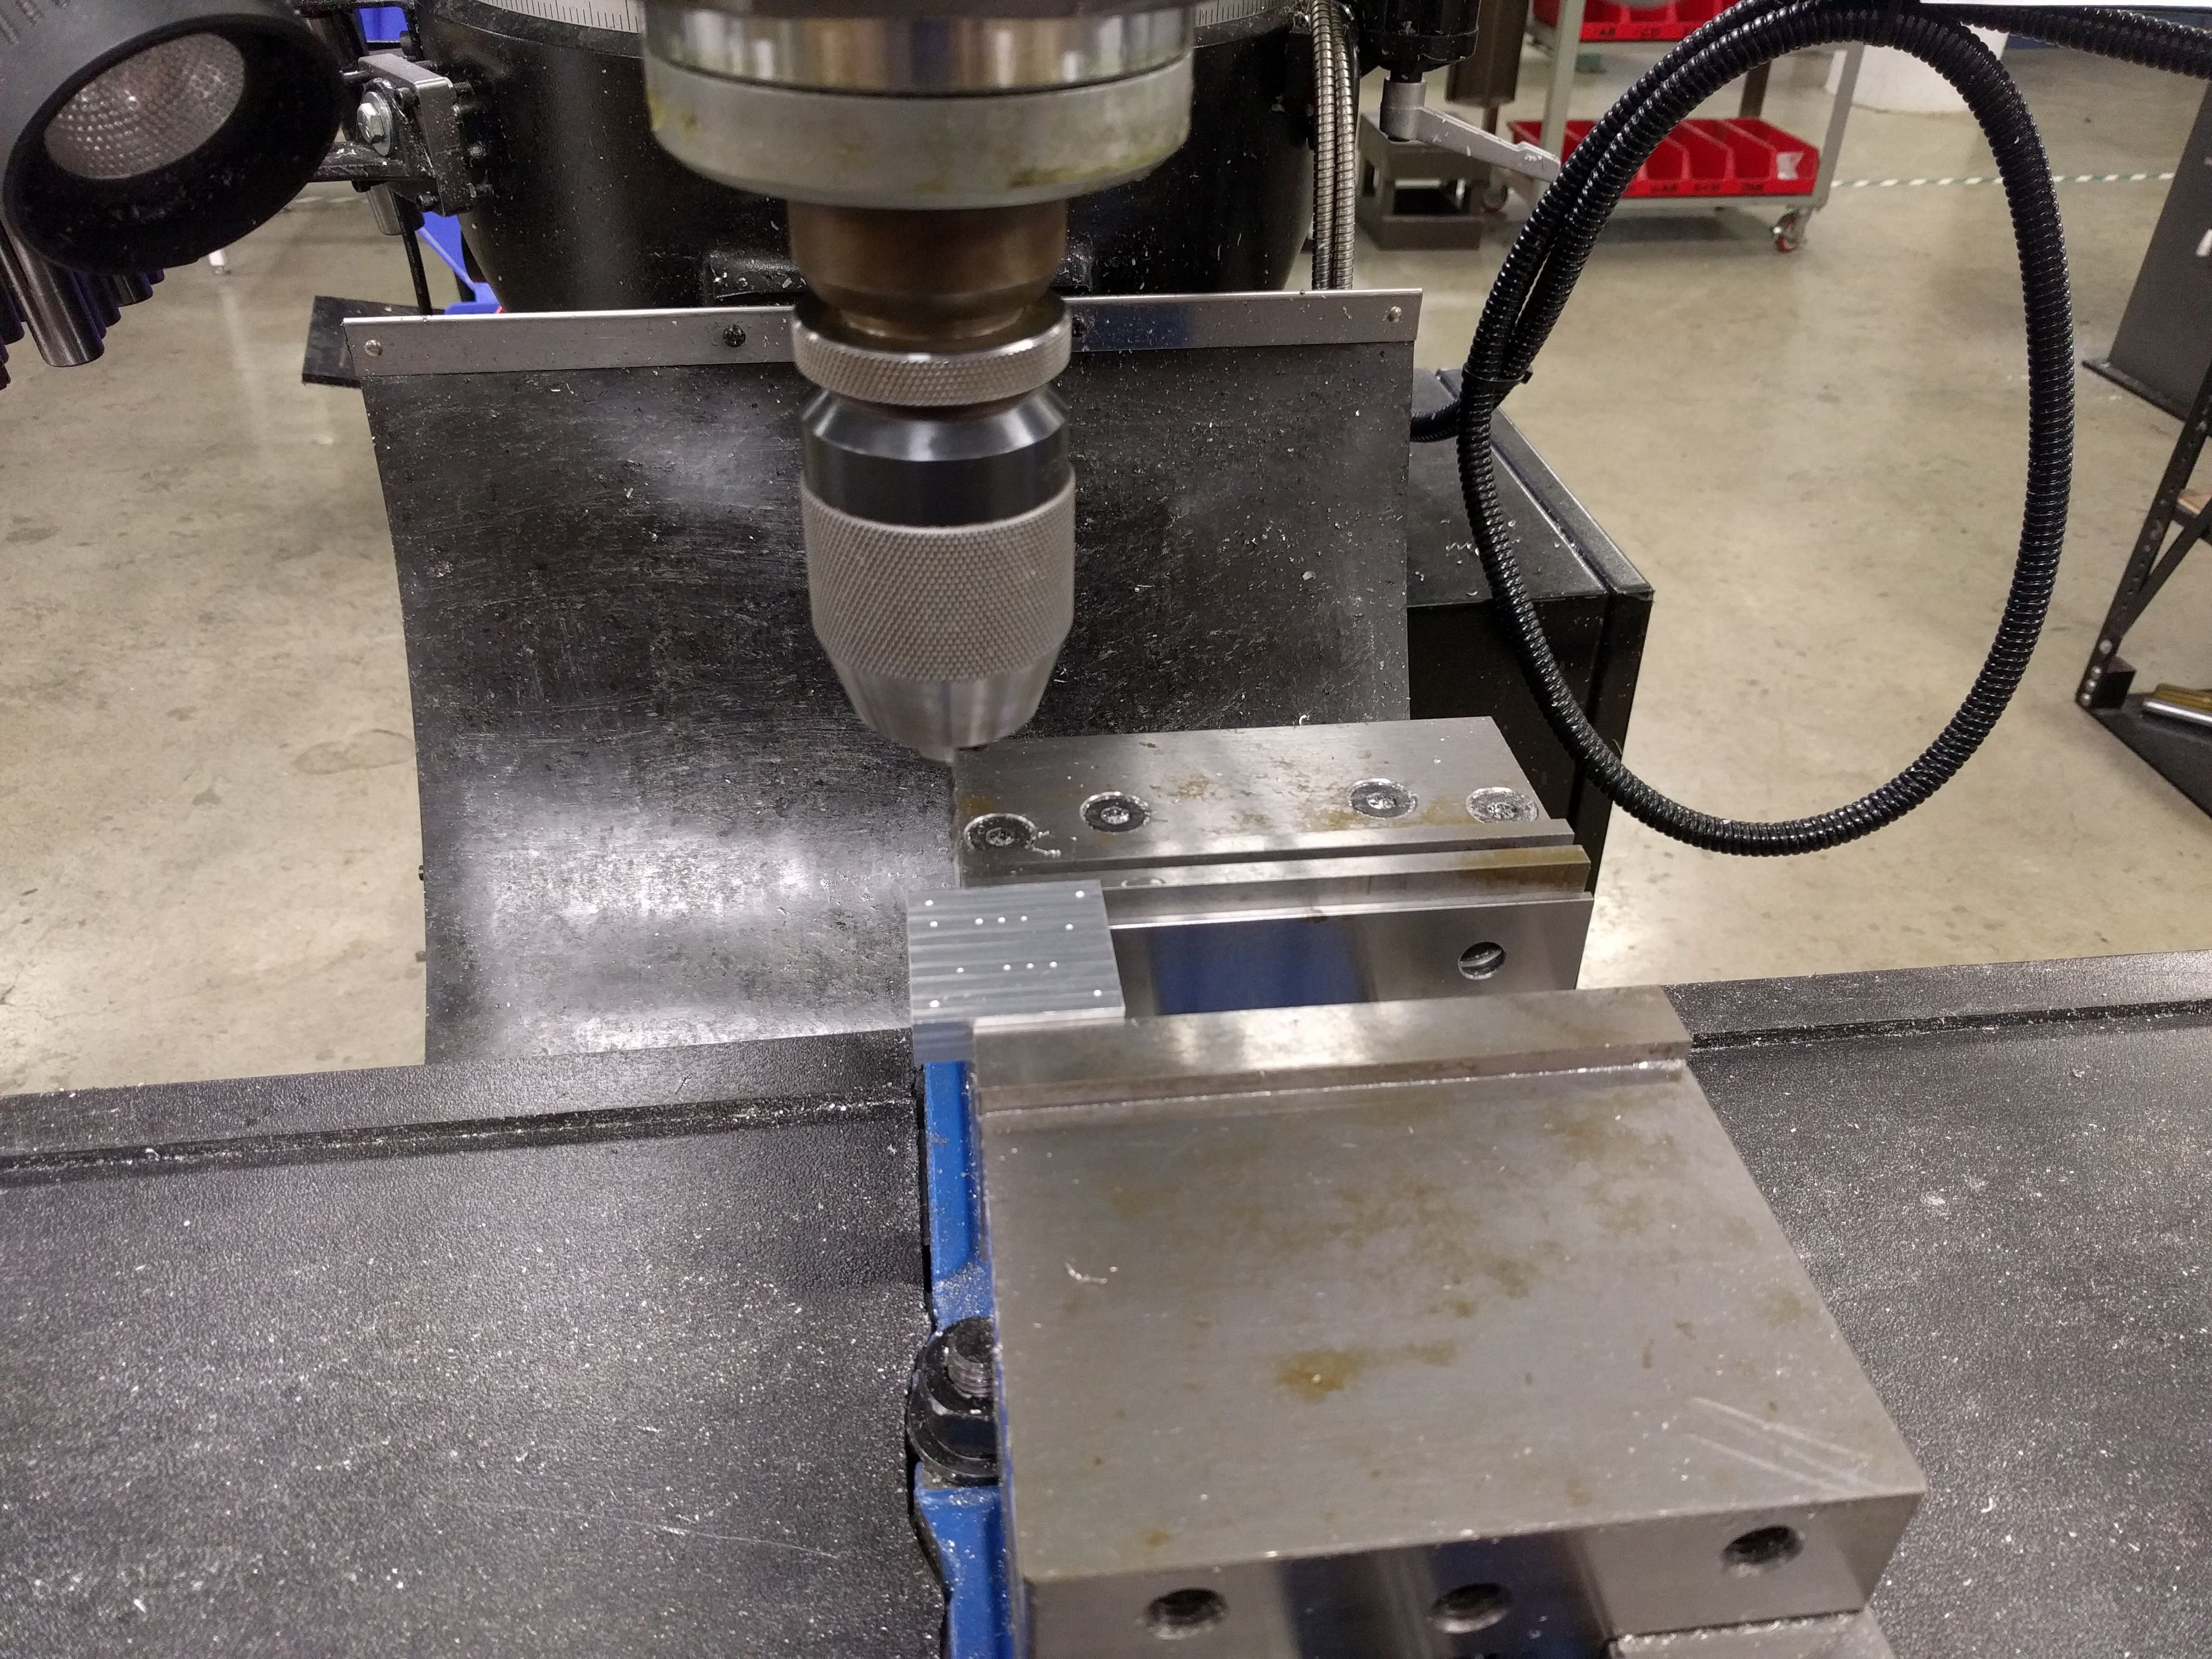
Then comes the laborious task of center-drilling every hole, changing drill bits, setting the drilling depth, drilling a few holes, changing drill bits, setting the depth, drilling a few holes, changing drill bits... and so on. Here it is partly through the top face:
![]()
The holes are then tapped, and the process is repeated for each of the three other faces that need holes. Finally, I milled the corner cut-outs:
![]()
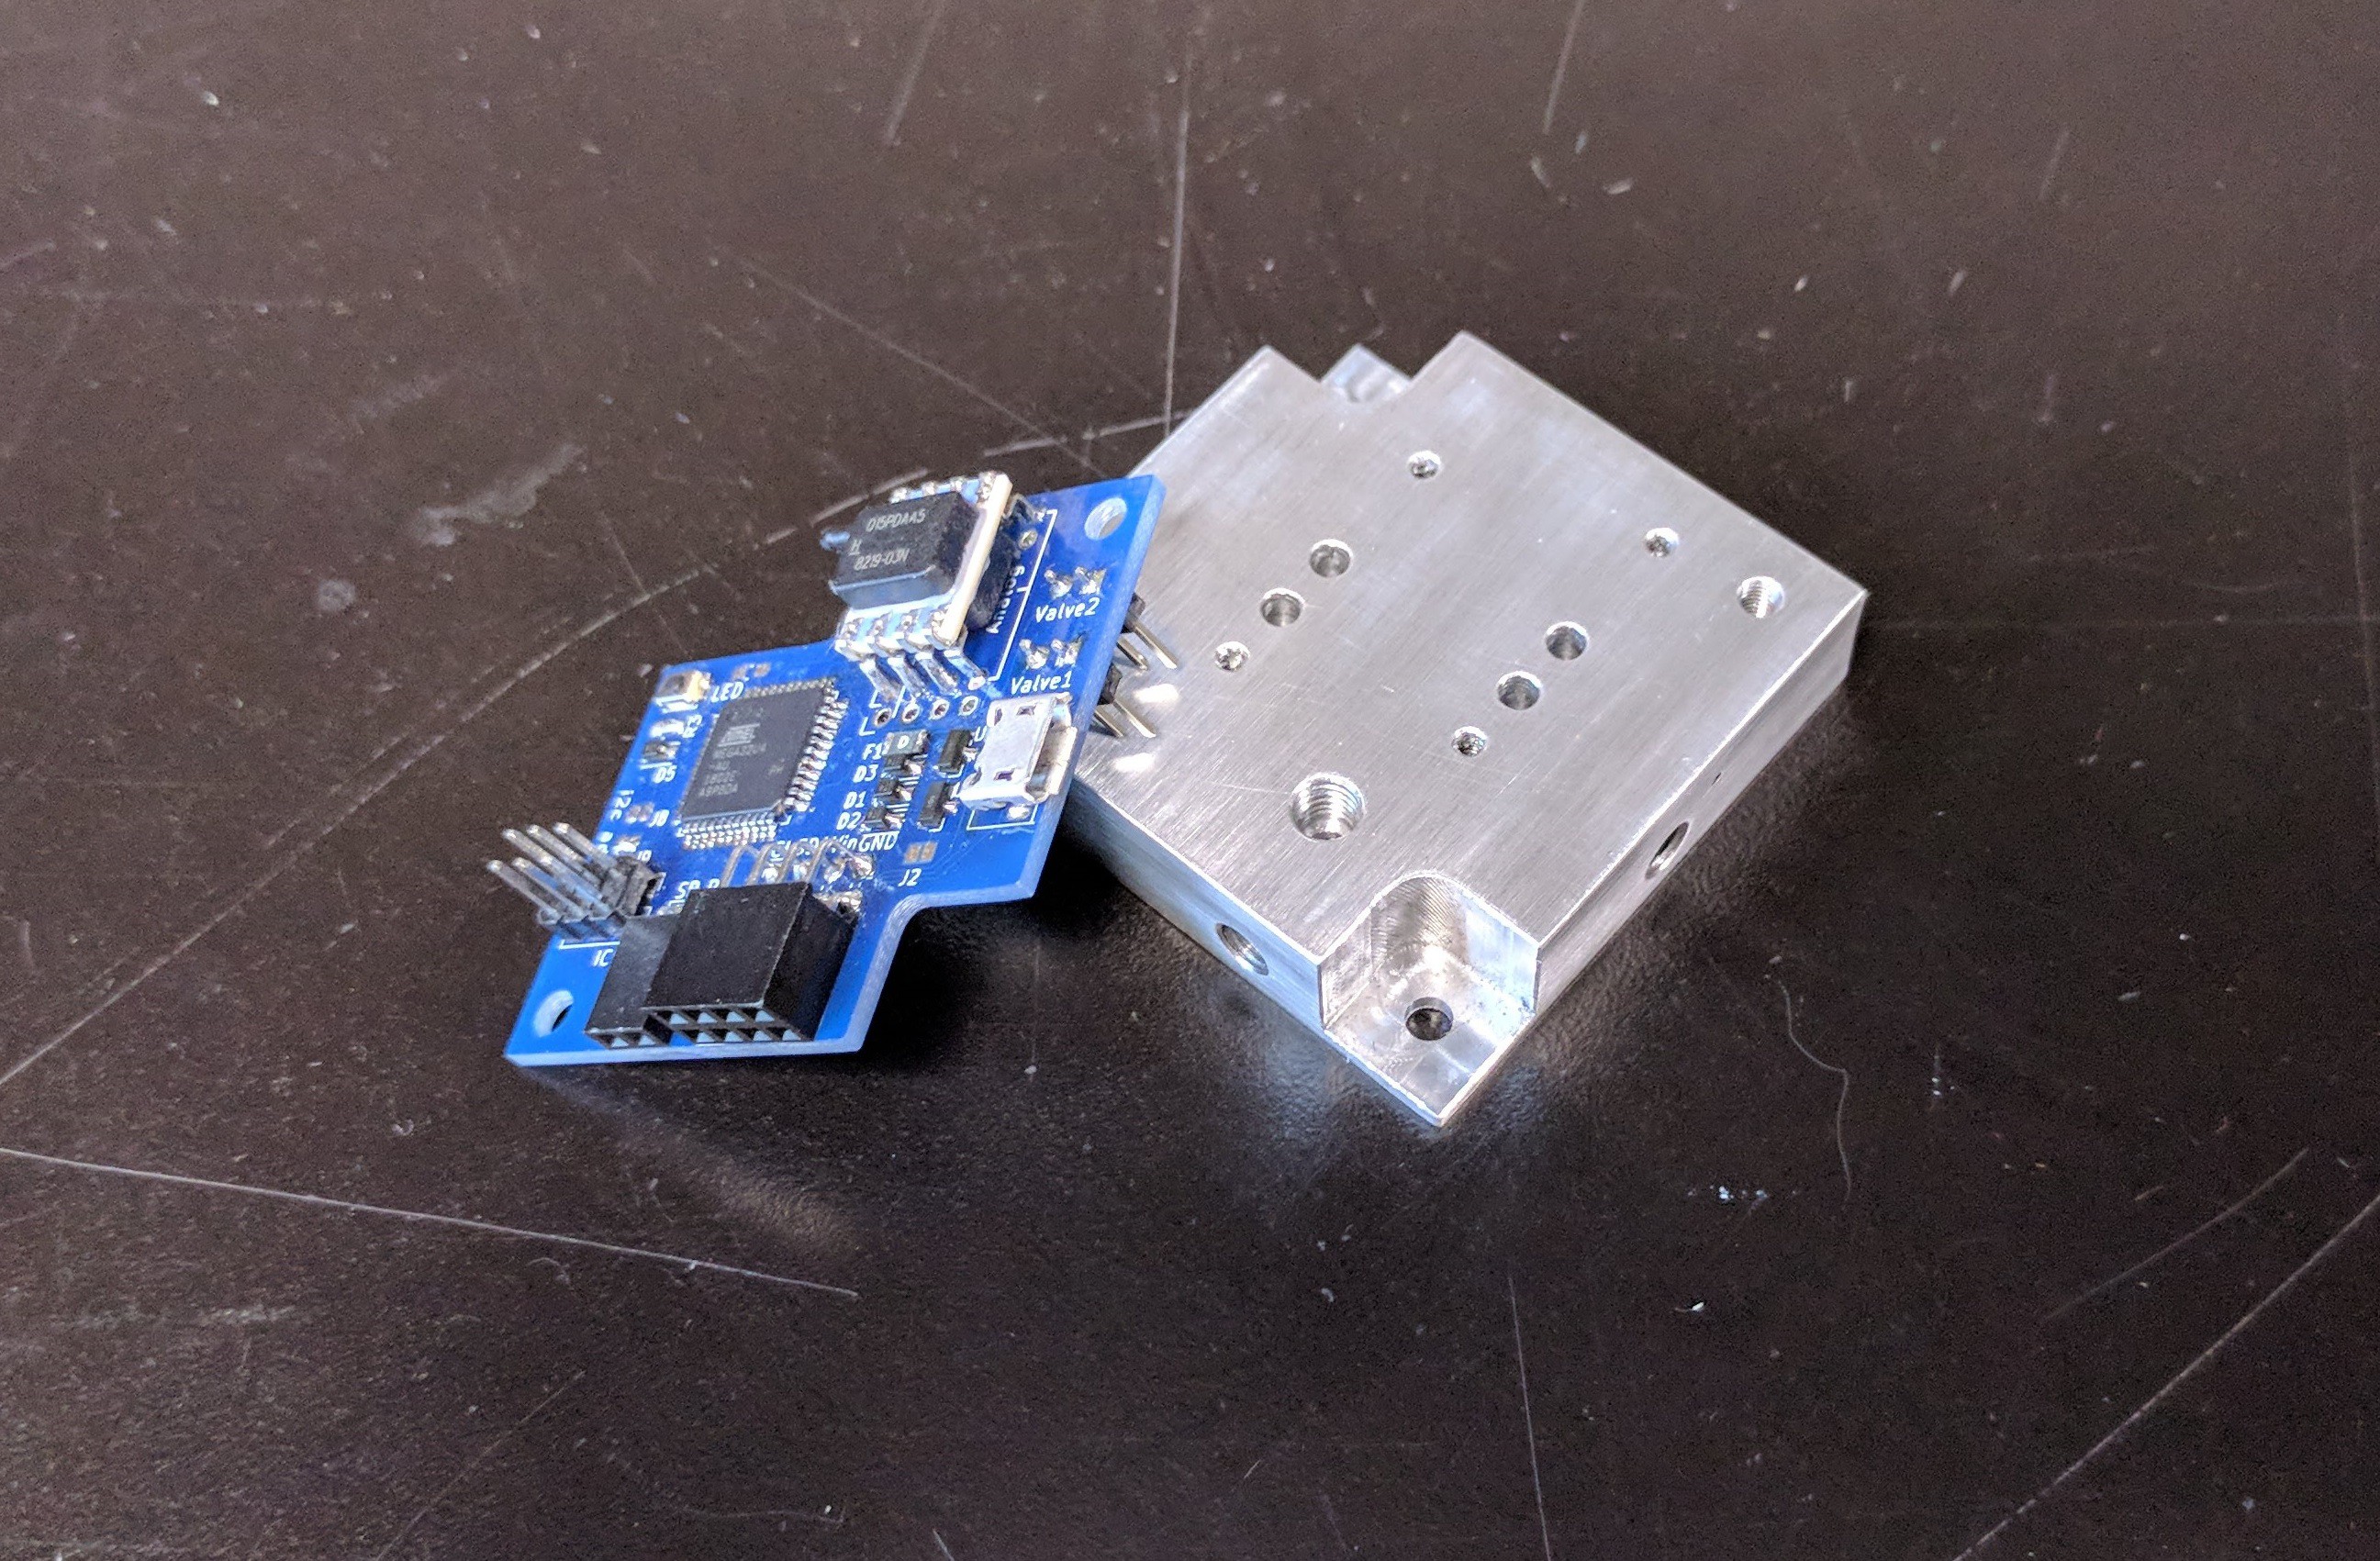
And after deburring the edges and giving everything a quick polish, I had my manifold. All it took was 5 or 6 hours of work (per piece), a few mistakes, and some cursing.
![]()
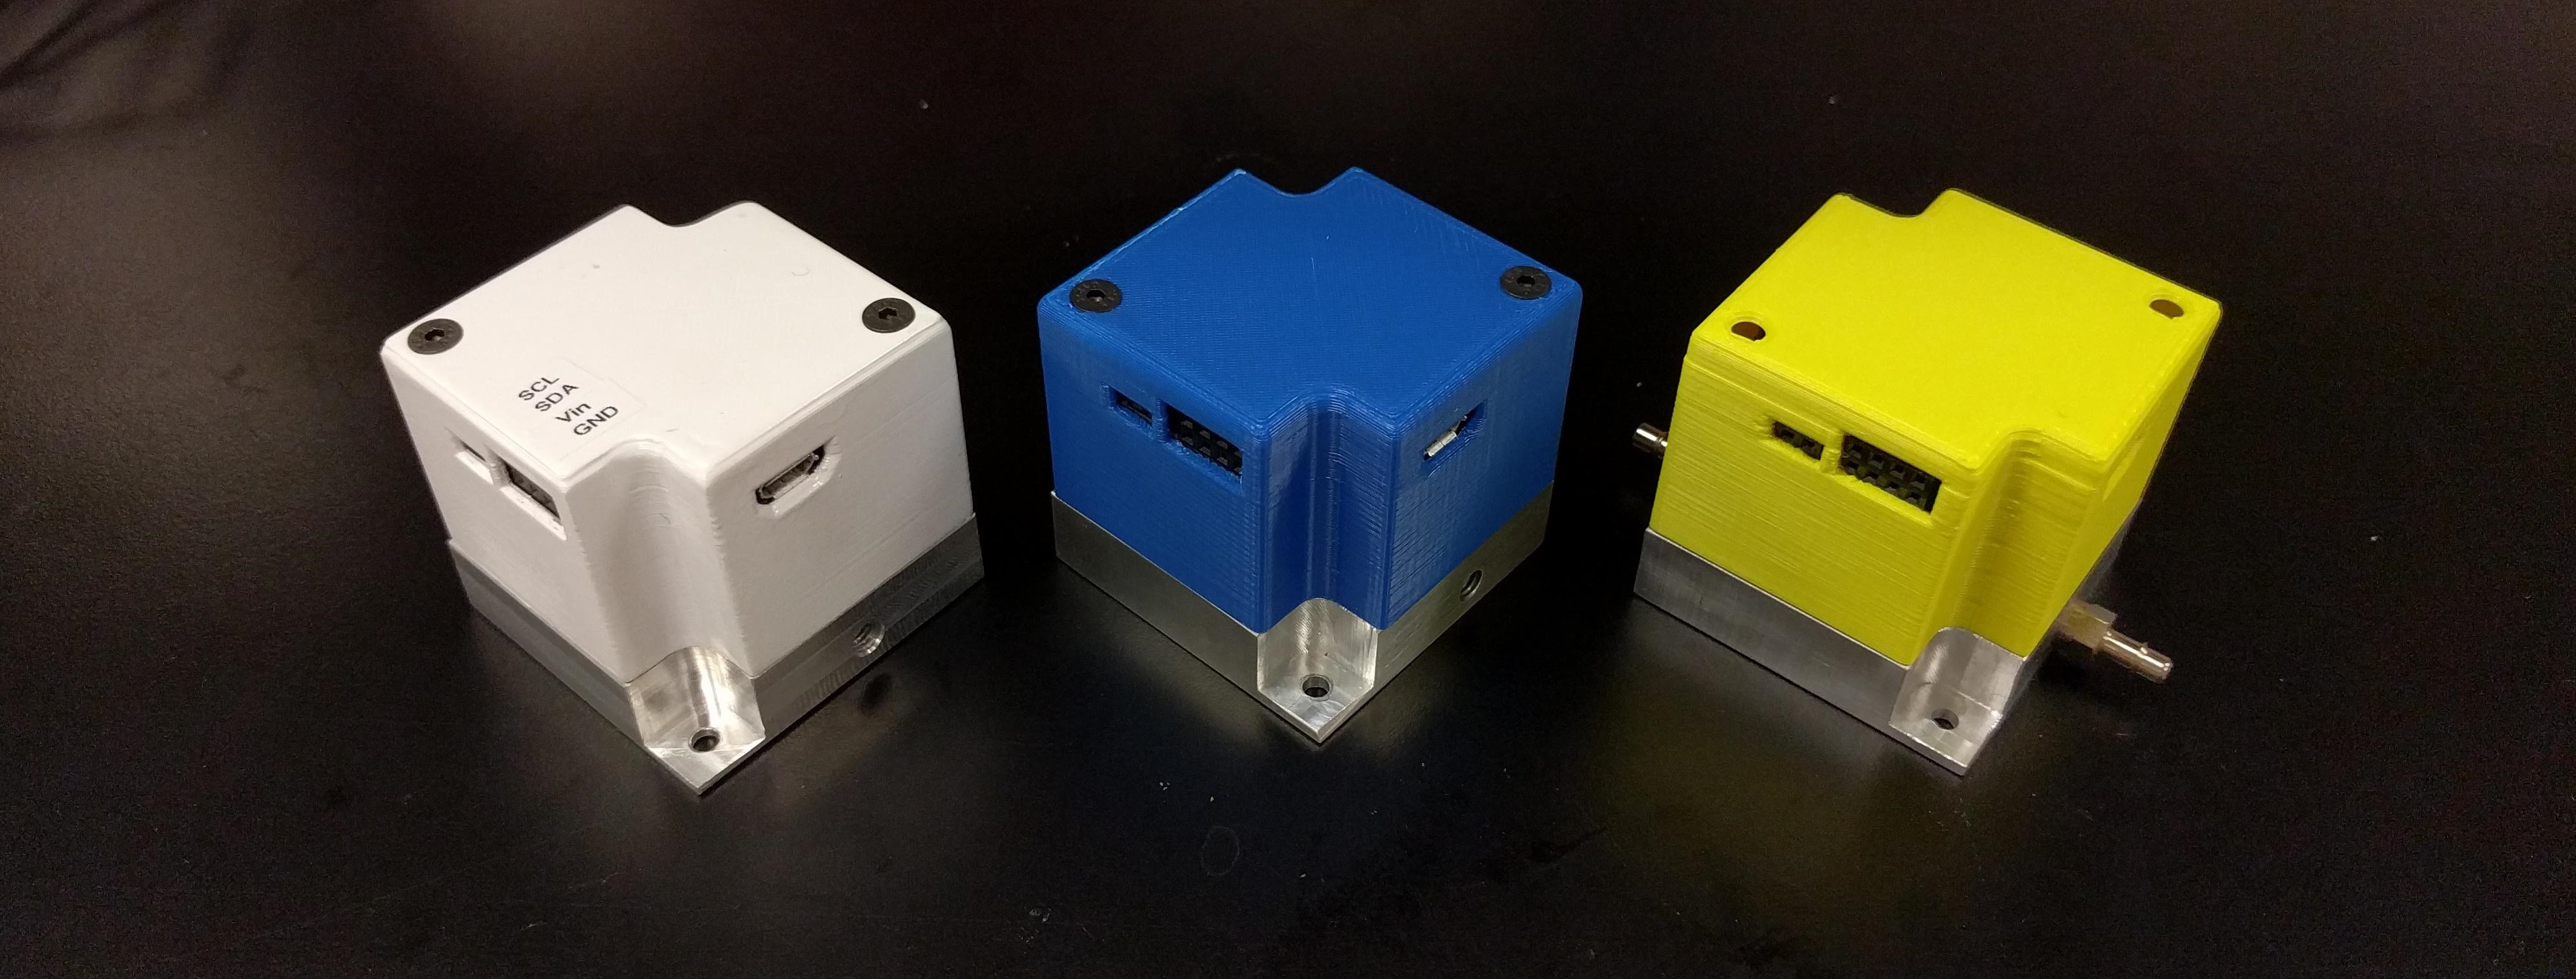
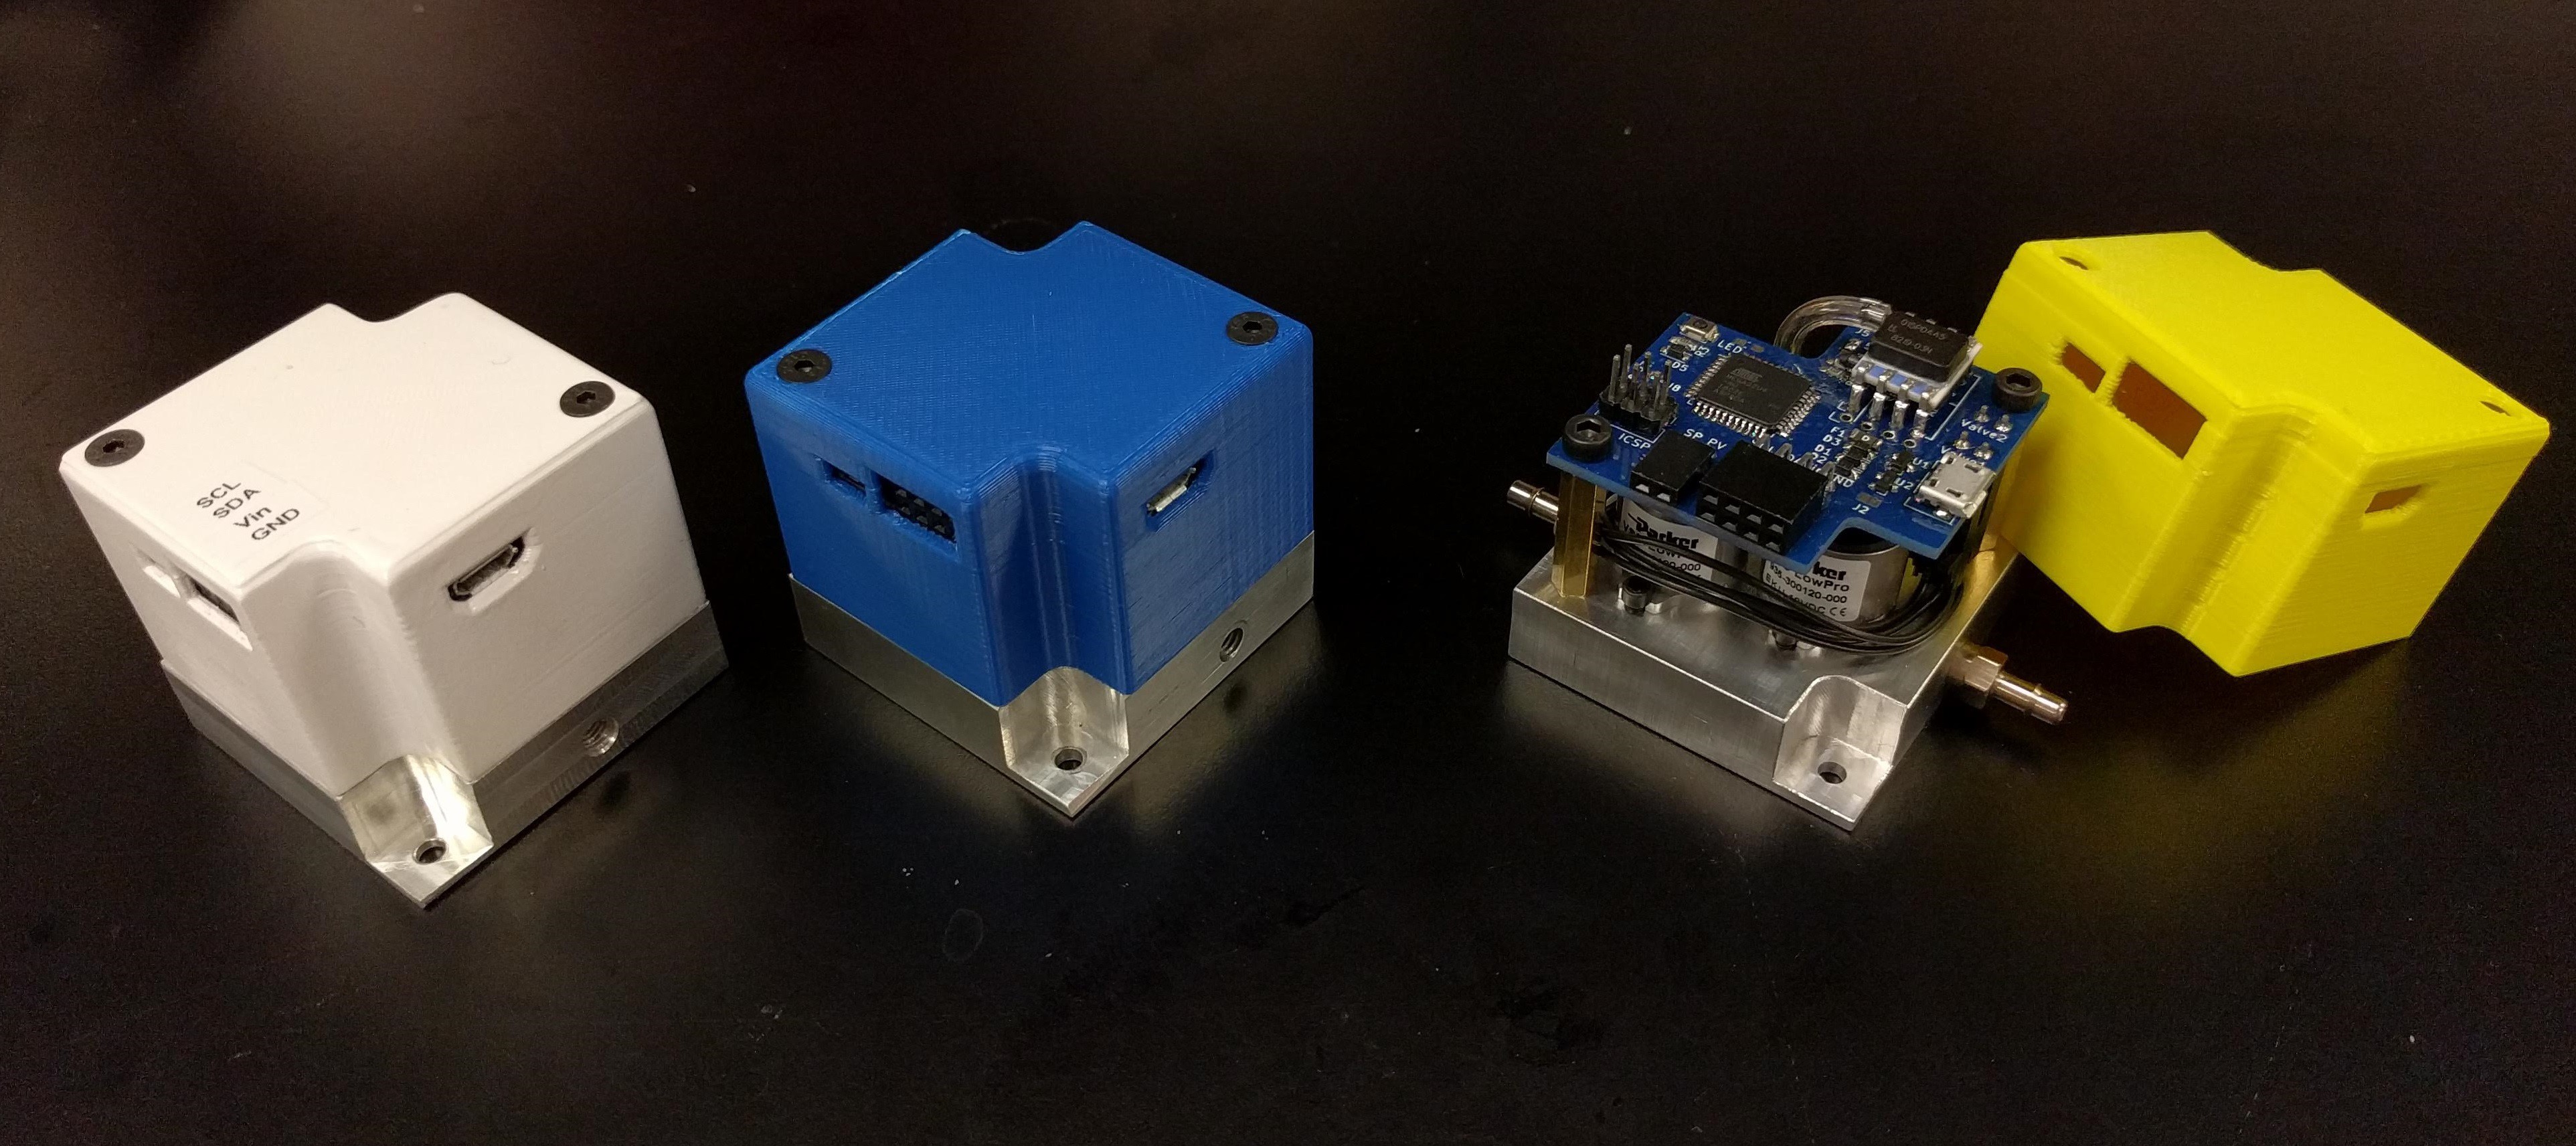
Still, everything fit together just fine. I assembled a couple more PCBs, and designed a simple enclosure, which I 3D printed in different colors to mark the different range of pressures that each regulator can handle.
![]()
White is 0-30 PSI (0-2 atm); blue is 0-5 PSI (0-3.3 atm) and yellow is +/-15 PSI (1 atm). I haven't thoroughly tested the third one yet but the other two work great.
-
Testing analog in/out
06/01/2018 at 19:19 • 0 commentsI just added support for analog input & output, i.e. setting the setpoint and reading the current pressure via two pins with voltages between 0 and 3.3V.
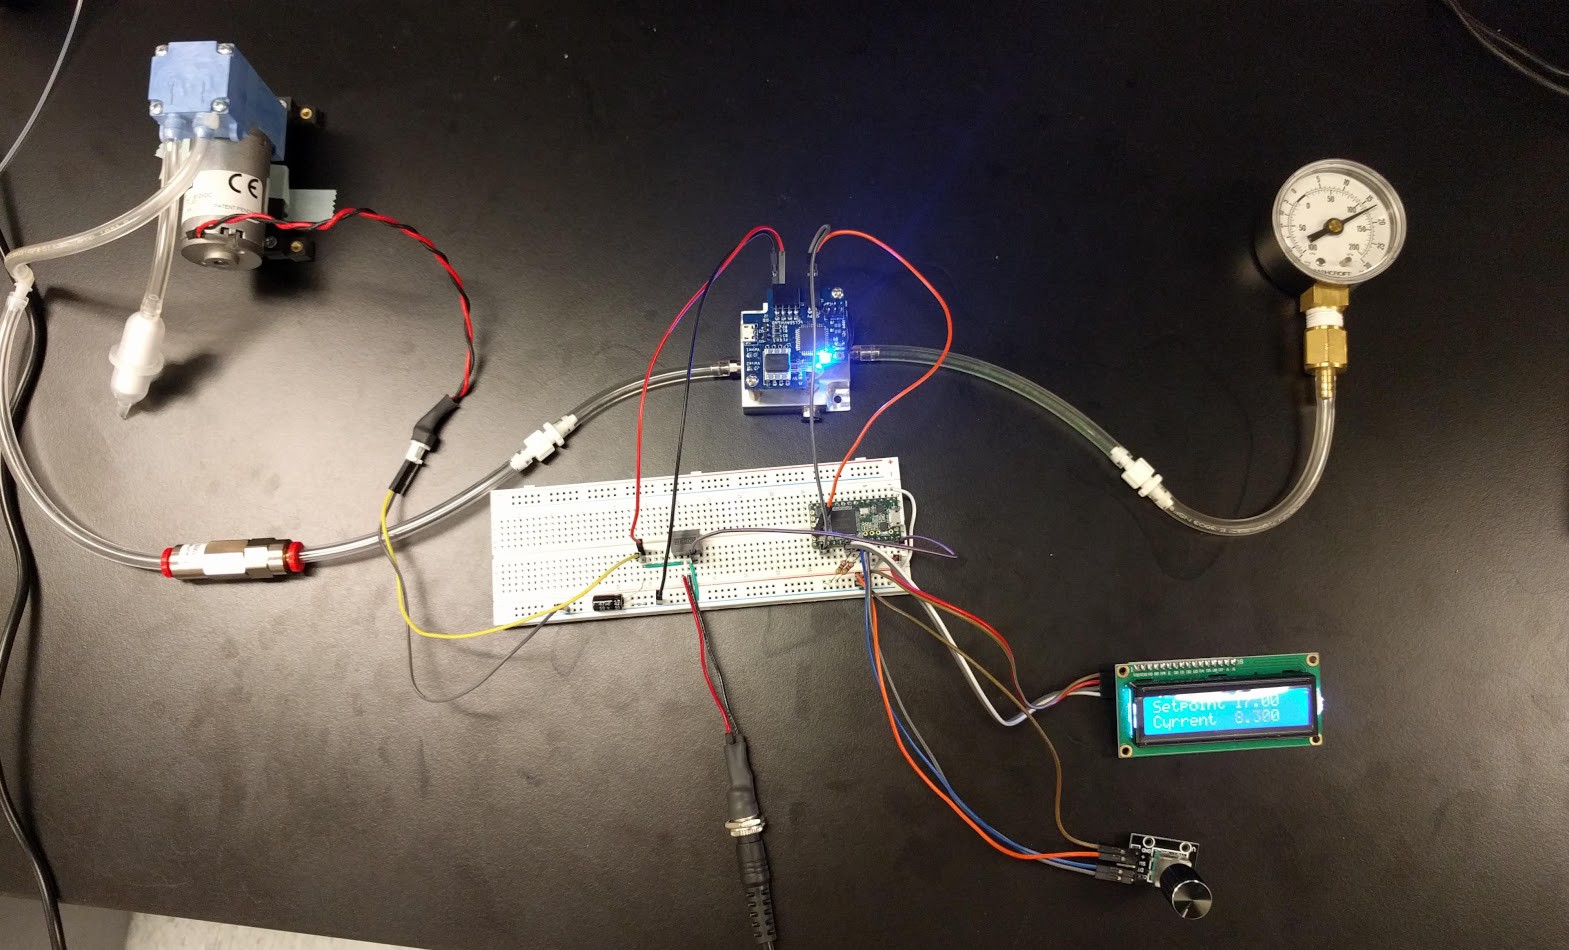
To test this, I used a Teensy 3.2 as the "master". A rotary encoder and LCD makes it easy to change the setpoint and view it and the measured pressure. This particular pressure regulator can manage 0-30 psi, so setting a voltage of 1V on the "SP" pin would request a pressure of 10 psi.
Here's what the test setup looked like:
![]()
The power input is 12V, which supplies both the pressure regulator and the pump on the left. The output of the regulator is hooked up to a pressure gauge, for easy validation.
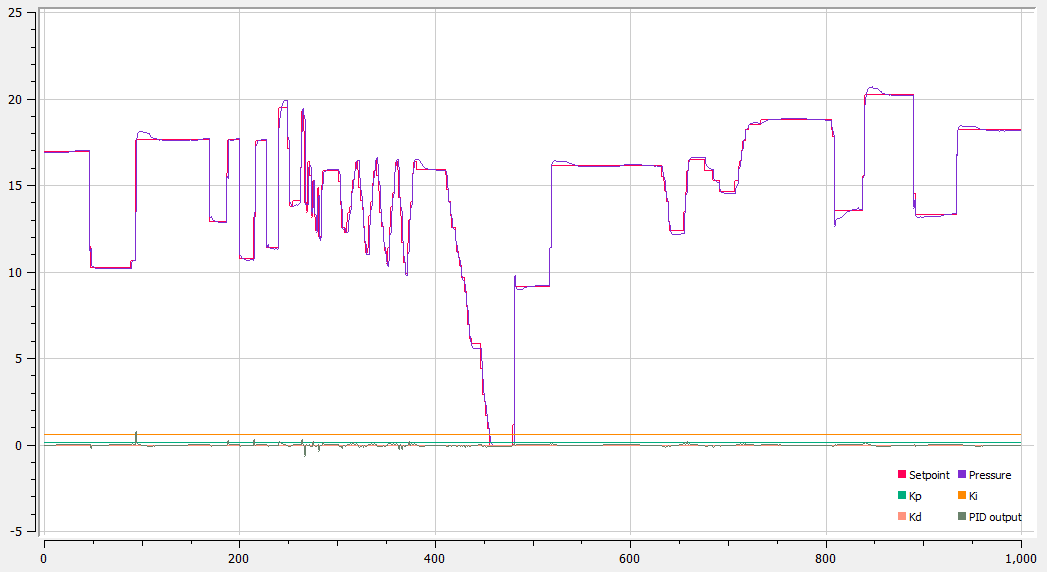
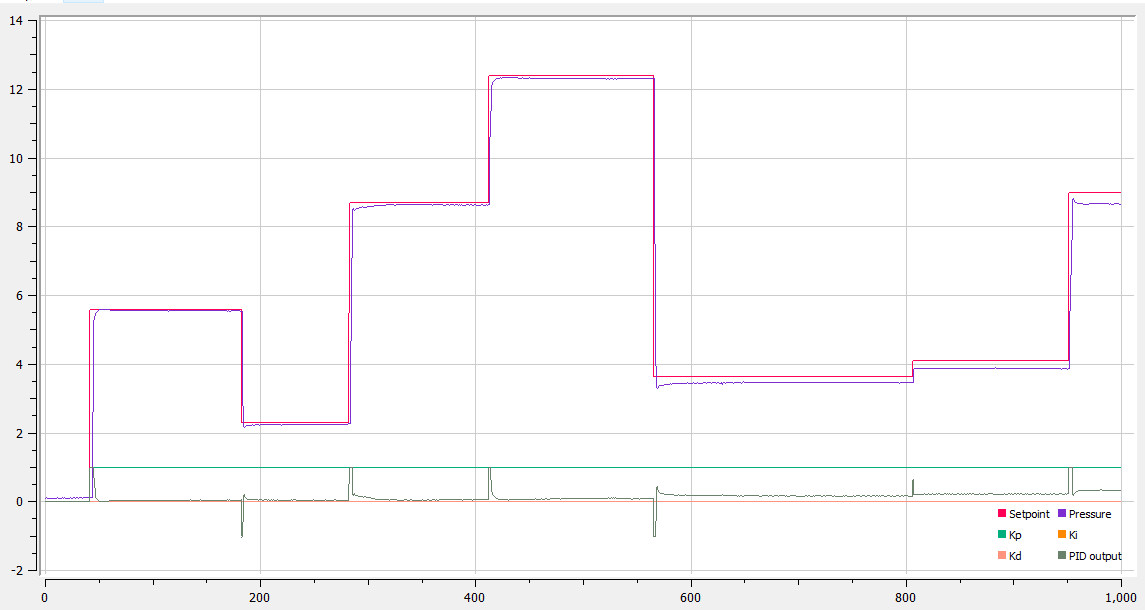
I also monitored the regulator via USB. With only P/I control, the results are already pretty good:
![]()
There is some overshoot upon large changes in setpoints, but nothing too dramatic. The pressure doesn't oscillate, and it can easily follow small changes in setpoints.
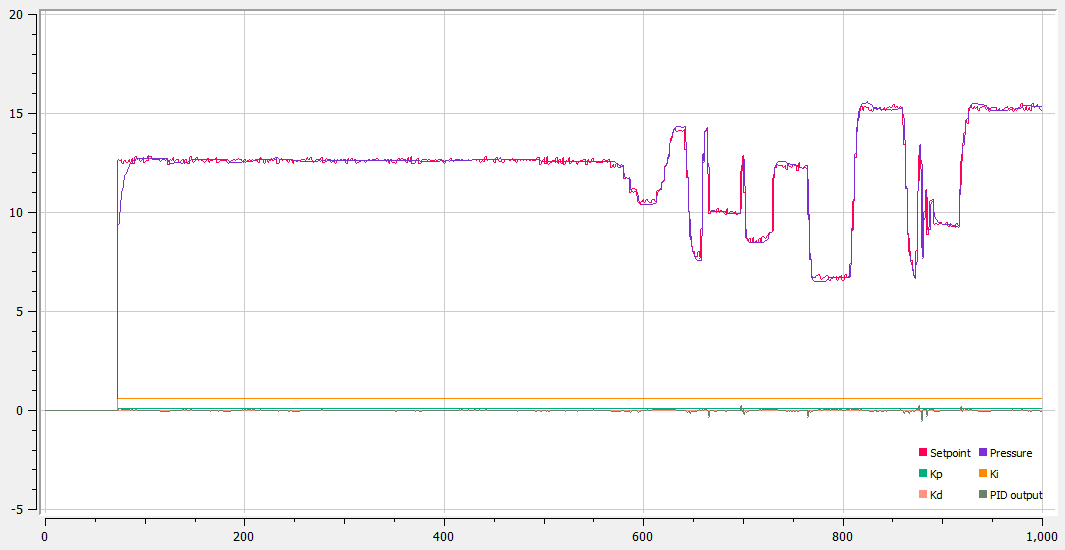
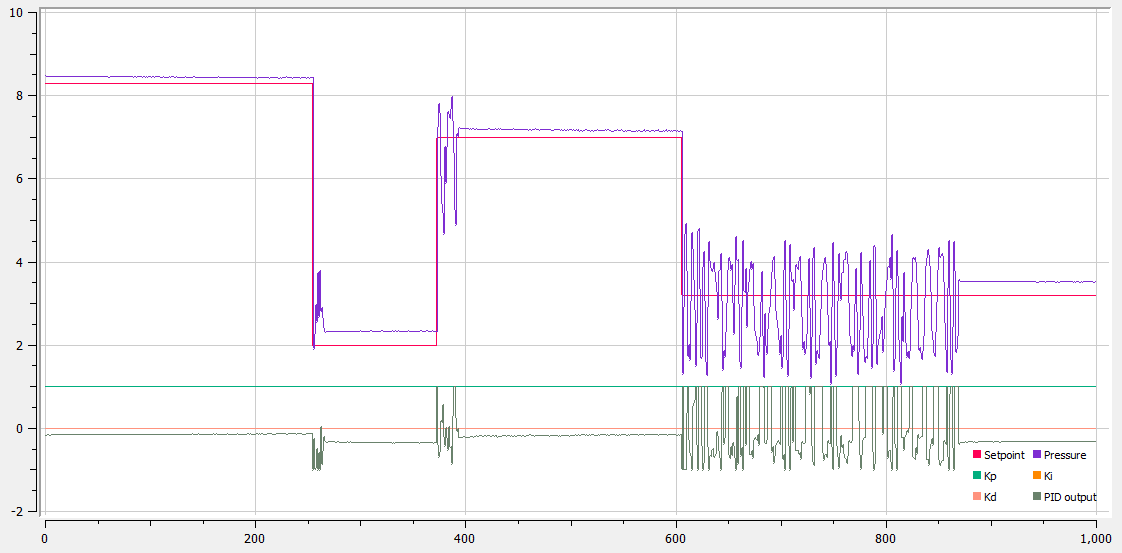
I did have to smooth the analog setpoint measurement, as there was some noise in the signal. It would vary by ~ 1% of the ADC range. So to counteract that, I average out several successive readings, and also only consider changes of >10/1023 to be an actual change in setpoint.
Without this correction, the graph looked like this:
![]()
Still pretty good, but this leads to unnecessary adjusting of the output, which wastes quite a bit of air.
Next up: i2c!
-
It works!
05/31/2018 at 15:36 • 0 commentsI received the PCBs and all other components last week. I also had the campus machine shop make a manifold out of aluminium, which came out perfectly.
After a few hours soldering hunched over a microscope, and some quick programming, I'm happy to say it seems to work so far!
Here is what it looks like: the bare manifold is on the left; valves and fittings are added, then the PCB is stacked on top:
![]()
As far as programming goes, this thing is essentially a Sparkfun Pro Micro 3.3V/8MHz. I used a Teensy I had on hand to flash the bootloader via the ICSP header, after which I was able to program my board as an Arduino.
The code is a work in progress; so far, I can read the pressure sensor value, compute a PID output and actuate the valves accordingly, and send & receive sensor values and PID parameters over USB.
The next steps are, roughly:
- Tune the PID controller
- Add support for i2c communication
- Add support for updating the setpoint & current pressure over analog in/out
- Save the PID constants to flash, when modified
Tuning the PID is a bit of a challenge. After a little (manual) tuning, I have gotten it to be stable and keep very close to the setpoint, but the response to a change in setpoint is quite slow (up to 2-3 seconds). Getting a fast response with no oscillating is difficult, I think mostly due to how quickly the pressure changes when the valves are opened even a little bit. My test setup consisted simply of compressed air on the input, and a pressure gauge on the output. There was little dead volume on the output, so opening the vent valve just a little would make the pressure drop very quickly.
This will be a bit different in a real application, with other parts hooked up to the output (and it could even be solved simply by adding a pressure tank on the output), but I still want to improve the performance as much as possible now.
First of all, I have to speed up the ADC.
By default, the sampling frequency is around 500Hz. That's a new reading every 20ms, which is way too slow.Edit : I really can't calculate. It's actually close to 5kHz, which is quite fast enough. Fortunately, it seems pretty easy to increase this. Once that's done, I'll resume messing around with the PID controller.Ideally, I'd like to model the system and take a smarter approach than just using an autotuner or trying a bunch of different parameters until it works well, but I don't know if I'll have the time to do that. As it is, the regulator is almost good enough to be used in my experiments, so I may have trouble justifying spending lots of time making it perfect.
I will be posting the code on github soon, along with a little demo of the regulator in action.
-
PCB design
05/15/2018 at 17:35 • 0 commentsI have finished the PCB design and ordered a first batch, so here is a quick update about it.
In short, the requirements for the PCB were:
- Shaped and sized to stack on top of the manifold, using two standoffs
- Connectors: USB, i2c, analog in/out, power, and an ICSP programming header
- Support for either SPI or Analog versions of Honeywell pressure sensors, as well as enough space for the sensor and tubing connecting it to the manifold
- 2 proportional solenoid valve drivers, with support for various voltages (5-24V at least)
Essentially, I want a small, integrated package, but still offer as much flexibility as possible with regards to communication with other components, and choice of valves and sensors.
The manifold I wrote about in the last log measures 45x45mm. The PCB should fit inside that, minus a couple millimeters on each side to allow space for an enclosure. This leaves little space for the components, so I had to pack everything in quite tightly and minimize the number of components on the board.
For the microcontroller, I chose an ATMega32u4, since it is Arduino-compatible (the Arduino Leonardo is an ATMega32u4), and it has built-in USB support. I wanted Arduino compatibility not only to make programming easier, but also to make the PCB design as easy as possible. I don't have any experience in designing boards for microcontrollers, so this way I could simply re-use elements of the Arduino Leonardo, Sparkfun Pro Micro, etc.
For the communication between the pressure regulator and external microcontrollers or computers, I wanted an i2c interface as well as USB (which would be used both to control the regulator and to program it if necessary). I also thought it would be good to include a simple analog input and output, where the set point and process values are given as voltages.
As explained in a previous log, I went with Honeywell pressure sensors. They are expensive (~30$/pc) but they are very precise and require no external amplifiers. They simply report the current pressure over SPI or i2c, or as an analog voltage between 0 and 3.3V or 5V. I wanted to support at least the SPI and analog variants.
There are also a bunch of different footprints for these sensors, but the most common one is an 8 pin DIP package. There was no easy way to use the same pins for both variants, so I simply put the two footprints side-by-side. One set of pins is used for the analog sensor, and the other set of pins is used for the SPI sensor.
I chose to go with a 3.3V operating voltage, for easier integration with other microcontrollers over i2c, since basically everything nowadays runs on 3.3V. To interface with a 5V microcontroller, one would need either a level shifter (for i2c), or a simple voltage divider for the analog set point.
The main constraints on the design were the shape of the manifold (square, with two cutouts in opposite corners), the placement of the pressure sensor, and the relatively large number of connectors (for such a small PCB).
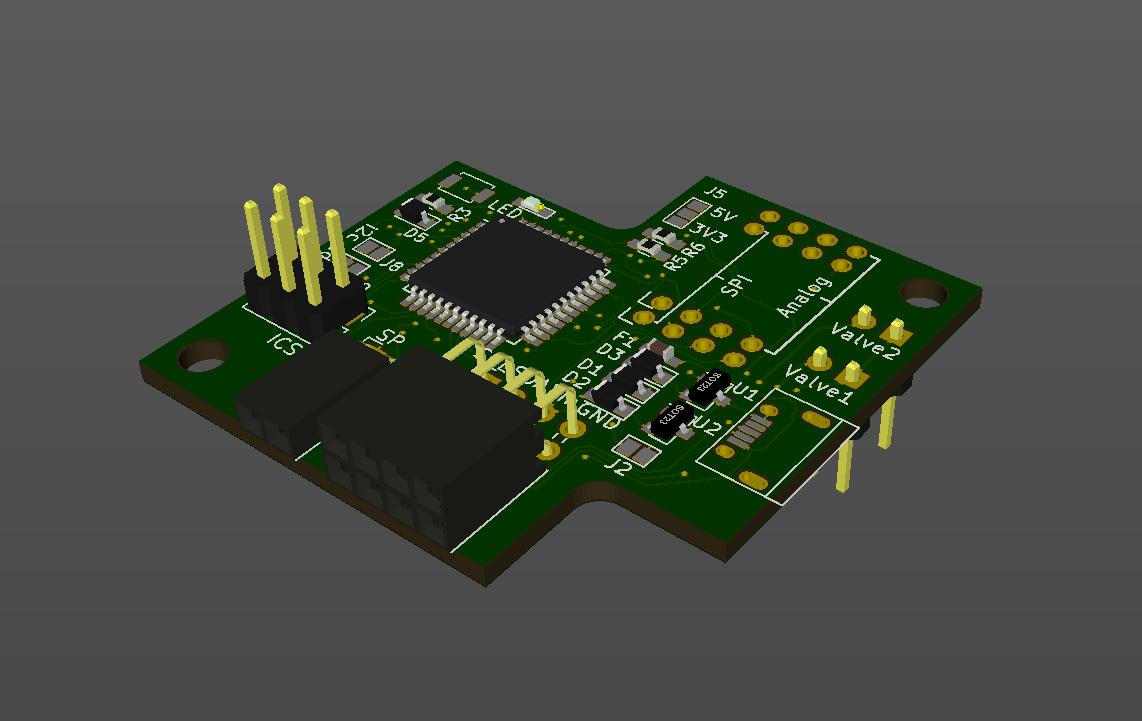
I did end up managing to fit everything onto a 2-layer PCB, cramming components on both sides of the board. Here's what it looks like:
On the bottom-right, you can see the connectors for the valves. These are pointed downwards, as the board will be stacked above them. If all goes well, there should be enough room for the connectors and cables, although it will be a snug fit.
Just to left of these are the pins for the pressure sensors. Either an SPI or analog sensor can be used, depending on which pins they are connected to. There is also a jumper to supply either 3.3V or 5V to the sensor, specifically for the analog model. I was not able to support both 3.3V and 5V SPI sensors, as this would require level shifters and I was out of board space.
In the bottom/left of the board are the connectors. The main one is a 4x2 connector, with pins for SDA, SCL, Vin and GND. They are doubled up to make it easy to daisy-chain several pressure regulators. The input voltage must be the solenoid's supply voltage -- anything from 5 to 24V should work just fine. Regulators bring this down to 3.3V and 5V for the rest of the board.
The other connector, 2x1, is the analog set point and current pressure. It will be possible to use either the analog or digital interface; switching between the two will likely be handled in software, with the analog being the default and switching over to i2c if a command is received there.
Also, it will be possible to set the i2c address via two jumpers: this should make it easy to change the address (between 4 pre-programmed options) without having to reflash the microcontroller. It's something I wish more i2c peripherals would do, since it can be handicapping to be limited to the factory-set address.
The 3x2 male header is the ICSP header, which will make it possible to flash the Arduino bootloader onto the atmega.
That's most of it, so I will stop here and patiently wait for my PCBs to arrive, and update when the boards are assembled!
-
Designing a manifold
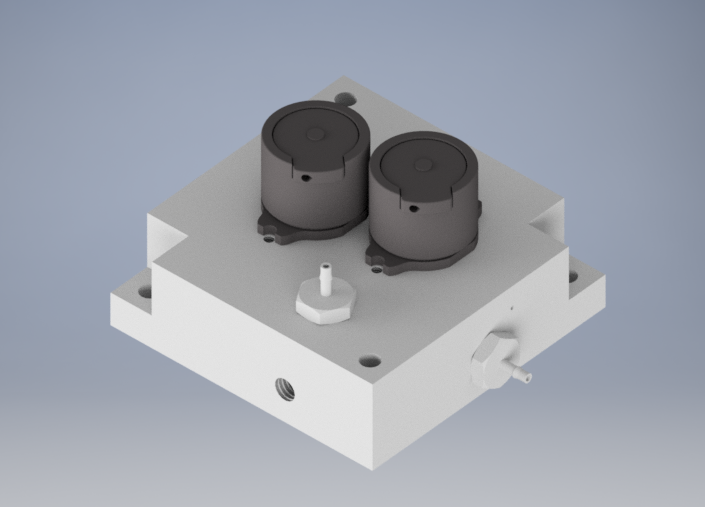
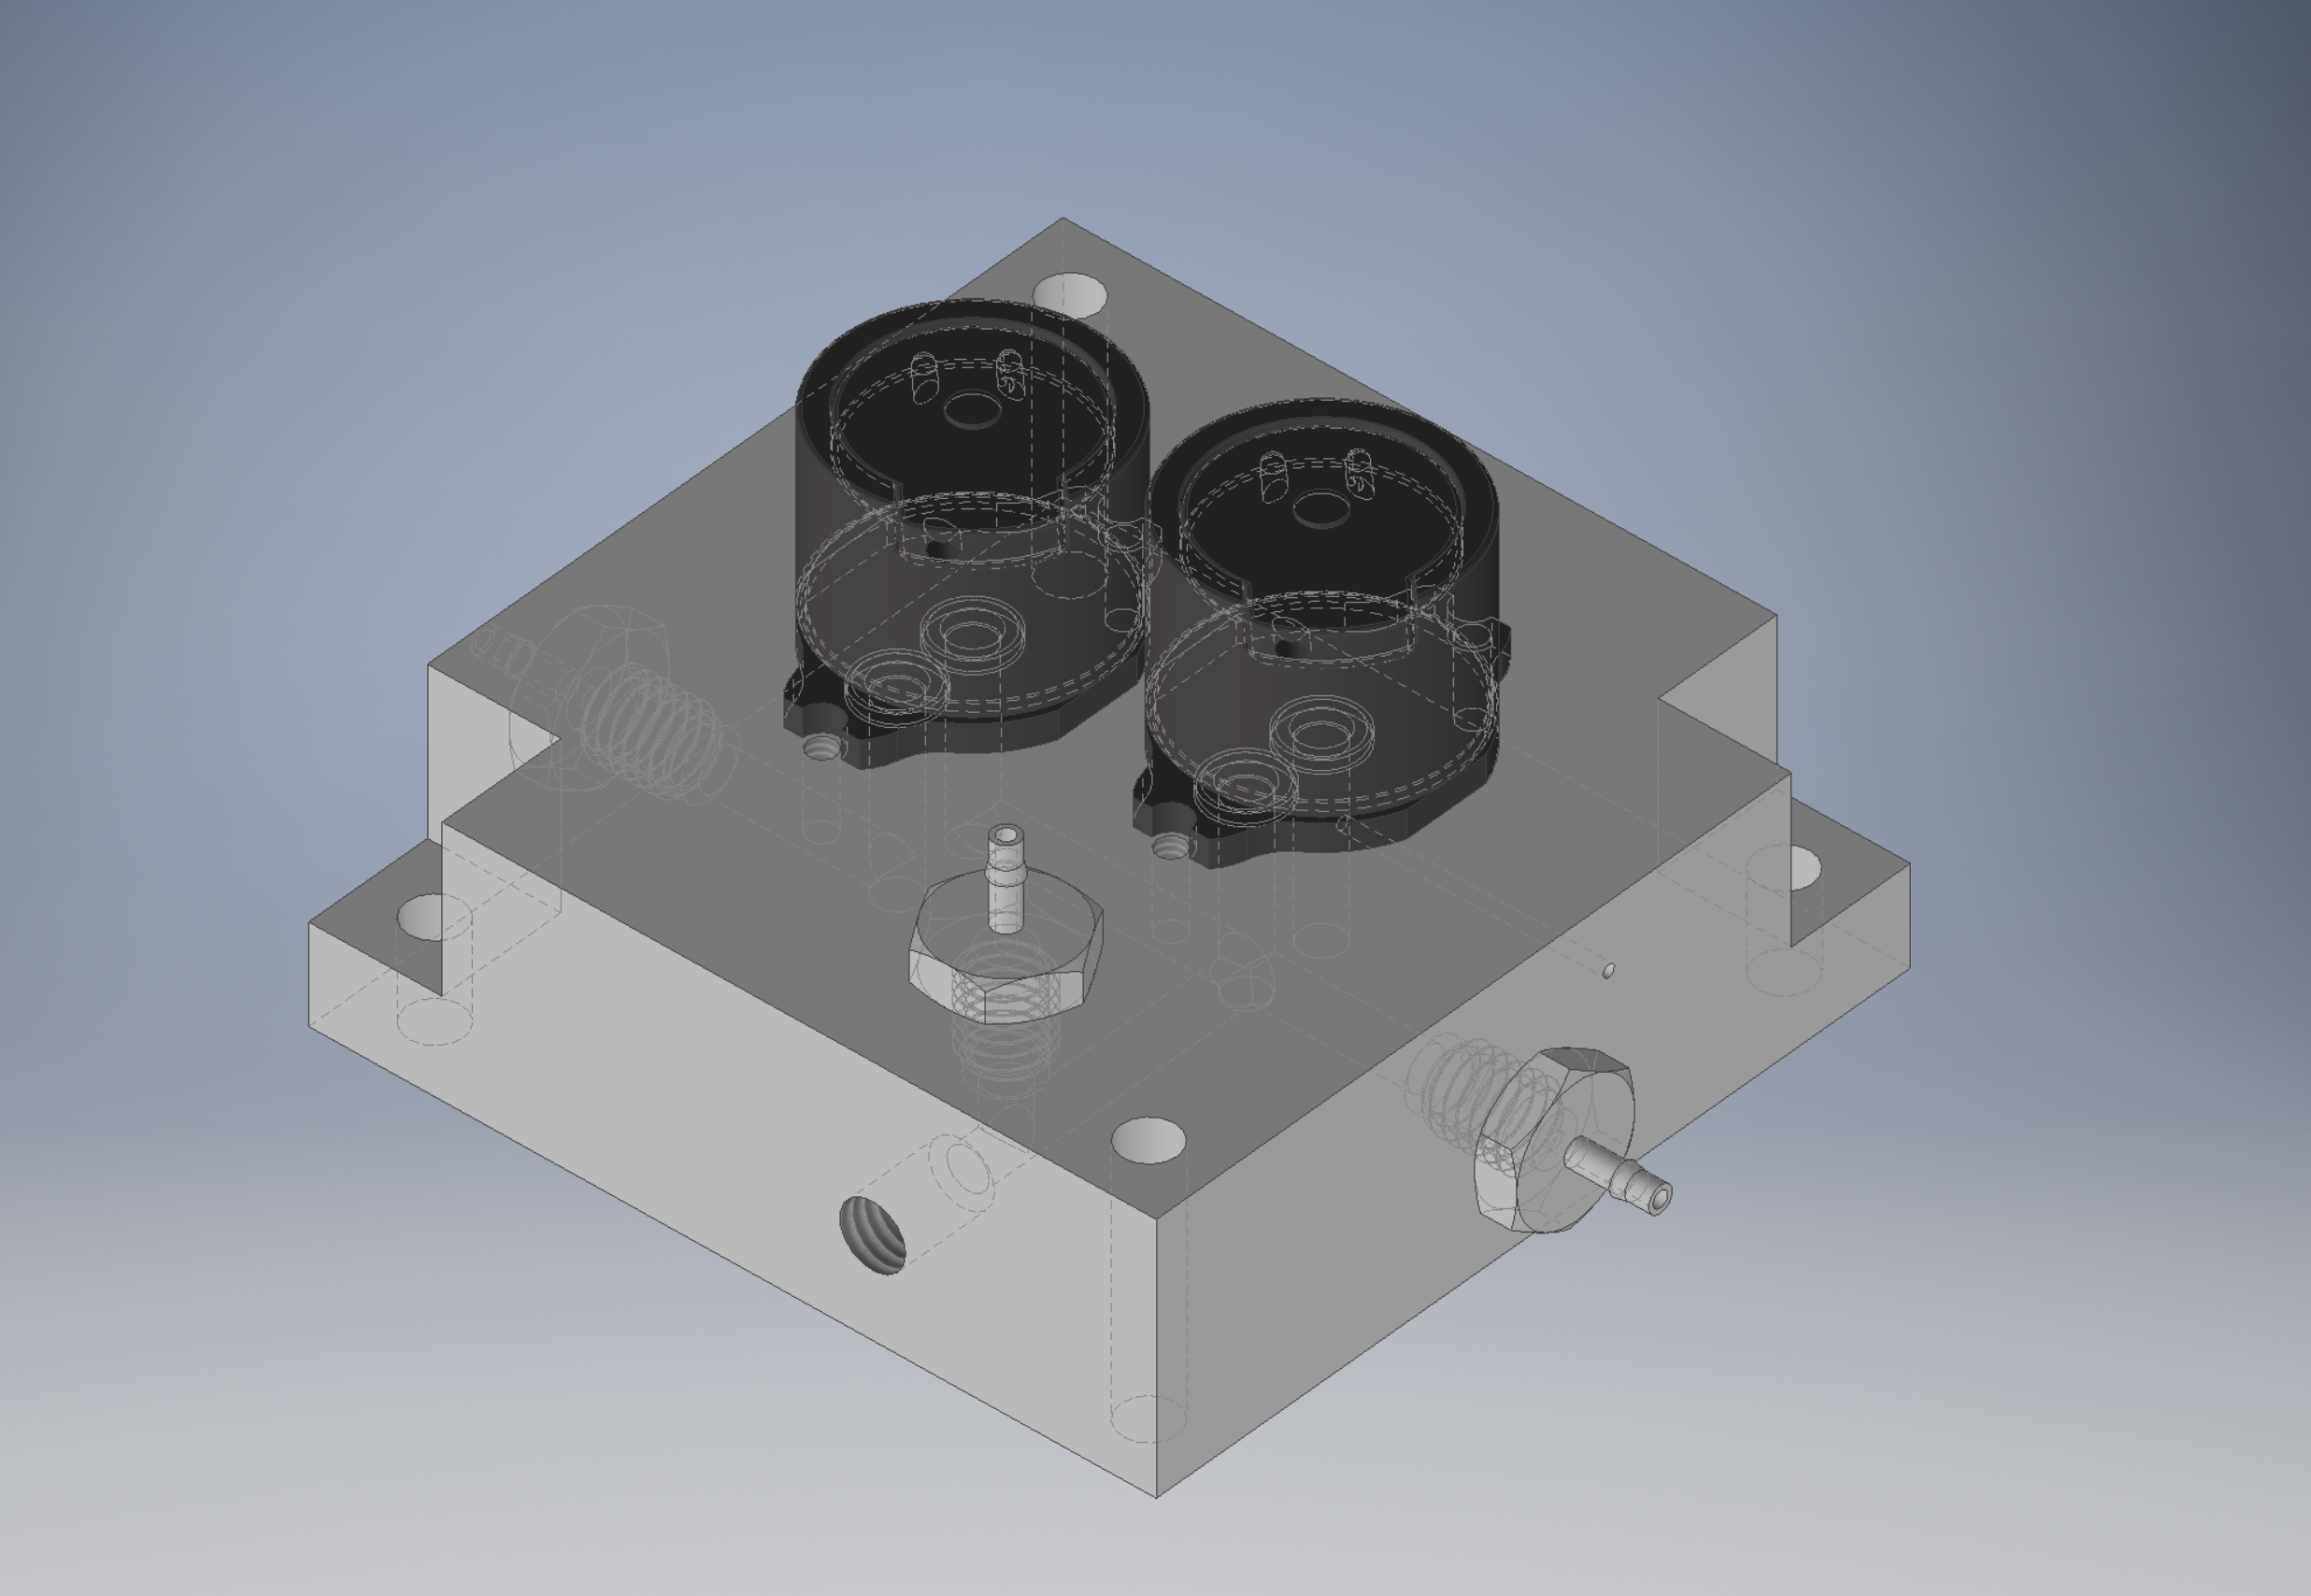
04/22/2018 at 19:15 • 0 commentsAlthough the pressure regulator will work just fine if it is assembled like my first prototype (see previous log), I want a cleaner, more integrated solution. That means designing a manifold, which will be a block of machined aluminum with ports for the input, output, pressure sensor, and valves.
It must be possible to make it with a mill, maybe even just a drill press. It should also be as small as possible while still leaving space for the two valves, the pressure sensor, and a PCB which will house a microcontroller along with all the components and connectors needed to drive this thing.
The design is not finalized yet -- I will need to design the PCB first, and make sure that everything will fit as intended -- but here is my current idea for the manifold:
The barbed connector on the right is the outlet. The one on the top is to connect tubing to the pressure sensor. The threaded hole on the left face will be plugged; it's just there to make it possible to drill the hole for the top barbed connector. Hidden on the left-back side is the inlet connector.
This may be a bit more clear with the hidden edges visible:
![]()
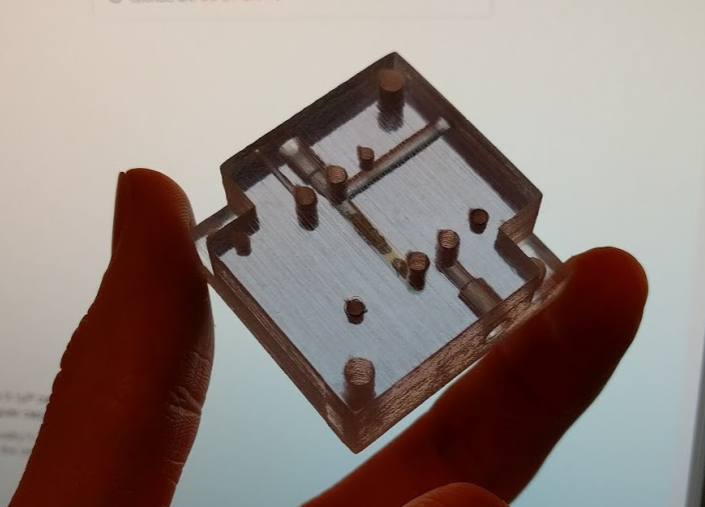
Before I had gotten this far, I made use of our university's makerspace (think[box]) and their fancy 3D printer that can print translucent material, to have a better idea of what the manifold would look like, and weed out any glaring errors. This earlier version is a little smaller (38 x 38mm rather than 50 x 50), and didn't include the top-side connector for the pressure sensor:
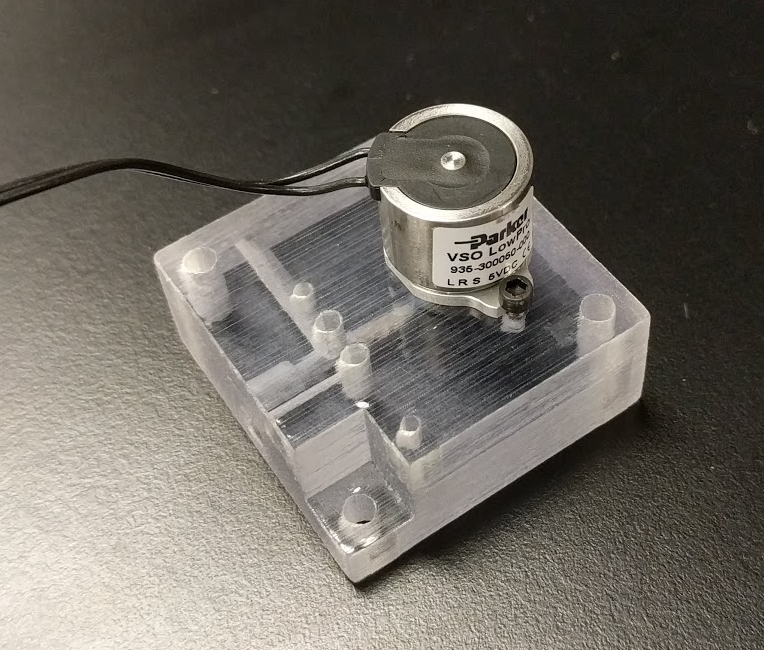
Besides the small amount of support material that didn't dissolve, it looks great and is very helpful in visualizing what goes where. I am waiting on more valves to arrive, but here is what it looks like with the one proportional valve I currently have:
I still have to refine some parts of this design, which will be easier to do once I have finished designing the PCB. Eventually, I want the PCB to stack on top of the valves. I am also trying to lay it out in a way that makes it possible to stack these regulators. They will end up being a little under 50 x 50 x 50 mm^3, so stacking one on top of another would be useful at least in my application (where they will reside in a box ~130mm tall).
-
First prototype
04/20/2018 at 16:10 • 1 commentIn order to validate the concept, I bought a pressure sensor and two solenoid valves (see bottom of this post for details). The pressure sensor is a fancy Honeywell model that includes electronics to amplify the signal, and transmit the measured pressure over SPI. This makes it super easy to use, as there are just a few wires to connect; no amplifier to design, not much to troubleshoot, and nothing to calibrate.
For the solenoid valves, as alluded to in the project description, I got one proportional valve and one non-proportional (i.e. open/close) valve. Proportional valves are necessary to smoothly increase the amount of air that is let in (since they can be opened anywhere from 0 to 100%), but I thought I could get away with a cheaper (35$ vs 70$) valve for the exhaust. Since the exhaust only opens every now and then to correct for overshoots and to release pressure when the setpoint is lowered below the current pressure, I thought a trade-off in precision might be ok.
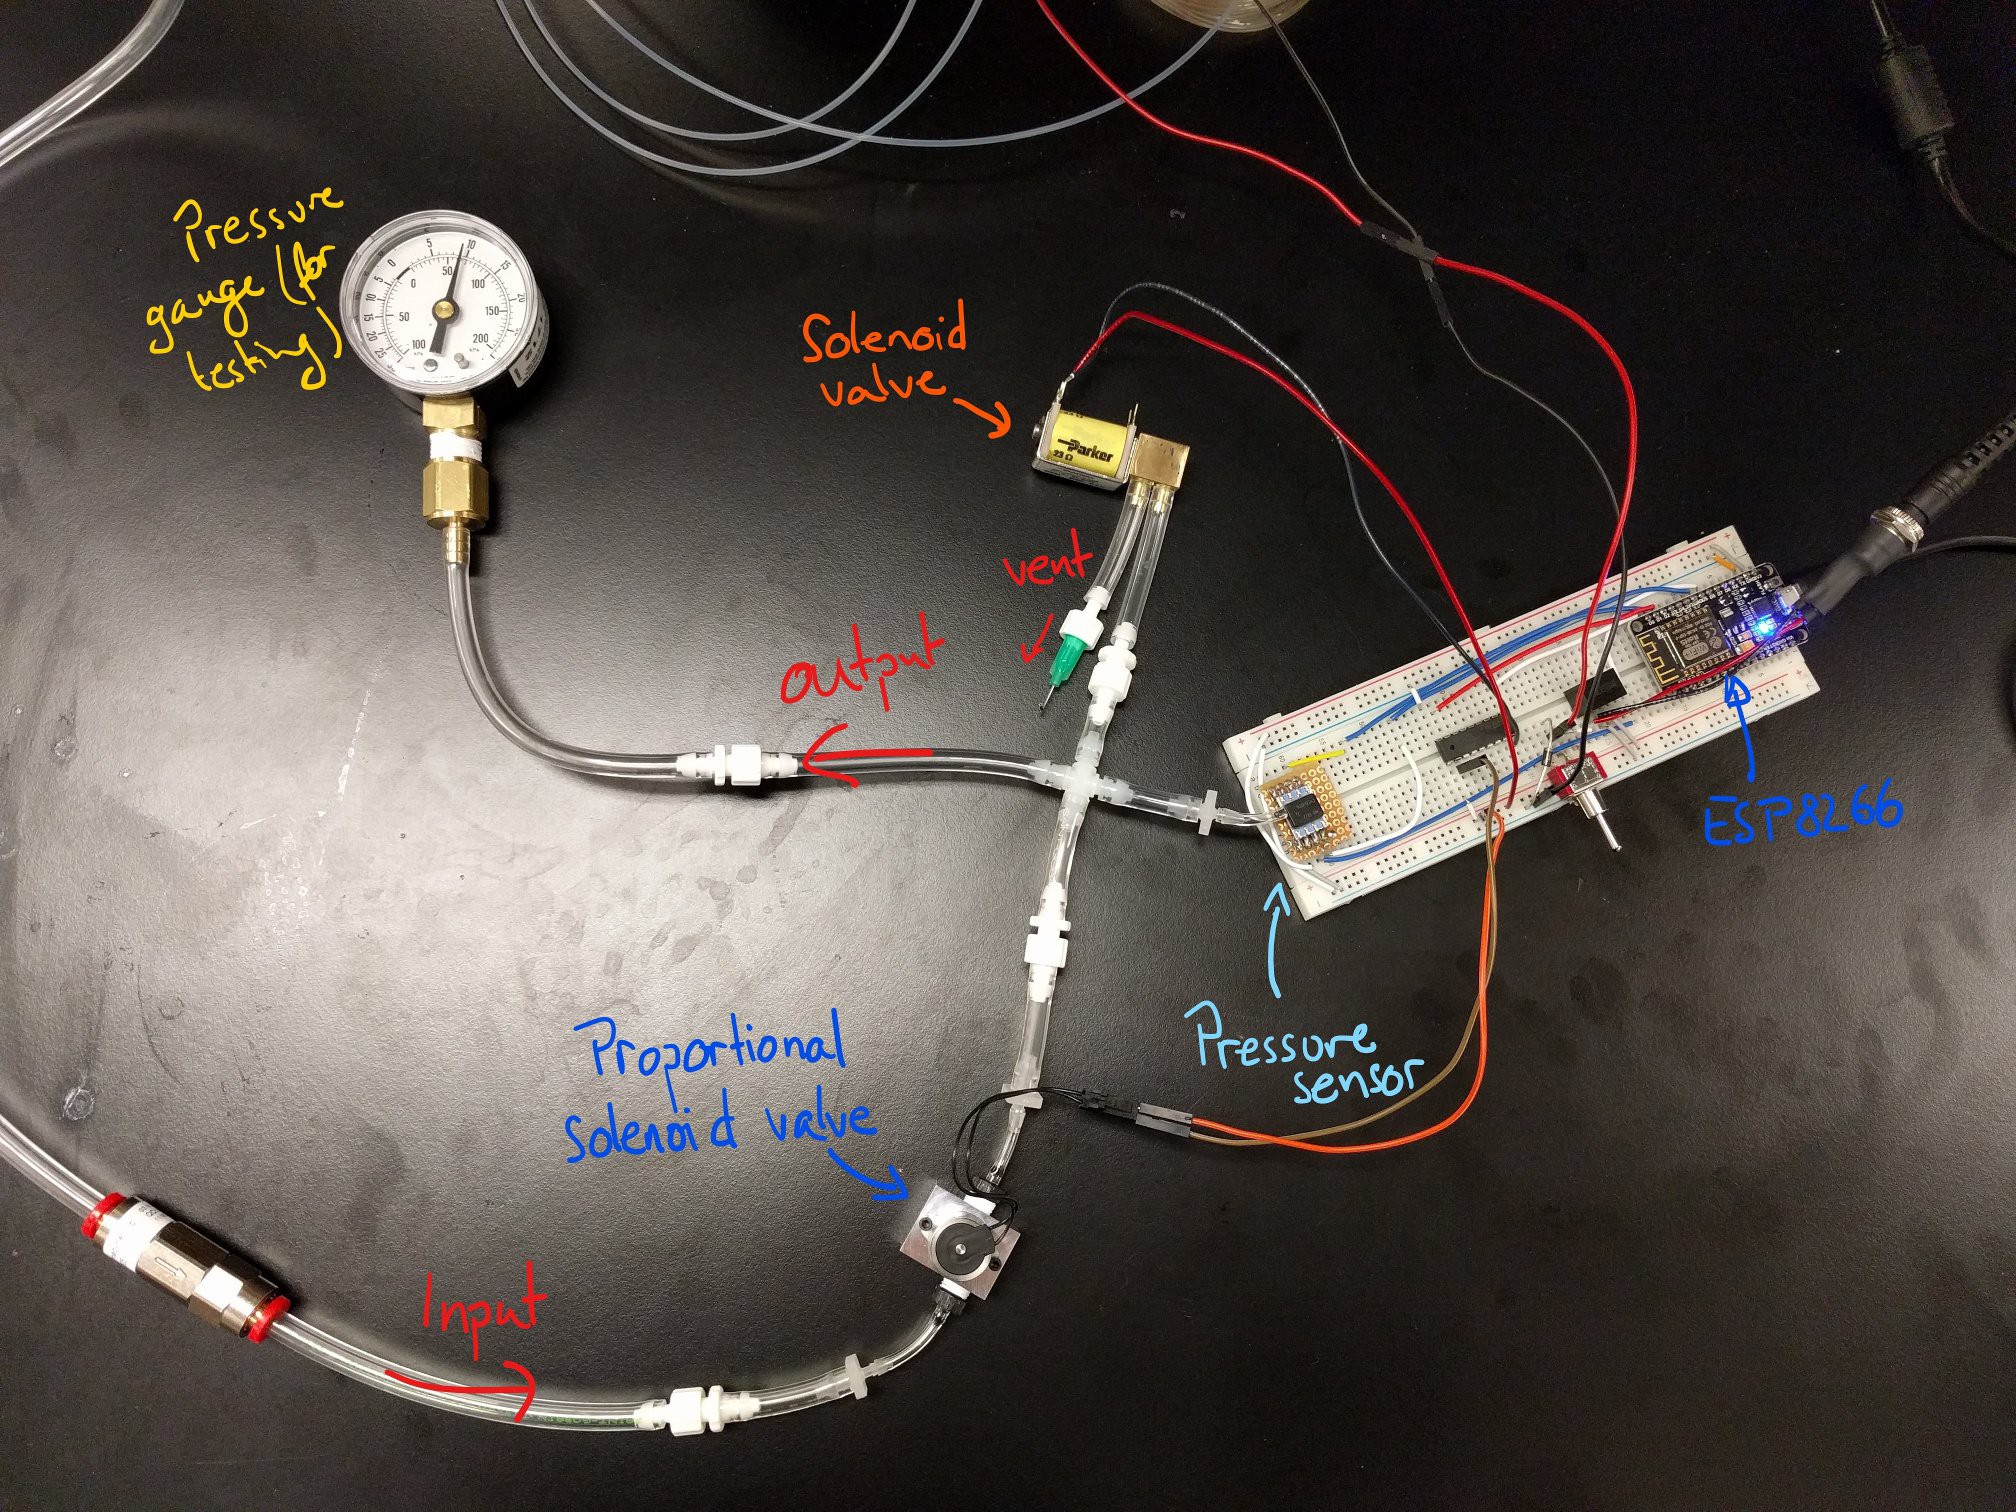
So, once I had tested each part individually, making sure I could read pressure and control the valves with an ESP8266 I had on hand, I dug into my collection of tubing and fittings to put together a first prototype:
![]()
The pressure gauge here is for testing purposes; this is where you would plug in whatever you need pressurized. In my case, it will be a bunch of solenoid valves connected via small tubes to a microfluidic chip, with mostly-closed channels. Therefore, the sealed output here is actually quite close to my intended application, which will consume little to no air.
Out of frame is a 12V diaphragm pump, which provides the pressurized air (at up to ~25 psi = 1.7 bar). The switch sticking out of the breadboard, on the right, turns it on and off. A check valve placed between the pump and the inlet valve smooths out the supply somewhat, and holds the pressure downstream even when the pump is turned off.
On the software side, I made use of the Arduino PID library. The output is clamped between -1 and +1. Positive values open the inlet valve (which is controlled by PWM, so analogWrite(0) closes the valve, analogWrite(512) opens it half-way, and so on).
For negative values, it is a little more tricky. The vent valve can be only fully closed or fully open, and it vents quite a lot of air every time it is open, even for just a few milliseconds (it takes ~25ms to open it and close it). So if the output of the PID controller is, say, -0.01, and we are just above the setpoint, I don't want to vent so much air that we drop to 50% of the setpoint. I am dealing with a non-linear, non-symmetric system so a simple PID controller won't work. My McGyvered solution was to set a threshold for opening the vent: if the output of the PID is below that threshold (arbitrarily set around -0.5), the vent valve is opened.
This did work to some extent, and rapid pressure deflation is easy to achieve; however, fine control is not so easy. Pressure will often swing wildly around the setpoint for a second or two before stabilizing, and there is no good way to reliably get close to the setpoint with this setup. I would welcome any suggestions to improve control of this sort of system, by the way.
Below is an example of proportional-only control (i.e. Ki = Kd = 0), working out fairly well:
![]()
And an example of it working out slightly less well:
![]()
The problem is that even a short opening of the vent leads to a big drop in pressure, making fine adjustments difficult.
I was actually able to alleviate the issue somewhat by placing a very small restriction on the vent, which reduces the flow rate out of the vent and thus the pressure drop whenever the vent is opened. There are still considerable spikes though. I think a better handling of PID output (allowing both the inlet and the vent to be open at the same time, for example) could help even more.
Still, the easier solution is probably to place a proportional valve on the exhaust, which is the solution I have decided to go with for now. This increases the cost of the regulator by ~35$, but it should be much more robust, and easier to develop. I may come back to this simpler setup later, however.
Components used
For this prototype, I used:
- Parker VSO LowPro proportional valve (935-300050-000)
- Parker Series 11 normally-closed valve (991-000316-008)
- Honeywell HSC series pressure sensor (3.3V, SPI) (HSCMRNN030PDSA3)
- ESP8266 (later, an ESP32) dev board
- Recom R-78 voltage regulator (12V->5V)
- ULN2803 to power the valves
Electronic pressure regulator
Closed-loop air pressure control that can talk to a microcontroller
 Craig Watson