Austin Marandos
-
Human Computer Interface Challenge
07/21/2018 at 06:14 • 0 commentsSince this challenge task is closely related to my project I thought I might write a few lines about how my project acts as an 'innovative interface for humans to talk to machines.'
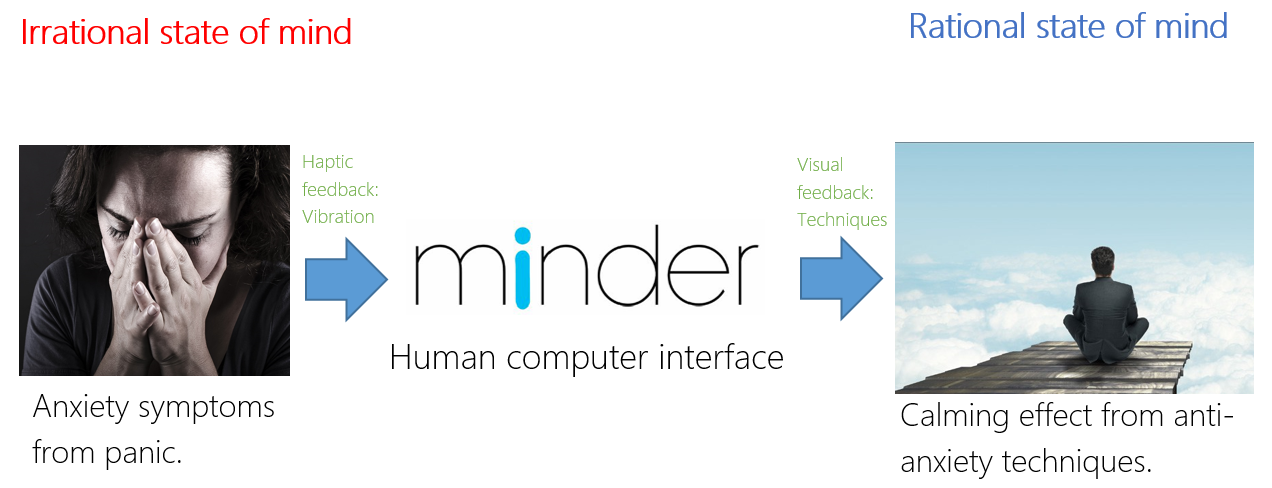
The minder smart watch at its core is a human computer interface. Simply put, it is a device that measures your body's current state and determines whether you are experiencing anxiety or panic, from there it provides the user with techniques and activities to lower their anxiety and panic. This is done through both visual and haptic feedback.
![]()
Minder attempts to make this process more natural and easy to use. By incorporating a simple design the watch draws little attention to the user allowing them to naturally activate the anti-anxiety mode. Further the use of visual techniques displayed on the large OLED screen makes this process much easier and clear.
-
Circuit Diagram
06/16/2018 at 15:10 • 0 commentsI have finally created a clear circuit diagram using the Fritzing circuit creator software. I will add this to the instructions. Please note this is the circuit schematic for version 1 of the Minder smartwatch. Also some of the parts were unavailable on the software so I used generic boards to represent them (eg: OLED screen).
Also the RGB leds are already on the Qduino board, they need to be removed by de-soldering them off the board and delicately using small pliers to pull them off. Alternatively you could buy separate RGB leds, but why not use what's already there? : )
![]()
-
Update
06/07/2018 at 05:48 • 0 commentsSorry for the lack activity, I am in the middle of finals at university and have not had time to work on the project. I will continue working on the project once finals are over next week.
-
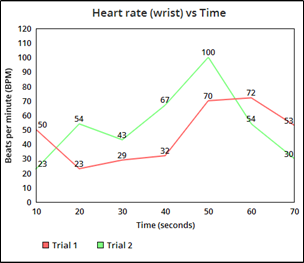
Heart rate sensor testing
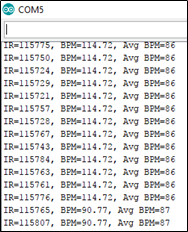
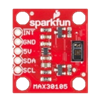
04/23/2018 at 10:25 • 0 commentsOne of the main features and aims of the minder smart watch is to be able to detect a panic attack. One of the main symptoms of a panic attack is a sudden increase in heart rate. The positioning of the smart watch on the user's wrist meant that the only way to detect heart rate would be via readings from the user's wrist. In-order to calculate the accuracy of such a reading I tested heart rate readings from both the finger and wrist (since the Sparkfun sensor I used recommended readings from the finger over the wrist). I conducted the test using the Sparkfun MAX30105 heart rate sensor.
The readings were taken from the Arduino IDE serial monitor:
MAX 30105 Test:
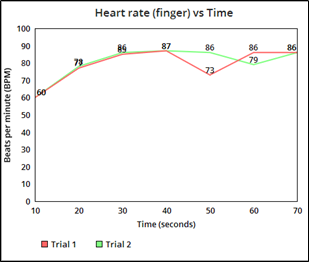
Trial 1: Heart rate reading on finger
Time (secs) BPM 10 60 20 77 30 85 40 87 50 73 60 86 70 86 Trial 2: Heart rate reading on finger
Time (secs) BPM 10 60 20 78 30 86 40 87 50 86 60 79 70 86 Graph:
Trial 1: Heart rate reading on wrist
Time (secs) BPM 10 50 20 23 30 29 40 32 50 70 60 72 70 53 Trial 2: Heart rate reading on wrist
Time (secs) BPM 10 23 20 54 30 43 40 67 50 100 60 54 70 30 Graph:
Clearly the heart rate readings from the wrist are very inaccurate as opposed to the finger readings. This is a major issue as it does not enable the watch to take accurate heart rate readings and subsequently alert the user of an upcoming panic attack. After doing some further research wrist heart rate readings appear to be very inaccurate even when used by some of the most advanced smart watches on the market (such as Apple watch and fitbit) and therefore I will need to further develop my own heart rate monitoring system.
-
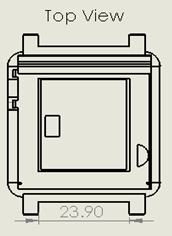
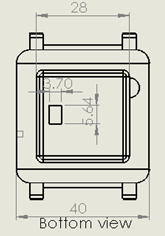
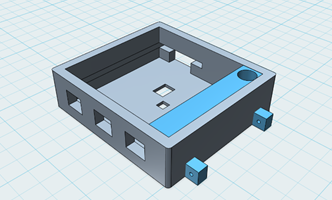
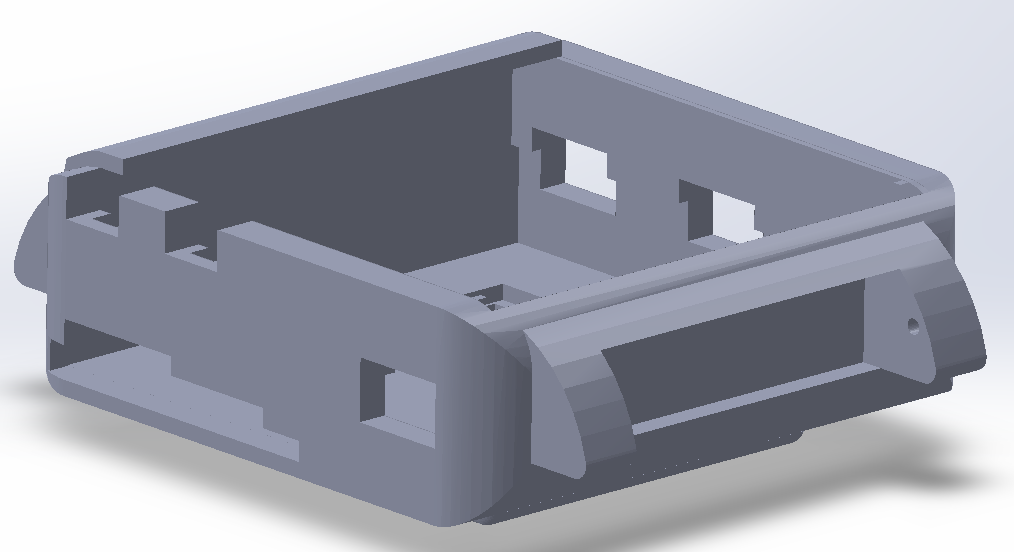
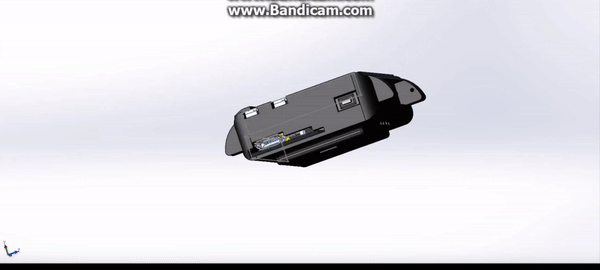
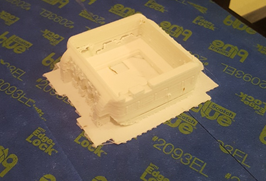
CAD development and 3D printing
04/23/2018 at 10:02 • 0 commentsOnce the final design was established I began to develop the 3D model using Solidworks.
Isometric drawing:
3D view
![]()
I also created/downloaded the circuit components and ensured that they fitted into the watch:
![]()
Once everything looked good it was time to print!
**Note: I used both white and black PLA for all my prototype cases (I created many due to problems printing and imperfections).
-
Electronics and pricing
04/22/2018 at 01:10 • 0 commentsThe electronics used for the minder smart watch were sourced from various different suppliers.
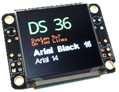
1. OLED screen: I choose a large 128X128 pixel OLED screen from the Australian electronics company Freetronics. I had used this screen in a previous smart watch project and it proved to be very versatile and reliable. (https://www.freetronics.com.au/products/128x128-pixel-oled-module#.WtvdWsiFPIU)
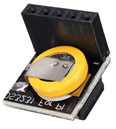
2. RTC module: for the RTC I decided on using the DS3231. This is mainly due to the fact that the arduino that I used for the project was rated at 3.3 volts. (https://www.banggood.com/DS3231-Clock-Module-3_3V-5V-High-Accuracy-For-Raspberry-Pi-p-938038.html?rmmds=buy&cur_warehouse=CN)
3. Processor: For the main arduino board I used the Qduino mini V2 from Sparkfun. This board has a built in charging capability and also is very small allowing me to easily fit it into the 3D printed case. (https://www.sparkfun.com/products/13614)
4. Battery: I used a 3.7V 500 mah Lipo battery from Adafruit to power the entire watch. (https://www.adafruit.com/product/1578)
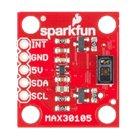
5.Heart rate sensor: For the heart rate sensor I used Sparkfun's MAX30105 board. This board also comes with other features other than the heart rate monitor such as; distance, particle detection and more. (https://www.sparkfun.com/products/14045)
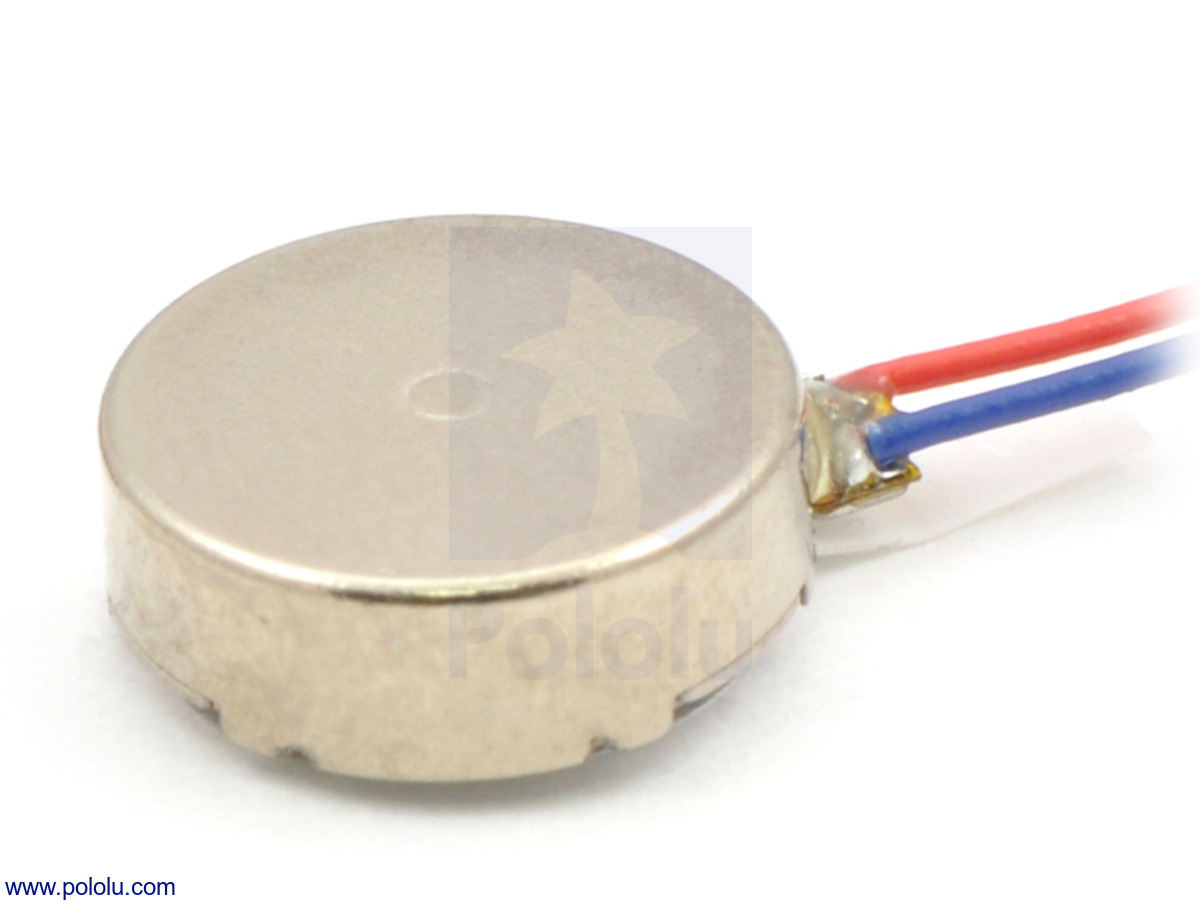
5.Vibrating motor: To alert the user of a panic attack and for haptic feedback I used a small vibrating motor from Polulo (https://www.pololu.com/product/1638)
![Image result for pololu vibrating motor]()
The overall price of the electronics:
Component Price ($USD) Quantity Qduino $29.95 1 Micro tactile buttons $0.50 4 Freetronics OLED screen $38.37 1 MAX30105 Sensor $12.95 1 Micro vibrating motor $3.49 1 Enameled copper wire $2.40 1 Micro SD card (for OLED) $11 1 TOTAL PRICE $98.66 -
How Minder is different?
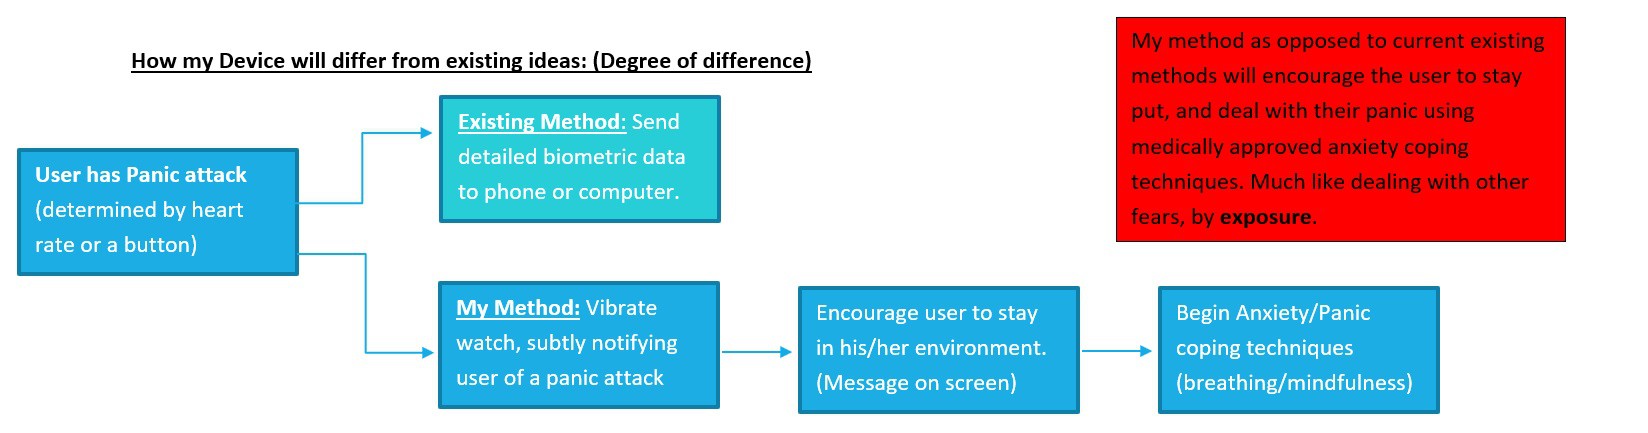
04/21/2018 at 13:16 • 0 commentsSomething in common with current existing technologies is that they do not provide the user with coping strategies and instructions on how to deal with their panic/anxiety attack. Similar anti-anxiety smart watches are very good at monitoring the symptoms of a panic attack however from personal experience and from professional advice from psychologists, the only way to lower the severity of a panic attack is to sit with the symptoms and using your breathing and mindfulness strategies deal with the panic attack. Monitoring is very useful for both the user and their psychologist, however personally applying anti-anxiety techniques whilst experiencing a panic attack is perhaps the best non-drug related method of dealing with anxiety and panic disorder. My device will set out to do just that.
All of the pre-existing technologies are also expensive (eg: Apple watch). Thus making such devices out of reach for many people.
My project will focus on exposure. One of the most efficient ways of dealing with anxiety is to not respond to the ‘fight or flight’ response. That is, if you are experiencing a panic attack you need to stay in the environment in which the panic occurred and using your techniques (given to you on the watch) wait until the panic lowers down to a stable level. This ensures that if the user goes back to the same environment in the future their anxiety levels will be much lower.
![]()
-
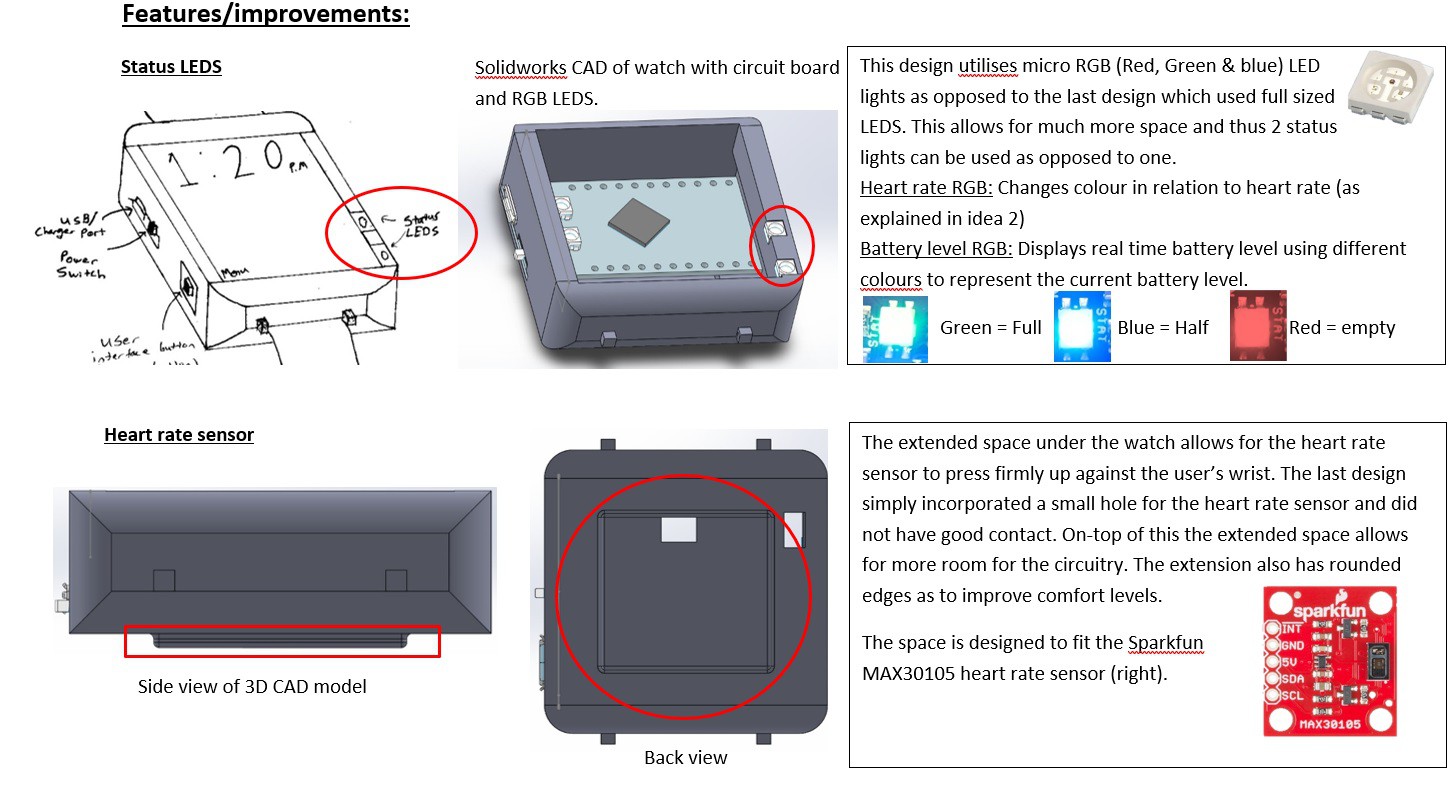
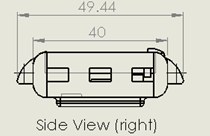
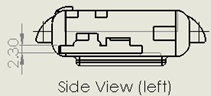
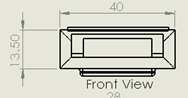
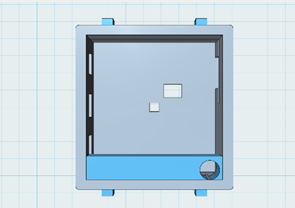
Final design concept
04/21/2018 at 13:12 • 0 commentsThe final design incorporated a curved rectangular shape whilst still using all of the same electronics mentioned in the initial design. This shape aims to improve comfort and also improve on the aesthetical qualities of the watch. The previous design lacked on comfort since its sharp rectangular edges cut into the wrist, this design will solve this problem. This design also incorporates new features including;
- Slots for 'status' LEDS which will showcase the battery level of the watch and the heart rate of the user.
- Extended section for the heart rate sensor which will press up against the wrist to maintain skin contact and thus allow for accurate readings.
Design features and CAD:
![]()
Isometric CAD drawings:
-
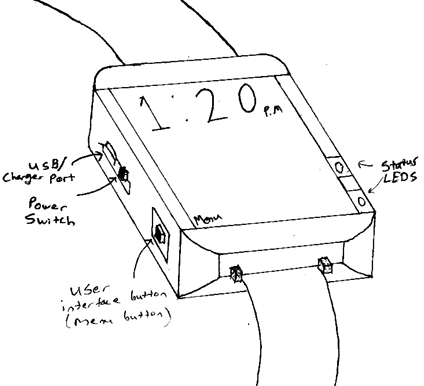
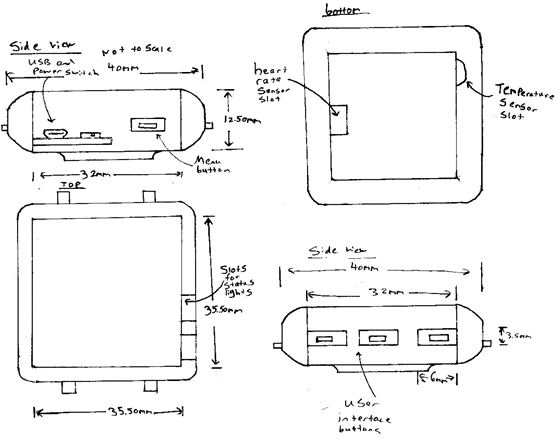
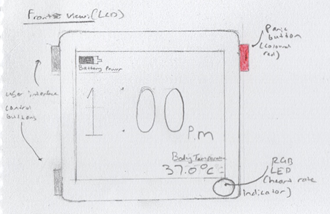
Initial designs and concept generation
04/21/2018 at 13:01 • 0 commentsThe minder smart watch went through various different renditions to reach its final state.
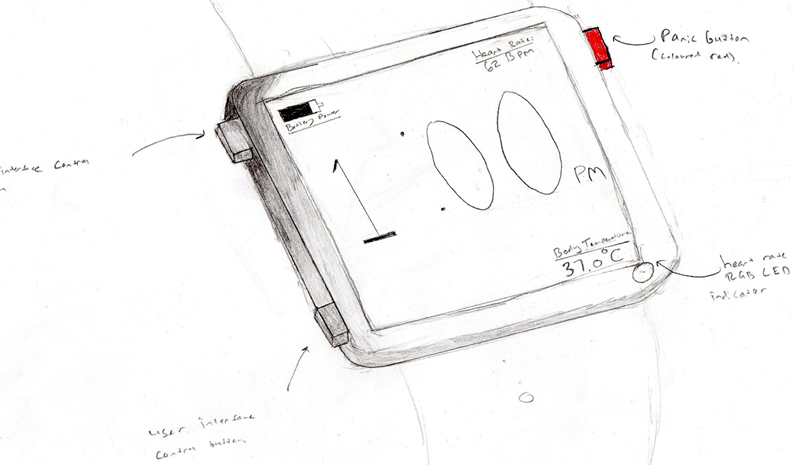
Initially a simple rectangular shape was designed.
This design incorporated an OLED (organic light-emitting diode) screen which projects various information, including time, body temperature, heart rate and anxiety/panic coping techniques. The design allows the user to take full control of the device through the use of user buttons on the side of the watch. The screen allows for multiple anxiety coping techniques to be utilised, if the user is experiencing a panic attack he/she can press the ‘panic button’ which then initiates the first program, if the first technique does not work and panic still persists then the user can press the panic button again and the next technique will be projected onto the screen, this will continue until the panic has dissipated.
CAD designs of initial shape:
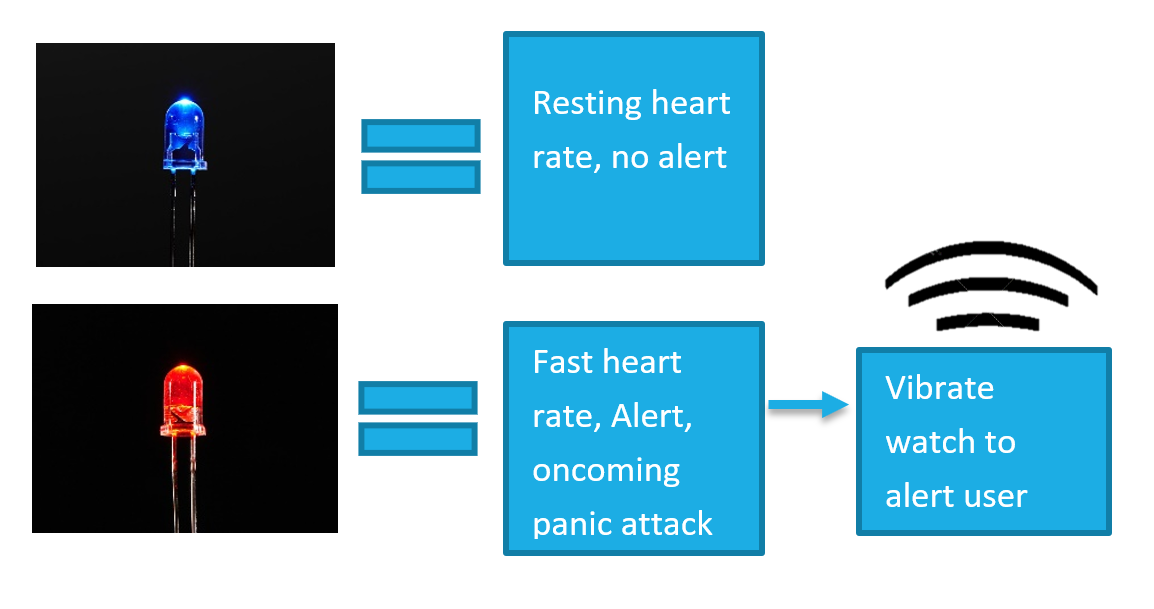
This initial design also introduced the idea of using an RGB LED to represent the users change in heart rate. A blue light would indicate a norminal heart rate whilst a red light would indicate a fast heart rate and would also vibrate the watch, warning the user of an upcoming attack.
![]()
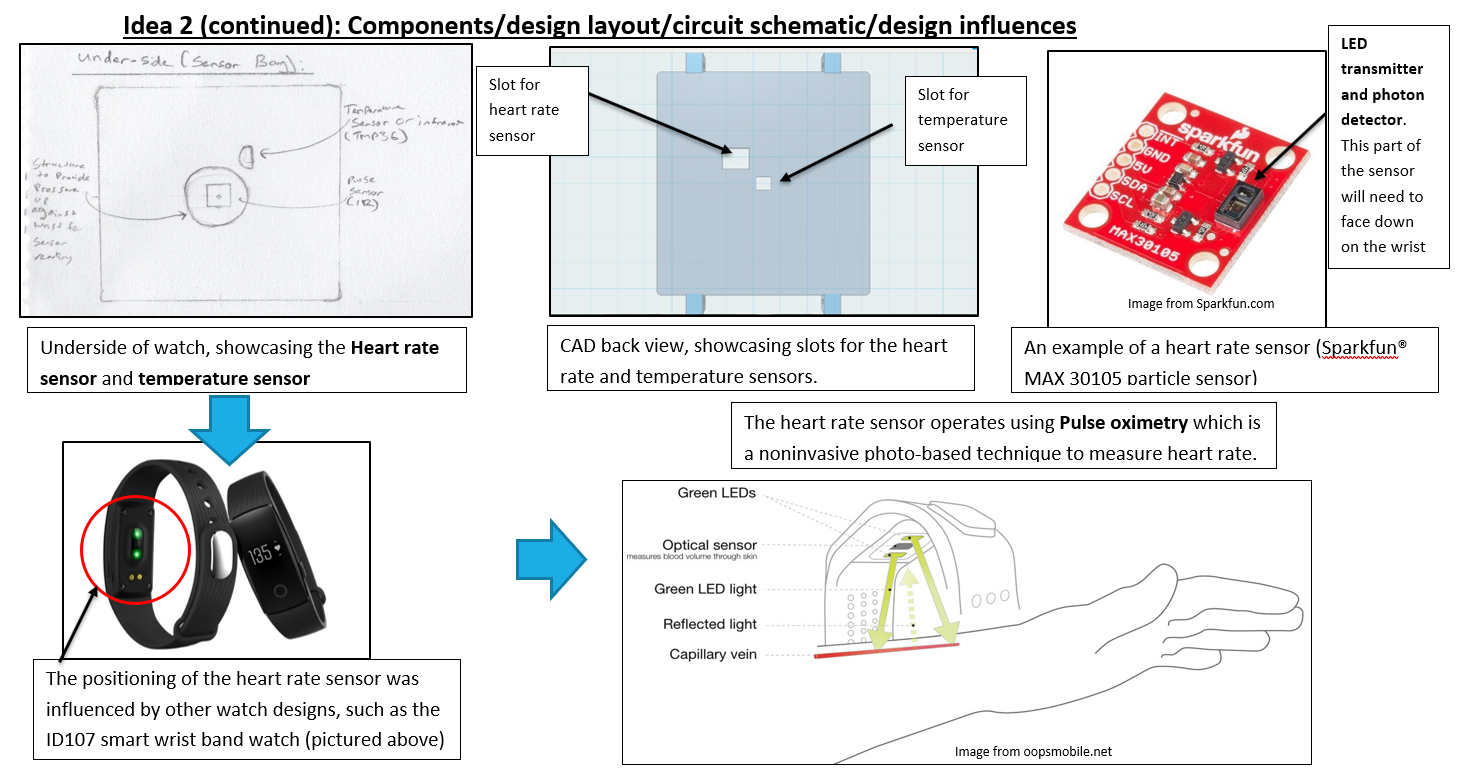
The positioning of the heart rate sensor was also worked out during this phase, as seen below (excerpt from my design folio)
![]()
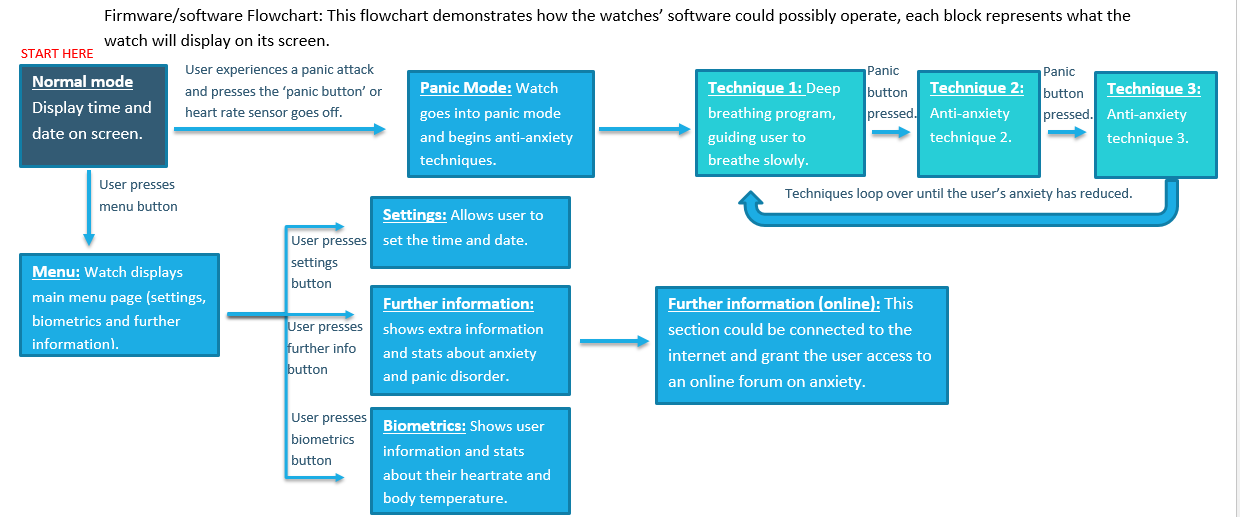
The general layout of the software and how the anti-anxiety techniques would operate in-conjunction with a fully operational smart watch are showcased in the flow chart below:
![]()
-
Foreword
04/21/2018 at 12:47 • 0 commentsBackground info:
The minder smart watch was the product i created for my Year 12 Design and technology major work (2017 -- now). Design and Technology is a subject in the Australian HSC (higher school certificate), and a major part of the subject is creating and developing a major work which can either be a product, system or an environment. This project must solve a problem and can either be an innovation of an existing product or an entirely new idea.
Due to the busy nature of my final year at high school I did not have time to record my progress on hackaday. However all of my progress was recorded in a folio (18000 words) which is a major component of the design and technology major project.
Therefore my project logs will reflect the information in my folio.
I have uploaded my folio to the 'files' section of this project, please check it out as it is very detailed and contains a lot of information about the Minder project.
Project recognition:
My project has been recognised outside of my school. My watch was chosen as the top project in the state of New South Wales, and was showcased in both the national art gallery and national science museum (Powerhouse museum) in the annual Shape 2017 exhibition.
Now that high school is finished I would like to make my project open source and share it with the world!
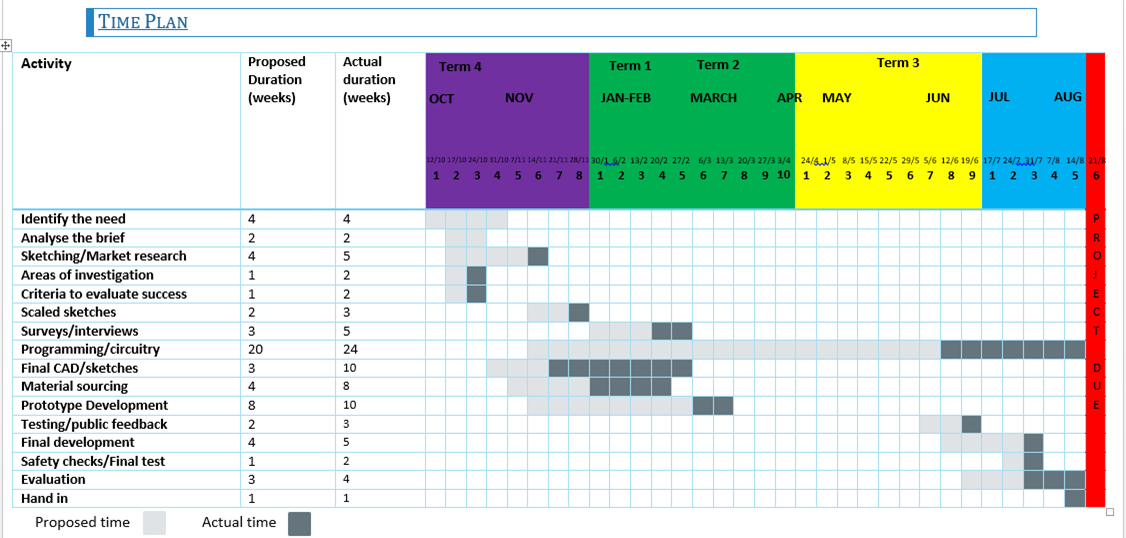
Time plan:
The following is a time plan of the different tasks that I achieved throughout the course of the year. Each of the 'activities' were criteria that i had to fulfill as per the marking criteria of the HSC design and technology subject.
Future/Present status:
Minder is by no means a complete project. By making my material open source I would like to further develop the project and enable others to both create their own watches and improve on my design. The hackaday 2018 prize is a great opportunity for such a collaboration and I would love to see my project grow even bigger than I initially anticipated. :D
Minder
An open source smart watch built for anxiety and panic disorder.


 3. Processor: For the main arduino board I used the Qduino mini V2 from Sparkfun. This board has a built in charging capability and also is very small allowing me to easily fit it into the 3D printed case. (
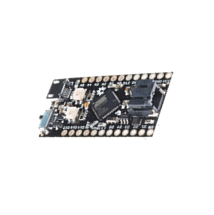 4. Battery: I used a 3.7V 500 mah Lipo battery from Adafruit to power the entire watch. (