 Tim Wilkinson
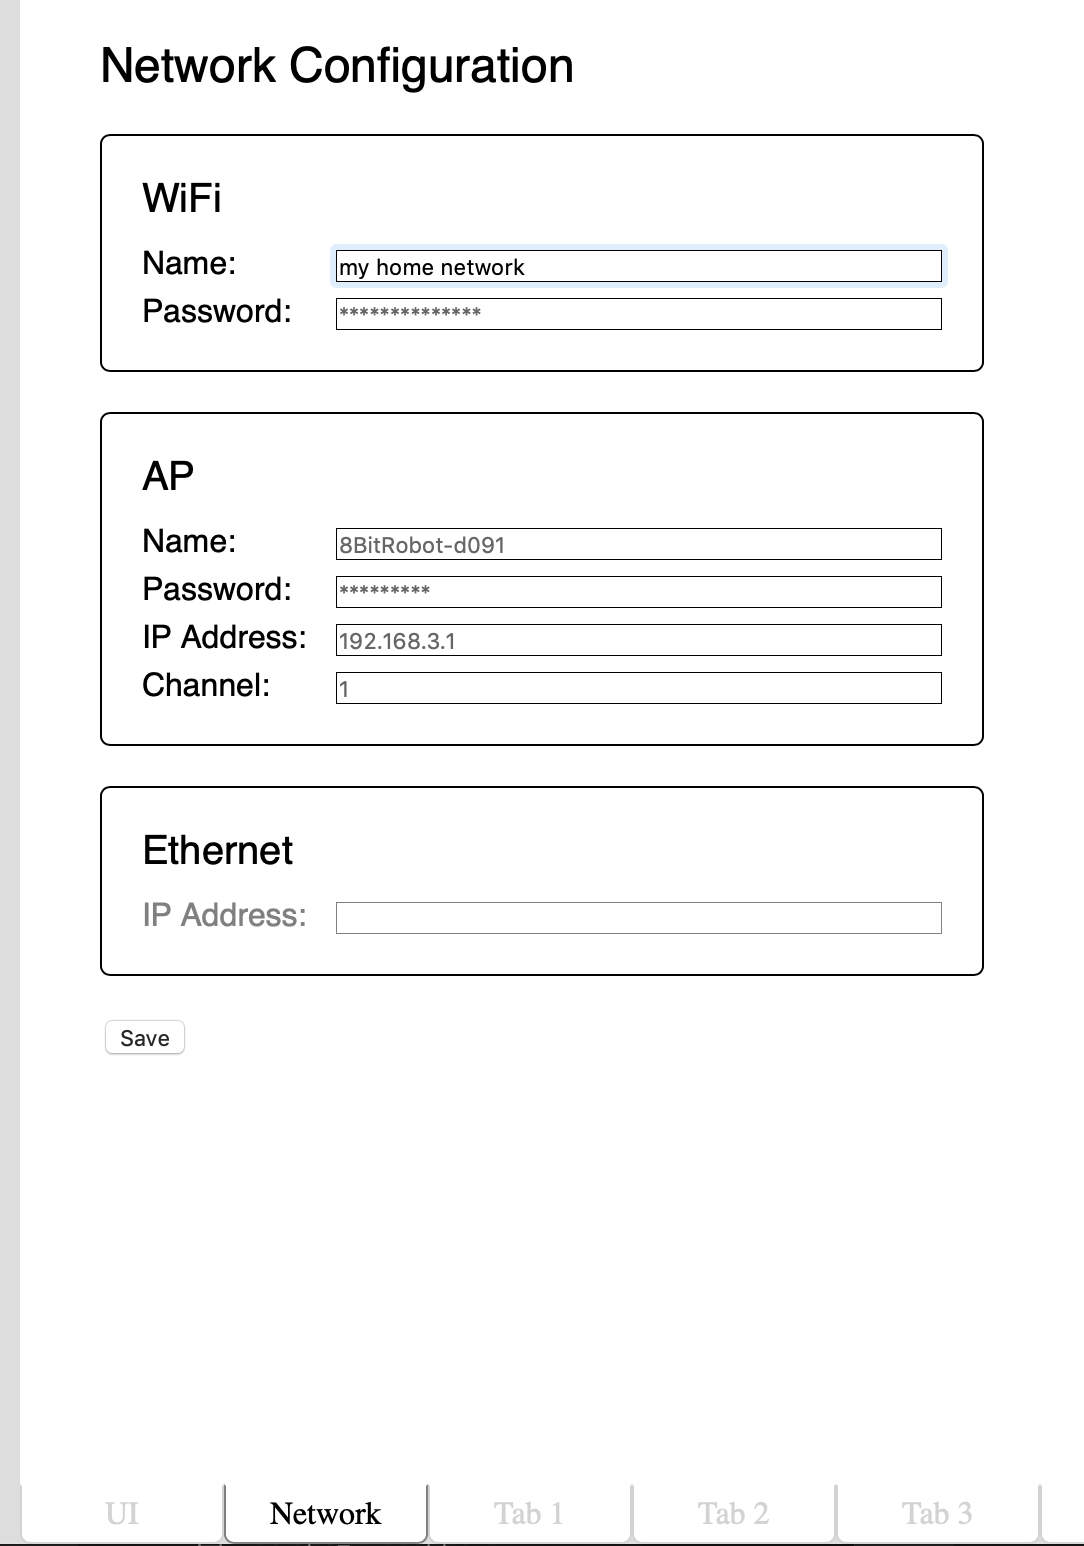 Today, what is probably the last part of the development environment landed; the network configuration tab. Ignoring my excellent visual design skills as demonstrated above, the Network tab allows configuration of the three networks supported by the module:
- WiFi - the wireless connection to a local wireless network (e.g. your home network)
- AP - an access point network allowing you to connect directly to the module (for when you're not at home)
- Ethernet - a wired network if the module detects a USB ethernet device has been connected.
By default the AP network is the one you might use to first configure the board as the network name is visible to any WiFi scanner and the password is well known. From there you might reconfigure that network, or connect the module to your local network (which just makes everything a little easier for later development).
The ethernet configuration defaults to serving addresses to whatever connects to it; ideal for just plugging directly into the ethernet port on a laptop. However, it the address is switched to DHCP it will instead act like any other client device on a shared network, soliciting an address from your local DHCP server.
Discussions
Become a Hackaday.io Member
Create an account to leave a comment. Already have an account? Log In.