Scott Hasse
-
Build testing link
10/10/2014 at 15:41 • 0 commentsIf you're interested to build and test the encryption/decryption device software, build instructions are available at https://github.com/Sector67/nsa-away/blob/master/README.md
Any feedback you can provide is welcome!
-
Code Jam #8, milestone celebration!
10/03/2014 at 12:37 • 0 commentsWe celebrated our semifinal submission milestone at code jam #8, and managed to get a few features (most significantly serial sending for the USB/HID bridge) and defect fixes merged upstream and tested as well. We're hoping we've gotten every i dotted and t crossed!
-
Video/code Jam #7
09/22/2014 at 17:28 • 0 commentsVideo code jam #7 wrapped up last night with a flurry of productive activity. We shot the raw footage we need to edit into the five minute video and worked through a few last-minute integration issues with the USB OTG support and OCR. There are still plenty of small development tasks, but we are sending messages device-to-device using keys from the hardware generator. Expect some code cleanup over the next week as well as some additional documentation!
-
Hardware update - practically everything works!
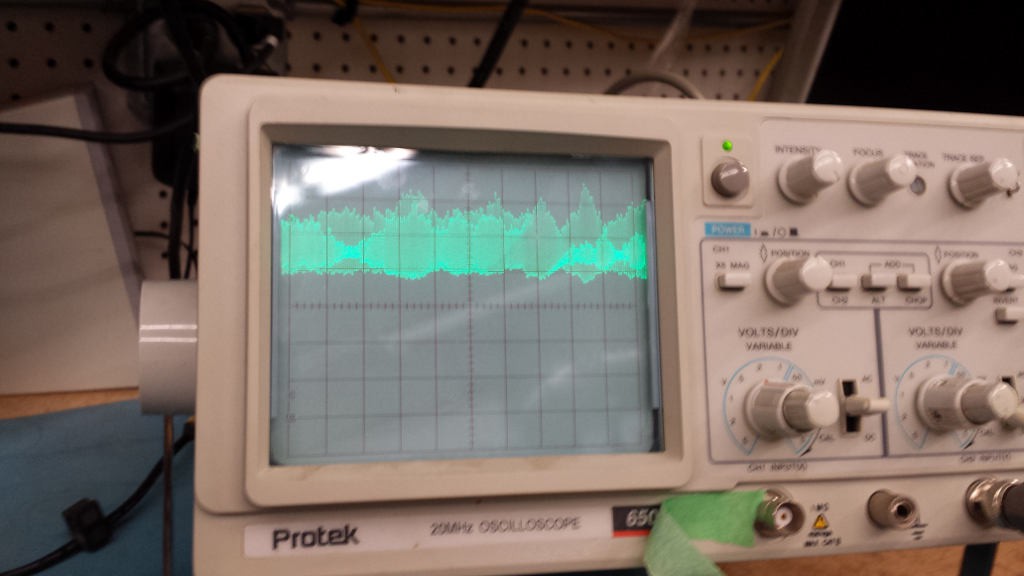
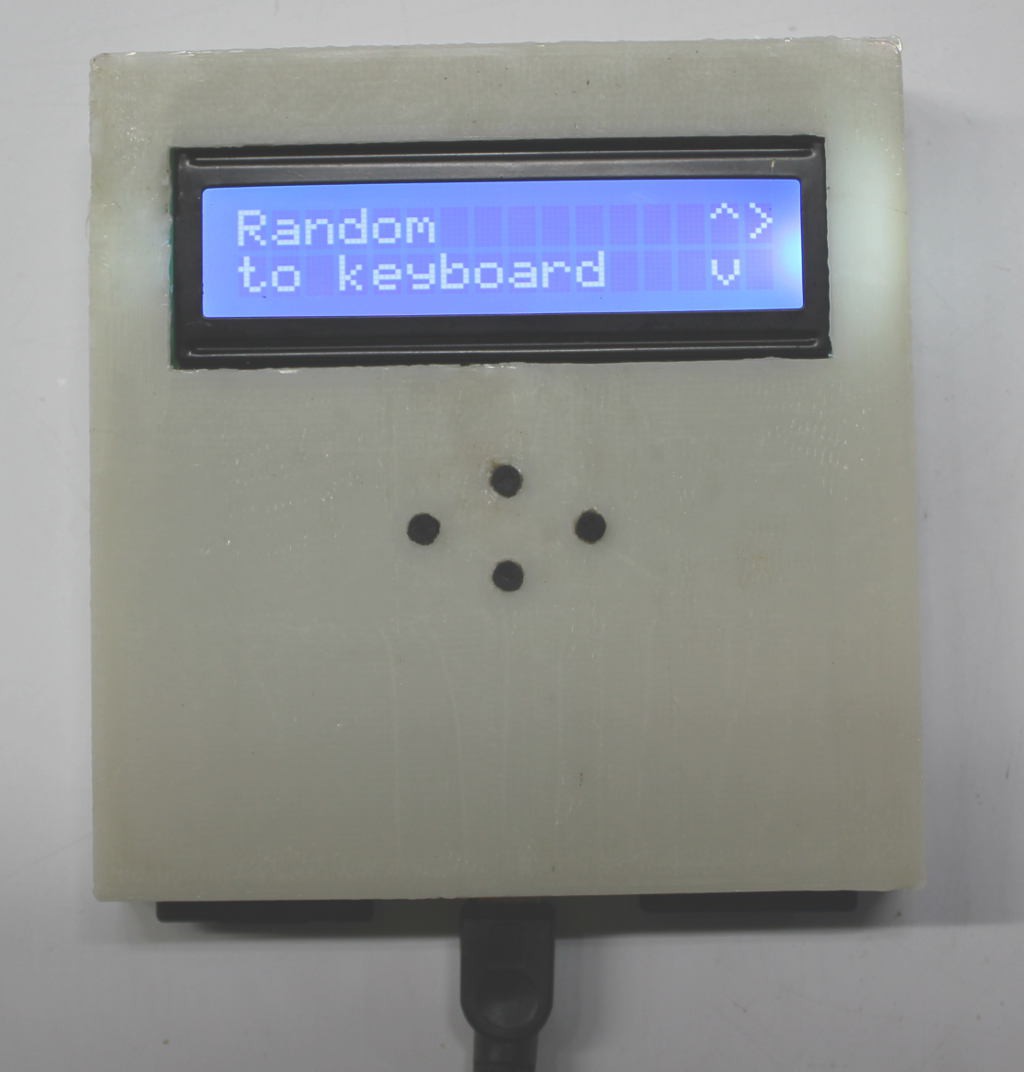
09/21/2014 at 23:59 • 0 commentsRandom Number Generator
I know it's not funny, but the only thing that's NOT working is the hardware random number generator. It turns out my analog-fu and ability to read documentation is lacking. While the current circuit does generate random noise, it's in a very narrow range (20mV peak to peak), and at a random voltage about 1V. I can't do much with it without some amplification and craziness. At least, it'll require a new PCB or some breadboarding with parts I don't have yet. The good news is that I can use the Arduino pseudo RNG TEMPORARILY as a stub until I get real random number generation working. I believe this is completely fair, as I can't have this holding up the rest of the development, and I do have prototypes that show some randomness coming out of my RNG circuit, just not good enough for digital conversion.
![]()
New Part
We had a discussion about how to get the data from the Android device to the computer. One option was having the Android device flash light, which a photodiode would detect. This turned out to be too slow for reasonable data transmission. We didn't want anything wireless, as that would cancel out the idea of the Android having all wireless completely disabled. We decided to go with USB OTG. But instead of the Android connecting to the computer directly, we wanted it to go through our trusted device. This way only one thing plugs in to the computer. To do this we added an FTDI chip; the FT231RS, which can do USB OTG to serial.
The serial was then piped into the hardware, and a new firmware mode was added to allow data coming in from the serial to be sent out through the other USB port connected to the computer as a keyboard. This way we can guarantee that no drivers are needed on the computer, and that it will only ever interface as a keyboard to anything; ensuring that data can't flow backwards into our secure device.
Implementing was a little challenging as I'm essentially out of available pins, and I think there is a conflict with one of the other libraries that prevented SoftwareSerial from working. I eventually rerouted some wires and got Serial1 working, but it was a tough half a day.
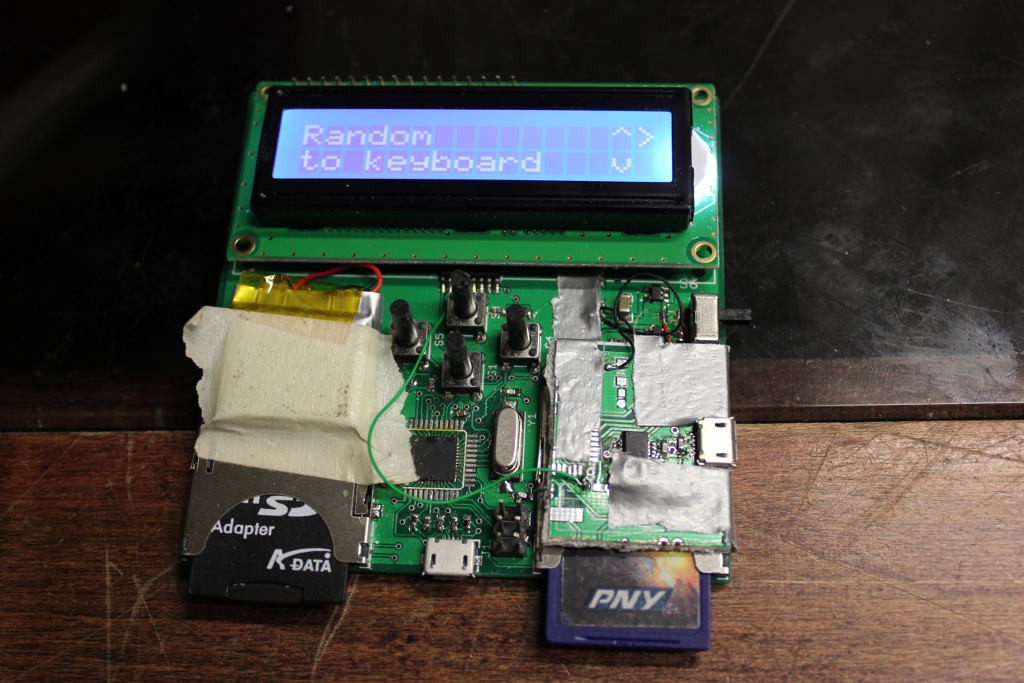
Everything Else Hardware
Everything else is working well. There was a small change necessary on the hardware to get the write protect detection working on the SD cards. Now the firmware can check on the card presence and the write protect tab to make sure that the cards are present and writable before doing anything.
![]()
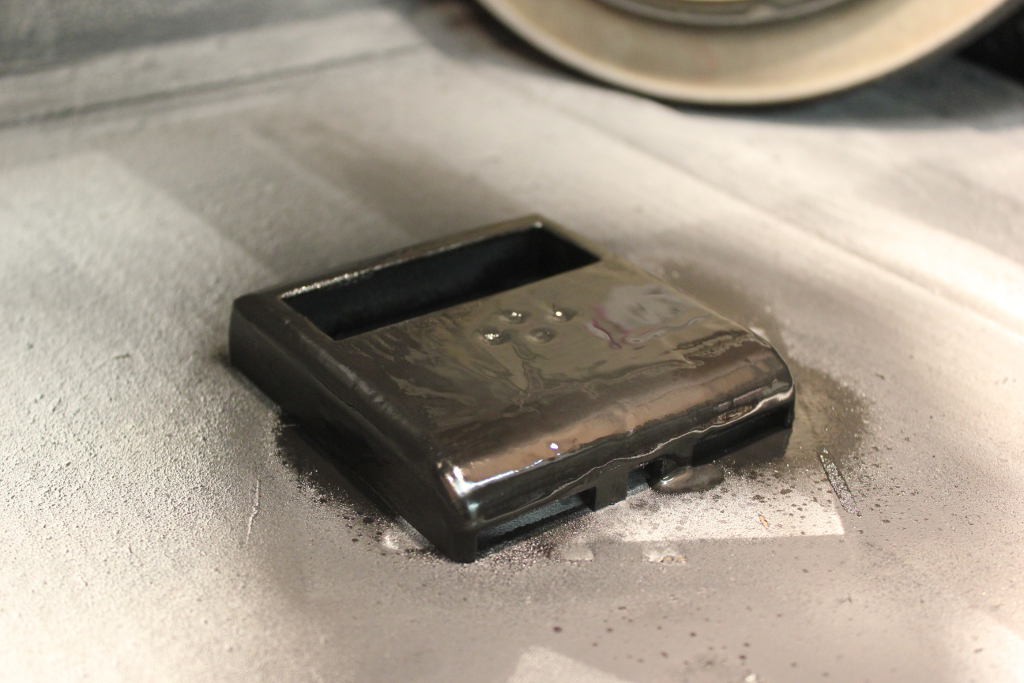
The enclosure has been updated as well. It's a little prettier, smoother, curvier, and now black!
![]()
Firmware
Using the newest version of the SDFatLib (https://github.com/greiman/SdFat) was a breakthrough. It has support for two cards at once, so I didn't need to rewrite the older SD library. Most of the features are now working completely, and the ones that aren't are not on the critical path for the minimum viable product. In other words, all the stuff that has to work does, and the rest is just nice to have.
To expand on that, you can now
- Create duplicate files on two SD cards of user-set size containing random data.
- Output a given section of a given file from the SD card to the keyboard.
- Receive data from the USB OTG Android device and print it out to the keyboard.
- Generate random data and print it to the keyboard.
Fun things you can do with this device
Besides its original intention, this hardware will allow you to do all kinds of things. You could write additional code to get it to have more fun features, but consider these options:
- USB Random Number Generator. These exist already as dongles (https://www.tindie.com/products/ubldit/truerng-hardware-random-number-generator/), but they're at least $30 for the cheapest I found. NSA-Away can do that and more!
- USB<->Serial. Essentially two USB->Serial ports on this one device. So many options!
- SD Card Management. You could copy any file from one to the other, or delete files, or wipe them. Go nuts!
- Generic Dev Board. It's got a battery, 16x2 LCD, 4 buttons, and a Leonardo clone. It's great for doing all kinds of things, and the BOM is just as much as an Arduino.
-
Code Jam #6
09/15/2014 at 22:12 • 0 commentsWe are working furiously toward the final working prototype, with the goal being to get all the necessary footage next Sunday to edit into the 5 minute video. Significant progress made includes getting each team member on a critical task: OCR integration, USB sending, HID bridge, hardware key generator and video sketch.
Kate also created a nice set of icons for the Android app.
-
Code Jam #5
09/08/2014 at 03:07 • 0 commentsWe had lots of good discussion and made several critical decisions to prioritize and prepare for the push toward Sept 28. Most notably is a plan to implement the capability for the hardware encryption device to read encrypted data via light flashes from a screen (both a PC and Android device) and forward the resulting data as keystrokes via HID to either a PC or Android device. This allows us an alternate data path for both OCR and USB keystroke sending from Android and greatly increases the number of potentially compatible Android devices. We'll still be fully implementing OCR functionality, and will maintain the light/HID as a parallel approach for transmitting encrypted data to the Android device.
-
Android encryption/decryption app update
08/20/2014 at 01:43 • 0 commentsWe've made significant progress on the Android application and a video walk through is available at:
The video shows test key generation, message entry, encryption, decryption and message viewing.
-
Hardware update - case and code
08/18/2014 at 02:10 • 0 commentsIt's been a while since the last log, so hopefully this one will make up for it. We've got good progress to report.
It works!
Here's a video of the device generating 1KB of random data and outputting it as HEX characters over the USB keyboard to a text editor.
Code
There are lots of parts to the hardware, so I wrote test applications for each section. Some parts don't have code (like the battery charger), but everything else has its own small sketch to test the individual section. The current list of test sketches:
- Buttons_Test – tests the four buttons, AND tests presence of each SD card and the write protect of the SD card.
- SD_Test – uses the SD Library to access the SD cards one at at time.
- LCD_Test – tests the LCD library with a hello world.
- Random_Test – tests the random number generator hardware and the shift register for bringing the data in.
- USB_Keyboard_Test – makes sure that the Arduino can talk to the computer as a HID Keyboard. It needs to be one way so that the computer cannot compromise the encryption device.
I've been putting it all together into the final sketch, though, and have made a lot of progress. There's a functional UI which responds to button presses. It connects to a computer as a USB keyboard and when the user tells it, will spit out random numbers to the keyboard.
Currently the random number generator part of the circuit isn't working, so for now I'm using a temporary solution with the Arduino pseudo-random number generator. In V2 of the hardware hopefully it will be fixed and I can go back to the hardware RNG.
I'm also having a hard time with the SD cards. It turns out the Arduino SD library creates globals that prevent me from initializing two SD cards at once. Now I'm delving deep into the library code to try to create and manipulate the two SD cards without using the global. It's a pain.
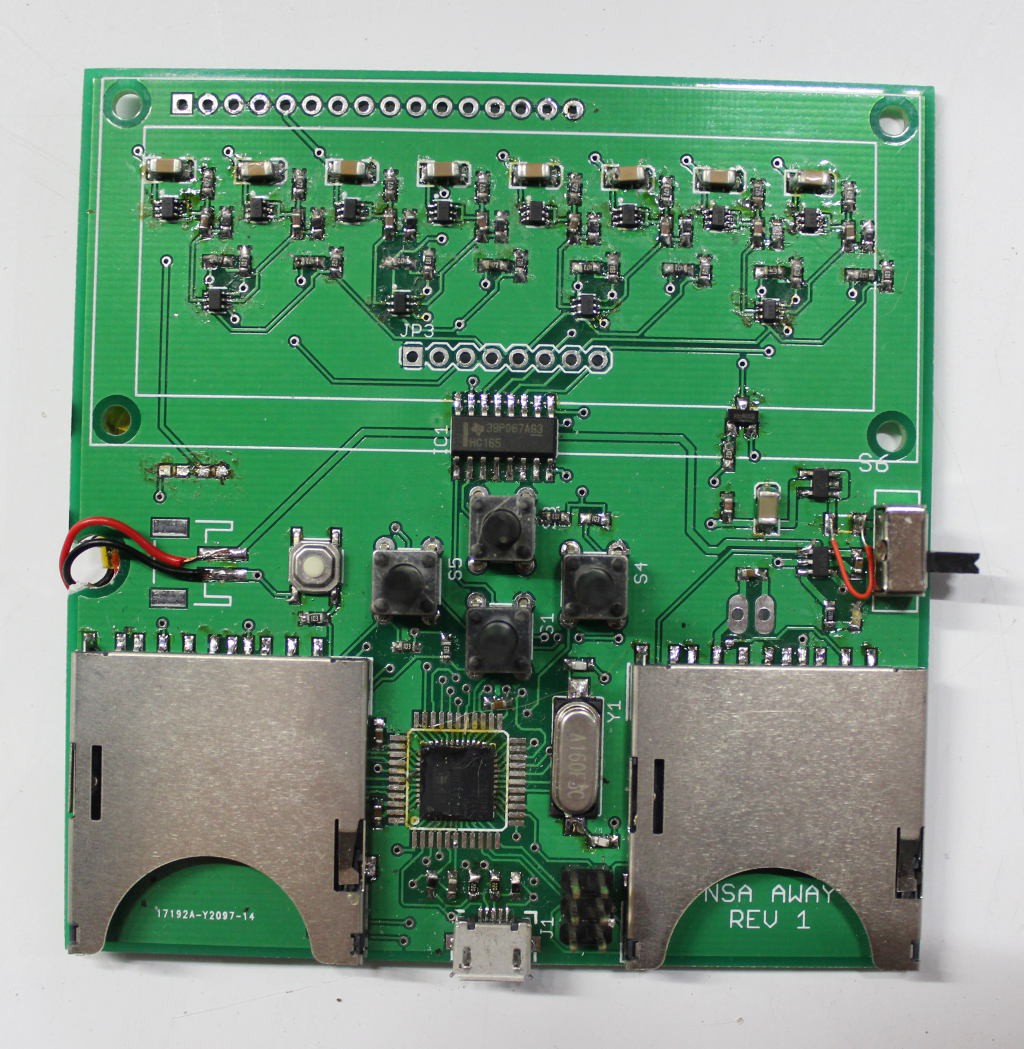
Also, I realized there's no photo of the random number generator circuit underneath the LCD, so here it is. Note that the 8 headers can be used to create your own RNG circuit, or as a debug header to look at the random signal.
![]()
Case
The case is designed, 3D printed, and fit on the first try. Well, there were some tolerance issues, but some sanding was all that was needed for it to fit. It will be a two part mold, with a parting line along the holes for the switch, USB, and SD cards. That way it'll be a simple injection mold with no slides and easy assembly, that's also easy to 3D print. Of course, this is the first version, and as such is way bigger than it needs to be and not pretty, so for the first case, I went a little overboard. But it works and will get us moving along for the video and demonstrations.
![]()
-
Code jam #3 and #4 progress
08/16/2014 at 12:51 • 0 commentsWe've completed code jams #3 and #4 with the result being the first successful test of the encryption functionality across multiple devices with manual data entry. This makes the Android program useful on its own, but we are continuing to work to integrate the OCR and keystroke sending features.
-
Hardware working - day 2
08/02/2014 at 16:25 • 0 commentsIn the last post about the hardware, I had 3 items that weren't working as expected. I'm happy to say 1.5 of them are solved, and they ended up being soldering problems, mostly caused by the stupid QFN package of the ATMEGA32U4. Unfortunately, the TQFP package is in high demand and unavailable everywhere, so I've had to use the QFN package lately, which is a pain to solder.
Anyway, the first problem, the left SD card, is now solved after reworking my soldering. I also populated a second board and it also works, so I'm relieved about that.
The second problem is the LCD, and for that I'm halfway to a solution. The problem is that I'm using 3.3V everywhere, but a 5V LCD. A bit of a pain, and it's possible that it could have worked anyway, so it was worth a shot. I played with some different resistor configurations for the contrast and found that the LCD is indeed working, though the contrast is so low I can barely read it. I have new 3.3V LCDs coming in a couple days, so hopefully that will work. But the code is correct and the LCD does initialize and show 'hello, world' so at least we're somewhere.
Still need to figure out what's wrong with the random number generator circuit.
NSA Away
Increase your privacy and security by exchanging short messages securely. Created by members of hackerspace Sector67.