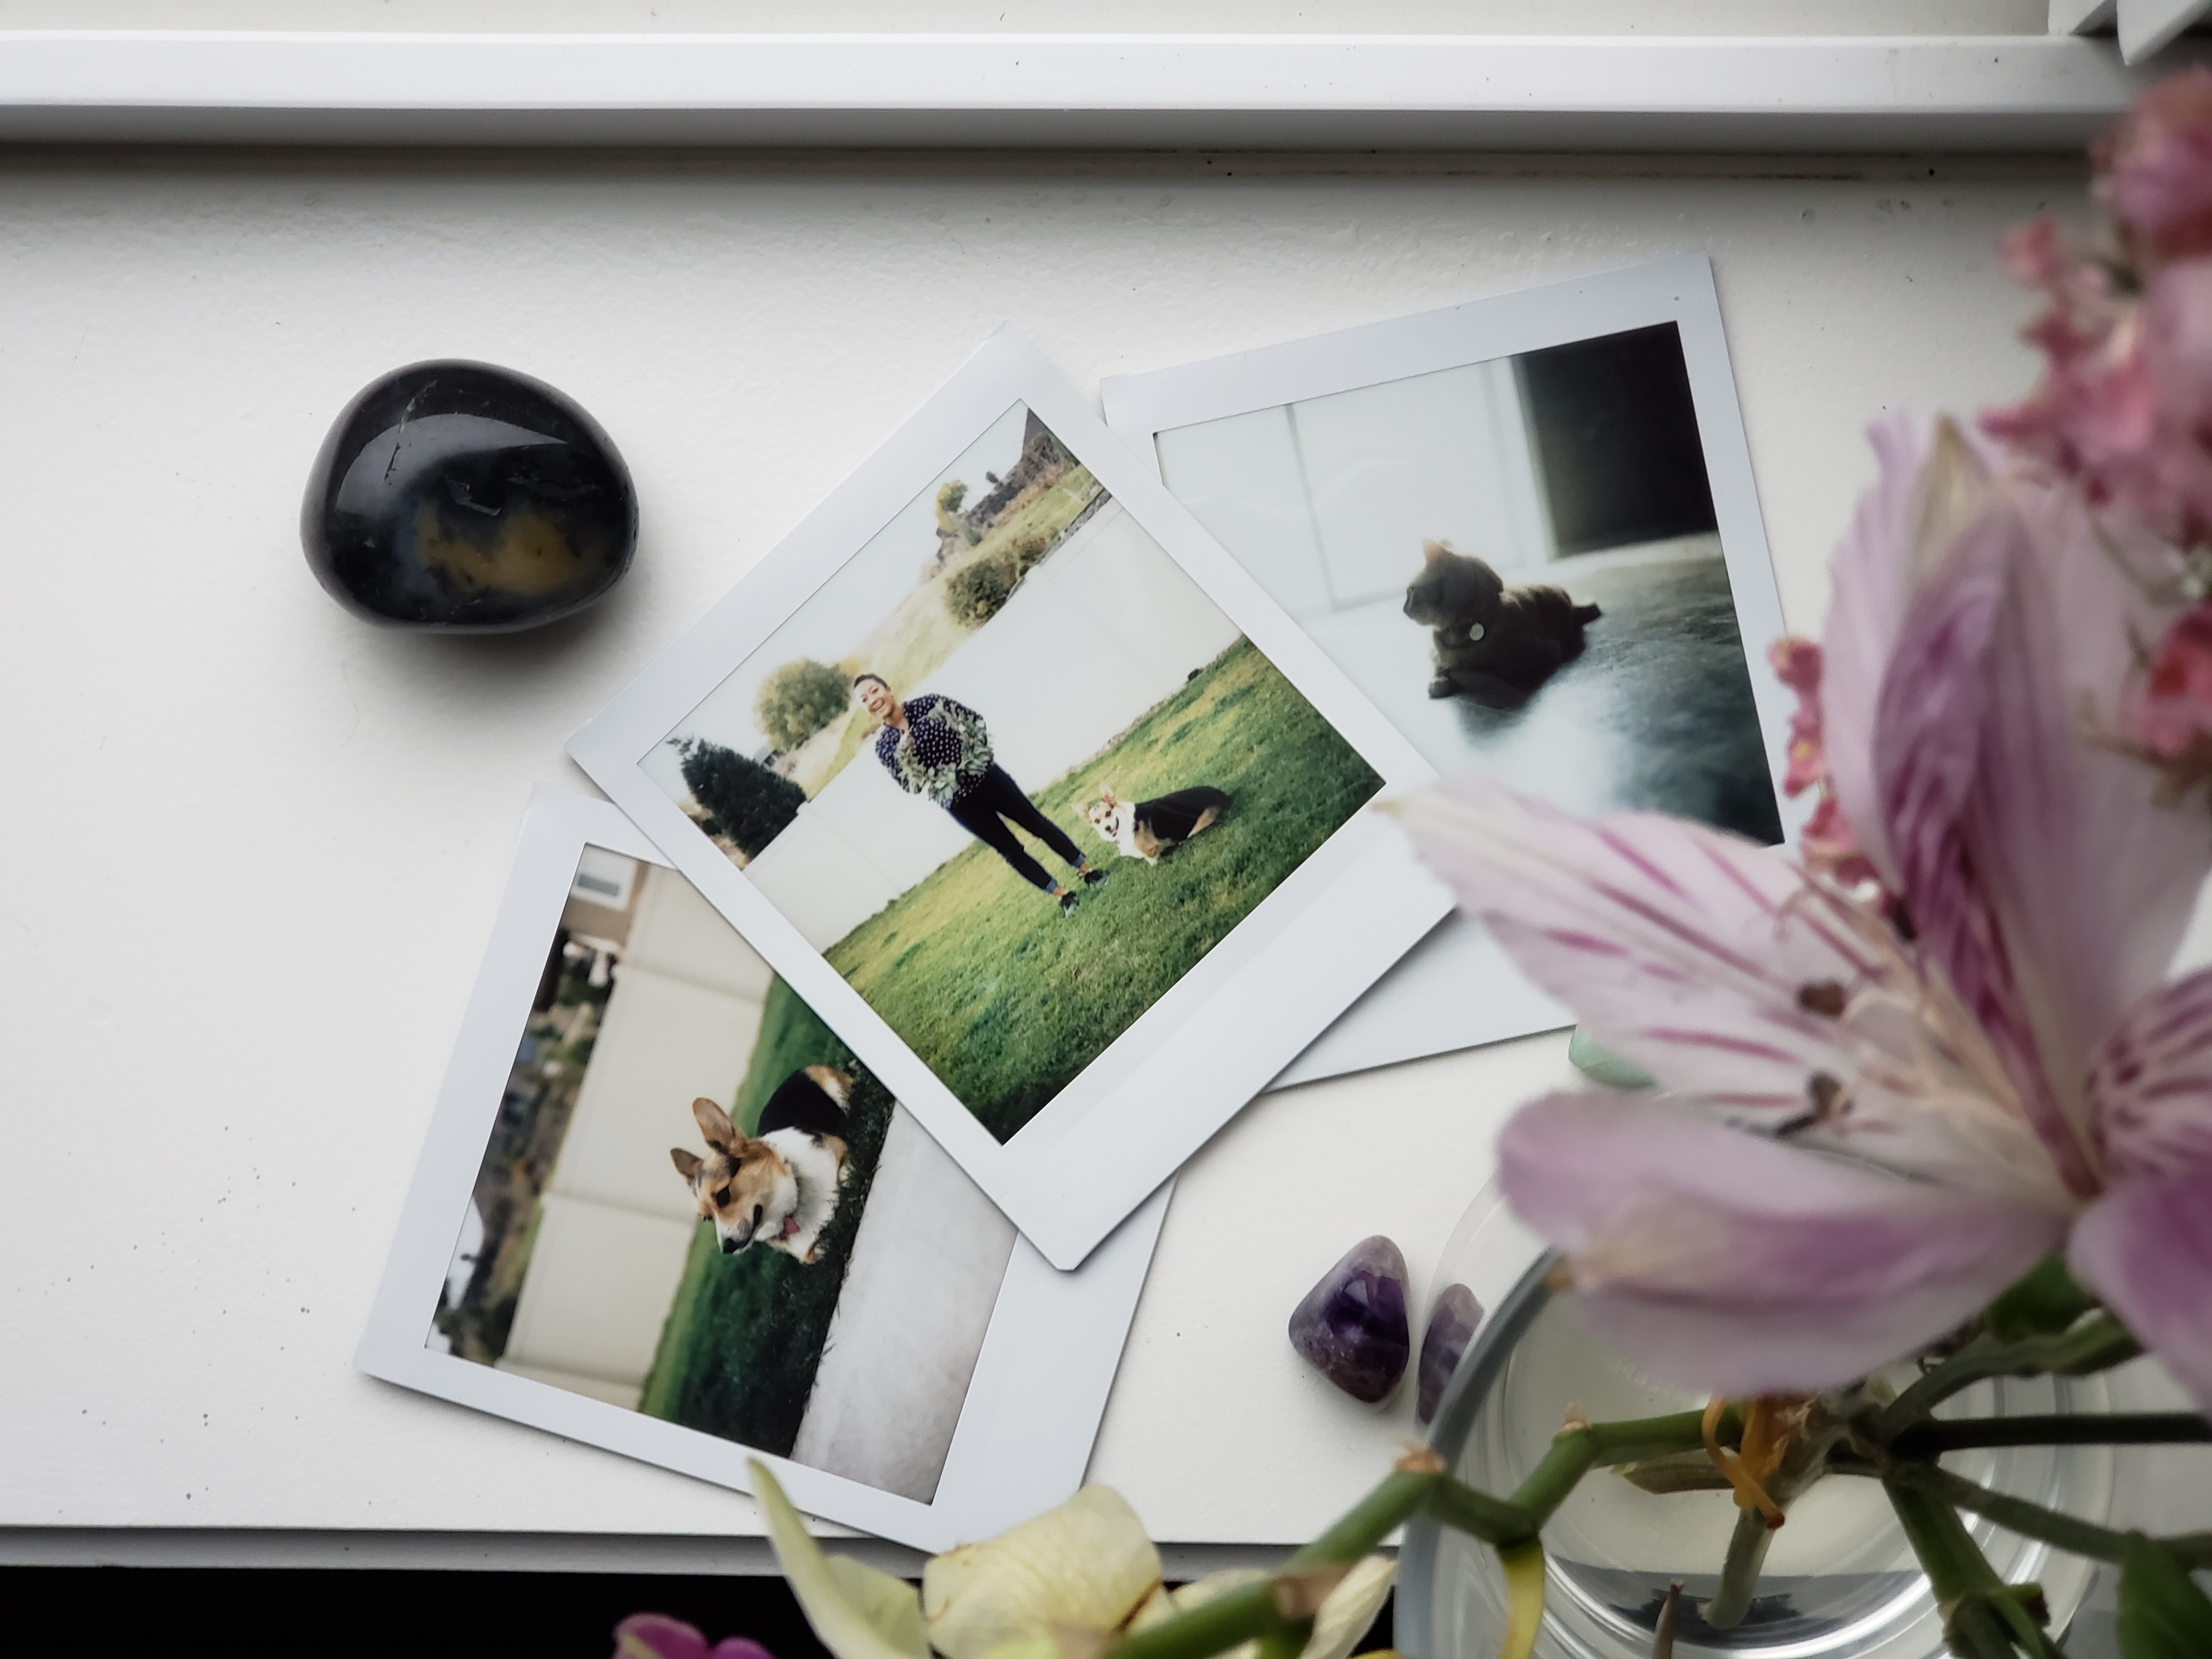
Time for an update! It's been some time since the last one. In short - I didn't get much use out of the re-lensed SQ6. Despite the better lens, it lacked a lot of the "creature comforts" that I've become so accustomed to. The viewfinder is tiny and tunnel-like, and is wildly inaccurate (it's actually angled towards the optical axis, optimized for portrait distances but useless for anything else). Zone focus has also proven very problematic - the point of the new lens was to allow some control over depth of field - so stopping the lens down and guesstimating focus defeats the purpose of that.
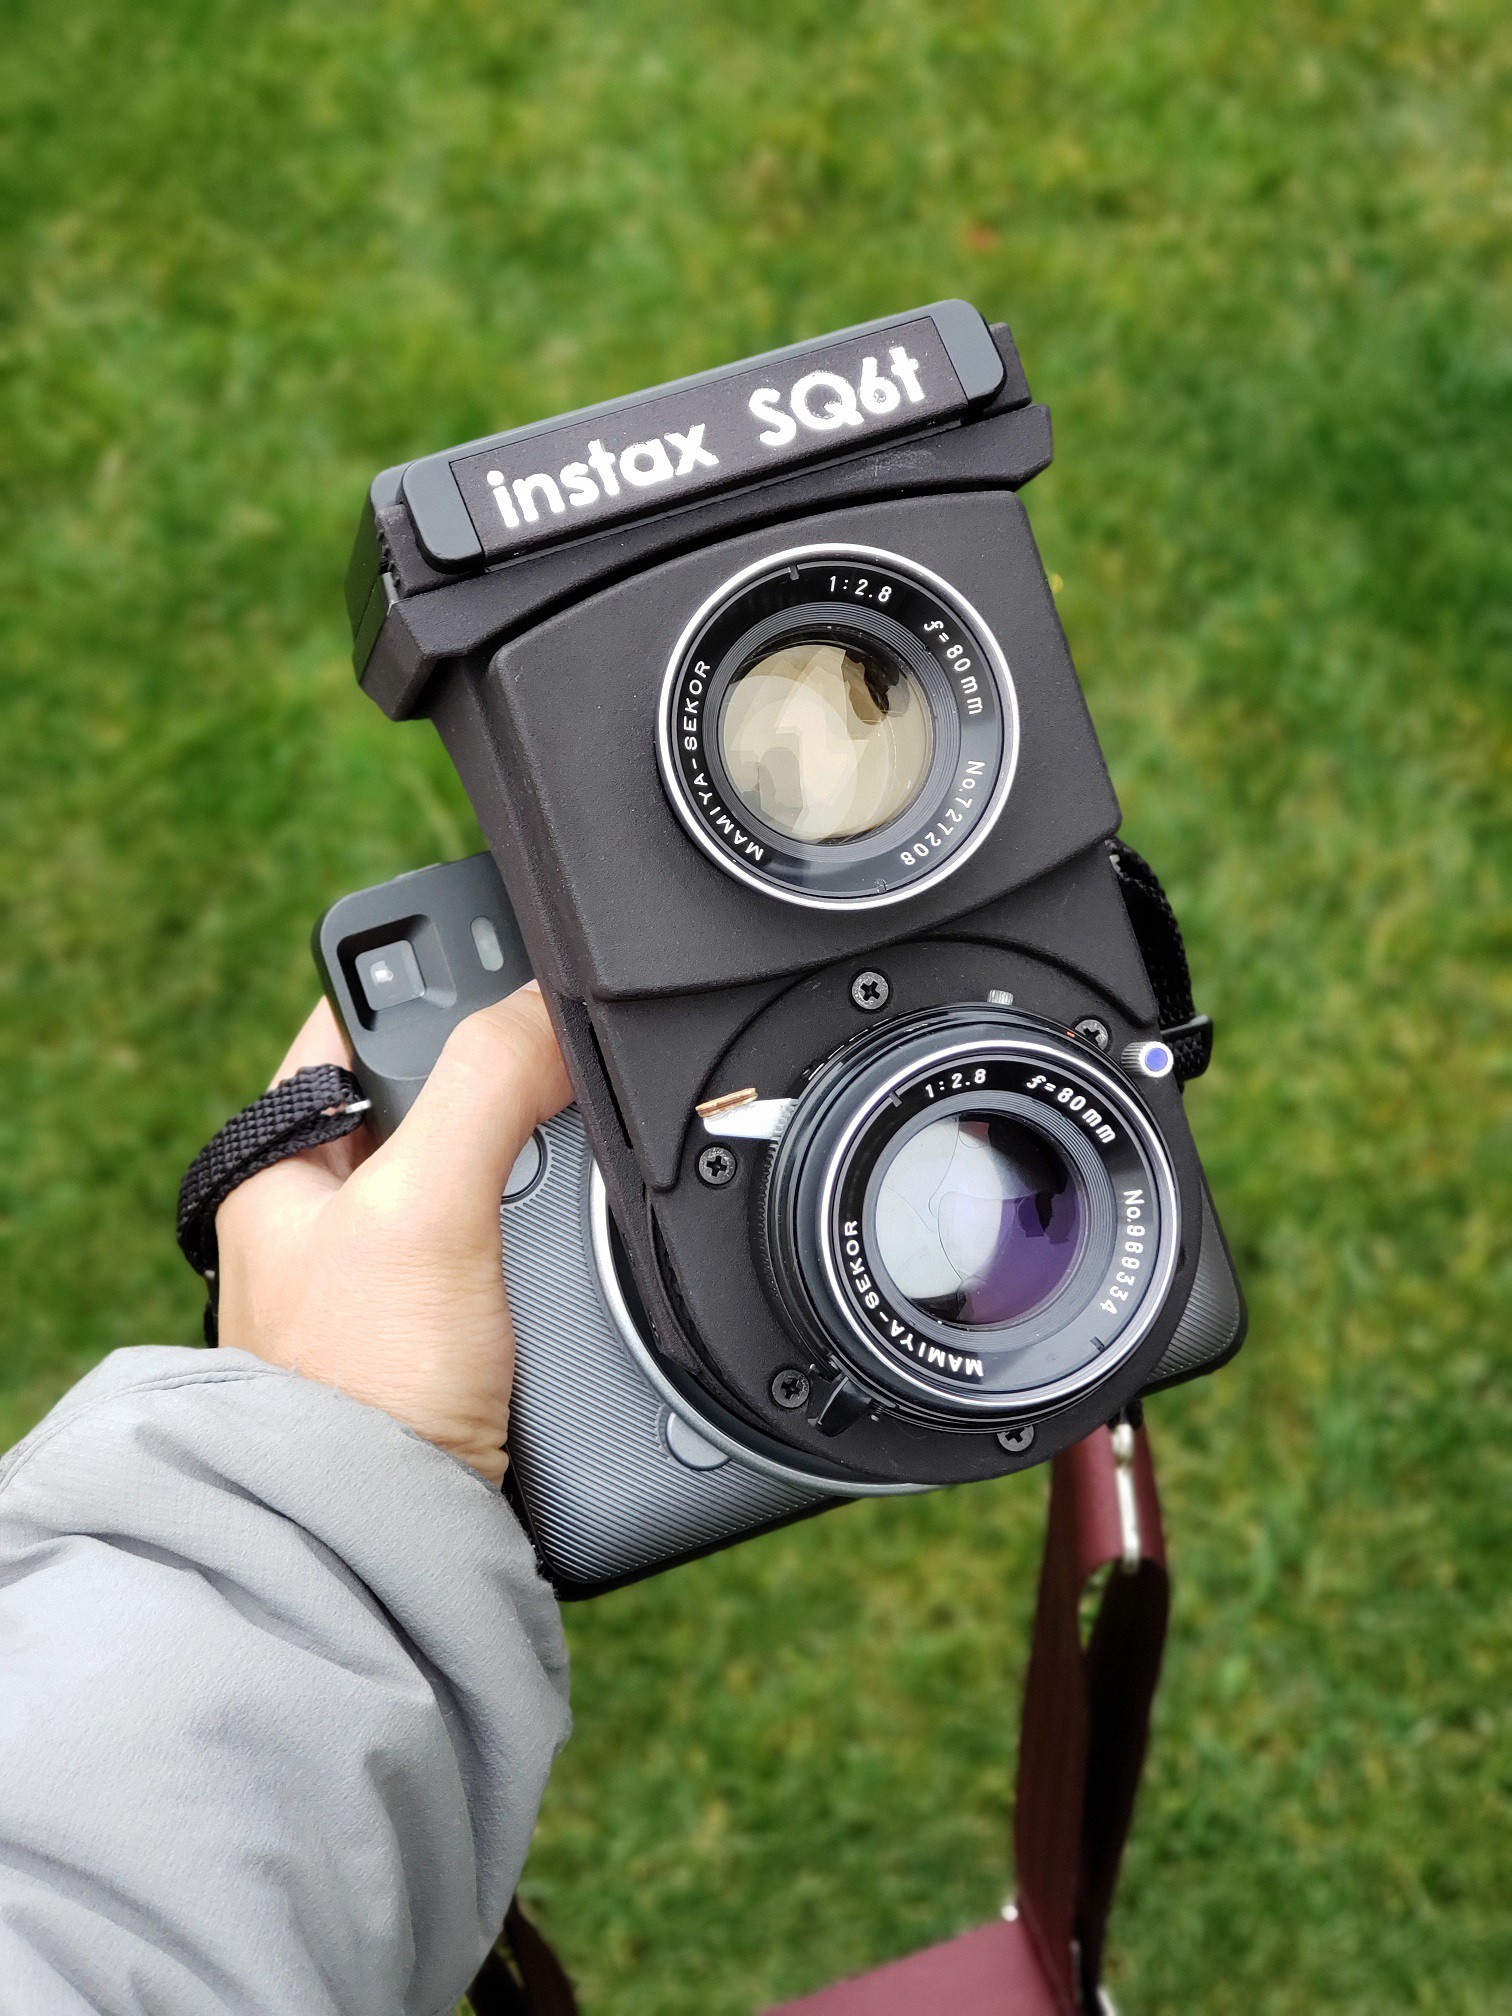
Originally, I had planned to bring the SQ6 on an upcoming trip, but those issues gave me serious pause. So, over the last couple of weeks, I slapped together a fun little variant of the original relensing effort that I'm calling the "SQ6t" ("t" for twin-lens reflex). I'll let the next photo speak for itself:

The SQ6t is basically the original relensed SQ6, but with a viewing lens and a waist-level viewfinder added. True to the original intent of the design, there are no permanent modifications to the SQ6 body. The mirror box and viewfinder are mounted to the custom "inner shroud" that was the centerpiece of the original set of modifications. The system is also designed modularly, such that you can remove the mirror box and second lens, so you could use it as a point-and-shoot (like before) rather than a TLR. But why would you do that?

Having full control over focusing and framing in a bright, crisp waistlevel finder feels good. It makes the camera feel like it's worth using, and I think it'll encourage me to take more photos. I've only been shooting with it for less than a day, so I hope to have more example photos and thoughts on the camera soon.
Until then, I have uploaded the STL files for the camera parts, and the BOM below. No detailed instructions as of yet - I was in a rush to put this together for my trip, so there's a distinct lack of documentation.
Camera components:
| Component Filename | Quantity |
|---|---|
| "front standard.STL" | 1 |
| "helicoid mount.STL" | 1 |
| "inner shroud.STL" | 1 |
| "mirror box.STL" | 1 |
Optical components:
| Item | Quantity | Source |
|---|---|---|
| Lens, Mamiya-Sekor 80mm f/2.8 TLR (black ver., chrome ver. may also work) | 1 | eBay, your local used camera shop |
| Viewfinder, Mamiya RZ67 Waist Level Finder | 1 | eBay, your local used camera shop |
| Focusing Screen, for Mamiya C330 (any variation, e.g. microprism, etc.) | 1 | eBay, your local used camera shop |
| Focusing Helicoid (macro tube adapter), M58 mount | 1 | eBay |
| Front surface mirror, 1.25mm x 63mm x 57 mm | 1 | Kaleidoscopes to You |
Fasteners (from McMaster-Carr):
| McMaster Part No. | Product | Quantity |
|---|---|---|
| 94100A110 | 18-8 Stainless Steel Press-Fit Nut for Soft Metal & Plastic, M3 x 0.5 mm Thread | 10 pcs |
| 91698A300 | Black-Oxide 18-8 Stainless Steel Phillips Flat Head Screws, M3 x 0.5 mm Thread, 4 mm Long | 6 pcs |
| 91698A302 | Black-Oxide 18-8 Stainless Steel Phillips Flat Head Screws, M3 x 0.5 mm Thread, 6 mm Long | 4 pcs |
| 91595A098 | Alloy Steel Dowel Pin, 3 mm Diameter, 4 mm Long | 1 pcs |
| 90190A051 | Phillips Rounded Head Screws for Sheet Metal, Zinc-Plated Steel, Number 1 Size, 1/4" Long | 8 pcs |
| 90006A079 | Slotted Flat Head Screws for Wood, Zinc-Plated Steel, Number 2 Size, 3/8" Long | 2 pcs |
 Kevin Kadooka
Discussions
Become a Hackaday.io Member
Create an account to leave a comment. Already have an account? Log In.
Great project Kevin! You've inspired me to try it myself. I am at the point where I have a question about mounting the ground glass from the C330. Are you only using the plastic ground glass portion only, or are you using the bracket (and possibly the clear glass) from the view screen assembly as well to mount it to the mirror box? After some trial and error i've finally gotten my 3d prints to turn out satisfactory using a carbon fiber PLA that gives a nice mat finish.
Are you sure? yes | no
Hey Kevin how did you align the film plane with your lens ? Do you have any pictures looking at the film plane?
Are you sure? yes | no