 blinkingthing
-
1Step 1
Power / Data Plan
I drew heavily on the advice of others for these as I was walking into this project having never worked with neopixels before. I found lots of helpful info in the Neopixel Uberguide and from this Neopixel Curtain project documentation.
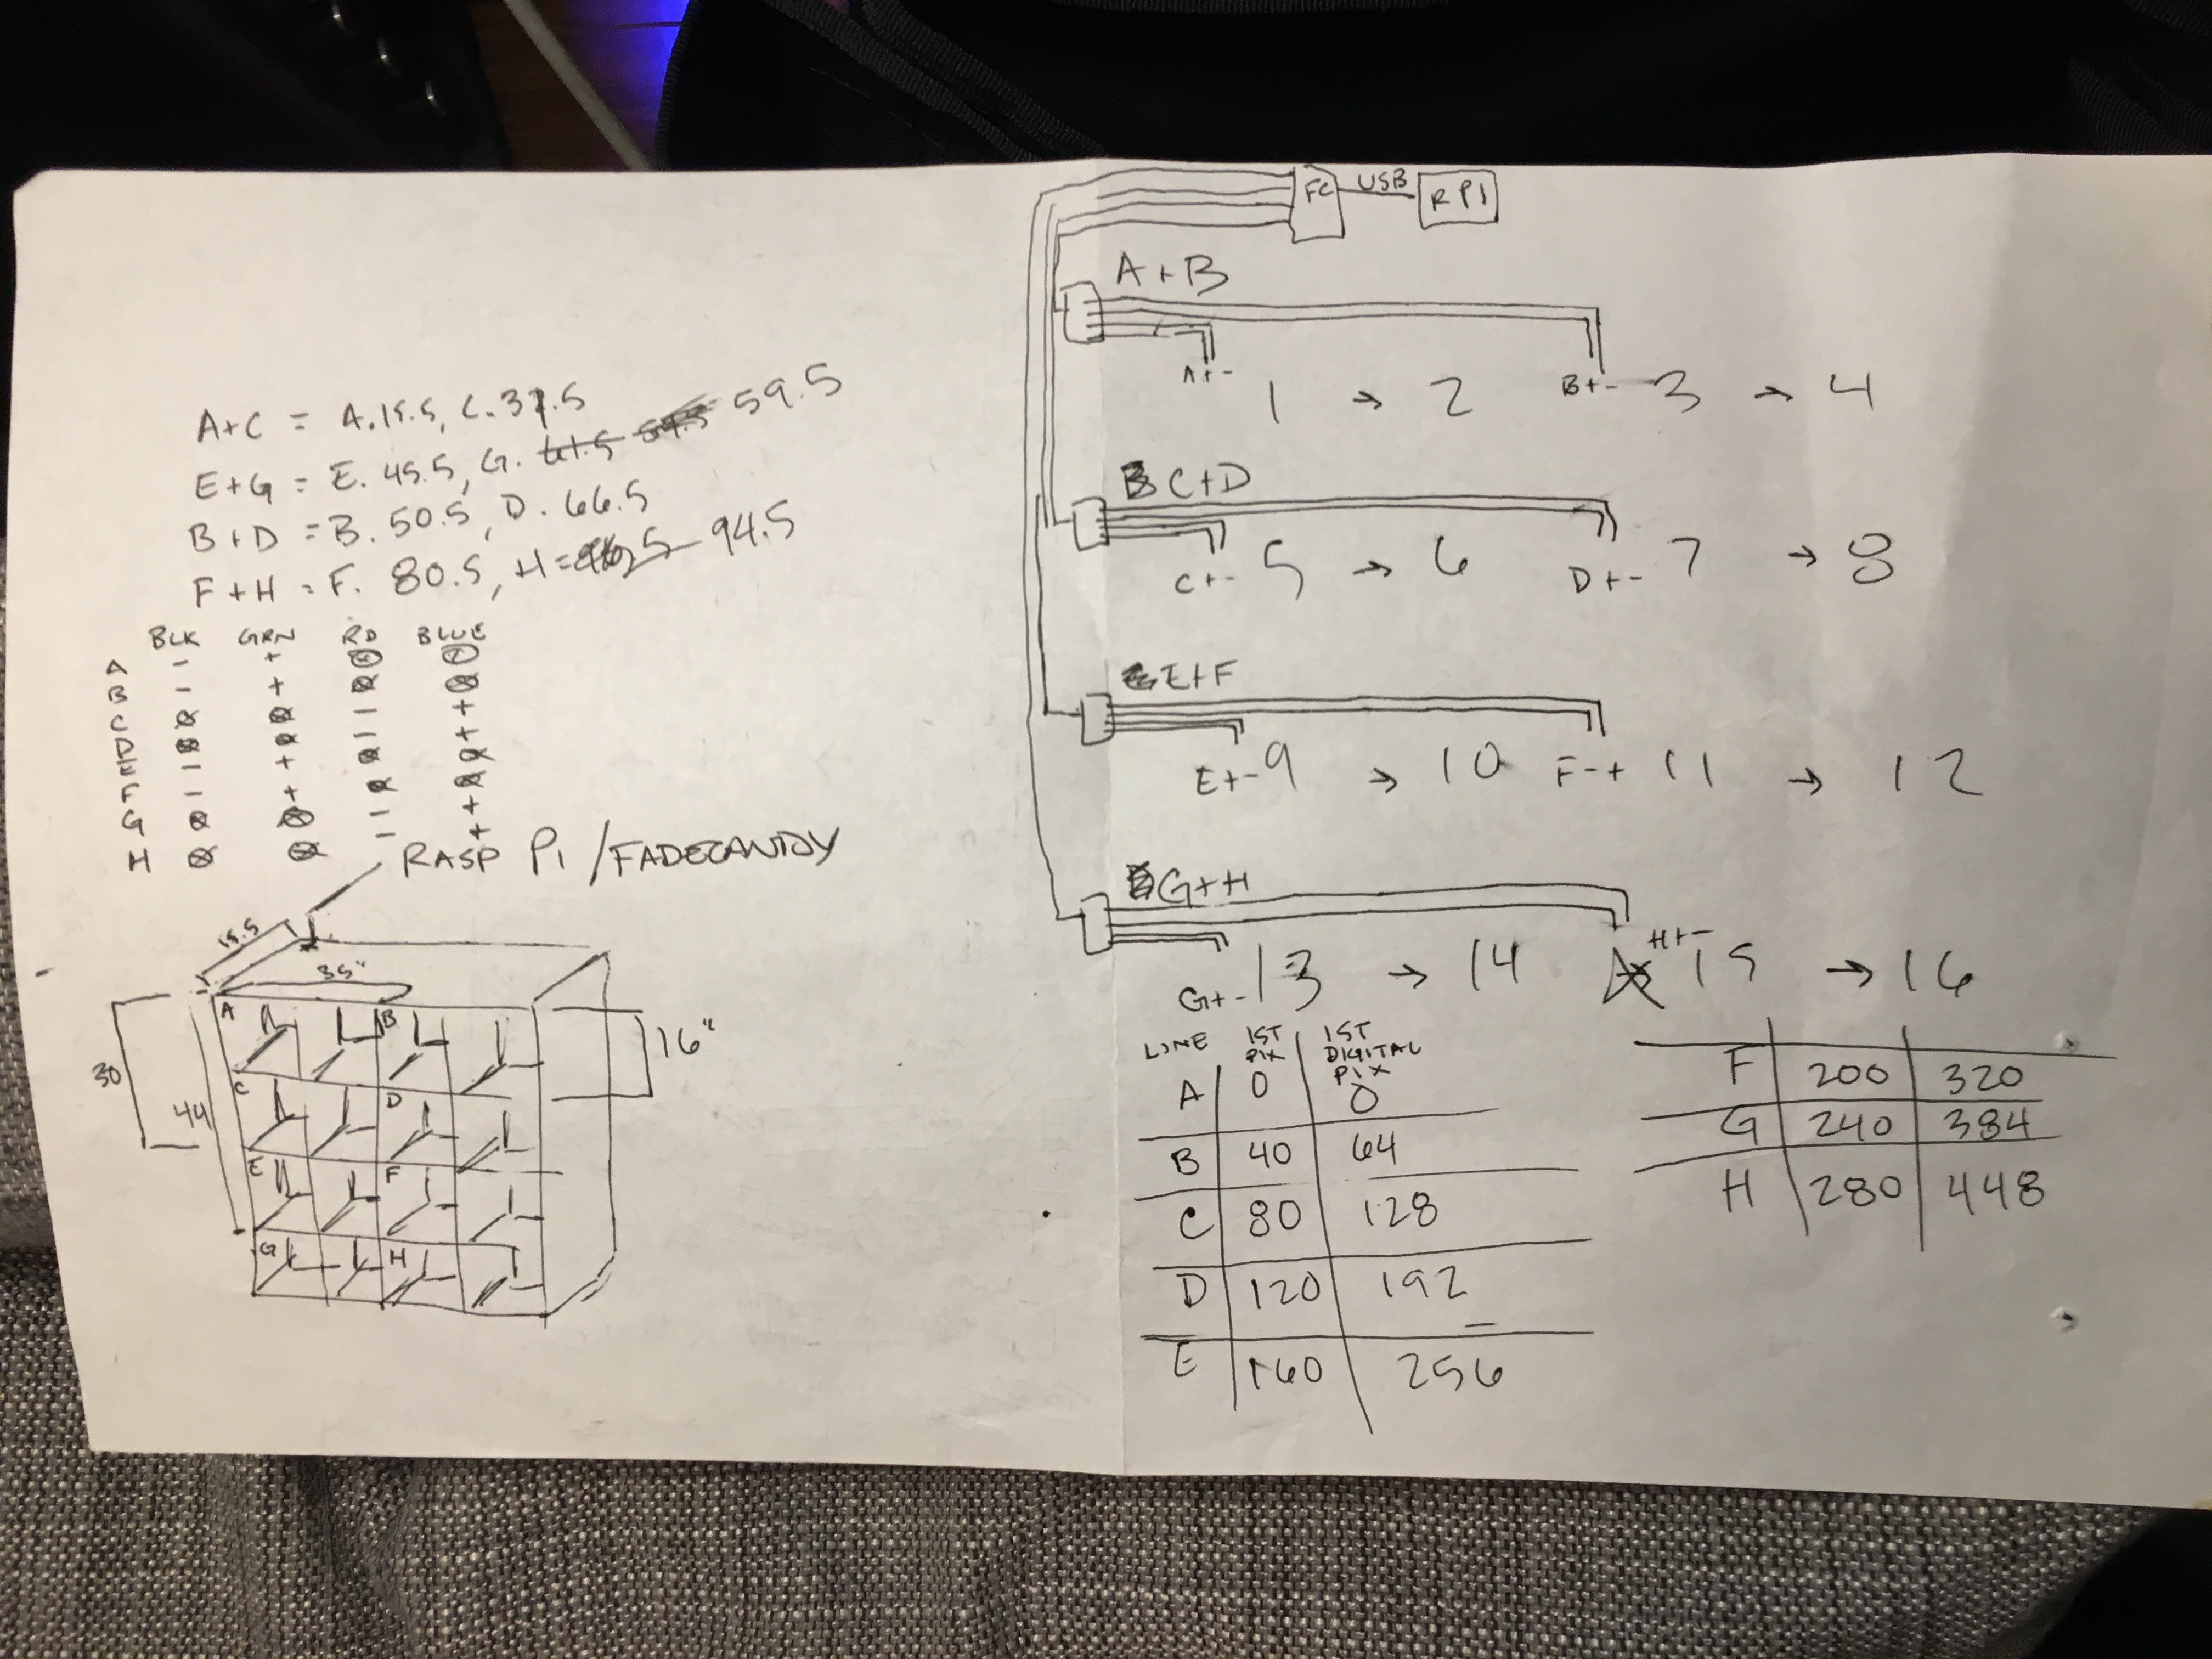
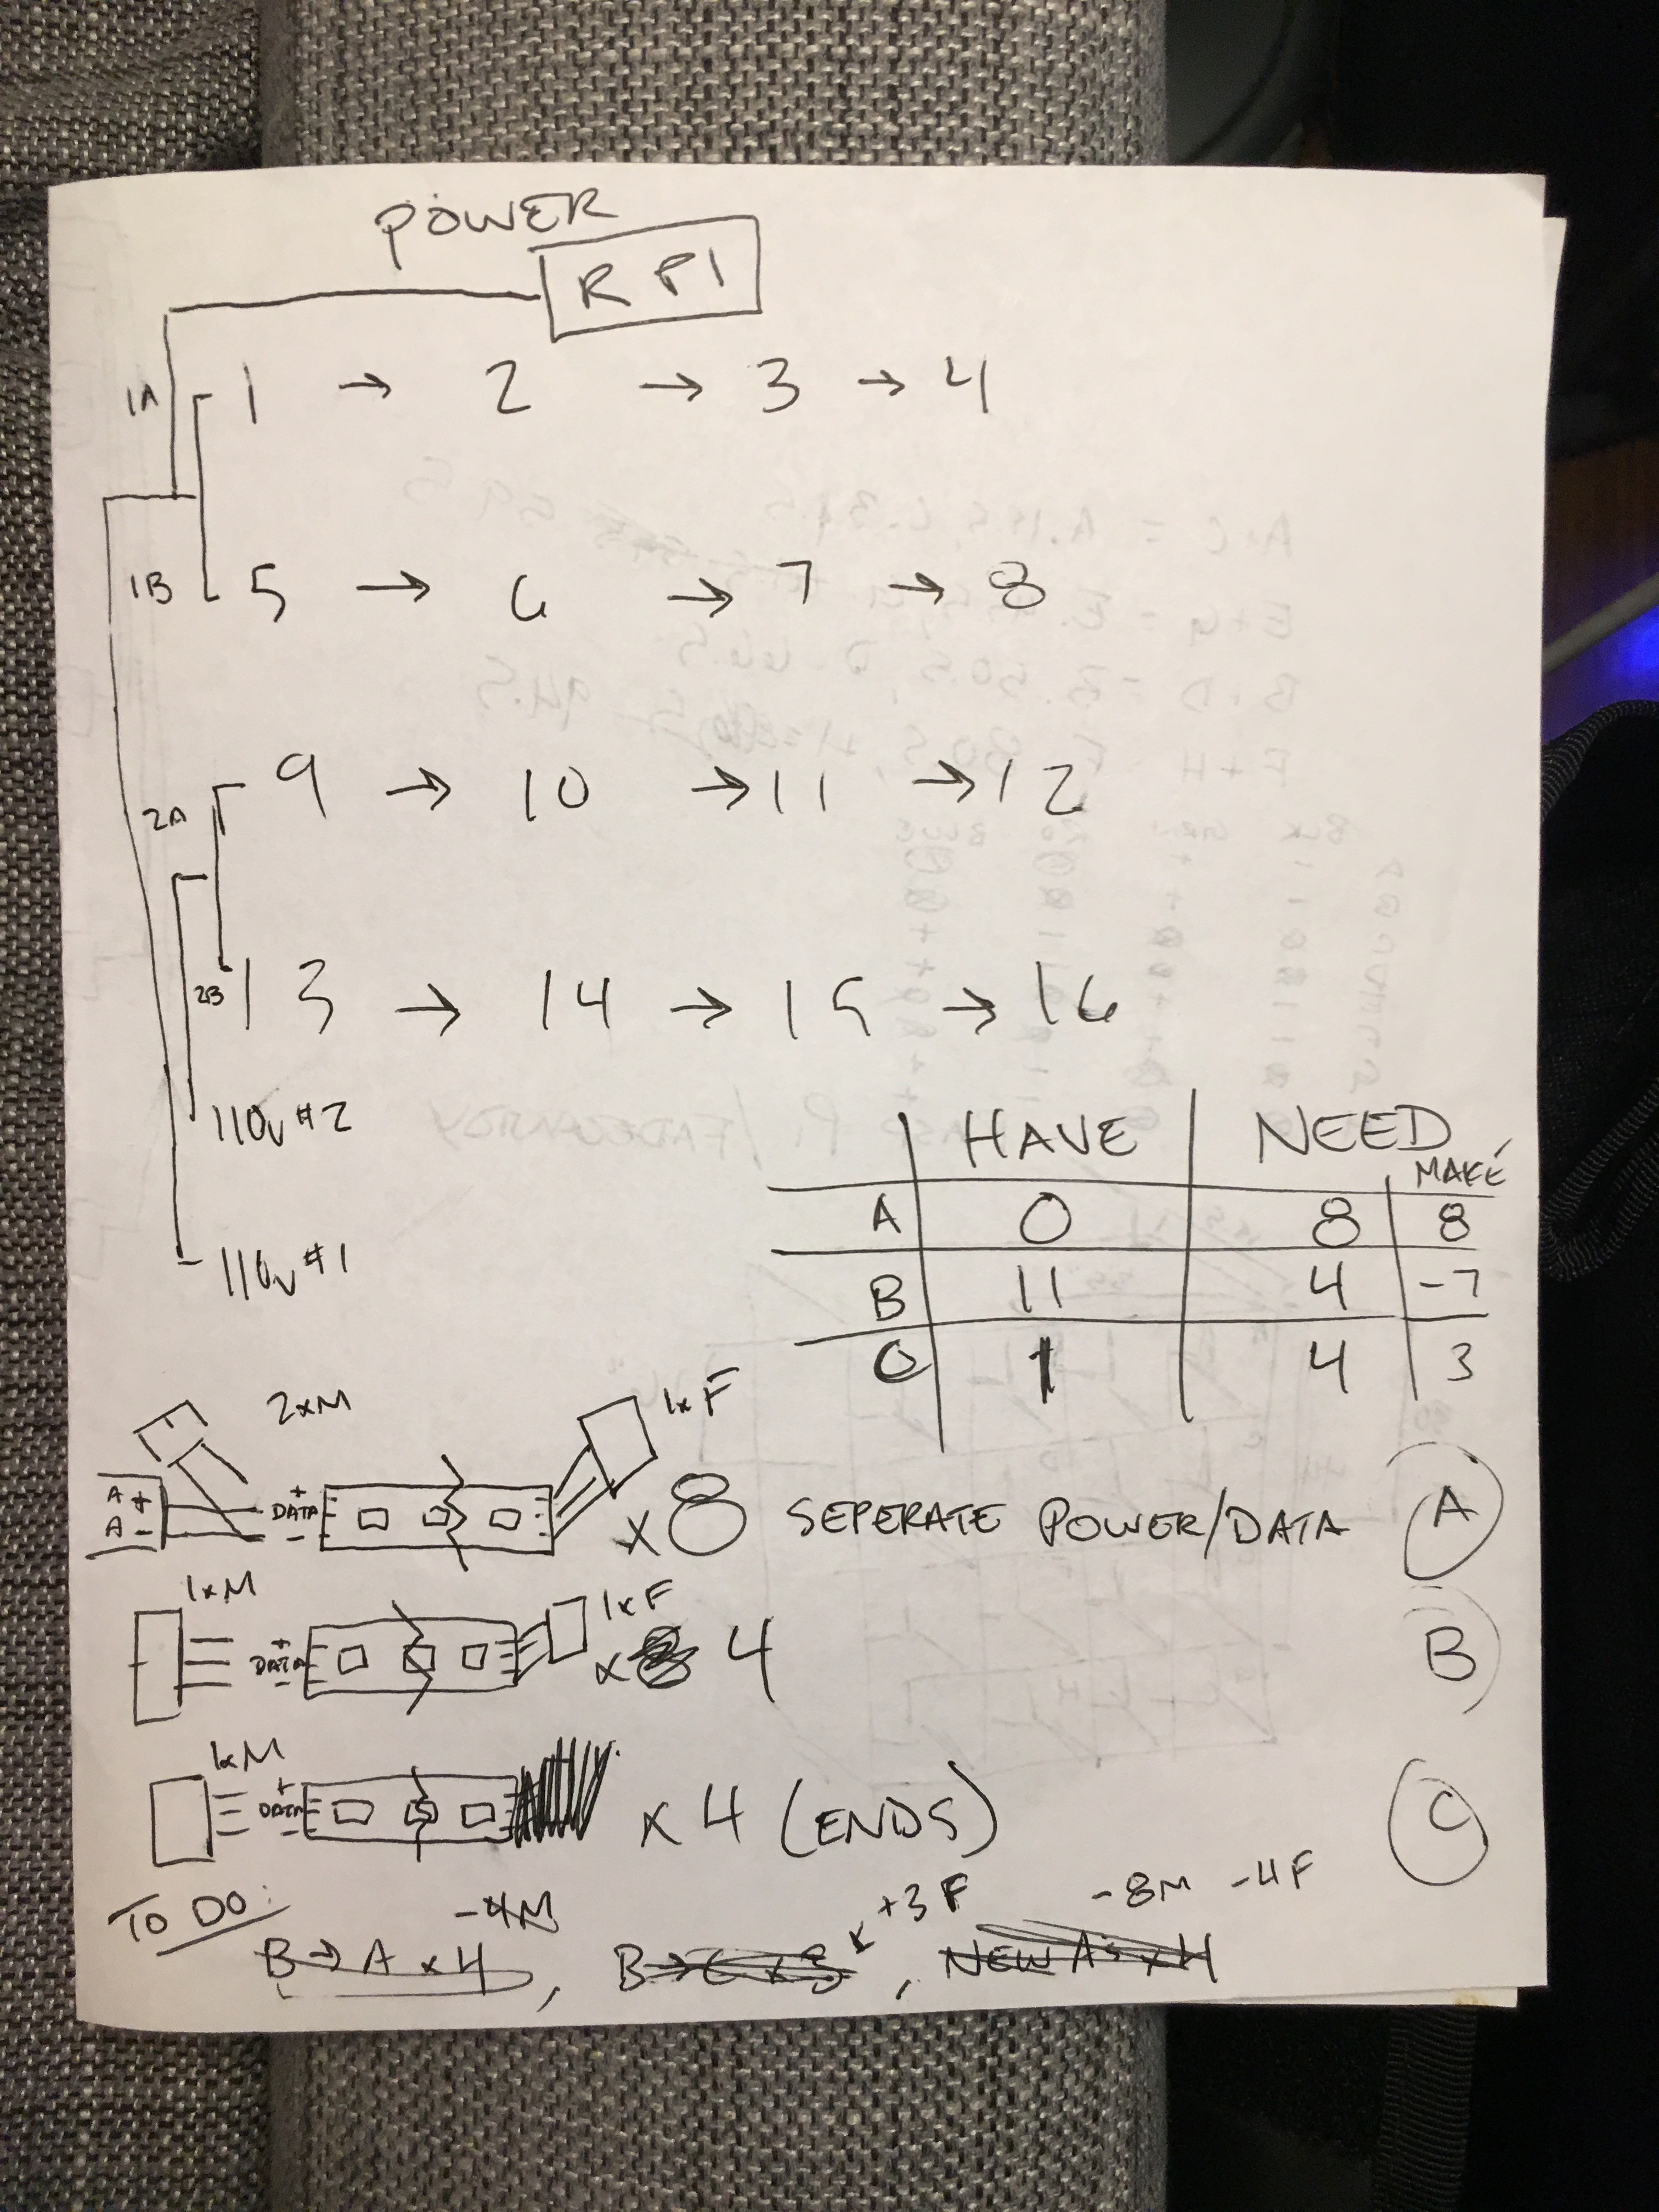
Here's my napkin plans for both power and data and info about how many extra strips I needed to make up during a upgrade/reconfiguration of my setup.
![]()
This data plan shows the flow from the Fadecandy to the mounted LED strips. Line A serviced boxes 1+2, line B went to boxes 3+4 and so on until line H at boxes 15 and 16.
![]()
The power plan shows two lines coming from 2 seperate 10A power supplies that each then split and service 2 full rows of the shelf. Each 10A power supply is handling half the total LED's.
-
2Step 2
Install necessary software on Raspberry Pi
If you haven't already, get yourself the latest version of Raspbian and get that installed and running on your Pi. Instructions here.
Setup for Raspberry Pi : here
Setup for Fadecandy : here
-
3Step 3
Prep LEDs and Wiring Harness
![]()
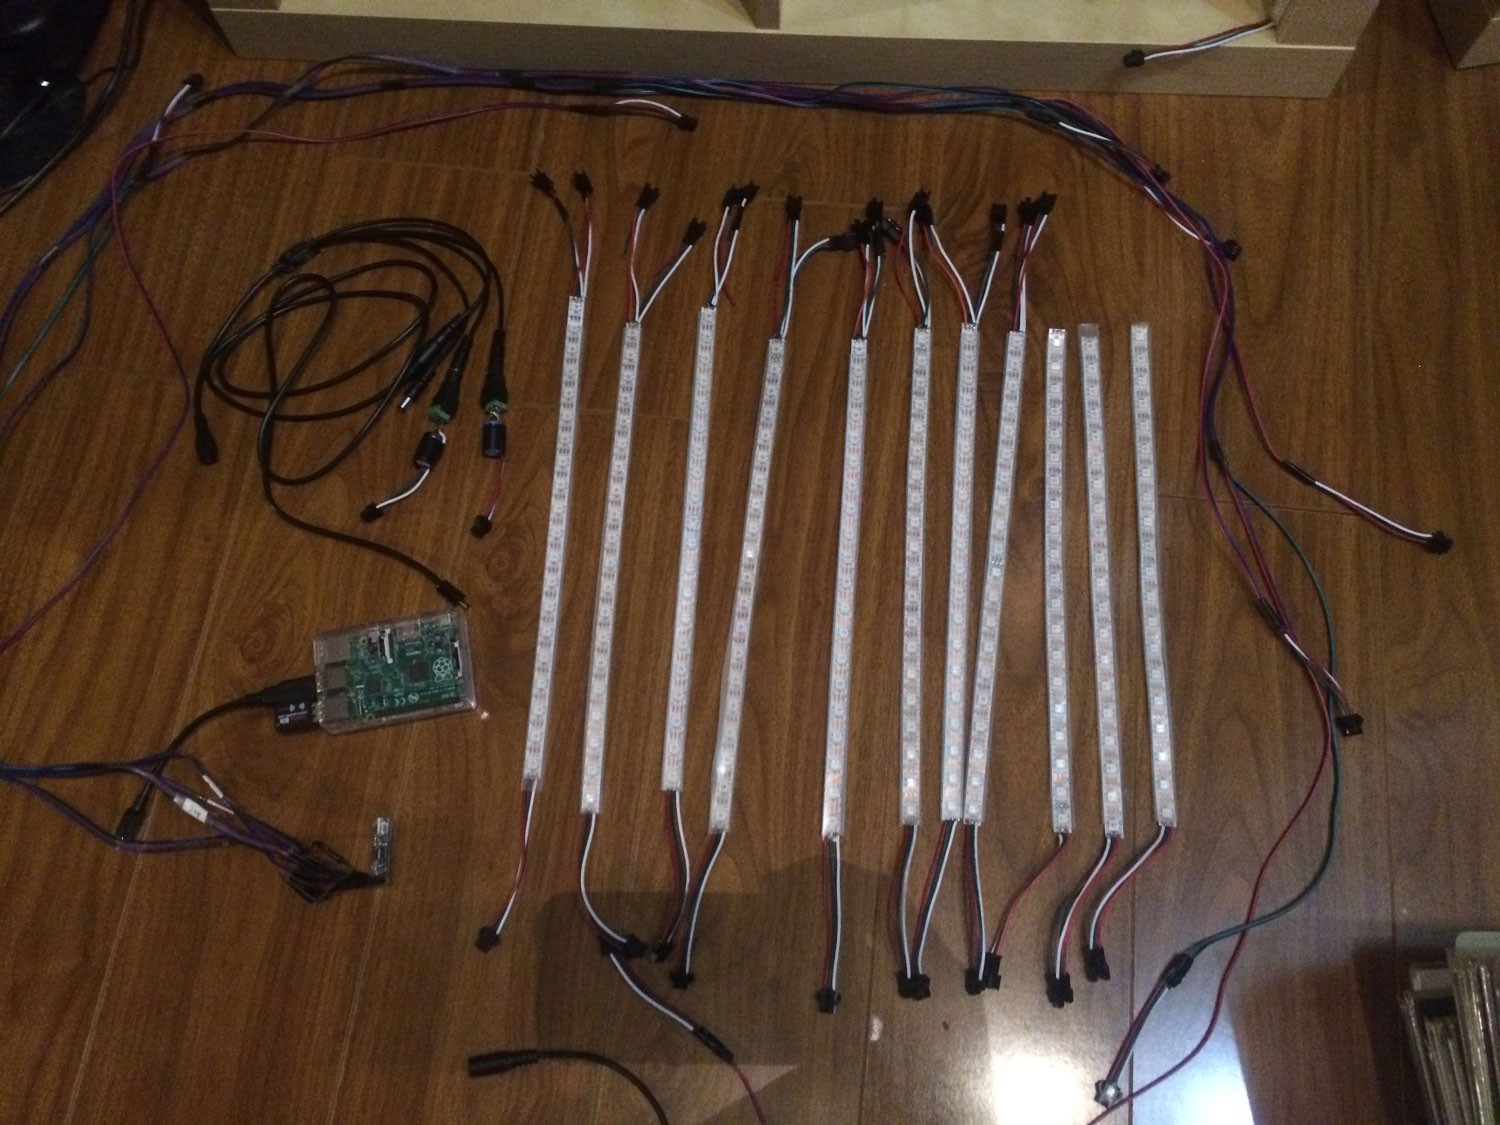
Reference your power plan and prepare all necessary wiring. I pre cut all my LED strips, soldered necessary connections and made all my long data cable runs before plugging anything in or turning anything on.
-
4Step 4
Test LEDs
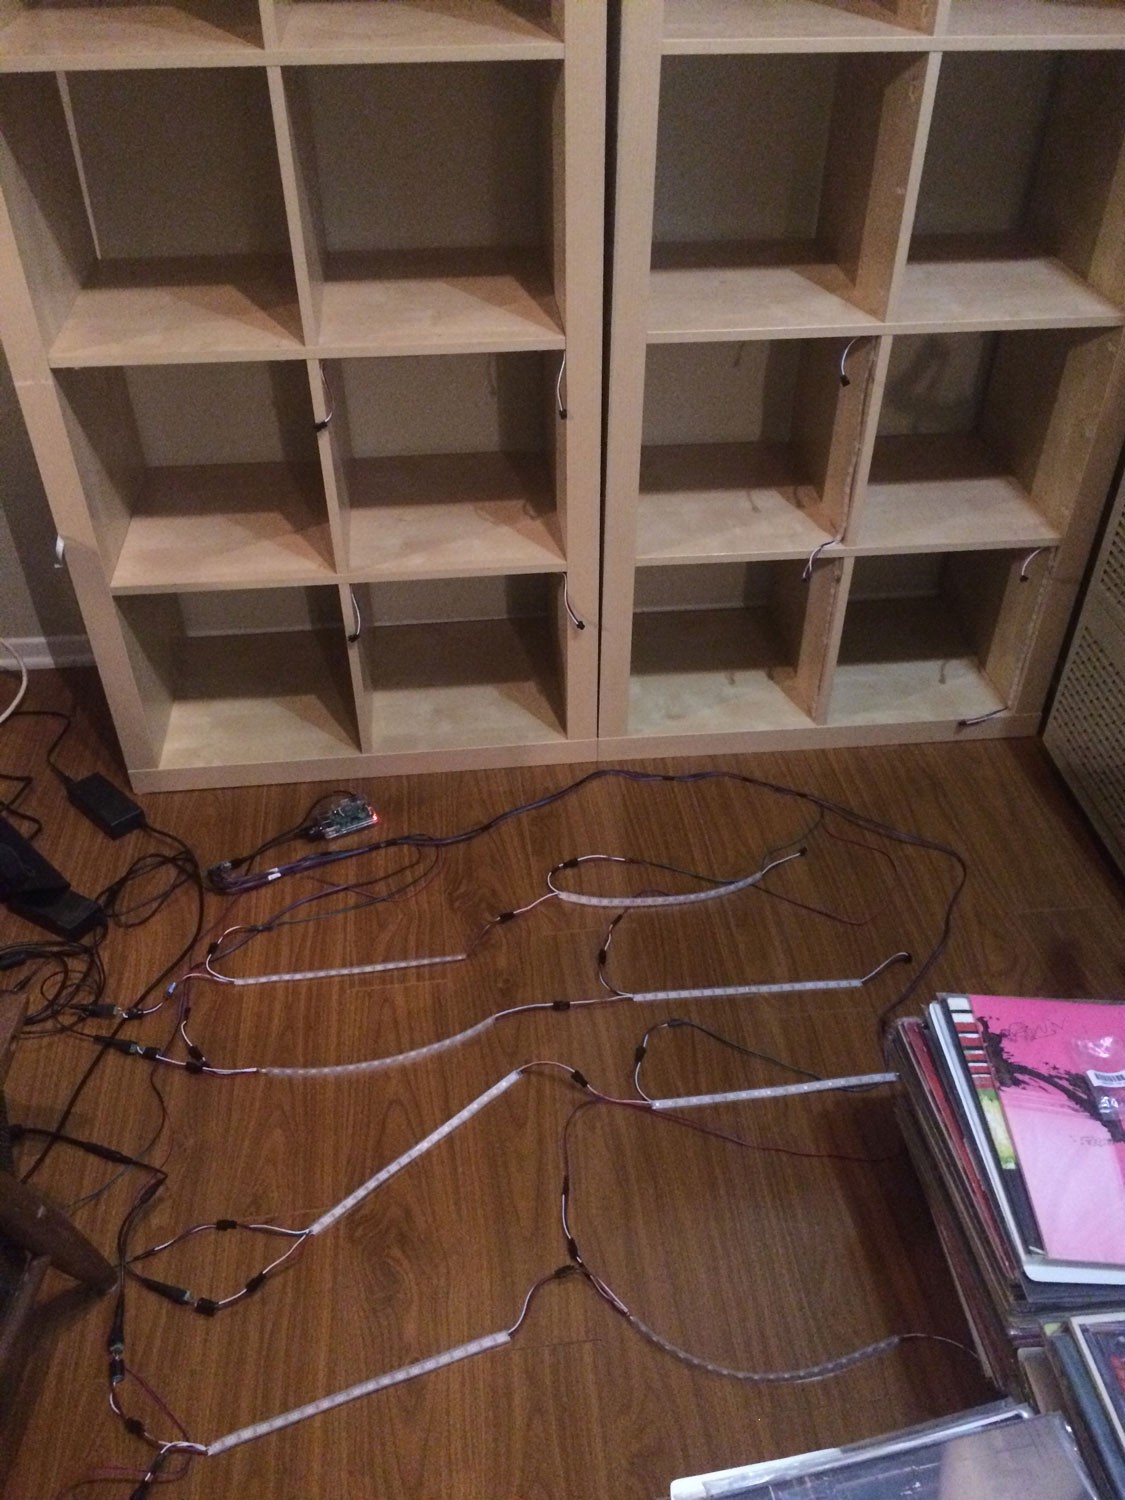
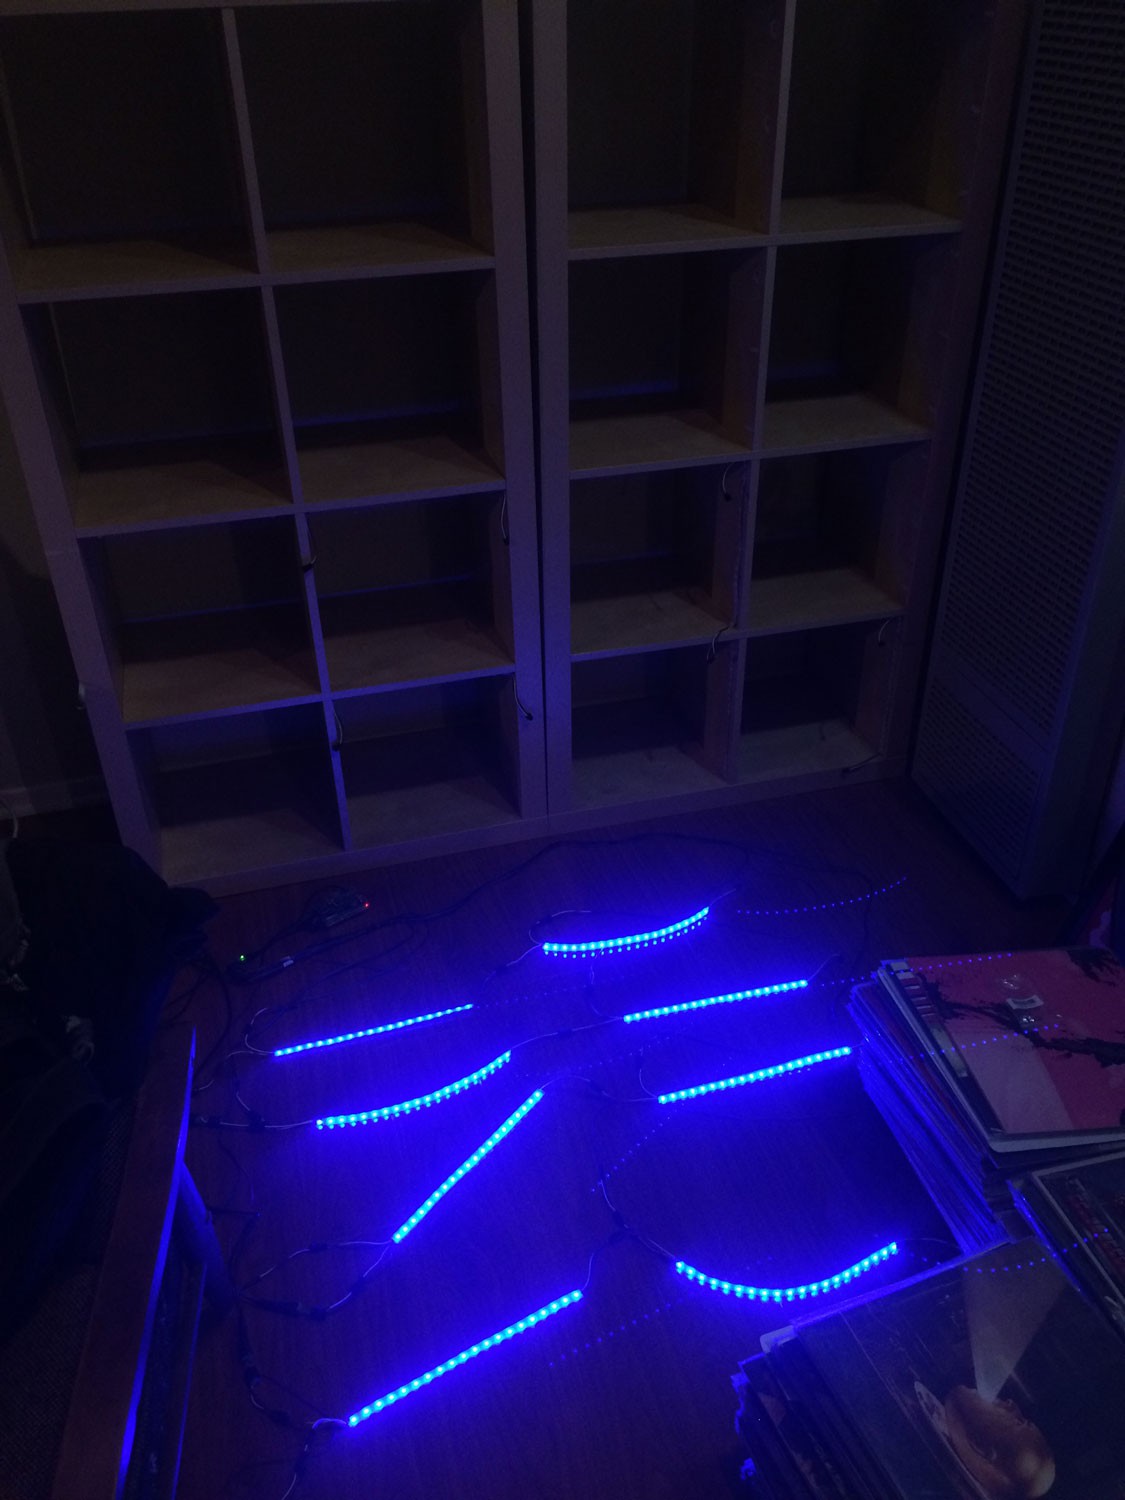
Prior to mounting anything, I suggest wiring everything up on a workbench (or the floor) and making sure everything is wired correctly and happy.
![]()
![]()
-
5Step 5
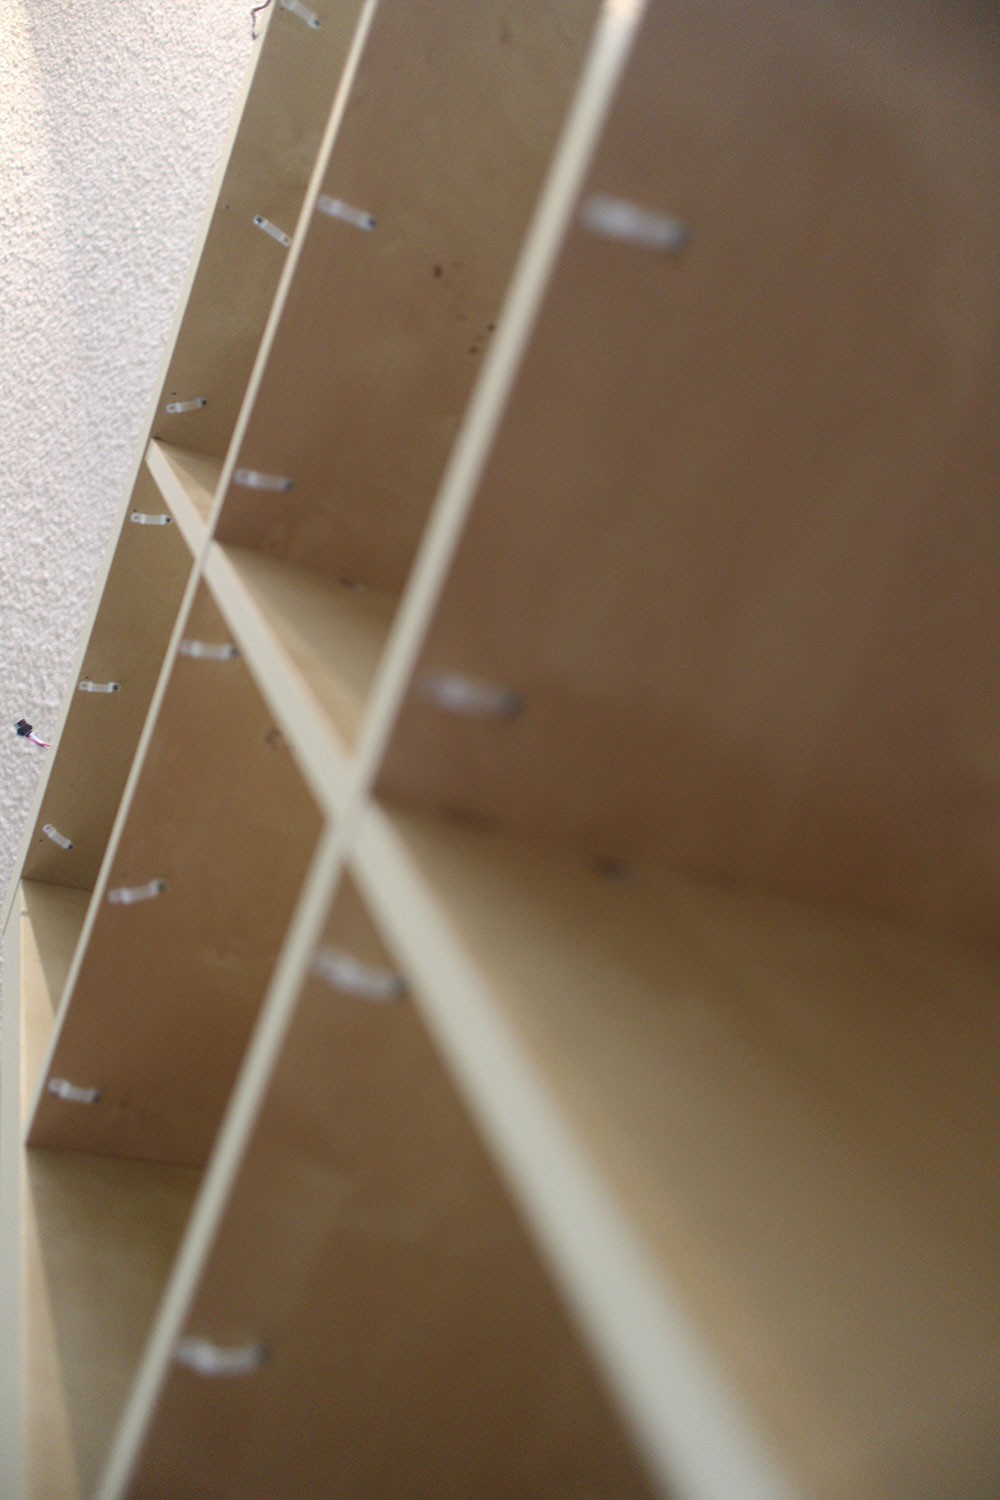
Mount / Wire LEDS
The shelf I'm mounting my LED's on is the Ikea Expedit. It's a popular shelf amongst vinyl collectors. It has since been discontinued but it's predecessor, Kallax, is readily available. The size of the "cubbies" in the shelf dictated the size of the strips of LEDs. I could fit about a third of a meter, or 20 LEDs on my 60 LED per meter strip, in each box. I liked the idea of having many strips of the same length with JST connections on either end. Being modular seemed smart for expansion/reduction and repairs.
I mounted the strips with silicone brackets made to fit around the waterproof sleeve the LED strip is inside. I drilled tiny pilot holes with a dremmel before mounting the brackets. I used #4 3/8" Oval Head Phillips screws.
![]()
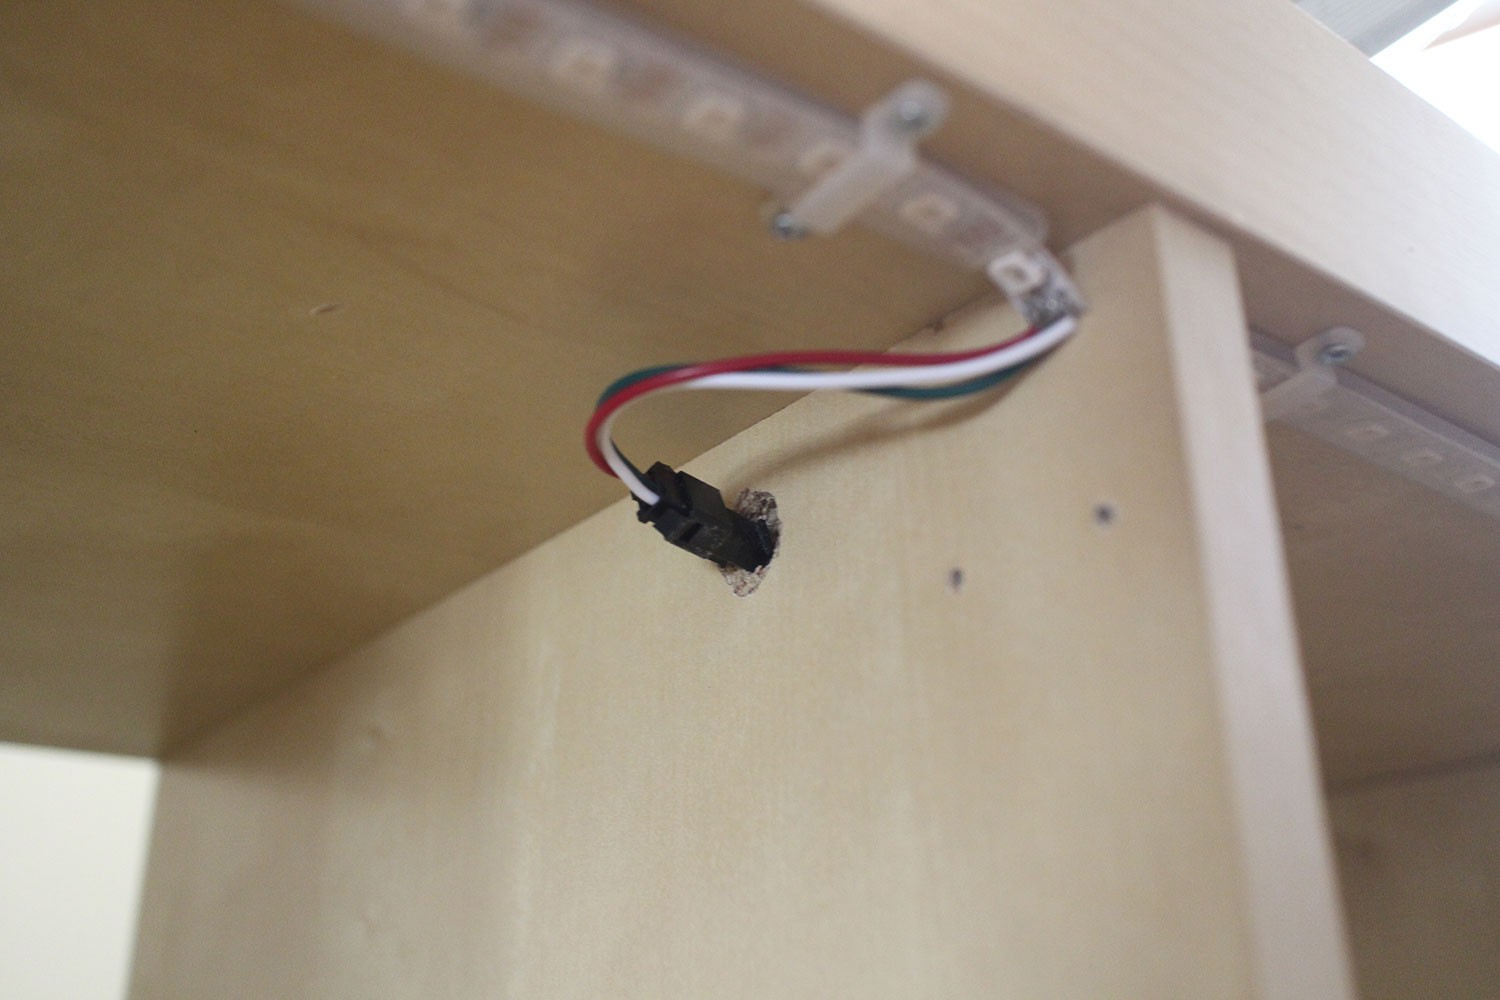
To make the connections between boxes I chose to drill holes through the inner walls of the shelf in order to conceal as much cable as possible. My shelf setup is (2) seperate 2x4 shelves. This prevented me from completely hiding all the cable as I did not want to drill through the exterior walls of the shelves to make the connections between the two units. The cable connections were always a temporary solution until I upgraded to a single 4x4 unit or an even bigger 5x5.
![]()
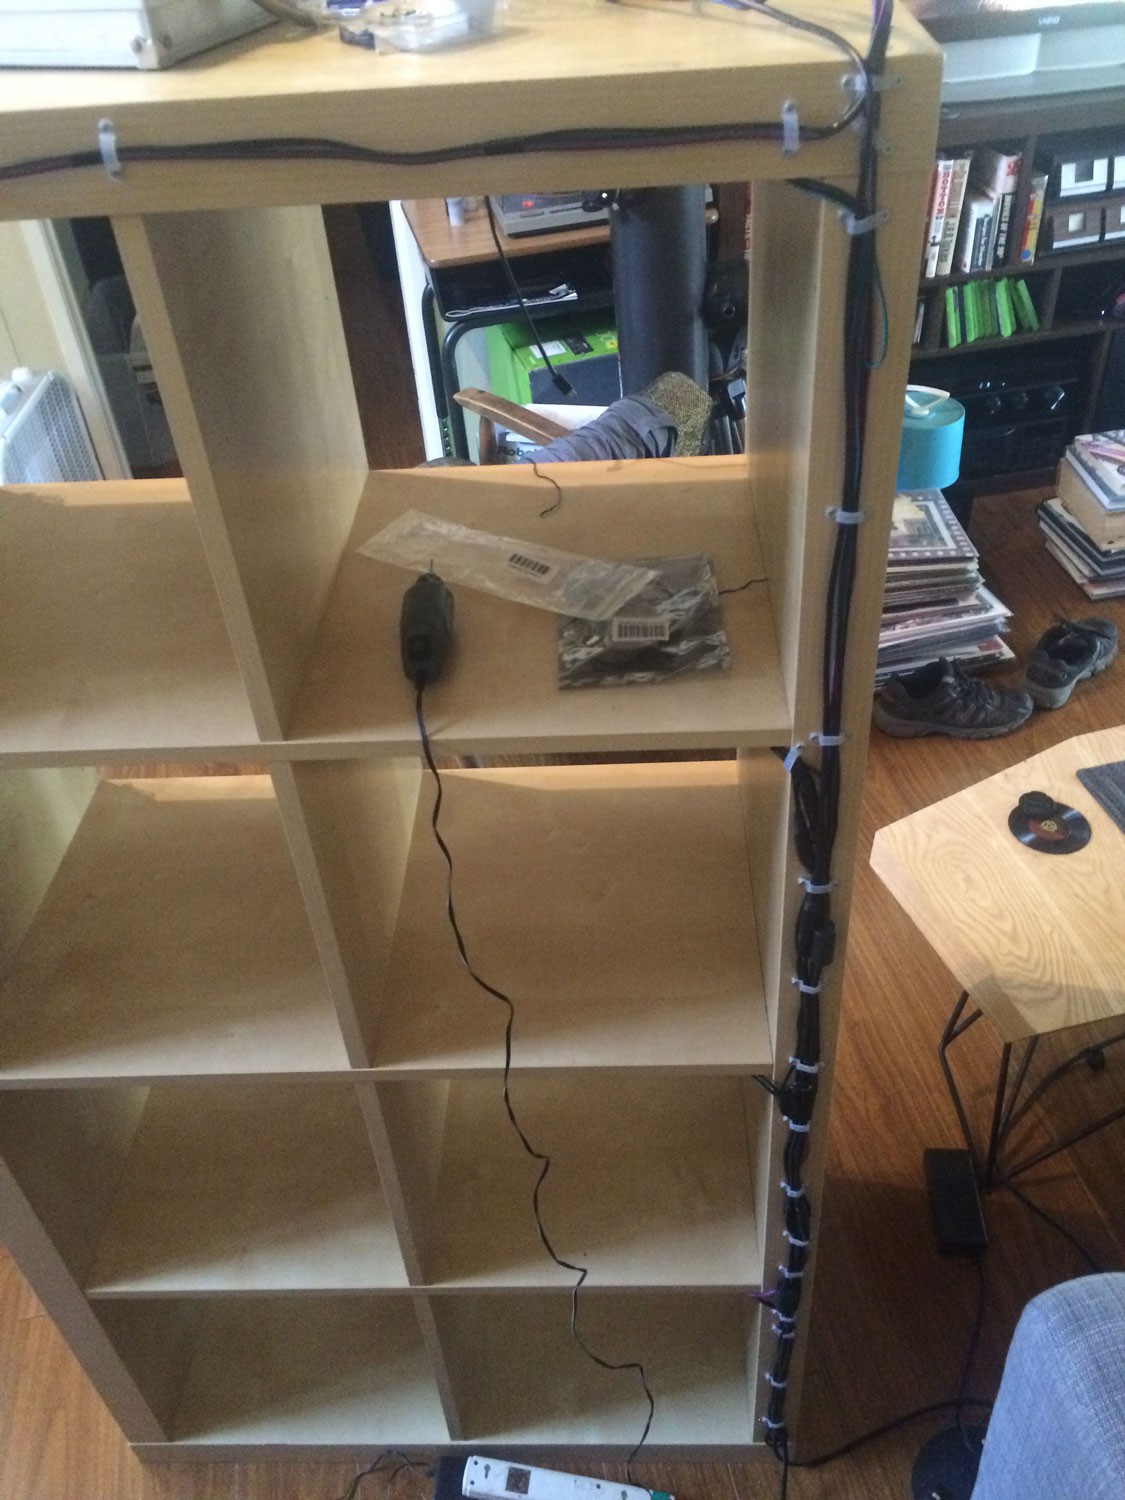
Shot of cable management on backside of shelf:
![]()
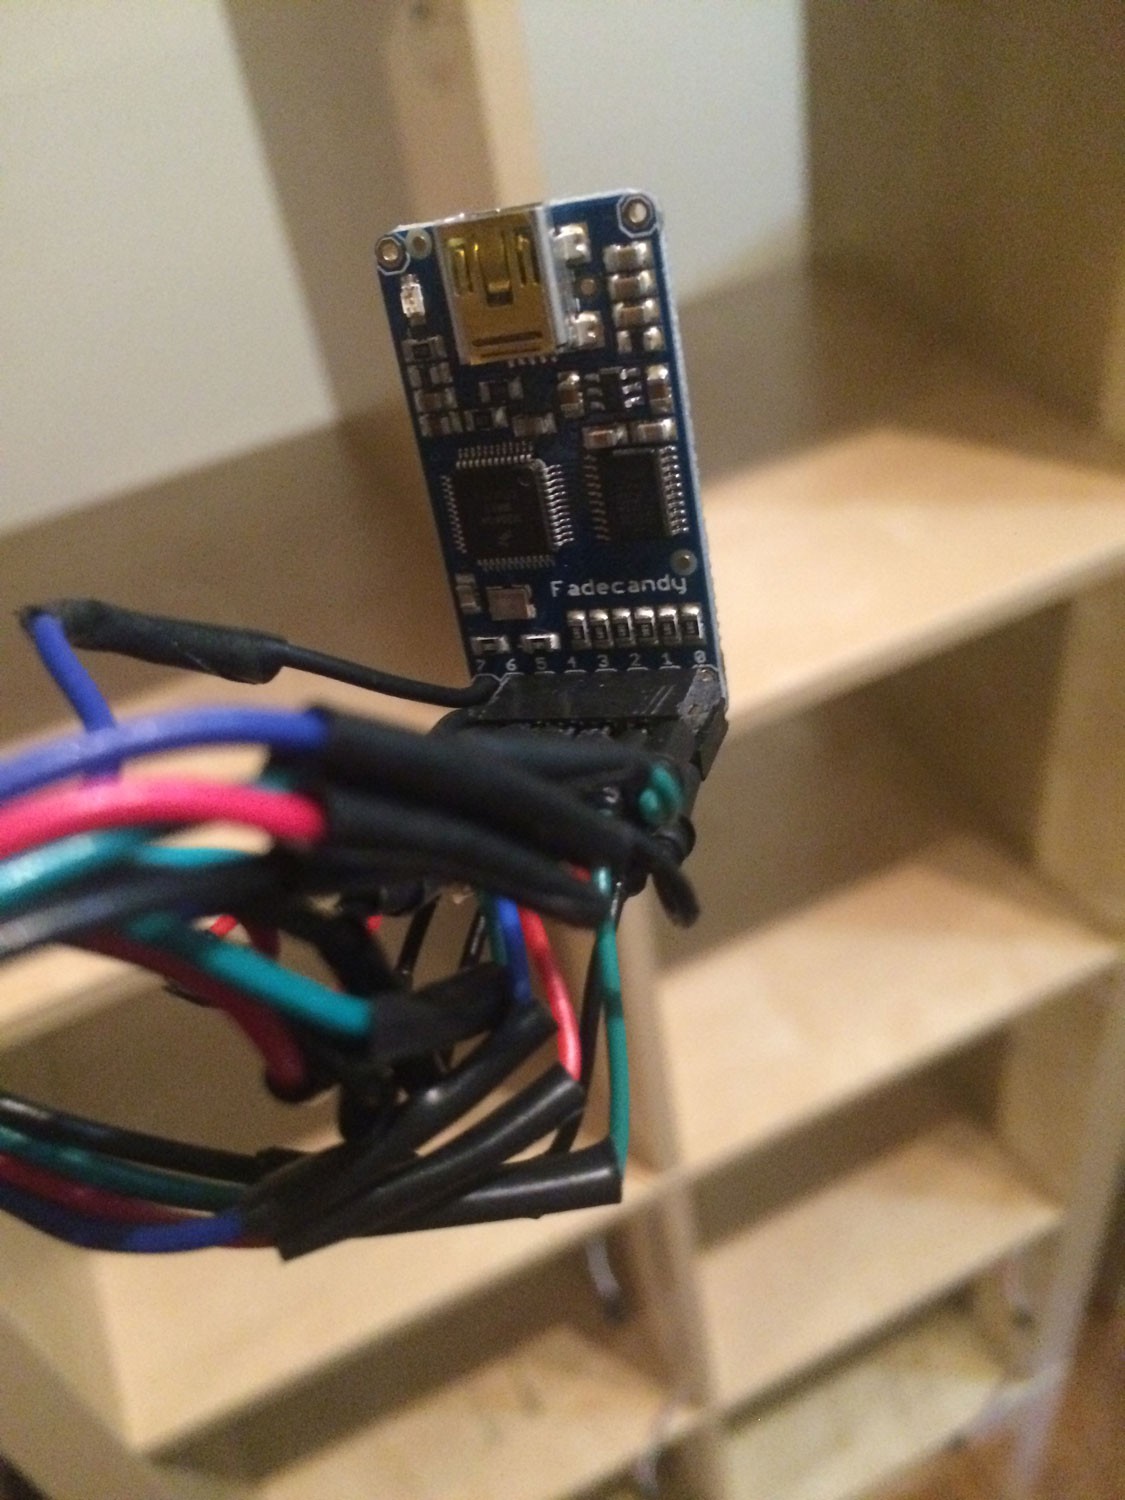
Termination of data lines at Fadcandy :
![]()
-
6Step 6
RPi / Fadecandy Setup
I followed the setup for the RPi and Fadecandy here and here.
This got the RPi up and running out the box and setup on my home network.
For the fadecandy server setup, this is what my fcserver.json file looks like:
{
	"listen": [null, 7890],
	"verbose": true,

	"color": {
		"gamma": 2.5,
		"whitepoint": [0.7, 0.7, 0.7]
	},

	"devices": [
		{
			"type": "fadecandy",
			"serial": "MY_FC_SERIAL",
			"map": [
				[ 0,    0,   0, 40 ],
				[ 0,   40,  64, 40 ],
				[ 0,   80, 128, 40 ],
				[ 0,  120, 192, 40 ],
				[ 0,  160, 256, 40 ],
				[ 0,  200, 320, 40 ],
				[ 0,  240, 384, 40 ],
				[ 0,  280, 448, 40 ]
			]
		}	]
}
Now the LED's can be tested using the Fadecandy's built in webserver testing tool by browsing to the following url in your favorite browser: "whaternameyougaveyourRPI.local:7890" and selecting 50% or full brightness from the 'Test Patterns' dropdown menu.
-
7Step 7
Install Webserver (Apache, PHP, MySQL)
I don't remember which documentation I followed online but there's a wealth of info out there on the subject.
-
8Step 8
Populate the Database
I have always kept a running list of my records going. I first kept the list at Record Nerd, then eventually moved it over to Dead Format.
I then used Import.io to scrape the info about my record collection from my Dead Format page. Import.io gives you a url and an API key so you can parse the data.
I used this script to fill my MySQL database with the info from import.io. I saved it as data.php at the root of the webserver on the raspberry pi and ran it through a browser on my laptop.
<?php
$servername = "localhost";
$username = "mysqlusername";
$password = "mysqlpassword";
$dbname = "recordShelf_db";
//connect to import.io API
$json = file_get_contents('https://api.import.io/store/connector/816986bd-ec00-4b40-a517-6b7b4f1cc3e6/_query?input=webpage/url:https%3A%2F%2Fdeadformat.net%2Fcollection%2Fiseriouslyhateyou&&_apikey=*INSERT_YOUR_IMPORT.IO_API_KEY*');
//decode the json code from the API response
$data = json_decode($json,true);

// Create connection
$conn = new mysqli($servername, $username, $password, $dbname);
// Check connection
if ($conn->connect_error) {
    die("Connection failed: " . $conn->connect_error);
}
//had to add this to select a DB so that mysql_real_escape_string would function properly
mysql_select_db('recordShelf_db', mysql_connect('localhost', 'mysqlusername', 'mysqlpassword'));
//loop through API response
foreach ($data['results'] as $result) {
	$temparray = explode ("|", $result['lps']);

	$sql = "INSERT INTO twelve_in (artist, title, label, color, extra)
			VALUES ('" . mysql_real_escape_string($temparray['0']) . "','" . mysql_real_escape_string($temparray['1']) . "', '" . mysql_real_escape_string($temparray['2']) . "', '" . mysql_real_escape_string($temparray['3']) . "', '" . mysql_real_escape_string($temparray['4']) . "')";
	//echo "Artist: " . $temparray['0'] . "<br>";
	//echo "Title: " . $temparray['1'] . "<br>";
	//echo "Label: " . $temparray['2'] . "<br><br>";
		if ($conn->query($sql) === TRUE) {
    	echo "New record created successfully",$temparray[0],"<br>";
			} else {
    			echo "Error: " . $sql . "<br>" . $conn->error;
			}
	}
$conn->close();
?>
recordShelf
recordShelf is an LED based organization system for any type of flat media you store on a shelf.
Discussions
Become a Hackaday.io Member
Create an account to leave a comment. Already have an account? Log In.