Introduction
In this ESP32 tutorial we will check how to send data with a socket client on the Arduino core.
Since we will need to reach a socket server, we will implement our own using Python. You can check in detail how to set a socket server in Python on this previous post.
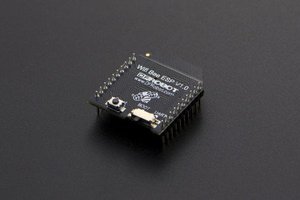
The tests were performed using a DFRobot’s ESP32 module integrated in a ESP32 development board.
The Python code
To get started, we will import Python’s socket module, which will make available the functions we need to set the socket server.
import socket
After that, we create an object of class socket, which we will use to configure the server and to listen to incoming connections.
s = socket.socket()
Now that we have our socket object, we need to bind it to an IP and port. These will be the two parameters that our socket client needs to know in order to reach the server.
To perform this binding, we need to call the bind method on our socket object, passing as first input the IP, as a string, and as second input the port, as a number.
Since we are going to expose the server to be reached in the local network, we will use the ‘0.0.0.0’ IP, which will bind the socket to all the IP addresses on the machine. Later, we will need to find out what is the actual local IP of the machine, so we can reach it from the client.
We will use port 8090 in this code, but you can try with other port. Just make sure the port you are going to use is available and not already in use by other application.
s.bind(('0.0.0.0', 8090 ))
After the binding, we need to make our server start listening to connections. We do it by calling the listen method on the socket object.
Note that this method receives as input the number of unaccepted connections that are allowed before refusing new connections [1]. Since our simple use case doesn’t involve multiple clients, we can pass the value 0.
s.listen(0)To start receiving the actual connections, we need to call the accept method on our socket object. This is a blocking method, which means the execution of the program will stop until a new client connects to the server.
Once a client connects to the server, this method returns a pair with a new socket object and the address of the client. We can then use this new socket object to establish the communication with the connected client.
Note that since sockets are bi-directional mechanisms, we can both send and receive data from it.
Assuming that we want our server to run indefinitely, we do this accept method call inside an infinite loop.
while True:

    client, addr = s.accept()
    # client handling code
Now we will start receiving data from the client. We will also assume that the client will be the one closing the connection after sending all the data, so we also read the data inside a nested loop, which will only break when the client disconnects.
To receive data sent by the client, we simply need to call the recv method on the socket object returned by the previously called accept method.
Note that in Python 3.x (the one I’m using for this tutorial) the recv method returns the data as a bytes object. On other hand, on Python 2.x, the data is returned as a string, so if you are using an older Python version you should adapt your code accordingly.
As input, the recv receives the maximum number of bytes to receive at once. If more than the specified number of bytes are sent by the client, they can be retrieved with other calls to the recv method.
One important thing to keep in mind is that the recv method is also blocking. So, after calling this method, the execution will block until either the client sends some data or disconnects.
In case of disconnection, the recv method will return an empty bytes object, which we can leverage as stopping condition for the data reading loop.
while True:

 client, addr = s.accept()
...
Read more »
 muzi
muzi
 Alan Kilian


 Harsh
Harsh