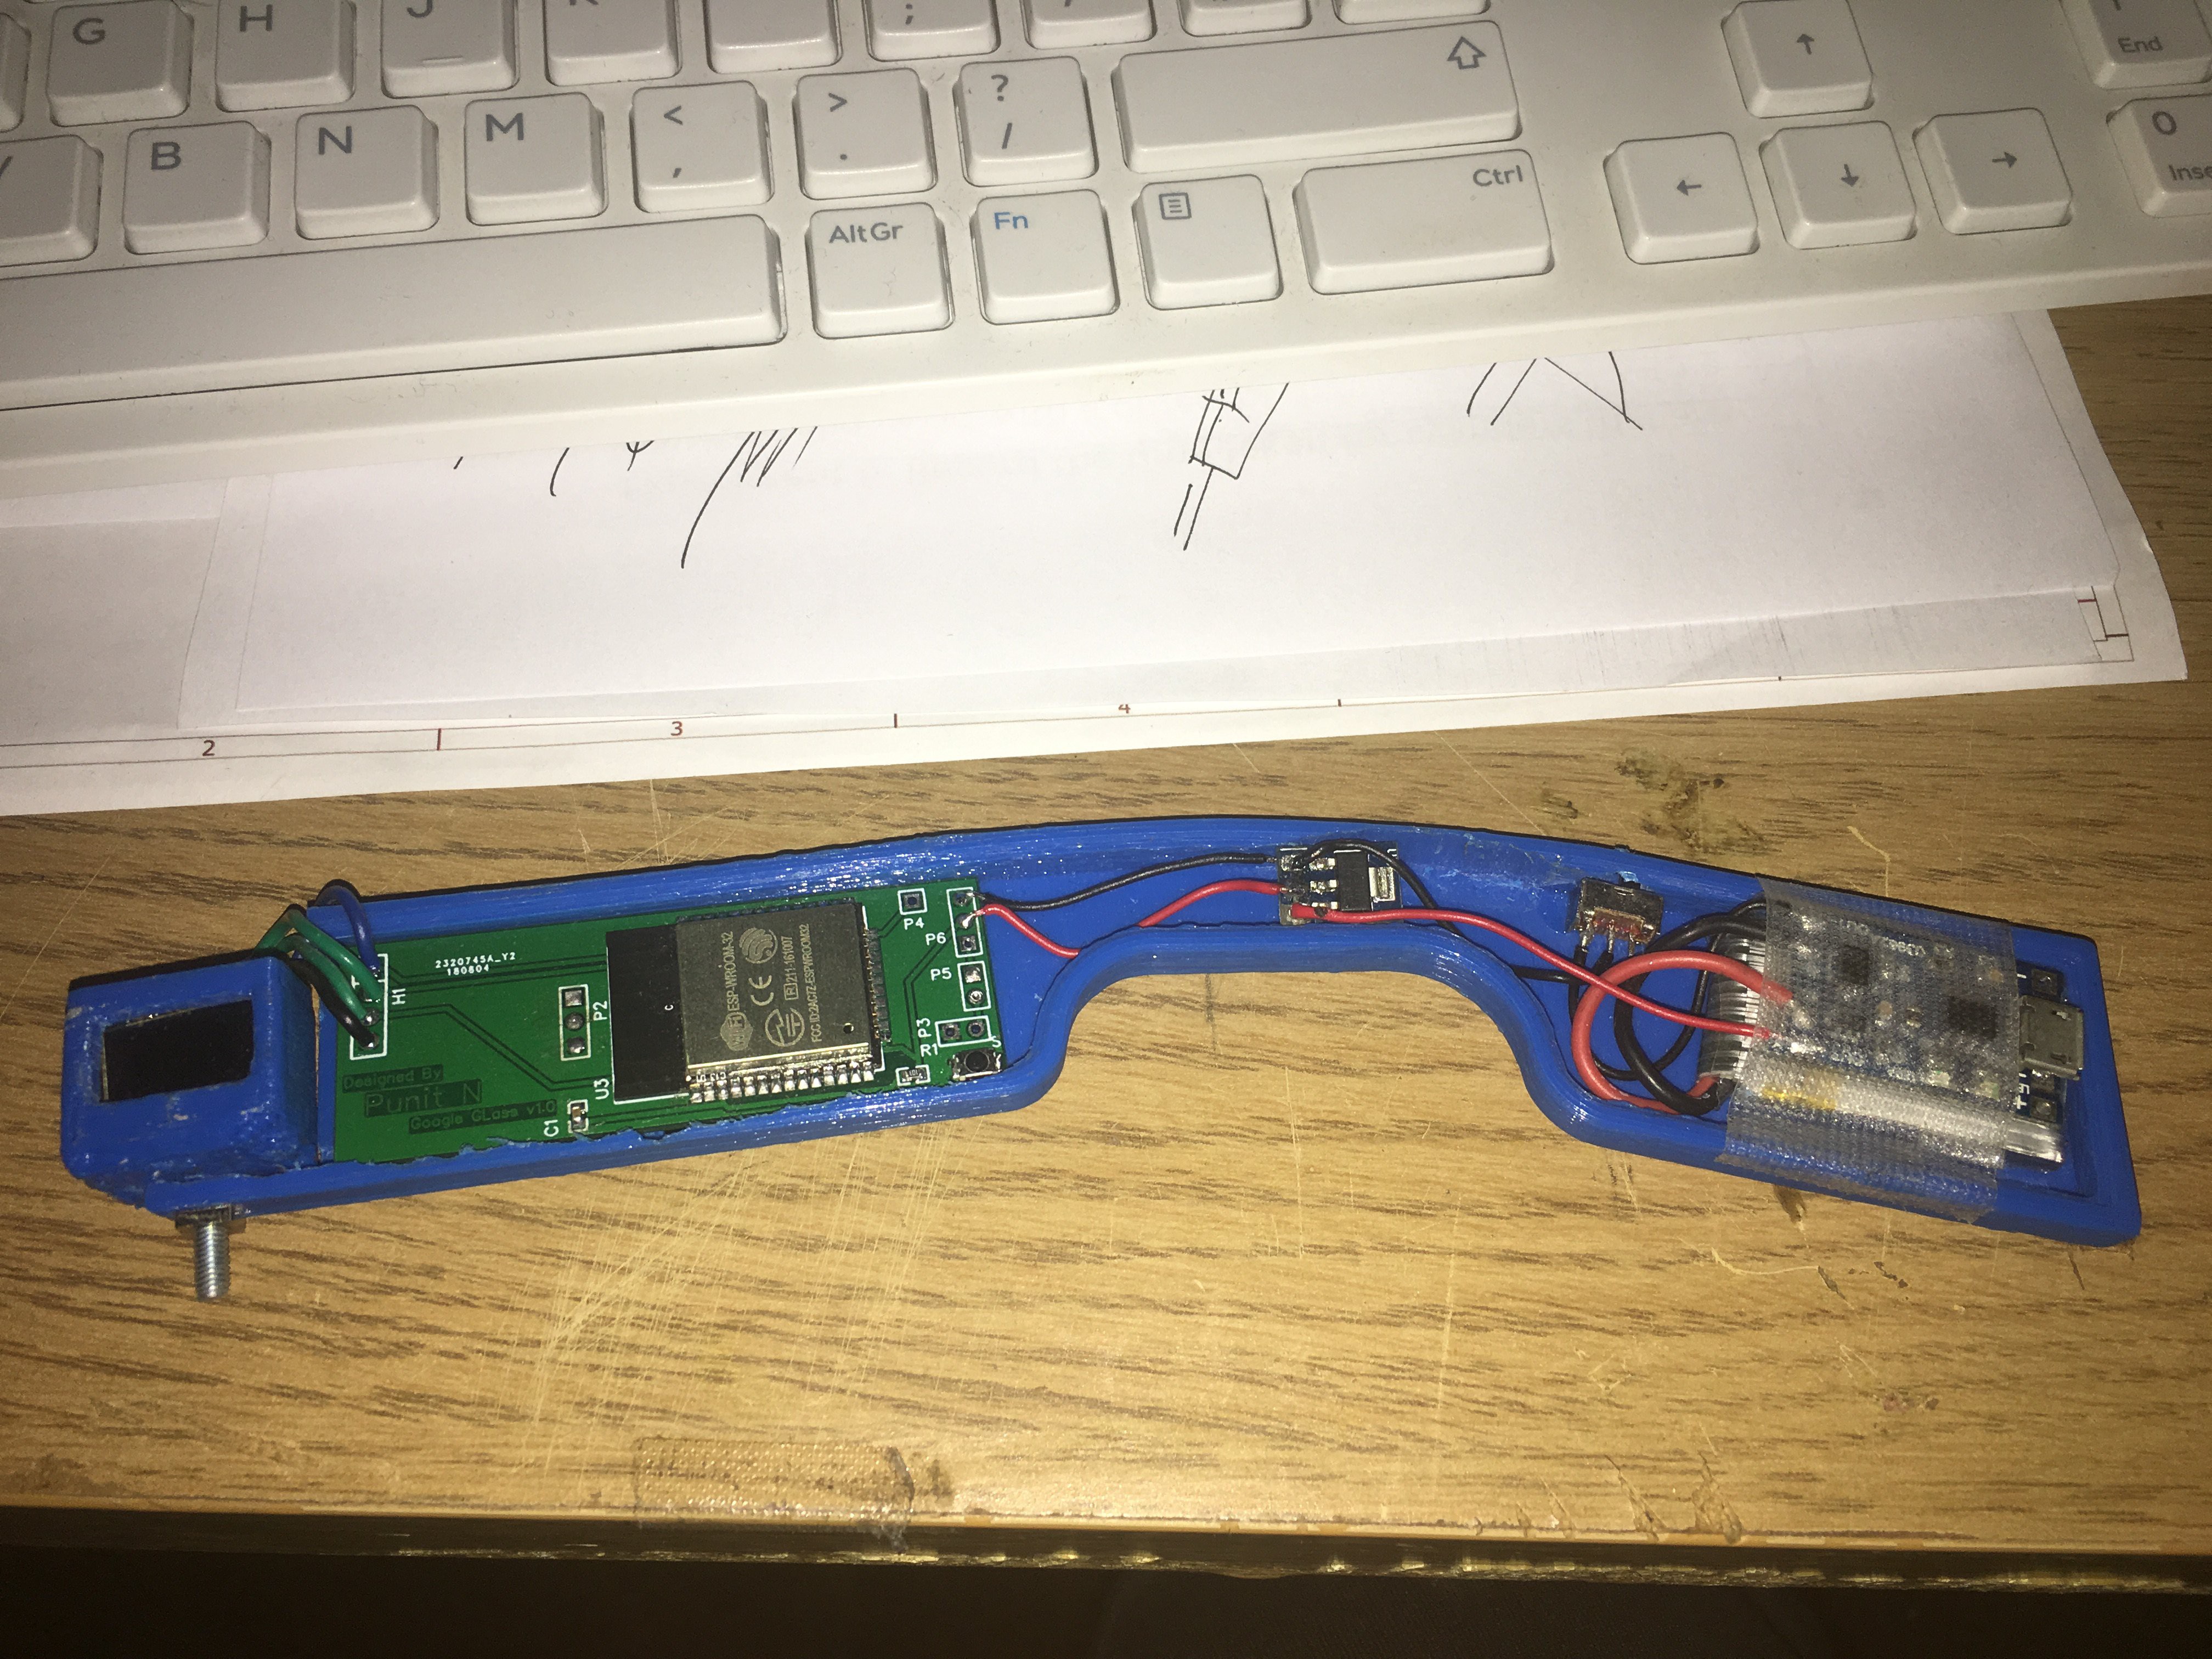
Done with installing the main components, the walls of the 3D print were too thick so I used a rotary tool to carve some space out for the custom PCB that holds the ESP32, Boot button and space for headers to connect the serial converter. next is to play around with the optics and get the software running.

Discussions
Become a Hackaday.io Member
Create an account to leave a comment. Already have an account? Log In.