Lex Kravitz
-
Setting up the Blynk app
06/30/2018 at 22:00 • 0 commentsSee instructions here for info on how to set up a Blynk app to monitor multiple devices like this, including exporting data, etc.
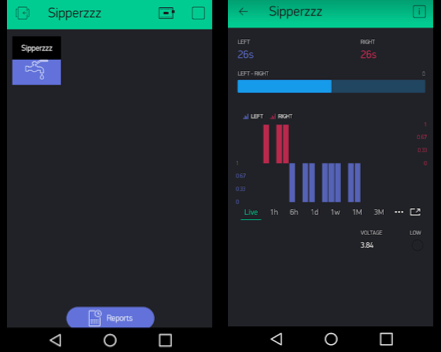
I've set this up to have a home-screen that tracks total interaction time on both sippers (currently only showing one device but the idea is to monitor many of these at once. For each device we're tracking total interaction time on each sipper, as well as battery voltage. I'll re-post screenshots when I have more devices online!If you want to follow along, here's the QR for the Blynk app!
-
Particle code
06/30/2018 at 21:54 • 0 commentsThe code is also a lot simpler than the original design, as this is an IoT device. That means that it doesn't need to keep track of the time (the internet knows this), or log data (we'll use Blynk for real-time visualization and logging). So really all the code needs to do is monitor 2 photointerrupters and count how long they are broken.
Here's my first code!
It works and is probably good enough, but I may try to implement sleep on the Photon to save battery. Right now I'm not doing that because I don't want to lose data while it's re-connecting to WIFI after sleep, and I can only get the Photon to wake on 1 pin, not 2. So I could only have it wake on one sipper. If anyone has insight into how to implement sleep in this project please drop me a line!
/****************************************************************************** Blynk virtual pins: V0 = Battery voltage V1 = Battery altert V2 = left licks V3 = right licks V4 = total licks V5 = left binary (1 if it's active) V6 = right binary (1 if it's active) V7 = Left - right (difference in seconds) Original Creation Date: June 29, 2018 This code is released under the MIT license. Distributed as-is; no warranty is given. ******************************************************************************/ #include <blynk.h> #include <SparkFunMAX17043.h> double voltage = 0; // Variable to keep track of LiPo voltage double soc = 0; // Variable to keep track of LiPo state-of-charge (SOC) bool alert; // Variable to keep track of whether alert has been triggered char auth[] = "BLYNK TOKEN HERE"; //Blynk token (get this from the app!) int leftPin = 2; int rightPin = 3; int left=0; int right=0; int leftbinary=0; int rightbinary=0; int total=0; void setup() { Serial.begin(9600); // Start serial, to output debug data lipo.begin(); // Initialize the MAX17043 LiPo fuel gauge lipo.quickStart(); lipo.setThreshold(20); // Set alert threshold to 20%. Blynk.begin(auth); delay (500); //allow device to settle } void loop() { if (digitalRead(leftPin)==LOW){ leftbinary=1; delay (650); //this delay slows incrementing to 1 count per second left++; //increment leftlicks by 1 total++; } if (digitalRead(rightPin)==LOW){ rightbinary=1; delay (650); //this delay slows incrementing to 1 count per second right++; //increment leftlicks by 1 total++; } voltage = lipo.getVoltage(); soc = lipo.getSOC(); alert = lipo.getAlert(); //Write data to Blynk Blynk.virtualWrite(V0, voltage); Blynk.virtualWrite(V1, alert); Blynk.virtualWrite(V2, left); Blynk.virtualWrite(V3, right); Blynk.virtualWrite(V4, total); Blynk.virtualWrite(V5, leftbinary); Blynk.virtualWrite(V6, rightbinary); Blynk.virtualWrite(V7, left-right); Blynk.run(); delay(200); leftbinary=0; rightbinary=0; } -
Circuitry is much simpler!
06/30/2018 at 21:50 • 0 commentsThe circuitry for this one is much simpler, due to it being an IoT project and not a stand-alone datalogging project. As the internet already knows the time we don't need an RTC, and as Blynk logs data we don't need an SD card reader.
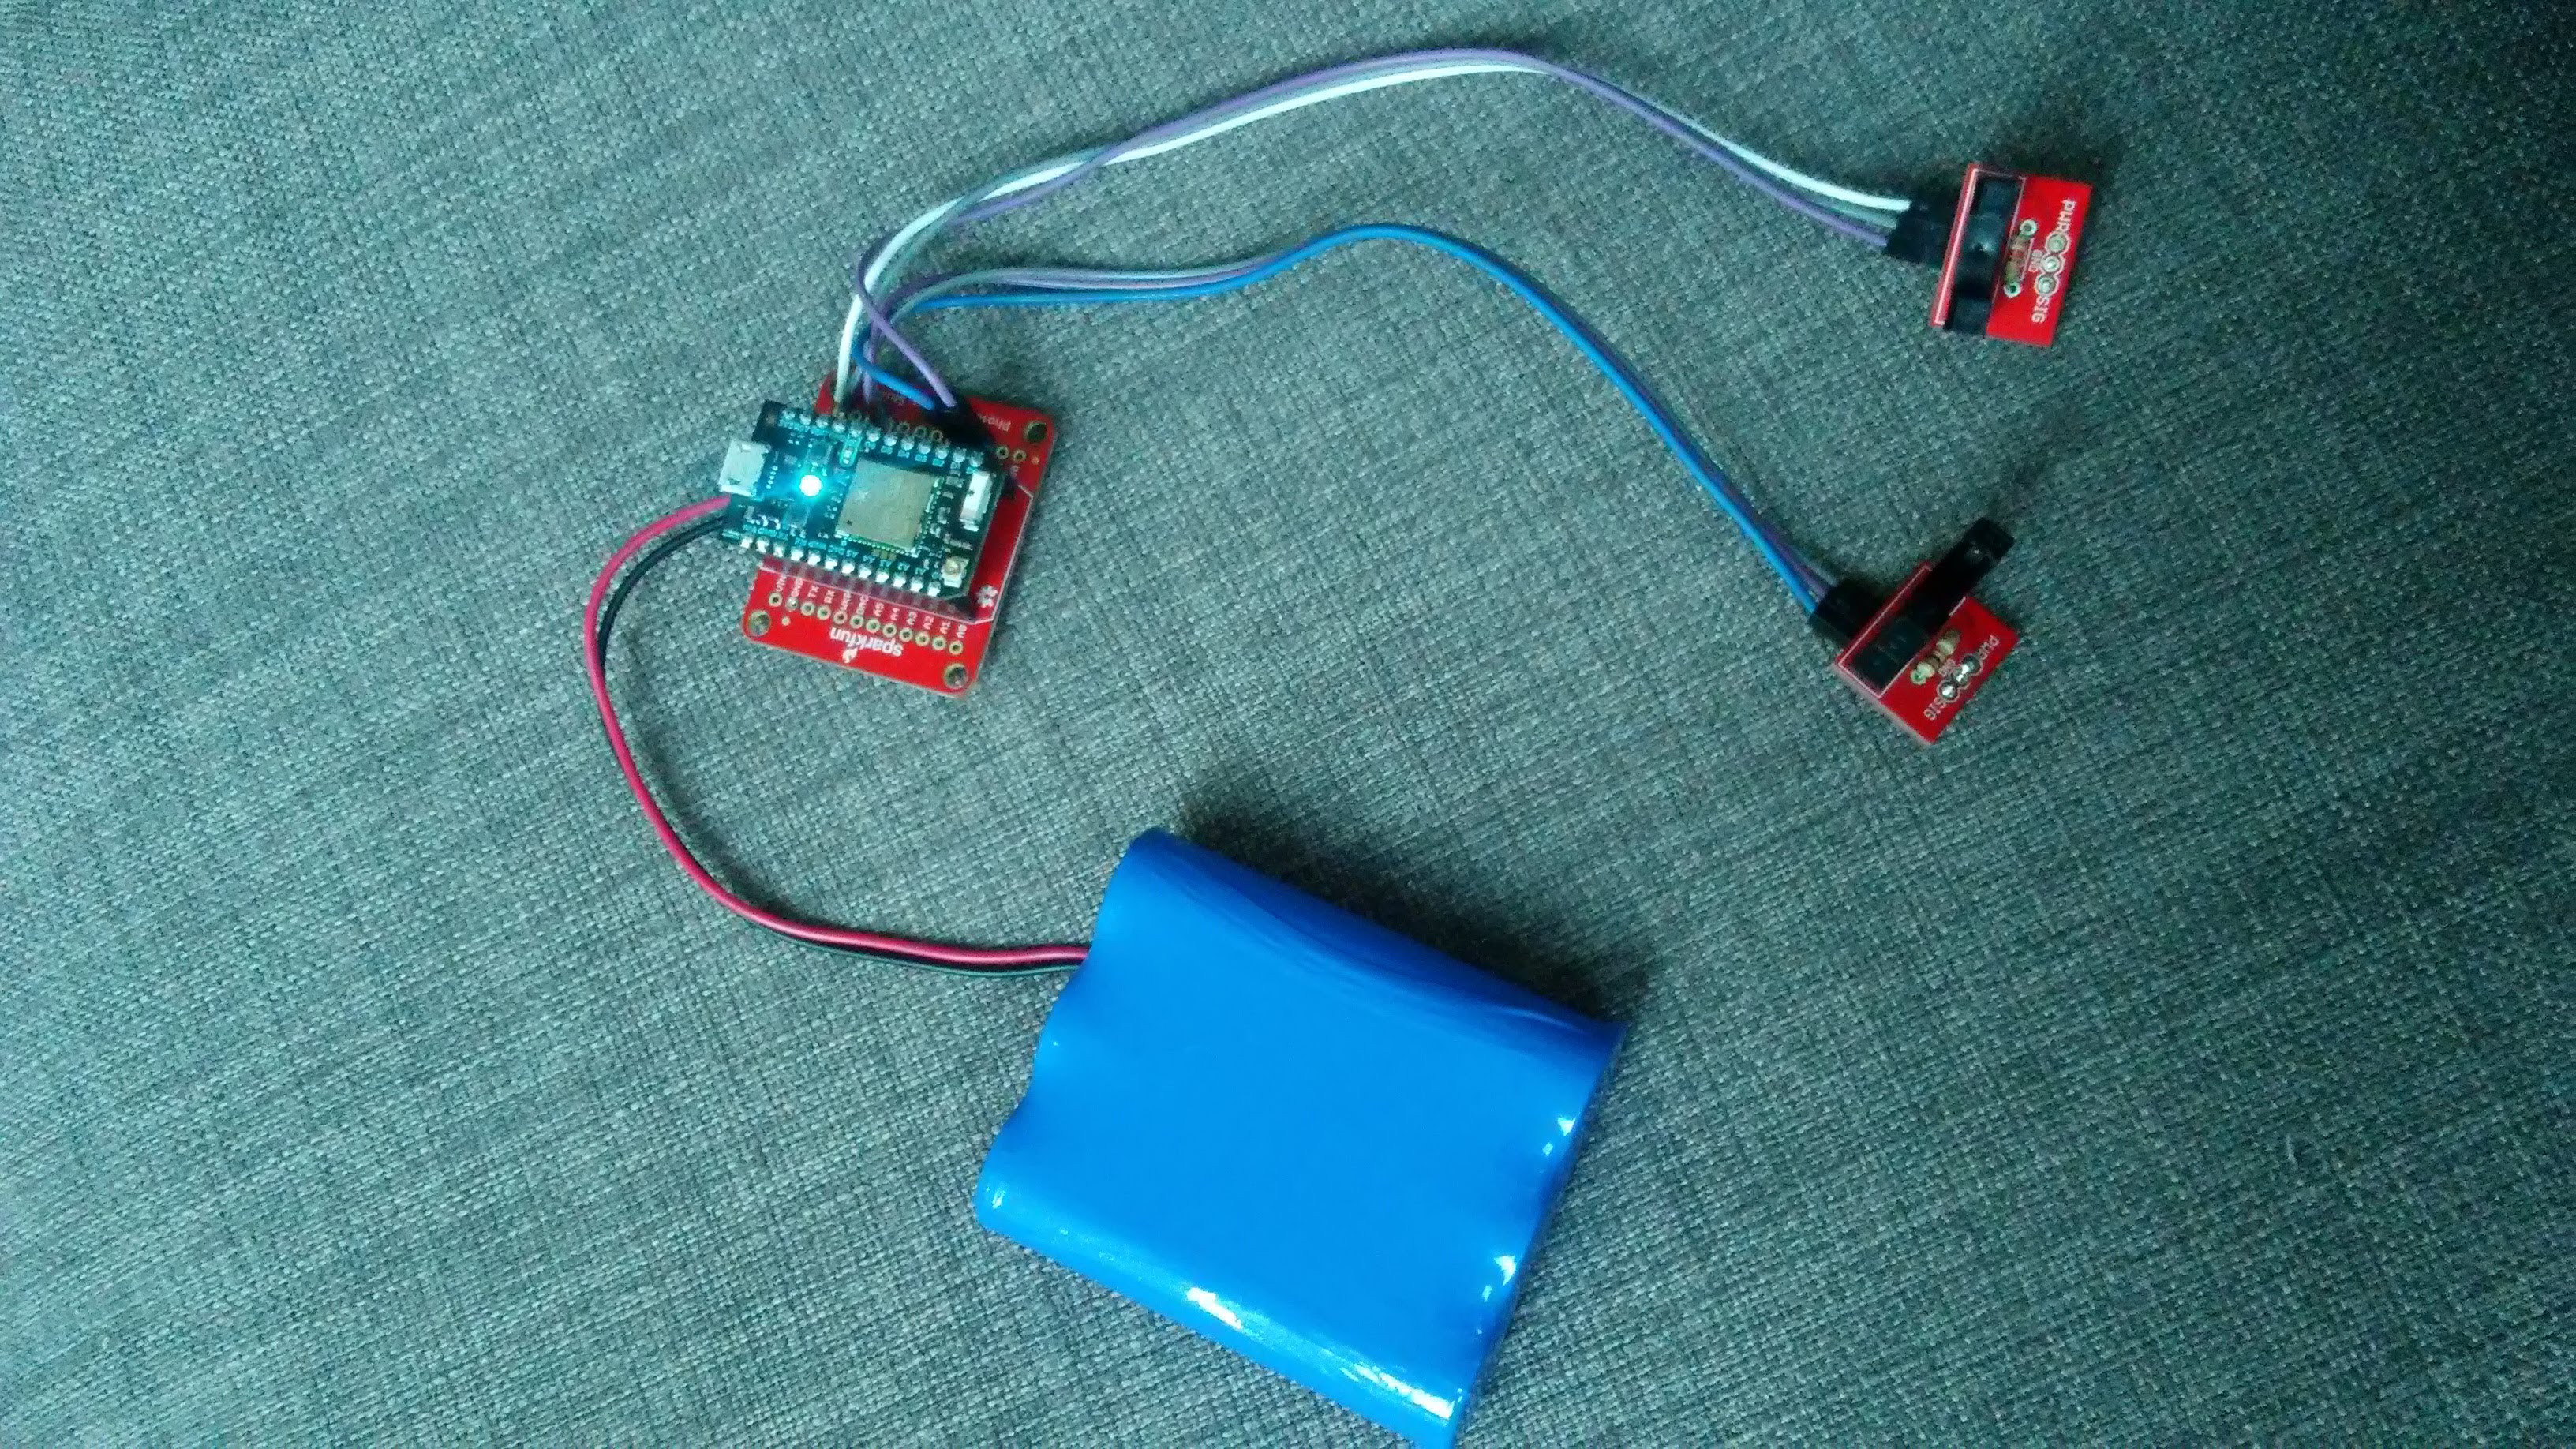
I decided to use the Sparkfun Photon battery shield, as I want this to be battery powered and it contains a "fuel gauge" chip in it. For $13 it seems like a very convenient solution.
This shield has the pins broken out for soldering. I just needed to wire up 2 photo-interrupters and attach them to 3.3V, GND, and D2/D3 (left/right). And then plug in a battery.
![]()
More detailed schematics coming, but that's it for the hardware!
-
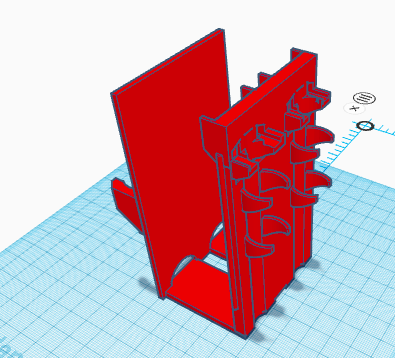
3D design
06/30/2018 at 21:45 • 0 commentsWorking on the 3D design. Photos of the prints coming soon!
Wireless automated homecage two-bottle choice test
A wireless adaptation of https://hackaday.io/project/158279-automated-mouse-homecage-two-bottle-choice-test