 TunMaker
-
1Introduction
This video shows how the robot operates acting as a pick and place Machine.
In this tutorial we will be making a pick and place Machine as this is the most common use for a delta Robot in the industry besides 3d printing. This project took me a bit of time to perfect and was very challenging, it involves:
- Mechanical design and feasibility check
- Prototyping and making of the mechanical structure
- Electrical wiring
- Software and graphical user interface development
- Implementing of computer vision for an automated robot (still need your help in this part)
-
2The Mechanical Design :
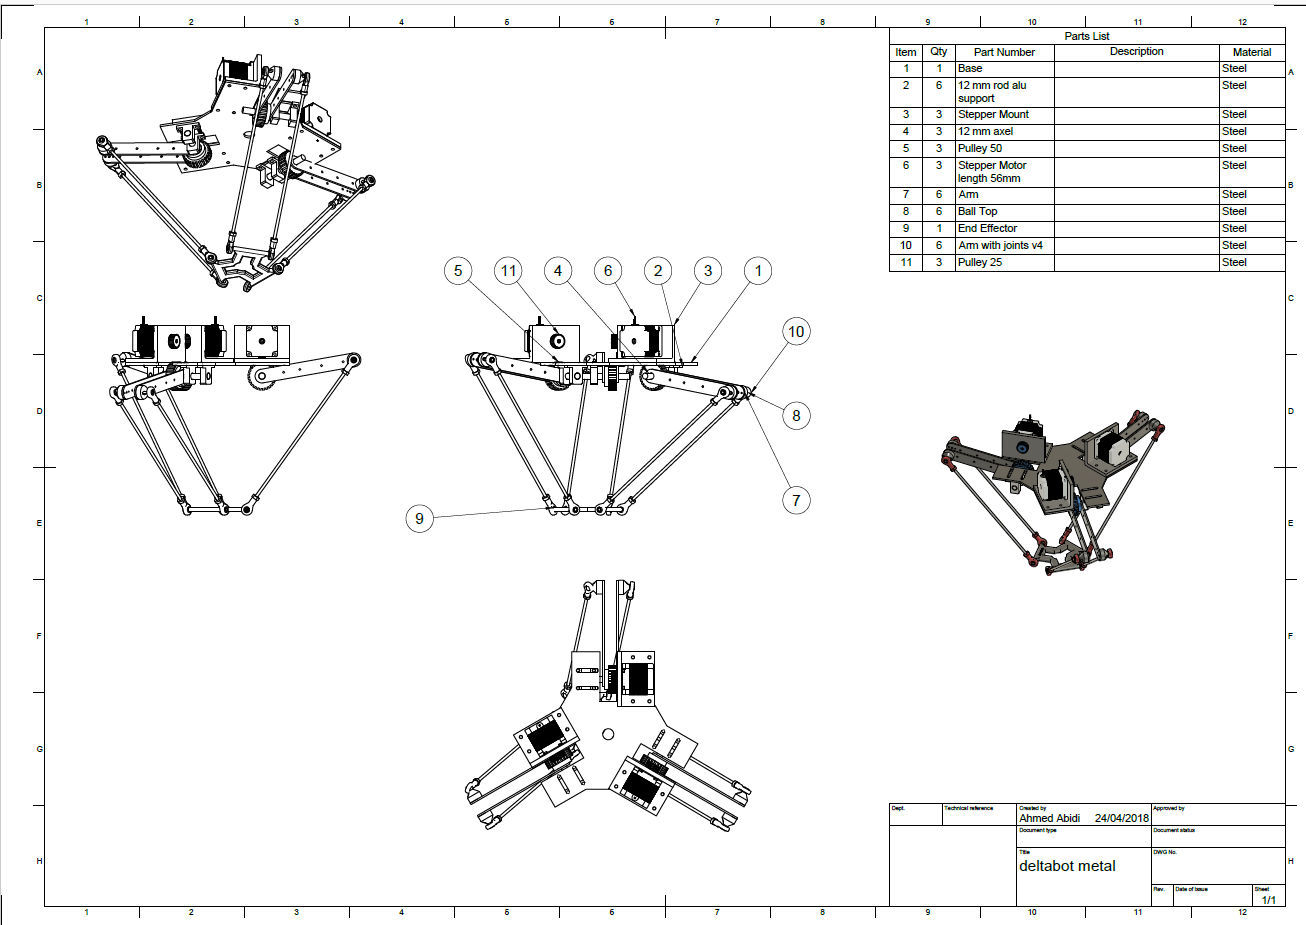
Before I started making the final robot (third version)I designed it on fusion 360 and here’s the 3d Model, Plans and overview:
![]()
For the plans it would be more accurate to get the dimensions from the 3D Model Downloadable Here from my fusion HUB and visit the project page on my website for PDF files
https://www.tunmaker.tn/2018/06/19/delta-robot-project/
![]()
-
3Mechanical Assembly:
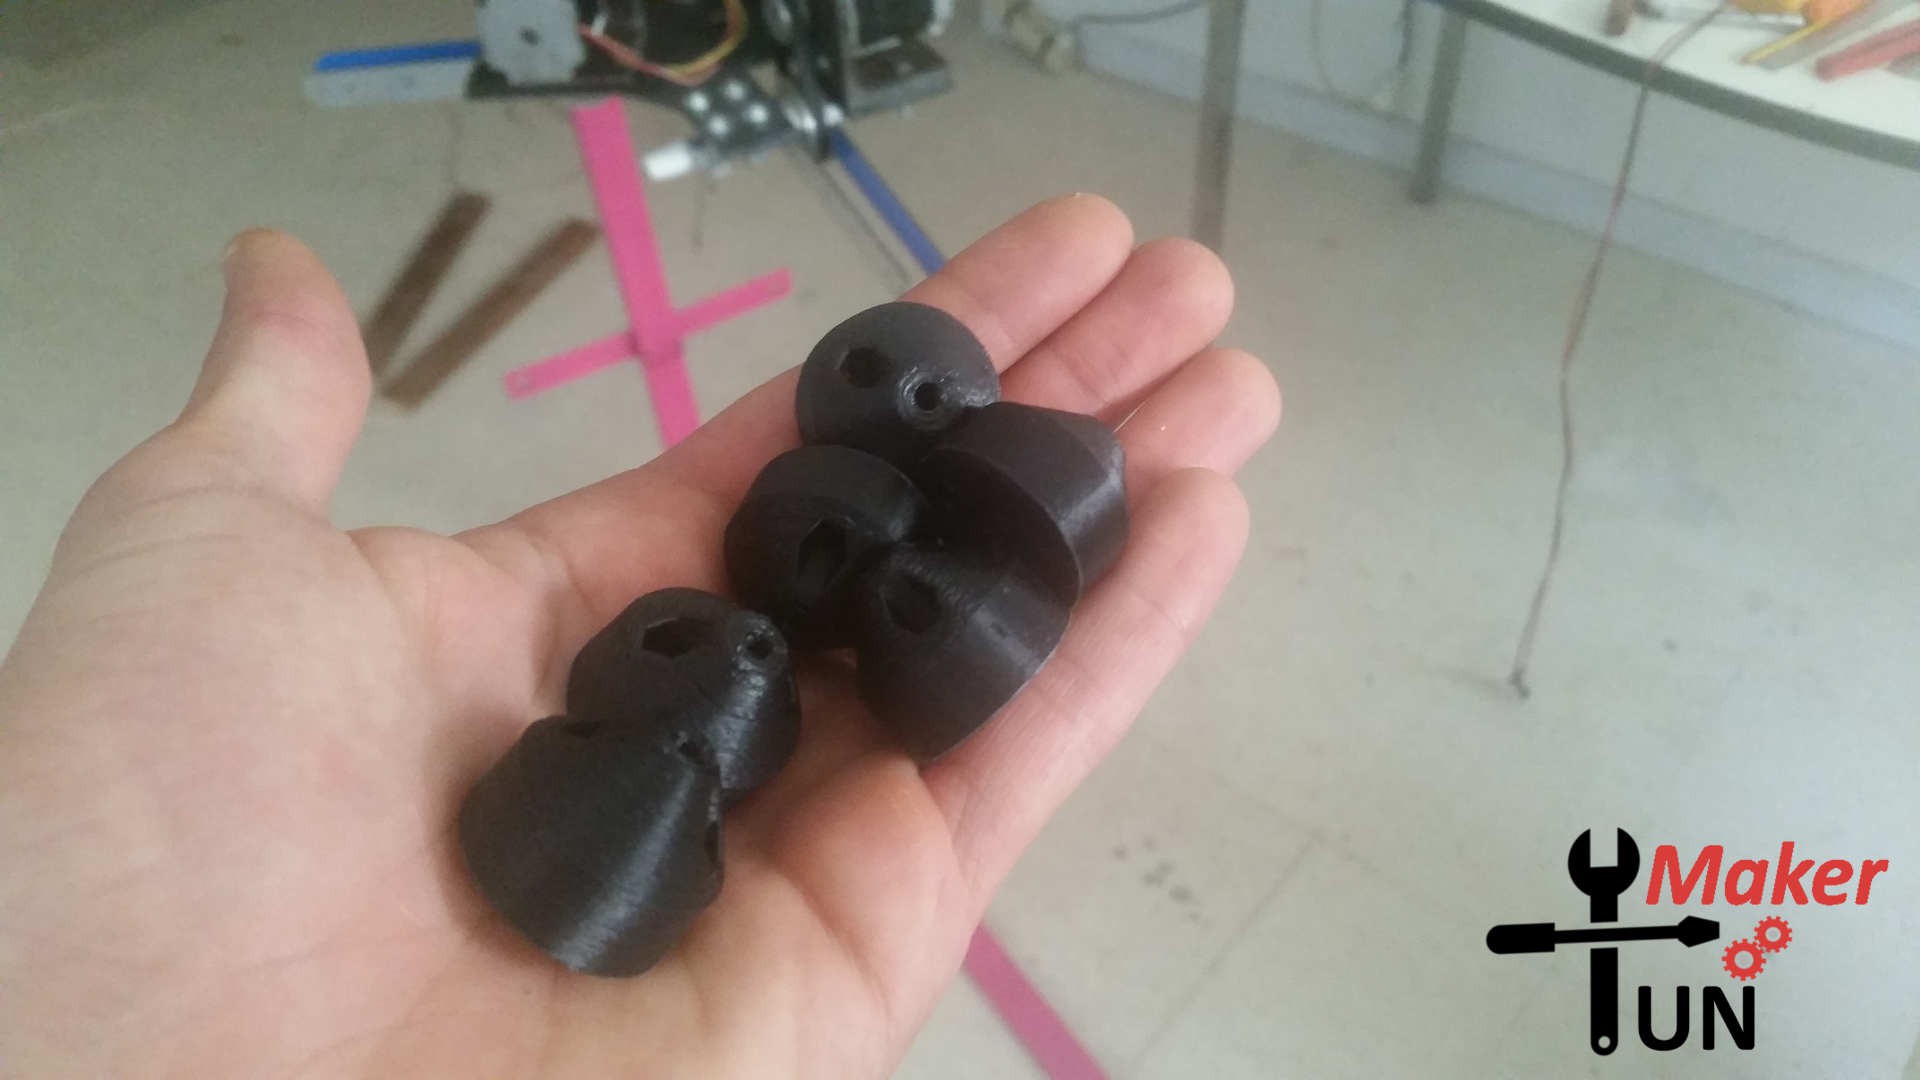
![]()
Start by 3d printing the rod connection and the end effector STL FILES on thingiverse. After that use wood or steel for the base I recommend its CNC cut for the precision as well as you should for the arms I made them from alucobond the material used for store fronts it’s made from rubber sandwiched between two thin aluminum sheet 3mm thick.
Next we have to work on the L shaped steel to mount the steppers, cut to 100mm and holes drilled to mount the steppers(hint: you can make the holes wider to be able to tension the belt )
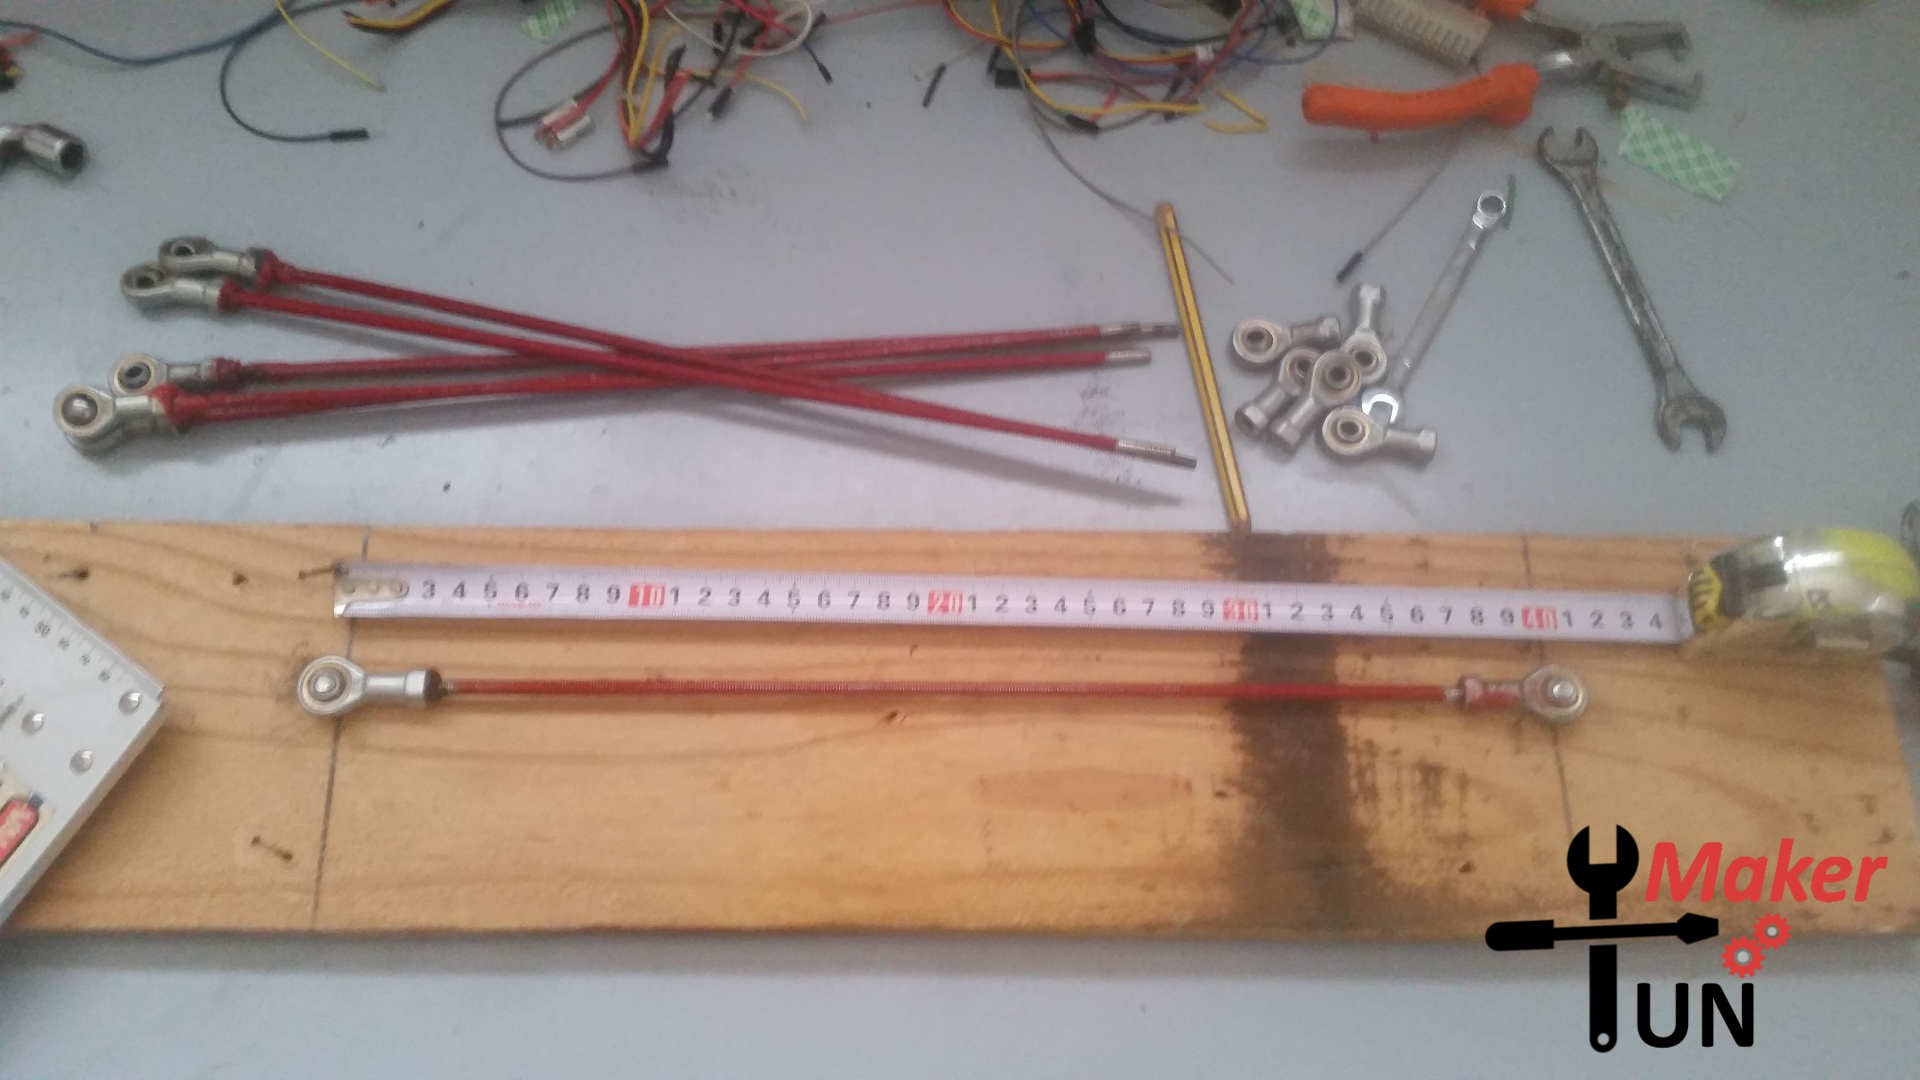
Then the threaded 6 mm Ø rods ,for the forearms connection 400mm length should be cut then threaded or hot glued to the ball joint I used this jig to ensure they all have the same length it is crucial for the robot to be parallel.
![]()
Finally the 12 mm Ø rods should be cut to about 130mm in length to be used for the pivot point of the robot connecting the 50mm Ø pulley.
Now that all the parts are ready you can start assembling everything which is straightforward as shown in the pictures keep in mind you need some sort of support like the pink one I used to be able to hold everything, better than what I did in the part2 video =D.
![]()
complete project build youtube playlist :
-
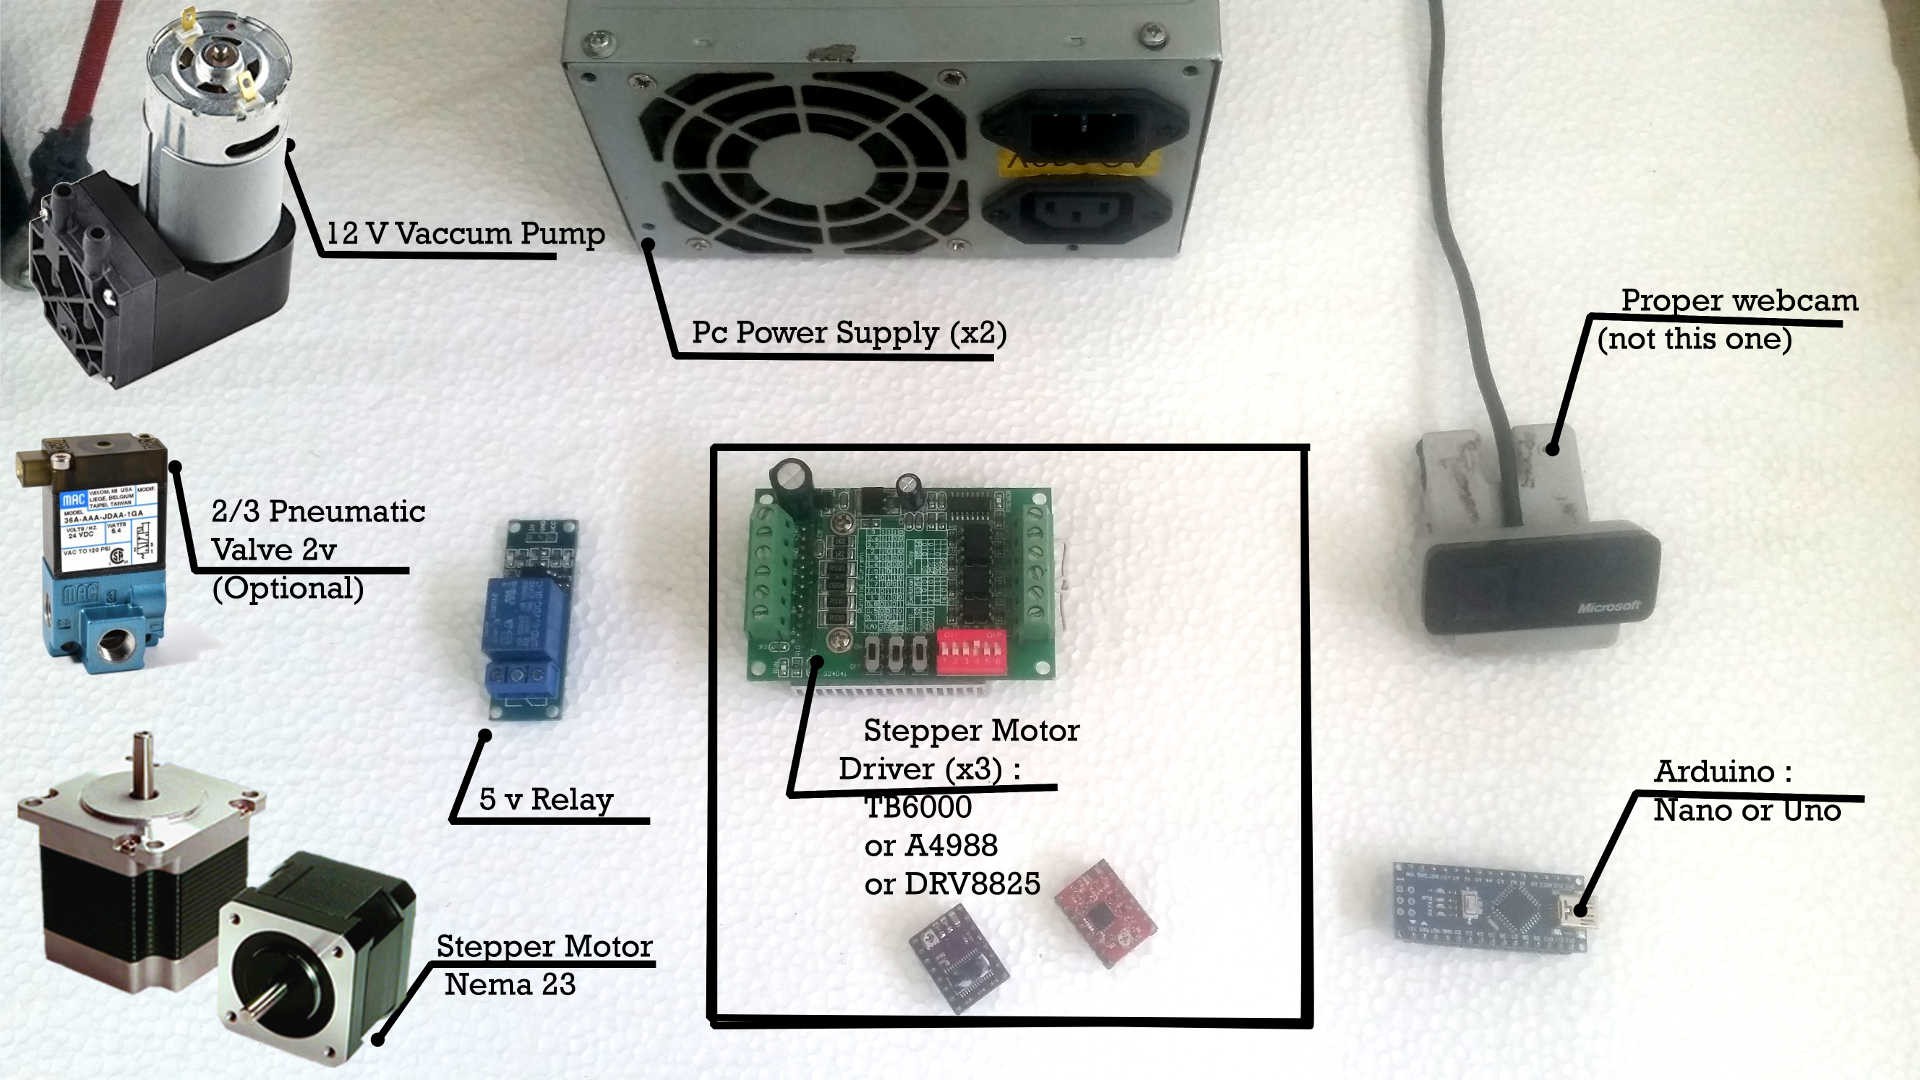
4Electrical :
from minute 5 i talk about the electronics :
![]()
![]()
The main thing we need to do is set up GRBL by downloading/cloning it from its Github repository I used the 0.9 version but you can update to 1.1 (Link: https://github.com/grbl/grbl). Add the library to arduino libraries folder and upload it to your arduino.
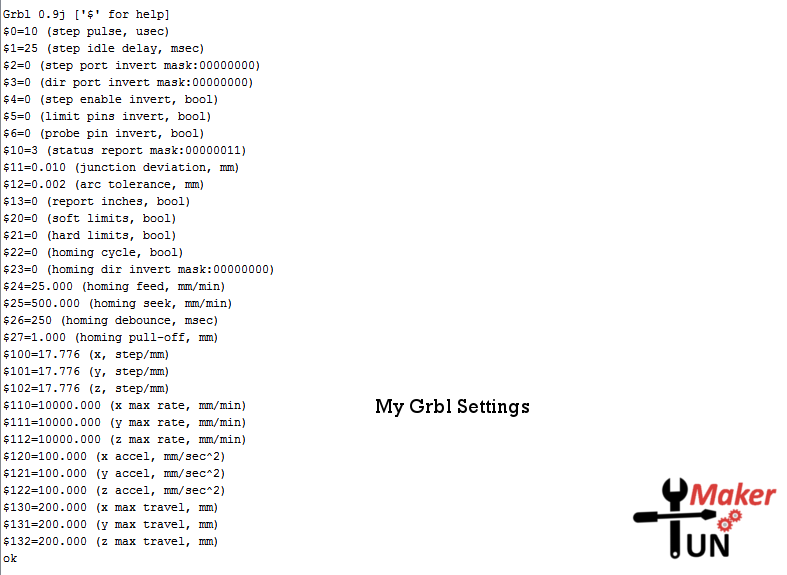
Now that GRBL is on our arduino connect it, open the serial monitor and change the default values as shown in the picture to match your robot configuration:
![]()
I used 50mm and 25mm pulley => 50/25 =1/2 reduction and 1/16th step resolution so 1° angle is 18 steps/°
Now the robot is ready to receive gcode commands:
M3 & M4 ⇒ activate / deactivate Vacuum
X10 ⇒ move stepper X to 10°
X10Y20Z-30.6 ⇒ move stepper X to 10° & Y to 20° and Z to -30.6°
G4P2 ⇒ Wait for two seconds (delay)
At this point with any gcode sender you can make it repeat preconfigured tasks like picking & placing.
you can download demo gcode files on my website
-
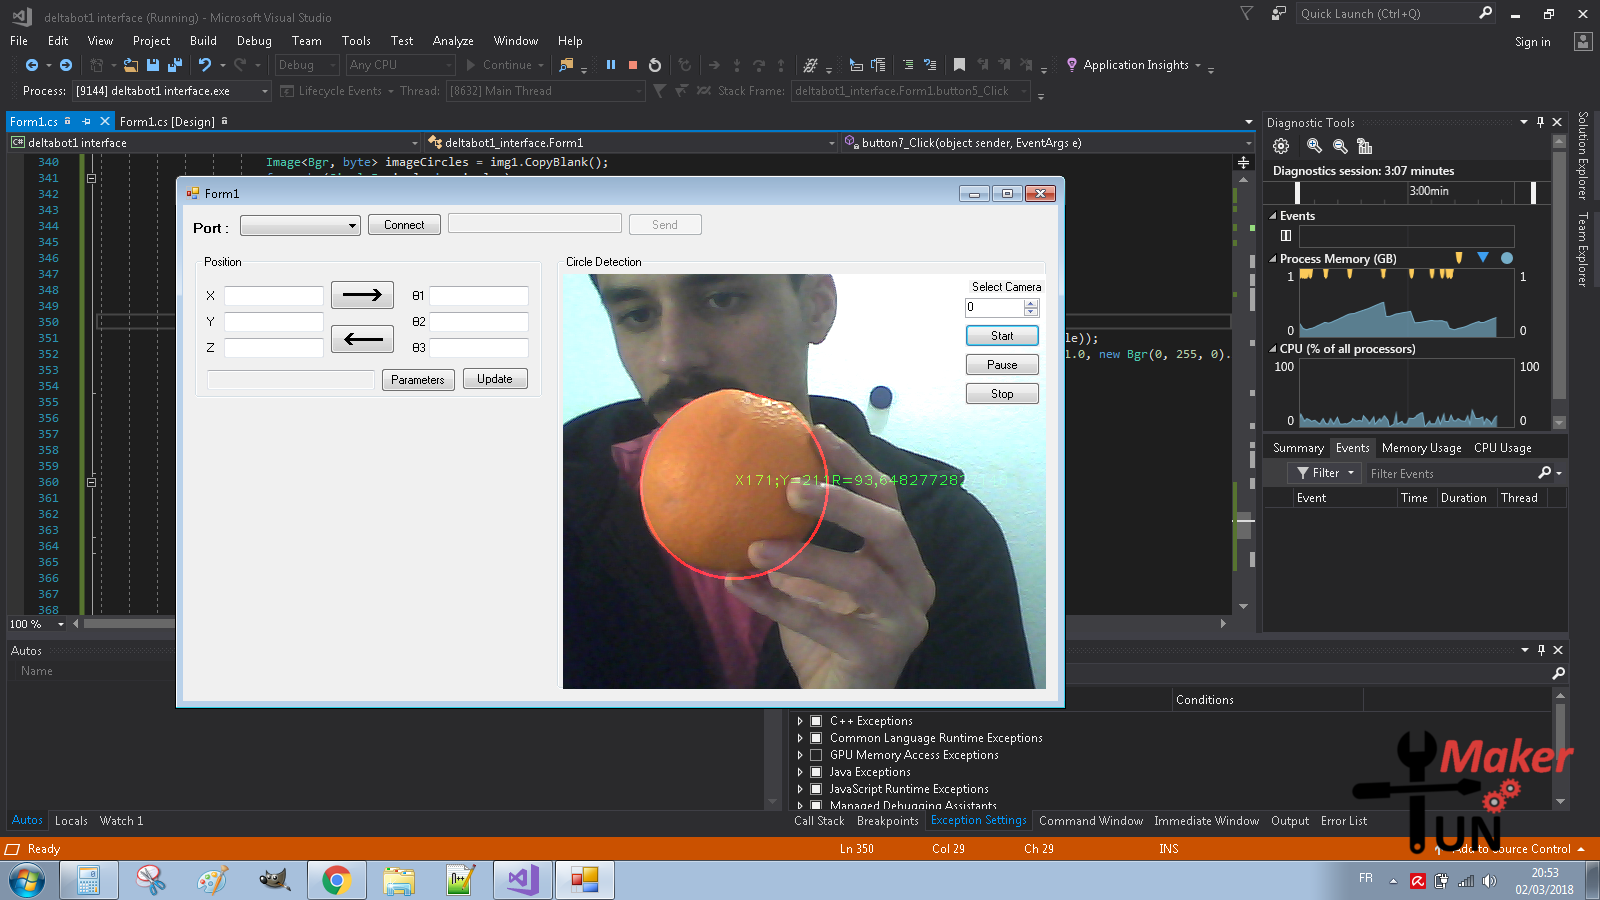
5GUI and Image Processing:
To be able to follow me on this you need to watch my video explaining the GUI, going through bits of the code & the interface starting from minute 8:30 :
![]()
The GUI is made with Visual Studio 2017 free Community version, I tweaked the code from http://forums.trossenrobotics.com/tutorials/introduction-129/delta-robot-kinematics-3276/ for the kinematics calculations to determine its position. The EmguCV library for image processing and simple math to move the end effector to the position of bottle caps to pick them and place them is predefined position.
You can download the windows application to test with the robot from my github repository or all of the source code and help me build up on it as it needs more work and debugging. Visit it and try to solve the problems with me or give new ideas recommend it to people that can help. I ask for your contribution on the code and to support me in any way you can.
Now I thank you for checking this awesome project and stay tuned for more.
Follow me on:
WebSite ► https://www.tunmaker.tn/
Twitter ► https://twitter.com/Tun_Maker
Facebook ► https://www.facebook.com/TunisanMaker/
Instagram ► https://www.instagram.com/tunmaker/
Delta Robot Automatic Pick & Place Machine
a stepper motor driven delta robot with its custom user interface, using machine vision to pick and place items


Discussions
Become a Hackaday.io Member
Create an account to leave a comment. Already have an account? Log In.
Better instructions and complete file downloads pdf plans and stl files are available on my website .
i hope you like this project and you found it informative.
Are you sure? yes | no