0%
0%
The Toaster
Restoring/Repairing a fancy (and expensive) toaster
 Tim Savage
Become a Hackaday.io member
Already have an account? Log in.
Just one more thing
To make the experience fit your profile, pick a username and tell us what interests you.
Pick an awesome username
hackaday.io/
Your profile's URL: hackaday.io/username. Max 25 alphanumeric characters.
Pick a few interests
Projects that share your interests
People that share your interests
 The outcome is the following schematic describing the operation of the unit. Low voltage side to the left and the mains side on the right.
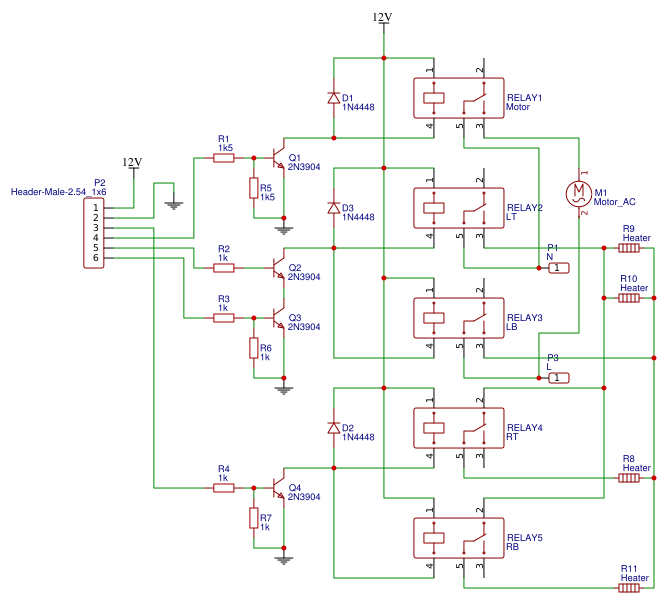


 Ian Hanschen
 Ben Lim
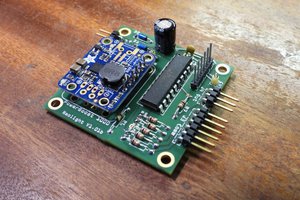
 robert
I had a cheap (around €15,-) toaster, which stopped to release the toast. I changed a dead CD40xx chip in the control board and it worked for about 2 times.
It turned out that the N connection of the heating element was intermittent, so the tap which was used to supply the electronics got overvoltage up to mains level.
The connections were some crimped brass rivets to the NiCr wire on the mica insulator. I did not see a longterm-working repair for this, so I trashed the toaster.
So look out for such problems, depending on the construction of your device.