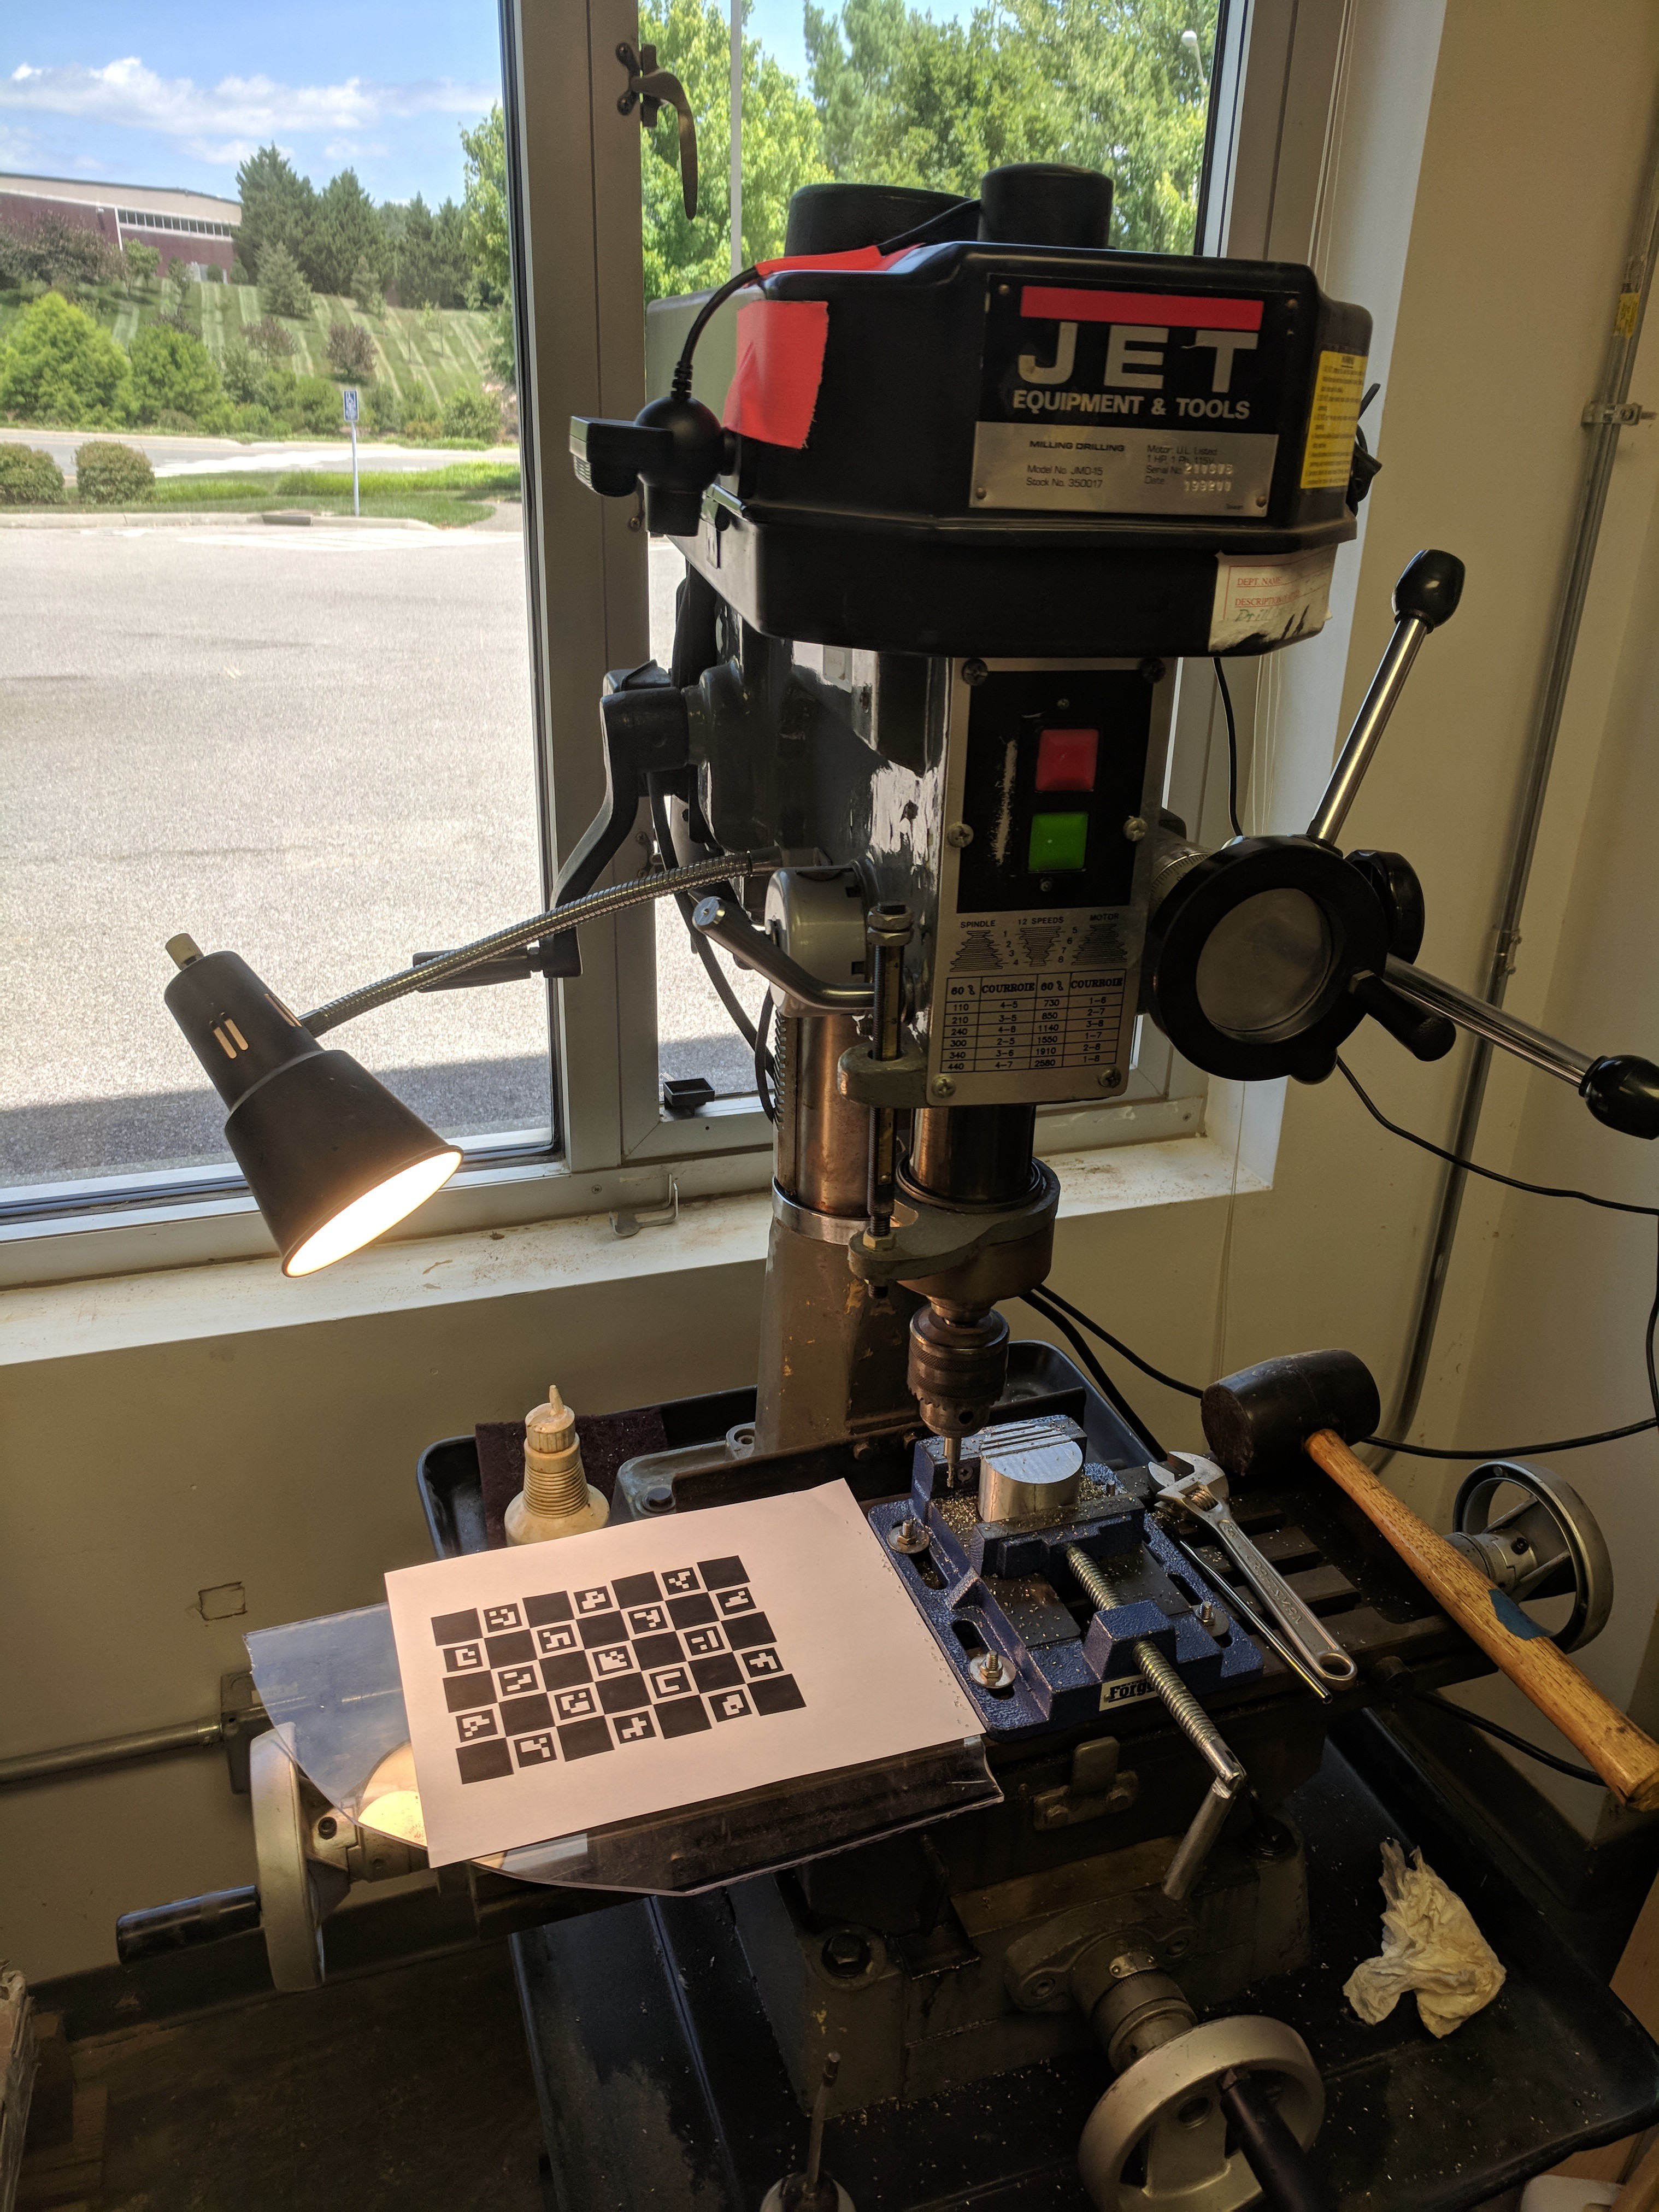
Today the code was created and initial testing was done.
TLDR
Absolute accuracy of Camera DRO is about 2 thousandths. Relative accuracy is similar. This is way better than I expected.
Test Parameters
- PS3 Eye Webcam at 640x480
- Telephoto focal length setting
- 5x7" Charuco Board
- Webcam about 18" away
Procedure
- Zero the Camera DRO. This accounts for the location of the table with respect to the camera.
- Move an inch or so in the X direction.
- Zero the angle (this calibrates any twist in the Charuco board relative to the table)
- Move each hand wheel a set amount based on the dial (I did 0.010" and 0.100"), and look at the Camera DRO readout.
Setup

Don't yell at me for holding an end mill in a drill chuck, we (Hacksburg, the makerspace where this mill is located) just bought the machine and we don't really have any accessories for it yet. Holding round stock in a vise like that isn't good either, but it's sufficiently tight that an 1/8" endmill isn't taking it anywhere.
Do Aluminum chips get on the Charuco board? Yes. It doesn't seem to really matter though, but at some point it will.
Performance
I didn't write down any performance numbers. The performance is way better than I expected. The first movement of the hand wheel (step 4 above) usually came up short, even though I took out the machine backlash (as far as I can tell), but it was only short by a couple thousandths. As I moved the hand wheel forward a couple rotations, the delta between rotations was between 0 and 2 thousands off, and there was no overall scale issues, which amazed me. By "overall scale issues" I mean that when I moved the hand wheel 10 turns, the absolute error was similar to when I moved it 2 or 5 turns.
My "ground truth" position came from the hand wheels, which are subject to backlash problems. The machine I'm using doesn't have a DRO, which is the primary motivation for this project. I also cut some test slots using the Camera DRO, but I think the machine actually moved when I engaged the material (1/8" flat end mill cutting ~0.020" deep slot in Aluminum), which may be a limitation of the machine. The machine was recently purchased at auction and may be worn out, I don't know its history.
Camera resolution isn't usually as important in computer vision as most people think it is, more pixels usually just means more computation time, but here I actually think the limiting factor is the pixel count. I'm going to retest with a higher resolution webcam when I can.
The measured table position moves ~0.020" when I turn the machine on. This is probably because the webcam is mounted to the movable part of the belt guard. I'd like to get the webcam mounted with a mag base to the head casting somewhere.
Originally, I had a piece of Acrylic over the Charuco board, for protection. Interestingly, the difference in refractive index of the Acrylic seems to have a real impact on accuracy. I'll quantify this more accurately in the future.
Conclusion and Future Work
I'm amazed this works so well. Future testing will hopefully involve a nicer webcam and actual numbers.
I did absolutely zero research to see if anyone else has done this before, let me know if you've seen someone try this or something like it before.
 MaxBareiss
Discussions
Become a Hackaday.io Member
Create an account to leave a comment. Already have an account? Log In.