Cole B
-
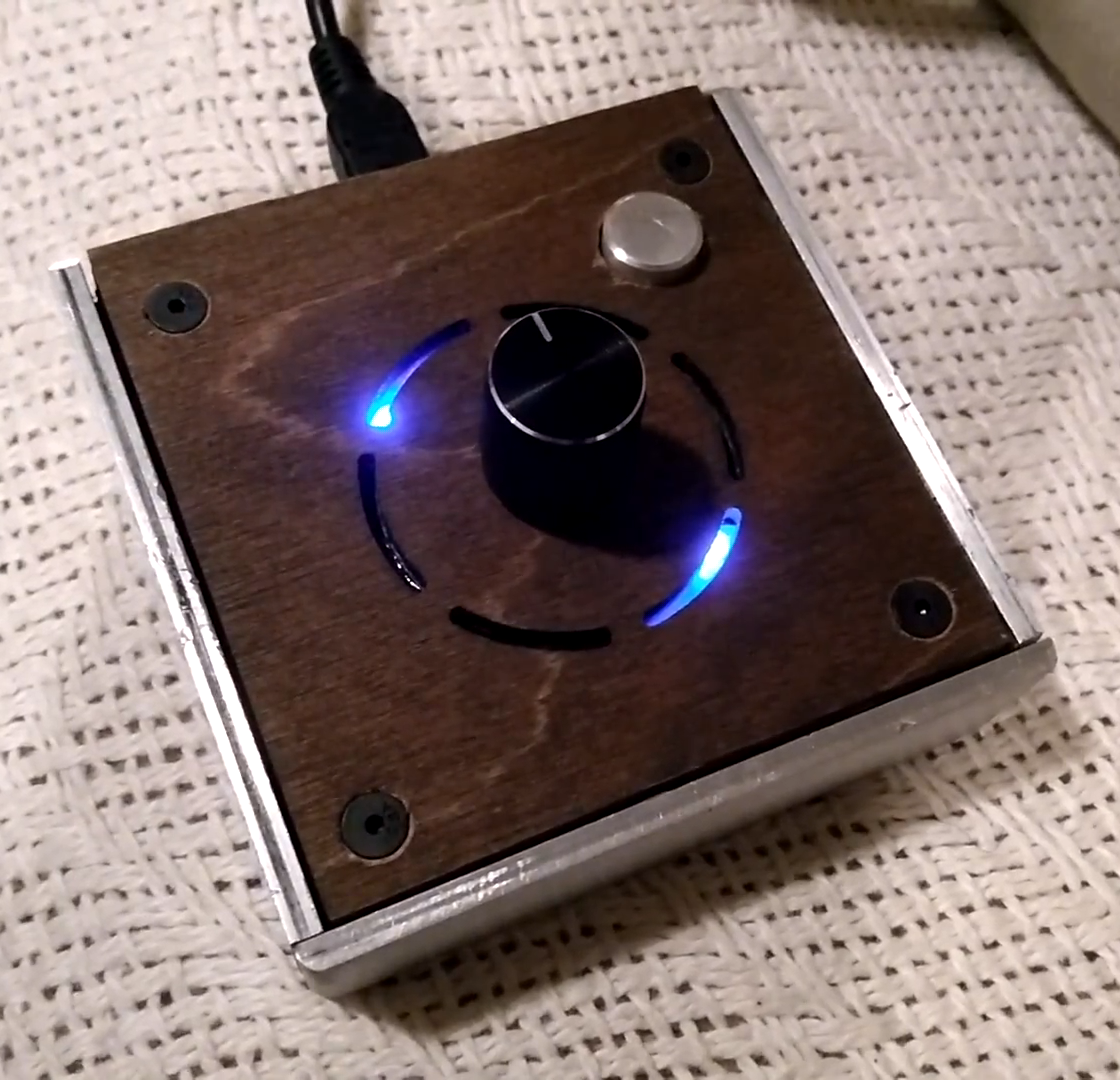
8/24 - Profile Selector Module Assembly
08/27/2018 at 03:24 • 0 commentsToday we finished soldering and assembling the profile selector module. Until we get the I2C connectors between modules working, we programmed the dial to select between hotkeys which are activated on pressing the dial.
![]()
-
Hotkey Modules Post 8/17
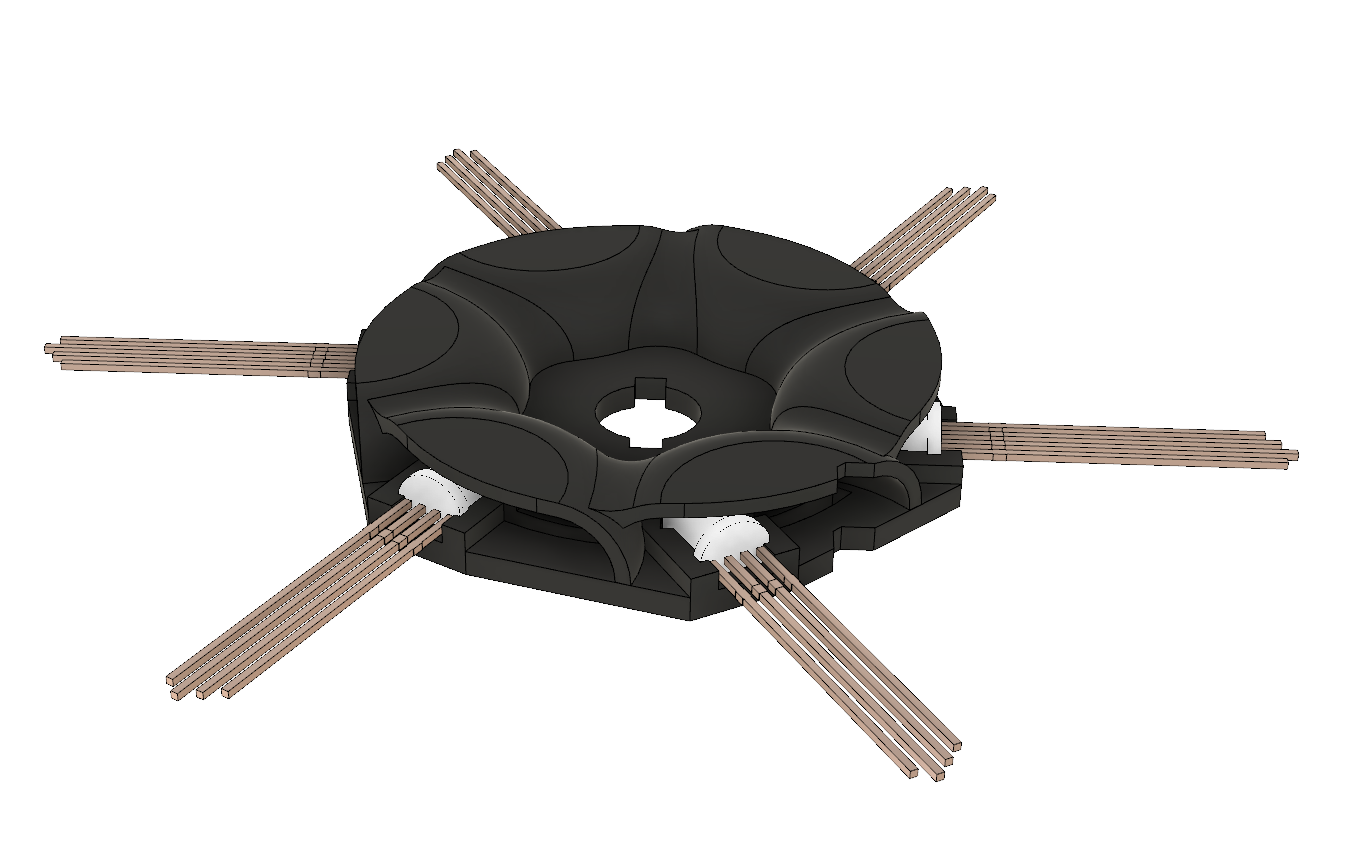
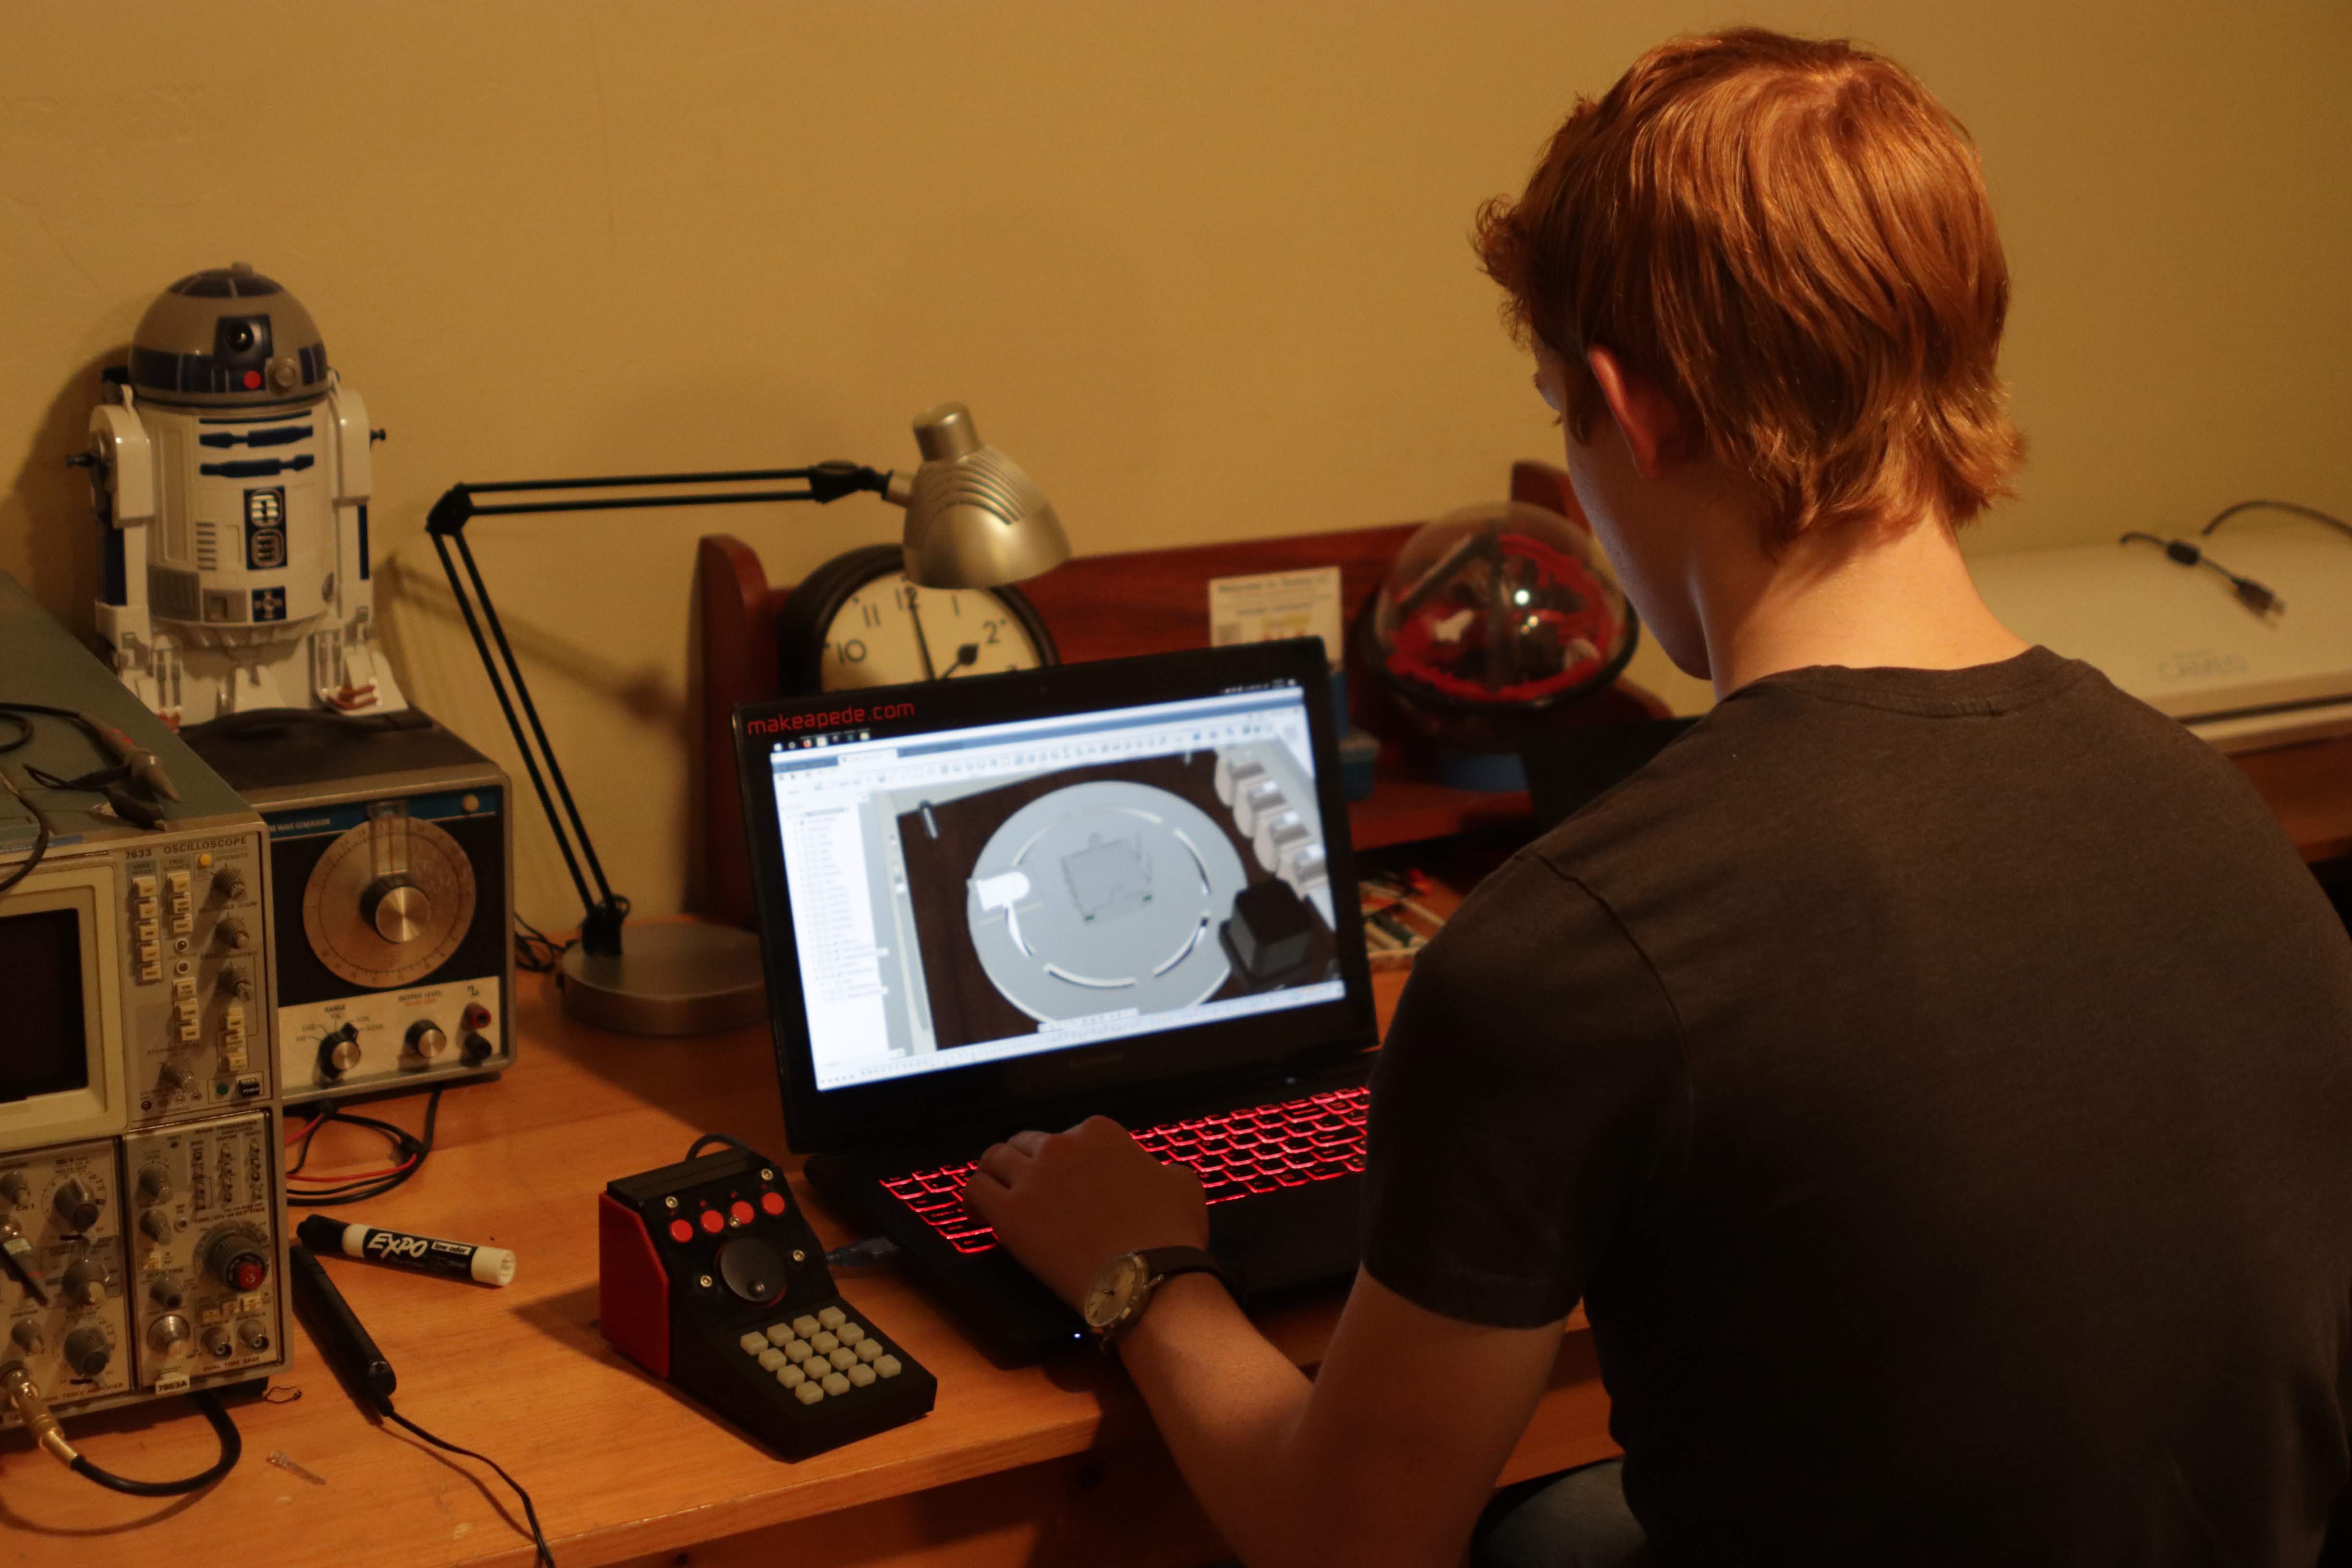
08/27/2018 at 03:08 • 0 commentsWith 3 of the 4 modules finished (at least the hardware), we got straight into finishing up the last one: the profile selector. This had a low-profile, 3DP’d shroud for the RGB LEDs contained beneath the laser cut wood. Detail of the shroud can be seen below (it, along with the other modules, were designed in Autodesk Fusion 360—it’s great software, if I do say so myself):
![]()
The bottom half of the shroud has semicircular cavities for the LED’s to nest into, slits for the light to escape, and an alignment notch for the rotary encoder. The top half reflects the light from the LEDs out the slits, as well as prevent any bleeding of light from one segment to the other. The LEDs were inserted into the bottom half, and then the cavities were filled with hot glue to diffuse the light. After multiple mistakes (my fault :P ) while aligning and gluing the top half (and subsequent removals with blowtorch-heated X-Acto knives), it went together smoothly. The soldering of the LEDs was a bit difficult considering the sheer amount of connections, but it worked just as we expected.
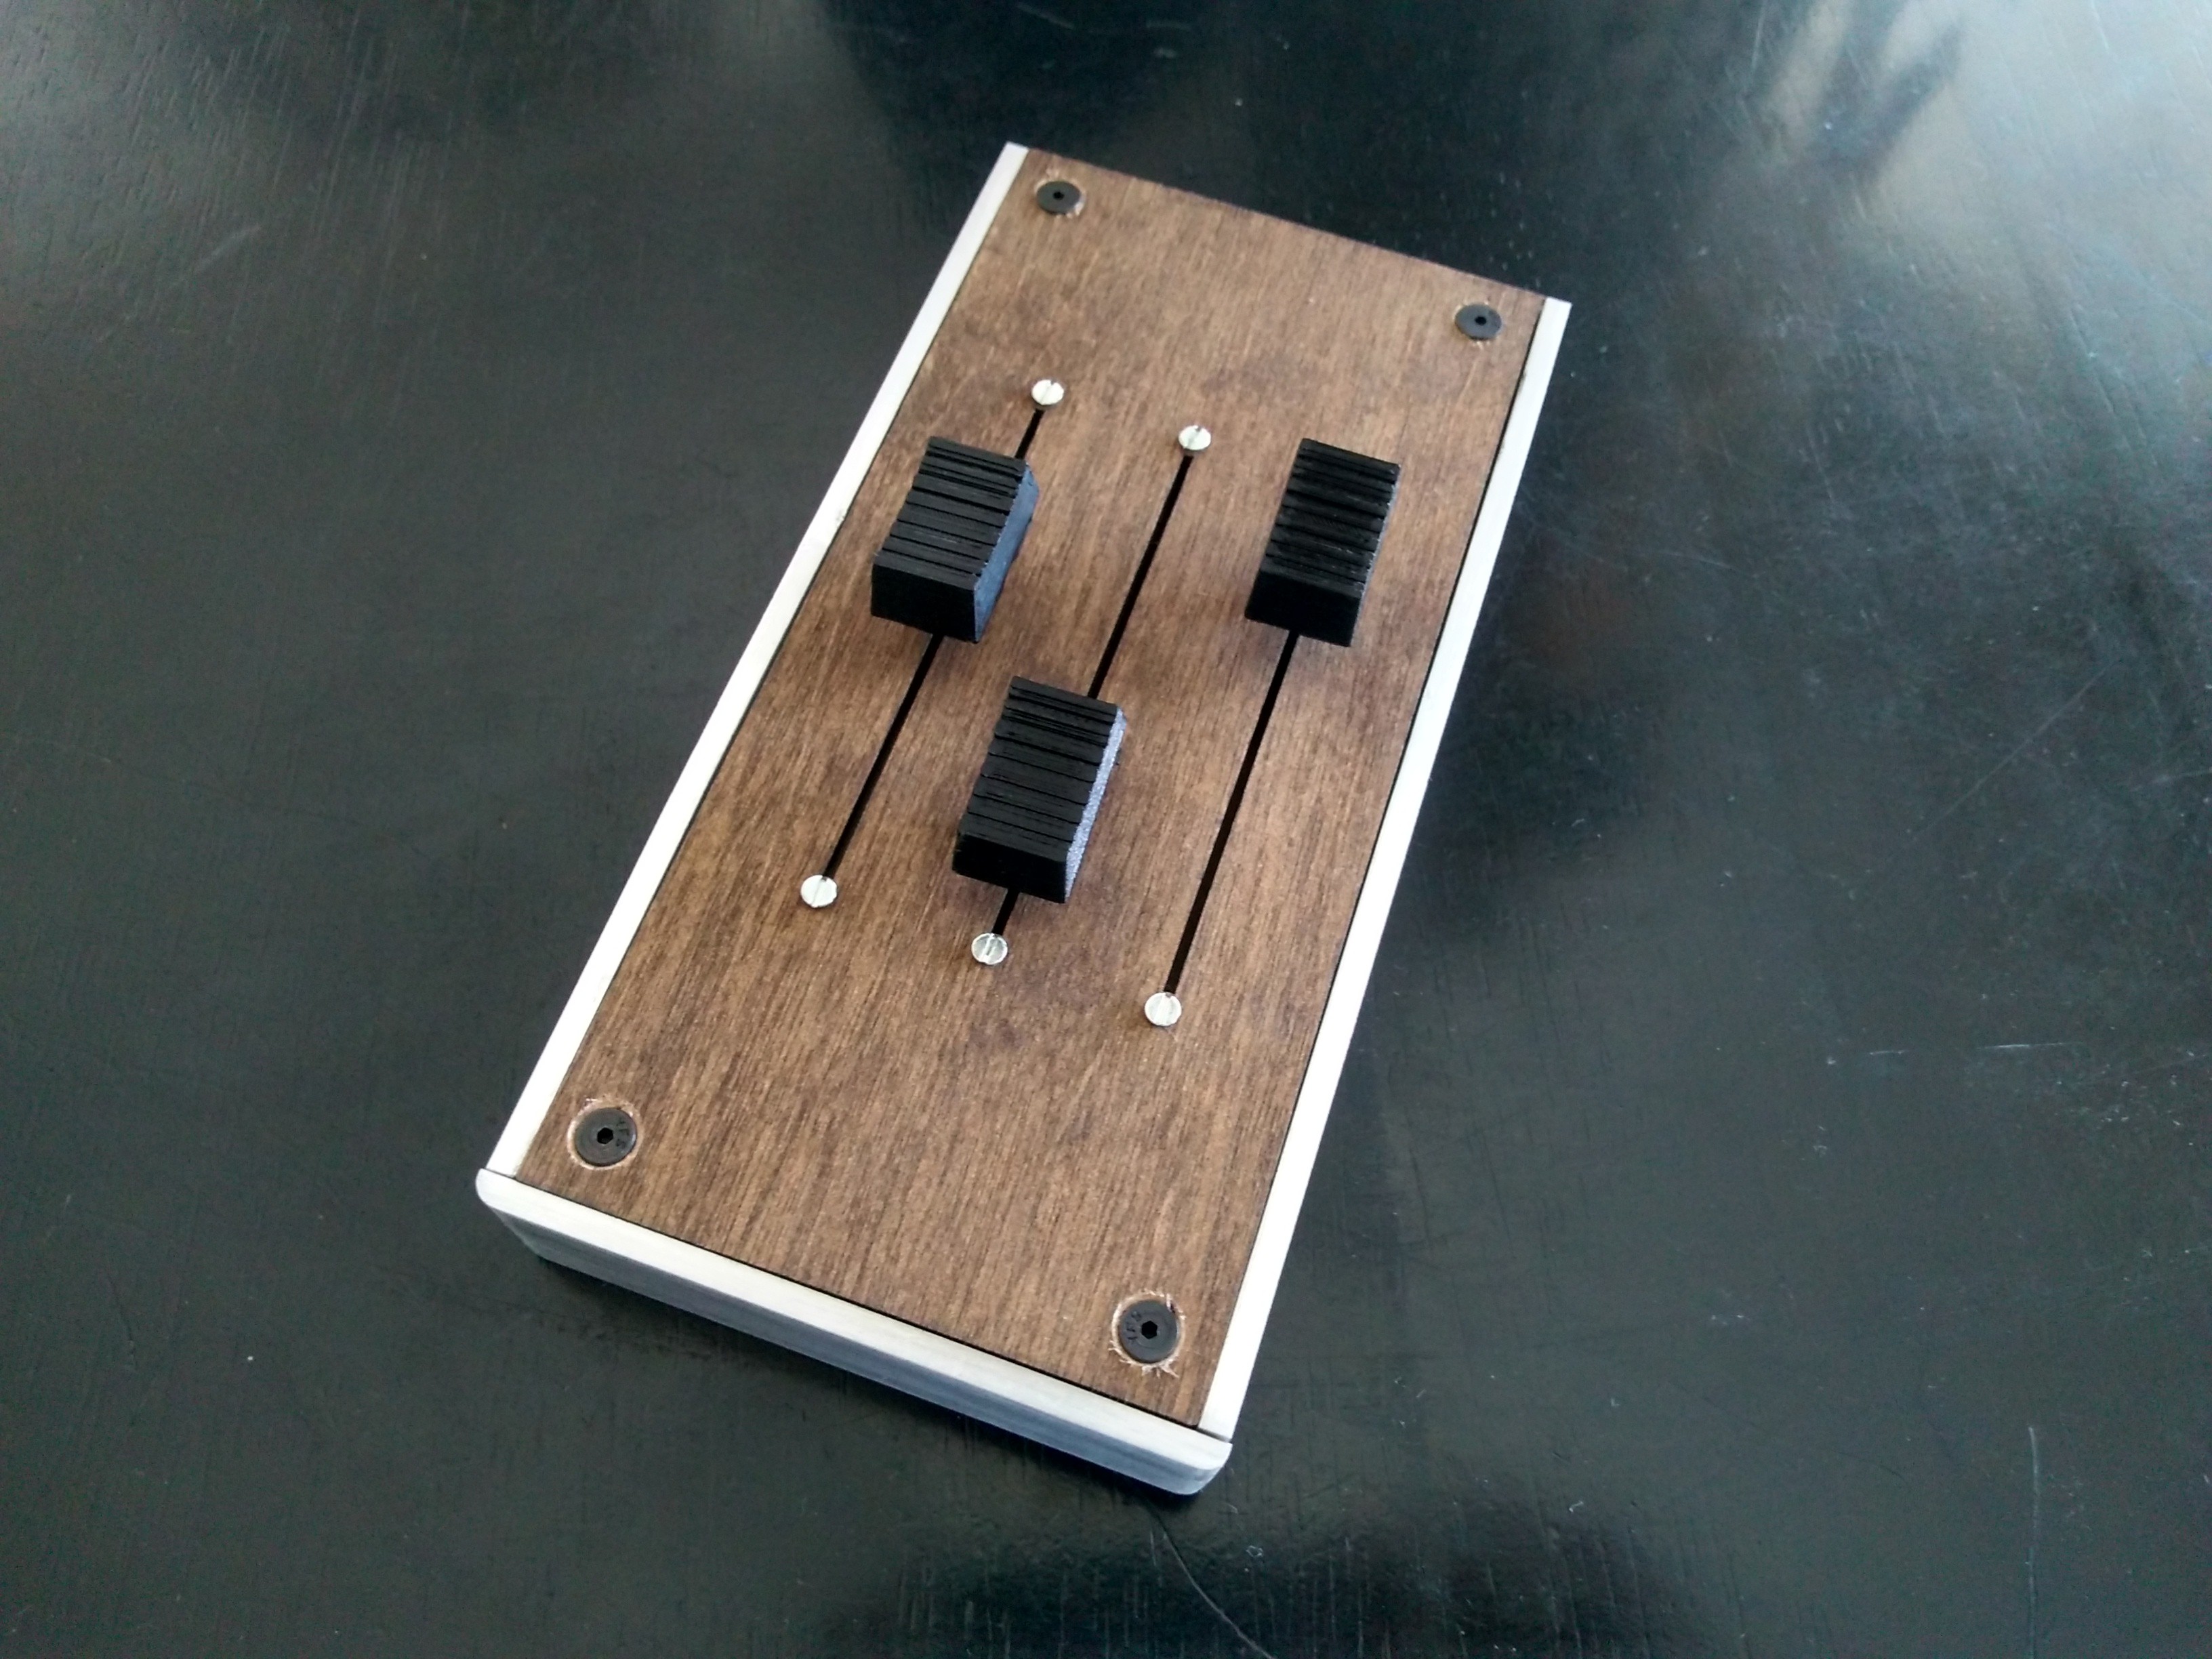
We also soldered the faders and assembled the fader module. We programmed each slider to function as a joystick axis.
![]()
![]()
-
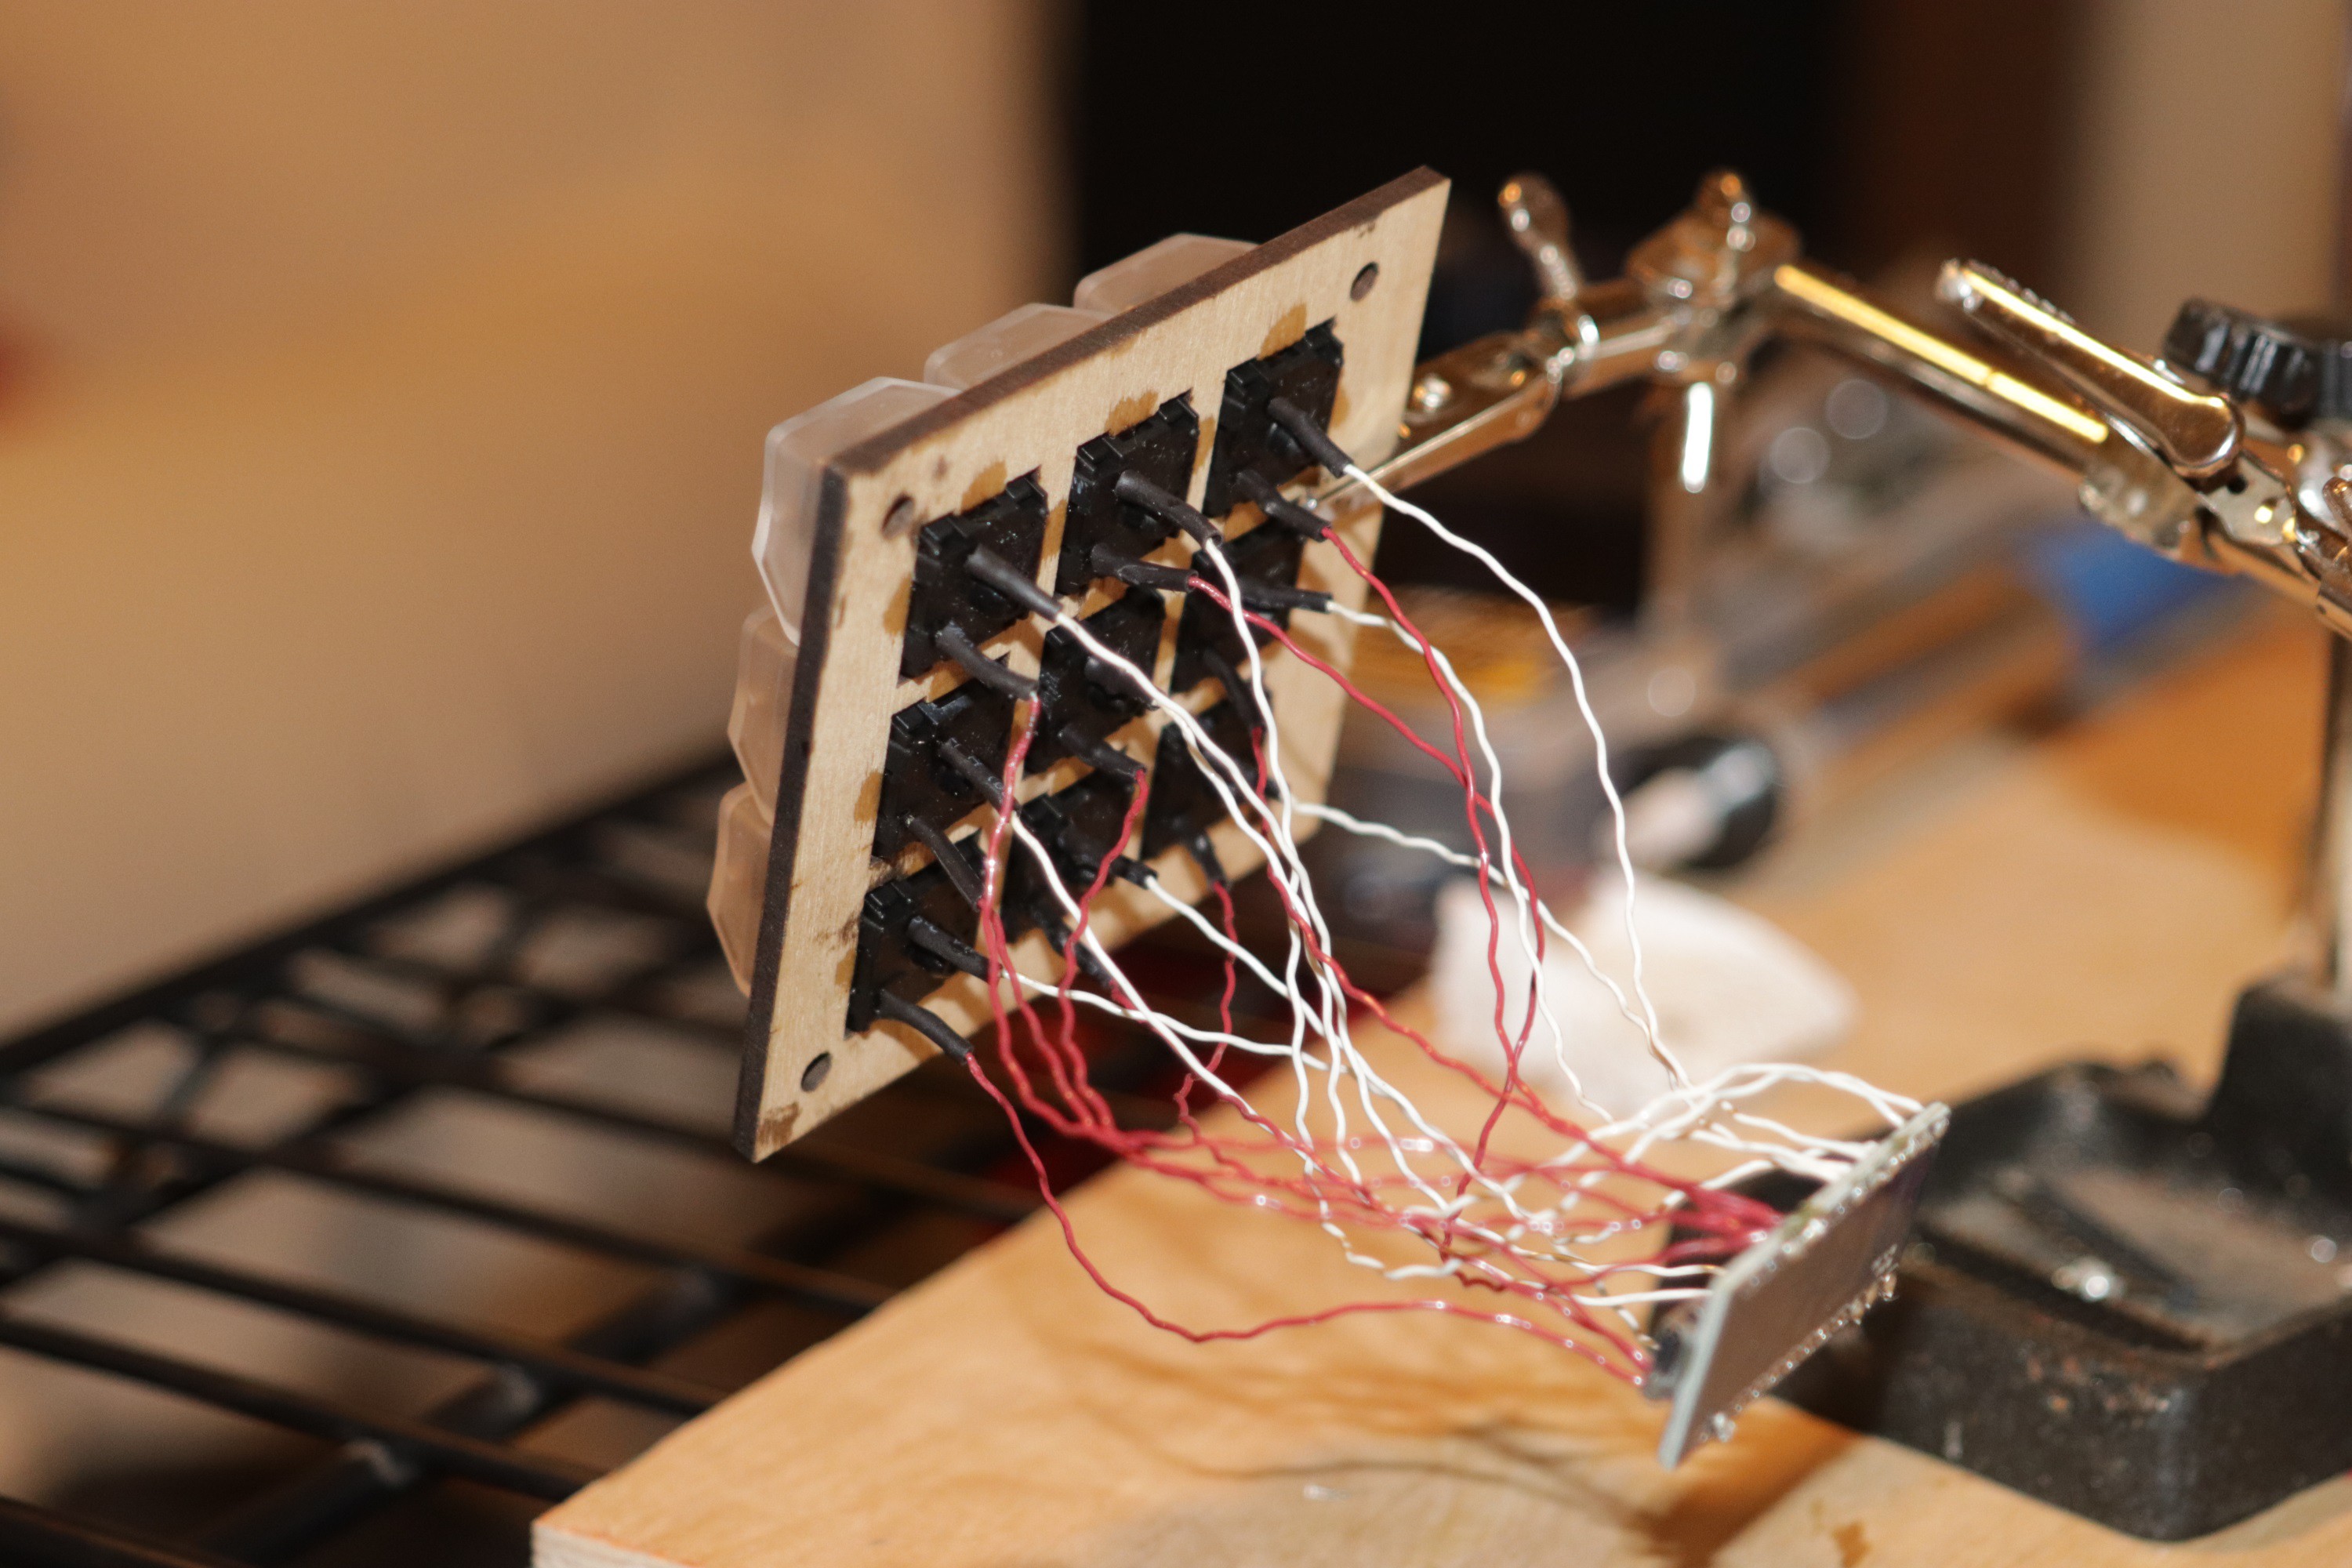
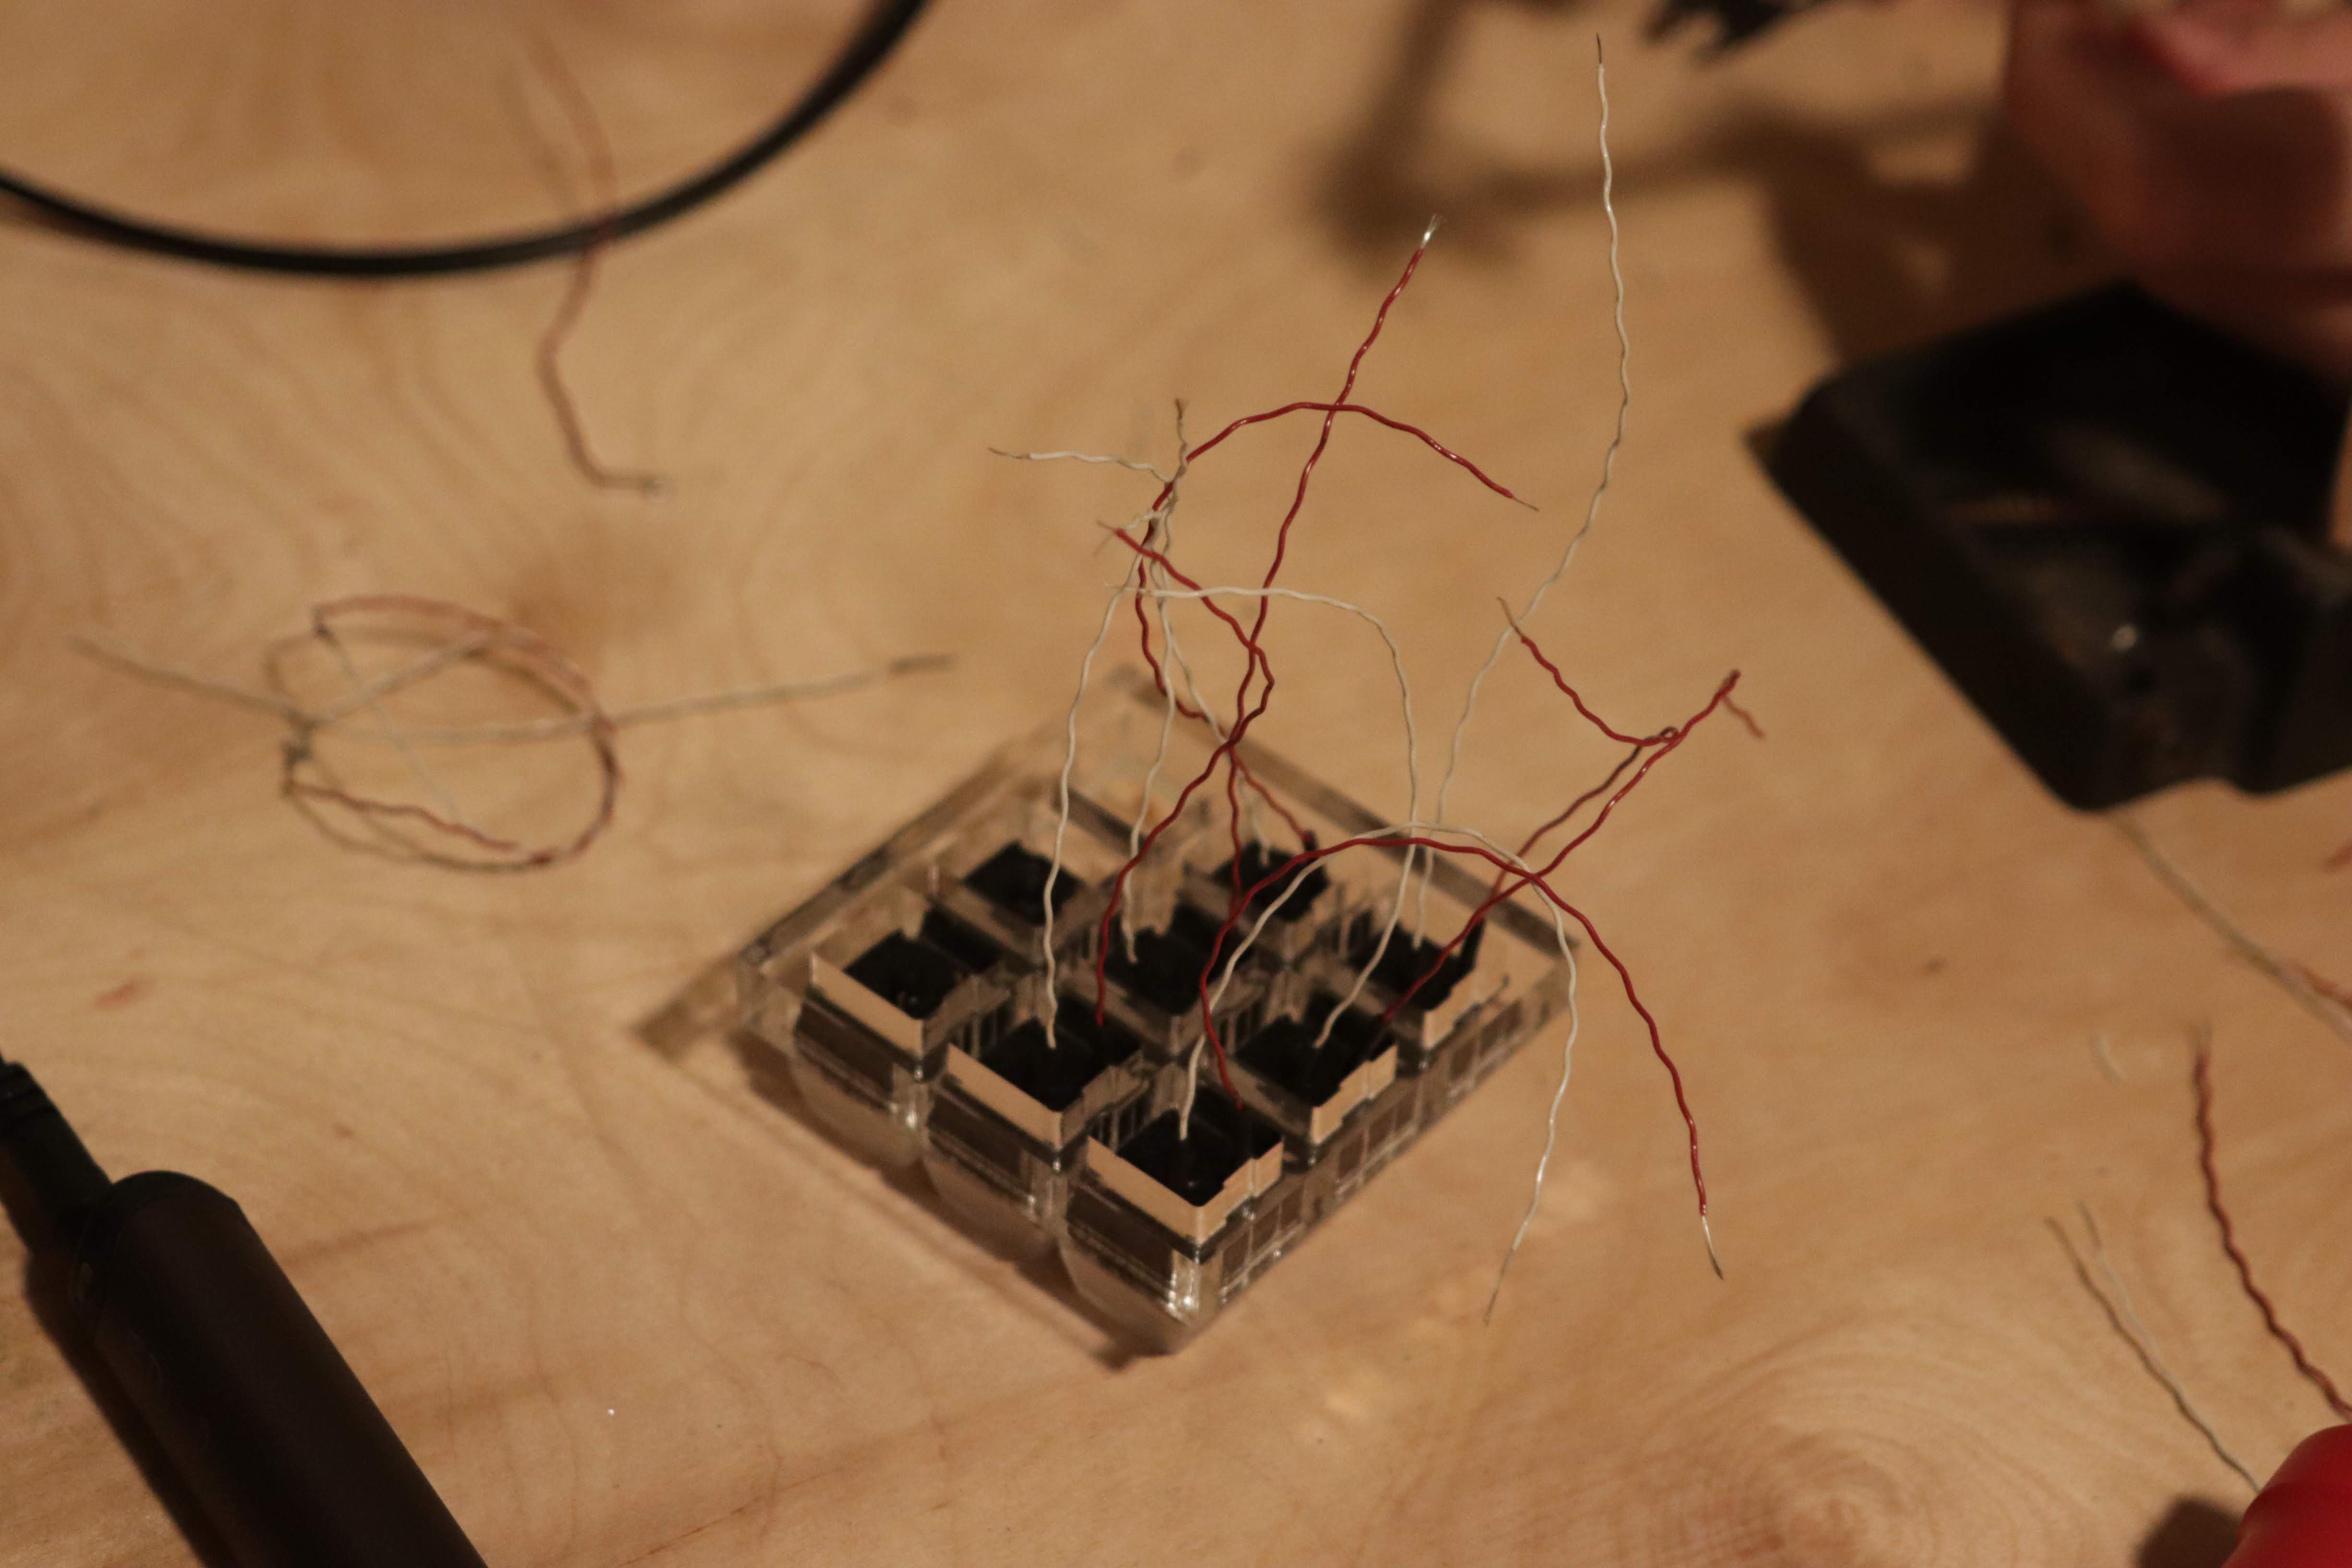
8/14 - Finishing the Keypad Module
08/25/2018 at 15:51 • 0 commentsToday we finished wiring and assembling the keypad module.
![]()
![]()
![]()
-
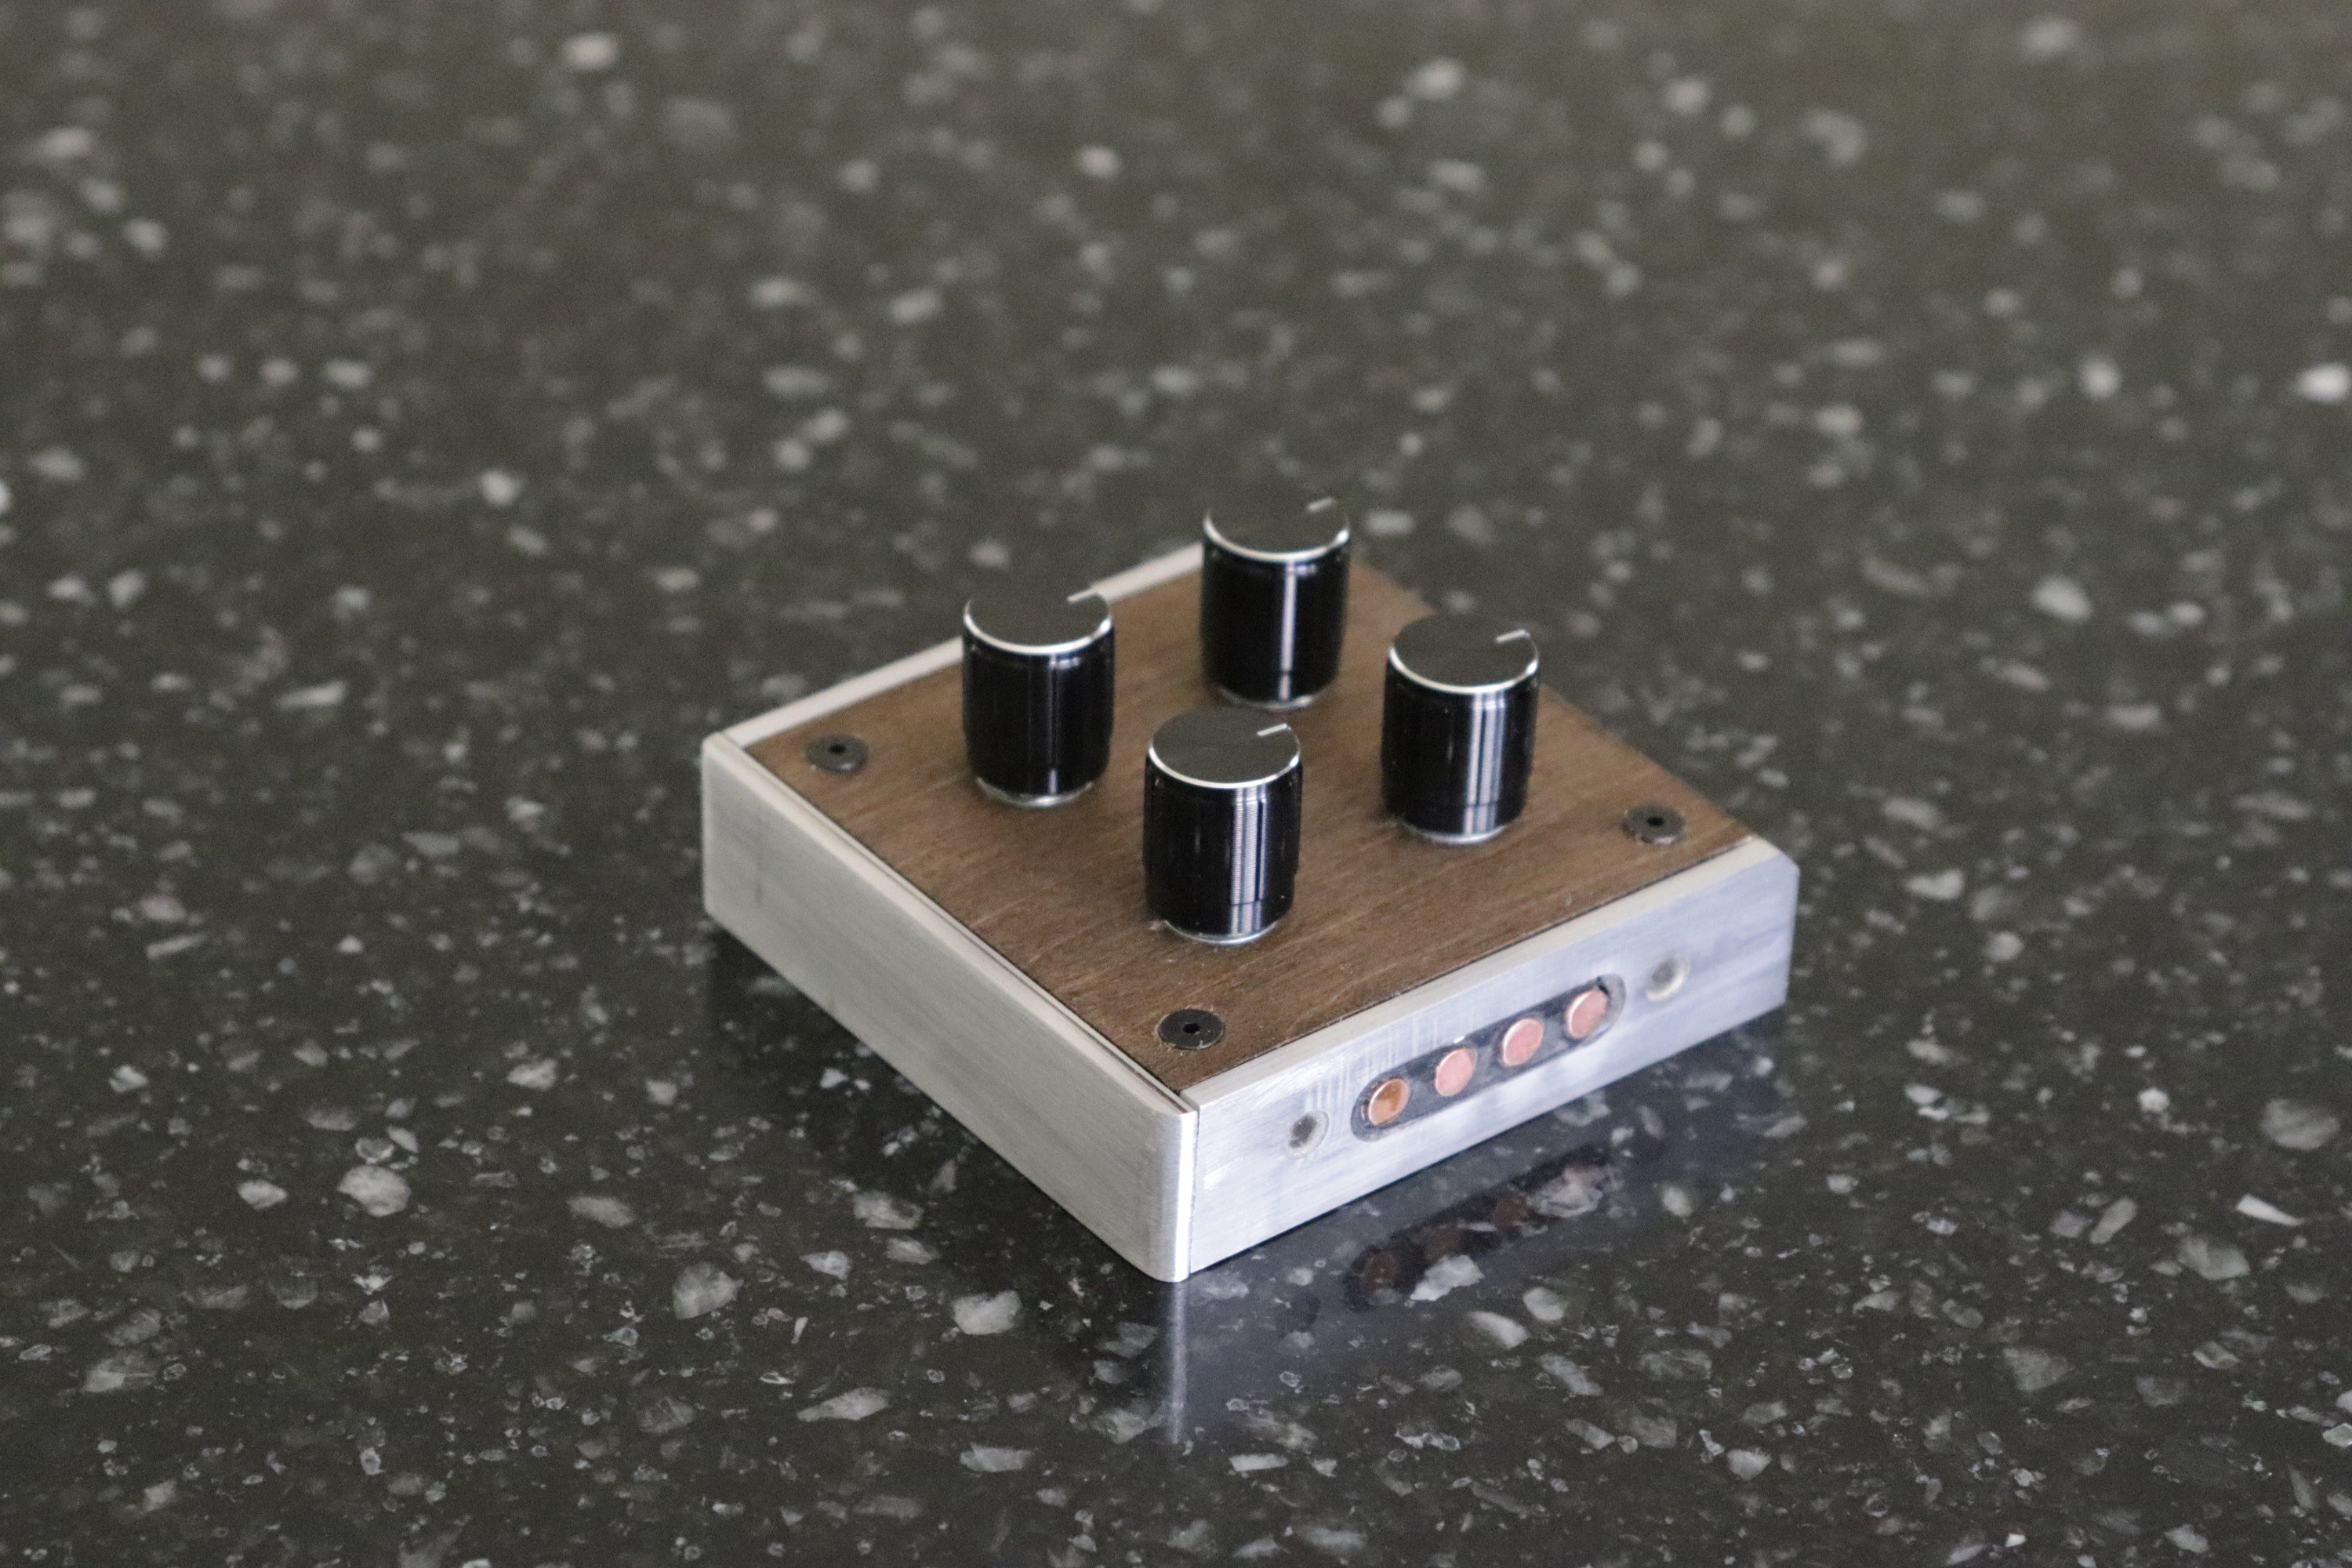
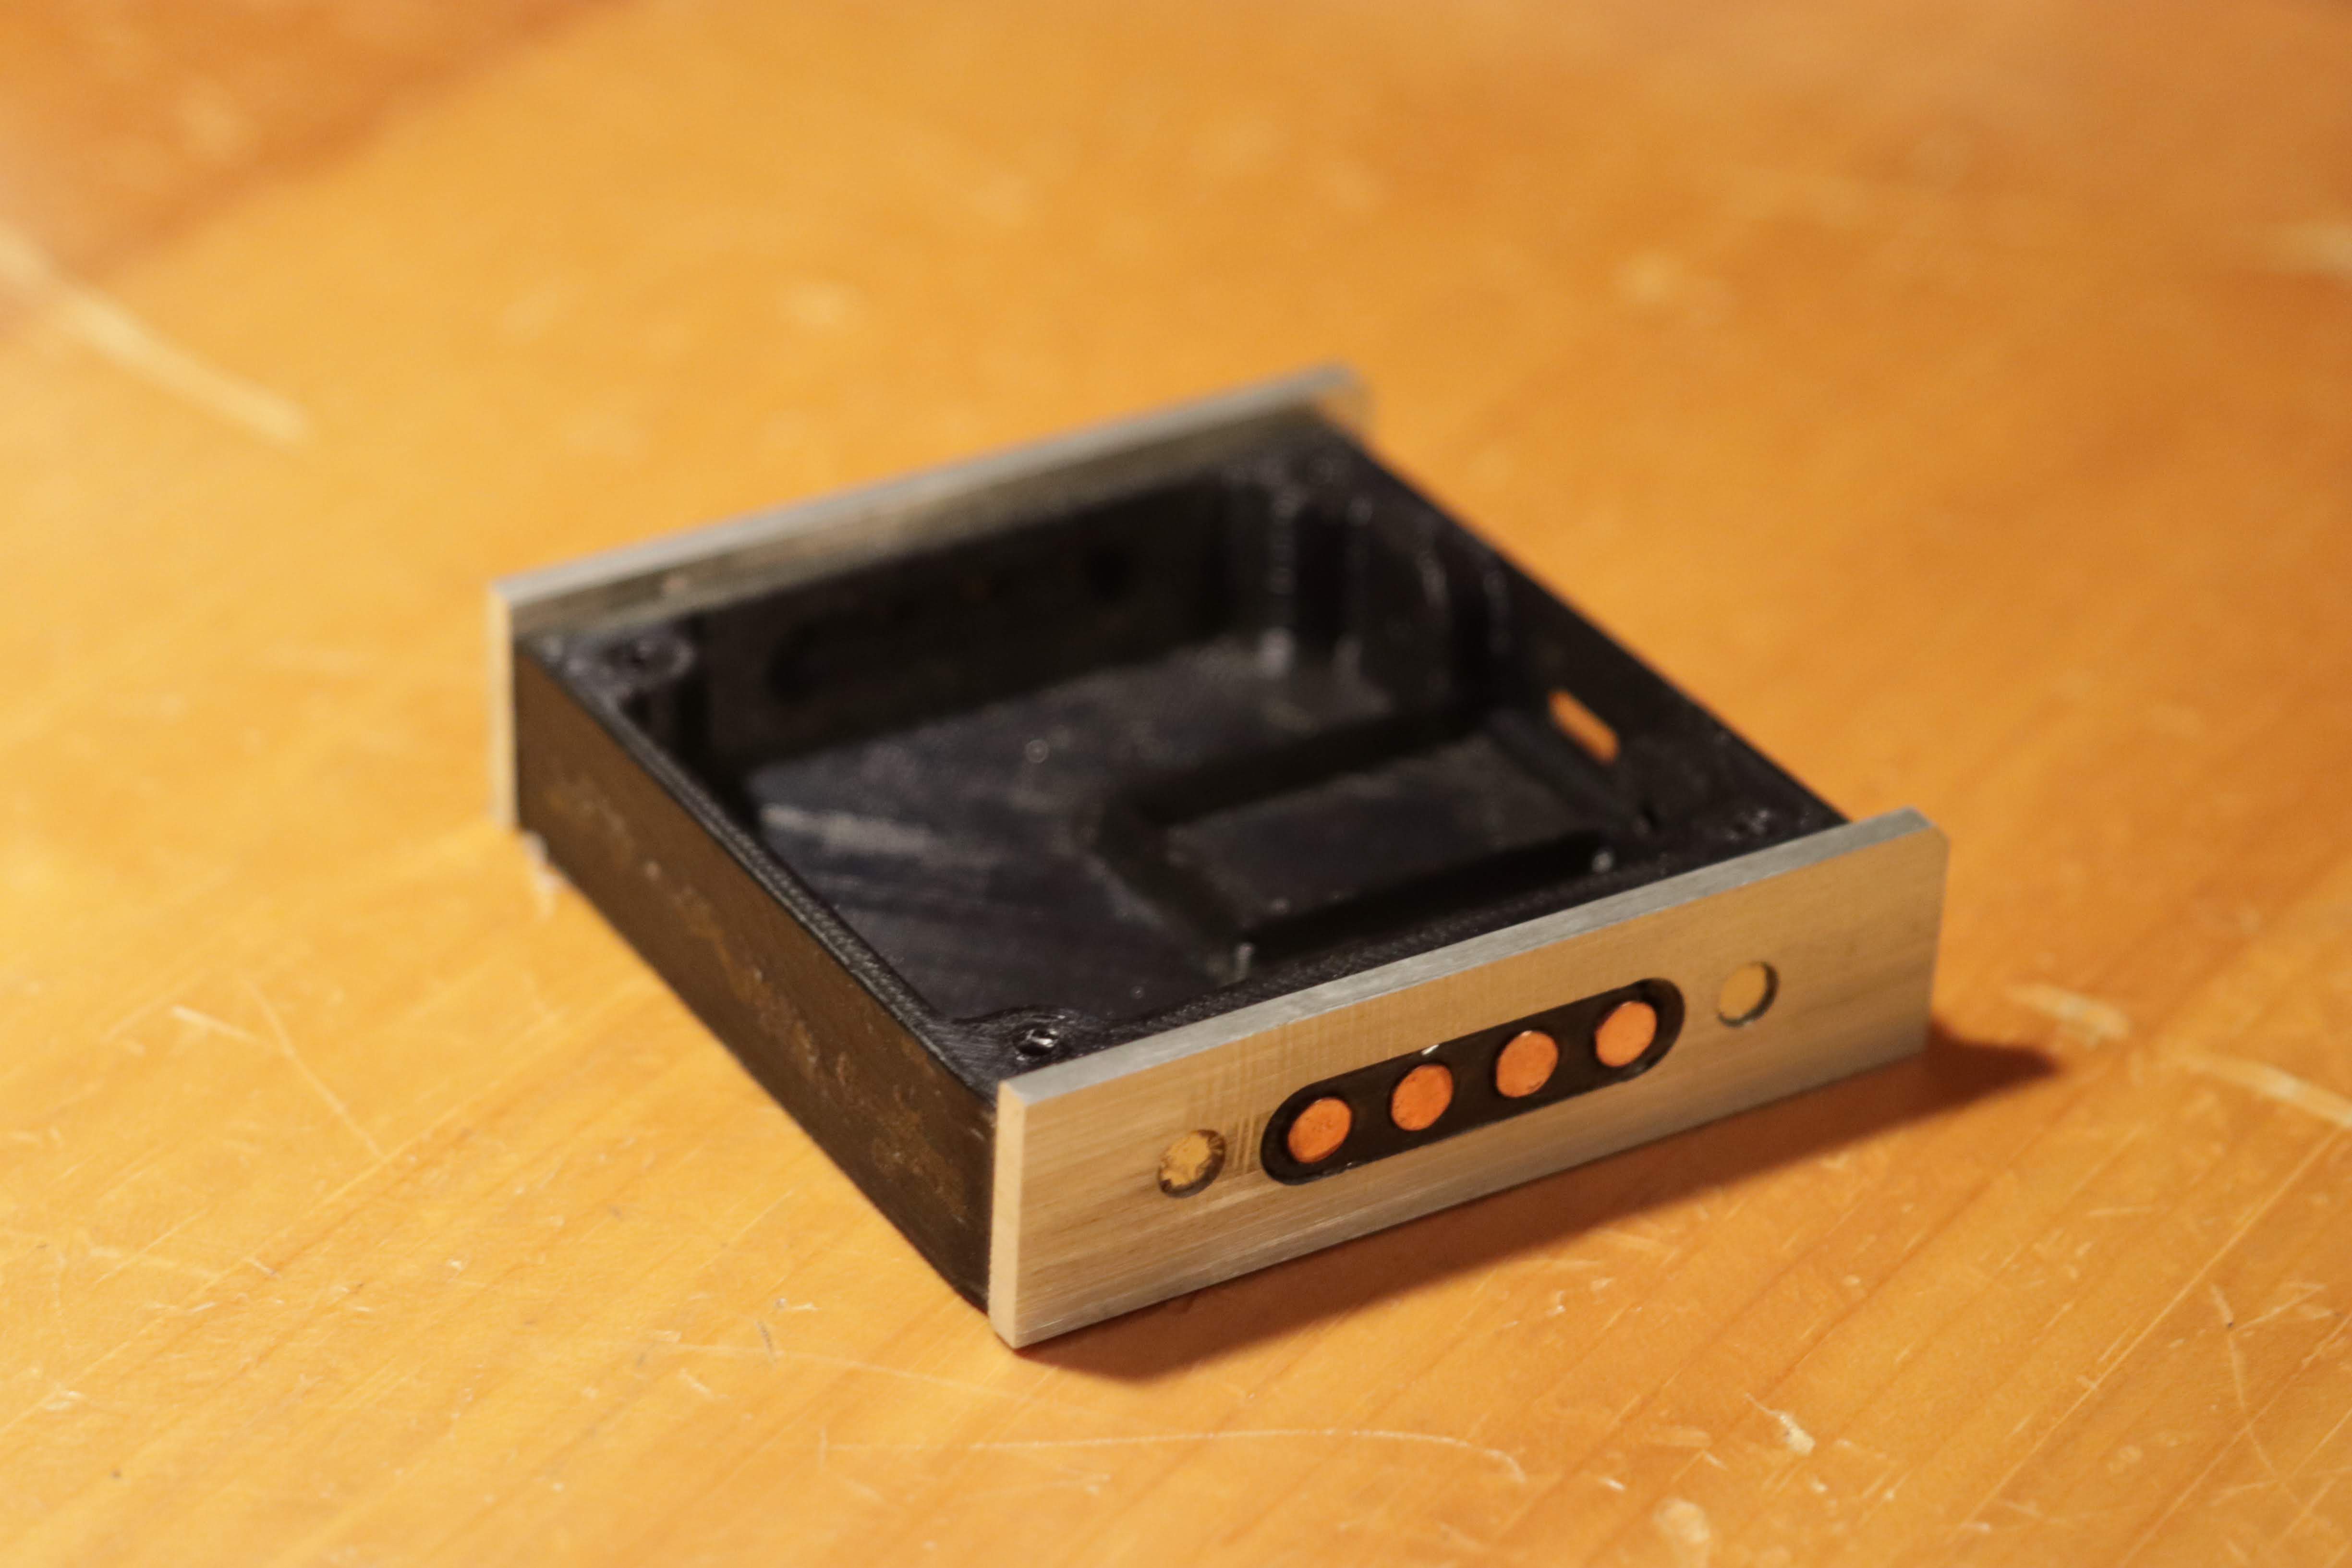
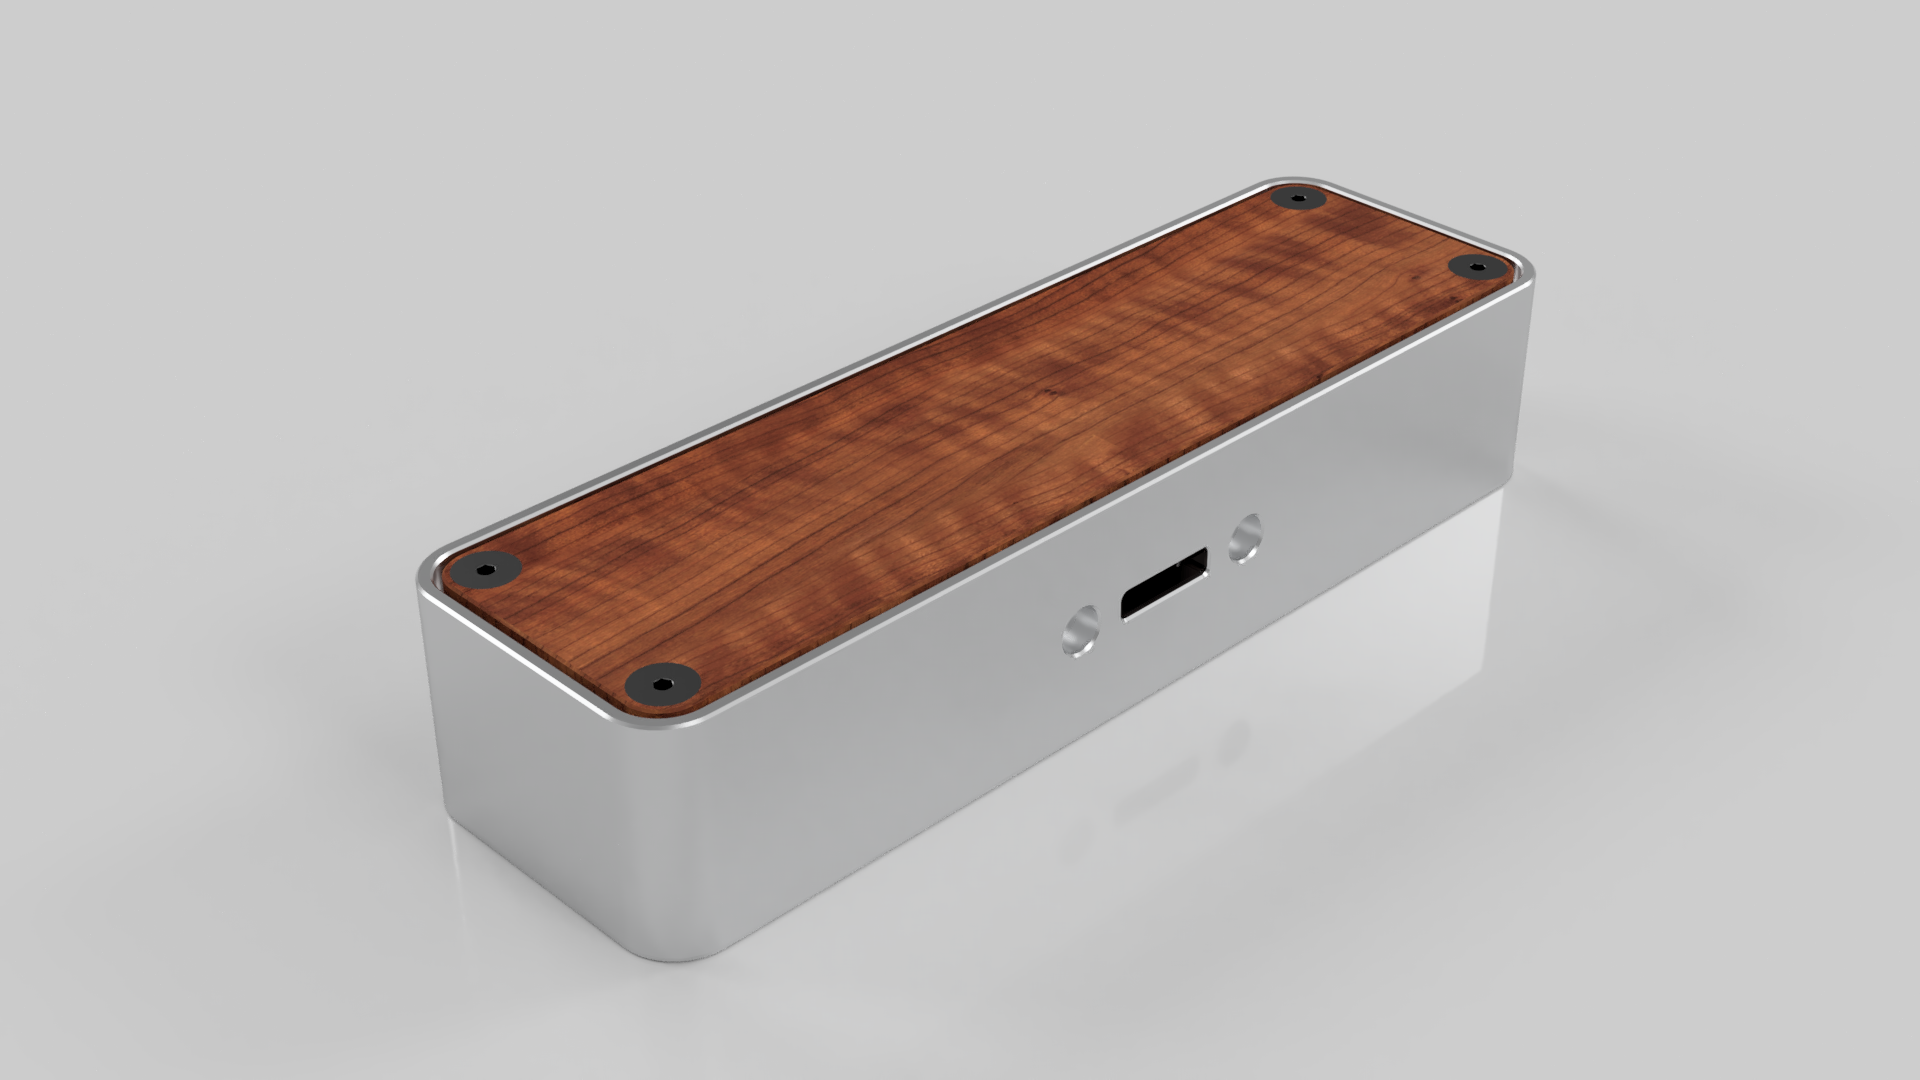
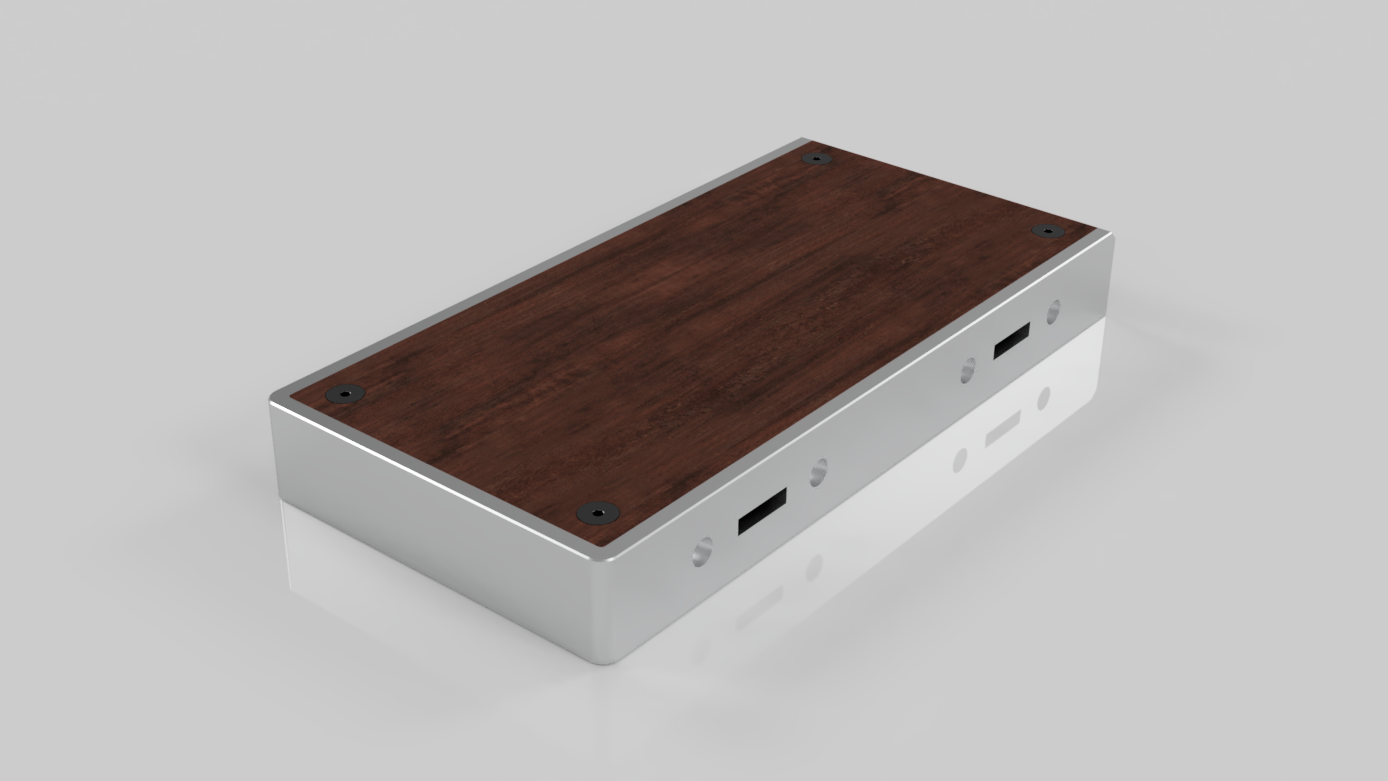
8/13 - Pogo Connectors and Dial Module
08/19/2018 at 23:14 • 0 commentsToday we cut to size and sanded the aluminum strips which go outside the box. We also attempted to assemble the pogo pins in the magnet connectors, but they were too small and they didn’t have enough spring distance. We knew this might be a problem, but we didn’t have time to get better ones, as they would have to come from China. For this reason, we decided to use the modules each with their own individuals USB cables, until we finish our alternate design of the pogo connectors. We also finished assembly of the dial module.
![]()
![]()
-
8/12 - 3D Printing
08/15/2018 at 03:13 • 0 commentsToday we finalized the magnetic connector design and started printing the module bases. We also started soldering the keypad module.
![]()
![]()
-
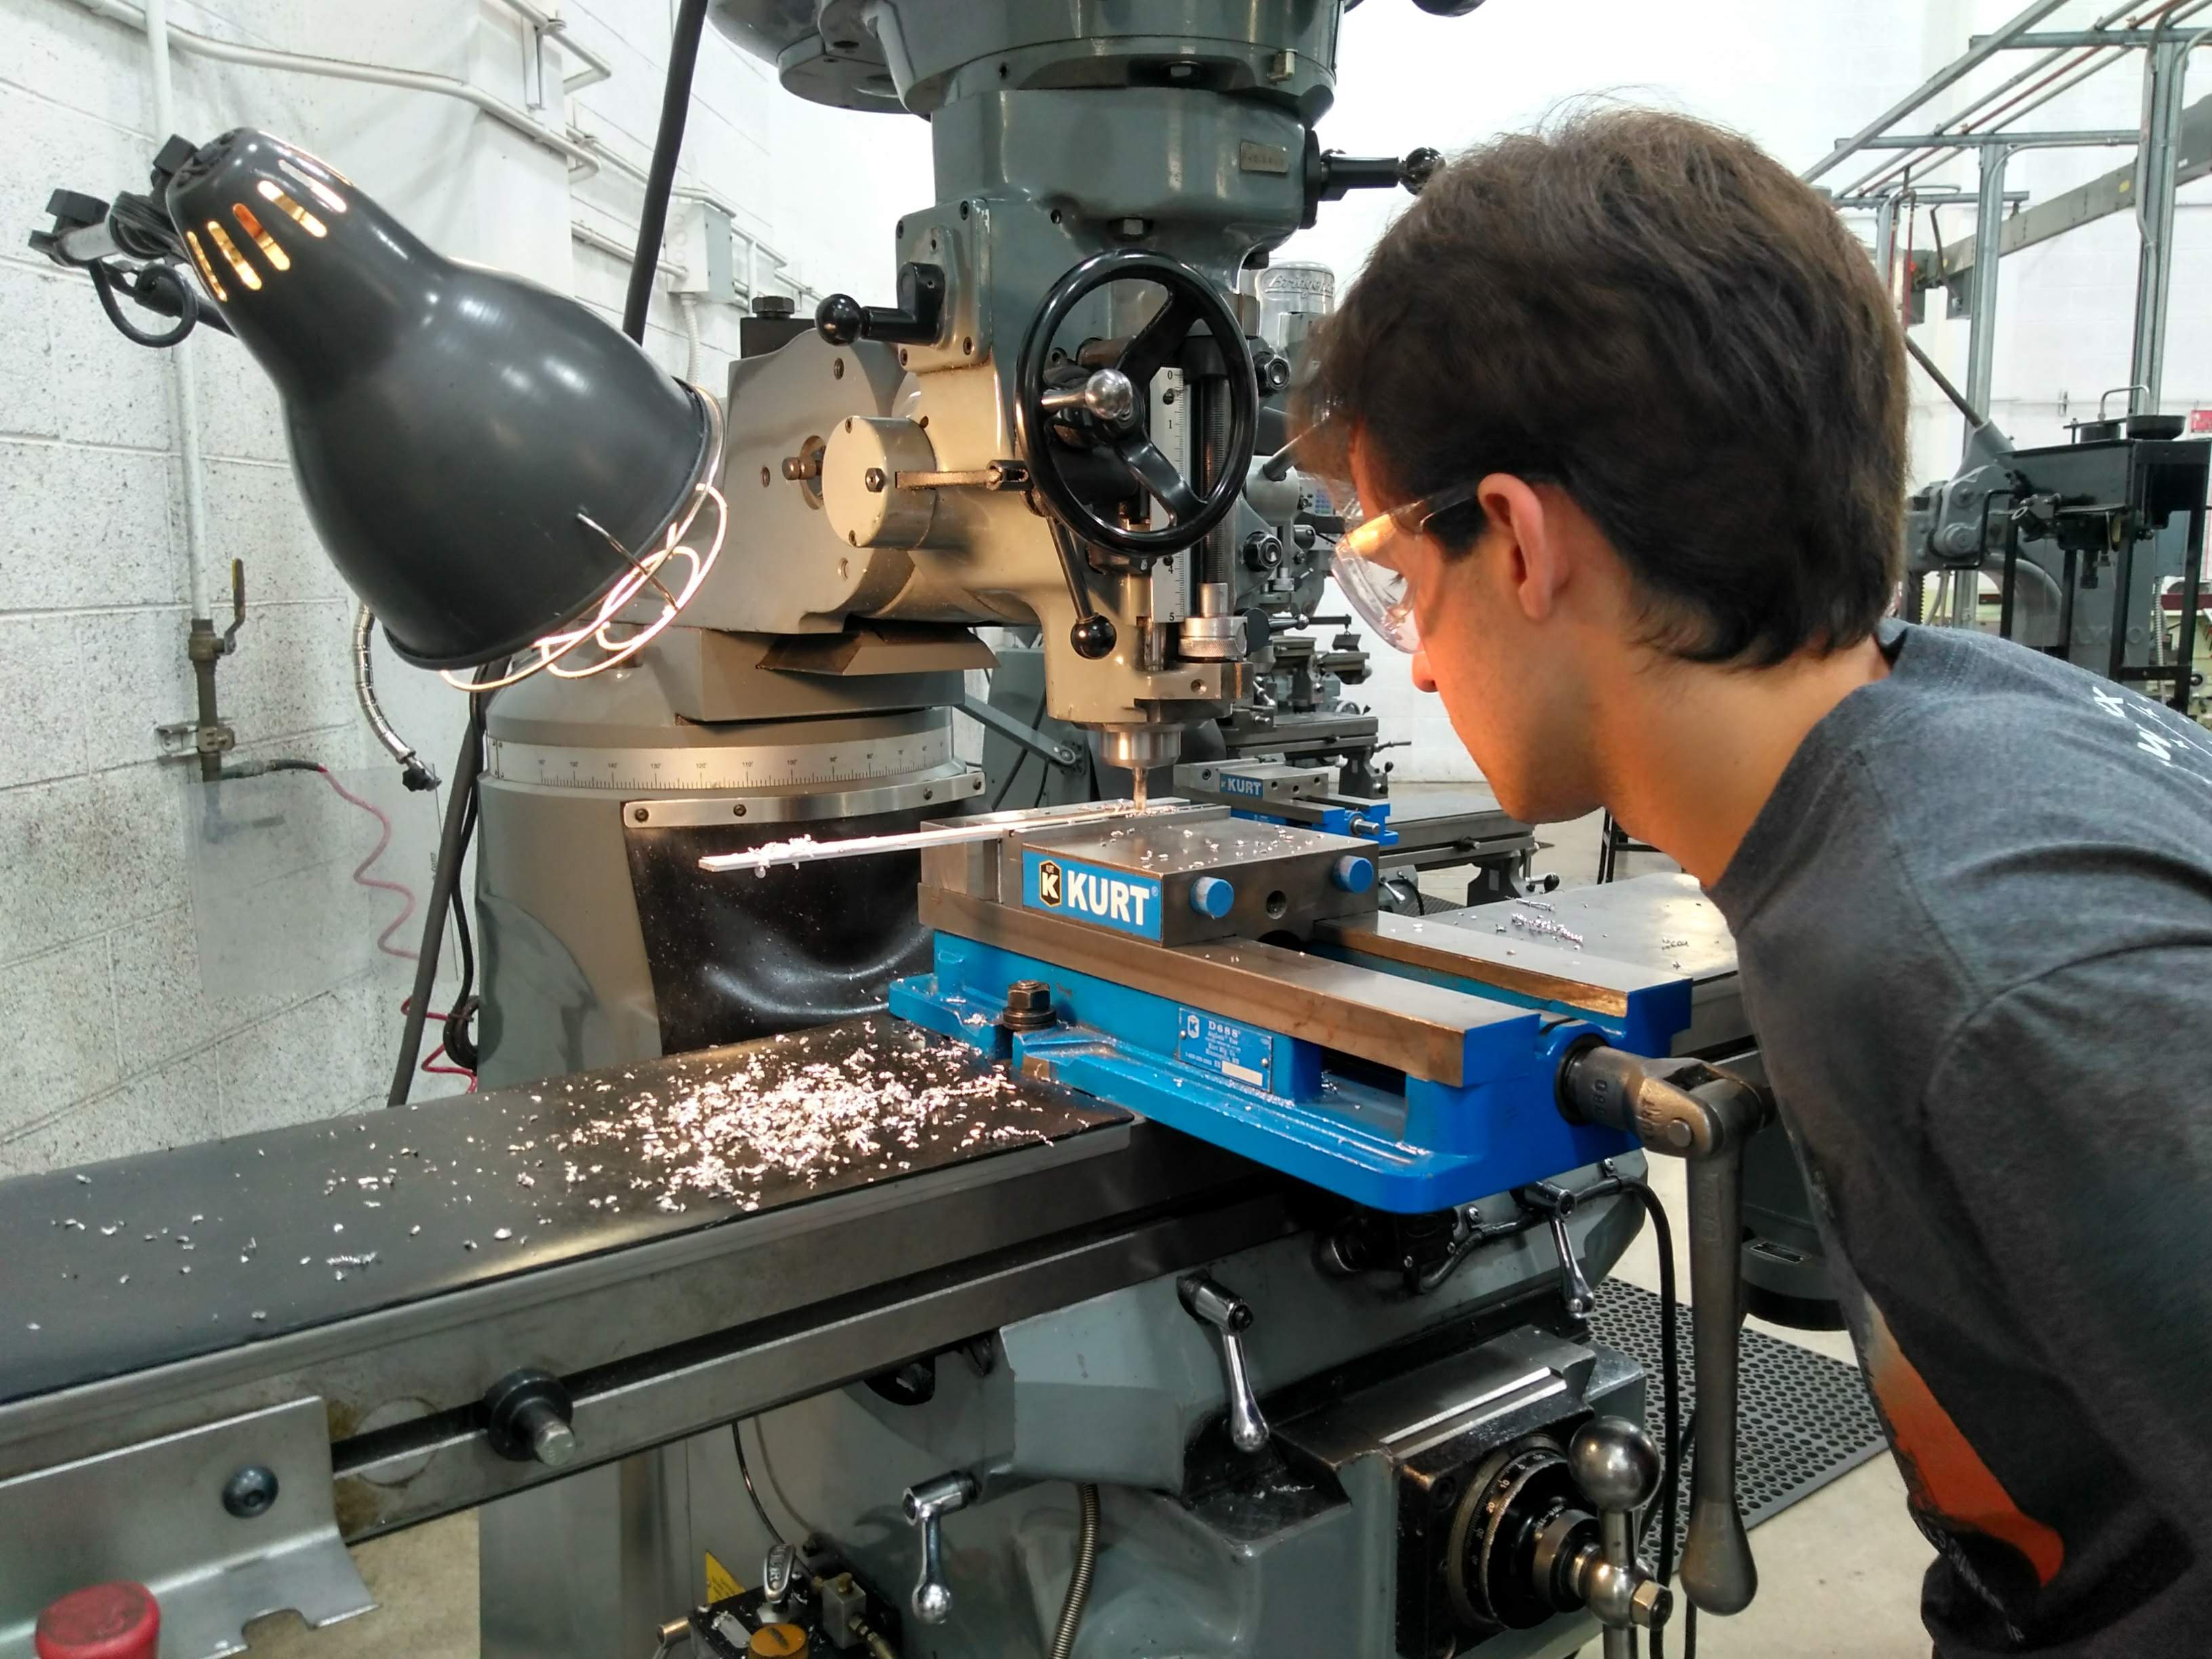
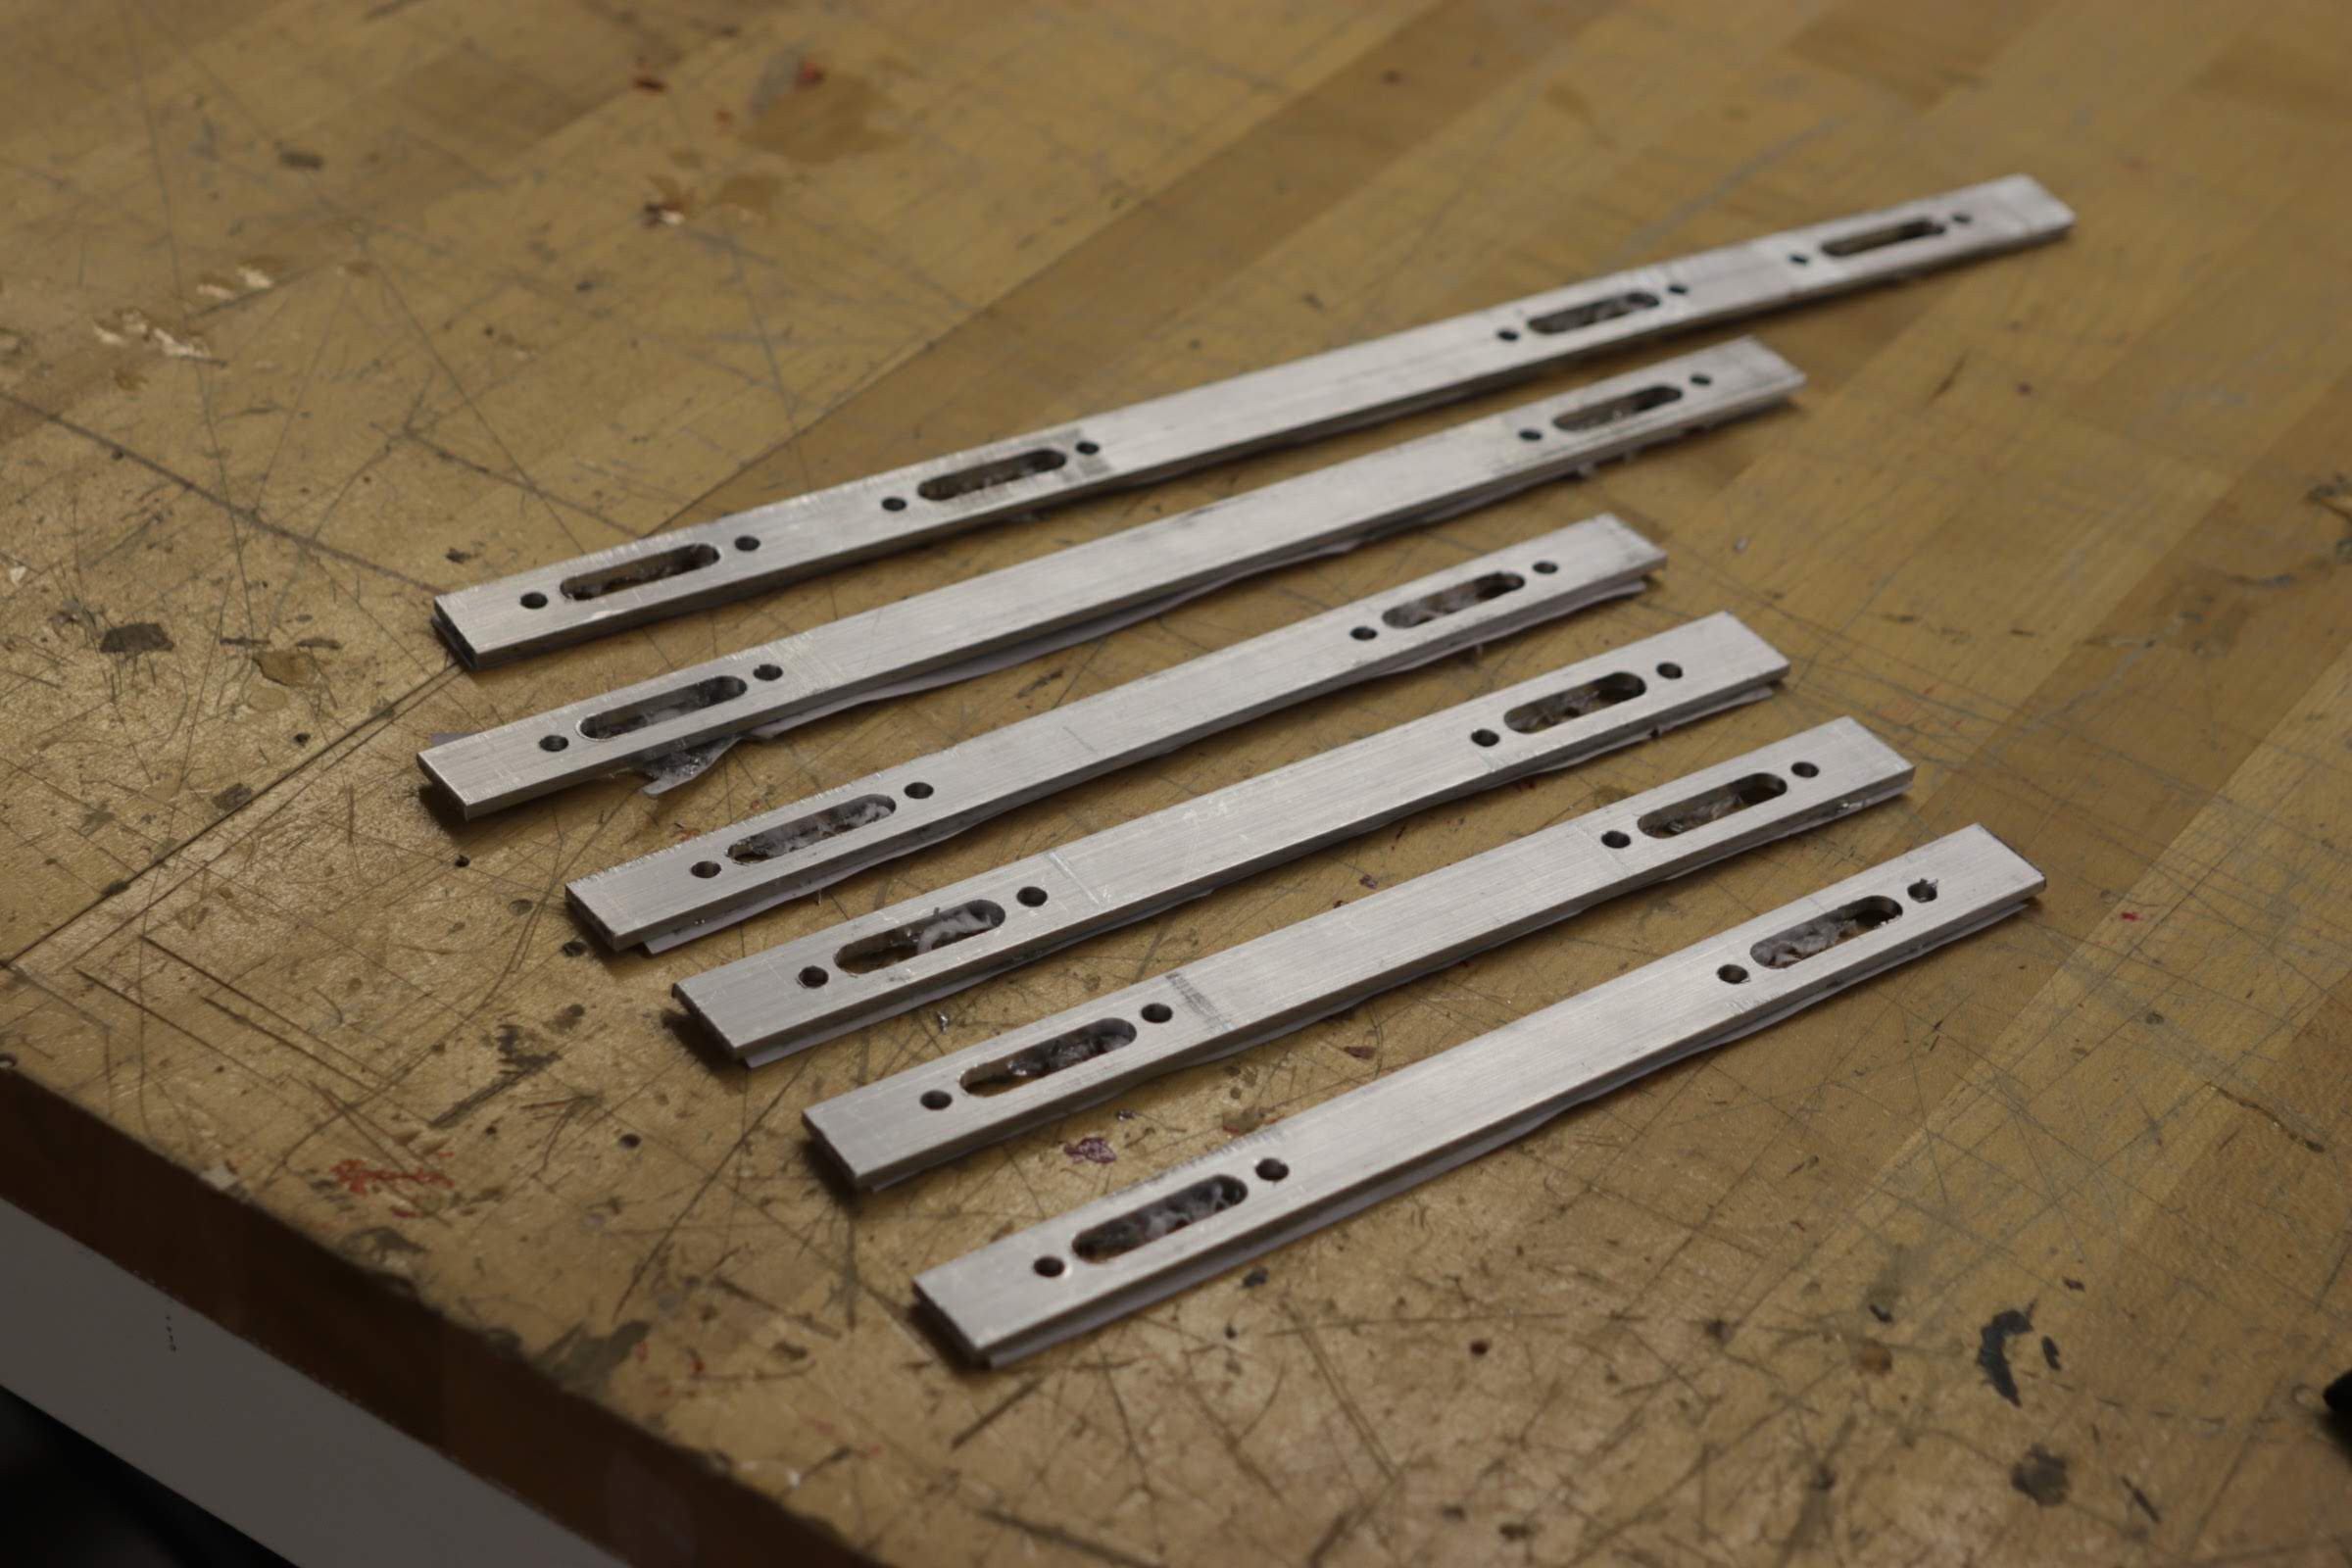
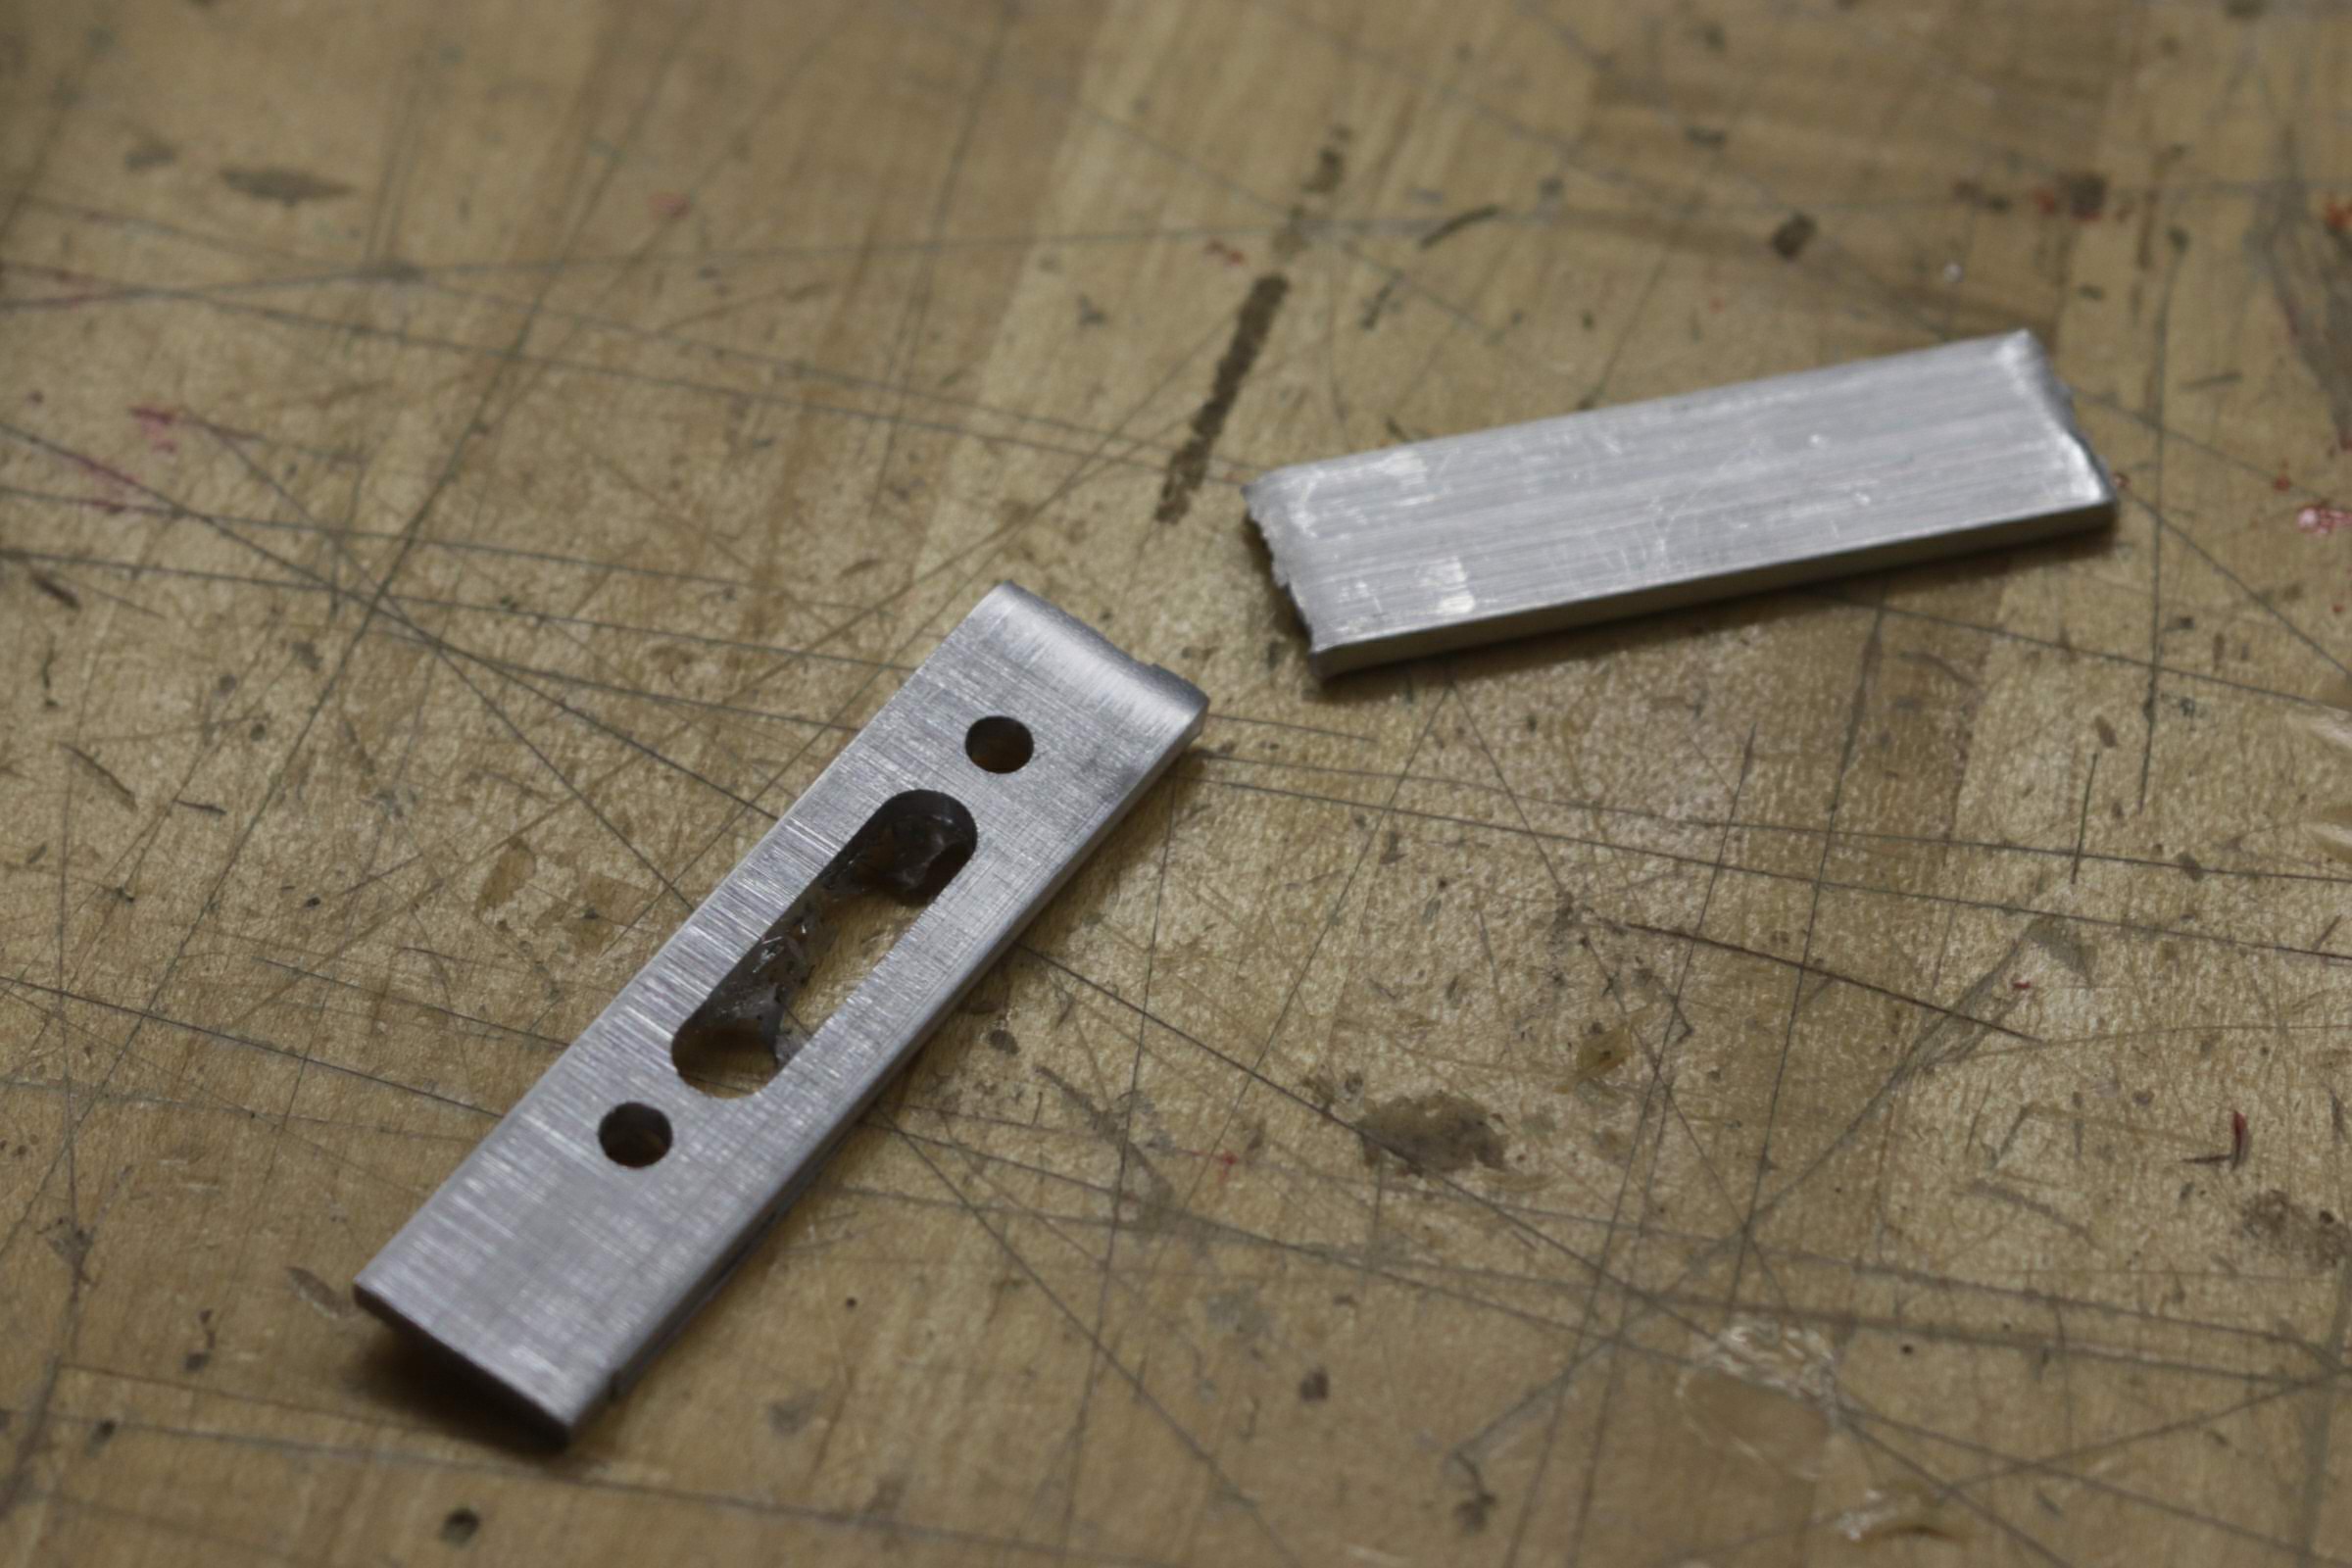
8/6 - Milling the Aluminum Cases
08/15/2018 at 03:02 • 1 commentToday we went to the ASU machine shop to mill the slots in the aluminum strips and to bend them. The milling went well and we completed all the strips needed for the modules we are intending to build. However, when we attempted to bend a test part we found that the required bend radius was larger than expected. We plan to cut the strips apart and glue the front and sides on separately.
![]()
![]()
![]()
-
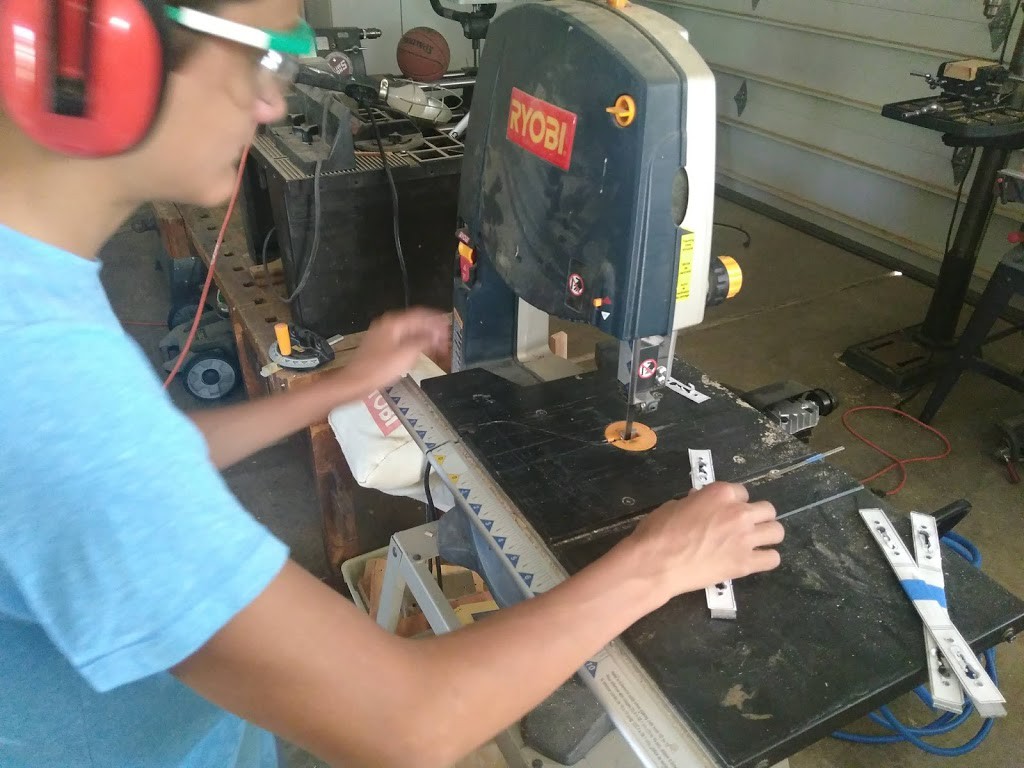
8/3 - Beginning Fabrication
08/15/2018 at 00:50 • 0 commentsToday we began fabricating the aluminum strips for the module bodies. We purchased three 1/8" thick and 3’ long aluminum strips. First, we attached paper templates to the strips and cut them to length. We then attempted to cut the slots by drilling holes at either end of the slot and using a scroll saw to cut out the slot. While this worked, the resulting slot was not as clean as it would be if a milling machine were used. As such we will complete the aluminum strips at a later date when we have access to a milling machine as well as a brake to bend the strips.
We also worked on the CAD design for the profile selector module and began working on the electronics for the dials module. We wired 3 dials and programmed the Arduino to track their positions.![]()
![]()
-
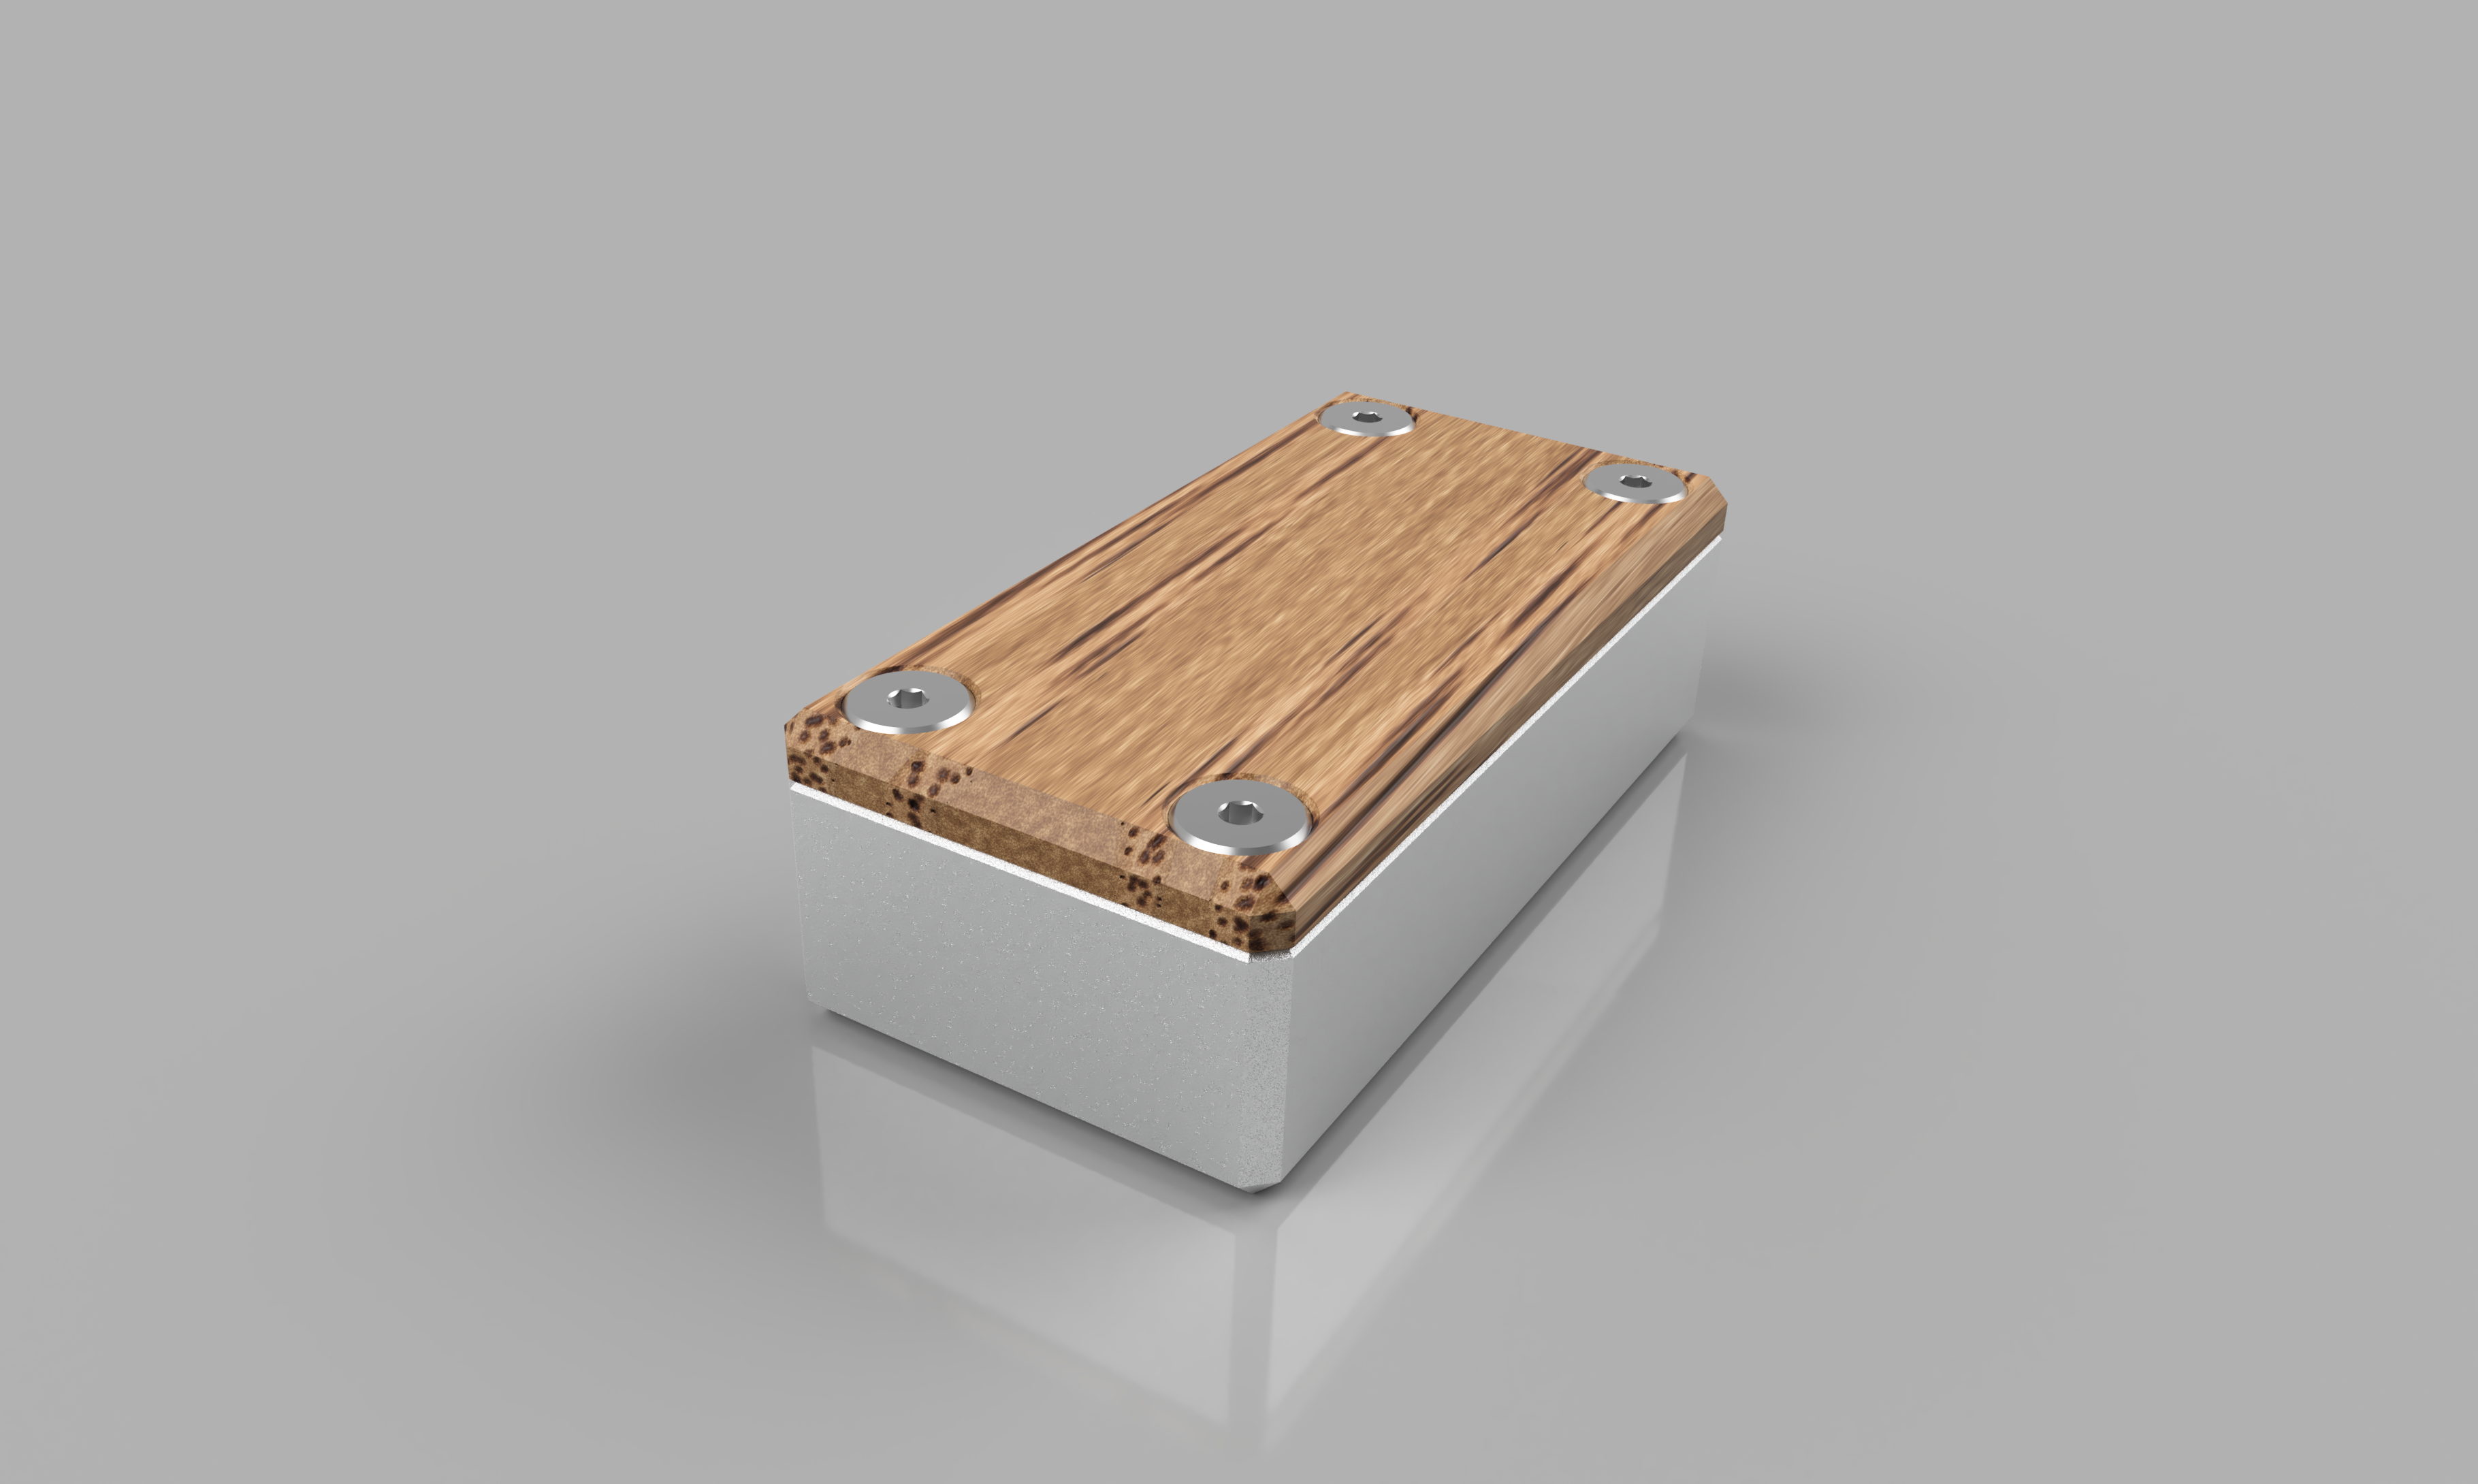
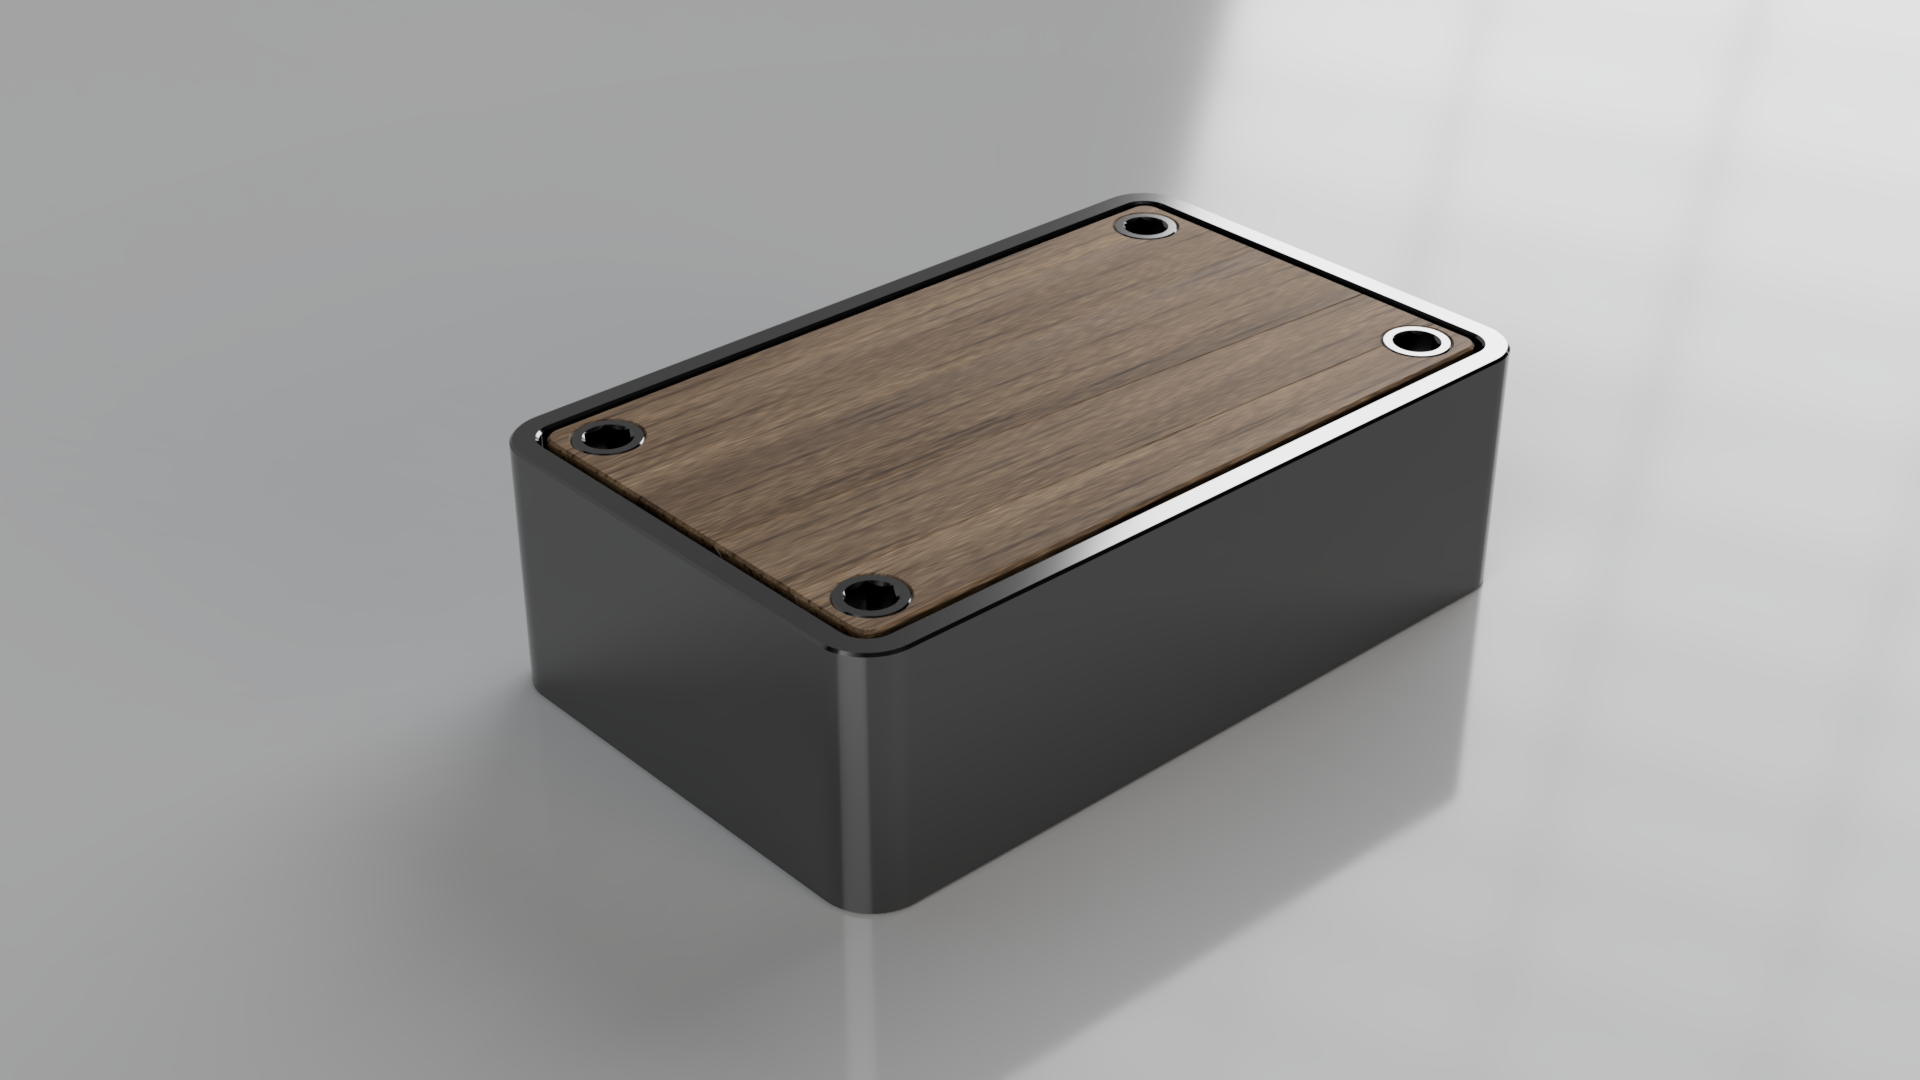
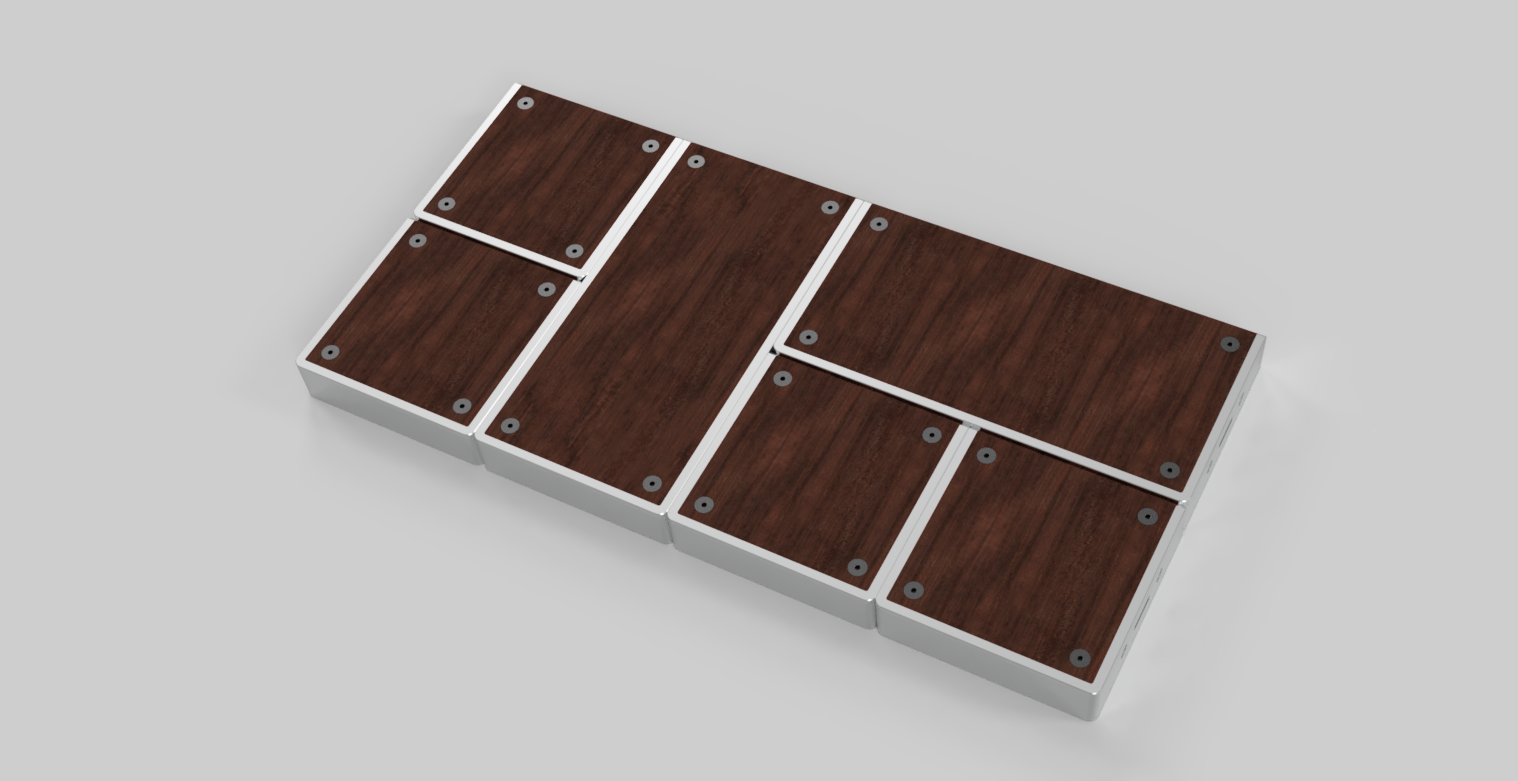
7/30 - Initial Module CAD Models
08/02/2018 at 20:53 • 0 commentsOver the weekend team members worked on creating mock-ups of ideas for the base module design. We decided to connect the modules using a custom built magnetic connector.
![]()
![]()
![]()
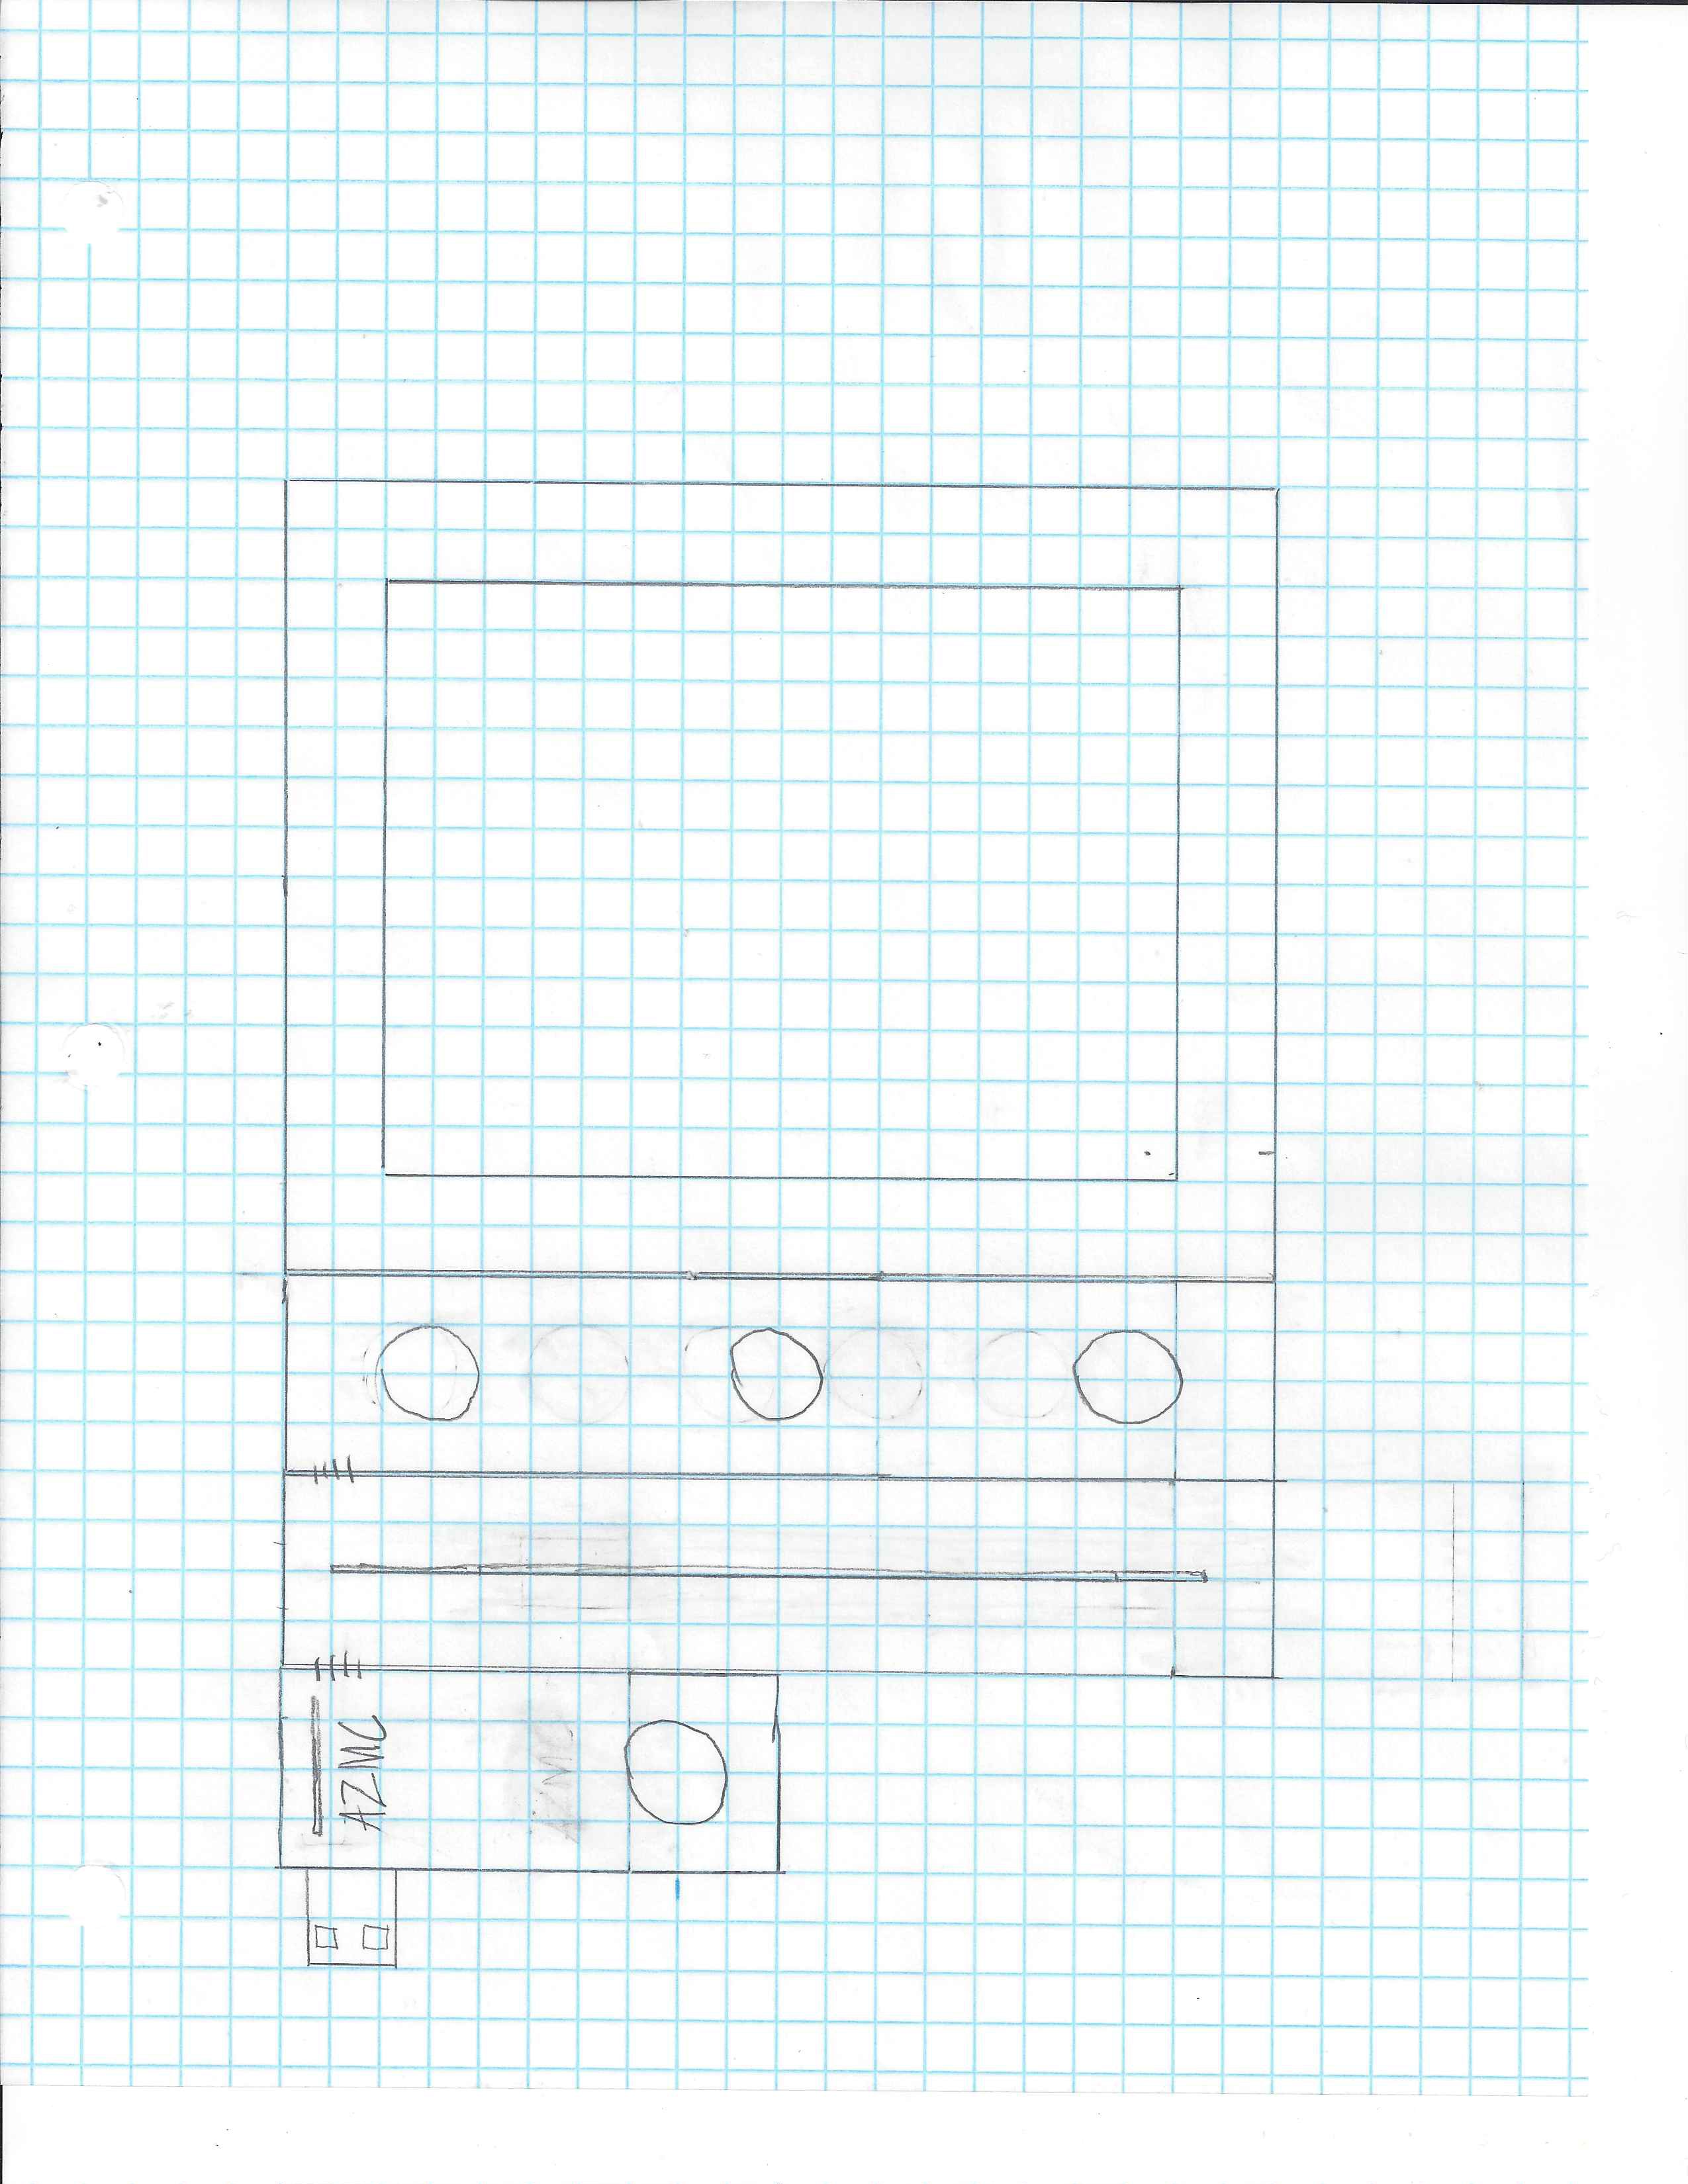
Today we created our final template design. We chose to do a variation on the design with the inset wood top that used an aluminum strip around a plastic body rather than a milled aluminum body. This will make the design much easier to build. We also decided to base the modules on a 3"x3" grid system that will allow for 2 rows of modules.
![]()
![]()
Once the template was complete, we began creating models for the individual modules. Each module uses a unique wood top that is laser cut specifically for mounting that module's components. All other parts are identical to the template.
-
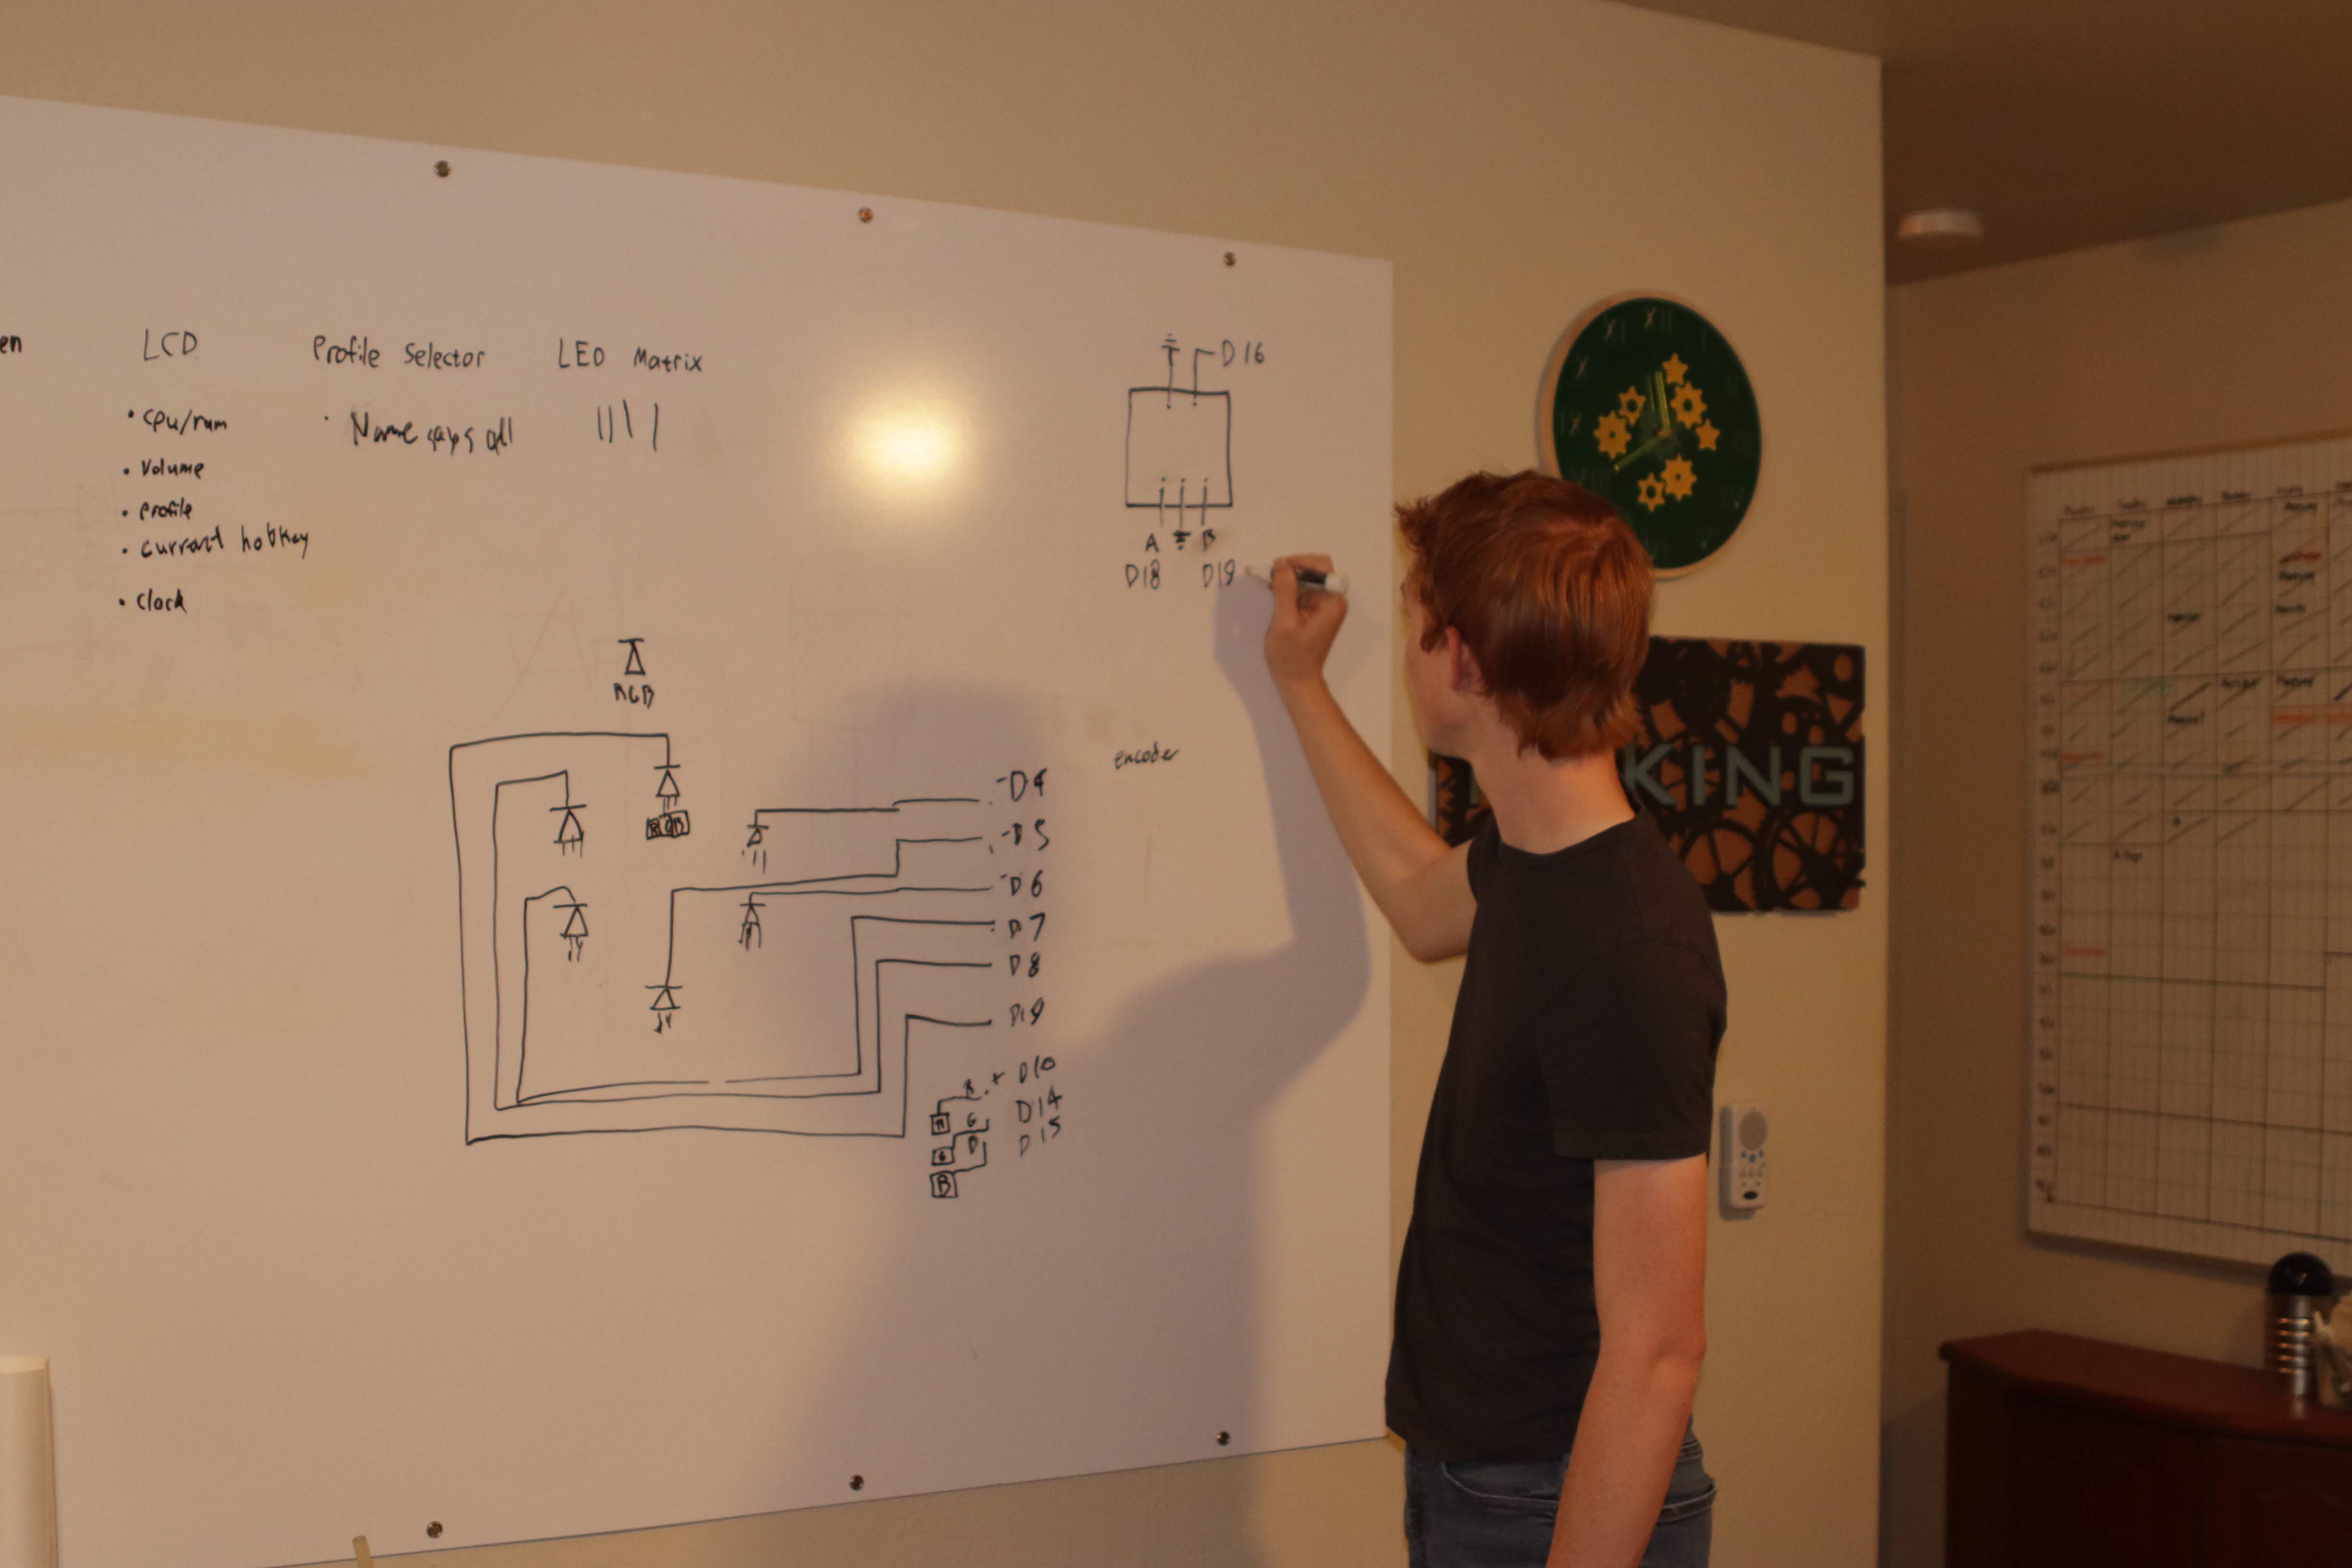
7/26 - Brainstorming
08/02/2018 at 03:14 • 0 commentsToday we brainstormed ideas for the Human Computer Interface Challenge. Our ideas included:
- Compact handheld motion controller
- New keyboard design
- Force feedback glove
- Full body or finger/hand motion capture
- EEG
- Force feedback joystick
- Projected keyboard/function pad
- Modular USB hotkey pads
- Small portable computer with projector
We decided on the modular USB hotkey pads idea. We will make a variety of different computer input device modules that link together and connect to a computer as one unit. Ideas for modules include a function keypad, sliders, rotary knobs, touchscreen, and a led matrix.
![]()
Modular USB Hotkey Controller
Programmable USB controller modules for gaming, CAD modeling, video editing, and more