-
11Soldering the wires to the buttons.
Solder the wires to the pads around the button that you want to automate. In my case I've chosen the large coffee.
-
12Detailed view of the soldered button.
When I did it, the result looked like this. Adjust the wires in order not to obstruct the shield or the lid, when closing the coffee machine.
-
13Reattaching the white shield.
Reattach the white shield and make sure that it fits tight and that it is not crushing any of the wires.
-
14Performing coding tests.
For code testing purposes, I used a battery.
-
15Wiring the relay.
Attach the wires to the relay on the common (C) and the Normally Open (NO) sockets. Make sure that the bolts are tight and that they are not pressing on the plastic cover of the wire.
-
16Wrapping up the mechanical part.
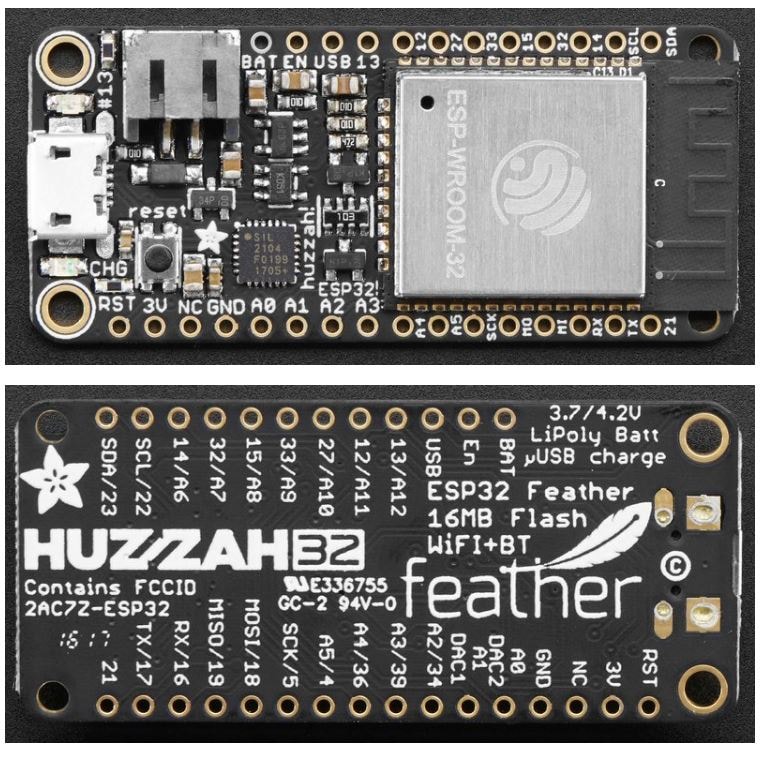
To power the ESP32 I used a small 230VAC to 5VDC 5W (mobile phone 1A) charger and connected the ESP32 via micro USB.
I assembled the machine by putting back again the side plastic lids. I attached them by screwing the bolts back on the bottom of the machine. I inserted the pressure manifold and attached it back by screwing the 2 bolts. Finally I attached the front cap by screwing the 2 bolts.
-
17Software part (Setting up the espressif environment).
Setup espressif toolchain on your computer:
Follow the official tutorial according your host OS in:
In my case I used Linux, so if you’re also using Linux just use this shortcut:
sudo apt-get install gcc git wget make libncurses-dev flex bison gperf python python-serialDownload the toolchain: In my case, Linux x64 bits
If you're using the terminal, cd into your Download folder and do:
wget https://dl.espressif.com/dl/xtensa-esp32-elf-linux64-1.22.0-80-g6c4433a-5.2.0.tar.gzIf you want to download using the browser click here.
Next, do the following:
mkdir -p ~/esp
cd ~/esp
tar -xzf ~/Downloads/xtensa-esp32-elf-linux64-1.22.0-80-g6c4433a-5.2.0.tar.gz
git clone --recursive https://github.com/espressif/esp-idf.git
Inside the folder esp you have just created, you should end up with two folders inside:
- xtensa-esp32-elf
- esp-idf
Define the above environment variables:
export PATH="$PATH:$HOME/esp/xtensa-esp32-elf/bin"
export IDF_PATH=$HOME/esp/esp-idf
You are now ready to cross-compile and flash your ESP32 device.
-
18Creating the Project Coffee Machine.
To create the coffee machine project, I used the hype framework.
This framework requires registration but it's free of use for a month.
After you register / login you can create a new app and select “Download Template” in this case for the ESP32
Download the template and decompress it to your project folder.
You will end up with something like this:
Except the file README.txt, as this was a file I wrote to explain how you can do to only download the libraries and not the template. The template already as your app identifier and access token hardcoded.
Now you can go to my dropbox repo and download the project.
Replace the files with your files in your project.
-
19Editing the template source code.
Inside your project, edit the file main/template.c
Between lines 24 and 36:
You have to replace the text between the quotes, for your wireless router name and respective password.
/* WiFi Settings */
/* Replace your WiFi Network Name for the "YOUR WIFI SSID" and respective password */
#define EXAMPLE_WIFI_SSID "YOUR WIFI SSID"
#define EXAMPLE_WIFI_PASS "YOUR WIFI PASSWORD"
If you already created the app in the You have to go to "My Apps" and "Create new App".
After creating the new App, click on it and go to "Settings".
Now copy paste your App Identifier and your Access Token into the Source code.
/* Hype Settings */
/* Please read the README.txt file first.
   Here you have to set your App Identifier and Access Token given on the website */
#define APP_IDENTIFIER "YOUR APP IDENTIFIER"
#define TOKEN "YOUR ACCESS TOKEN"
Now in my case I defined PIN 23 to control my coffee machine push button, but you can choose any other output PIN.![]()
/* Define here the GPIO Pin that you want to use to activate the coffee machine button */
#define MACHINE_GPIO 23
Save the file modifications and close it.
-
20Compiling and Flashing the project.
Run on your linux terminal:
make
Make sure you have write privileges to flash your device. You can add this privileges either by:
- Adding your user to the dialout group (re-login is needed).
sudo usermod -a -G dialout $USER- Or by setting all privileges on the fly. (Where ttyUSBx is your device and “x” is its number, i.e. ttyUSB0)
sudo chmod 777 /dev/ttyUSBxFinally I flash the device with the command:
make flashAfter all this is done you should have your smart coffee machine fully functional.
How to hype your espresso
Turning a simple coffee machine into a Smart coffee machine.
 joshuaevans029
Discussions
Become a Hackaday.io Member
Create an account to leave a comment. Already have an account? Log In.