Emmanuel Lecomte
-
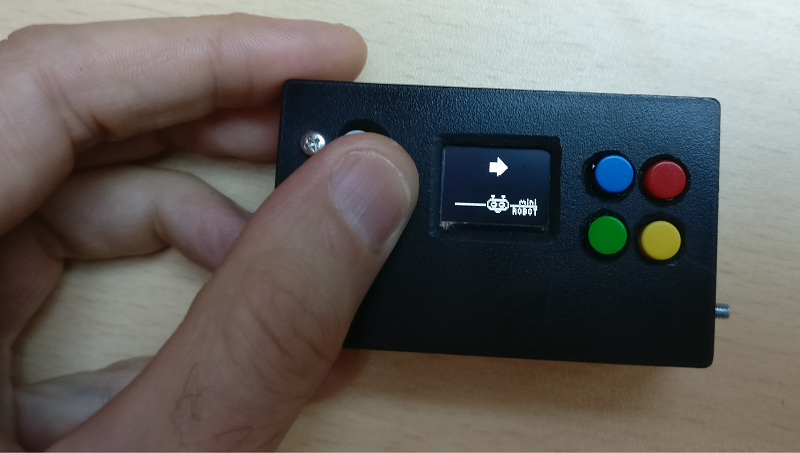
Second prototype completed with box
10/08/2018 at 11:01 • 0 commentsI had few hours to at least complete the second revision of the remote, and to program it.
It's small, it's not so pretty (but prettier than revision 1 ...) but it works.
And it's much more children proof !
For now it's only able to drive my mini robot, but I will add other features later.
![]()
And if you are asking, yep, the small robot head is animated. I have less space on screen with this revision than on Rev 1, so I decided to be more "graphic" than "textual" ...
Here how it works with "robot small" (sorry for vertical video ...)
I don't think I will be able to work on a new revision with a custom PCB until maybe 6 months or so. So for now I will use this version and complete my robot projects. And then I will start some connected home projects.
-
2nd prototype - in progress
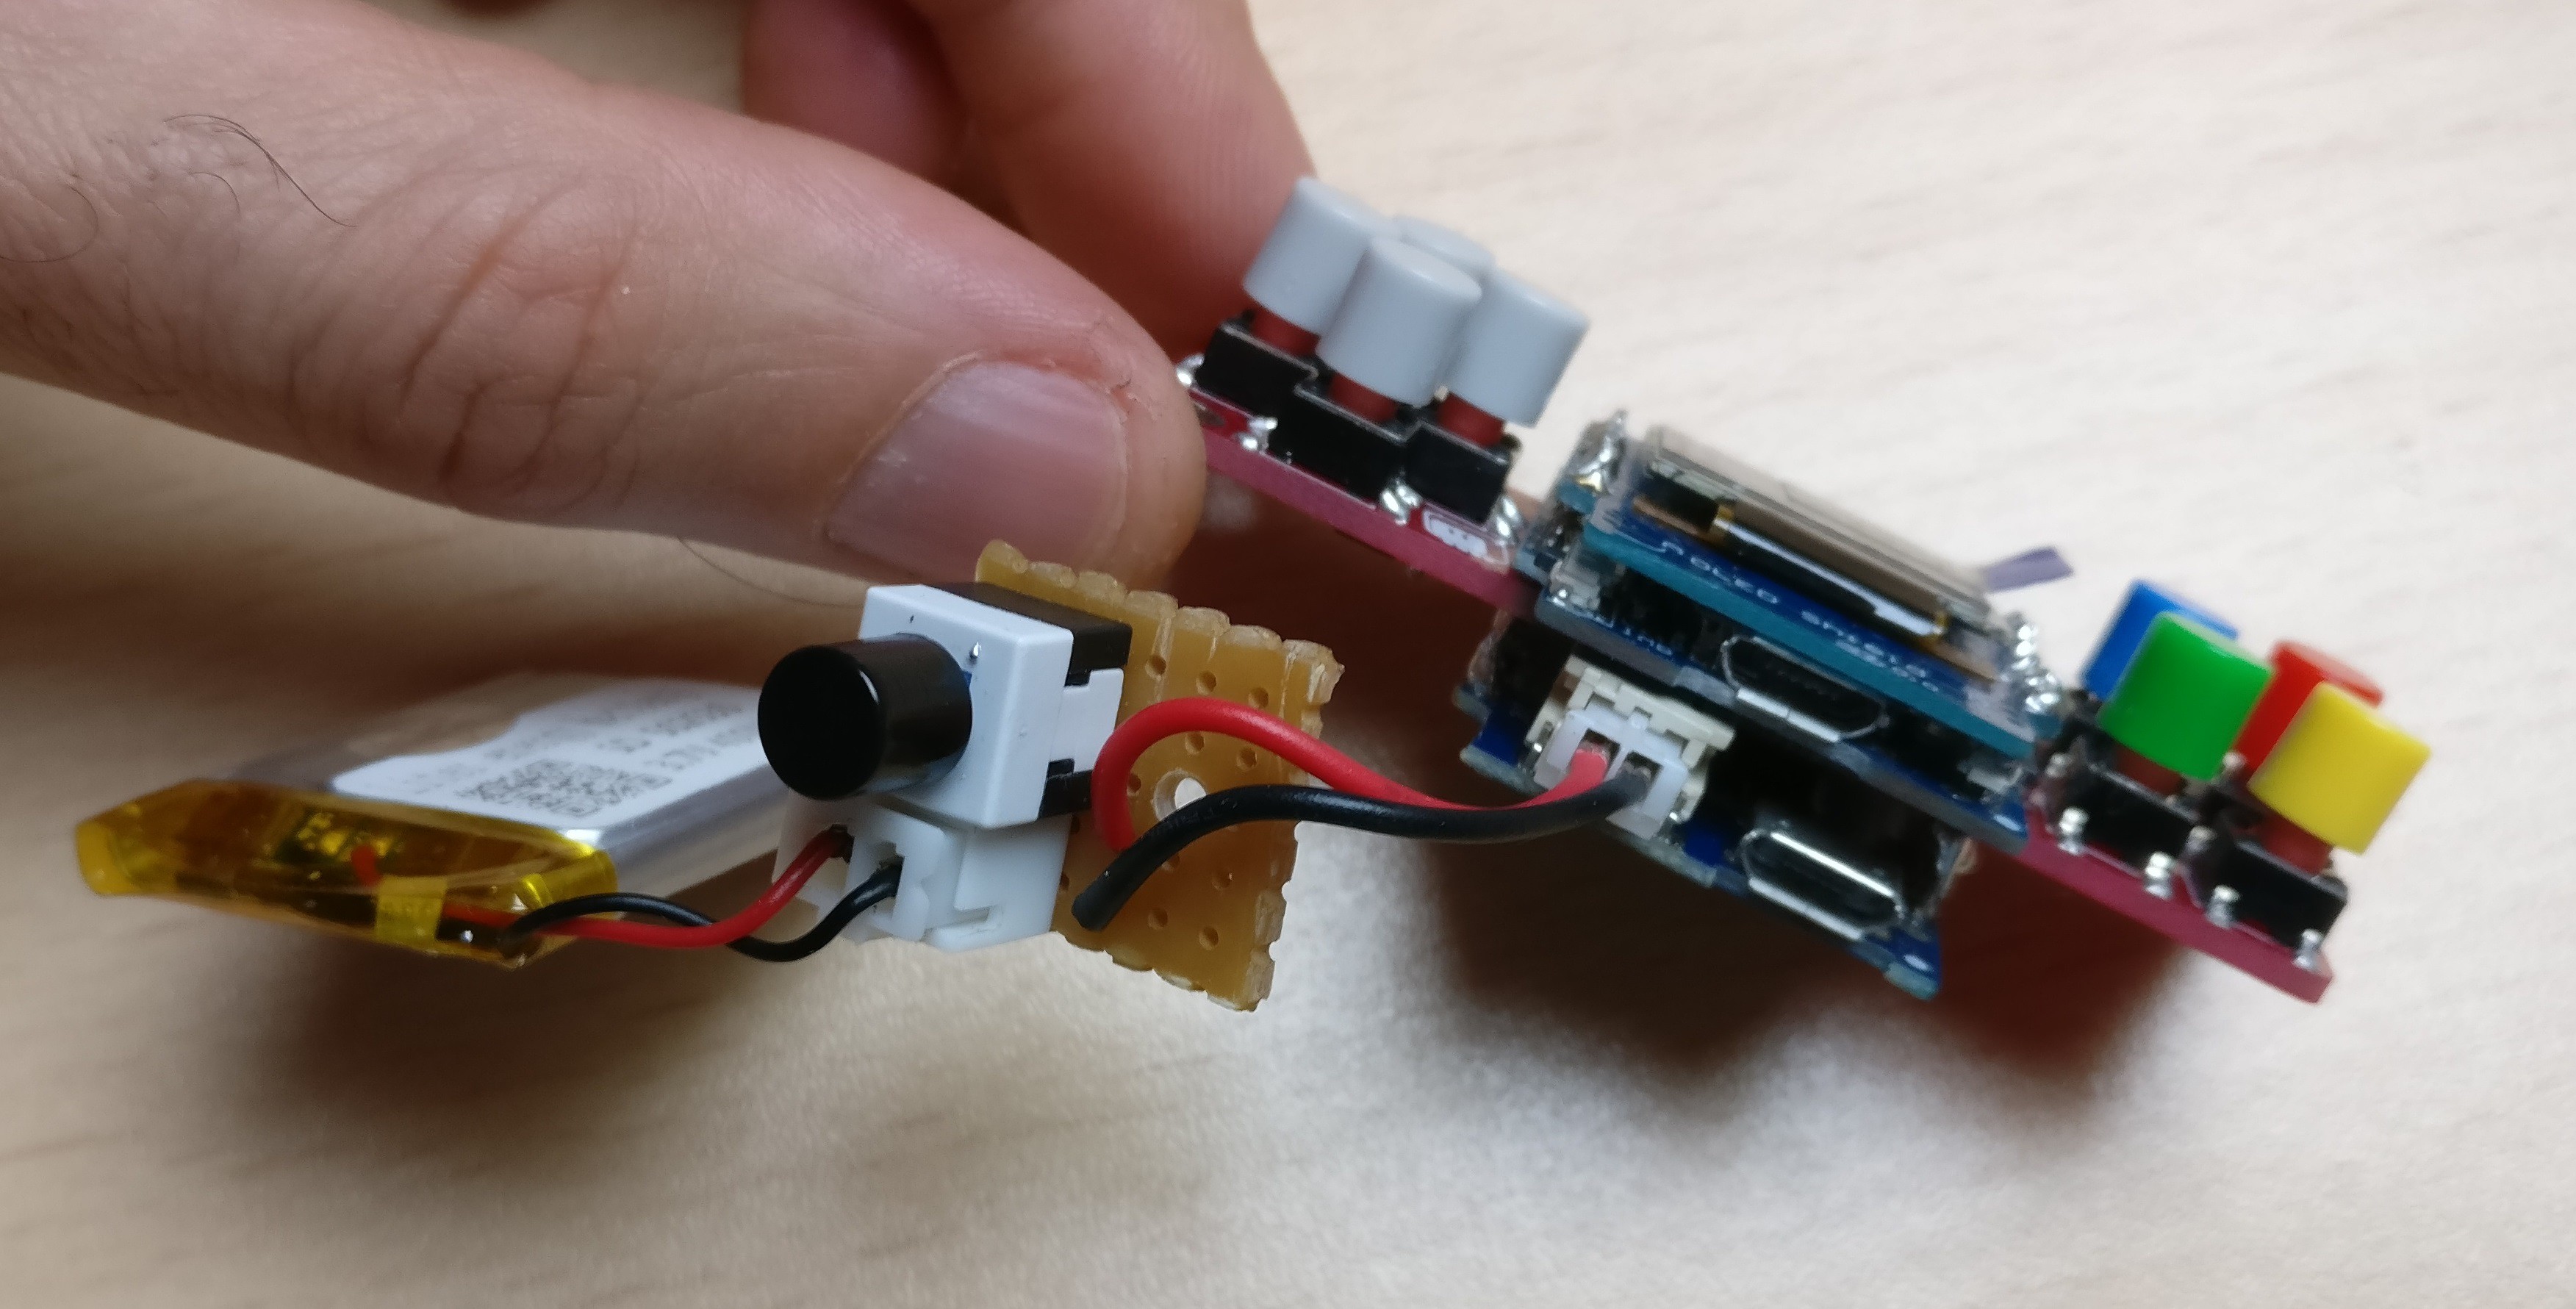
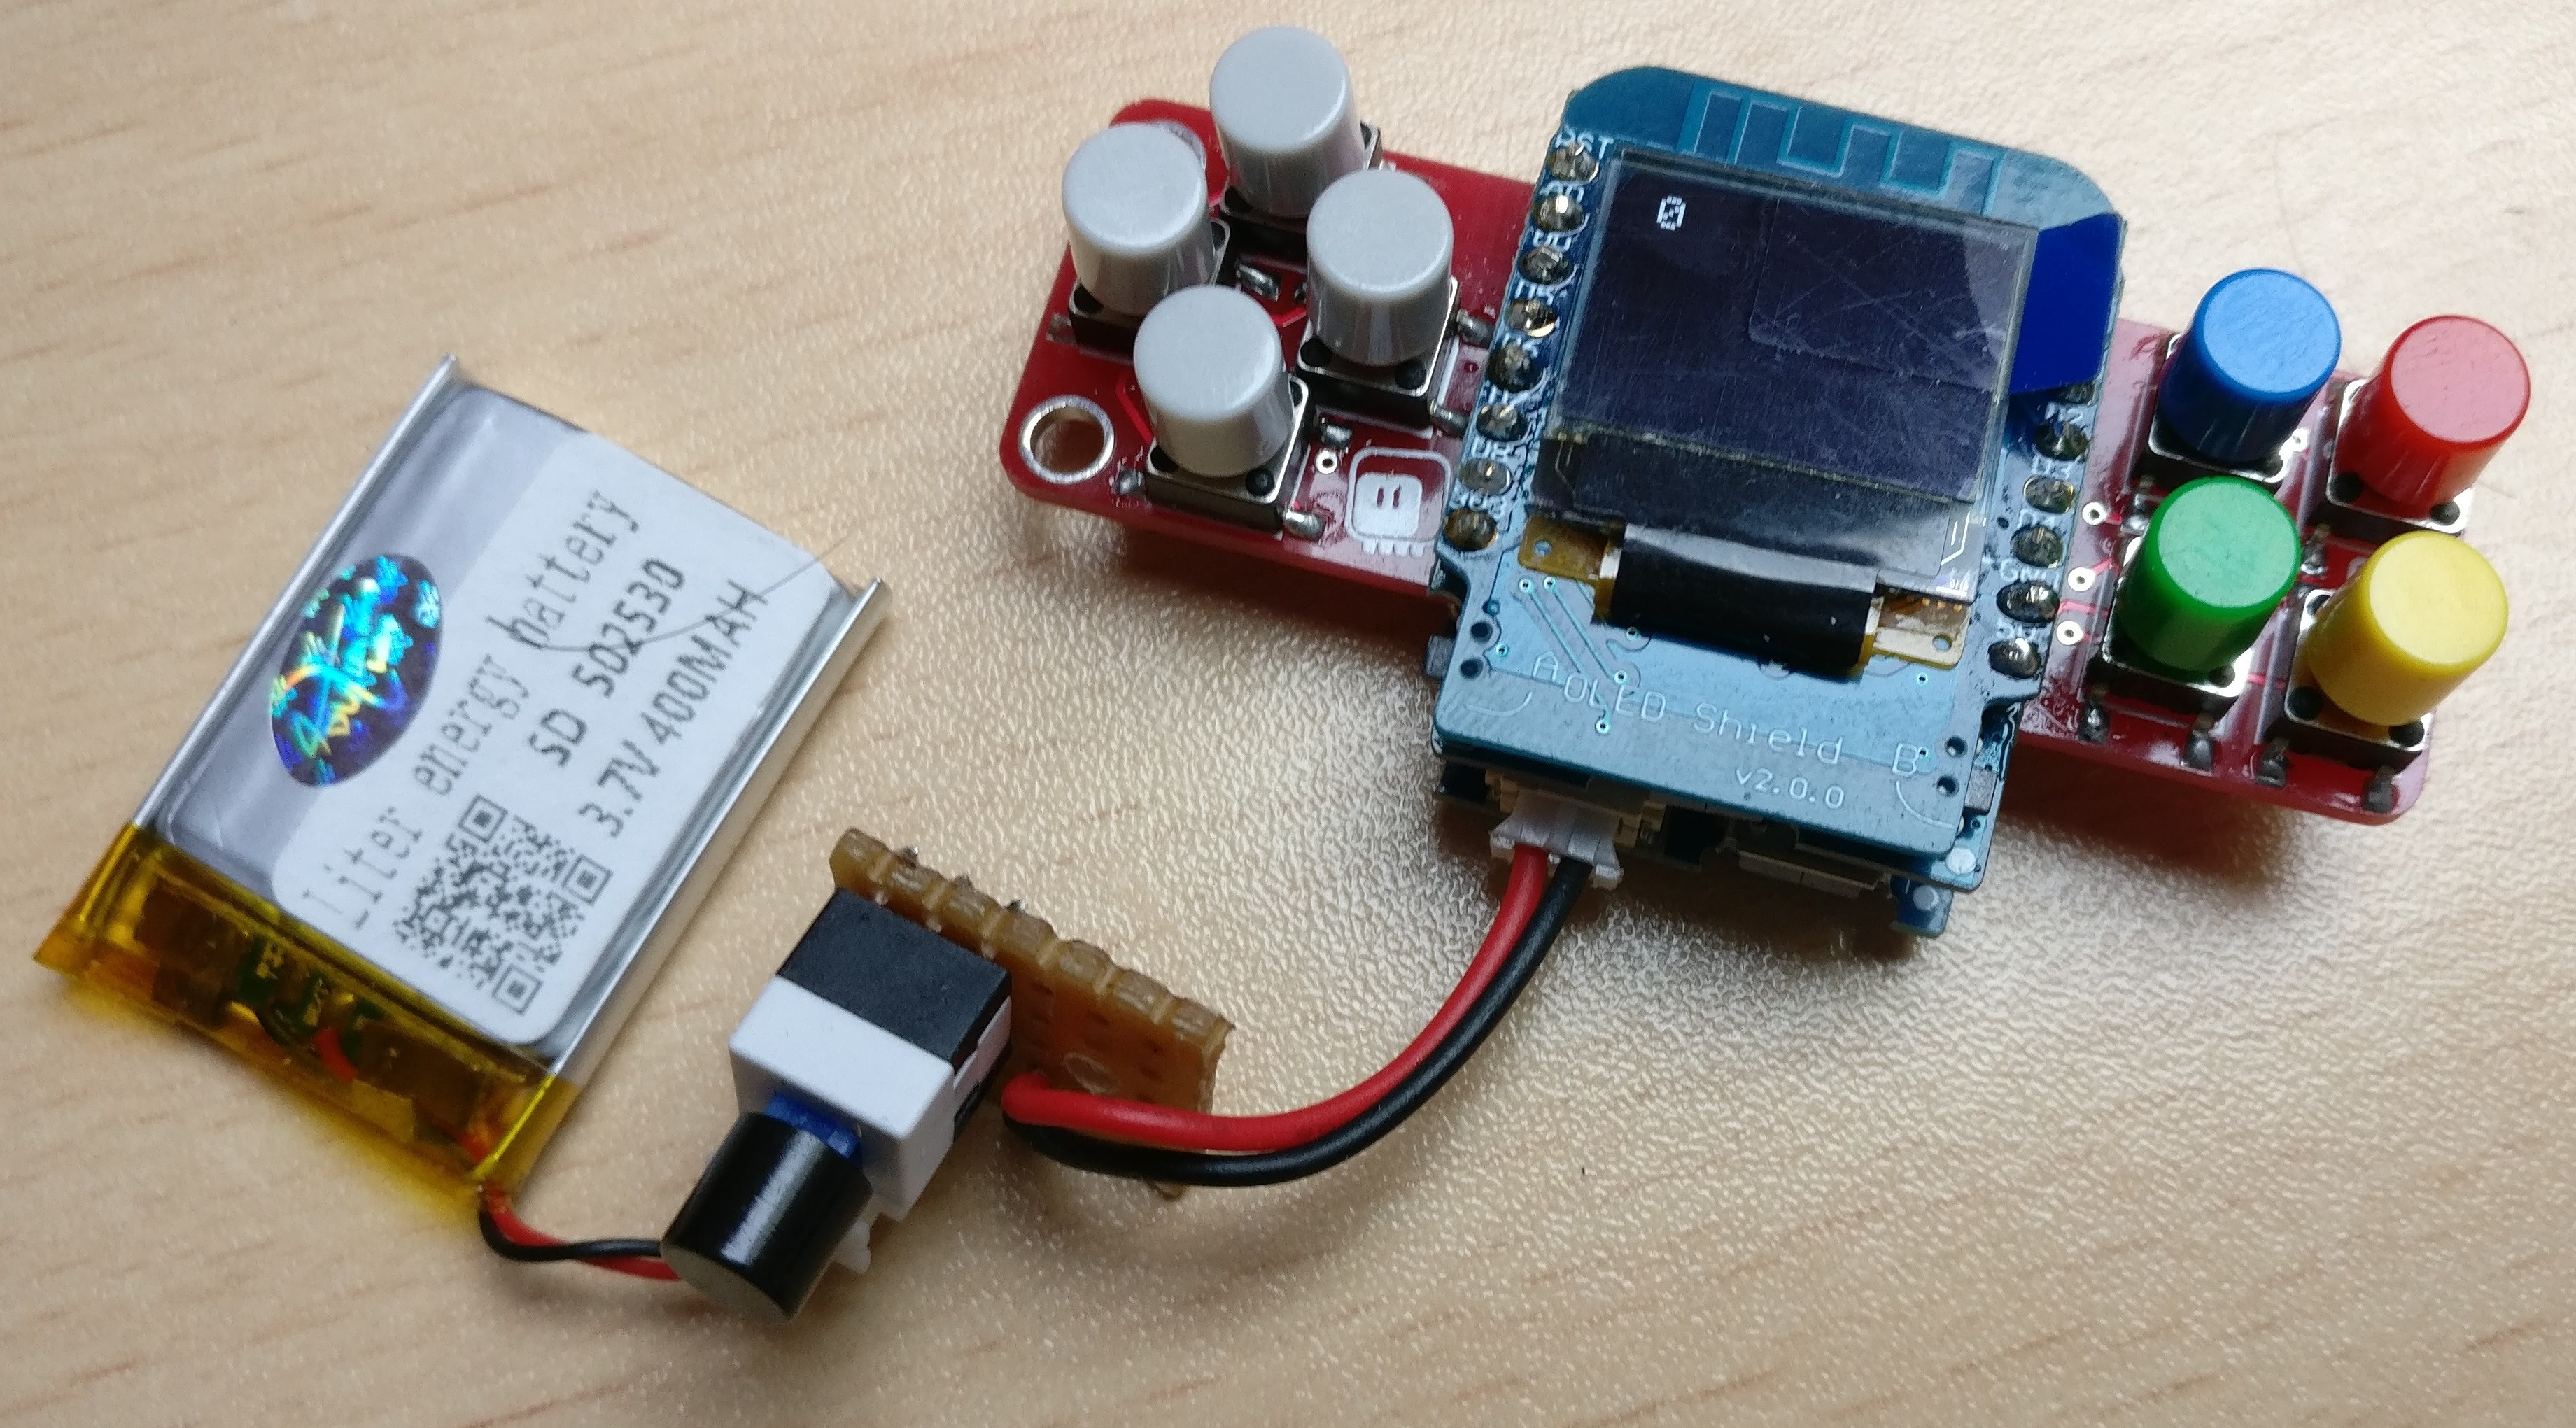
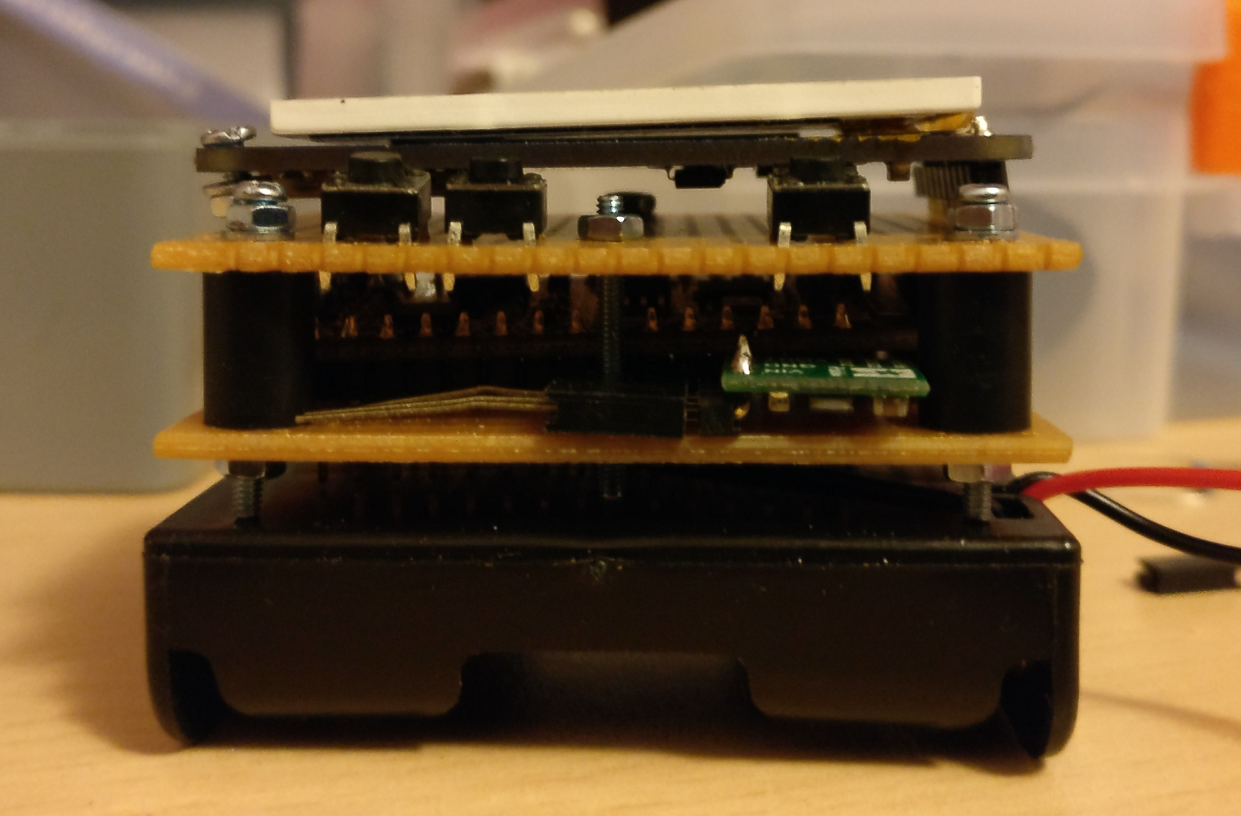
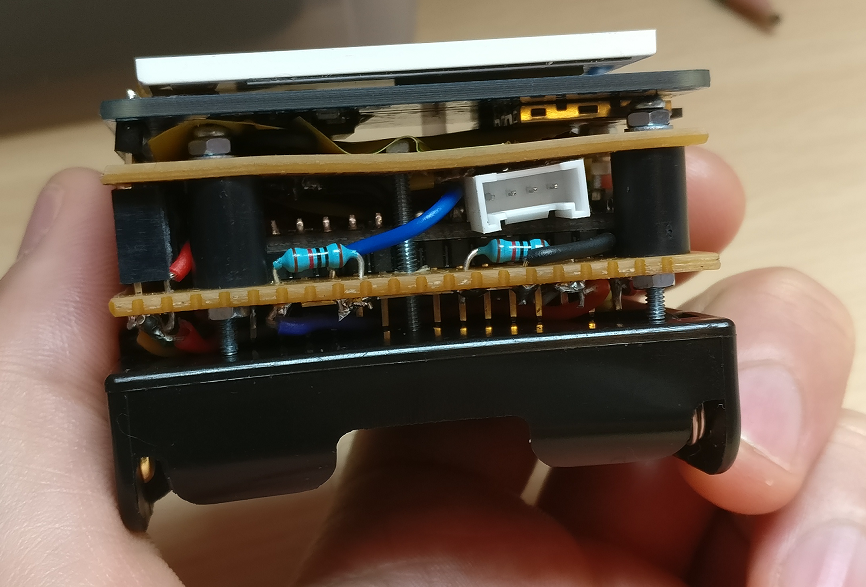
09/18/2018 at 12:36 • 0 commentsI don't have a lot of time for working on my projects, but I was able to prepare something for the 2nd prototype based on standard D1 Mini modules
I'm not good at all on soldering, and I did a mistake with the D1 Mini Battery shield, so I had to remove and restart everything.
But at least now it's OK and working.
It's built around the ꝺeshipu's D1 Mini X-Pad, using only orginal Wemos D1 mini lite + shields. I have added a LiPo + one on/off button + some button caps.
These shields are very compact
![]()
It works :-)
![]()
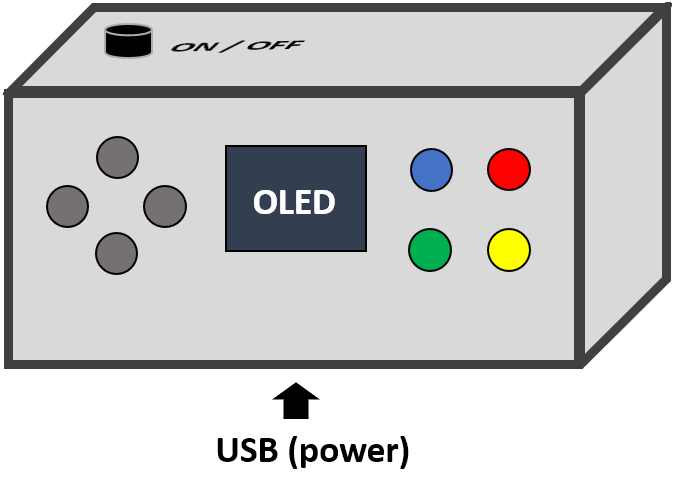
Everything will be crammed into a standard 72x44x25 project box like this :
![]()
I know it's ugly but it's already better than the 1st proto :-)
Maybe I will be able to work on it in 1 or 2 weeks
-
What I expect to do for the 2nd prototype
08/22/2018 at 07:41 • 0 commentsI want to keep the same stack (ESP8266) for code compatibility, but what I have discovered :
- The remote needs to be children proof. My girls are using it for the small robot. The 1st proto is "too big" for them. I need to remove R6 batteries, and use something slimier (3.7V battery ...)
- 3 buttons is "OK" : 1 action button + 2 left / right buttons. Pressing left + right add option menu. But all the debouncing needs to be done, and I need to add more and more sub menu for every features. More buttons is better
- The screen is quite good, and with color. But I can use something cheaper (this one cost +20$) and smaller
- No need for status LED, the screen is enough
- I wanted to be able to read pictures or details from the SD card but it's not usefull
So I will start something simpler, and I have found an amazing board for this : the D1 Mini X-Pad from amazing ꝺeshipu
I will use :
- The X-Pad. I love the form-factor, it seems more child compliant than arduboy-like button boards, and stay very, very small
- 1 D1 mini lite (1 MB flash with ESP8285). It's a cheaper D1 mini. CPU core is the same, and I don't need flash space for now.
- 1 D1 mini Oled shield. Yes this screen is very small and black and white but it's also cheap
- 1 D1 mini battery shield
- 1 Lipo 3.7v / 400 mA battery
So it's just an assembly of standard boards :-/ Total price is well bellow 15$
But for 3rd prototype, maybe I will try to create my own PCB ...
-
1st prototype building details
08/22/2018 at 07:25 • 0 commentsThe 1st prototype is mostly based on standard boards / modules, mixed together with 2 pre-drilled protoboard
What's inside :
- NodeMCU (ESP8266) from Robodyn : https://robotdyn.com/wifi-nodem-esp8266-cp2102.html
- Adafruit 1.8 TFT LCD with MicroSD : https://www.adafruit.com/product/358
- A Step-up / step-down voltage regulator from polulu : https://www.pololu.com/product/2119 I love this stuff :-)
- A battery holder (3 x LR6)
- 3 push buttons + pull up resistors
- 1 white LED
- 1 groove connector for Serial connector
- 2 custom proto board (pre drilled proto PCB)
Node MCU is soldered (for space constraints). Everything else can be removed
The idea was to add everything from a breadboard to space-constrained boards. And to be able to build it with a crappy solder iron, bad quality protoboard, and spare pieces. Everything was done in few days 4 months ago
Here some pictures I have kept
The Node MCU is taking a lot of space : at this time I didn't knew about D1 Mini :-) :
![]()
I have tried to organize everything before soldering :
![]()
Once completed : Yes I know, it's ugly ...
![]()
Since then it's programming only. I work with Arduino IDE only, no micropython. Code is on github. Still in "prototype" mode ...
Wifi remote
Trying to use ESP8266 to build a "remote" for driving some of my wifi compliant personal projects (robots, home appliance ... )