 Shervin Emami
-
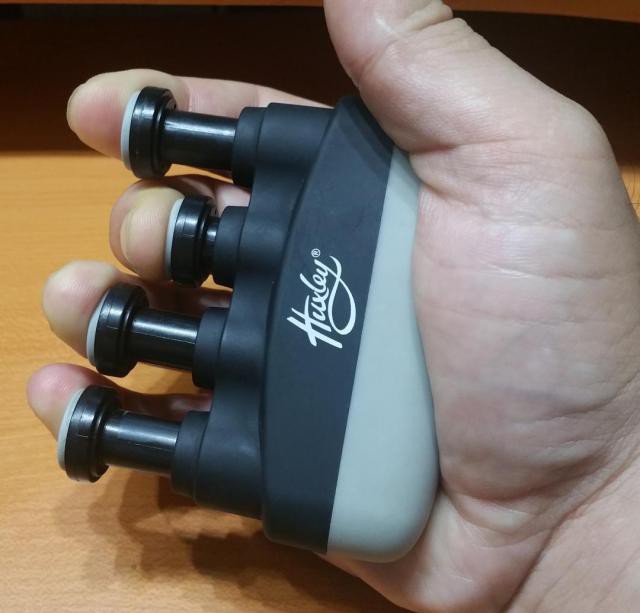
1Remove the rubber end of the guitar exerciser and insert magnets
When you first buy it, the unmodified guitar exerciser looks like this:
![]()
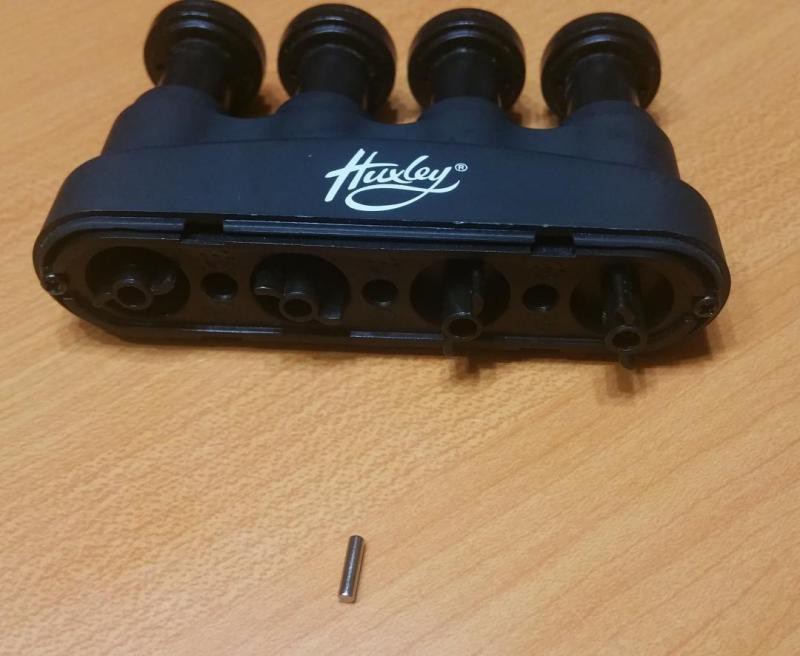
Simply pull the large grey rubber palm-rest off. This section is designed to come off easily (so you can adjust the springs).
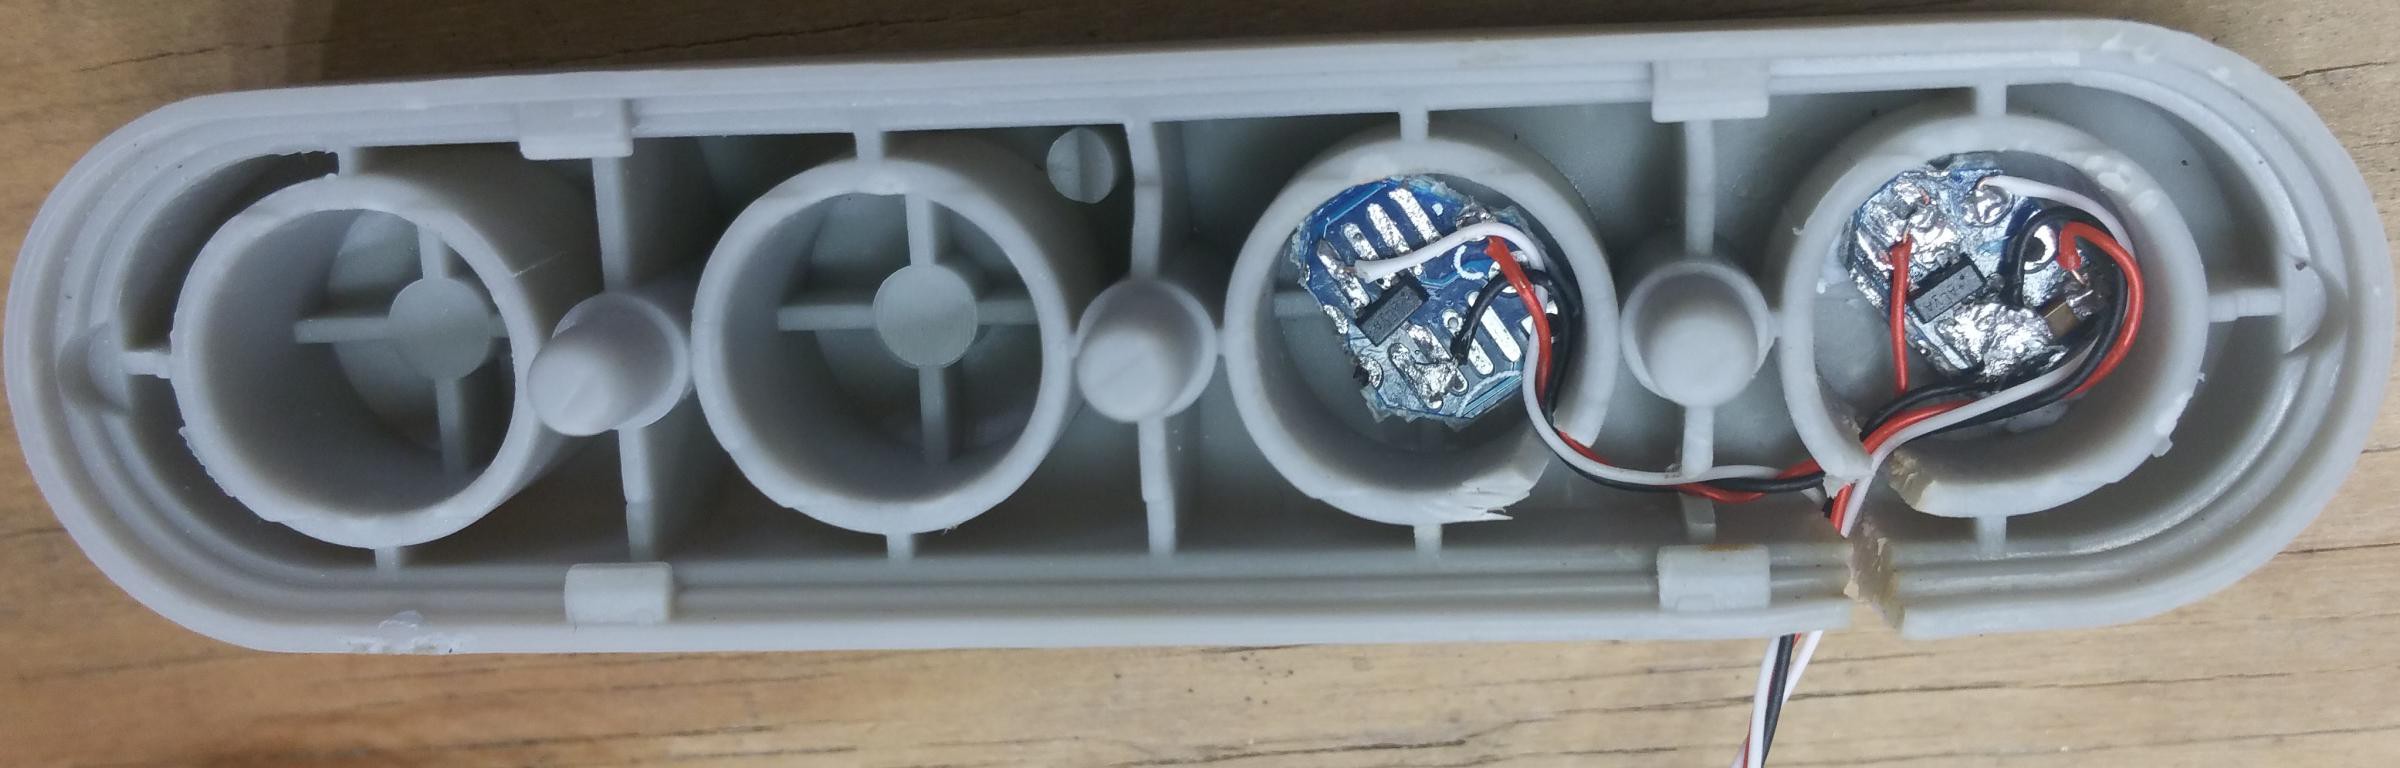
Insert a magnet in each of the 4 black plastic holes. Don't worry about which way around the magnet is, because you'll measure it later to see if you need to swap the magnet around.
![]()
You don't need to glue the magnet, it will hold onto the metal pole by itself using magnetism :-)
-
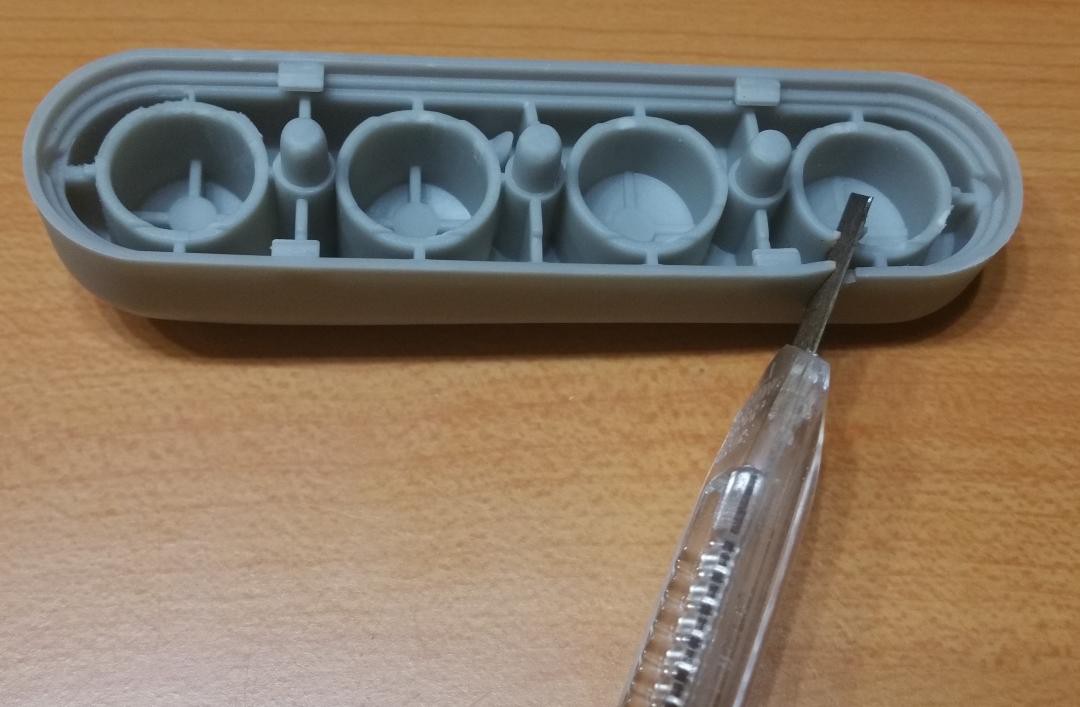
2Cut slits into the rubber palm-rest
You'll need to pass 6 wires from the Tiny BLE board into your 4 sensors that will be kept inside the rubber palm-rest. So cut a slit roughly 1.5mm thick x 8mm long, in the edge of rubber to allow wires to pass through.
![]()
Also cut small slits (1mm thick) on each inner rubber flange so that a few wires can pass between each finger board from the left side all the way to the right side.
You don't need to add wiring just yet, but to give you an idea of what parts of rubber to cut, this is what your wiring will eventually look like:
![]()
-
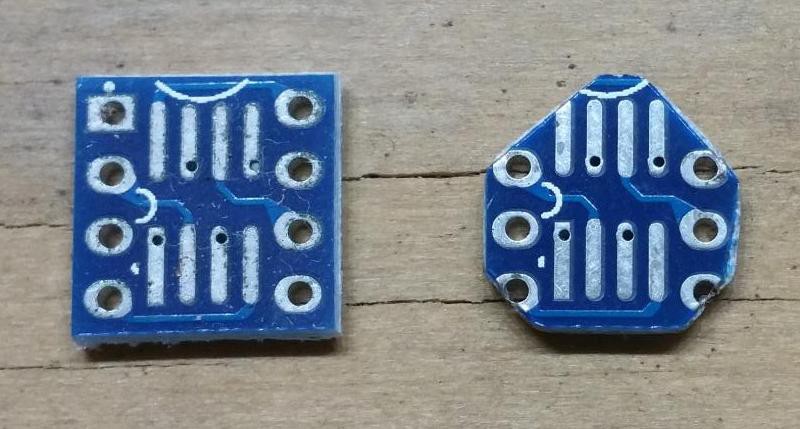
3Remove the corners of 4 small SMD adapter PCBs
You need 4 PCBs that are small enough to fit into the existing gaps of the rubber piece, while still having enough pins to hold the 3-pin sensor and some wires. I used a wire cutter to shrink SOIC to DIP adapter PCBs to fit. The pins don't line up perfectly with the sensor, so you might consider building custom PCBs instead so the soldering is easier.
![]()
-
4Solder the 4 sensors onto the 4 PCBs
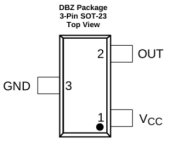
The wiring of this step is very simple in theory, but you'll need quite a steady hand & eyes because it requires SMD soldering. These 3-pin DRV5053 sensors simply have a Ground, Positive and Signal pin.
![]()
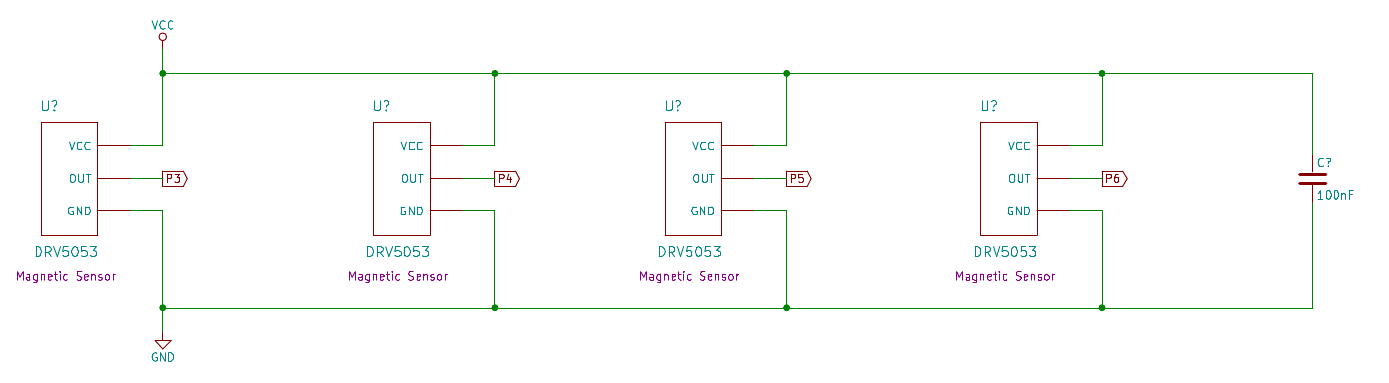
To connect 4 of these sensors to the TinyBLE you just need a GND wire that goes to all 4 sensors, a VCC wire that goes to all 4 sensors, and then 4 separate wires for the 4 different signal pins.
![]()
(The full KiCad schematic is at https://github.com/shervinemami/AlterErgo/tree/master/Schematic)
Use thin wire around 30 AWG instead of the common 24 AWG hookup wire. I recommend Black for all the GND connections, Red for all the VCC connections, and then either 1 color or 4 colors for the signal pins.
I recommend you also attach an SMD capacitor (eg: 100nF) between the VCC and GND pin of one of the sensor boards (shown in the photo below), to reduce electrical noise problems. It's not crucial, so feel free to skip the capacitor if you get frustrated with the SMD soldering.![]()
There isn't enough space in the rubber gaps to have long wires, so make sure your wires are all fairly close to the ideal length.
At this stage you might want to grab a 3.3V power source (such as the 3V3 pin on the Tiny BLE board) and measure the output voltage from 1 or 2 fingers with a multimeter, to see if the first 2 sensors are working before soldering the remaining sensors. Put a small amount of Blutac or double-sided tape or hot-melt glue on the back of each PCB so it sticks onto the rubber. (You don't need much, since they won't have much room to move anyway).
![]()
Carefully attach the rubber palm-rest back onto the exerciser. Connect 3.3V and GND, and make sure you see the voltage move up or down as you squeeze each finger closer. Don't worry if the voltage increases or decreases as you squeeze the finger, we can swap the direction later when testing the software. Once you have verified that 2 sensors are working, connect all 4 sensors to the 6 pins on the edge of the TinyBLE.
You should end up with something like this:
![]()
-
5Attach everything together
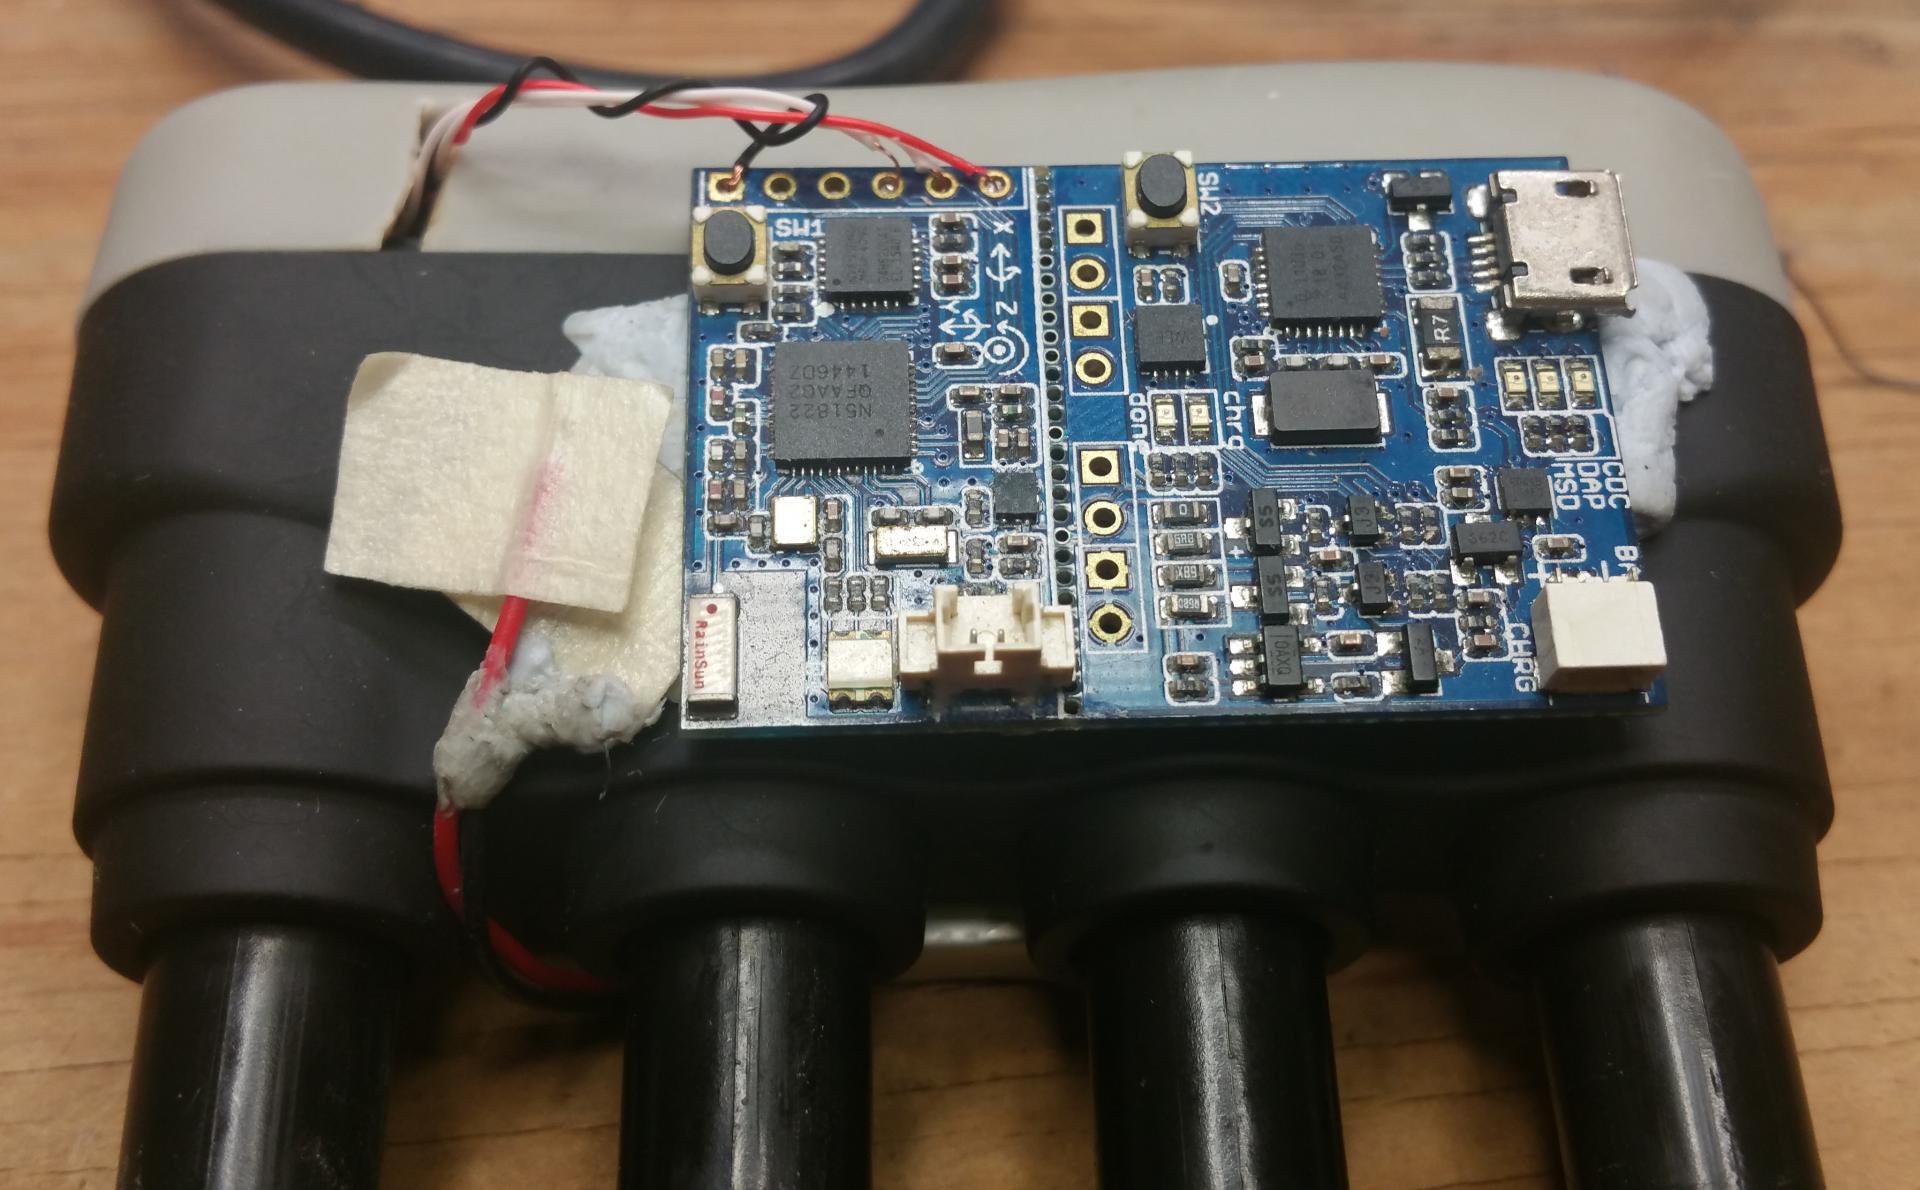
Use BluTac or double-sided tape or hot-melt glue to attach the TinyBLE to a large side of your exerciser. (Either side of the exerciser works fine). Attach a LiPo battery on the other side of the exerciser, to make a sandwich:
- TinyBLE on the top,
- Guitar exerciser in the middle,
- Battery on the bottom.
![]()
Cut the default connector off your LiPo battery, and attach a small slide-switch in series with your LiPo battery (see the full circuit schematic if you're unclear), then attach a JST SH 1.0mm 2-pin battery connector on the end. There are 2 tiny battery connectors on the Tiny BLE board (if you haven't split the Tiny BLE in half). Plug your battery connector into the socket labelled CHRG (near the USB port), so that it can be charged with a typical micro-USB cable.
-
6Choice of firmware
Now we are ready to upload our firmware into the Tiny BLE. Plug the Tiny BLE into your computer using a micro-USB cable so you can upload code into the device. (Don't worry if your development machine doesn't have Bluetooth, it only needs USB. For example, if you don't have a computer you could develop the code on any Raspberry Pi, upload the code into the Tiny BLE using USB, then get the Tiny BLE to control your Android or iOS phone or TV media player).
My code can act as either a wireless keyboard, or a wireless mouse, but not both at the same time. So you need to decide whether you want your device to be a keyboard or a mouse. (Remember that if you build 2 devices then you can build a keyboard for one hand and a mouse for your other hand and connect them to the same computer or phone at the same time, if you want).
If you want your device to be a wireless keyboard:
- Follow the step titled "To upload the firmware for a wireless keyboard", and skip the mouse step.
Or if you want your device to be a wireless mouse:
- Skip the keyboard step and jump to the step titled "To upload the firmware for a wireless mouse".
-
7To upload the firmware for a wireless keyboard:
Open the code at https://os.mbed.com/users/shervinemami/code/Shervs_TestKeyboard_TinyBLE/ (Click on "Import into Compiler" so you can use it in your mbed online account).
By default the keyboard code gives the following behavior:
- Squeezing finger 1 sends the F8 key,
- Squeezing finger 2 sends the F4 key when squeezing, and Numlock when releasing the finger.
- Squeezing finger 3 sends the Up key.
- Squeezing finger 4 sends the Down key.
- When the battery is low, the message "RECHARGE BATTERY!" will be typed on your computer (once until power off).
The reason why Finger 2 sends a different keypress on squeezing versus releasing is to show how you can signal something to be enabled for as long as you are squeezing the finger. For example, you might set up your computer to be on mute when the finger is squeezed, and unmuted when the finger is released.
You can easily change these key mappings by editing the "main.cpp" file. Look for this code, around line 53:
const int FING1_KEYCODE = KEYCODE_F8;
Some common key codes are placed in the top of that file, but you can also find more key codes in "https://github.com/jpbrucker/BLE_HID/blob/master/BLE_HID/Keyboard_types.h".
I haven't added any code for different key mappings based on orientation of the device, but the Tiny BLE demo code shows how to measure the device orientation, so it's not too hard to add yourself.
If you want to disable the transmitting of a keyboard message when your battery is low, look for the line of code in "main.cpp" that says:
send_string("RECHARGE BATTERY!");Comment out the line by changing it to:
//send_string("RECHARGE BATTERY!");Once you are ready with your key mapping, click on "Compile" then save the generated hex file, and copy it onto your Tiny BLE virtual drive.
If it works then great! Customize the code as much as you wish, and let me know in the comments if you come up with anything interesting! But if you have any problems, read the "Troubleshooting" step below.
-
8Or upload the firmware for a wireless mouse
Open the code at https://os.mbed.com/users/shervinemami/code/Shervs_TestMouse_TinyBLE/
(Click on "Import into Compiler" so you can use it in your mbed online account).By default the mouse code gives the following behavior:
- Squeezing finger 1 sends a left mouse click.
- Squeezing finger 2 sends a right mouse click.
- Squeezing finger 3 sends a mousewheel scroll upwards.
- Squeezing finger 4 sends a mousewheel scroll downwards.
- When the battery is low, the LED will stay blue, until you turn the device off.
You can change these behaviours by editing the "main.cpp" file, near the bottom of the function called "main". The 2 important sections are when the finger is first squeezed:
if (fing1 > FINGER1_PRESS && !press_keyup[1]) {And when the finger is first released:
if (press_keyup[1] && fing1 < FINGER1_RELEASE) {You might also want to get the mousewheel scrolling rate to scroll faster if the finger is squeezed hard rather than squeezed softly, by changing the 3rd number in the code:
mouseServicePtr->setSpeed(0, 0, 1);
I personally prefer the scroll to be a single speed but others might have different preferences.
I haven't added any code for different behavior based on orientation of the device, but the Tiny BLE demo code shows how to measure the device orientation, so it's not too hard to add yourself.
Once you are ready with your mouse mapping, click on "Compile" then save the generated hex file, and copy it onto your Tiny BLE virtual drive.
If it works then great! Customize the code as much as you wish, and let me know in the comments if you come up with anything interesting! But if you have any problems, read the "Troubleshooting" step below.
-
9Troubleshooting
The LED is blue during startup then flashes red on & off around twice per second when it's waiting for a Bluetooth BLE connection. Then it switches to flashing the green LED very slowly while connected to BLE. If you ever see the LED stop blinking, then the microcontroller has frozen so you might have a bug in your code!
If you experience problems, you can look at the log messages by plugging the device into your computer using micro-USB and running PuTTY or picocom to display at 115200 baud rate. When the Tiny BLE boots up, you should see various log messages on the serial port. After it has booted up for roughly 1 second, you should see a row of numbers being printed occasionally, such as:
0.27 F1=0.38, F2=0.33, F3=0.31, F4=0.32
This means the battery value is 0.27, finger 1 is at value 0.38, etc. If any of these values are exactly 0.00 or 1.00 then something is wrong with your wiring, because they should all be typically between 0.10 to 0.90. The finger values should be increasing as you squeeze that finger, but If you find that some of the finger values are decreasing then you simply need to open up the gray rubber palm-wrest and swap the direction of the magnet for that finger, so it causes the opposite magnetic field.
If you want to adjust the amount that each finger needs squeezing to trigger an event, or you want to adjust the range of finger motion, edit the values in "main.cpp" such as FINGER1_PRESS and FINGER1_RELEASE.
If you have problems with the Bluetooth BLE connection, try un-pairing it from your computer and turning the device off, then trying again. On Linux I found that restarting your Bluetooth service sometimes helps, by running the command "sudo systemctl restart bluetooth.service".
Ergonomic handheld mouse / keyboard alternative
A wireless input alternative that's actually ergonomic!


Discussions
Become a Hackaday.io Member
Create an account to leave a comment. Already have an account? Log In.