Close
0%
0%

E-mail delete pedal

It's not a hack. It's arduino based. But, it's mental medicine. Introducing the kick-it-to-delete-it gesture.

Similar projects worth following
Well, what is it that makes a good interface? Now, this one here changed my life (little exaggeration allowed I hope). Being annoyed by the flood if useless information to skim through every morning, I decided for two things:

1. instead of filtering and moving mails to some folder where they will not be read anyhow, delete everything that is not really important right on the spot, and
2. make deleting more fun.

Now, this foot-actuated button, really makes the reduction of e-mail-noise feel excellent – perfect haptic feedback combined with the robustness to withstand the occasional slightly stronger kick it gets when extra-annoyed ;).

And, wow, thank to the community it is so simple to make. Not even soldering is required. Literally making it a 5 min project! Probably the highest cost-benifit balance I've come across recently.

Here's the diagram – howto press this button by foot:
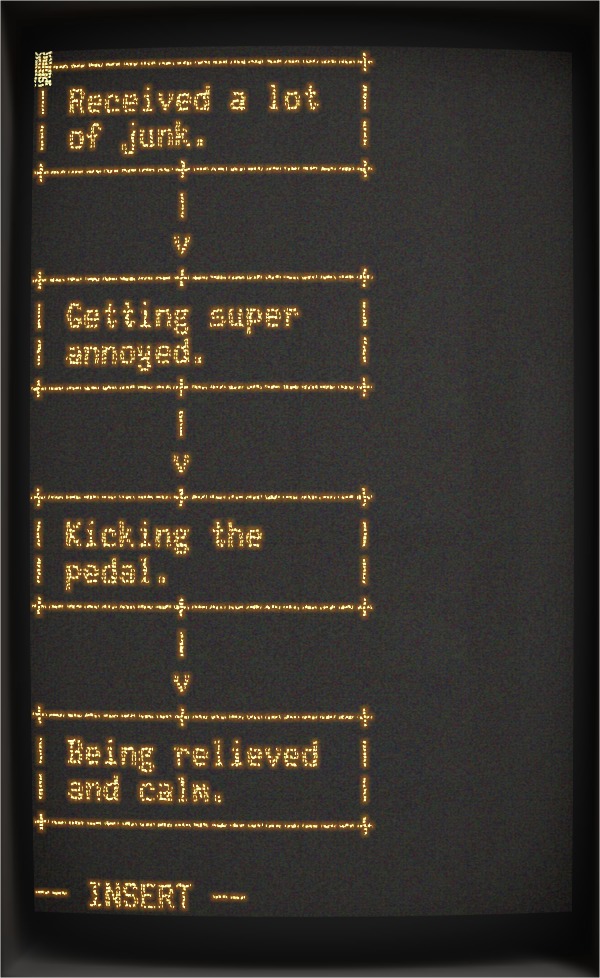
Created using the awesome http://asciiflow.com and Cathode (http://www.secretgeometry.com/apps/cathode) as usual ;)

  • 1 × USB extension cable
  • 1 × Pedal e.g. MARQUARDT 02410.0301-01, reichelt.de: 36804
  • 1 × Digispark mini e.g. reichelt.de: 192128
  • 2 × jumper wire (male-male) or just about any cable with a bit of tin

  • USB over night

    magnustron08/27/2018 at 11:43 0 comments

    Assembly, is pretty straightforward! Just works out of the box.

    BUT, overnight, the connection is sometimes lost and the device does not appear anymore in the USB settings (e.g. lsusb). Perhaps some improper sleep/suspend mode?

    Well, needs a short reconnect in the morning and works again, but would be nice to solve this at some point.

View project log

  • 1
    Get the components

    Good news: it's 2018 and all we need is easily source-able. You will also need a screwdriver for assembly. A parts list with example parts is provided on the project page.

  • 2
    Wire stuff up

    2nd good news: two jumper wires suffice. No need for soldering. Just use the screwdriver  (see step 1 ;)) and replicate what is seen on the image here.

    • Open pedal
    • connect USB extension cable to Digispark
    • connect jumper wires to terminal block
    • connect jumper wires to Digispark: black wire goes to GND, yellow to P2=D2 (or change the sketch in step 3)
    • Close it
  • 3
    Install the sketch

    Now, this is what we want: every kick is a single key press (press+release) of the delete key (better: back-space, key code 0x24; yes, I am on a Mac).

    // Public domain
    #include "DigiKeyboard.h"
    
    const int LEDA=0;
    const int LEDB=1;
    const int BUTTON=2;
    
    void setup() {
      pinMode(BUTTON,INPUT_PULLUP);
      pinMode(LEDA,OUTPUT);
      pinMode(LEDB,OUTPUT);
    }
    
    void loop() {
      while (digitalRead(BUTTON)==HIGH) DigiKeyboard.delay(10); // <- important to have USB stuff still running in BG.
      digitalWrite(LEDA,HIGH);
      digitalWrite(LEDB,HIGH);
      DigiKeyboard.sendKeyStroke(0);
      DigiKeyboard.sendKeyStroke(0x2A);
      DigiKeyboard.delay(100);
      while (digitalRead(BUTTON)==LOW) DigiKeyboard.delay(10);
      digitalWrite(LEDA,LOW);
      digitalWrite(LEDB,LOW);
      DigiKeyboard.delay(100);
    }

    Some comments:

    • I use quite some debouncing delays. 
    • The while loop waiting for the pedal press really needs to call a DigiKeyboard.delay to make sure that USB is not stalling.

    Upload using the instructions here: https://digistump.com/wiki/digispark/tutorials/connecting

View all 4 instructions

Enjoy this project?

Share

Discussions

Similar Projects

Does this project spark your interest?

Become a member to follow this project and never miss any updates