-
1Get the components
Good news: it's 2018 and all we need is easily source-able. You will also need a screwdriver for assembly. A parts list with example parts is provided on the project page.
-
2Wire stuff up
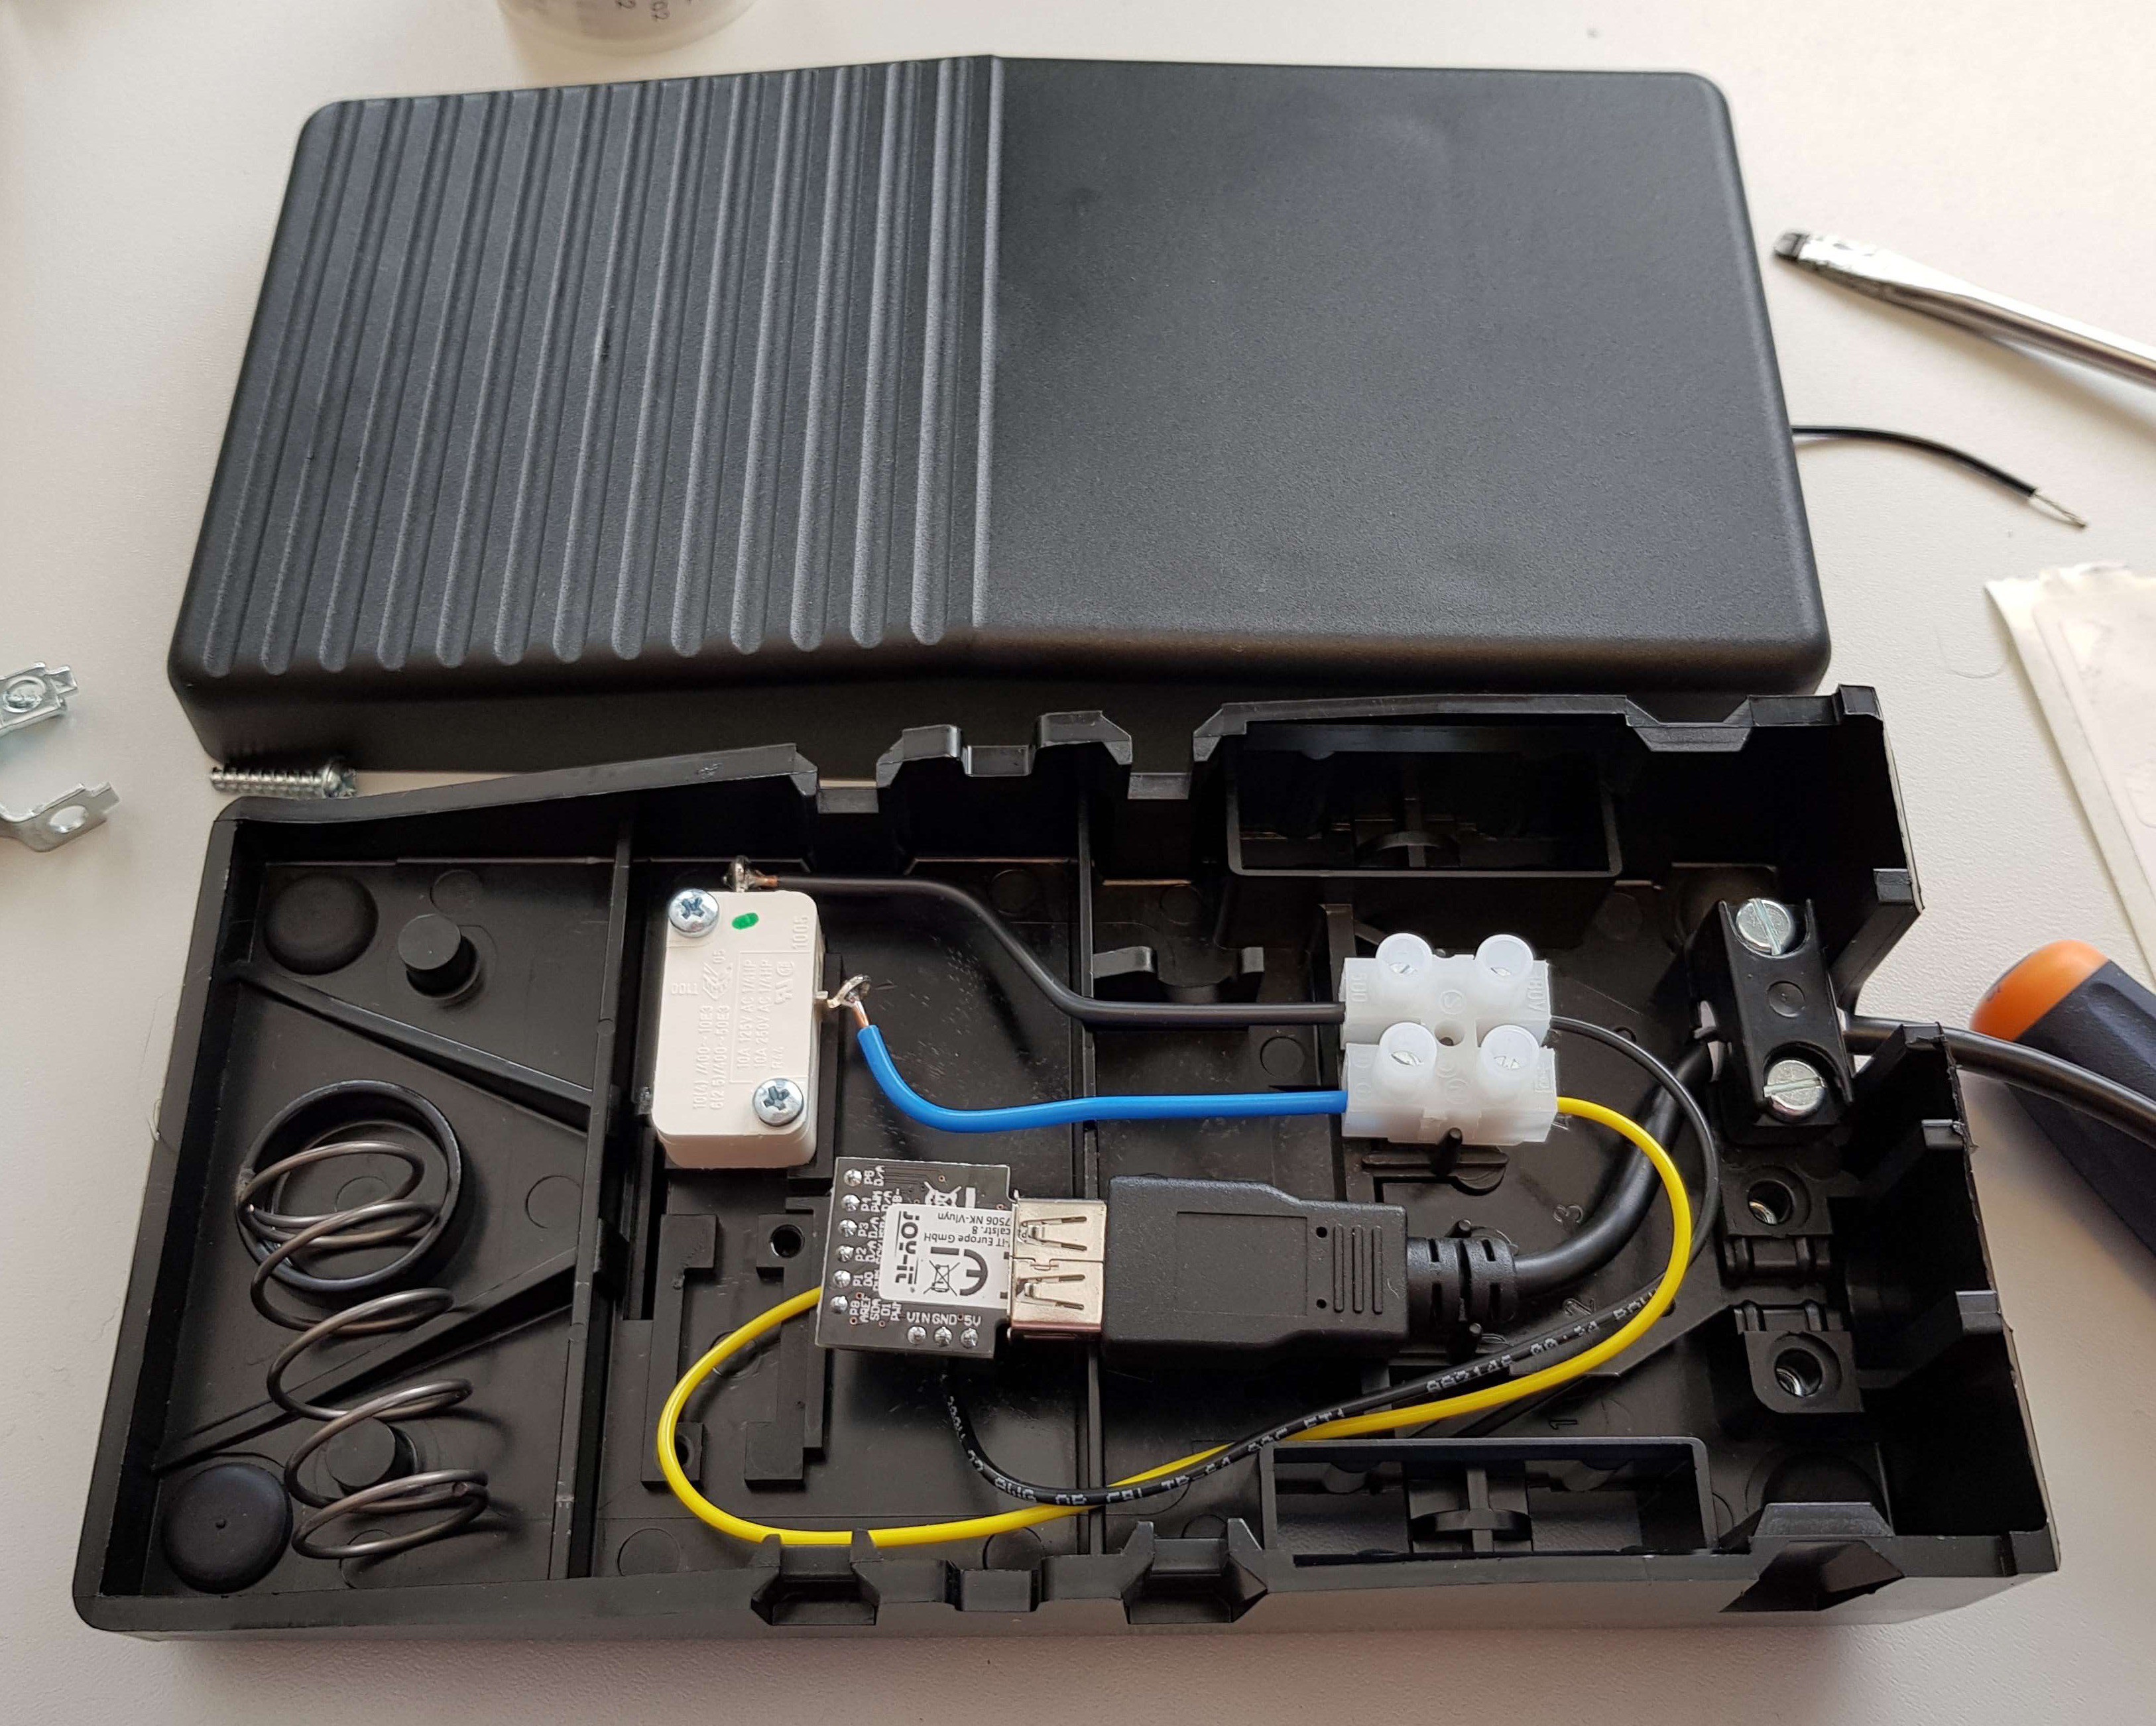
2nd good news: two jumper wires suffice. No need for soldering. Just use the screwdriver (see step 1 ;)) and replicate what is seen on the image here.
![]()
- Open pedal
- connect USB extension cable to Digispark
- connect jumper wires to terminal block
- connect jumper wires to Digispark: black wire goes to GND, yellow to P2=D2 (or change the sketch in step 3)
- Close it
-
3Install the sketch
Now, this is what we want: every kick is a single key press (press+release) of the delete key (better: back-space, key code 0x24; yes, I am on a Mac).
// Public domain
#include "DigiKeyboard.h"

const int LEDA=0;
const int LEDB=1;
const int BUTTON=2;

void setup() {
  pinMode(BUTTON,INPUT_PULLUP);
  pinMode(LEDA,OUTPUT);
  pinMode(LEDB,OUTPUT);
}

void loop() {
  while (digitalRead(BUTTON)==HIGH) DigiKeyboard.delay(10); // <- important to have USB stuff still running in BG.
  digitalWrite(LEDA,HIGH);
  digitalWrite(LEDB,HIGH);
  DigiKeyboard.sendKeyStroke(0);
  DigiKeyboard.sendKeyStroke(0x2A);
  DigiKeyboard.delay(100);
  while (digitalRead(BUTTON)==LOW) DigiKeyboard.delay(10);
  digitalWrite(LEDA,LOW);
  digitalWrite(LEDB,LOW);
  DigiKeyboard.delay(100);
}
Some comments:
- I use quite some debouncing delays.
- The while loop waiting for the pedal press really needs to call a DigiKeyboard.delay to make sure that USB is not stalling.
Upload using the instructions here: https://digistump.com/wiki/digispark/tutorials/connecting
-
4Delete stuff
Whenever you feel the need to expressively delete things, press the pedal. Gives some relief.
E-mail delete pedal
It's not a hack. It's arduino based. But, it's mental medicine. Introducing the kick-it-to-delete-it gesture.
 magnustron
Discussions
Become a Hackaday.io Member
Create an account to leave a comment. Already have an account? Log In.