Close
0%
0%

Muscle MIDI Music

Control the volume and pitch of MIDI instruments using the electrical signals generated from your muscles!

Similar projects worth following
Muscle MIDI Music is a device that allows users to control electronic music signals (MIDI) using signals regenerated from their muscles. This tutorial guides users through the process of creating their own muscle activity amplifier and using an Arduino to translate the muscle activity into electronic music signals.

Whenever your nervous system needs to make a movement, it sends tiny electrical signals through neurons to control your muscles. The technique of electromyography (EMG) allows us to amplify and measure these electrical signals. In addition to being a useful clinical tool for diagnosing different neurological disorders, EMG recordings have been used more recently to control prosthetic devices. 

In the hopes of becoming more familiar with EMG amplification and recording techniques, I thought it'd be fun to build an EMG amplifier that I could then use as a control signal for a different device. Rather than controlling a prosthetic arm, I decided to incorporate my interests in music and used the EMG signals to control a MIDI device. MIDI stands for Musical Instrument Digital Interface, and is the standard protocol for sending and receiving musical signals electronically.

InstrumentationAmp_1167fc.pdf

Instrumentation amplifier datasheet

Adobe Portable Document Format - 509.53 kB - 09/02/2018 at 17:14

Preview

AudioAmp_LM386.pdf

Audio amplifier datasheet

Adobe Portable Document Format - 303.61 kB - 09/02/2018 at 17:14

Preview

MIDI_EMG_Melodic.ino

Arduino code for running the project in "Melodic Mode"

ino - 4.94 kB - 09/02/2018 at 17:13

Download

MIDI_EMG_Drums.ino

Arduino code for running the project in "Drum Mode"

ino - 4.21 kB - 09/02/2018 at 17:12

Download

  • 2 × LT1167 Amplifier and Linear ICs / Instrumentation Amplifiers
  • 2 × LT1112 Amplifier and Linear ICs / Operational Amplifiers
  • 1 × Soldering iron
  • 1 × Wire strippers
  • 1 × Heat shrink tubing Heat shrink tubing is so fun.

View all 14 components

  • Project Overview and Parts List

    John09/02/2018 at 17:12 0 comments

    Our project is composed of three main components:

    The 1.) EMG amplifier, 2.) the Arduino, and 3.) the MIDI device.

    1. We'll build the EMG amplifier on a breadboard. If you're interested in a more in-depth look at the science behind the EMG amplifier and more detailed steps on how to build your own, check out my EMG audio amplifier Instructable.
    2. We'll power the Arduino from the same 9V batteries that power the EMG amp. Most of the work with the Arduino will be on the software side.
    3. I used an iPhone running Garageband as my MIDI device. The Arduino will send standard MIDI signals over a standard MIDI cable, so any MIDI device should work in place of the iPhone.

    Parts

    • (2x) LT1167 (instrumentation amplifier)
    • (2x) LT1112 (or any dual op-amp chip)
    • (1x) LM386N (audio amplifier)
    • (5x) Surface EMG electrodes (two per muscle and one for a reference) (Amazon)
    • Arduino Uno (Amazon)
    • iPhone (or any MIDI device)
      • MIDI to iPhone adapter cable (if using an iPhone) (Amazon)
    • Various resistors, capacitors, and jumper wires
    • Breadboard (Amazon)
    • (2x) 9V battery

    Tools

    • Soldering iron (Amazon)
    • Wire strippers
    • Heat shrink tubing
    • Electrical tape

View project log

  • 1
    Project Overview

    Our project is composed of three main components:

    The 1.) EMG amplifier, 2.) the Arduino, and 3.) the MIDI device.

    1. We'll build the EMG amplifier on a breadboard. If you're interested in a more in-depth look at the science behind the EMG amplifier and more detailed steps on how to build your own, check out my EMG audio amplifier Instructable.
    2. We'll power the Arduino from the same 9V batteries that power the EMG amp. Most of the work with the Arduino will be on the software side.
    3. I used an iPhone running Garageband as my MIDI device. The Arduino will send standard MIDI signals over a standard MIDI cable, so any MIDI device should work in place of the iPhone.
  • 2
    Assemble the EMG Amplifier

    For a more thorough tutorial on how to build the EMG amplifier, check out my EMG audio amp Instructable.

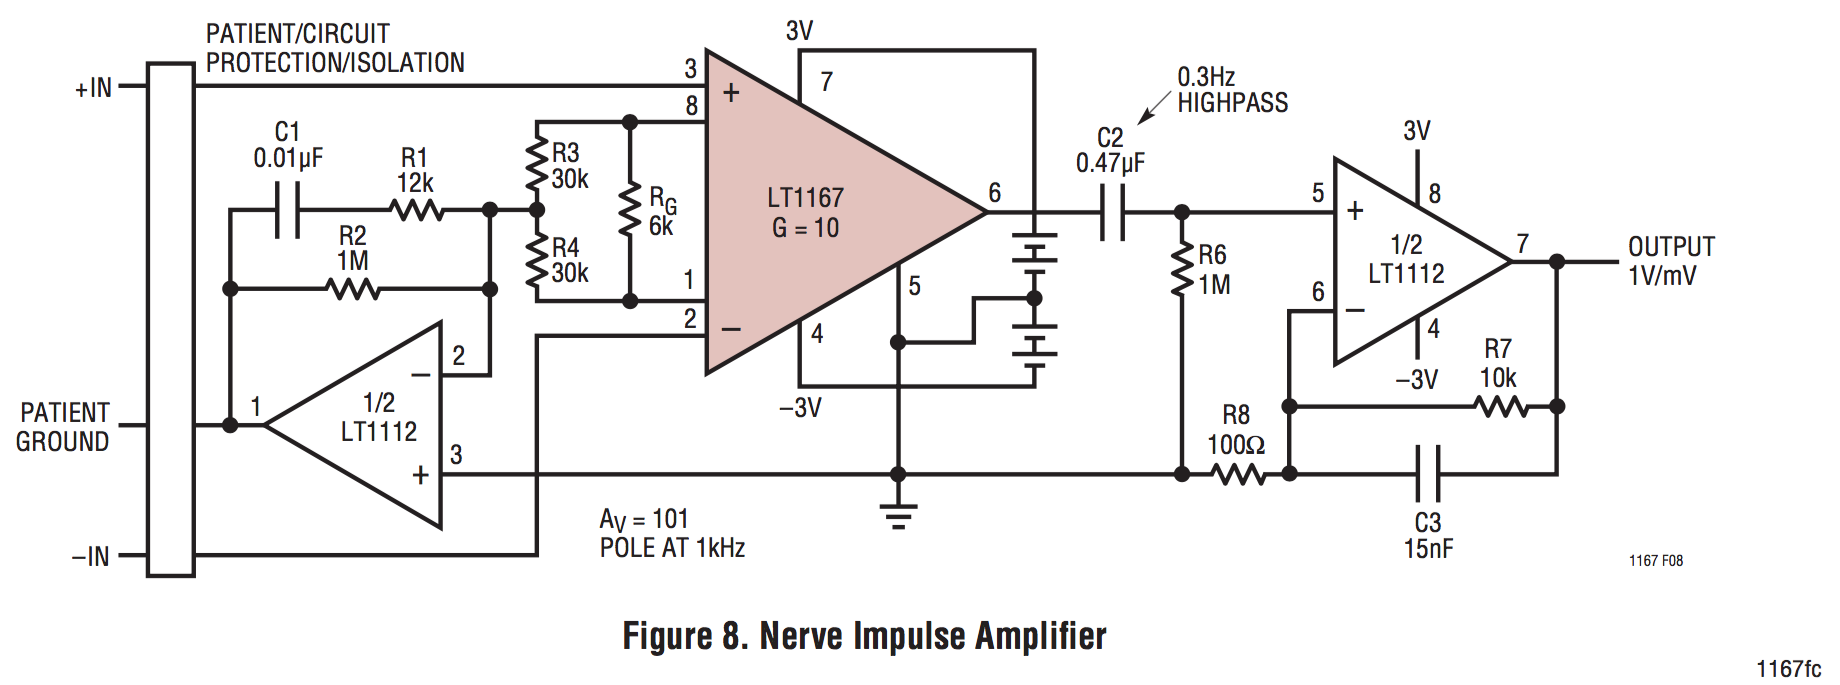
    We'll build an EMG amplifier capable of amplifying two EMG channels. We'll use one LT1167 instrumentation amp per channel. The LT1167 datasheet helpfully contains a schematic for a "Nerve Impulse Amplifier," which we will follow in this step.

    Assemble the circuit

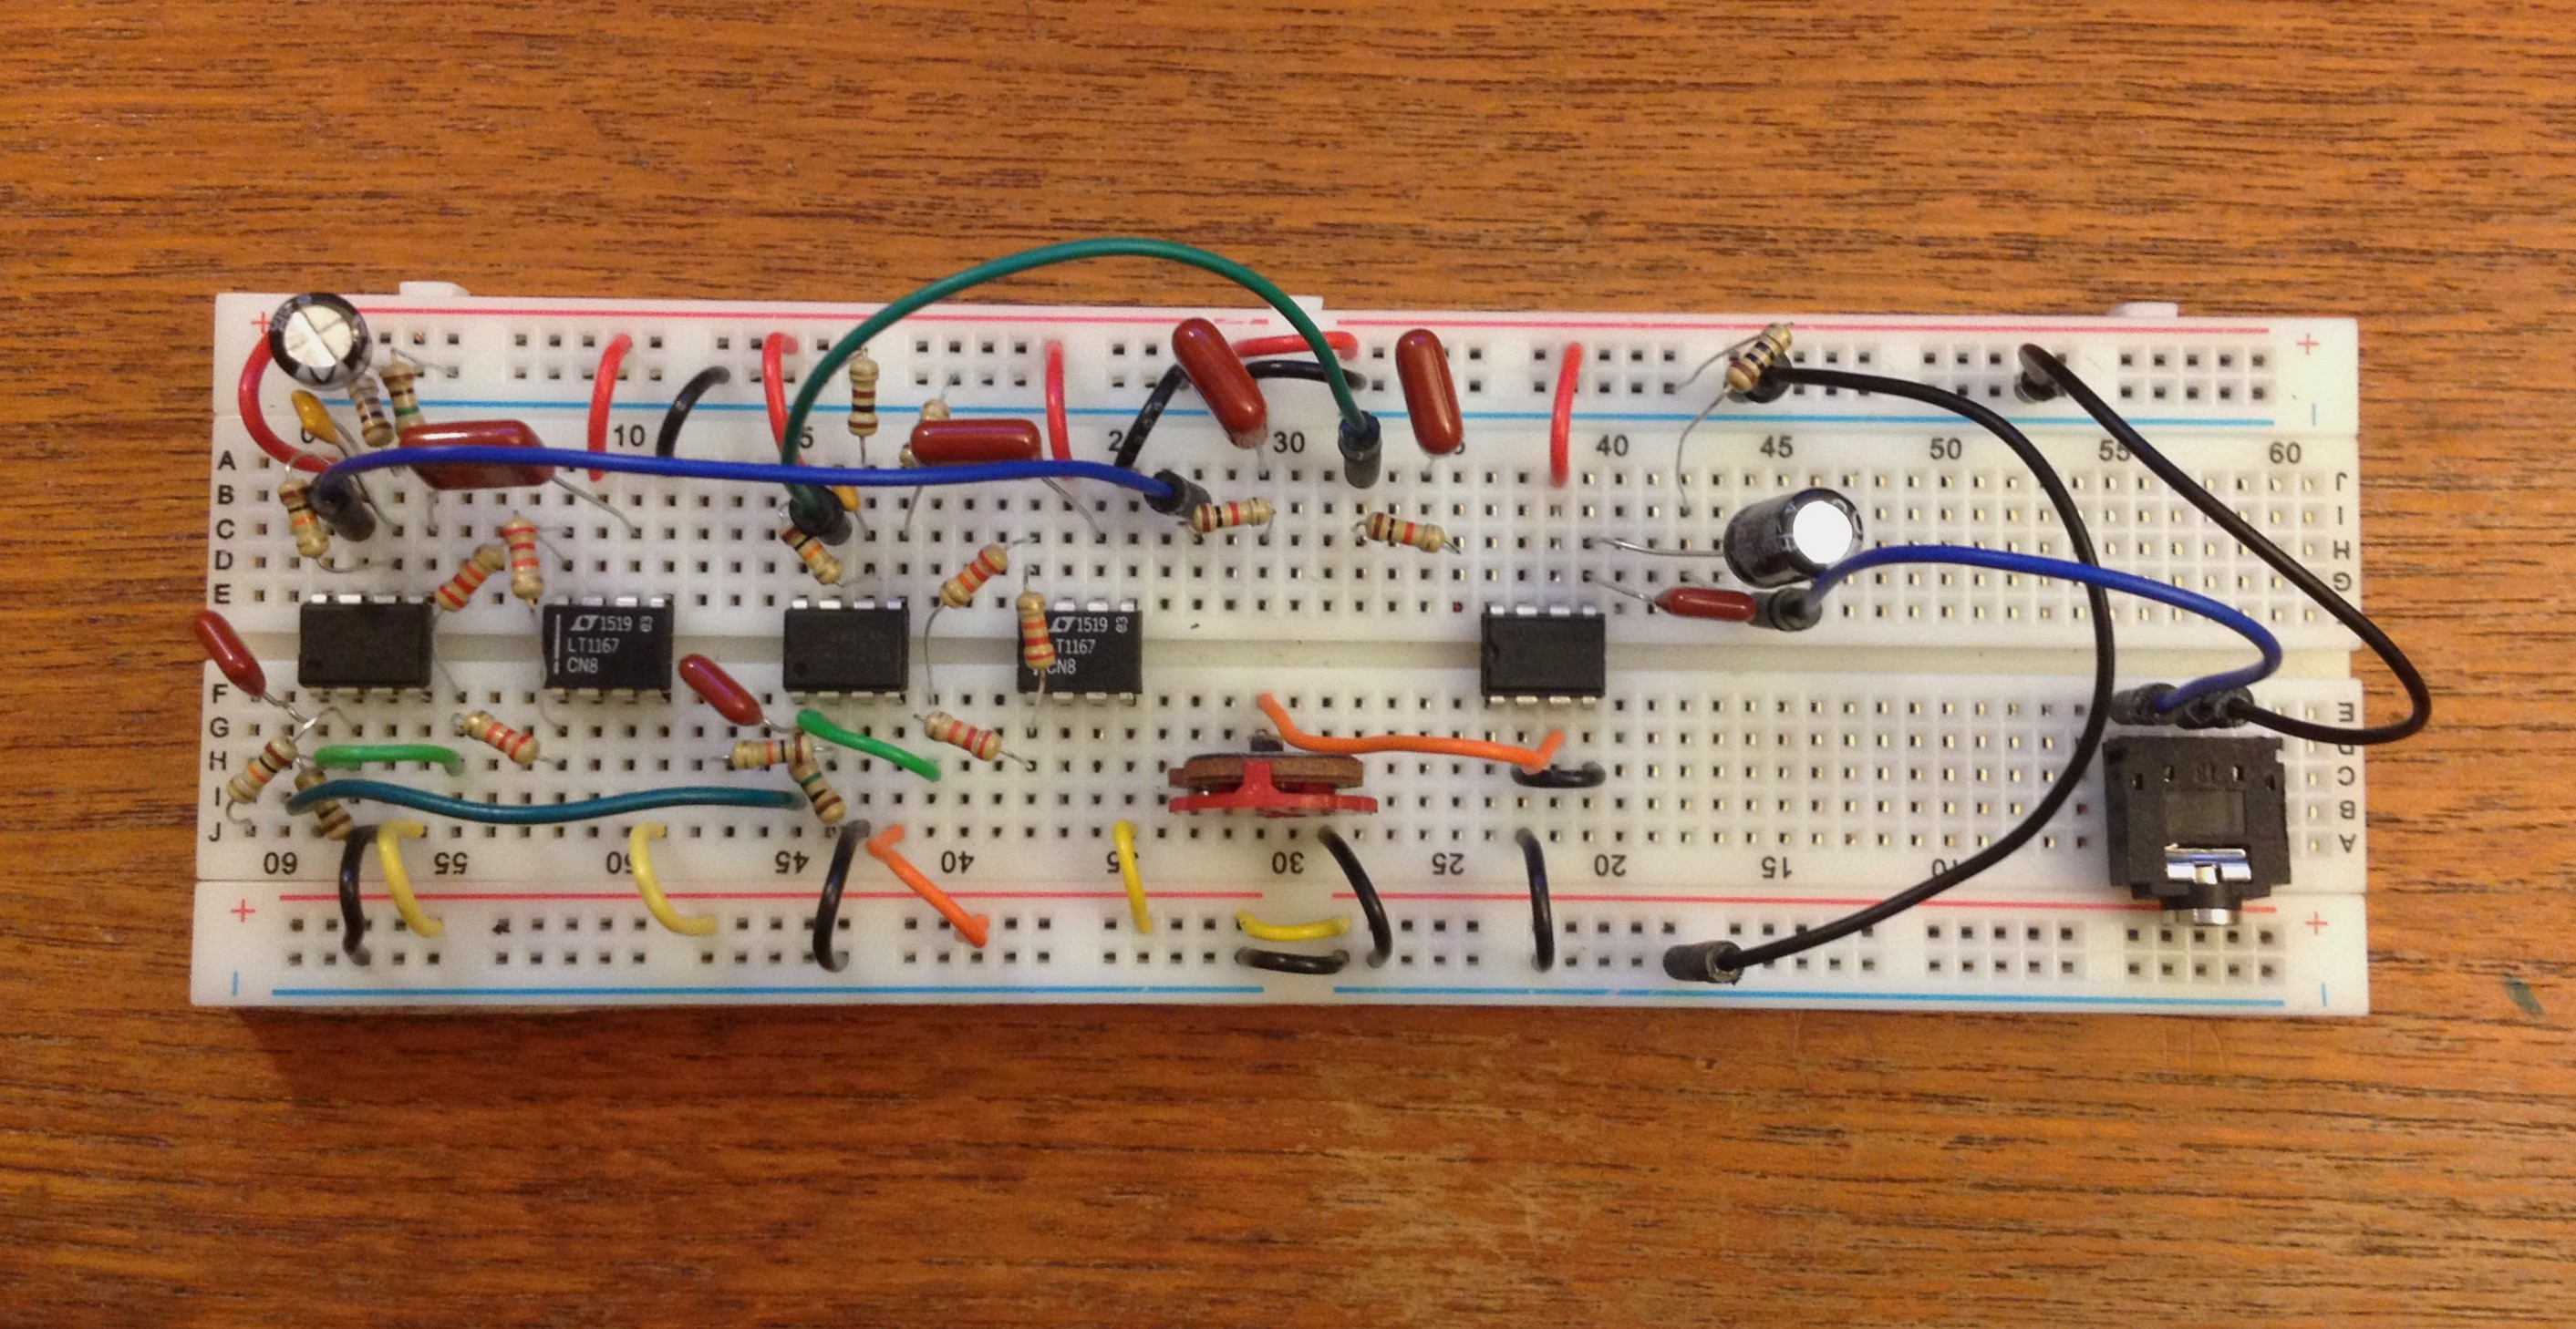
    On the breadboard, assemble two copies of the nerve impulse amplifier shown above. The pictures of my assembled circuit should help guide you towards the end goal. I added passive 1st order low-pass filters to the output of each my amplifiers to help reduce noise. If you'd like to add them to your circuit, I used a 1 kΩ resistor with a 0.047 μF capacitor for a cutoff frequency of approximately 2,000 Hz.

    Power

    We'll be powering the circuit off of two 9V batteries. The LT1167 needs a +V and -V (because the EMG source signal has both positive and negative values), so we'll connect the minus pin on the +V battery to the plus pin on the -V battery. The minus pin on the -V battery becomes the -V value. When using two 9V batteries, you'll end up with +V and -V being equal to +9 and -9 volts respectively.

    Electrodes The next step covers the electrode placement in more detail. The reference electrode plugs into pin 1 of one of the instrumentation amps, and the muscle electrode pairs plug into pins 2 and 3 on the instrumentation amps. The +/- orientation of the electrodes does not matter.

    Note: If your circuit isn't working, you probably did something wrong! A good technique for finding a mistake in a circuit is to draw out the schematic for the circuit you've actually assembled on your breadboard and compare it to the original schematic. In that process you may find an error (as I did many a time).

  • 3
    Prepare the Electrodes

    As I mentioned above, we'll need a total of five electrodes for this project. EMG recordings are conducted with a differential amplifier, meaning we are amplifying the differencebetween two points of reference on the muscle. This means we'll need two electrodes per muscle. Additionally, we need a single reference for the muscle activity to be measured with respect to. Here is a link to some surface EMG electrodes sold on Amazon. The exact type of electrode isn't too important for our purposes.

    Like I've shown in the picture above, place two electrodes on the inside edge of each forearm, parallel to the length of the muscle and separated by about 2 cm. Place the reference electrode on the bony part of one of your elbows, away from the electrodes on the muscles.

    Twisted wire pairs

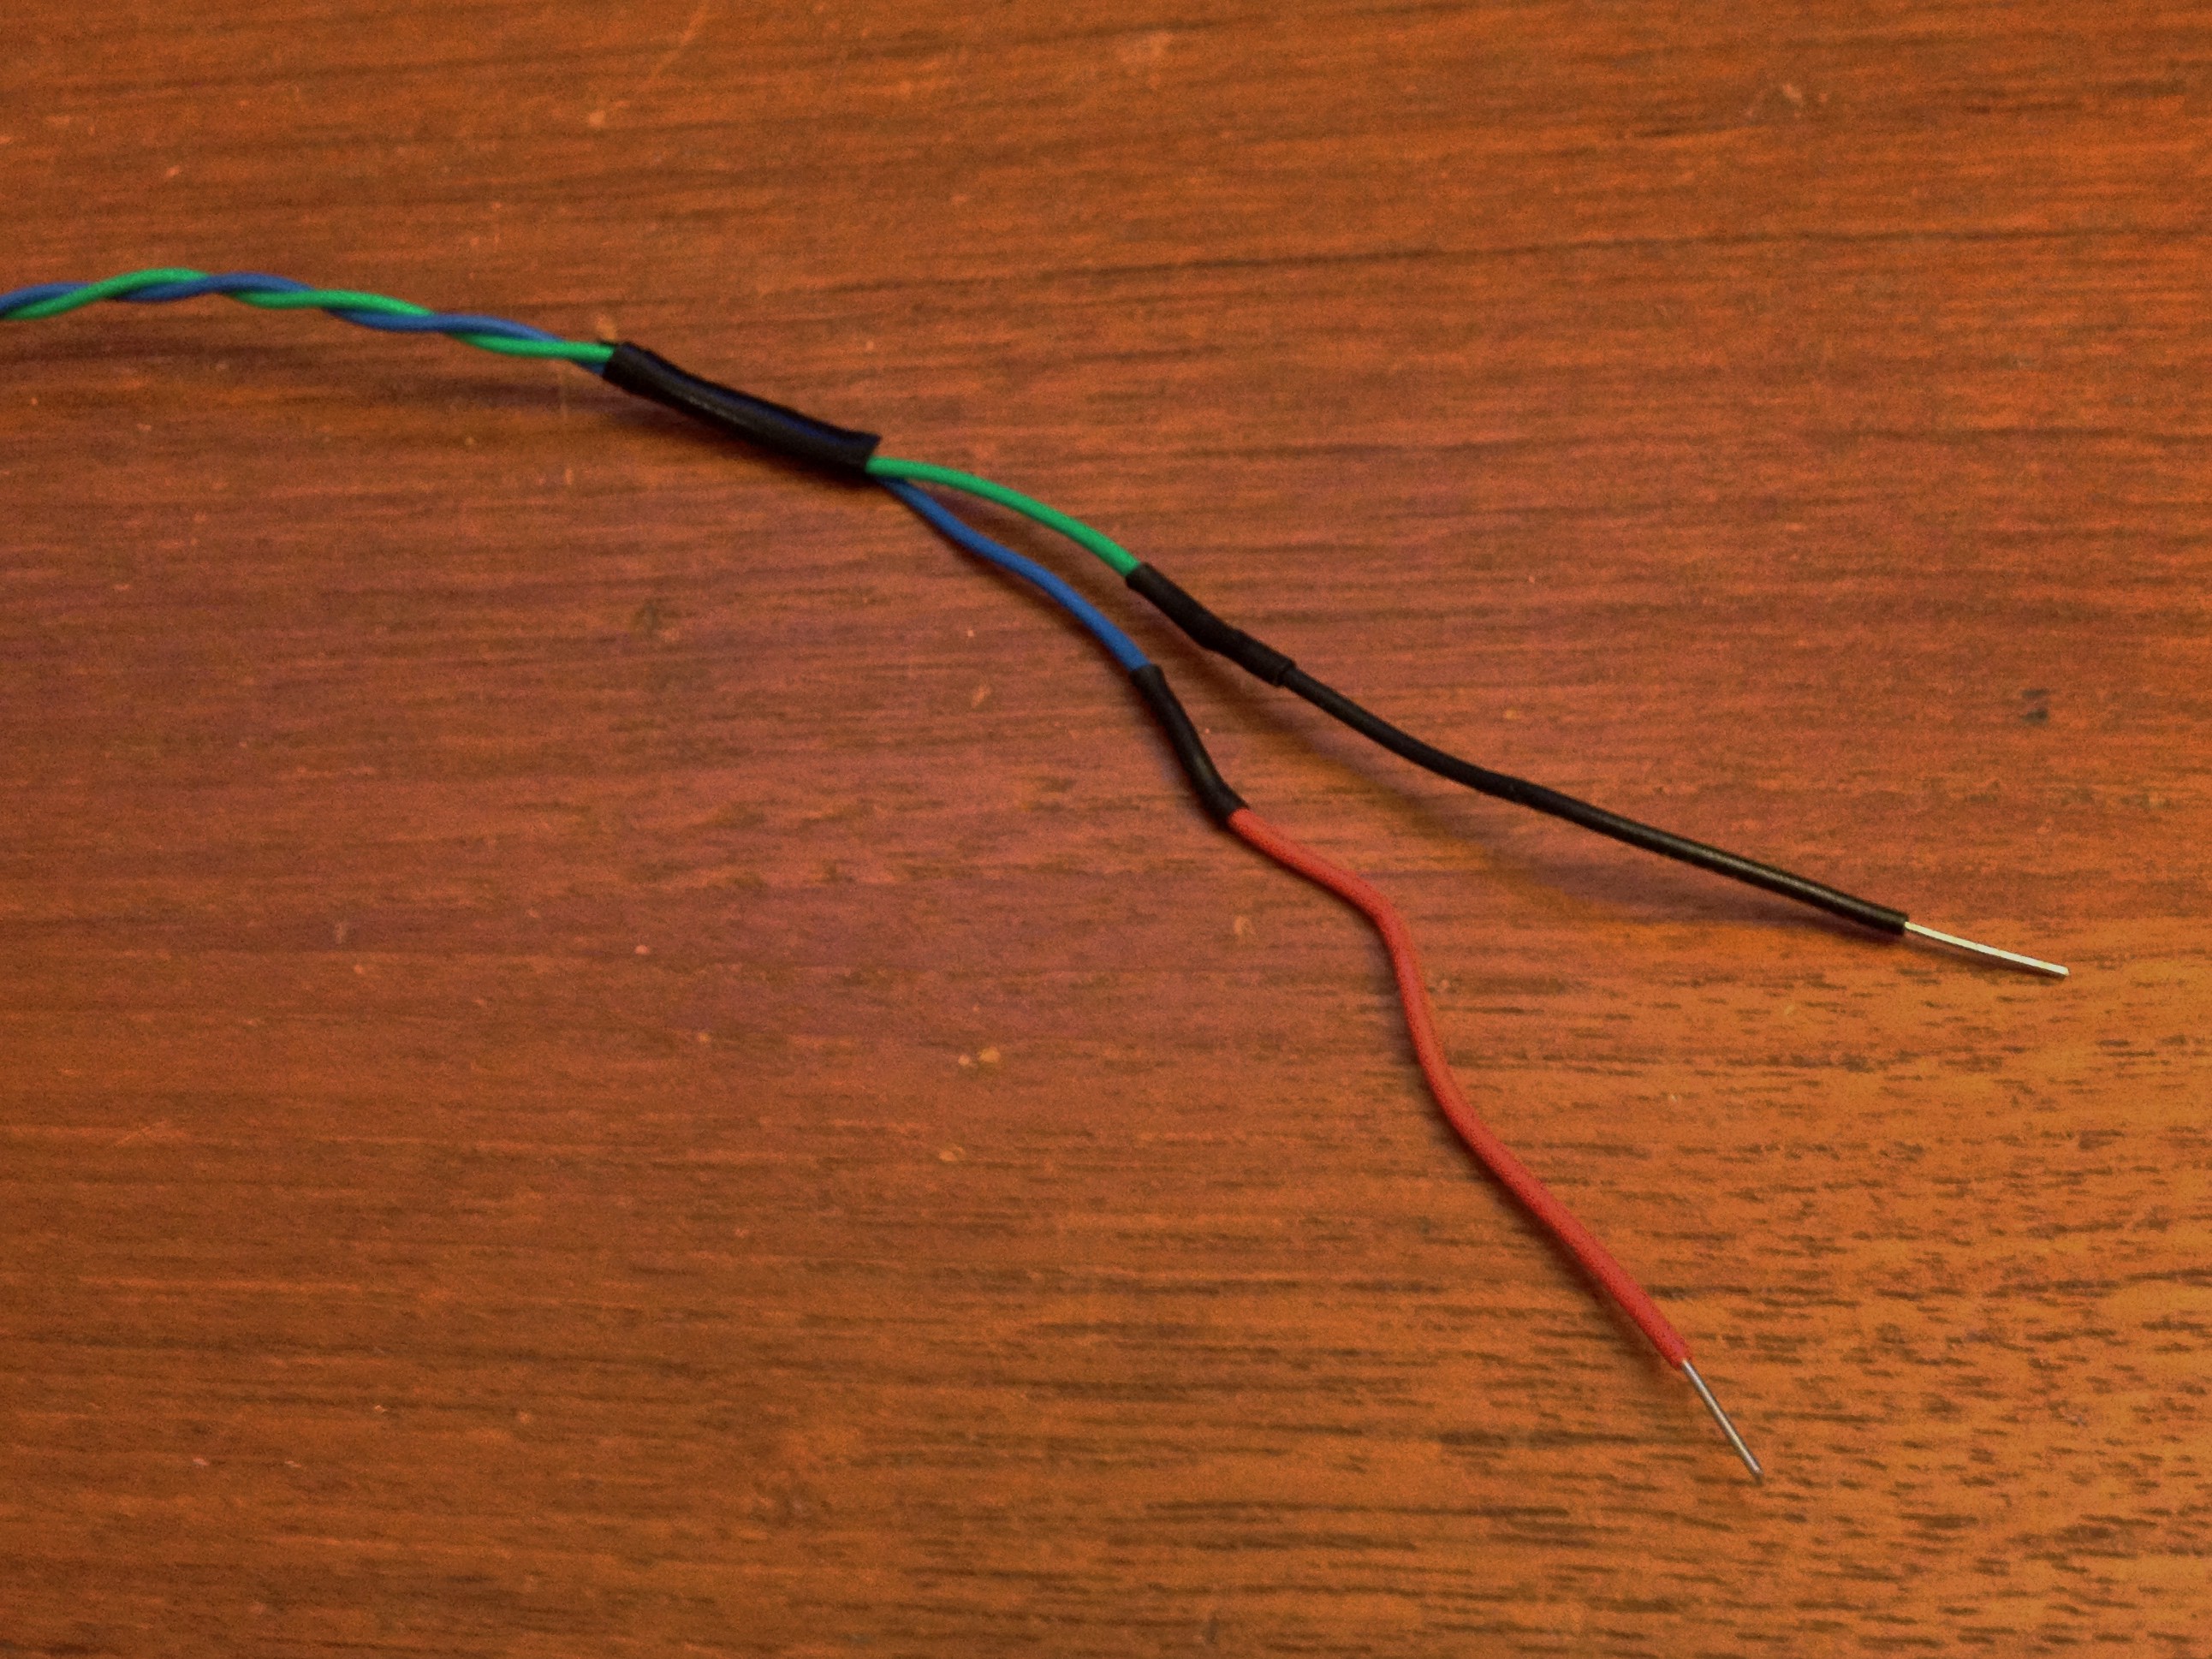
    You'll also want to twist the wires on your electrode pairs as shown above. In addition to cleaning up the mess around your circuit, twisted wire pairs help reduce electrical noise picked up by the electrodes. By alternating the position of the wires back and forth, any external electromagnetic interference (e.g. 60 Hz from mains) will affect the wires an equal amount. The differential amplifier will then remove this common noise signal.

View all 7 instructions

Enjoy this project?

Share

Discussions

Pasteur wrote 05/25/2023 at 19:52 point

It is a universal language that transcends cultural boundaries and has been a part of human civilization for thousands of years. https://worldmusicviews.com/

  Are you sure? yes | no

Similar Projects

Does this project spark your interest?

Become a member to follow this project and never miss any updates