 Kenneth Marut
-
1Gather Parts:
- Obtain all off-the-shelf hardware listed above
- 3D print all plastic components, 0.1mm to 0.15mm resolution for FDM printers with a 30% infill should be fine, 0.03mm - 0.05mm for resin printers
- Cut display cover using 0.06" clear acrylic with a laser or die-cutter (optional)
- Breakout board can be manufactured with PCB manufacturer of your choice (I use seeedstudio)
-
2Assemble/Solder Electronics:
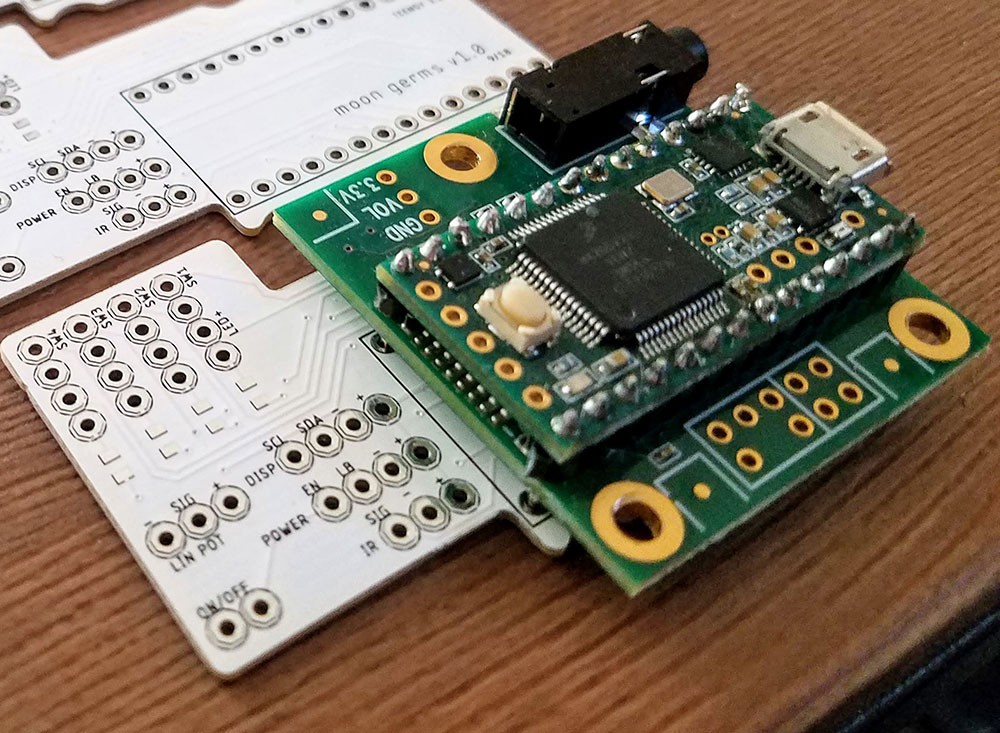
- Solder Teensy 3.2 and audio shield using headers with Teensy ON TOP of audio shield, then solder Teensy+Audio shield to breakout board, clip headers with flush cutters:
![]()
![]()
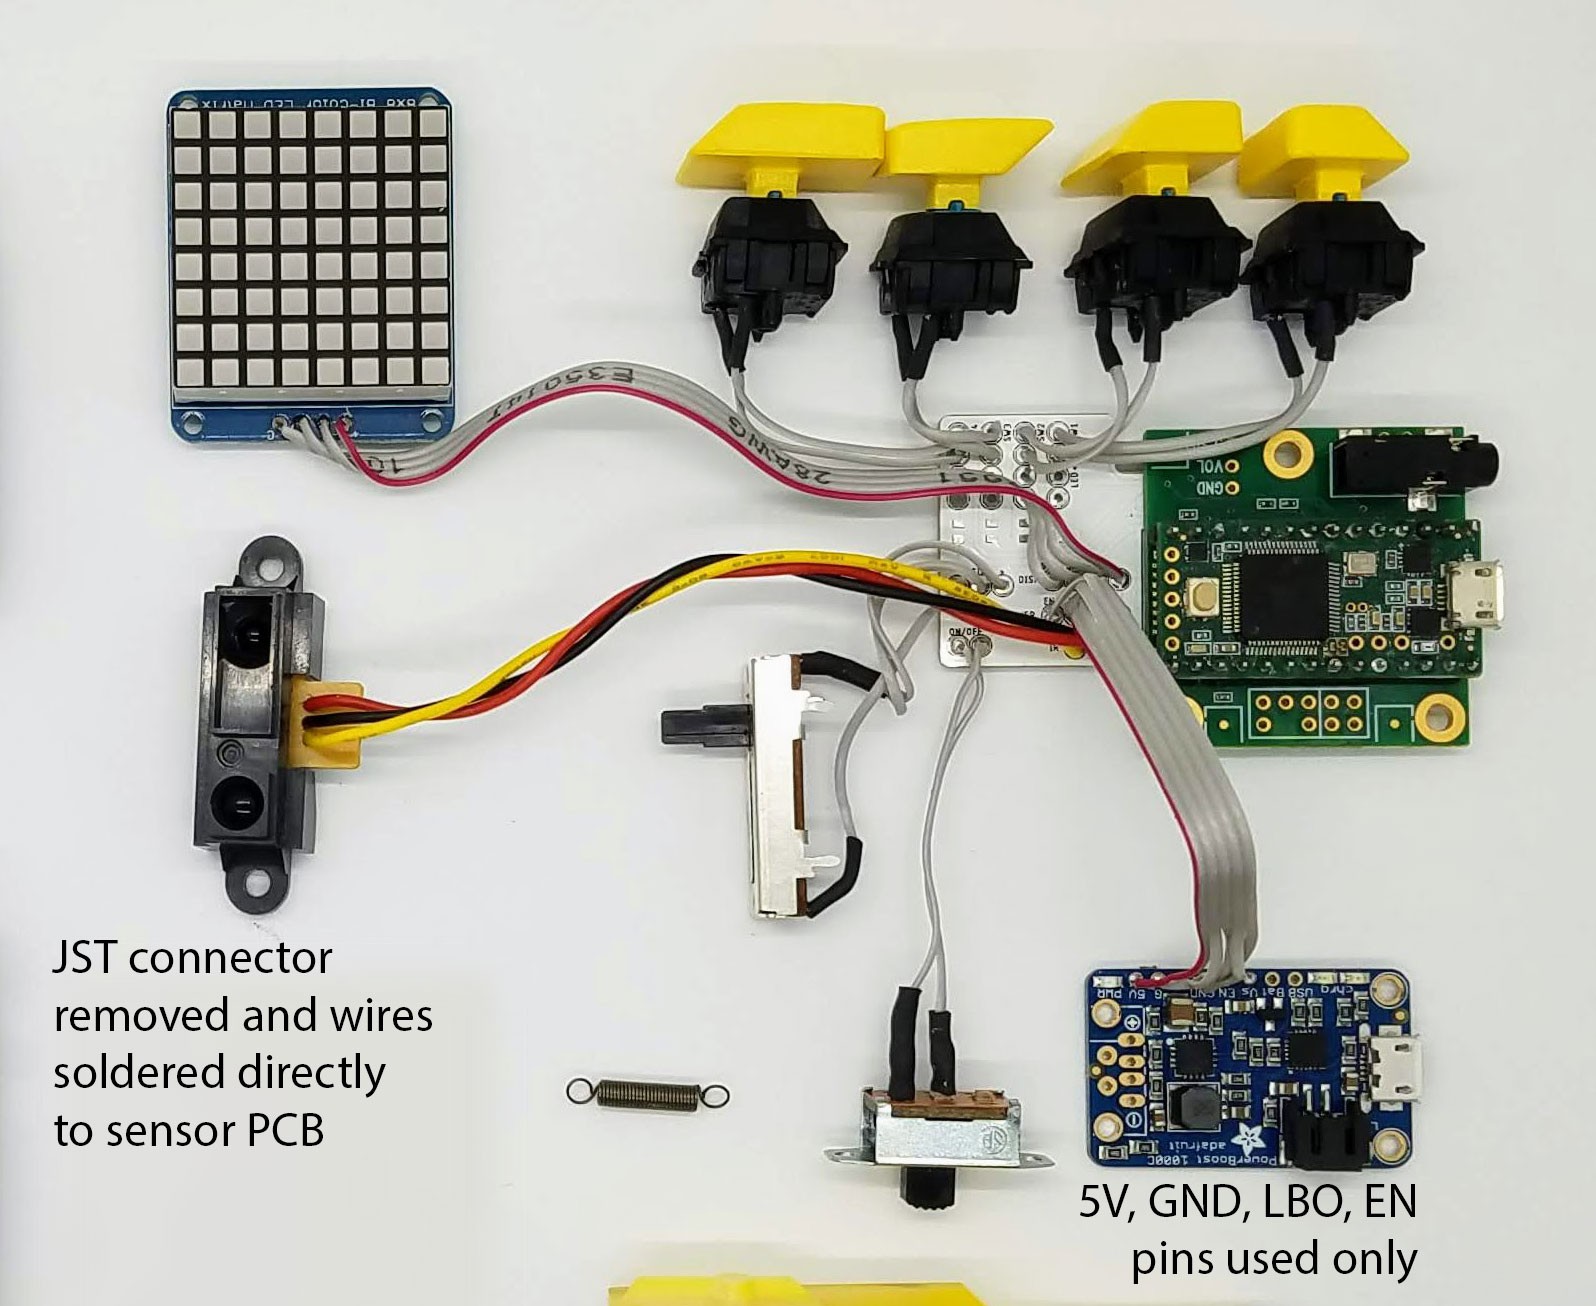
- Assemble all electronics modules according to their documentation, DO NOT attach any headers. (Visit product links for assembly instructions)
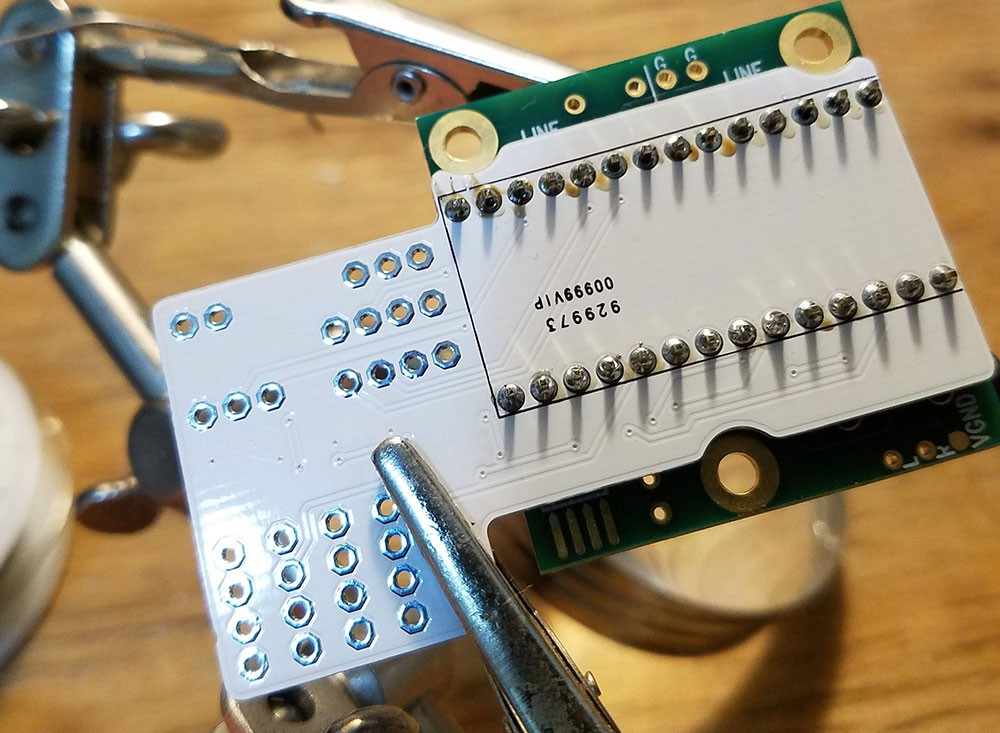
- Solder all electronic components to breakout board according to the image below, refer to silkscreen for details:
![]()
-
3Upload Firmware to Teensy 3.2
- Install Arduino IDE from www.arduino.cc
- Install Teensy loader software from https://www.pjrc.com/teensy/loader.html
- Download and open Moon Germs firmware with Arduino IDE
- Install necessary Arduino libraries listed at the top of the moonGerms.ino file
- Connect Teensy board to computer with a micro-USB cable and upload moonGerms.ino, the 8x8 display should flash with a bootup Animation if the upload was successful
-
4Enclosure Assembly
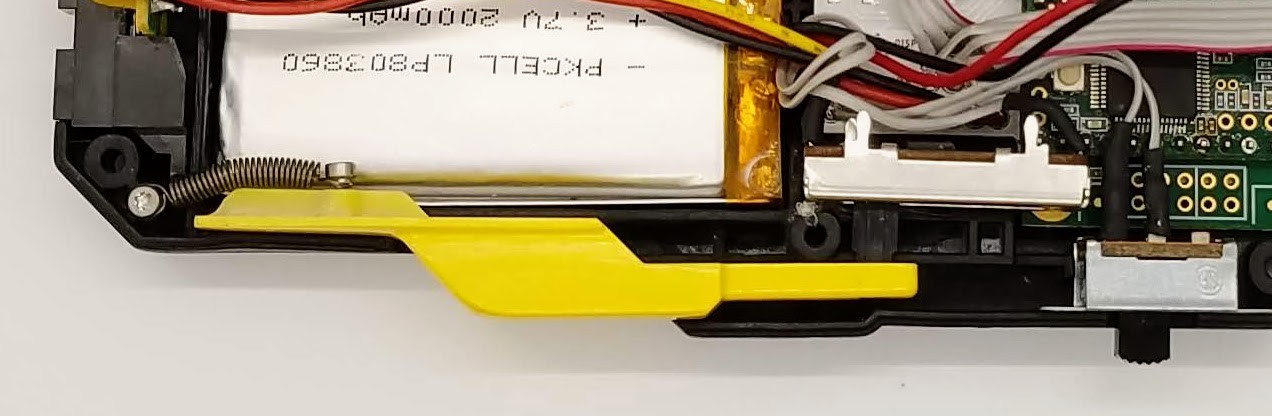
- Assemble lower-half of enclosure according to the image below, use hot-glue to hold linear potentiometer in place:
![]()
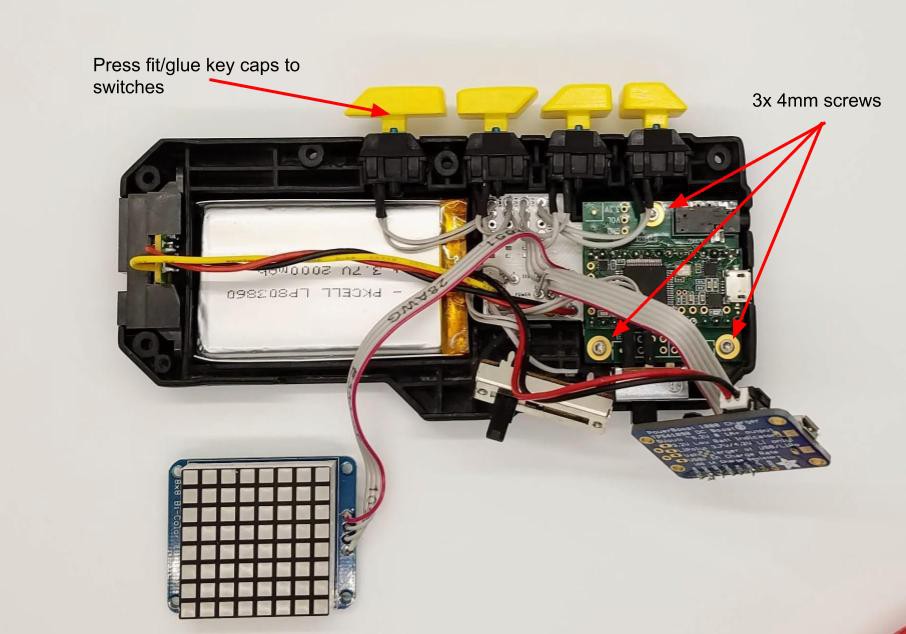
- Assemble spring-trigger and insert into lower-half of enclosure using 2x 4mm M2 screws, ensure that linear potentiometer is properly captured by trigger cutout:
![]()
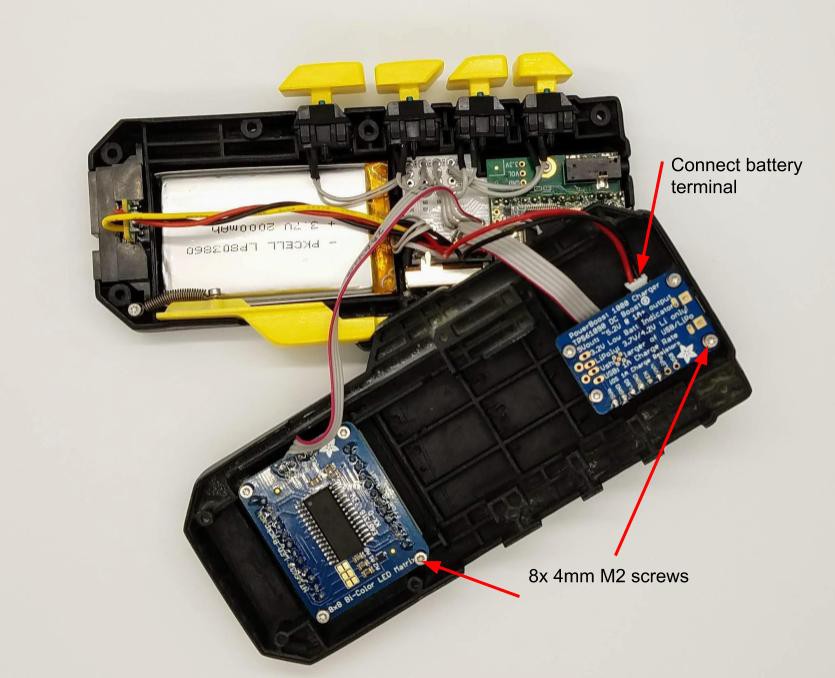
- Assemble upper-half of enclosure according to the image below:
![]()
-
5Test device
- Power on the device by flipping the on-off switch located on the bottom right side of the device, the display should play a bootup animation and pressing down button 1 should display a waveform. Plug in a pair of headphones to ensure the device is generating sound and play with the IR and trigger. If there are any issues, check connections!
-
6Final assembly!
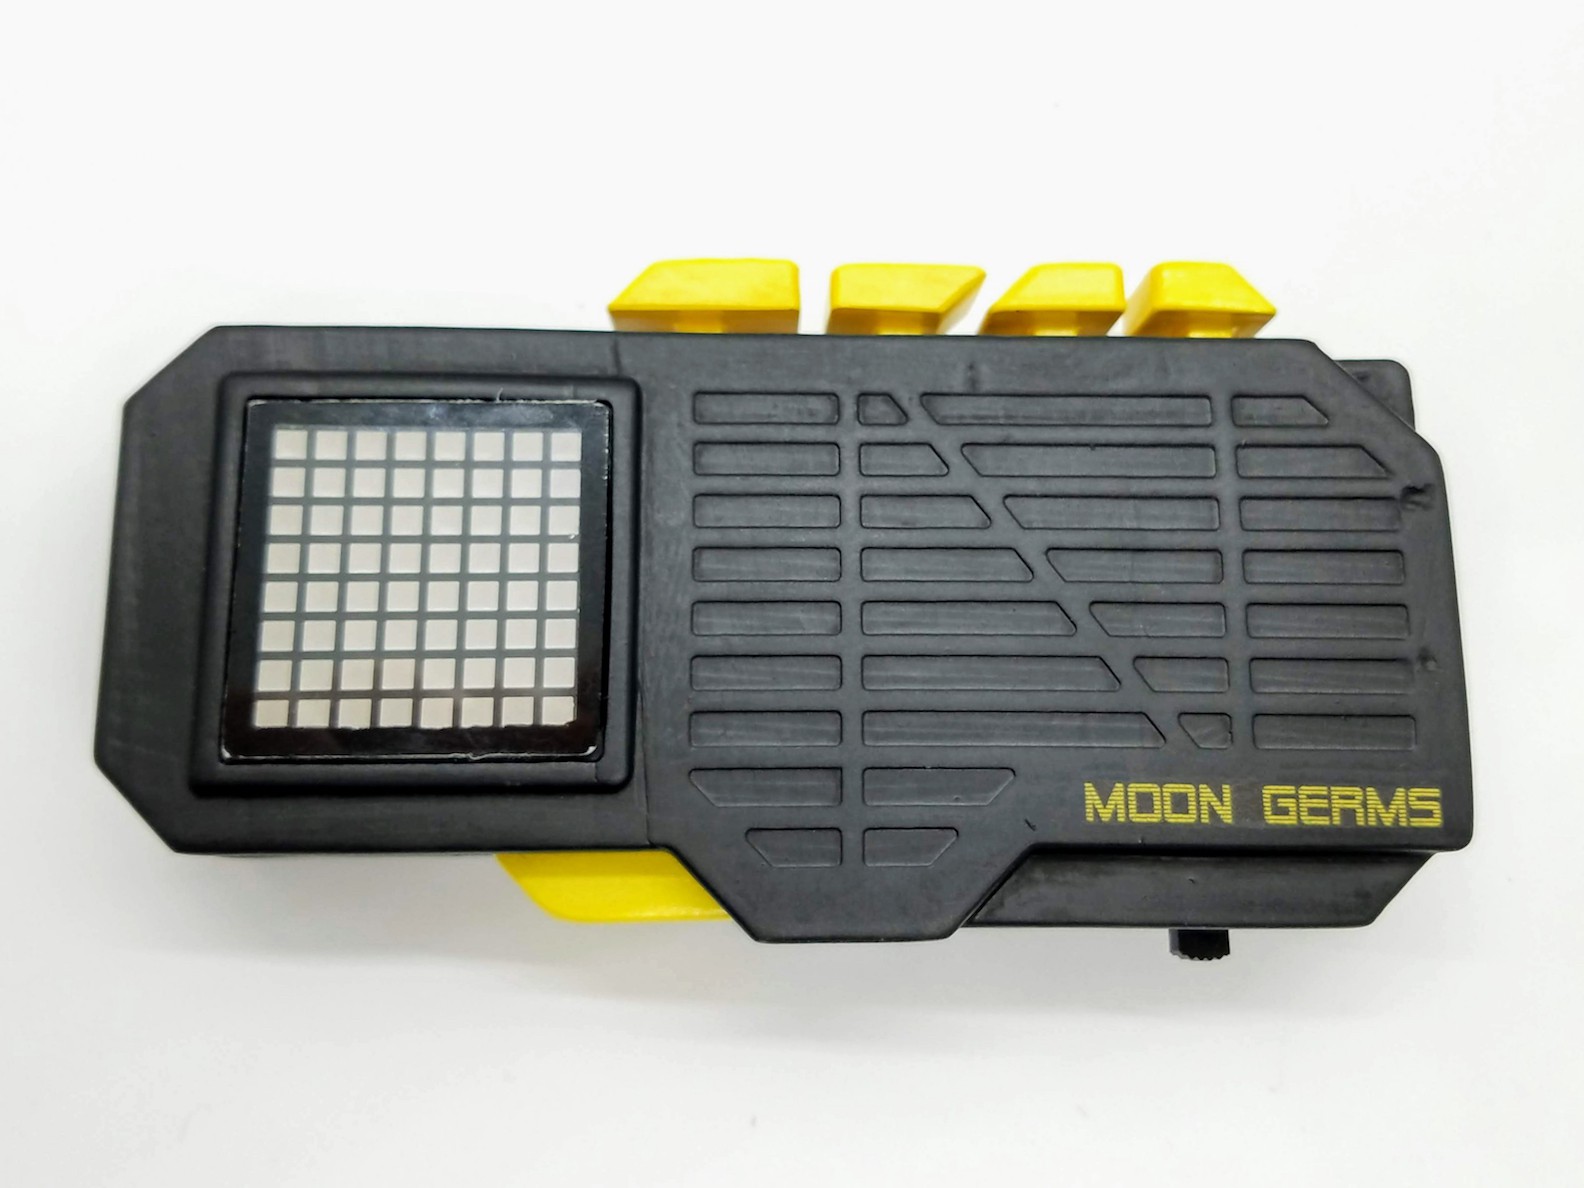
- Carefully assemble the two halves of the enclosure, ensuring that wires are not caught or snagged during assembly. Use 7x 8mm M2 plastic screws to hold enclosure together.
![]()
Discussions
Become a Hackaday.io Member
Create an account to leave a comment. Already have an account? Log In.