-
1Loading the software on the Arduino
For this project we'll need an Arduino Mega or UNO that has either a 16U2 or a 8U2 chip for USB communication. I'm using a Mega with a 16U2 chip. Many chinese manufacturers use a cheaper one on their arduinos, but only these work with the firmware we will be flashing in order for the computers to recognize our Arduino as a MIDI device without any tinkering.
Before flashing, we will upload the code that will translate the input from the pressure sensor into a midi signal:
https://github.com/andreykramer/MIDIBreathController/blob/master/MIDIV3.ino
MIDI library required: https://github.com/FortySevenEffects/arduino_midi_library
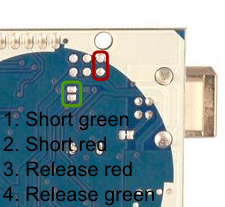
To flash HIDUINO onto the board you download the Atmel Flip software, put your arduino in DFU mode (here's how's it done with an arduino Mega, note that you may need to solder a couple of header pins if yours doesn't come with them already installed)![]()
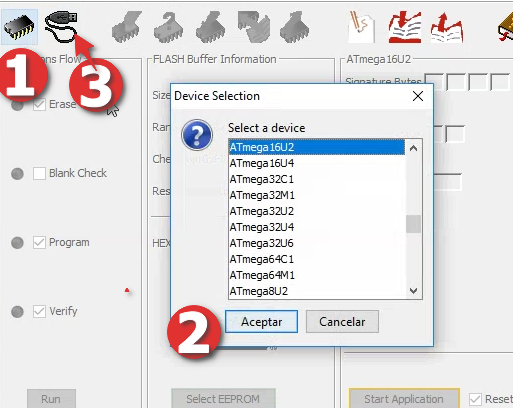
Then click on your arduino on the device manager, and install the corresponding driver to it. You will find them inside the flip installation. Open FLIP, click the chip icon, select your chip, click the usb icon, open the connection, press file -> load hex file and load the HIDUINO firmware (choose the appropiate file from the list). Then just click run and your Arduino will be recognized as a midi device the next time you plug it into any computer.
![]()
-
2Assembling the PCB
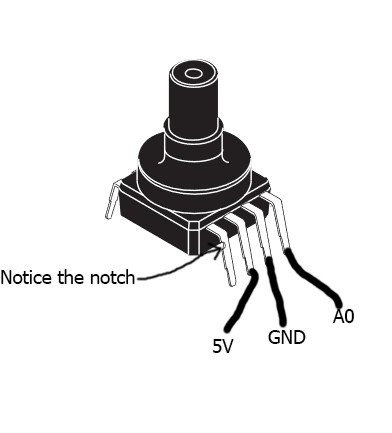
The hardware part of this build is pretty straightforward. It's mainly a shield for the Arduino consisting of a perfboard, a MPVZ4006GW7U pressure sensor (reads from 0 to 0.87 psi, from what my research has revealed it's the optimal range for capturing human blow), a melodica hose (that luckily for us just fits right onto the sensor and is sold separately) and, optionally (explained in step 3), three capacitors. The connection diagram looks like this:
![]()
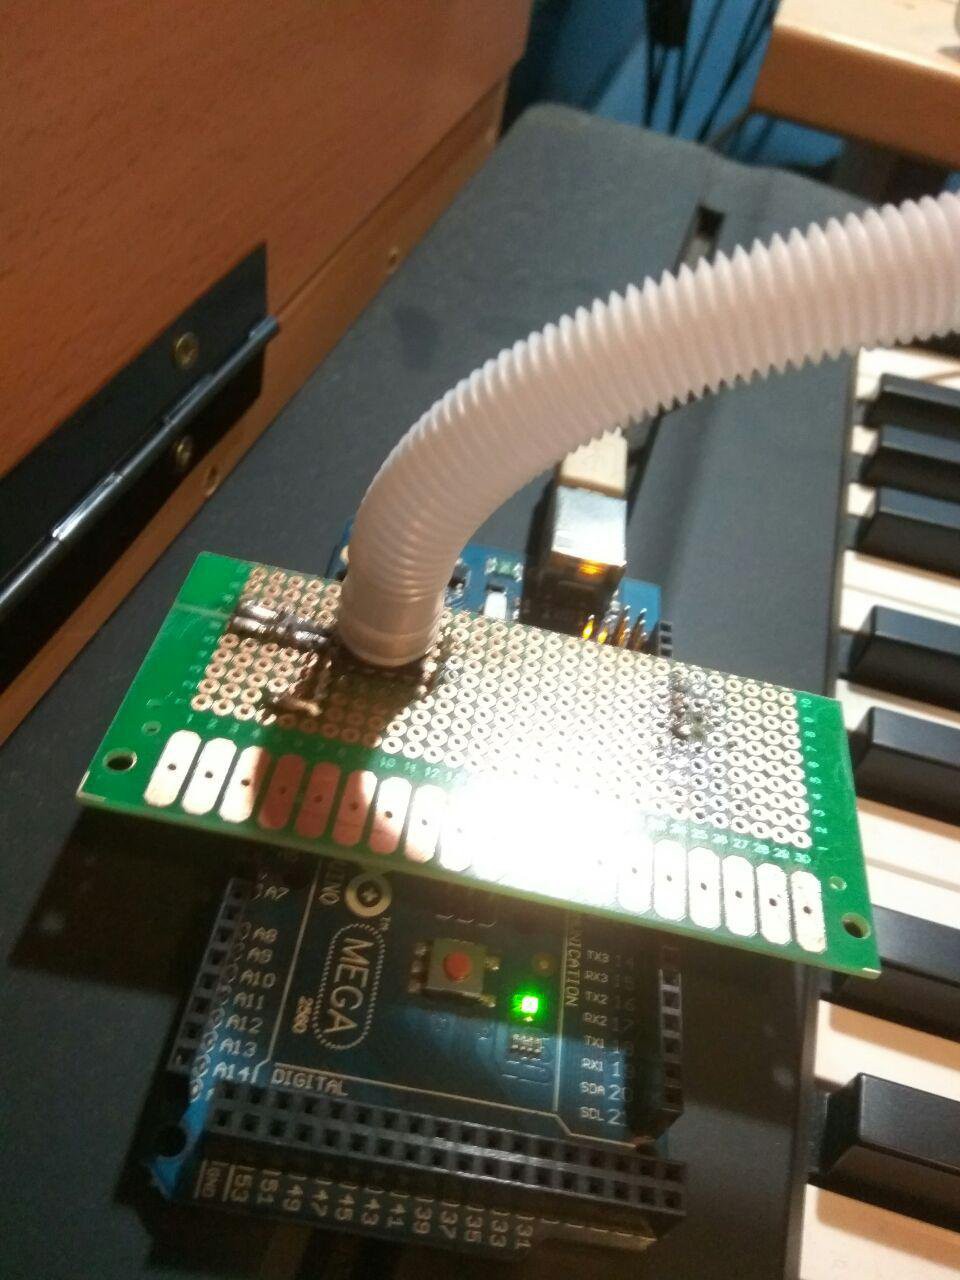
And I believe the actual layout of the pcb will vary depending on the Arduino board, but mine looks like this:![]()
![]()
The header pins on the right aren't connected to anything and just serve stability purposes. -
3[Optional] The decoupling circuit
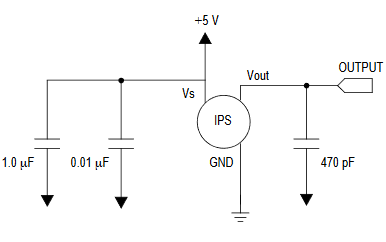
The manufacturer of the sensor recommends to add three capacitors to the circuit in this fashion to decouple the power supply and filter out some noise from the readings
![]()
Why am I saying it's optional? Because experimentally, the noise reduction attained is neglegible as the arduino resolution on the analog pins is pretty low, and MIDI protocol has only 7 bits which is an even lower resolution. A change in a few mV won't affect the functioning of the breath controller.
-
4Last steps: configuring your VST
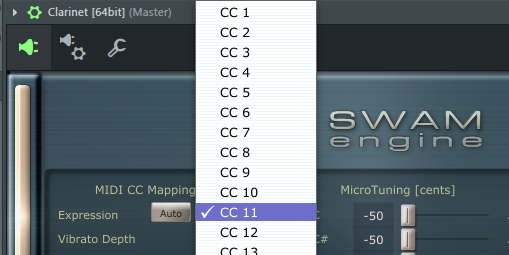
Now that the breath controller is a fully functioning usb midi device, you just have to enable it on any port inside your Digital Audio Workstation, launch your VST and make sure that the expression control is mapped to channel 11, as we're sending our sensor readings through that one:
![]()
USB MIDI Breath Controller
Cheap DIY solution to turn blown air into a MIDI signal sent through arduino's USB to any computer
 Andrey Kramer

Discussions
Become a Hackaday.io Member
Create an account to leave a comment. Already have an account? Log In.