David Boucher
-
ESP8266 Version Demo Video
04/27/2019 at 20:35 • 0 commentsI've finally got around to finishing the demo video for the ESP8266 version. In the first video I ran the simulation at EDSAC speed. This time I'm running it flat out so you can see how much faster it is.
-
ESP8266 update
03/02/2019 at 12:29 • 0 commentsI've improved (well, simplified) the ESP8266 version a little bit:
![]()
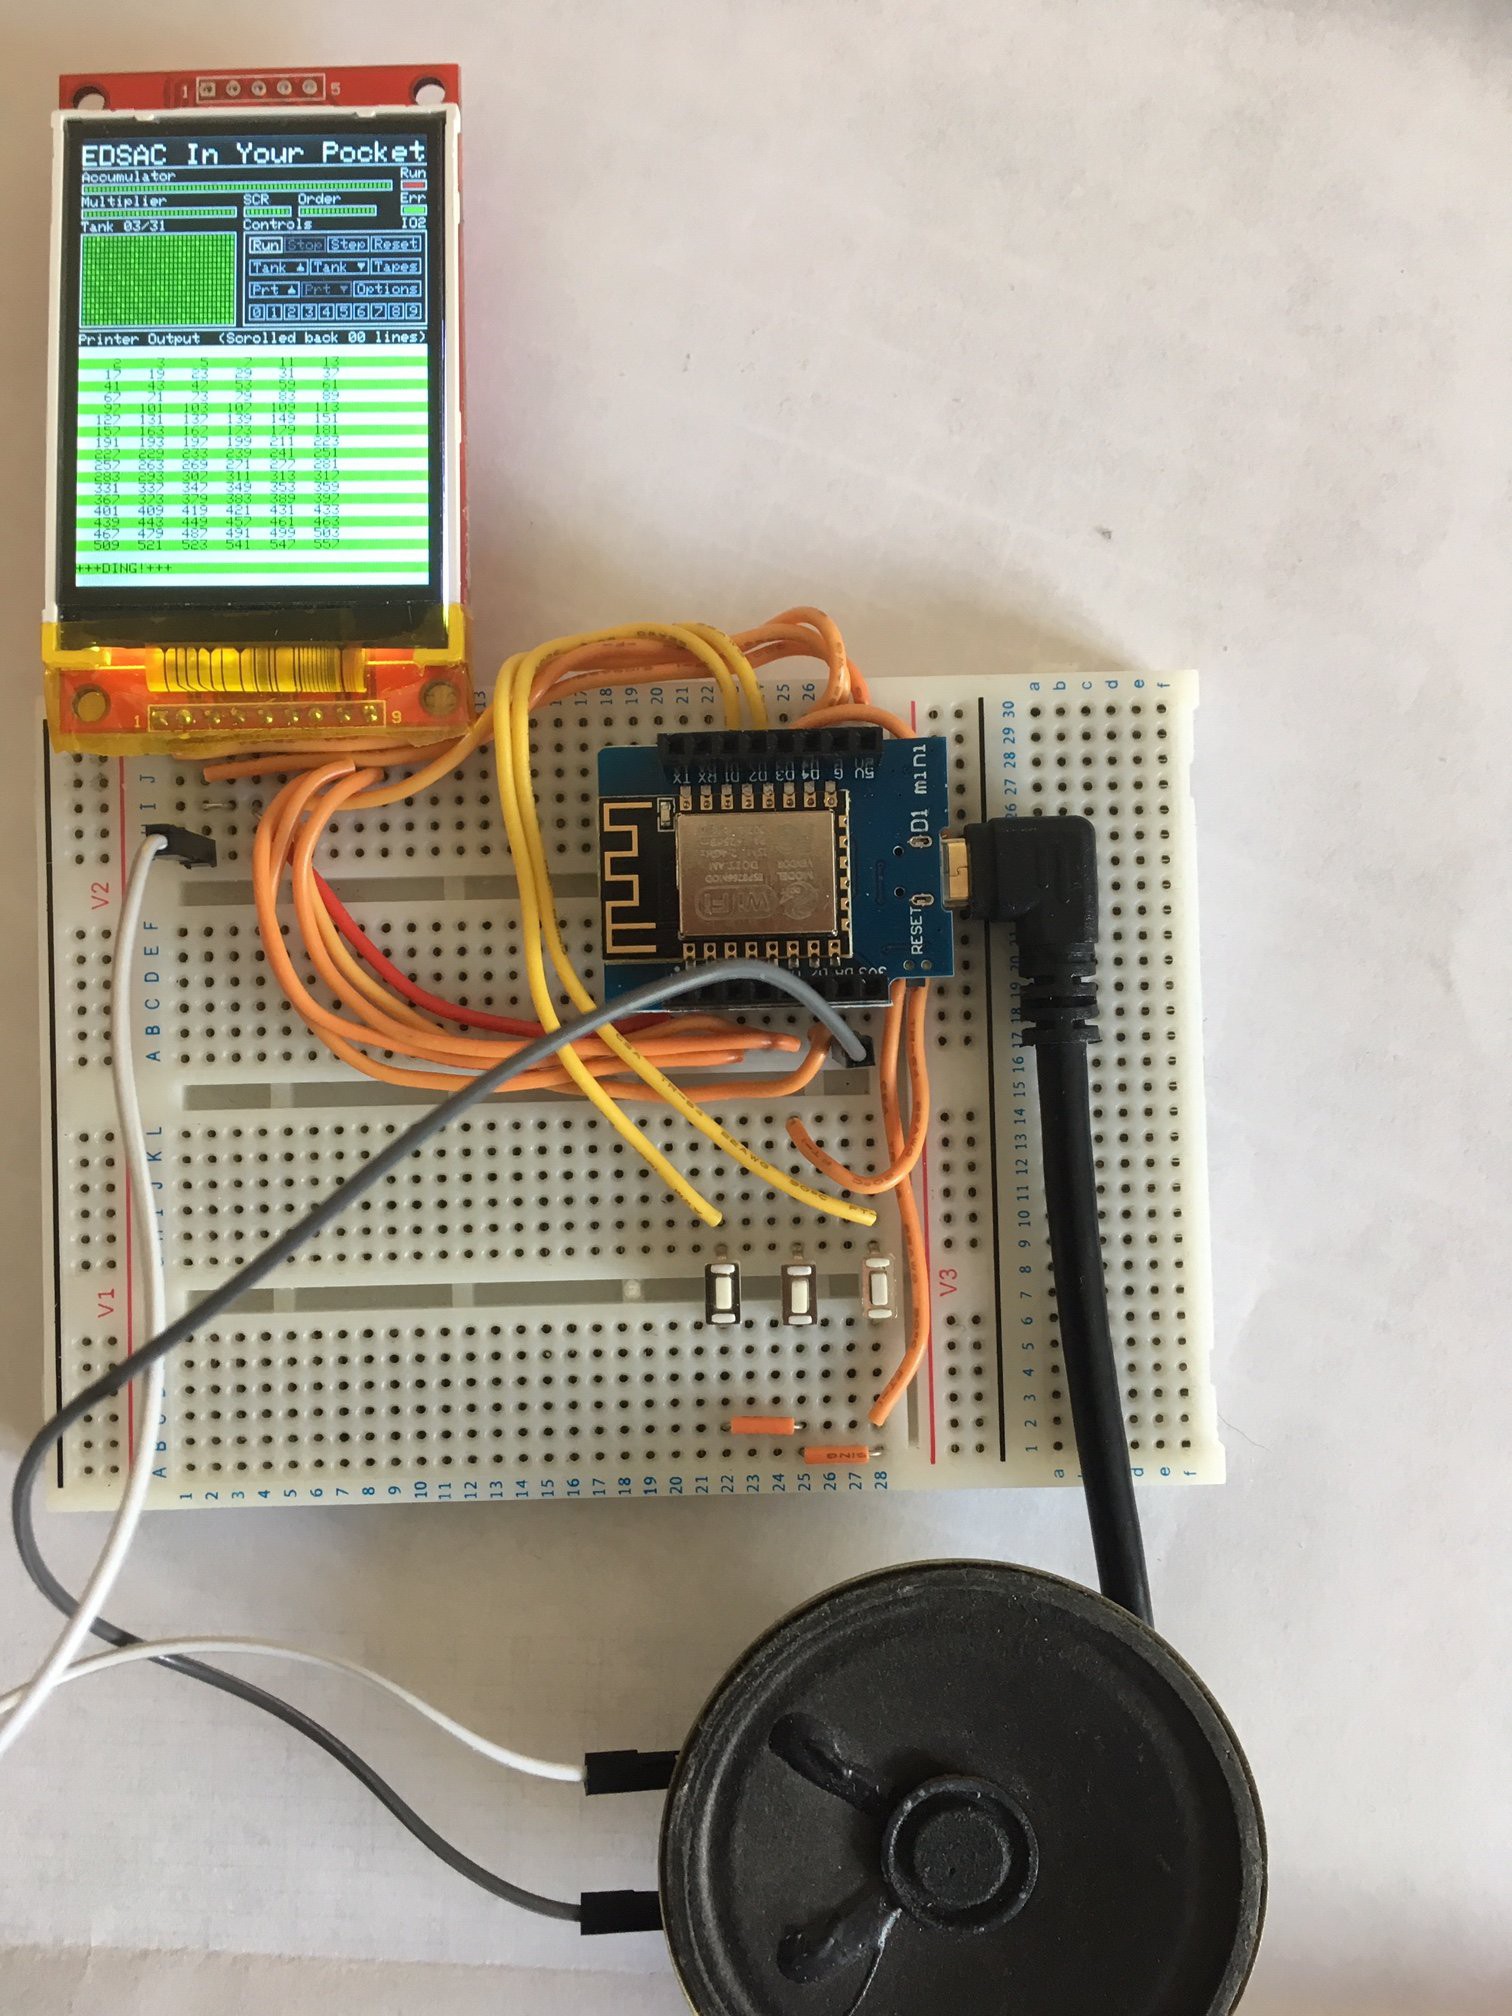
The IO expander chip is not needed, so this is just an ESP826 dev board (Wemos D1 mini in this case) along with the screen, buttons, and speaker as before. Functionally, it's identical to the original as I've not used the WiFi or extra storage of the ESP8266. It's a little faster than the Teensy but not by much.
The source code can be downloaded from https://dboucher.org.uk/edsac/. -
ESP8266 port
02/03/2019 at 20:56 • 0 commentsI've had a few questions about whether this project could be ported to an ESP8266. It turns out the answer is yes:
![]()
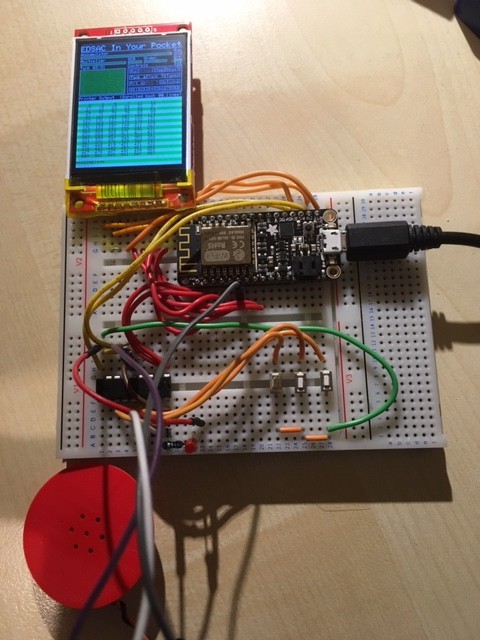
This port is at a very early stage, so I'm not releasing the code just yet. It runs, but loading and saving of settings (and tapes) doesn't work and it makes no use of the WiFi capabilities of the ESP8266.
I'm using an Adafruit Feather Huzzah here but it should work on other ESP8266 boards like a Wemos D1 mini. The screen is the same as the Teensy version and I'm using an MCP23008 I/O expander for the buttons due to a shortage of GPIOs. I might be able to get around that with a bit more work though.
-
[Thank you!]
01/19/2019 at 15:47 • 0 commentsMy project got featured on hackday.com today, so this is just a quick note to say thank you to everyone who took the time to take a look at it and for the comments and likes on the project page and on the video. Also thank you to hackaday.com editor [Al Wiliams] (must have the square brackets :) for featuring it.
-
Demo Video
12/28/2018 at 19:05 • 2 commentsThe demo video is finally complete! In my last post I said that I wanted to try to make a good video and it's taken a lot longer and needed a lot more work than I expected.
In explaining my project I ended up talking about the original EDSAC as much as I talked about my own work and ended up with an eight minute video rather than the five minutes that I was aiming for. If you want to skip the explanation and just see the project running, jump to 5:36.
Anyway, here is the video, I hope you like it.
-
Download Uploaded
12/01/2018 at 14:51 • 0 commentsI've made the source code and the source files for the 3D printed parts available to download from this page. Source code is licenced under GPL 3+, and the 3D part files (OperSCAD) are under CC BY-SA 4.0. There are more details on the page.
One other thing that I want to do is a demonstration video, however I have recently discovered that I suck at making videos, so that part is taking longer than I had hoped. I want to try to produce a good video rather than one of those videos where someone turns their project on, waves it in front of a camera and doesn't say anything.
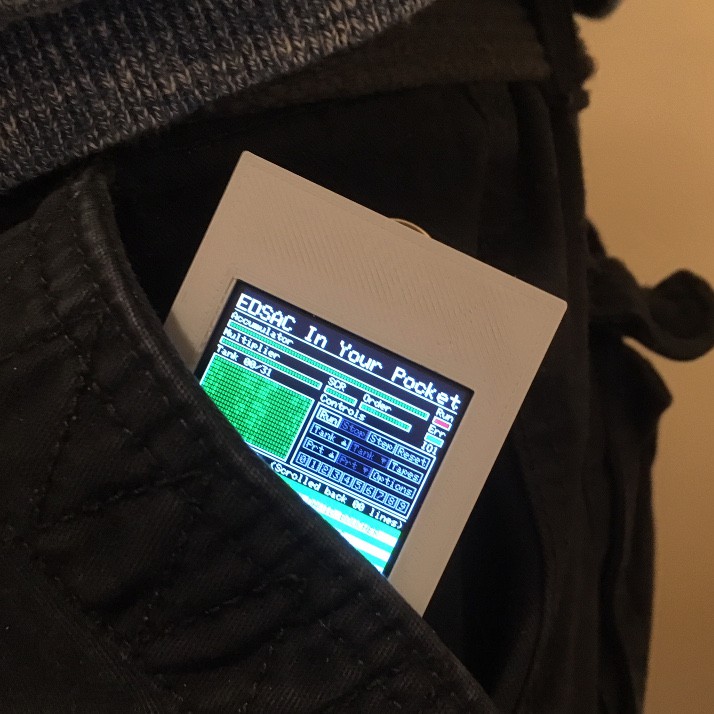
Finally, up until now, the "In Your Pocket" part of this project has been "Citation Needed", so let me fix that:
![]()
-
One Shade of Grey
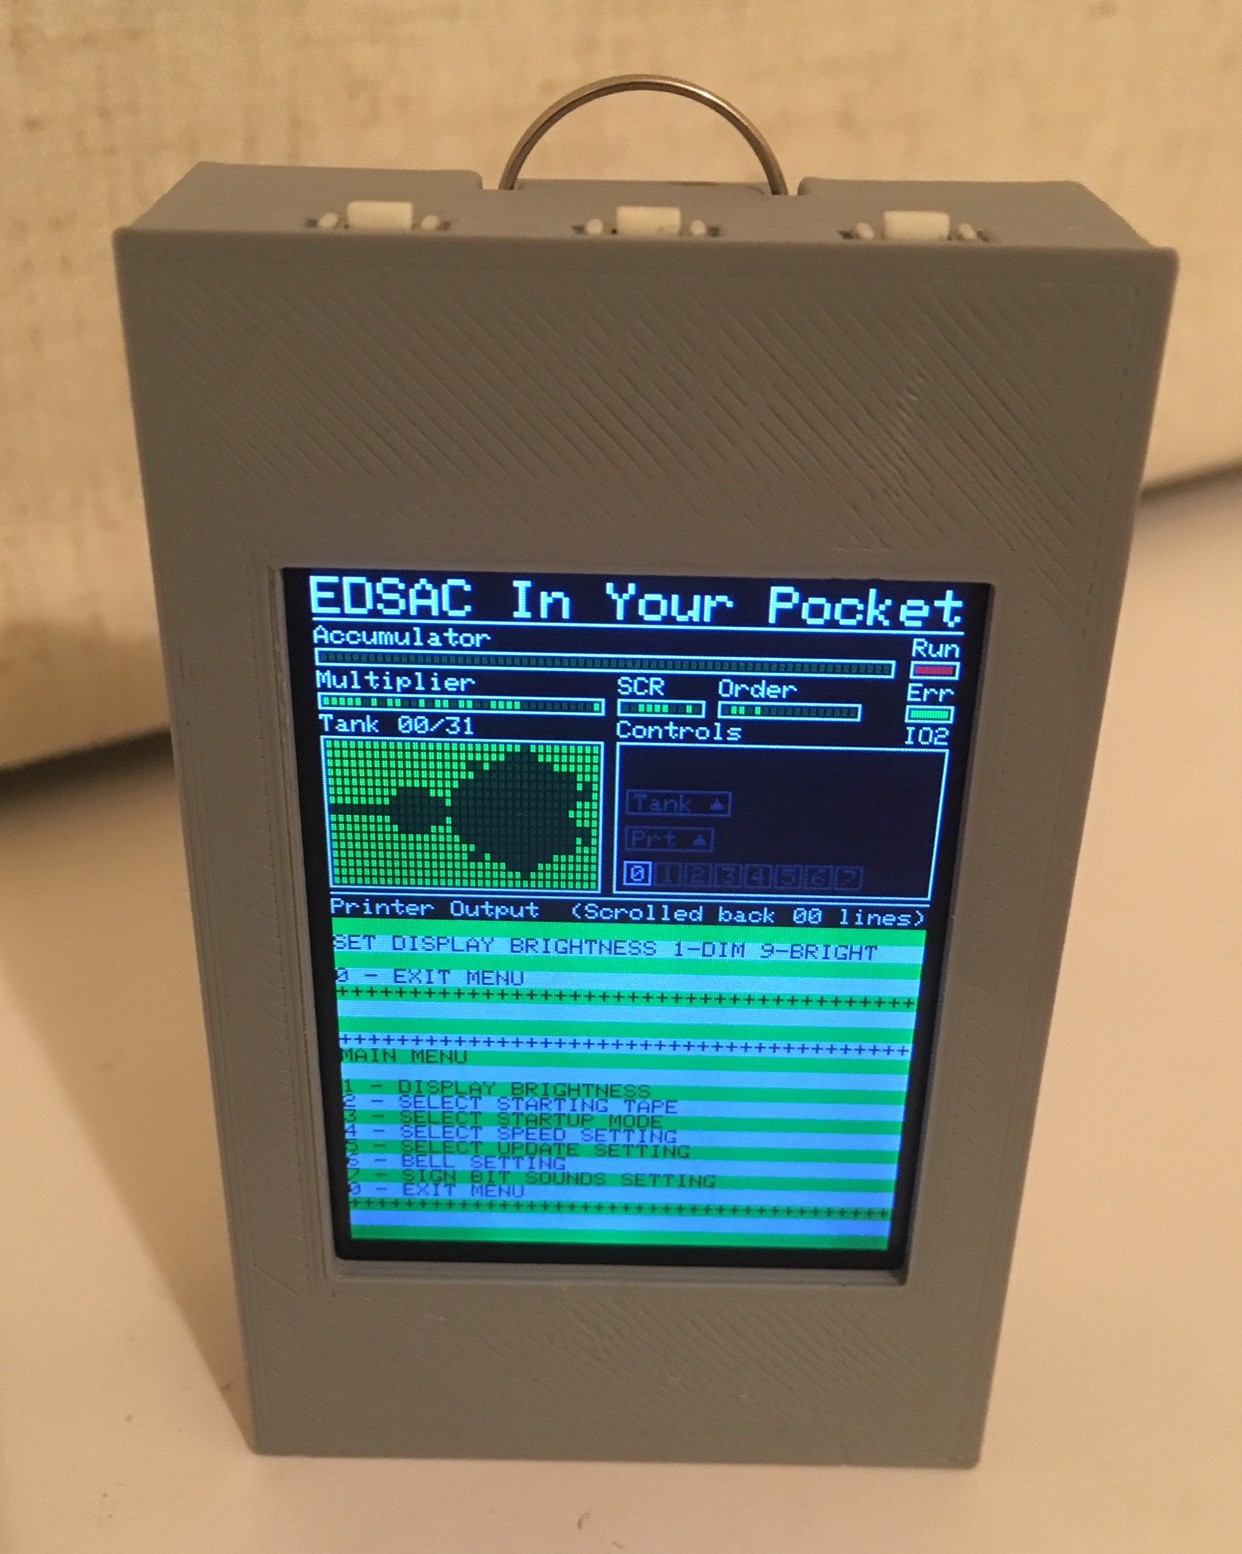
11/24/2018 at 21:14 • 2 commentsThe white case was never meant to be the final one, so I've reprinted it in grey to match the steel frames of the original EDSAC.
![]()
In other news, the software is complete, so I just need to package things up for release.
-
Progress
11/10/2018 at 14:57 • 0 commentsSince the last update I've added a few more things:
Sound
The original EDSAC had a warning bell that would ring when the machine processed a stop instruction in order to get the operators attention. I had already simulated this in my version with a speaker, but what I'd overlooked until last week was that the original also had a speaker tied to the sign bit of the accumulator. The idea was that the operator would be able to tell whether a program was working correctly from the sound produced. A continuous tone or repeating pattern of noise might indicate that the program is stuck in a infinite loop for example. I've now added this to my version and I might do a video at some point to demonstrate what it sounds like,
Serial
I've added the facility to operate the simulator over USB serial. Using "screen" under Linux (though other terminal programs should work), I can connect to the simulator and issue text commands. The output is something like this:
> RESET
RESET

EDSAC IN YOUR POCKET BY DAVID BOUCHER

SELECTED TAPE IS HELLO
----------------------------------------

> RUN
RUN
HELLO EDSAC
+++DING!+++
>
I can also use this to load programs over the serial connection with the "E_UPLOAD" command. After entering the command, I paste the source "tape" into the terminal and press escape to finish. This is what the source for the program above looks like:
T64K
GK
O13@
O14@
O15@
O16@
O17@
O18@
O19@
O20@
O21@
O22@
O23@
O24@
ZF
*F
HF
EF
LF
LF
OF
!F
EF
DF
SF
AF
CF
EZPF
I won't go into detail about the program above, but the first part is a series of "O" instructions which read data from a specified memory location and print it. The second half is the data to print. In the middle you can see the "Z" instruction which means "stop and ring the bell".
Next StepsAt the moment, programs loaded over serial are only stored in RAM, so the next step is to add a command to save them to the Teensy's EEPROM. Also, when I was at TNMOC the other week, I had the idea of reprinting the case in grey to match the metal frames of the EDSAC rebuilld, so that's also on my TODO list.
-
EDSAC In Your EDSAC
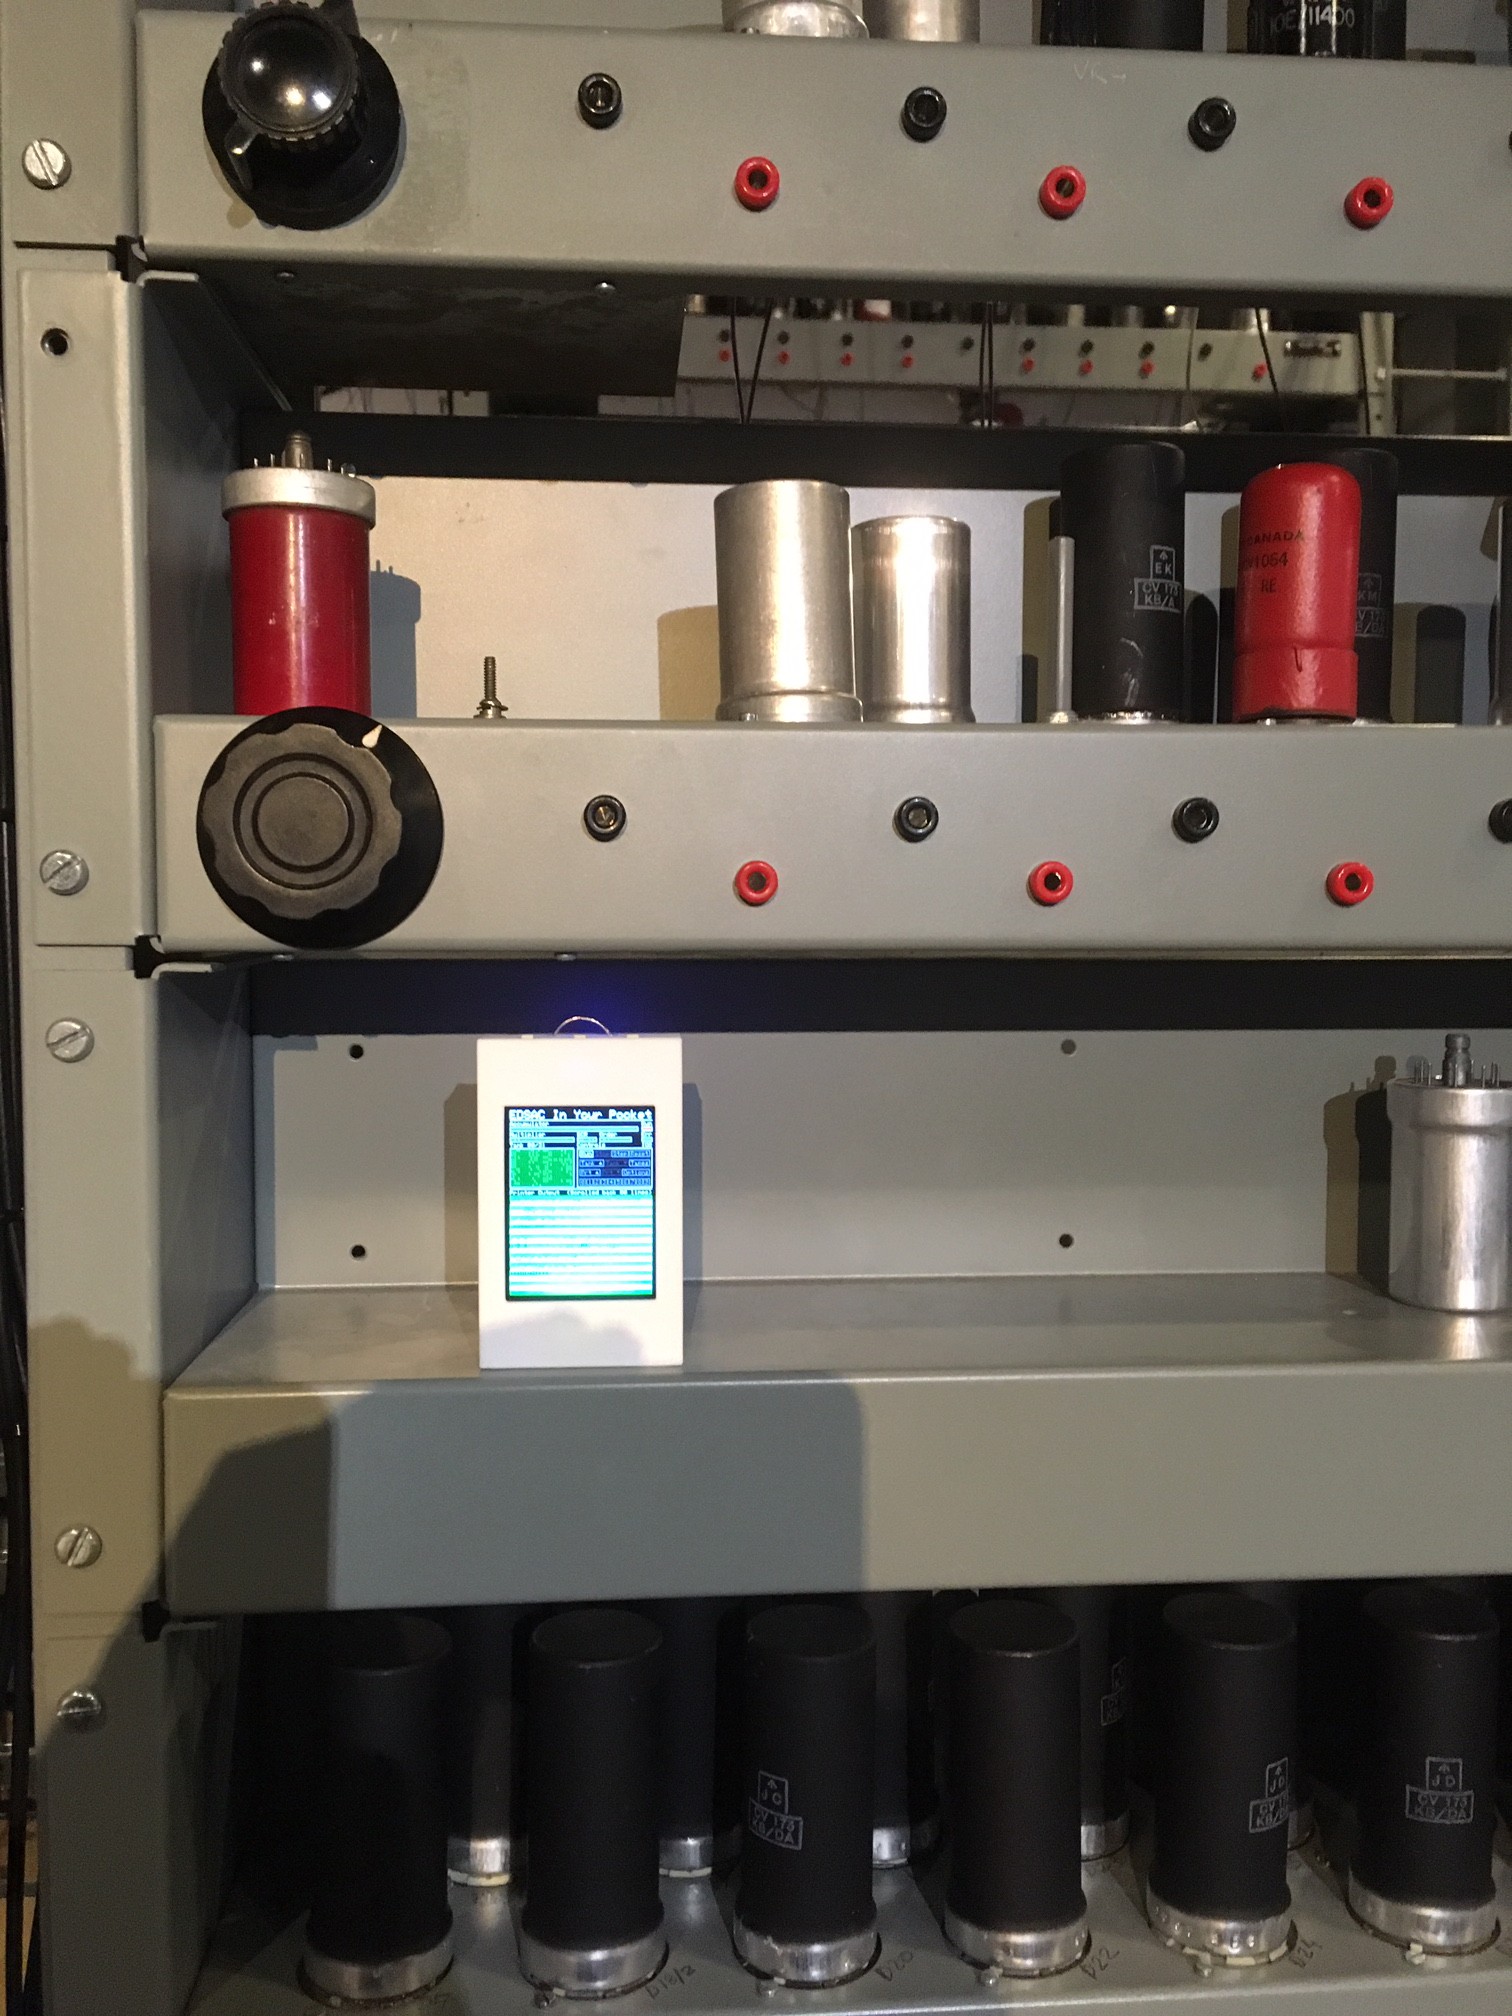
10/27/2018 at 18:43 • 0 commentsToday I went to The National Museum of Computing at Bletchley Park for the Members' Club Open Day. The museum is currently constructing a full-size and, as far as possible, historically accurate replica of EDSAC. This is now nearing completion and will hopefully be fully operational sometime next year. I was able to talk to some of the people who are working on the project about it and also about my somewhat less historically accurate version. Later, with the assistance of TNMOC volunteer guide Peter Hoath, I was able to get this picture:
![]()
Yes, it's an EDSAC in an EDSAC. This is my EDSAC simulator sitting in one of the racks of TNMOC's full-sized rebuild.
My thanks to the staff and volunteers of TNMOC for allowing this, and to the members' club committee for organising the open day. If you ever get the chance to visit the museum I would highly recommend it. If you do go and enjoy it, you might want to consider supporting the museum by joining the members' club.
-
The Story So Far
10/23/2018 at 18:58 • 0 commentsI've started documenting this project at a point where it's almost complete, so this log is mainly a catch up for those who are interested.
Software
The core EDSAC simulator software is operational and can run various EDSAC programs. The code needs a bit of a tidy up but that is all really. There are a few more things that I want to add to the software as a whole though:
A demo mode - this will load a specified program, run it to its conclusion, pause to display the output, then reboot and repeat until interrupted.
The ability to control the simulator using commands sent over USB serial - Currently, the simulator sends it output to the USB serial interface as well as to the screen. I plan to expand this so that it can accept commands this way too. The upshot of this would be that it would to possible to try out the simulator using just a Teensy connected to a USB serial terminal with no other components connected. It would also allow me to implement my next feature...
The ability to load an EDSAC program over USB serial and run it, then save it to EEPROM - At the moment, the only EDSAC programs that can be run are the ones compiled into the simulator software. I plan to change this.
Once I've done these things and I'm happy with the state of the software I will release it under a free licence. There will be two versions: the EDSAC In Your Pocket version to be loaded into a Teensy 3.1/2 and a version that can be run from a Linux command line, which I might call EDSAC On Your Command Line.
Hardware
The hardware is complete and I've added a parts list to the project page. I will add the design files for the 3D printed parts when I do the software release. There are only four parts: the main case (front and sides) the back and two internal supports. The case looks a little plain at the moment, so I might do something to jazz it up.
EDSAC In Your Pocket
A pocket sized recreation of a room filling computer from 1949