The ability to export SVG files does not come natively installed into Fusion 360 but is available as a plugin. Click on the Add-Ins menu and select Fusion 360 App Store.
2
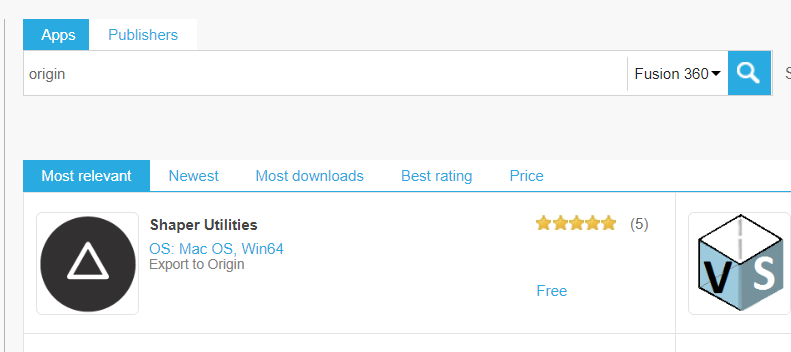
Download Shaper Origin Plugin
Type “Origin” on the search bar and hit enter. Click on the Shaper Origin icon that shows up. Select either MacOS or Win64 version and click on Download. After the download is complete, open the application and install it.
3
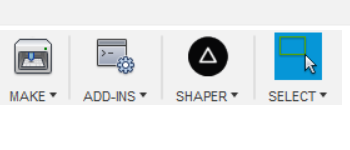
Restart Fusion 360
For the icon to appear on the toolbar you’ll have to restart Fusion 360. After relaunching Fusion 360 you should see a new icon on the toolbar labeled Shaper.
4
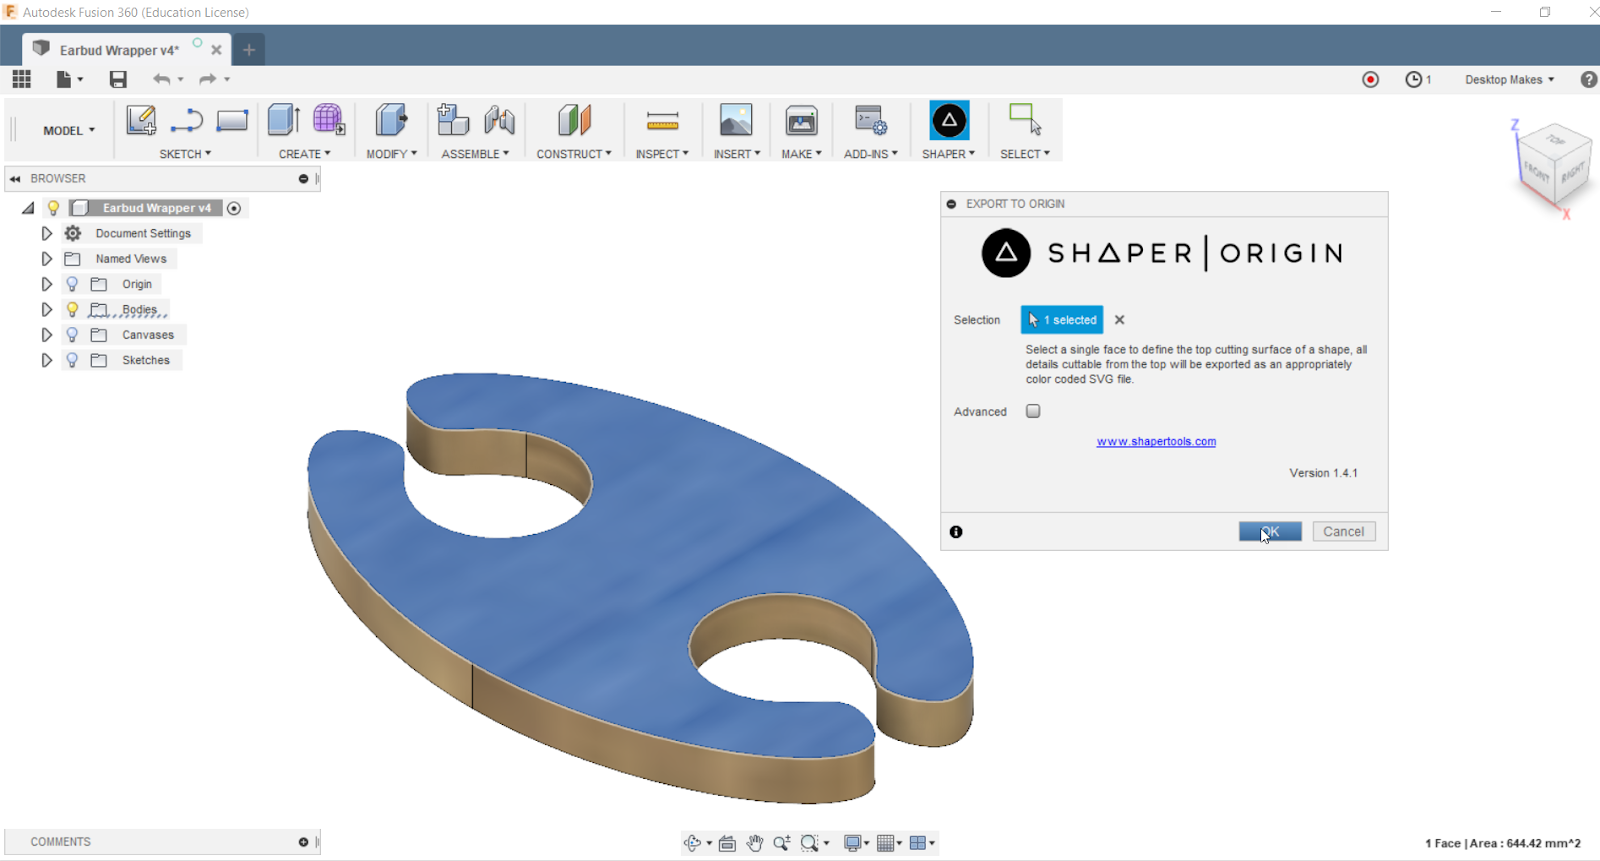
Export Your Face
Click on the the Shaper menu icon and then select the face of the body you want to export. Click Ok and select the file location to save your SVG file. You can now import your new SVG file into whatever software you use in order to prepare it for laser cutting, CNC milling, or waterjet cutting.
 Vladimir
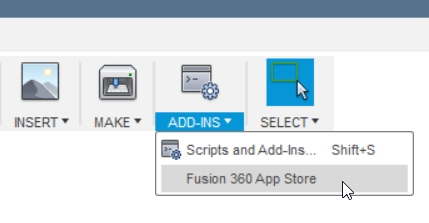
Discussions
Become a Hackaday.io Member
Create an account to leave a comment. Already have an account? Log In.