-
1Using HTTP APIs to log data
We've all heard of HTTP - it's in the browser bar right now! But what is HTTP, really, and how can we use it to send data to a server? Well, HTTP stands for HyperText Transmission Protocol. It runs on top of TCP, or Transmission Control Protocol. You don't need to fully understand these protocols, just grasp the basics. TCP is responsible for taking data from an application, assembling it into a packet, and passing it to the ethernet or wi-fi card to transmit across the Internet. At the other end, the reverse happens. In the case of HTTP, the data is hypertext, or HTML. But it doesn't have to be HTML. HTTP can be used to transfer files, images, scripts, videos and more.
The two most important requests are called GET and POST. These are commands in the HTTP standard that an HTTP server will understand. When I want to view google.com, my browser sends a GET command to google.com's web server, and it returns the homepage. When I type a search into the search bar and hit enter, my browser sends a POST command to the server with whatever I typed. Think of it like posting a letter!
![]()
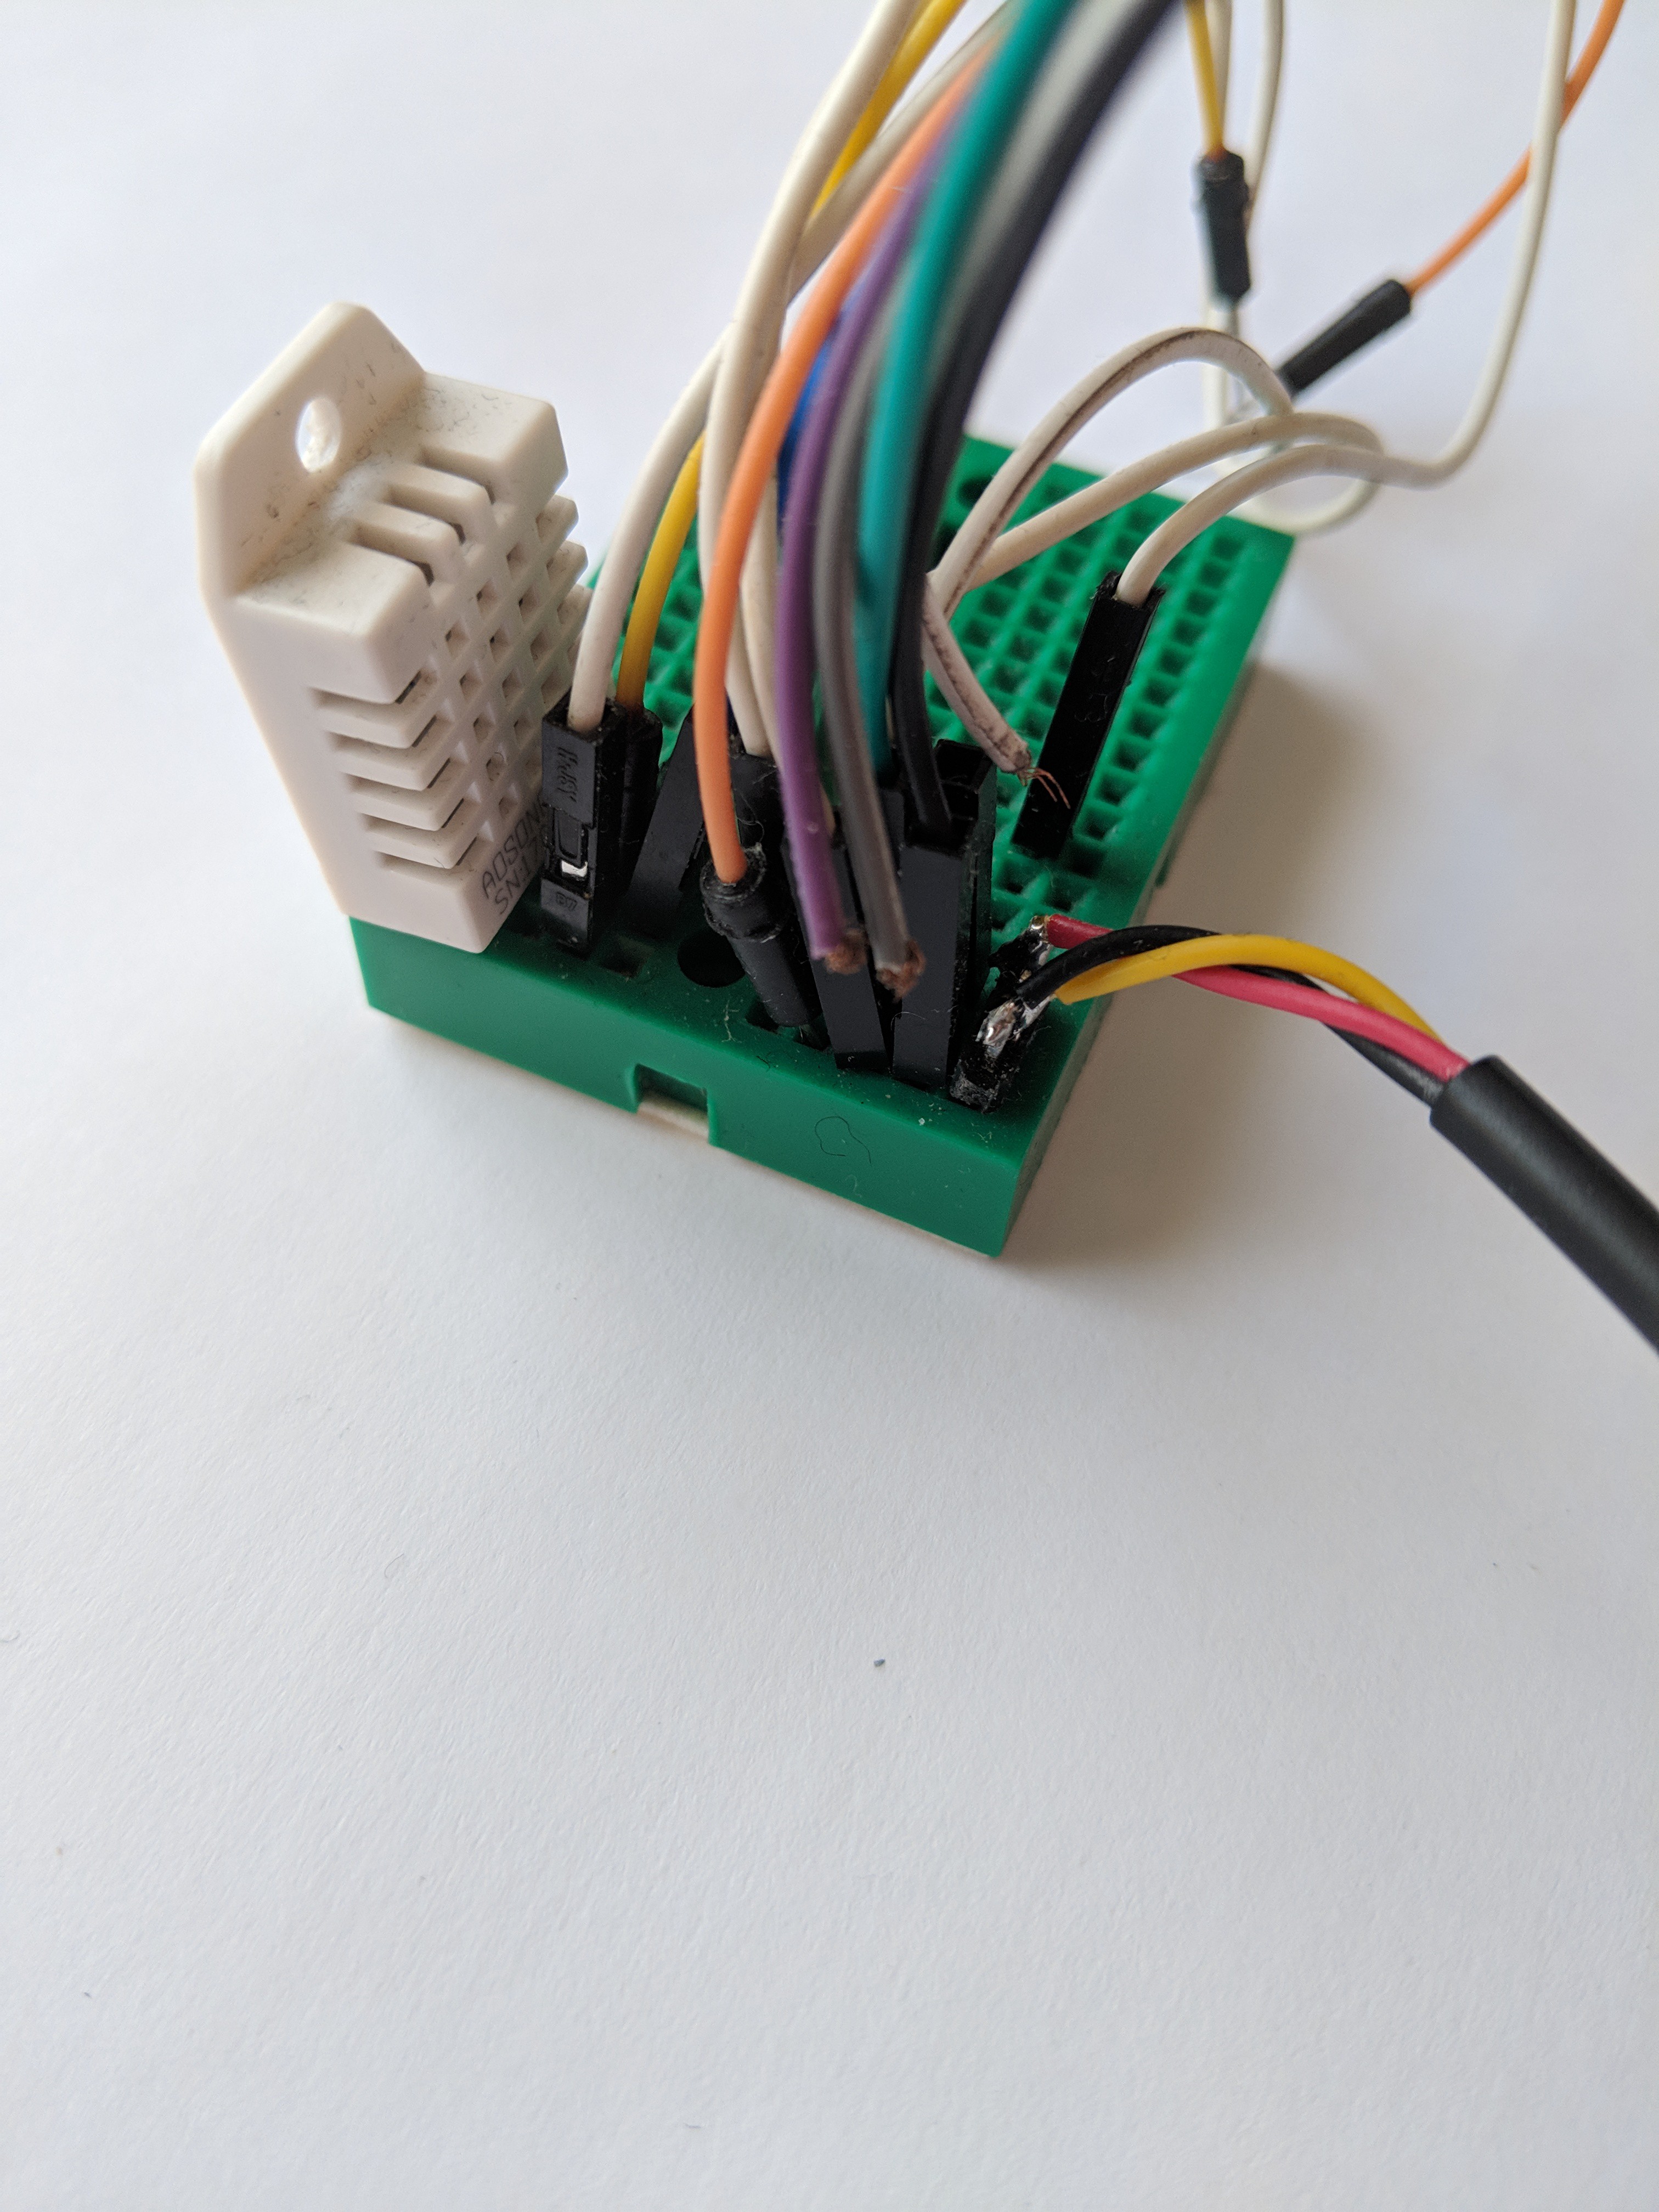
The breadboarded sensors for this project! Alongside the GET and POST commands, HTTP also sends some extra data called headers. These headers are little tidbits of information the server can use to modify what it gives you. For example, a common header is the User-Agent header. This tells the server what kind of browser we are using. Ever wondered how it is you get a different layout when you go to a website on your smartphone? Your smartphone's browser is telling the server via the User-Agent header that it's a mobile device, and so the server sends a different layout so that it fits on your smaller screen!
In our case, all we want to do is get some data from a sensor, and send it to a server. So we will only be using the POST request. We will also be including some data in the HTTP headers, so that the server knows who we are and doesn't reject our requests (they don't want you sending data to someone else's stream!).
There are a huge number of services available that will allow you store and display data for free. Many are open-source, too, which is a bonus! For this tutorial, we will be using Adafruit IO, but once you understand the process you can easily substitute any other service. Popular ones include Freeboard.io, Thingsboard, Node-RED, Thingspeak, and many, many more.
The documentation for the Adafruit IO REST API is located here. I suggest taking at least a cursory look before reading the rest of this tutorial. Make sure to take a look at the createData operation - this is the one we will be using.
-
2Sign up for Adafruit IO
As I mentioned previously, you are free to use any cloud data service you want! However, if you want to be able to use the code as provided, then it's easier just to use Adafruit IO. You can sign up by visiting https://io.adafruit.com/ and clicking the Sign Up button.
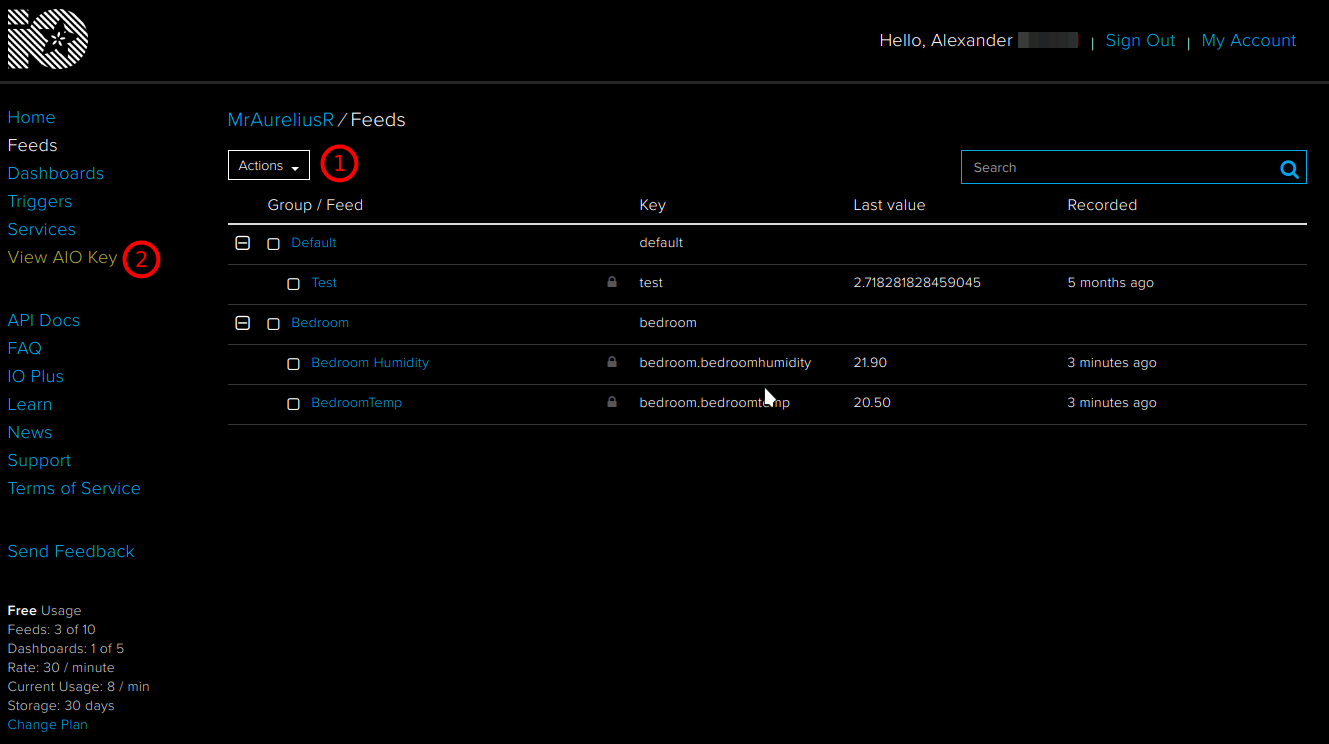
Once you've signed up, navigate to the Feeds section in the left-hand toolbar, and then create two feeds. In my image below, I have created a feed called bedroomhumidity, and bedroomtemp. I've also placed these into a group called Bedroom, but this isn't necessary.
![]()
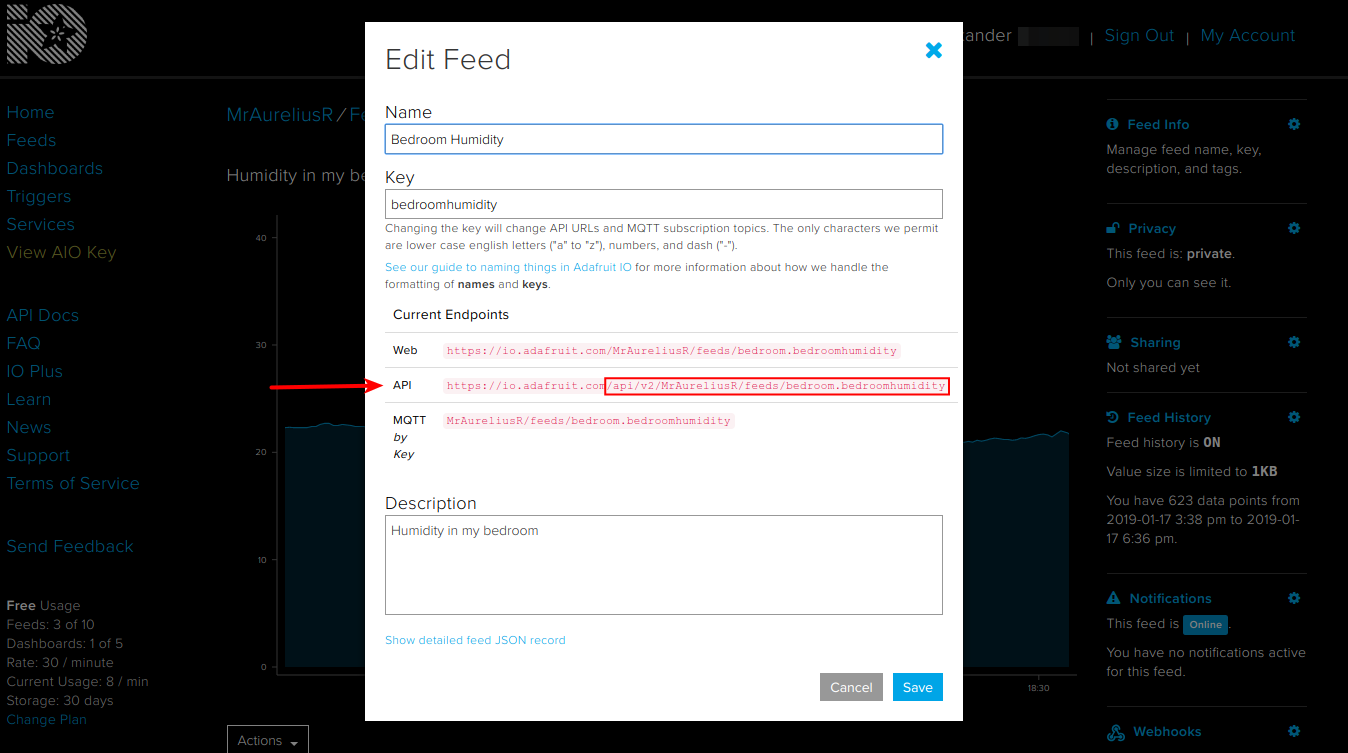
After signing up, create two feeds, and then view your AIO Key Once you've created the two feeds, click on the name of one of the feeds, and then click Feed Info in the right-hand toolbar. This brings up all the info about the feed, including the API endpoint that we will need later. Make sure to also click on View AIO Key -- we will need this key later as well.
![]()
If you click on Feed Info, you can see the API URL generated for you
That's all we need for now! Later on, feel free to play with creating Dashboards to view your data. -
3Installing libraries and breadboarding
In order for this project to build and upload successfully, we need to add a few more libraries to our Arduino environment. Fire up Arduino, and then just like way back in part 1, open the Library Manager by pressing Ctrl-Shift-I. In the search box, type DHT, and scroll down until you see Simple DHT. Click install. It should look like this:
![]()
After that, enter OneWire into the search box, and install the OneWire library which looks like this:
![]()
Now that we've got that out of the way, let's take a look at our circuit, and the sensors we will be using. Both the DHT22 and the DS18B20 are very widely available, and quite inexpensive. They can be found from the usual suspects, as well as auction websites and Chinese importers. The DS18B20 was made by Dallas, who were acquired by Maxim in 2001.
The DHT22 is a low-cost humidity sensor with surprising accuracy for the price. It actually has a built-in sensor similar to the DS18B20 for thermal compensation of the humidity sensor. The reason I am collecting temperature data from a separate DS18B20 is because I have one on a longer wire, encased in a metal probe. This allows me to place the probe away from the DHT sensor, meaning I can sample temperature from two places at once if needed. However, if you only have one or the other (or a different sensor altogether) this project will still work with some modifications.
![]()
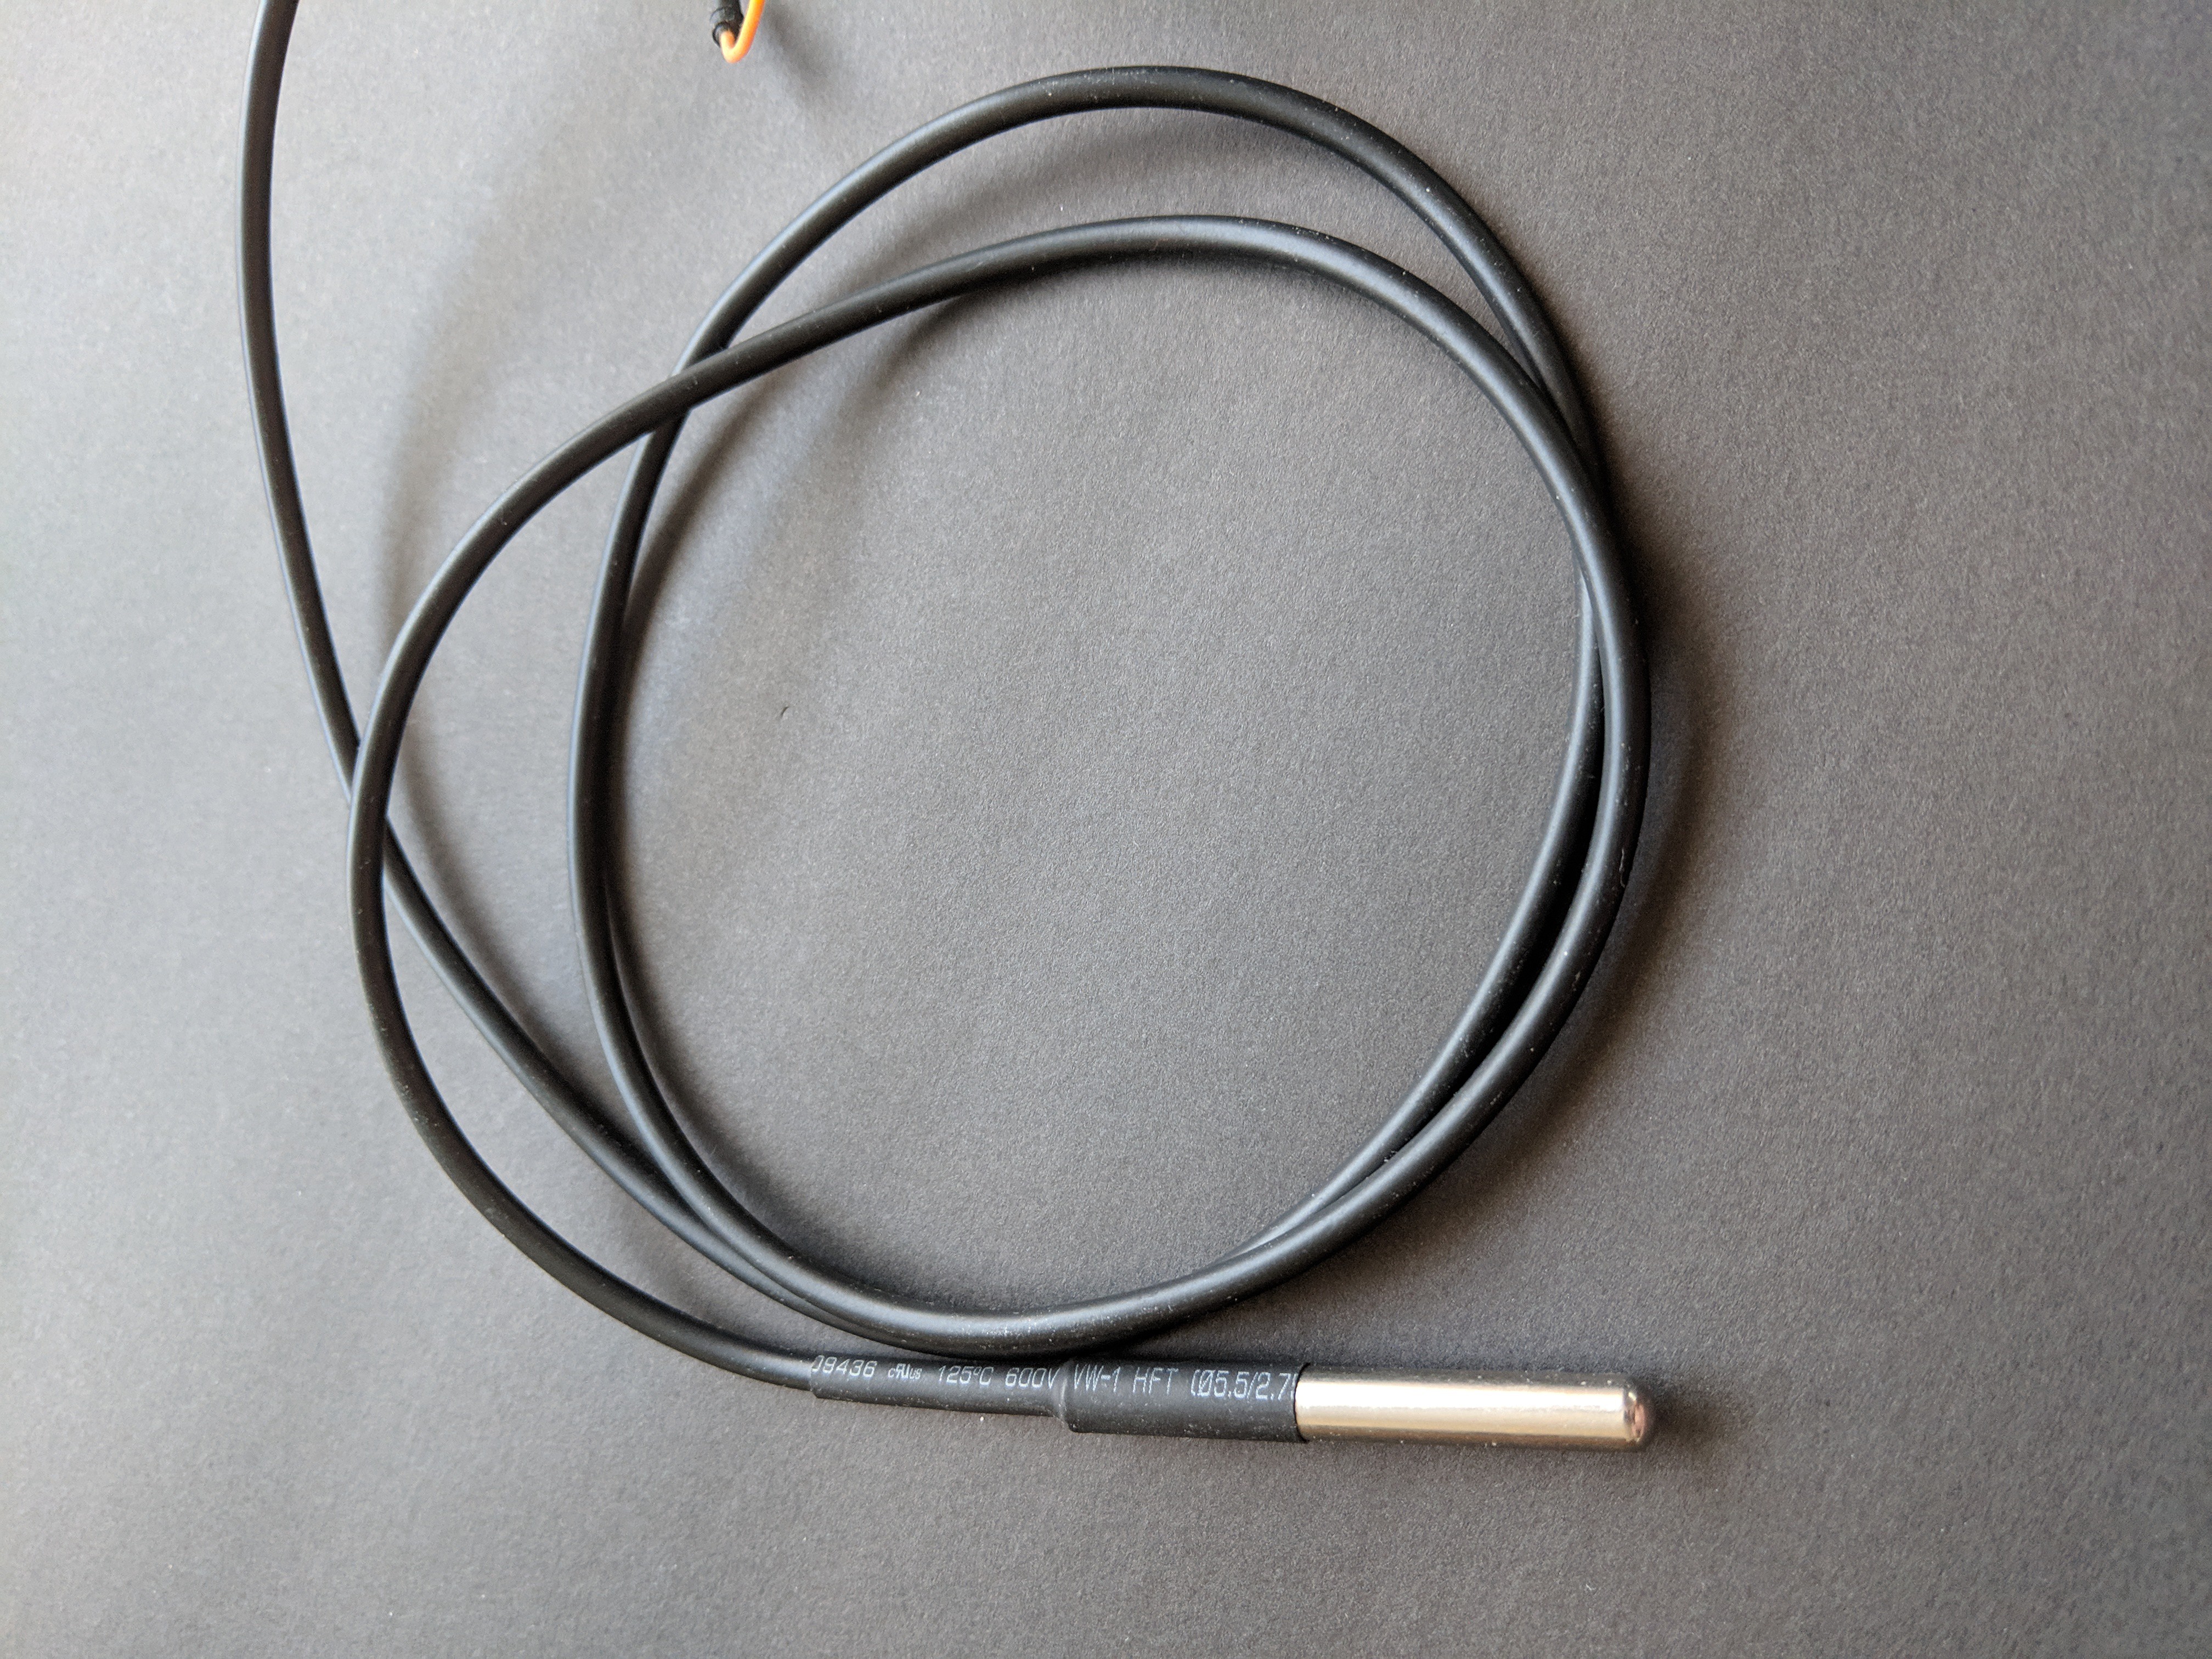
A waterproof, cabled DS18B20 Grab a breadboard, a couple 1K resistors, your sensors and your ESP8266 and let's put it all together!
![]()
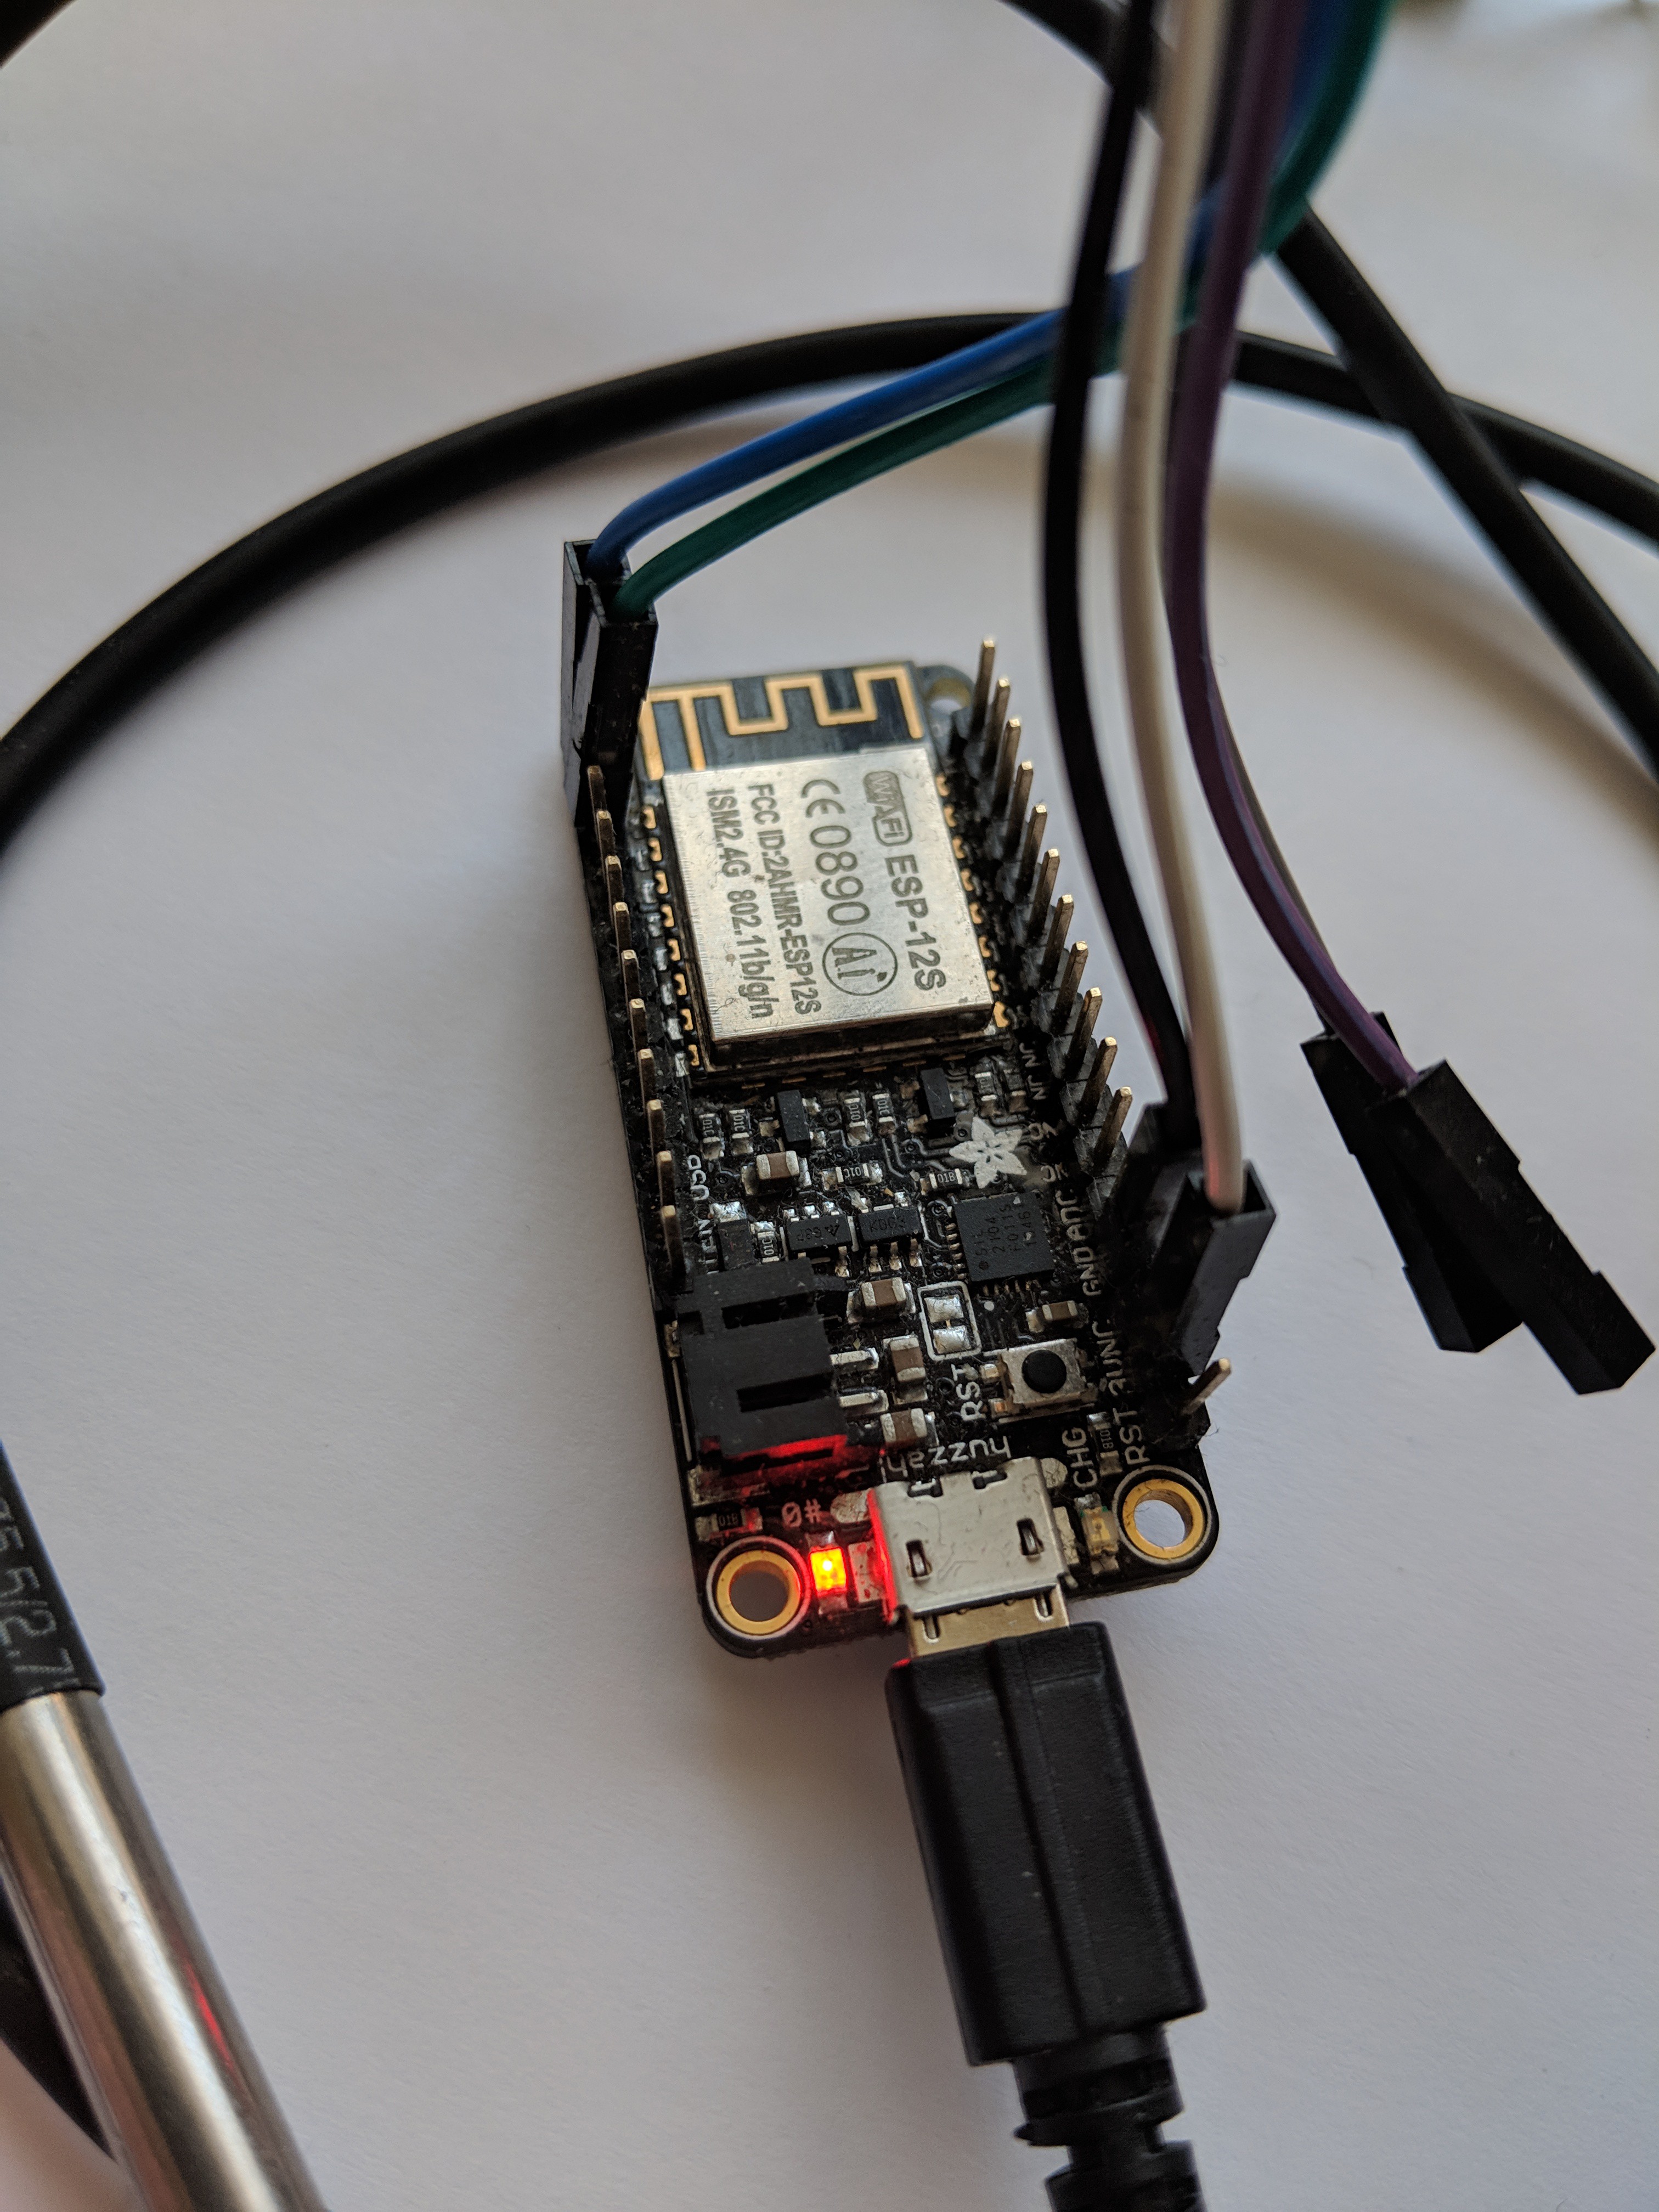
Our circuit with an Adafruit Feather HUZZAH ESP8266 The above diagram uses an Adafruit Feather HUZZAH but you can use any ESP8266 board. Just make sure you connect the sensors to the same pins, or edit the code to match the pins you picked. Also, be sure to power the sensors from 3.3V as the ESP8266's pins cannot handle 5V!
-
4Using the Adafruit HTTP API
All right -- it's time to dive in head first! I know this may seem like a lot to absorb at once, but stick with it and you'll get through to the end! Take your time to understand each part as we cover it.
As mentioned earlier, almost all HTTP requests also have extra data sent with them, in the form of headers. This is how many HTTP-based APIs work. Headers are simply a list of pairs of data, typically the name of a value and the value itself. For example, when we make any request to Adafruit IO, we need to prove that we have authentication to access the data we are requesting. We do this by adding a key in the header called X-AIO-Key. This is paired with the Adafruit IO key that we copied earlier.
We will be sending our data to Adafruit IO in JSON format, using a POST request to the URL we got from the Feed Info page earlier. We don't need to dig too deeply into JSON; all we need to know is that it's a way of storing data in a nice, organized format. In order to tell the Adafruit server what data format we are using, we need to send another header called Content-Type, and the value will be application/json.
An example JSON file might look like this:
{
  "value": "string",
  "created_at": "string",
  "lat": "string",
  "lon": "string",
  "ele": "string",
  "epoch": 0
}
You can see that it's just a list of key:value pairs. Both the key and the value are surrounded in quotes, even if "value" is an integer or a floating-point value. The only exception is the "epoch" value, which again we won't be using. The above example is actually from the Adafruit IO documentation, showing the values we can pass to log data to the server. We will only be using the "value" field, so our requests will simply be of the form:
{ "value": "22.4" }All the other fields are optional, and we won't be using them. So, to summarize, we need three things:
- The Adafruit IO key, in the X-AIO-Key header
- The Content-Type: application/json header
- The JSON data itself { "value": "20.4" }
Pretty simple when it's broken down to its component parts!
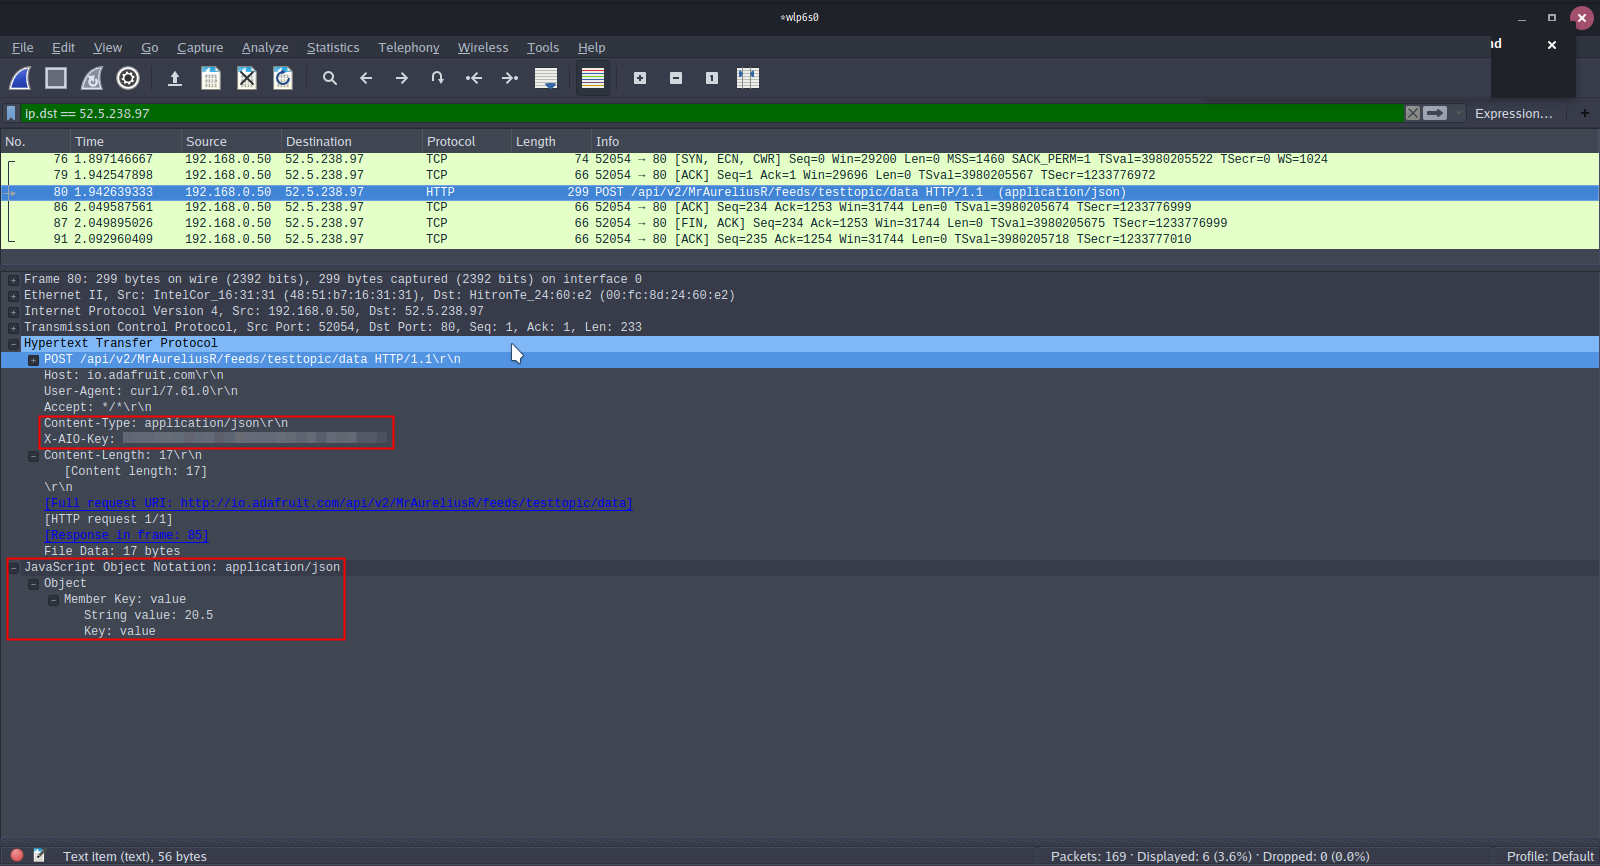
Here's a look at the packet, sniffed by Wireshark. Don't worry about all the other stuff on screen, just notice that our headers and value are the only things we need to concern ourselves with -- the Arduino libraries take care of everything else! Also, ignore the \r\n -- that's just an artefact in Wireshark, and not something we need to worry about.
![]()
The highlighted sections show the important parts of our packet The tradeoff for this simplicity is that we need to include a lot of header files, and include a few bits of complex code to set up a few things for us. However, we don't need to fully understand what these bits do, as long as we understand what they are for.
-
5Putting it all together
The ESP8266 libraries that we installed include specific libraries for Wi-Fi control, as well as HTTP client control. We will also be using the aforementioned OneWire and SimpleDHT libraries, as well as an SSL library so that our communication with the Adafruit IO server can't be snooped on by anyone.
We need to include all the following header files:
#include <ESP8266WiFi.h>
#include <ESP8266WiFiMulti.h>
#include <ESP8266HTTPClient.h>

#include <WiFiClientSecureBearSSL.h>

#include <OneWire.h>
#include <SimpleDHT.h>
The first three are part of the ESP8266 libraries, and they control the Wi-Fi portion of the board, as well as generating and formatting our HTTP requests. The fourth include is the SSL library we will be using to send our data encrypted. The last two are the libraries we installed earlier to communicate with the two sensors.
The next section is just initializing variables, as well as starting the OneWire and DHT buses:
ESP8266WiFiMulti ESPWifi;
OneWire dsBus(5); // DS18B20 on pin 5
SimpleDHT22 dht22(4); // DHT22 on pin 4

const char *ssid = "your_ssid";
const char *ssidPass = "your_password";
const char *url = "https://io.adafruit.com";
const char *io_key = "your_io_key";
const char *humid_url = "your_humidity_url";
const char *temp_url = "your_temperature_url";

const uint8_t fingerprint[20] = {0x77, 0x00, 0x54, 0x2D, 0xDA, 0xE7, 0xD8, 0x03, 0x27, 0x31, 0x23, 0x99, 0xEB, 0x27, 0xDB, 0xCB, 0xA5, 0x4C, 0x57, 0x18};
You will, of course, need to change those variables to your SSID and password, your Adafruit IO keu, and the URL for the feeds we created earlier. Note that the URLs are everything after https://io.adafruit.com, so everything from the slash onwards. The fingerprint variable is the fingerprint of Adafruit's HTTPS certificate. We need this to confirm we are connected to the correct server with the correct certificate.
Our setup() function is quite simple:
void setup() {
  WiFi.mode(WIFI_STA);
  ESPWifi.addAP(ssid, ssidPass);
  Serial.begin(115200);
}
We simply enable the wi-fi in station mode, and then connect to the wi-fi network specified earlier. We also start the Serial terminal at 115200 baud, so we can print debug messages if needed. Now we get to the slightly more complex part. Remember -- you don't need to know how everything works, as long as you understand why it's there.
The beginning of the loop() function is again quite simple:
void loop() {
  uint8_t data[12];
  uint8_t addr[8];
  uint8_t i;
  uint8_t presence = 0;
  float celcius, humidity;
We just create some variables that will hold information from the sensors later on. Now we need to get the temperature from the DS18B20. To do so, we need to read the DS18B20 datasheet. The important points to know are that all 1-Wire communications start with a reset pulse. Following this, we can either send the 64-bit address of the sensor we want to talk to, or, if there's only one sensor on the bus (as is the case for us) we can send the SKIP ROM command to just talk to the one device on the bus. That's what we do in our case. We send the command 0x44, which tells the sensor to start a temperature conversion. This takes about 750ms, so we wait 800ms to be on the safe side.
Then we send another reset pulse, another SKIP ROM, but this time we send command 0xBE, which tells the sensor we want to read out the values from its internal memory. We only need the first two values, but just in case we want to look at the values in a future version of this code, we read out all 9 values.
The first two values together make up the 16-bit value which represents the temperature. The upper 12-bits represent the whole number, and the last 4 bits encode the fractional portion. We concatenate these together, and an easy way to convert it to celcius is to just divide what we get by 16. Now we have our temperature!
  // Get the temperature from DS18B20
  dsBus.reset();
  dsBus.skip(); // skip ROM
  dsBus.write(0x44); // start converstion
  delay(800);
  dsBus.reset();
  dsBus.skip();
  dsBus.write(0xBE);
    for(i = 0; i < 9; i++) {
    data[i] = dsBus.read();
  }
  int16_t result = (data[1] << 8) | data[0];
  celcius = (float)result/16.0; // convert to celcius
Getting the humidity from the DHT22 is much easier. The SimpleDHT library is built with the DHT22 in mind, so all we need to do is call a single function, dht22.read2(). This does all the hard work for us. We pass it the variable we want the humidity stored in, and the function does the rest.
Note that we actually pass the address of the variable; this is called "dereferencing" the variable and is a topic for another day. It's why we put the ampersand (&) before the variable name. If you are interested, read up on pointers and dereferencing in C!
Now we get to a bit of a hand-wavy part, where you just have to trust me. Trying to explain what these next few lines do is way beyond the scope of this tutorial. In a nutshell, the if statement checks to see if we are connected to Wi-Fi. If we are, we then create a new Secure Wi-Fi object which we will use for all the HTTPS communication in the rest of the if statement. We give it the fingerprint for the server we want to connect to, so it can confirm that we have connected to the right server.
  if((ESPWifi.run() == WL_CONNECTED)) {
        std::unique_ptr<BearSSL::WiFiClientSecure>client(new BearSSL::WiFiClientSecure);
        client->setFingerprint(fingerprint);
Alright, it's time to send our data to the cloud! We create a new HTTPS client, and we pass it the Secure Wi-FI object from the last section, as well as the URL of the server we want to connect to. Then, we tell it what headers we want to add (in our case, the ones discussed in step 4 -- X-AIO-Key and Content-Type) as well as their respective values. Finally, we make the POST request, with our very basic JSON as the data we are sending. The backslashes in the POST request tell the compiler that the following character is meant to be a literal character, and that it's not part of the code. Otherwise, the double quote would end the string and we would get errors.
We check to see if the return code was 200 (which means success) and then we end the HTTPS session.
    HTTPClient https;
    https.begin(*client, String(url) + String(humid_url));
    https.addHeader("X-AIO-Key", io_key);
    https.addHeader("Content-Type", "application/json");
    int httpCode = https.POST("{ \"value\":\"" + String(humidity) + "\" }" );
    if(httpCode == 200) {
        Serial.println("Humidity submitted successfully!");
    }
    https.end();
We repeat this exact same process, but this time we send the temperature instead of the humidity. There's also a 100ms delay between the two connections to space things out a bit.
    https.begin(*client, String(url) + String(temp_url));
    https.addHeader("X-AIO-Key", io_key);
    https.addHeader("Content-Type", "application/json");
    httpCode = https.POST("{ \"value\":\"" + String(celcius) + "\" }" );
    if(httpCode == 200) {
        Serial.println("Temperature submitted successfully!");
    }
    https.end();
After that, we wait for 10 seconds, and then we do it all over again!
You can view the whole file over on GitLab!
-
6Check your results!
Once you have the code running on your ESP8266, be sure to go back to Adafruit IO and check to see what data is being sent! You should see datapoints appearing on both feeds. If you want, you can create a dashboard, and then add these feeds to display them visually. This can make the data much easier to understand and interpret.
I know this seems like a big step up in difficulty from Part 2, so make sure to take time to understand the code and what is going on. Check the Getting Help section in the project details if you need to ask questions! I'm usually quite responsive to inquiries. Stay tuned for more upcoming tutorials -- we're going to take what we've learned to create a full-scale IoT project!
![]()
 Alexander



Discussions
Become a Hackaday.io Member
Create an account to leave a comment. Already have an account? Log In.
is that transistor for protection against over voltage and garant an equal amperage? i could not open the frizing gif picture for perusing the type of tr. looks cool never used a feather mcu.
Are you sure? yes | no