 Andy Preston
-
1Screw Thread on Microscope objectives

If you've tinkered with optical devices before, you'll be familiar with the threads being weird (non) "standard" sizes and the wallet-unfriendly prices you can expect to pay for taps and dies.
Most microscope objectives use the standards of The Royal Microscopical Society (RMS) for universal compatibility.
Which, I believe is the same as the Deutsche Industrial Normen (DIN) standard. (please correct me if I'm wrong)
The old microscope bodies I found on E. bay are of mid-last-century English manufacture and I'd assume they are as RMS as you could possibly be and the objective I've used is (or was) DIN A 10X and they seem to fit together perfectly.
If you want to start your quest for parts with a trip down this rabbit-hole, here's where I started:https://www.microscopyu.com/microscopy-basics/microscope-objective-specifications
-
2Getting The Lens Out (1)
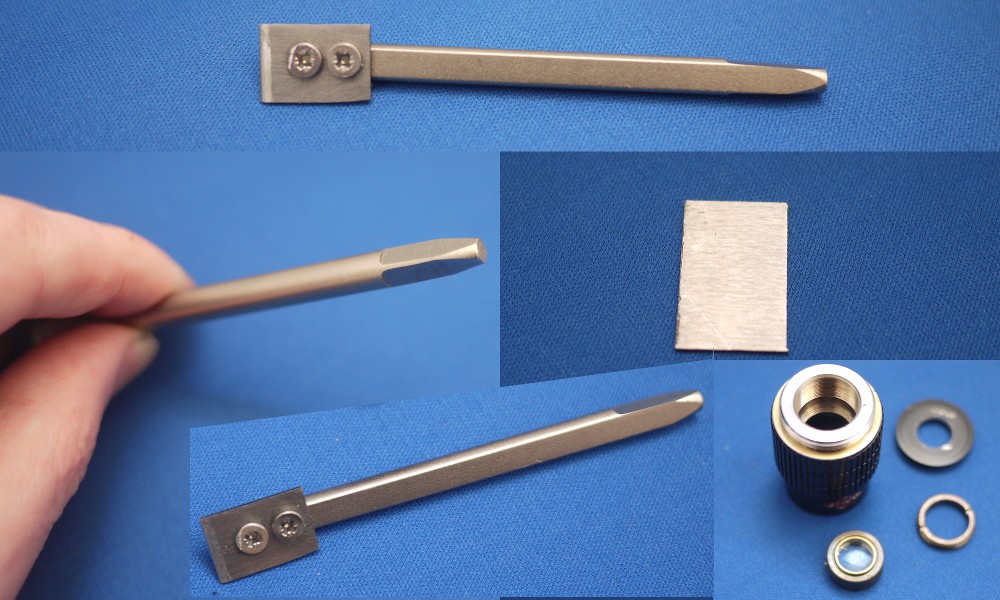
Your objective is likely to be built differently to mine and you'll have to use your own ingenuity to prepare it. I mentioned that optics seem to love their own size standards, well I needed custom tools too:
![]()
I cut a piece of 2mm toolsteel to the right width to match retaining ring inside the objective. drilled a couple of holes in it, hardened and tempered it and then ground the end to fit the slot in the retaining ring like a screwdriver would. I mounted this on an old axle "harvested" from a broken dot-matrix printer (quick tip: dot matrix have loads more useful metal parts than more up-to-date printers). This axle was round with one flattened face that I could easily join the tool steel to. I matched the holes by clamping the tool steel to the axle and punching the axle through the previously drilled holes in the toolsteel. After tapping the holes in the axle, I it could be fixed with a pair of machine screws (I think they were M3). The final thing did come out a bit wonky but it did do the job. I also squared off the other end so that if it needed a bit of effort getting the retaining right moving, I could use a tap wrench as a handle (it didn't really need this in the end)
-
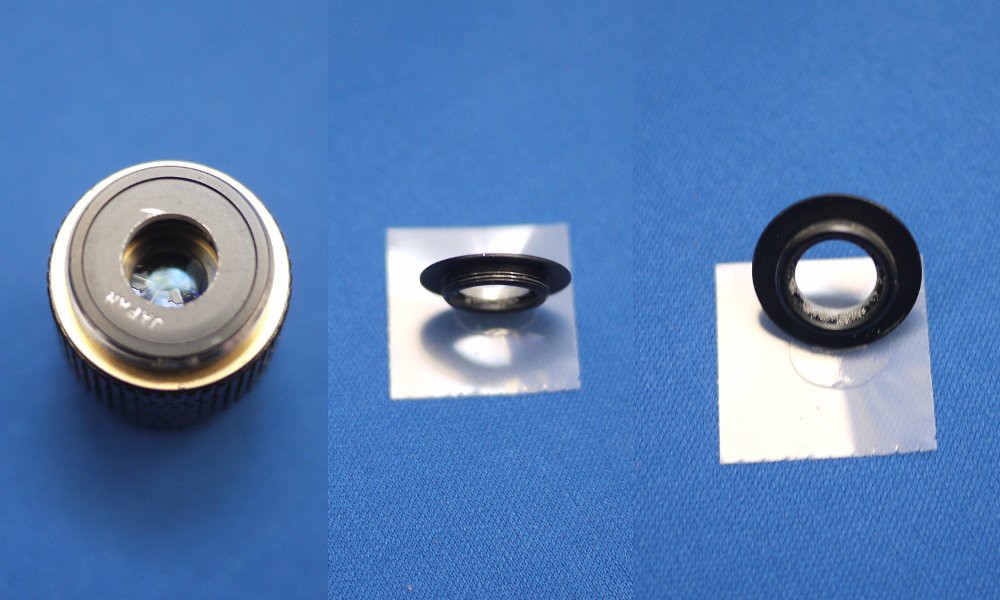
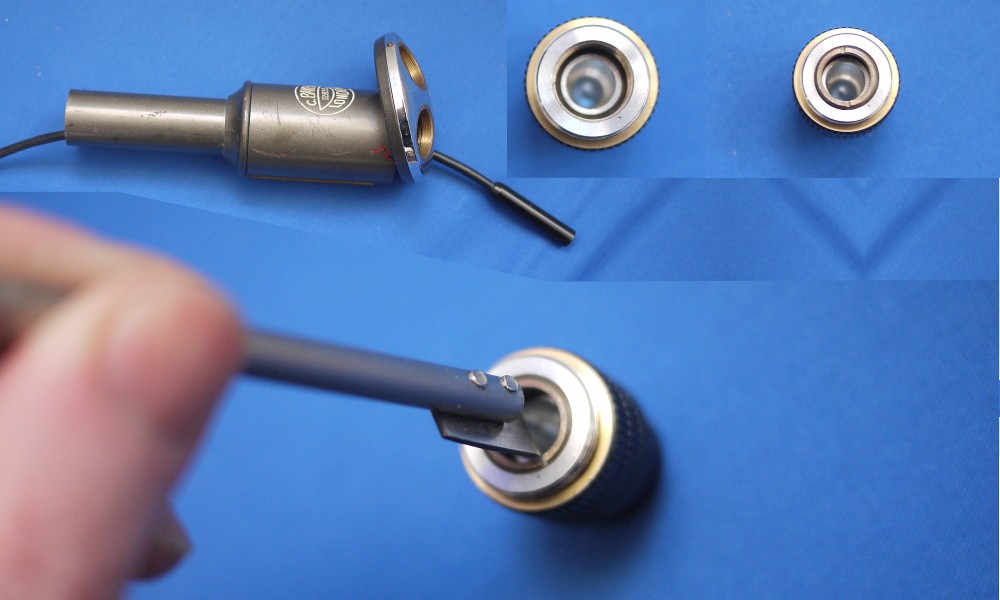
3The cap on the lens assembly
There's a small cap screwed on in front of the lens assembly. That can easily be unscrewed with a thumb and a bit of friction:
![]()
We'll need to save this for later modification.
-
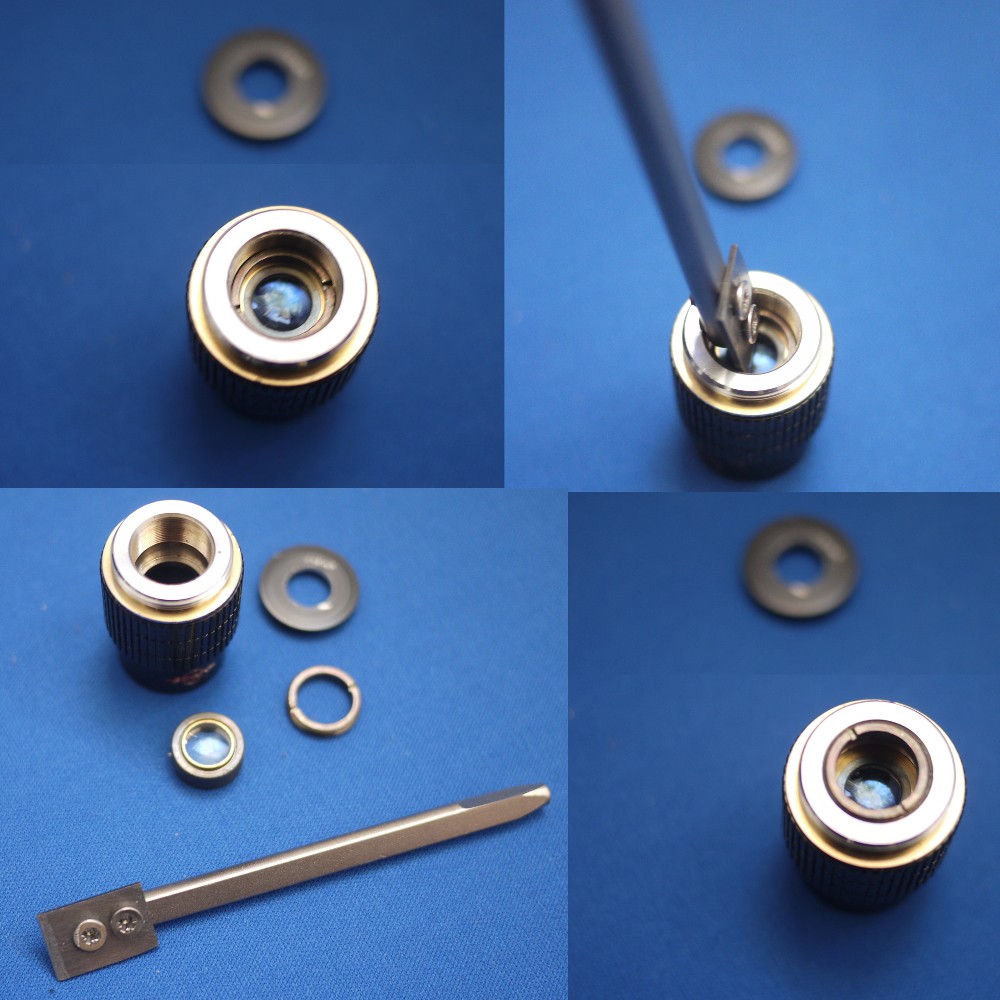
4Getting The Lens Out (2)
Once the cap is removed, we can use our super-width screwdriver to get the lens retaining ring out.
![]()
We'll need the retaining ring for later but there's nothing to do with the lens apart from add it to the optical "junk" bin.
-
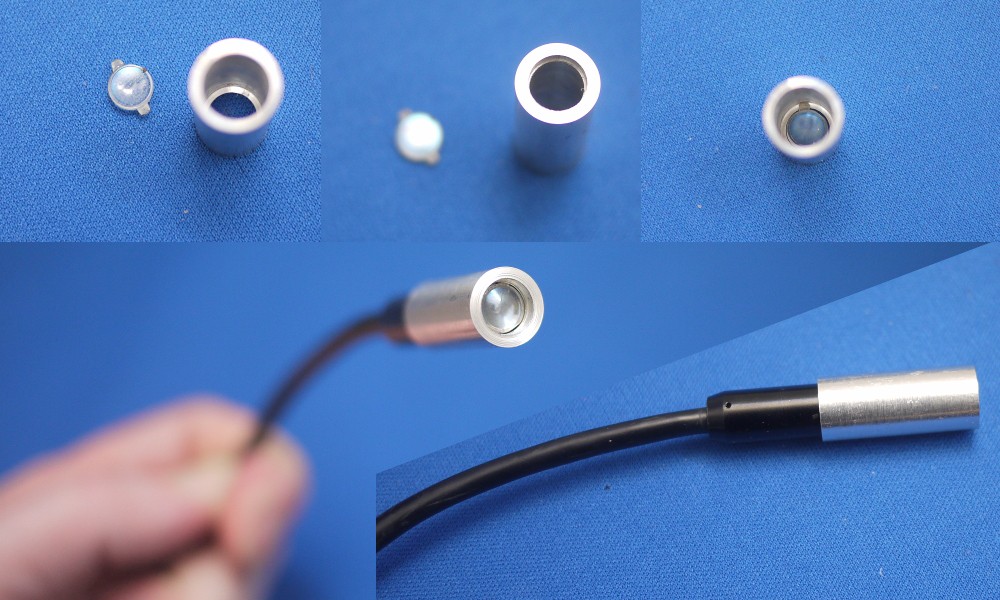
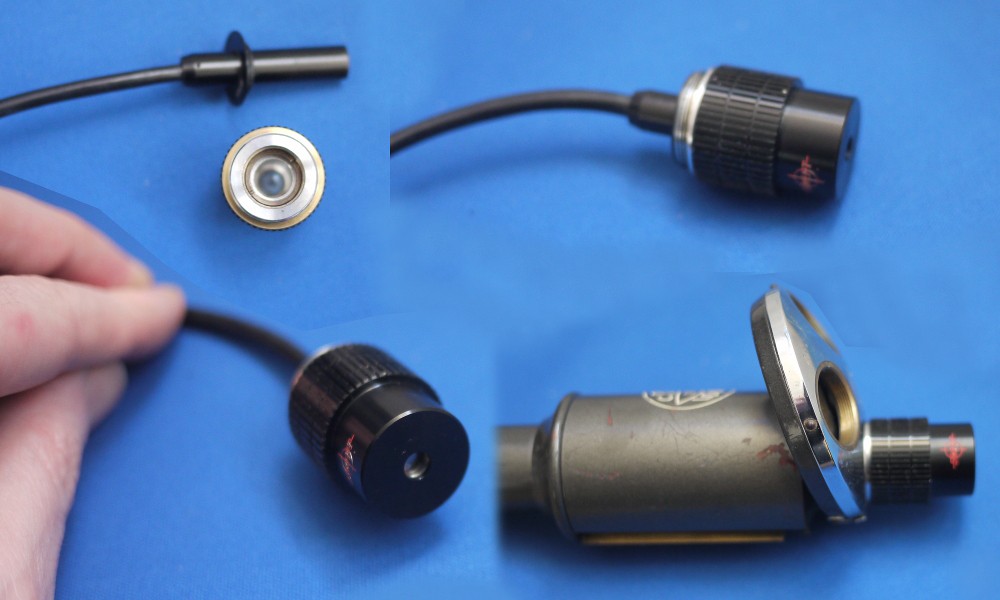
5Webcam sleeve.
This was originally the dummy objective to hold the camera... it's now a lot thinner to act as padding between the inside of the objective and outside of the camera.
![]()
I was lucky here, as the two little tabs on the lens harvested from the DVD player were the same diameter as the camera body.
The sleeve's length should be about the right length to fit inside the objective and have just enough room for the retaining ring to hold it firmly in place.
The outer diameter should be the size of the inside of the objective.
For nearly all of it's length, it should have an inner diameter that matches the outer diameter of the camera.
But with a small ridge at one end to support the DVD lens but as narrow as possible.
Assembly is simple... just drop the lens down the tube (about 97 times to get it to land the right way up) and just in the camera until everything is good and tight.
-
6Assembly 1
![]()
-
7Assembly 2
![]()
-
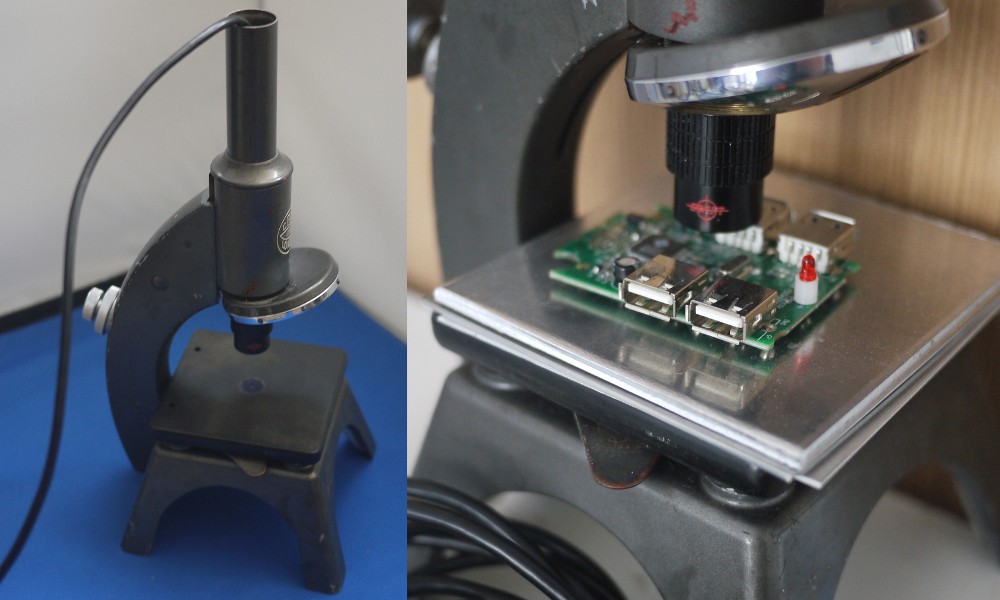
8Almost Finished - Adjust Focal Length
It looks like it's finished once all the microscope parts are reassembled, until we realise that the focal length is somewhere between poor and completely useless... To get anything into focus we'll need to pile up a load of stuff on the stage. We then need to measure how much higher the stage has become.
![]()
-
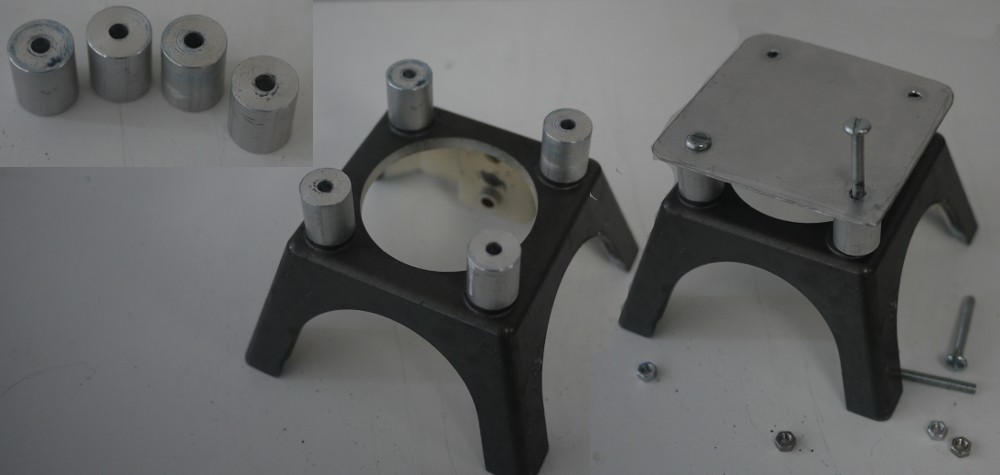
9Fix The Focal Length
I ended up removing the stage (i'm not going to be using the under-stage lighting or condenser) which revealed 4 nice bold holes on the corners of the base.
![]()
-
10"Stilts" For The Stage
It was fairly simple to machine 4 parts from aluminium that will raise the new stage up to the height difference I measured drilled to accept bolts that fitted the holes already in the base. The new stage is just a plain aluminium sheet roughly the size of the plate that topped the old stage.
![]()
USB Microscope
Assembling my own USB microscope out of old junk, spare parts and a little bit of home-shop metalwork


Discussions
Become a Hackaday.io Member
Create an account to leave a comment. Already have an account? Log In.