 jomega
-
1Xbox One X Teardown
Follow the excellent instructions provided by ifixit
https://www.ifixit.com/Teardown/Xbox+One+X+Teardown/99609 -
2Case Fabrication
Use the stl files provided to machine the aluminum panels. Use your favorite CAD software to export them as DXF files. I would recommend finding a local machine shop that can work with you. If you are more adventurous, you can also purchase a desktop router like the Shapeoko or X-Carve to do the job.
-
3Test components
Do a "dry" assembly of the parts on your work bench. Using an appropriate power supply, turn everything on and verify that the screen actually displays the Xbox HDMI output. It's a lot easier to fix at this stage than once everything is assembled.
-
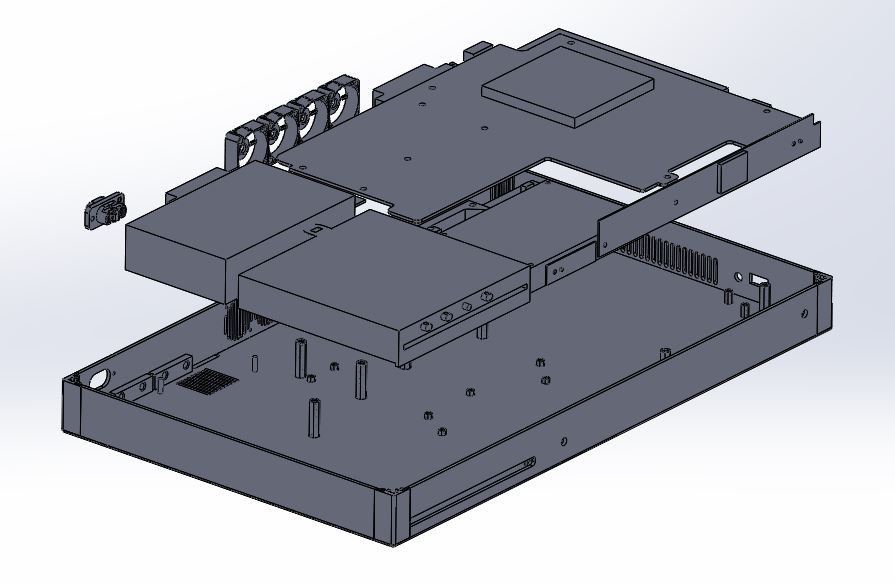
4Mounting the components
Glue the standoffs to the appropriate locations marked on the panels and wait for everything to cure. Then use pan head phillips to screw all of the components in place. You can use this image for reference.
![]()
-
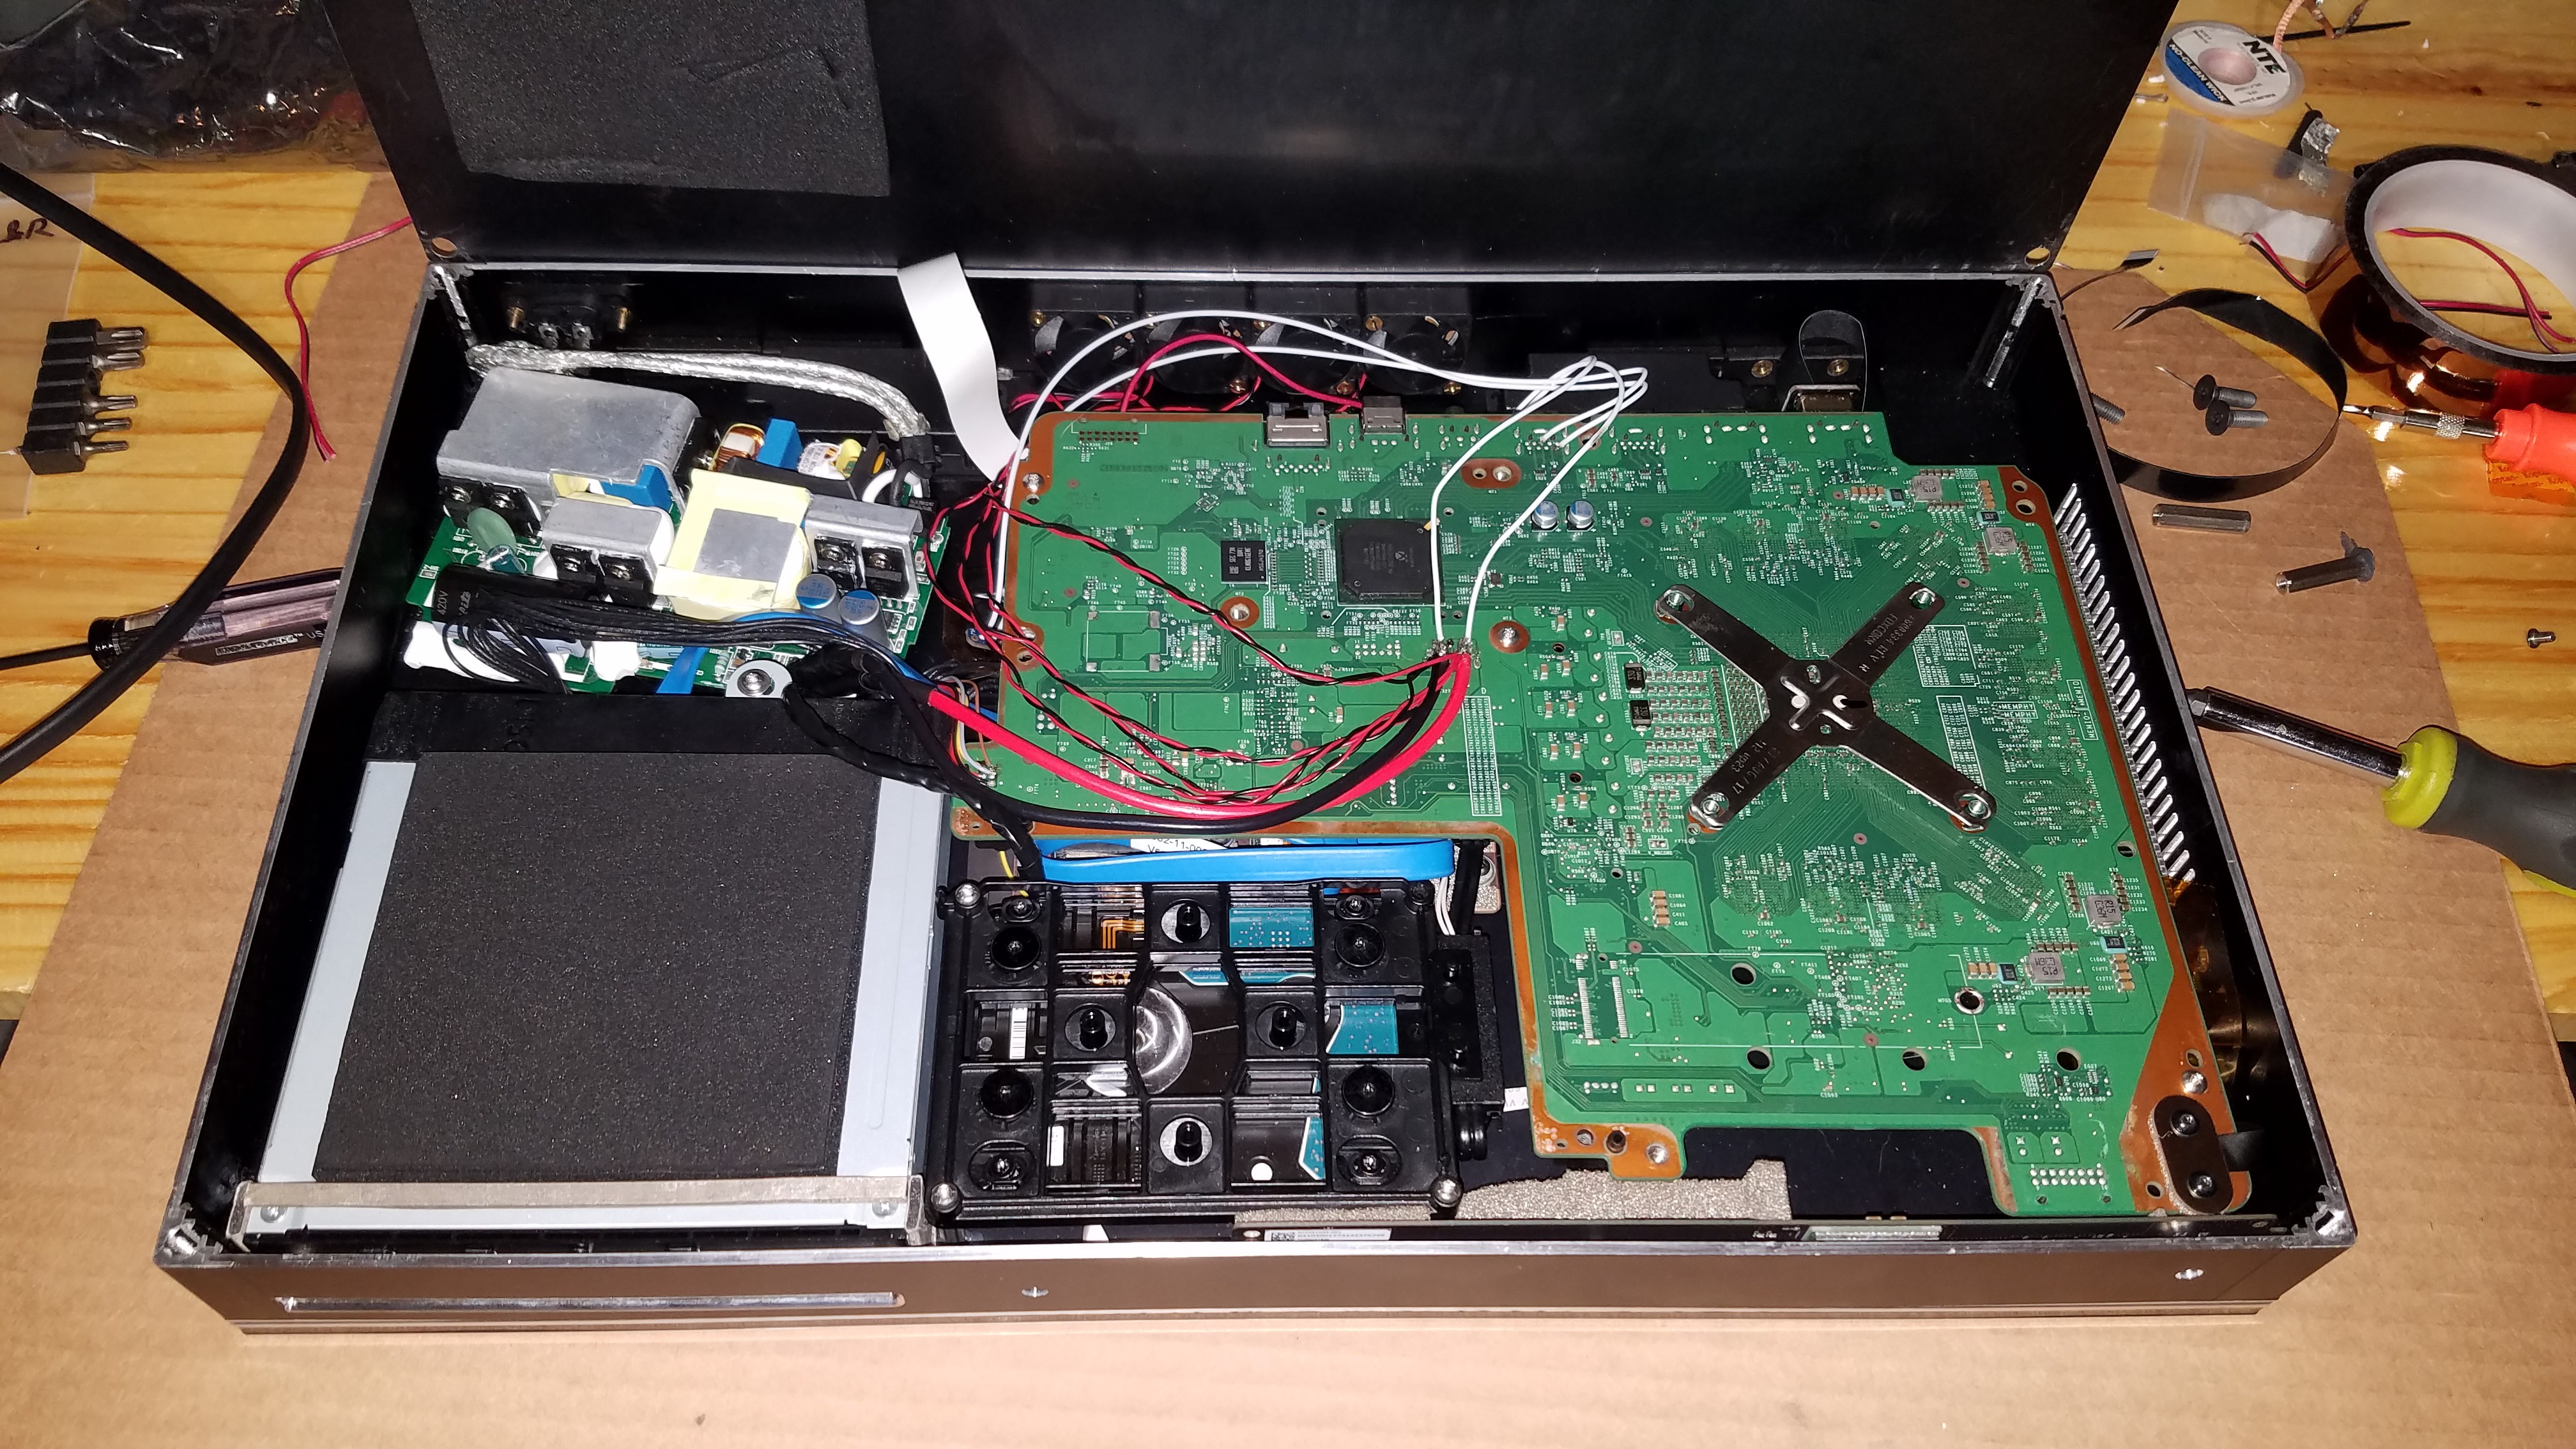
5Soldering
Due to the nature of the Xbox motherbaord, you will need a 150 watt soldering iron (pencil style) to do this smoothly. I highly recommend the JBC DDE-1B. Most hobbyist-grade irons don't have enough power. Tie the power supply to the mother board and tack on the wires for the fans and display driver. You can get 12V straight from the power supply and 5V from the USB ports. Make sure to test for shorts once everything is complete.
A finished unit will look like this. Note how the fans tap into the main 12V power supply on the motherboard.
![]()
-
6First boot
Plug the unit into the AC outlet. If the fans do not come on, abort immediately. This points to bigger problems. It is very important that the unit is completely sealed at this point so that the cooling system works correctly.
Discussions
Become a Hackaday.io Member
Create an account to leave a comment. Already have an account? Log In.