-
Cut/Uncut
12/31/2018 at 15:55 • 0 commentsMy preferred way of doing a repair is to diagnose the problem with pin-point accuracy. This often means eliciting the undesired behaviour repeatedly while varying conditions.
In this case I need to make and break connections, and on a printed circuit that is not too easy. But I have a little bottle of silver conductive paint, and brought it out.
My hypothesis is that there is an unintended leakage of current between a probe line and a sense line in the matrix. This happens where the one passes over the other in a bridge.
So the next step was to identify the bridge(s) that gives the problem.
But first I had to undo my previous cut, which removed all power from the line. I will admit that I was trepidatious, because I did not know if my silver paint would be compatible with the printed conductor, or work at all. I had left the power on, and a few seconds after I'd painted the machine beeped and the fault condition was established again.
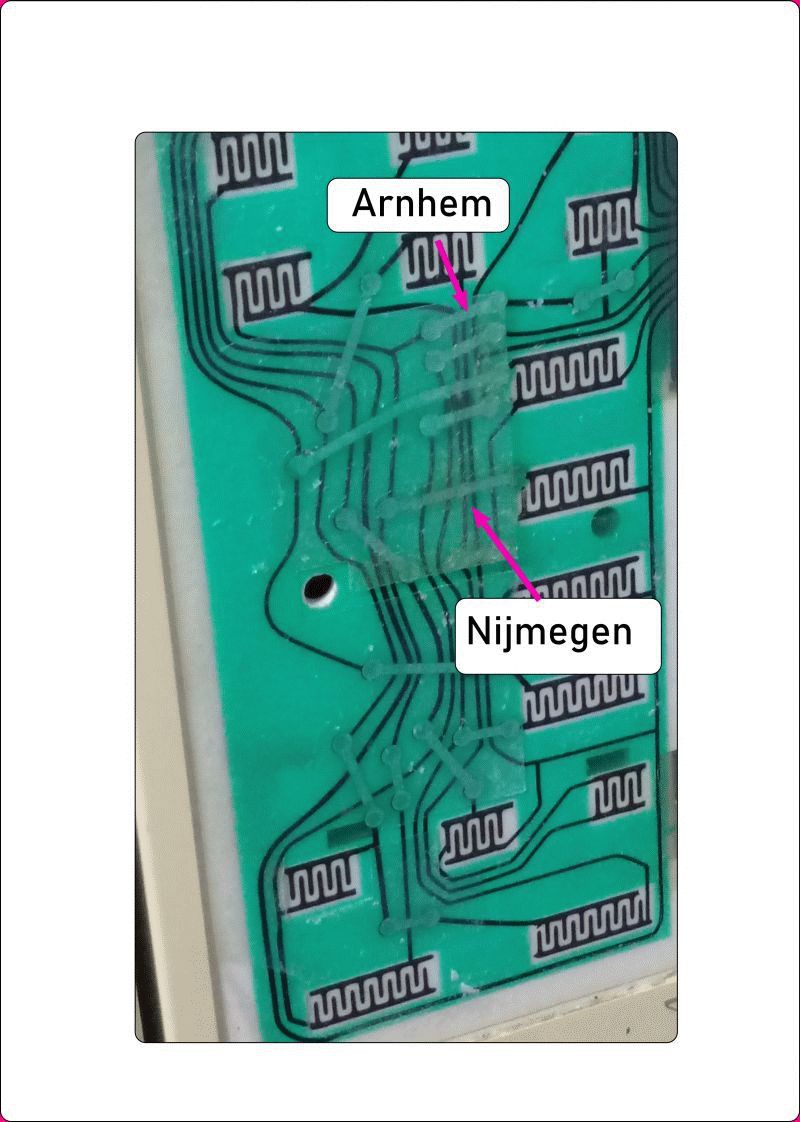
The matrix lines I suspect of involvement in the malfunction are Line 5 and Line 8. Line 5 is the probe line, and Line 8 is the sense line. They cross at two places, at bridges I call Arnhem and Nijmegen, shown on the picture below.
![]()
Cutting the track east of Arnhem bridge made the malfunction disappear, but also disabled the same number of buttons as did cutting the track west of Arnhem bridge.
This showed that the current leakage did not take place between Line 5 and Line 8 at Arnhem bridge.
Next I cut Nijmegen bridge itself, just before it crossed the first track. This removed the malfunction, and it only disabled Button H. To confirm that it was the crossing that cause the problem and not another leak somewhere else, I repaired the cut and made a new cut in Nijmegen bridge east of the tracks. This did not make the malfunction go away.
I made a few other cut/repair combinations, and I am now certain that the source of the leak is the crossing of Line 5 and Line 8 at Nijmegen bridge.
I can now start considering my options for repair. It might be as simple as nail varnish and silver conductive paint.
There is a danger that I might not complete this project, because the microwave oven is now usable, except for power level control. It reduces the urgency to complete the job.
-
A source
12/03/2018 at 15:09 • 0 commentsI hope that it would be possible to somehow repair the printed touchpad of the microwave oven, but there's a possibility that it might prove unfeasible.
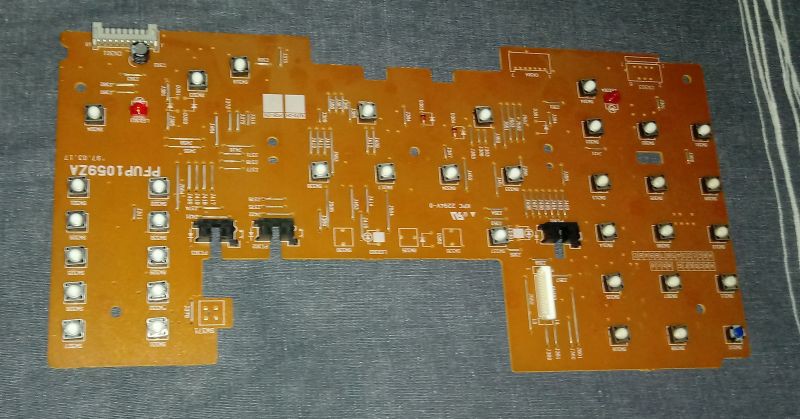
In that case, I might replace the membrane keypad with pushbuttons. Here I have a source of them: the front panel printed circuit of a fax machine that's on its way to e-heaven.
![]()
I only need 15, and here's 35, so ample margin for a learning curve and any accidents.
-
I've made a cut
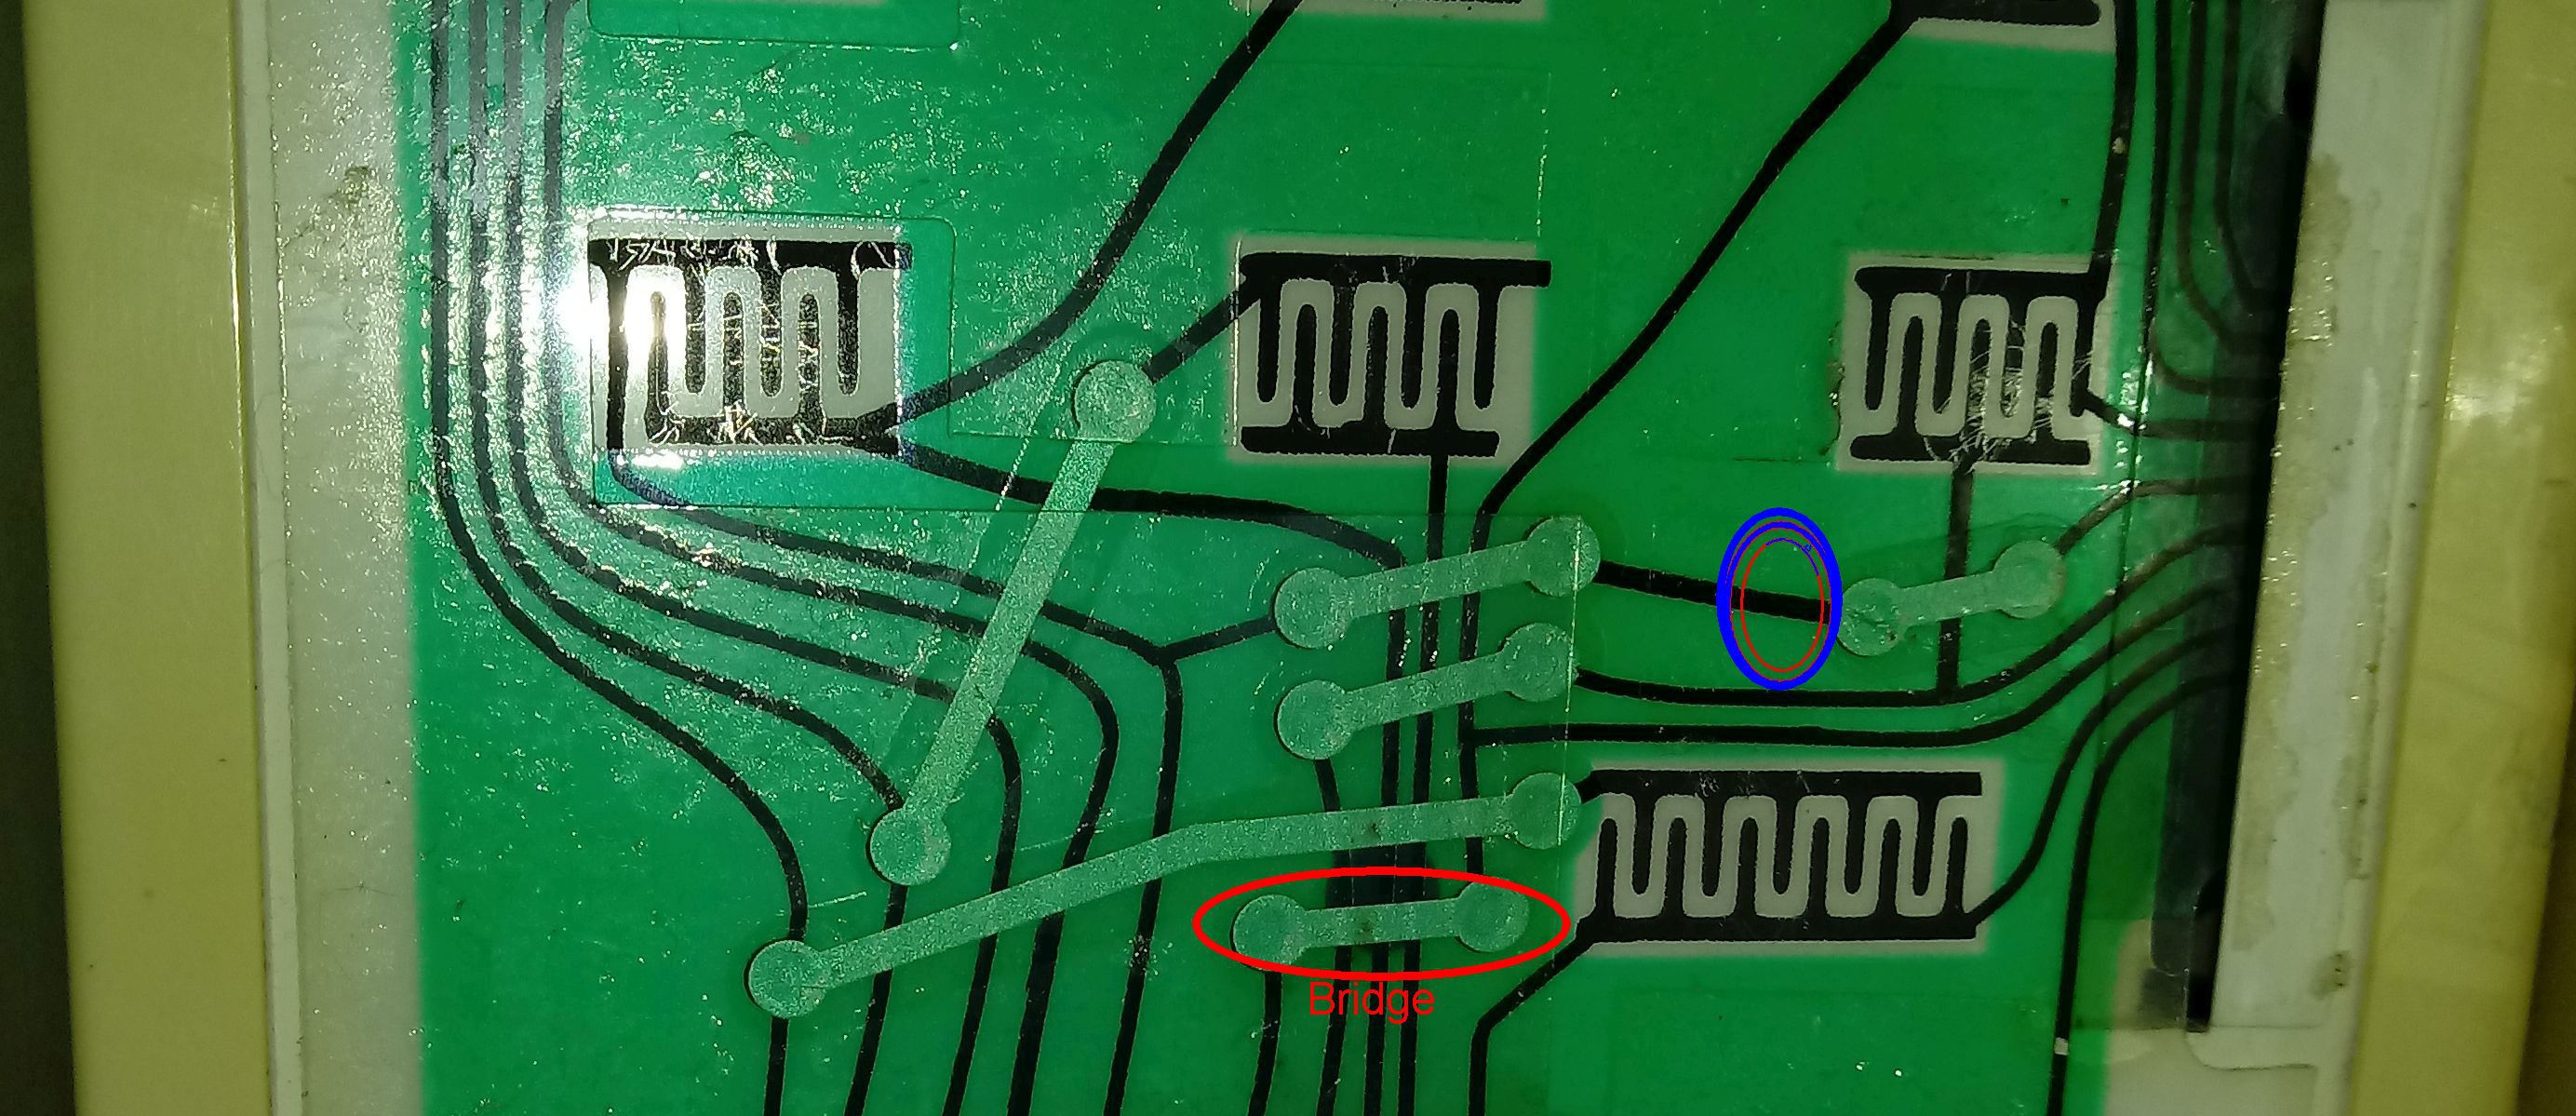
11/29/2018 at 19:59 • 0 commentsFrom a set of resistance measurements it seemed that there was a short circuit at button D (Time Cook). This is quite possible because there are two bridges where Conductor 5 (energizing, or incoming) crosses over Conductor 8 (detecting, or outgoing). I'll call these places 'bridges'. If this was true, then cutting the energizing conductor would de-energize the outgoing trace that is wrongly giving the signal.
I therefore cut the trace at the spot marked by the blue circle. The problem disappeared.
![]()
Unfortunately it all the buttons on Conductor 5 is now disabled. This includes the original ghosting button "Time Cook", and "Power Level" and "Stop Reset". This basically means that the microwave oven cannot be used for programmed functions any longer. But the "Min +" button still works fine, so I can still heat things at full power for a minute or longer. I can stop the cooking by opening the door, and I can restart it by pressing the "Start" button, so there is a measure of control.
But this is a hack, and I'm still aiming for a repair.
-
Worse than I feared.
11/29/2018 at 08:07 • 2 commentsI though that the problem might be simply that some deposition had formed between an incoming and outgoing conductor, causing a short circuit or a leak. In that case all that might be needed would be a simple cleaning.
I don't think it's going to be that simple. As far as I can tell all the traces are printed on, which means, I think, that it is the interleaved layer of insulation that is failing.
Microwave oven keypad repair
My trusty KIC microwave oven is no longer functioning, because of a keypad failure. I think it's repairable.
 Niel Malan

