 Hexabitz
-
1Generate your speech WAVE files
First step is to get some good .WAVE files for the speech or words you need in your project. You can, of course, record your own or somebody's else voice and you can search for the files online and download them. However, to meet your exact needs, you'll probably need a text-to-speech service. There are many options online, from free websites with clunky voices to Google and IBM ultra-realistic, deep learning text-to-speech engines. Here's are some good free options:
- https://www.text2speech.org/. Download WAVE files directly. Medium quality.
- IBM's Watson Text to Speech demo. Note that you can type something in a the demo and download an MP3 file for free (and without registration). Just use any MP3 to WAVE converter to convert the files.
I generated using the IBM's engine four WAVE files for: "Learn", "Play", "Correct" and "Wrong". You can download them in the file section.
-
2Convert the WAVE files into embedded C code
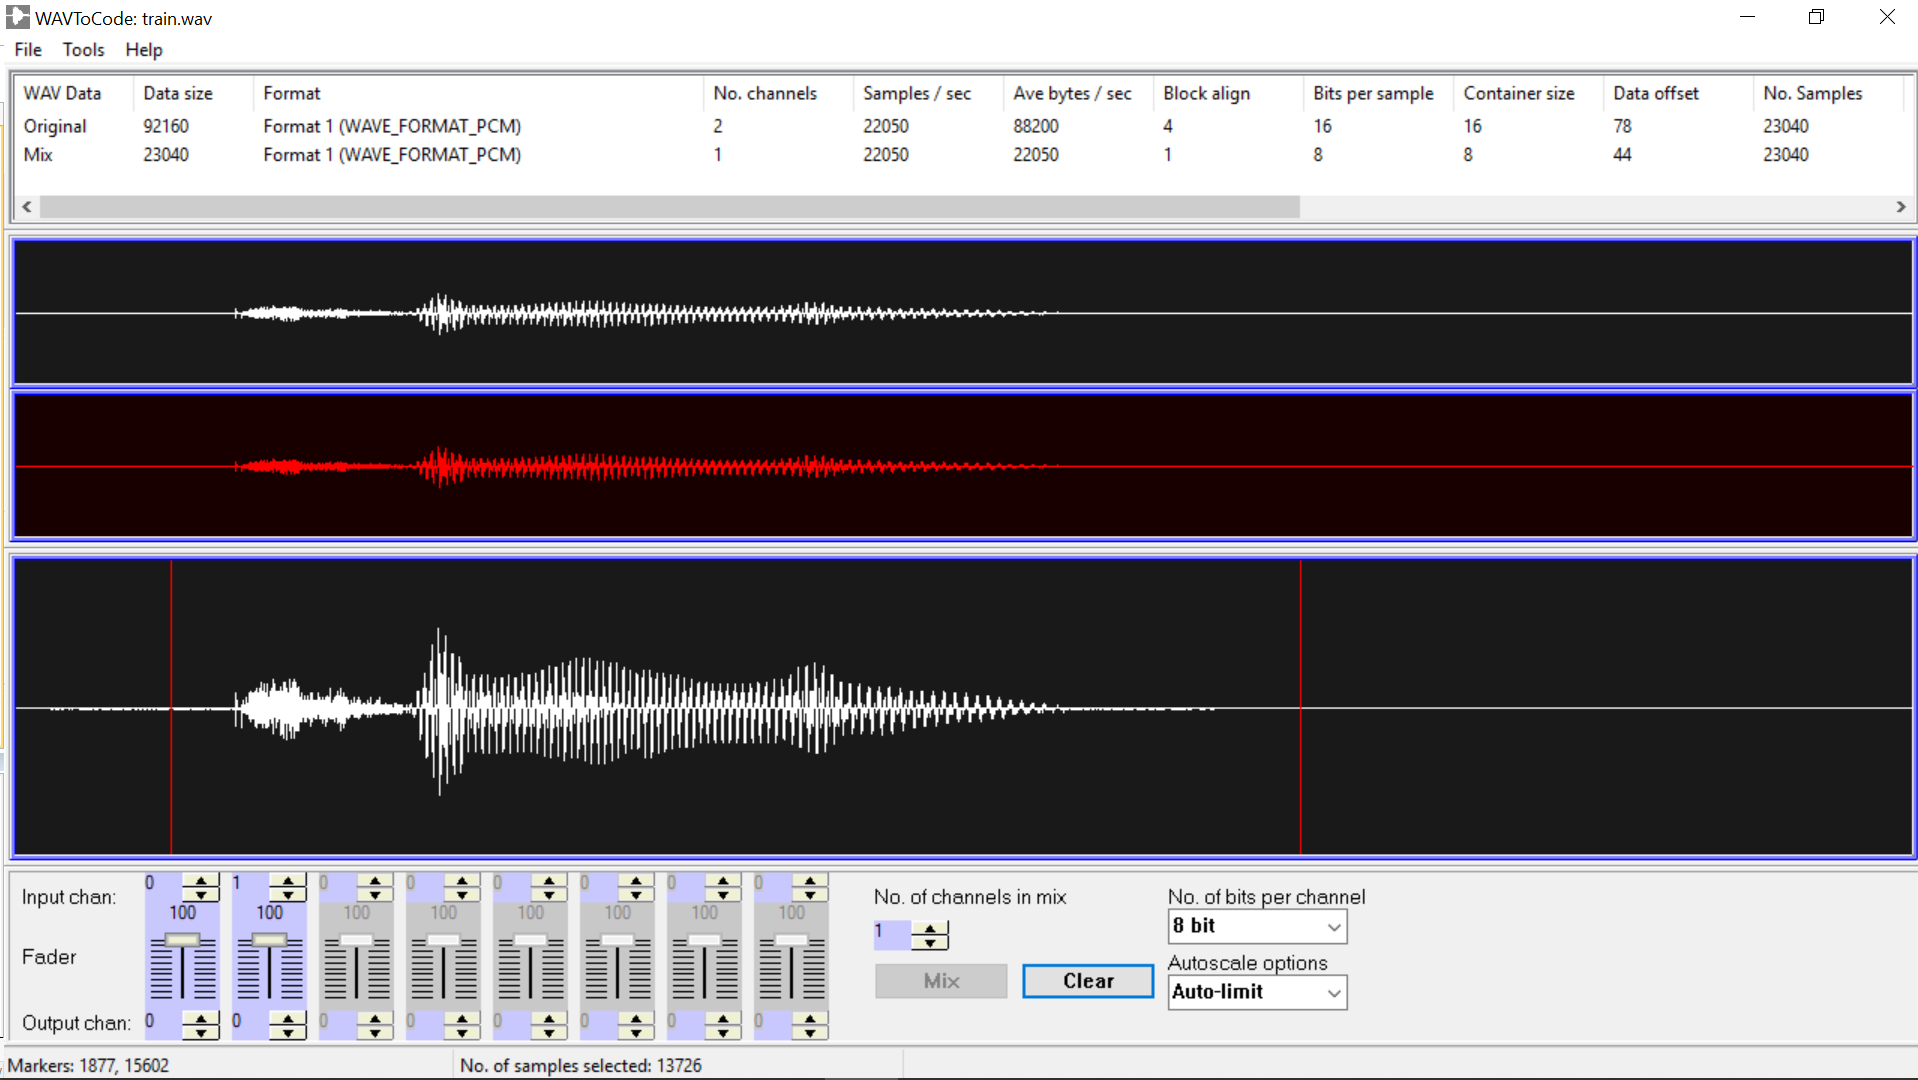
You can use this nice free software WAVToCode to convert WAVE files into a C files. Check their help page for instructions on using the software.
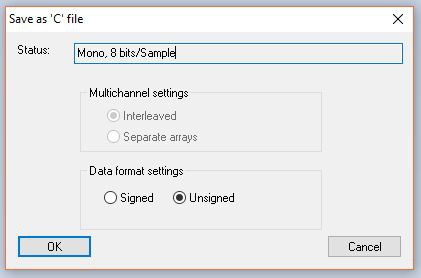
The DAC in this module accepts only 8 or 12 bit samples but this software generates 8, 16 and 24. Load each file to the software, pick "8 bit" for No. of bits per channel option and click Mix. Then use your mouse buttons to add two markers before and after the wave to remove empty sections. From the menu Tools you can listen to your mixed wave and then convert it into a C file from the menu File. Choose Unsigned for the output. The original C files generated from this converter are available in the file section marked with "orig_".
![]()
![]()
Note: If the wave sound in the module is weak, you need to set the autoscale option to Normalize.
-
3Modify your wave C files to include in the project
You need to perform some minor edits on the the wave C files before you can use them in the speaker module project:
- Remove #define NUM_ELEMENTS line and add the definition #include "wave.h" instead.
- Replace the array data[NUM_ELEMENTS] with a meaningful definition, e.g., waveByteCode_Correct[WAVEBYTECODE_CORRECT_LENGTH]
- Replace unsigned char with const uint8_t.
-
4Clone an empty H07R30 project and add the wave C files
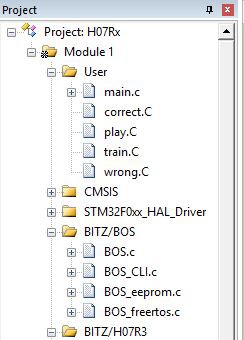
Clone the module project from its repository here. Inside the folder User, delete all the C files (except main.c) and add your wave C files there. Then open the uVision project and add the modified wave C files to the User virtual folder in the project tree.
![]()
-
5Add wave definitions to the project
In wave.h:
- Update number of wave files.
- Replace wave length definitions with those for your wave files.
- Replace wave resolution (bits per sample) definitions with those for your wave files (usually 8).
- Replace wave rate (sample per sample) definitions with those for your wave files (file bitrate / 8).
- Export the wave arrays defined in main.c
In main.c:
- Define the wave arrays, their length and resolution arrays.
- Add textual description for each wave.
Then compile and make sure there's enough Flash in the MCU to store your all your waves! The current module with 128KB Flash can store about 42000 samples max (8 bit/sample).
Note 1: To find out current Flash size for your program, sum the numbers shown for Code and RO-data when you click Compile All. You can also double click Module 1 in project tree to view the memory map. Scroll down near the end and you will find Total RO Size which should be < 128K for the current module.
Note 2: You can increase optimization level for the compiler (if it's not already O1 or higher) to get more Flash space to store your waves. From uVision Options for Target >> C/C++ >> Optimization, pick Level 1 (O1) and recompile, this should save you about 10-15k of Flash. Sometimes the program won't compile or load if its near Flash limits so you must increase optimization level.
-
6Finally use your embedded waves!
Use the following APIs to play your waves:
PlayWave("play", 1, 0);where you define wave string name, number of repeats and a delay in ms between repeats.
Discussions
Become a Hackaday.io Member
Create an account to leave a comment. Already have an account? Log In.