 Deepak Khatri
-
1Build the coils
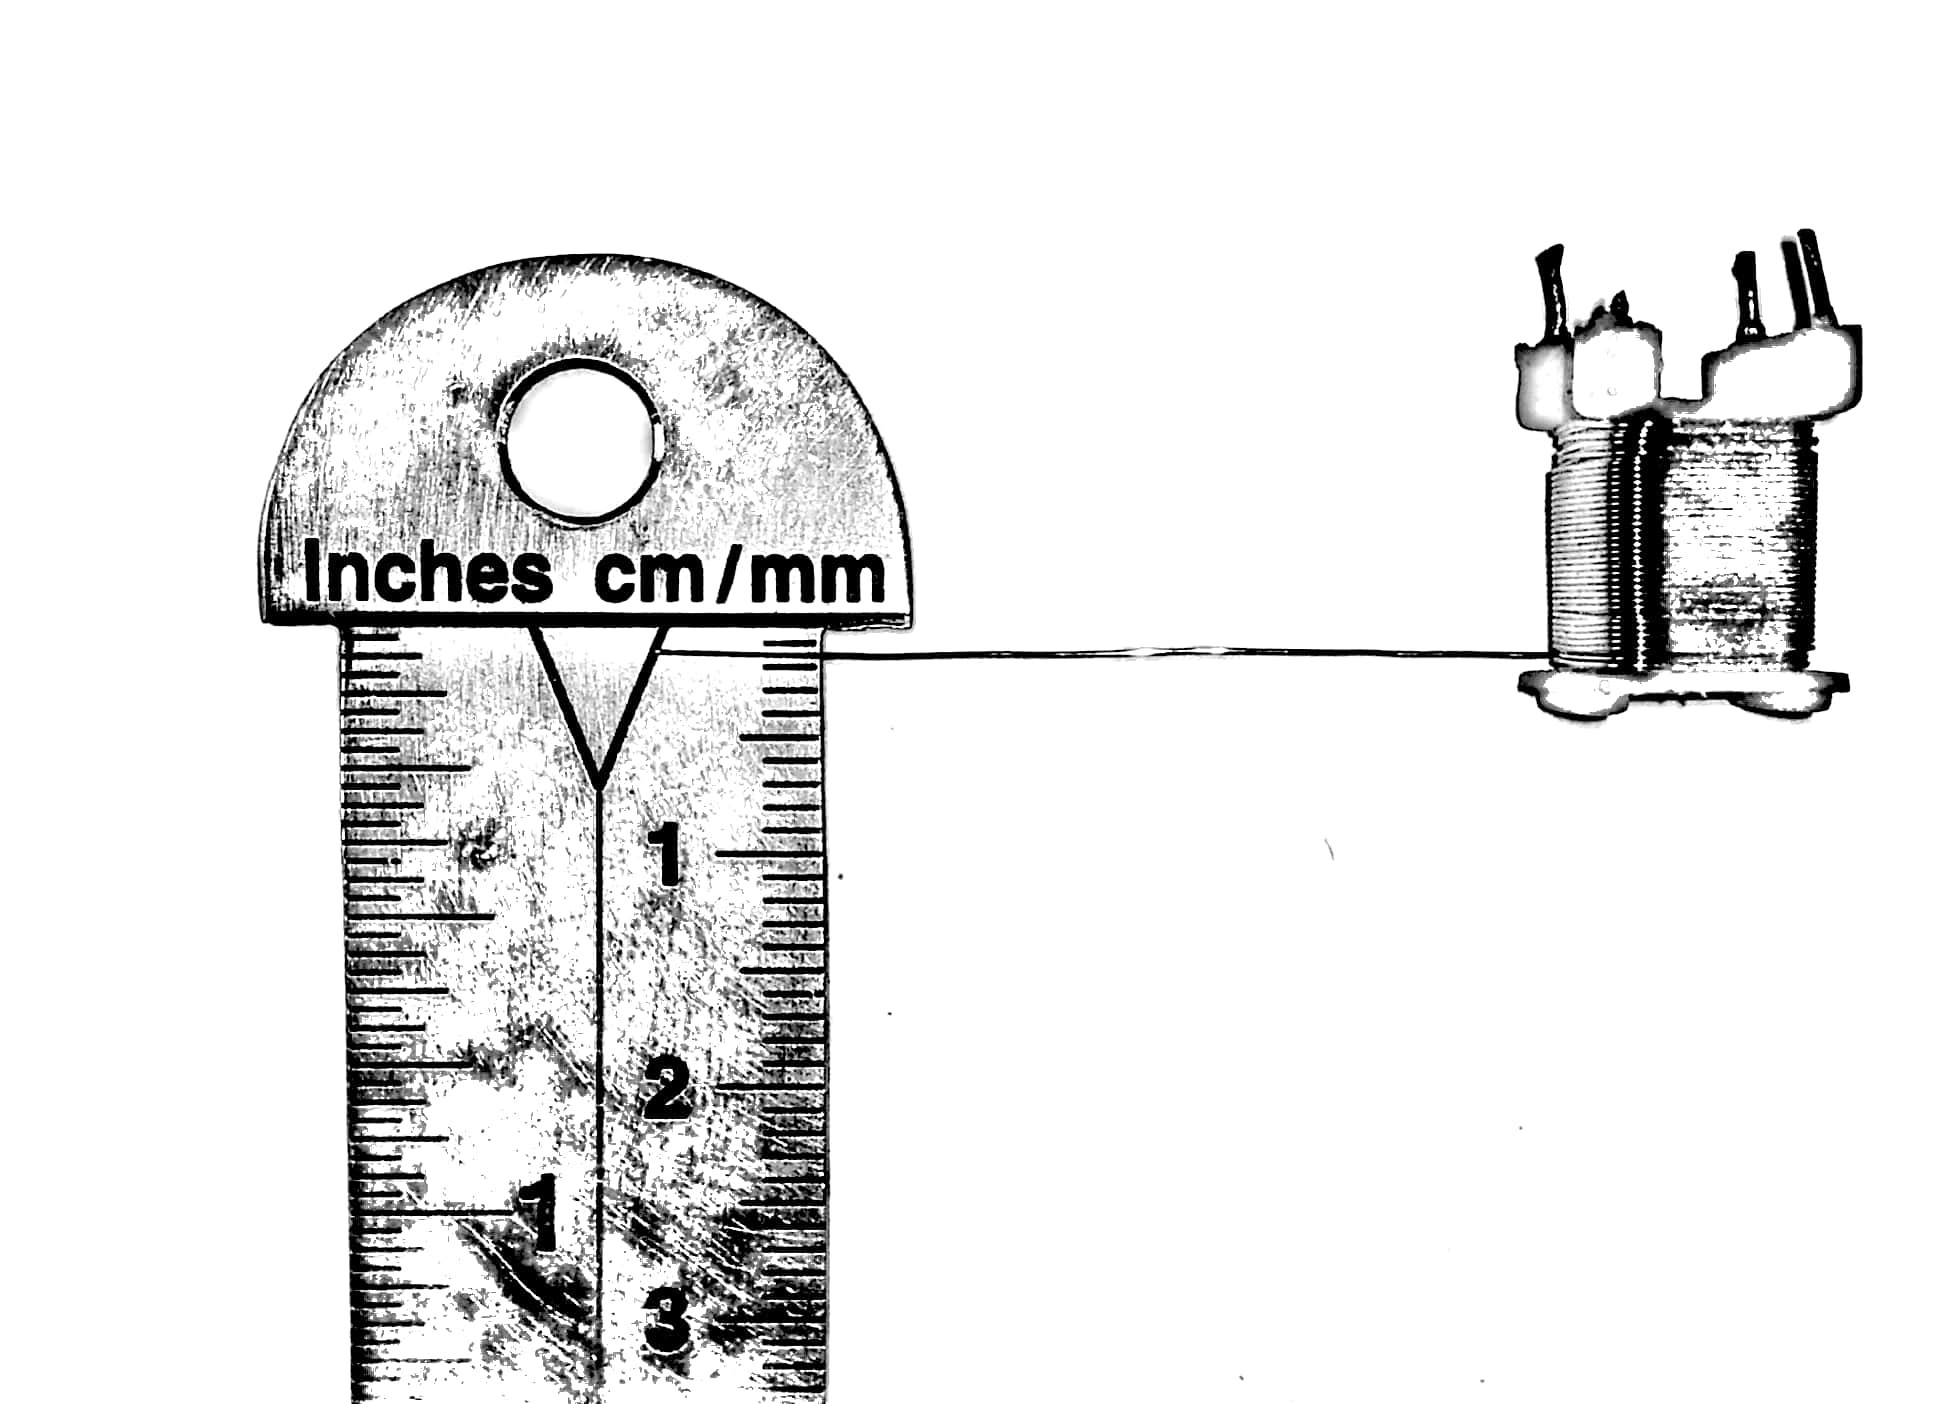
You can skip to the end to watch the video with explaining the making of this project else, For making the transmitter coil I am going to use 100cm of 0.2mm enamelled copper wire which I have salvaged from old CFL choke transformer.
![]()
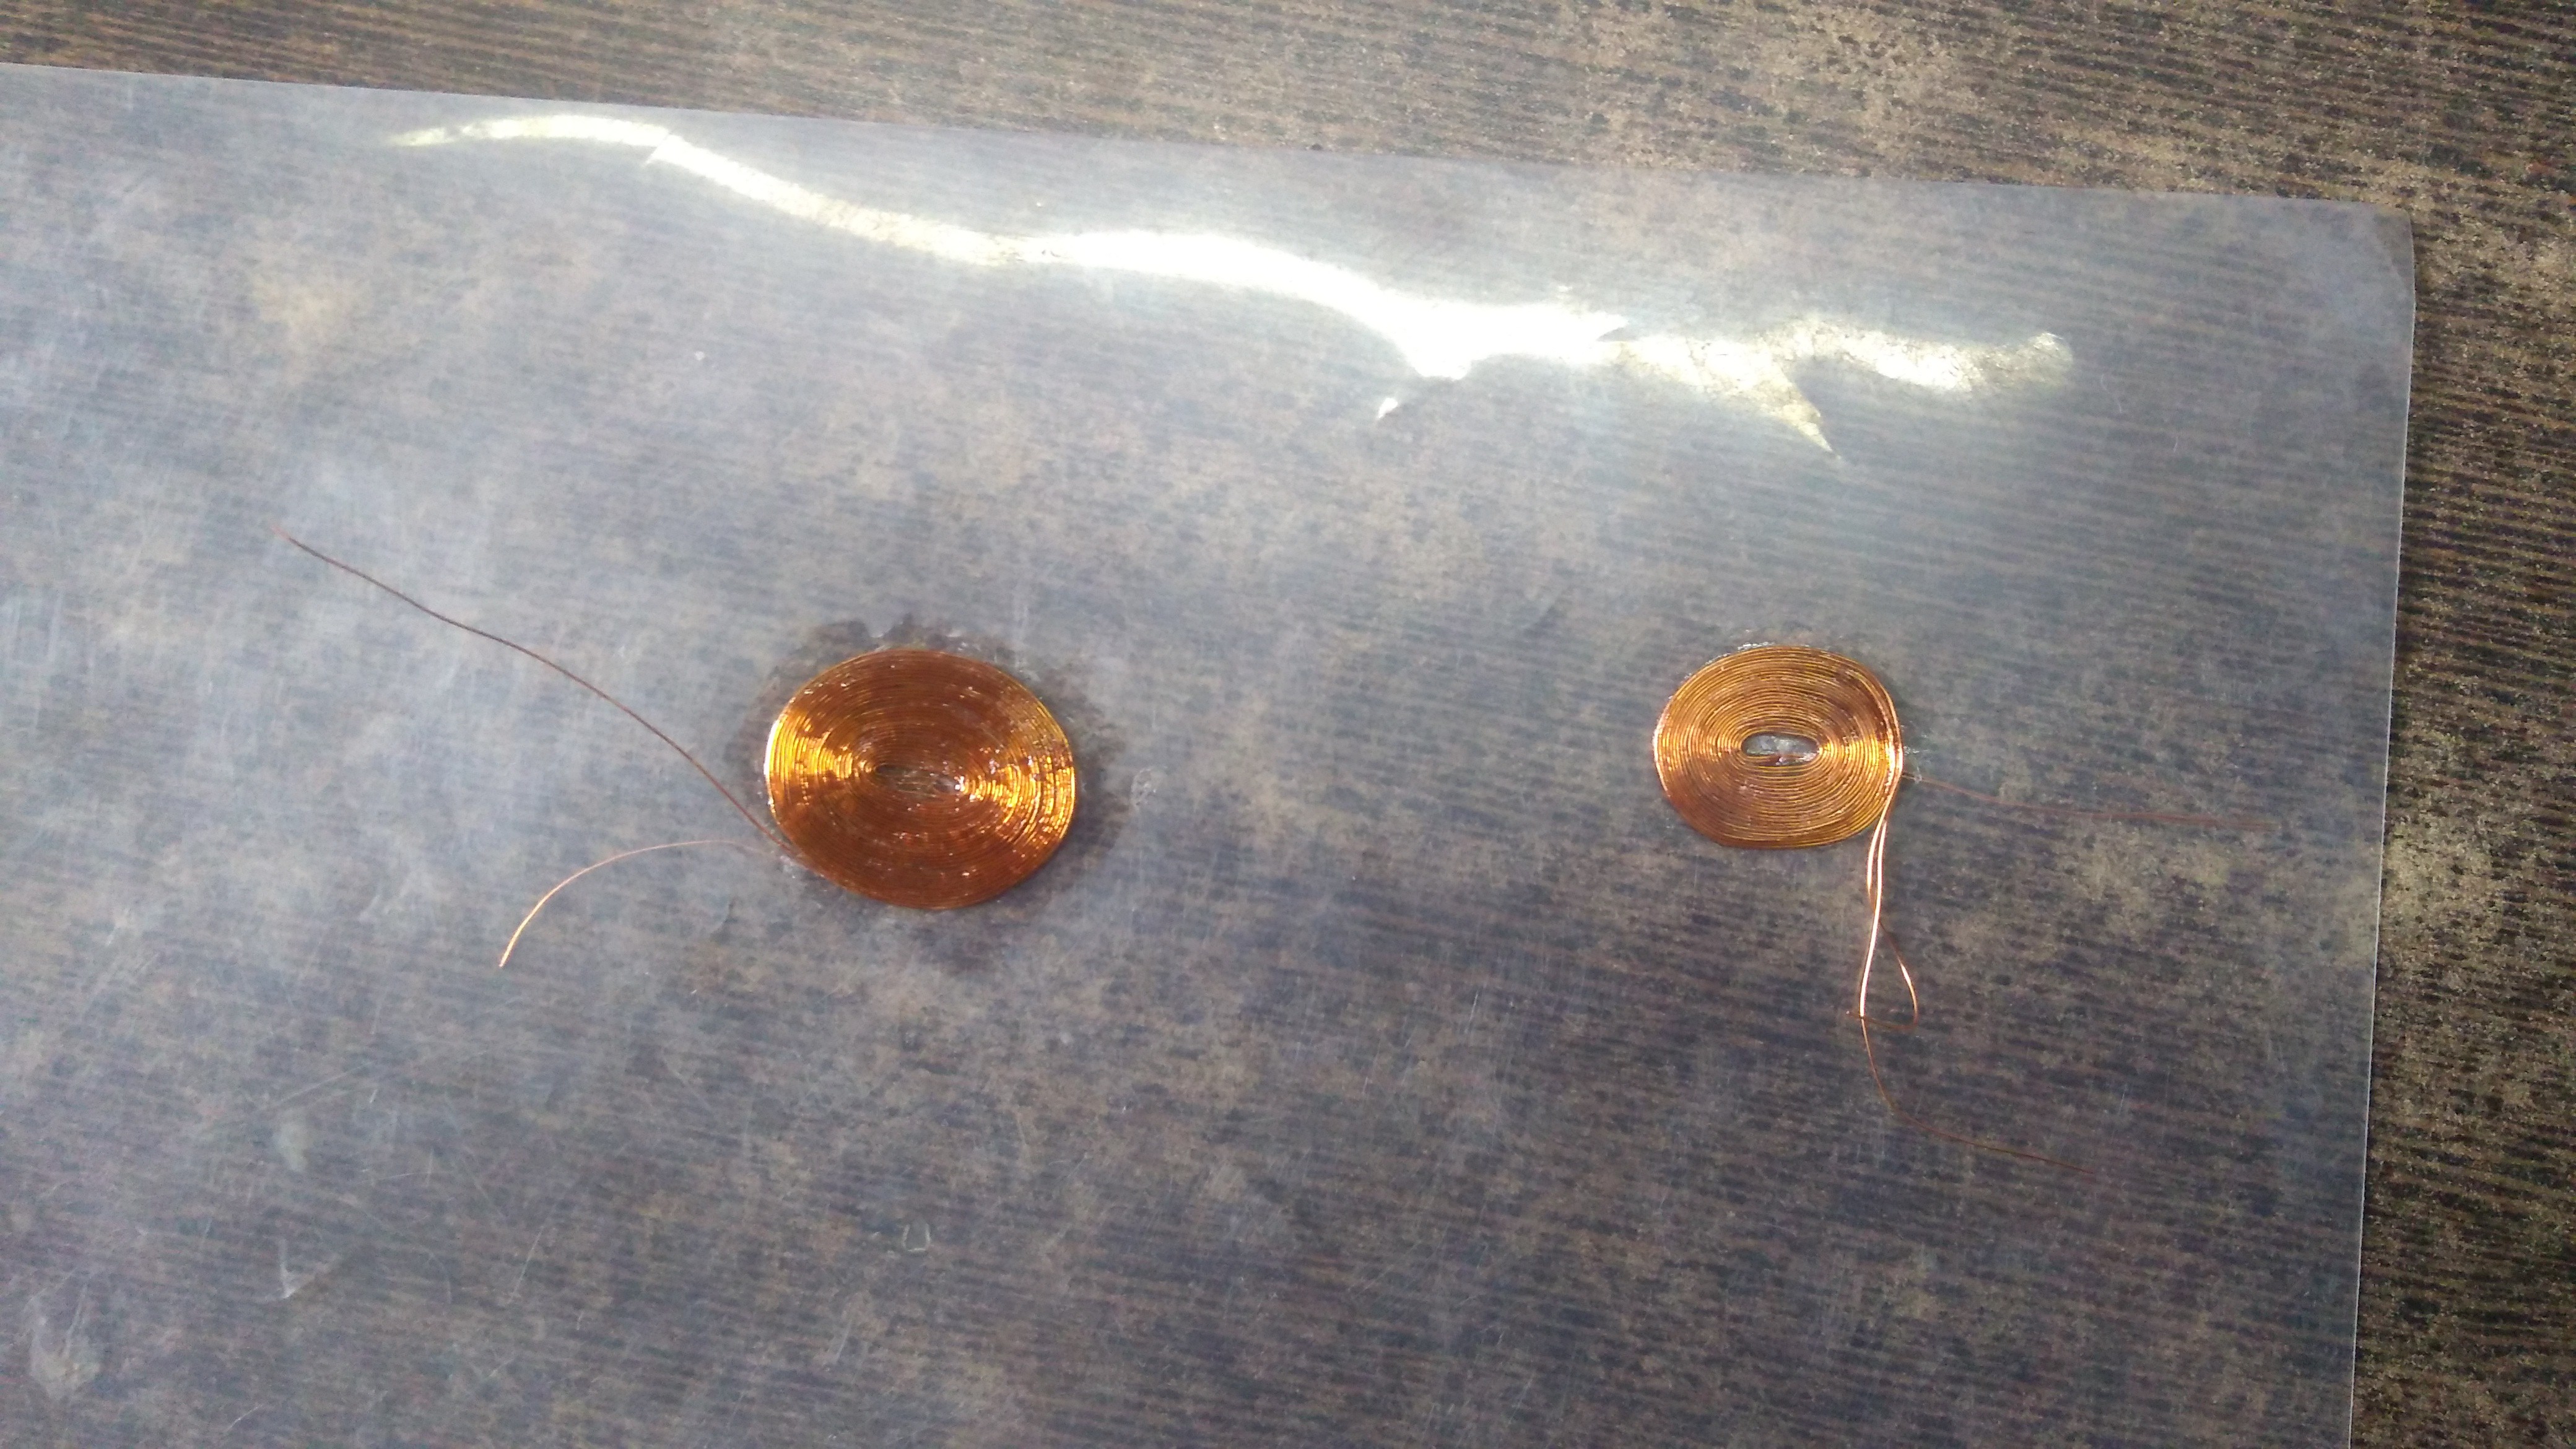
just straighten it and fold it into half now pierce a hole onto a plastic sheet and pass the wire through it make sure to pass the junction, not the open ends. leave 4-5cm of the wire for connection now make a flat coil out it. it is easy to show the procedure of making the flat coils in a video rather than explaining with pictures watch this video to get an understanding of how to do that.![]()
For making the receiver coil, use the same parameters for wire i.e 100cm of 0.2mm enamelled copper wire. just repeat the same procedure we used for making the transmitter coil- pierce a hole
- pass the wire from the hole
- leave 4-5cm of wire for connection
- make a flat coil from the remaining wire on the surface.
-
2Set up the coils
Now pierce a hole in the sheet near the end of the coils for both the receiver and transmitter. for transmitter pass the free ends to the surface because we are going to build our circuit on the surface and for the receiver pass the wire from the surface to the bottom of the sheet because we are going to connect the LED there. also make a cut in the junction of the transmitter coil.
![]()
-
3Get it ready for the circuit
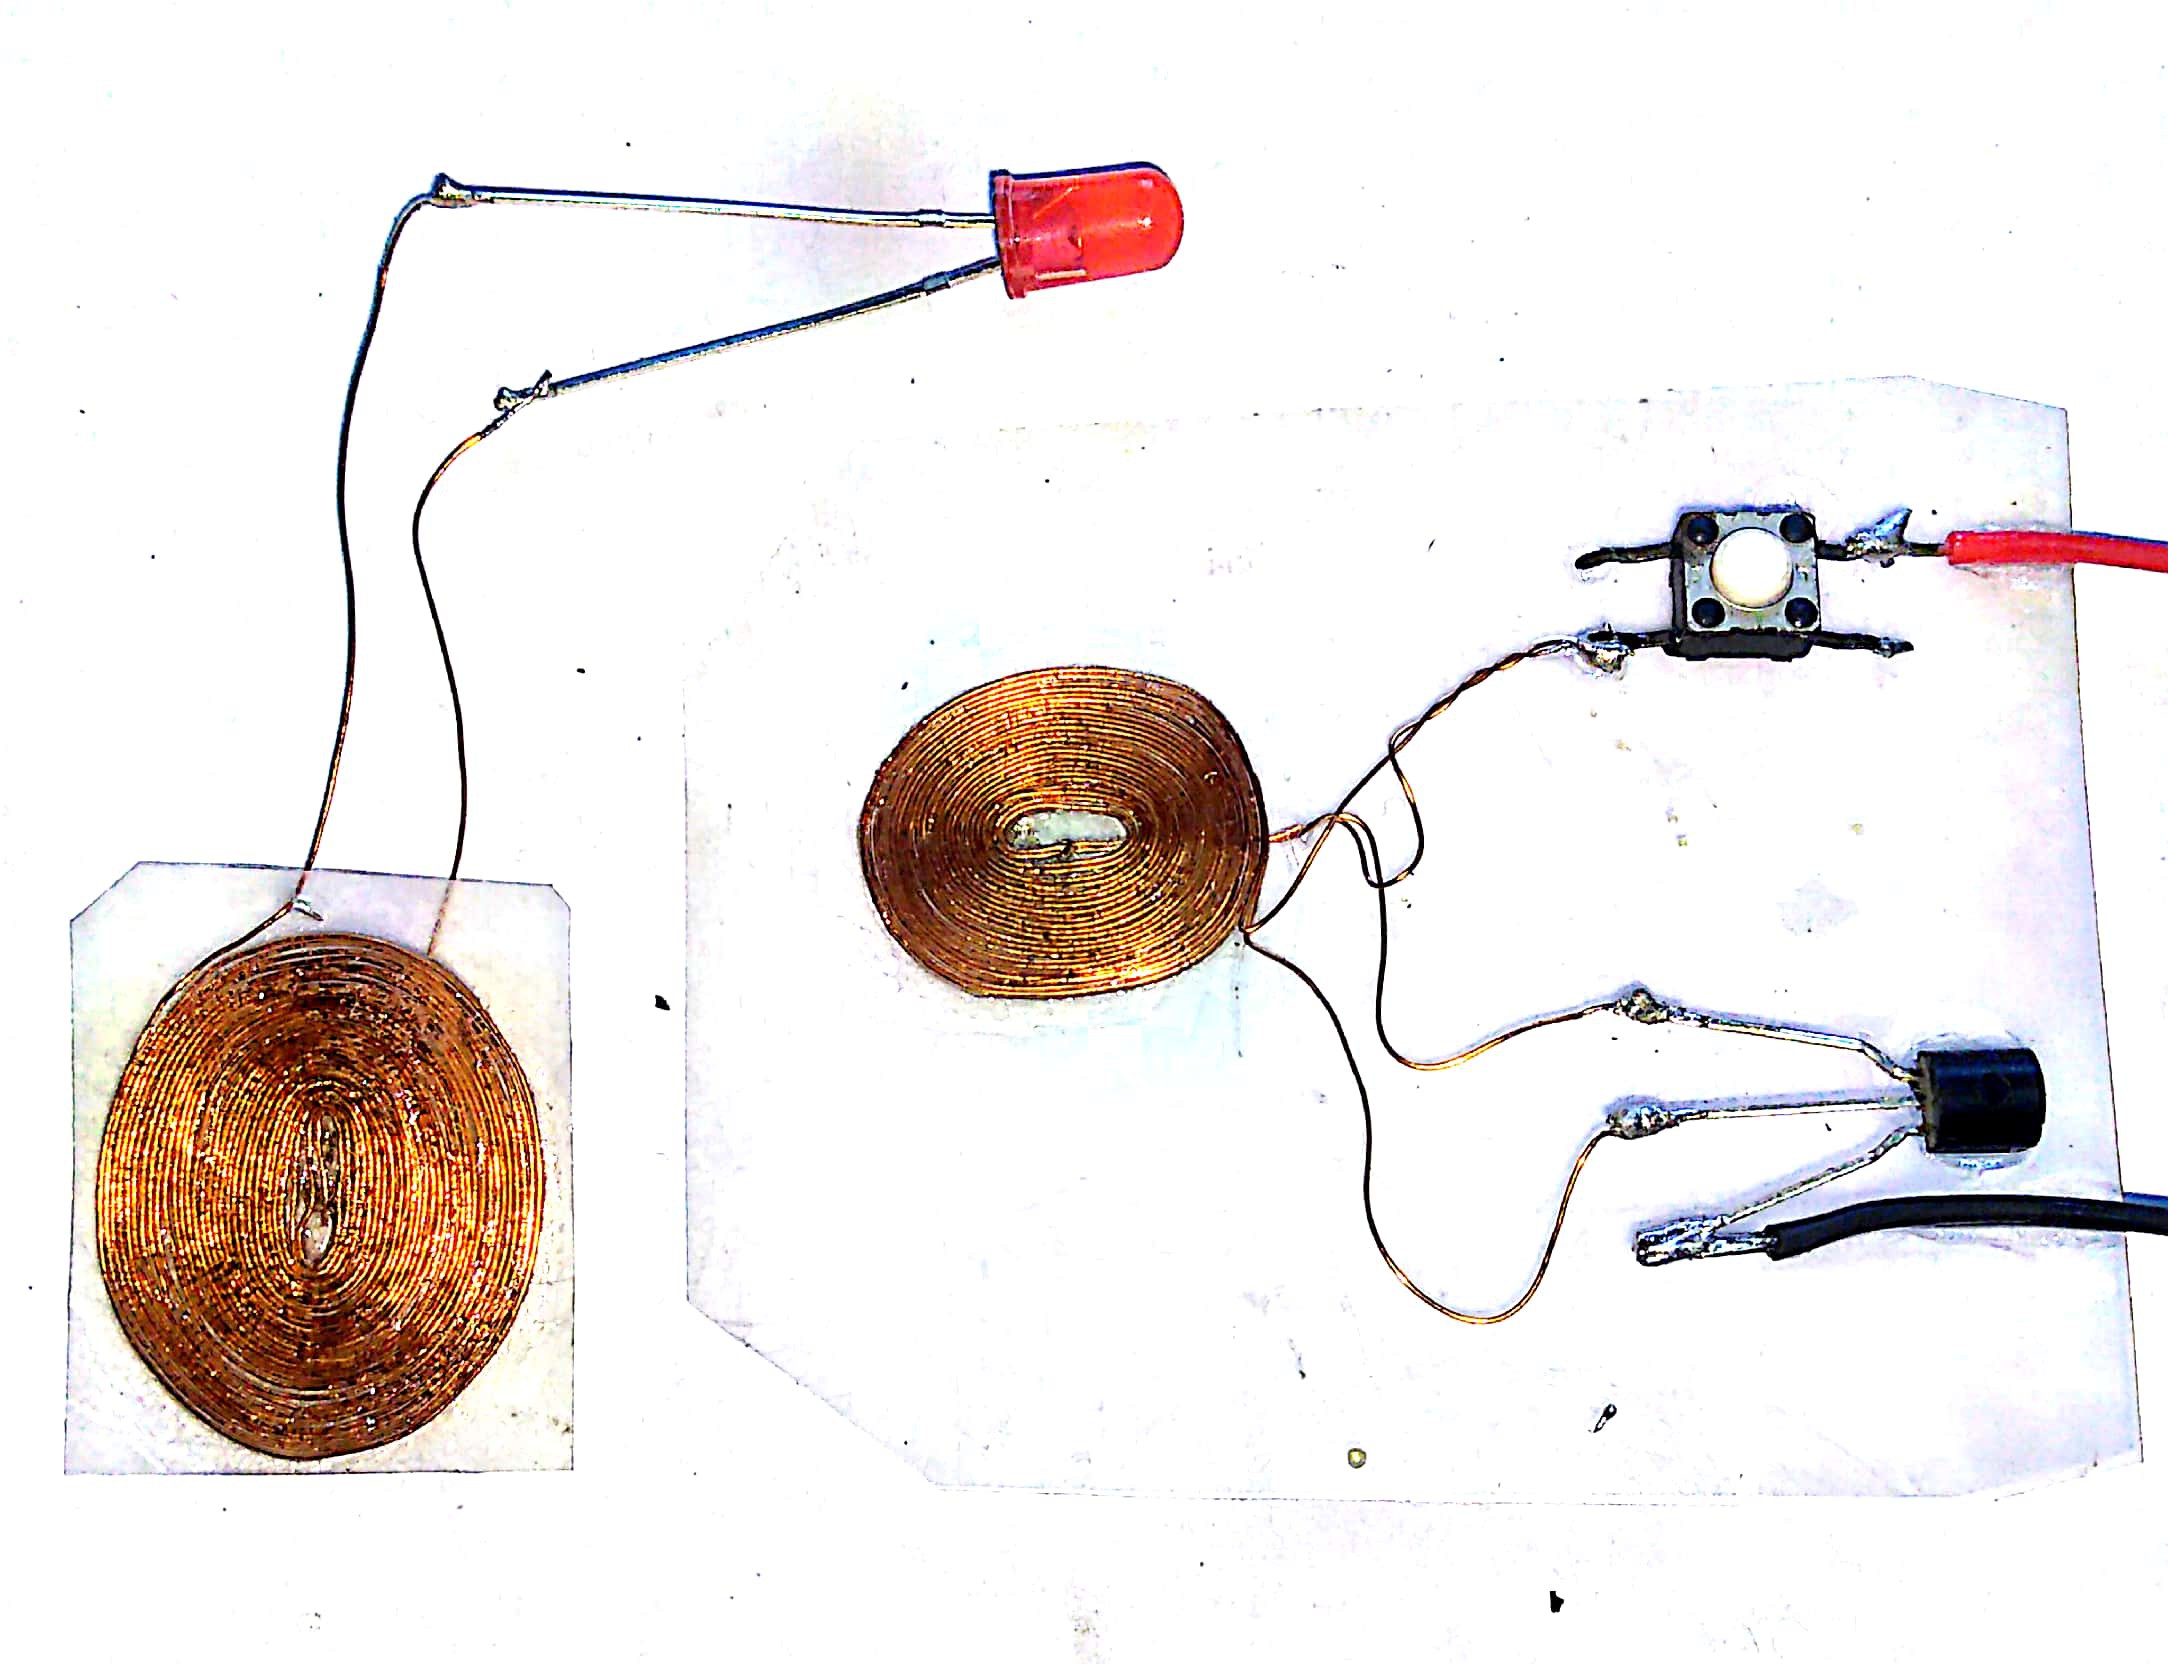
As we have used the enamelled copper wire which means we have to remove the enamel from the ends if we want to make any connection. it's very simple to do, use any sharp tool to remove the enamel and then tin the wire using solder. you can also just burn the enamle but that may or may not work depending on the quality of enamel used on the wire. remove enamel and tin all the wires and we are good to go.
we have to solder the alternate ends of the coils of our transmitter to get our resonance induction circuit to work. cut the receiver from the sheet because we are going to work on the transmitter circuit.
-
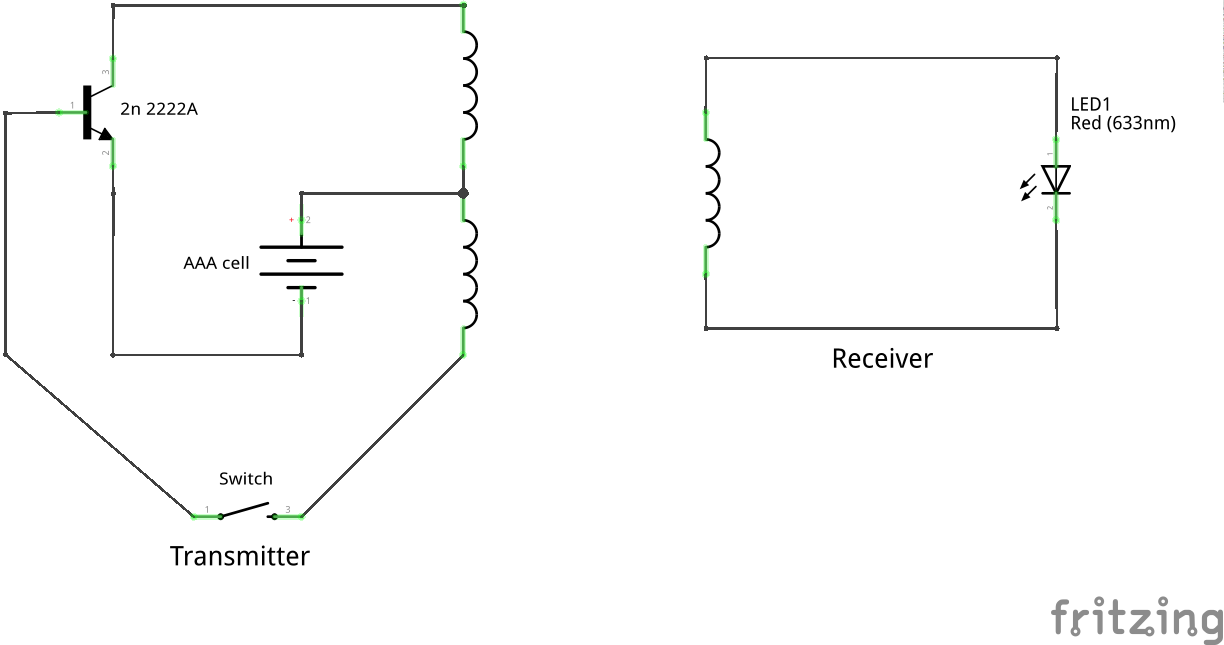
4Create the circuit
now the fun part begins we are going make the resonance induction circuit for our wireless energy transmission project it sounds very cool nooh?.
![]()
join the base and collector of the transistor with the two free ends of the transmitter coil solder two wires with AA or AAA dry cell and connect the positive terminal of the cell to the alternate-end junction and negative terminal of the cell with emitter of transistor with that done connect the receiver coil with a LED try swapping the connection if you think the led is not very bright. solder a tactile switch or any other switch of your choice and finalize the connections by soldering everything in place use super-glue to fix transistor and the switch and cut the transmitter unit from the remaining plastic sheet, now test everything is working or not.![]()
that was my earnest attempt to explain the building of the resonance induction circuit-based wireless energy transfer project tell me in comments what type of projects you what to see in future until then stay curious and ill see you soon...
Resonance Induction - Wireless Energy Transfer
DIY flat coils and wireless energy transfer circuit project, that works like a joule thief but with wireless capabilities!!

Discussions
Become a Hackaday.io Member
Create an account to leave a comment. Already have an account? Log In.