I did not plan the dimensions beforehand, just went cutting and soldering. However, I measured the parts of the chassis and sketched them so anyone interested can try. The dimensions are in mm and be aware that I measured with a simple ruler. The structure below is used for the bottom and top parts of the chassis.
You can visit the gallery for pictures of the building process of my robot.
2
Circuit
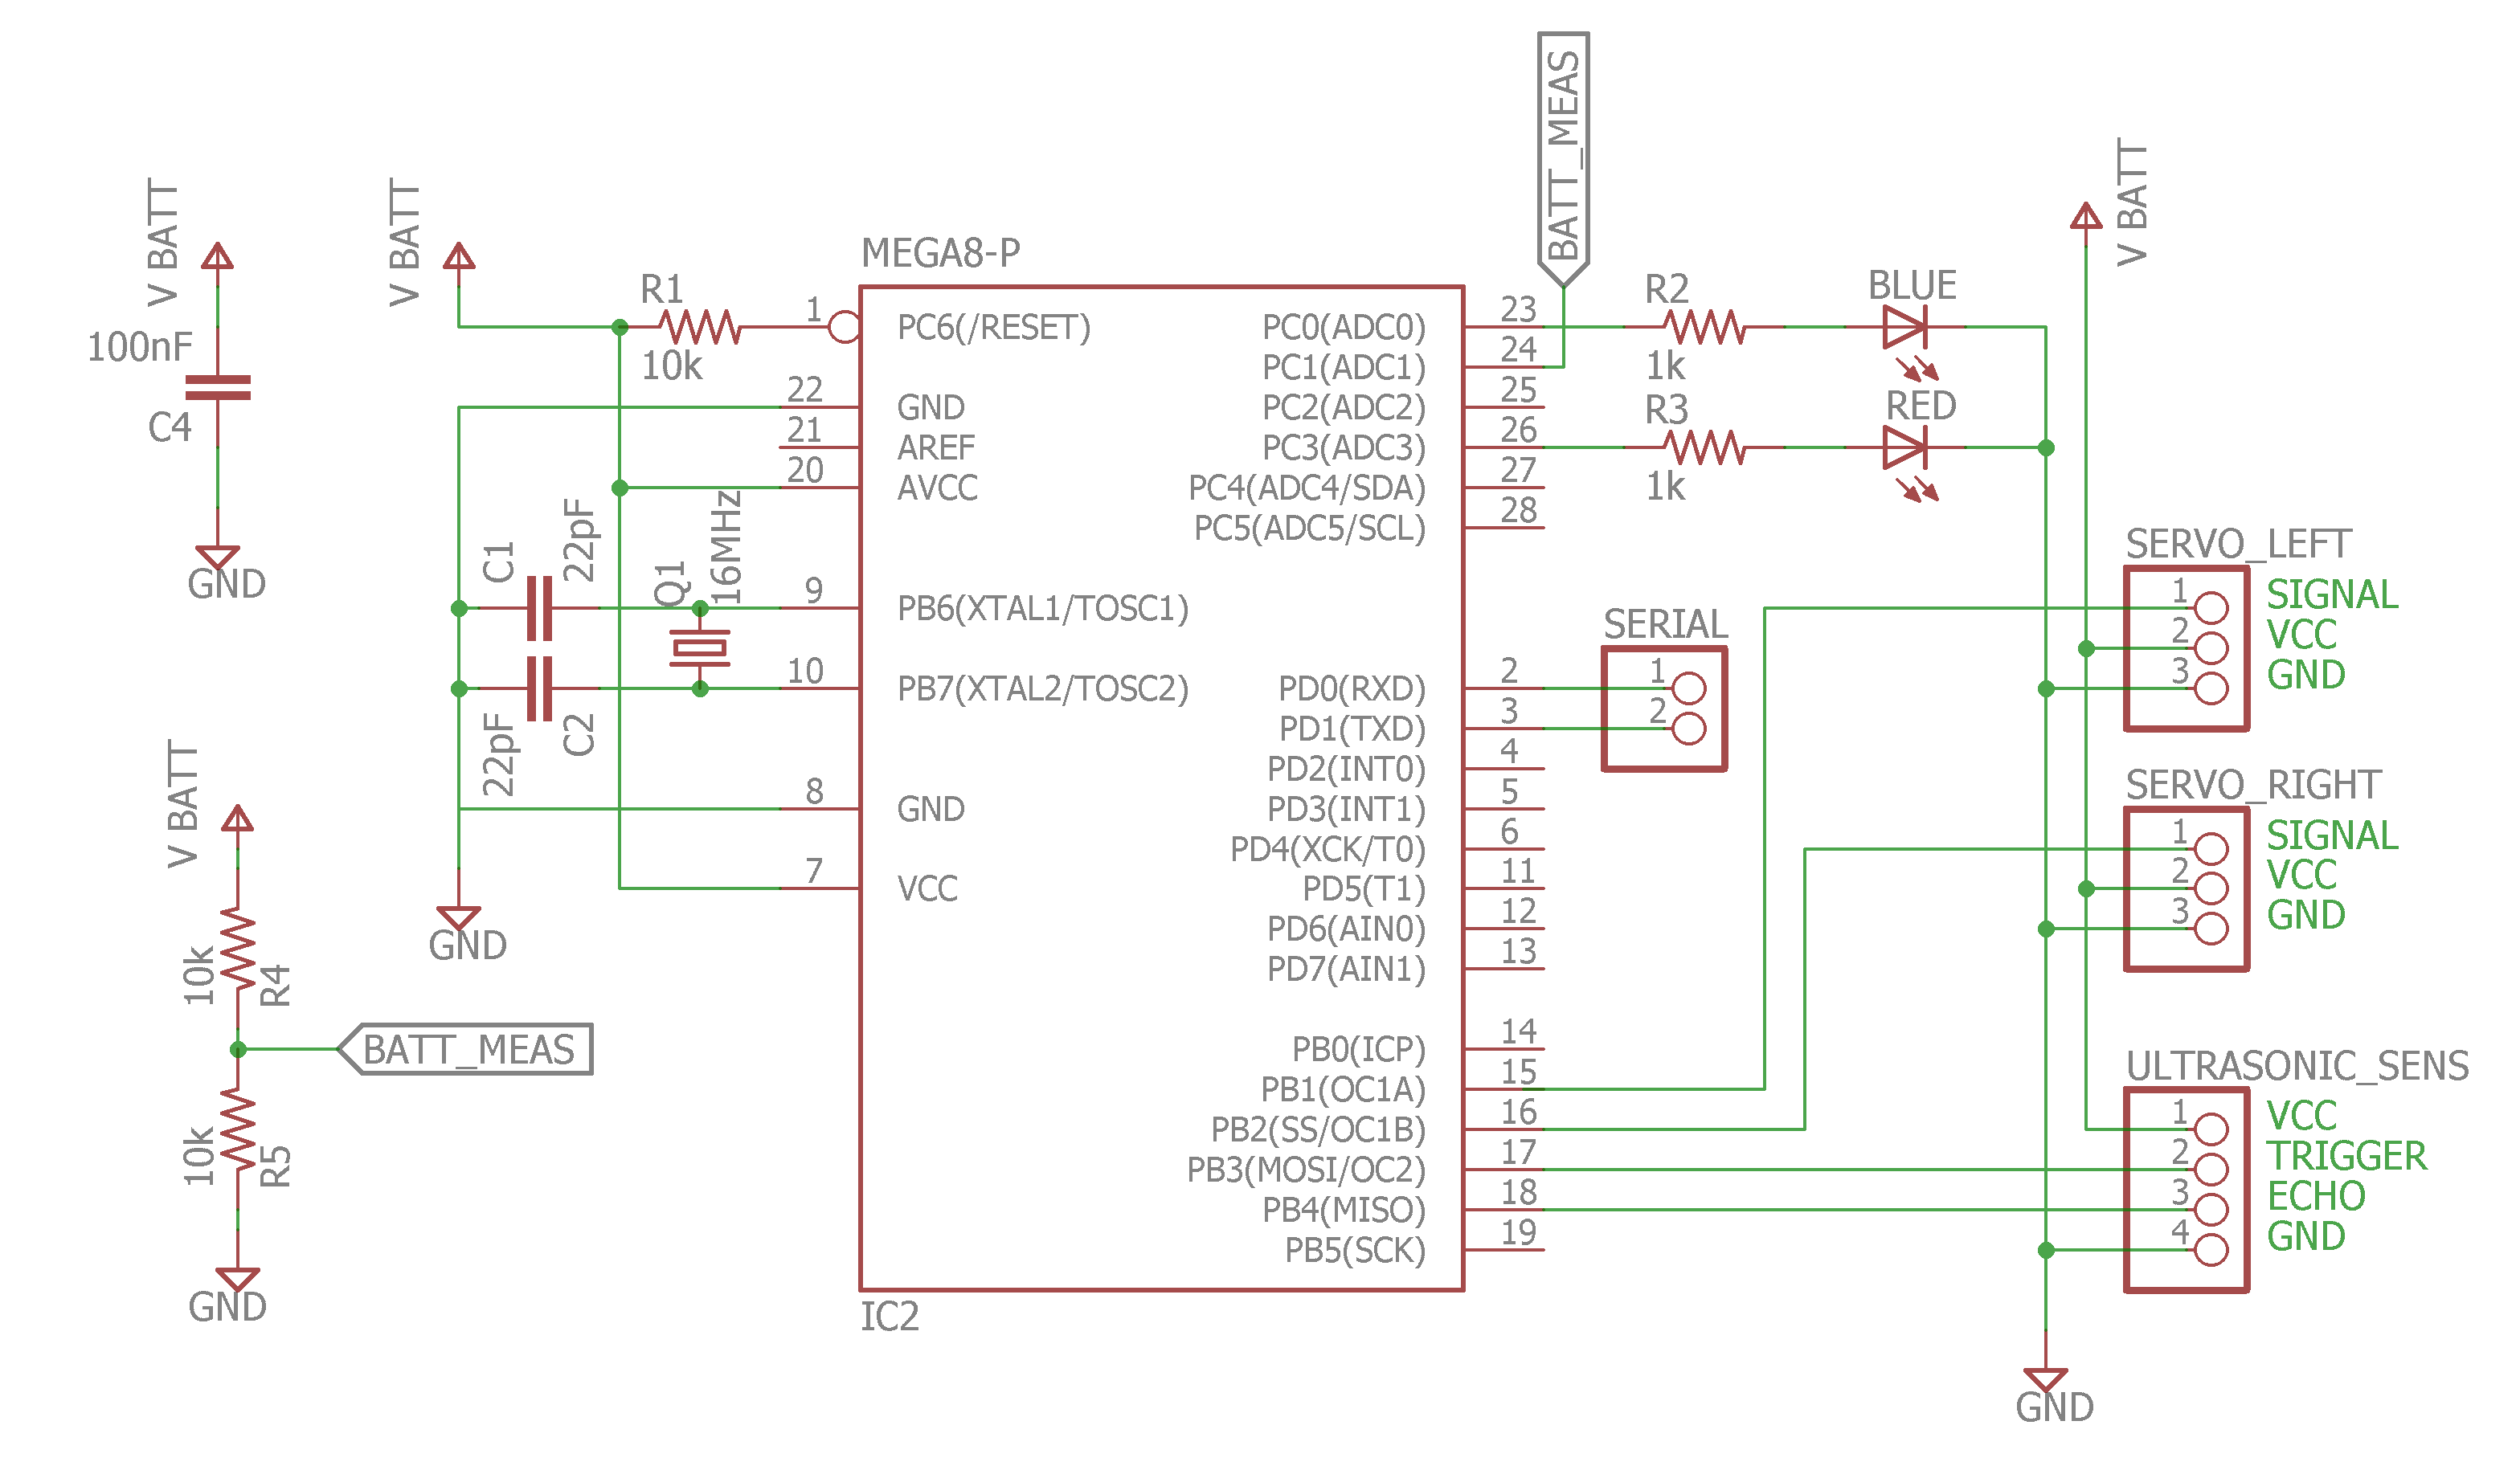
I can't add step by step building of the freeform circuit, of course, but I can add the schematic of my circuit here as example. Then you can build it as you like, or just design your own with the microcontroller and sensors that suit you.
3
Programming
This assumes you have basic knowledge of how to program a controller with a programmer. The code I use can be found in the Files section.
The ATmega8 used can be programmed with the Arduino IDE. I used the mega8 because I have many of them, but an ATmega328p could have been used too.
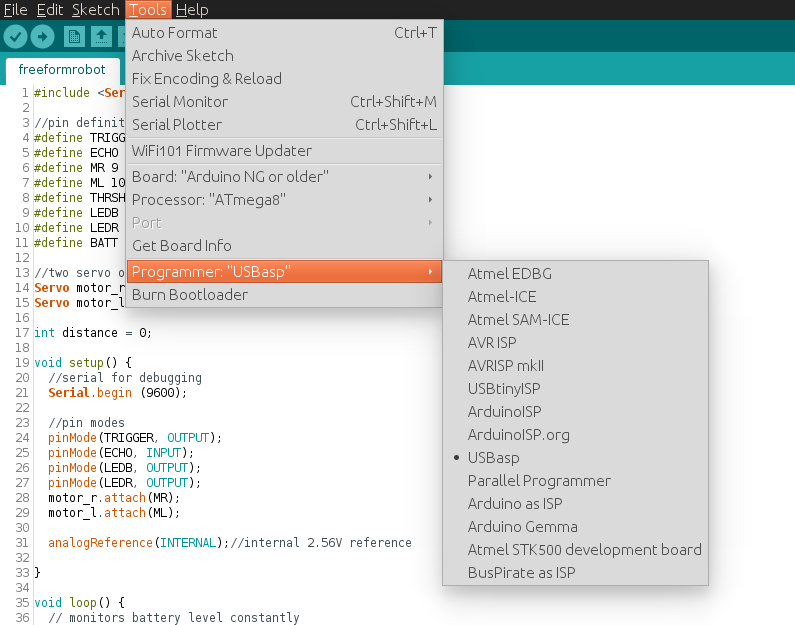
To program an ATmega8 with the Arduino IDE, just select Arduino NG or older and ATmega8 from the Tools menu. Then select the programmer you have. If you don't have a standalone programmer, a Arduino can be used, just search online for "Arduino as ISP"
It is a good idea to use the "Burn Bootloader" option once, even if you don't plan to use it, as it also programs the correct fuse values into the chip. The microcontroller needs to be configured to use a external crystal, this is done separately from the code thru specif bits called fuse bits and they are not reset when you upload new code. The Burn Bootloader option does that automatically, then you can overwrite the bootloader with the "Upload Using Programmer" tool, which keeps the fuse bits programmed.
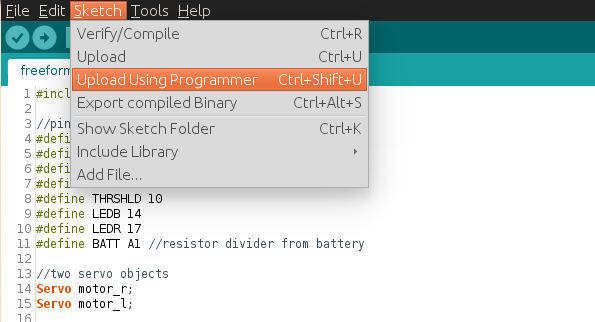
Then you can program the chip using the Upload Using Programmer option. Just select under the Sketch Menu. Skipping the bootloader gives you extra flash, but I use it simply because the bootloader for the ATmega8 takes forever to startup the main code.
 RobsonCouto
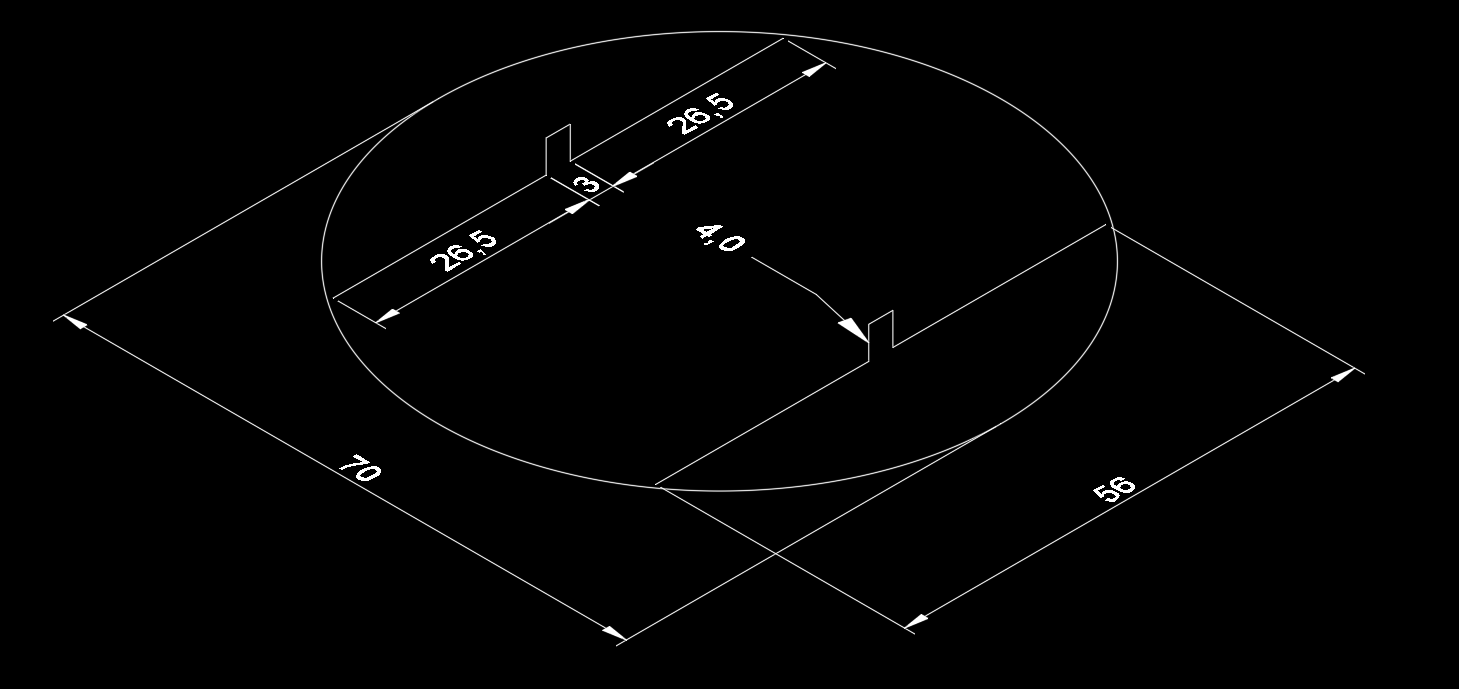
Discussions
Become a Hackaday.io Member
Create an account to leave a comment. Already have an account? Log In.