-
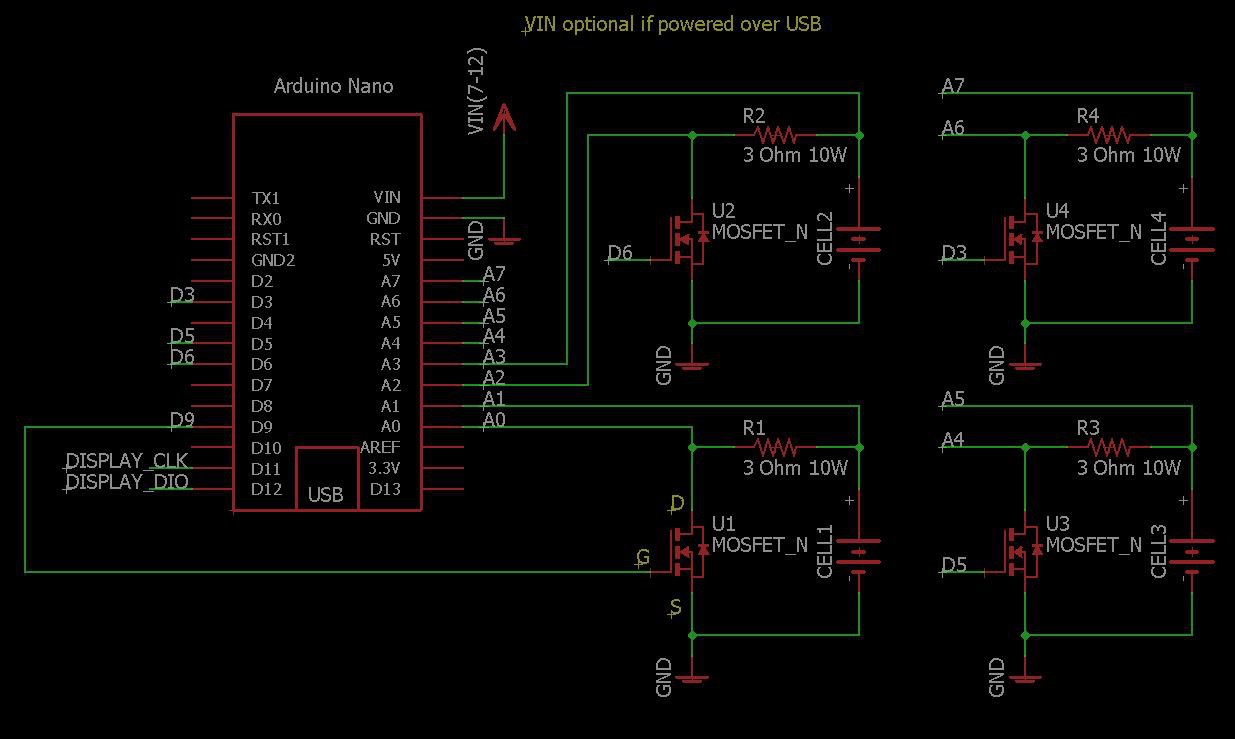
Schematic for Discharger
11/06/2019 at 18:44 • 4 comments -
Resistance is futile, or small at least.
02/13/2019 at 20:25 • 0 commentsThe cells have some internal resistance as well, usually on the order of 0.2 Ohms or so. Sometimes a lot higher.
The higher it is, the more the cell wastes power and heats up during charging and discharging.
I went looking and I believe I can measure the internal cell resistance with my current rig, but it will require some code changes. It basically involves shutting off the load resistor, measuring the voltage, turning it on 100%, measuring the voltage drop inline with my known resistor, and then calculating the missing resistance. You have to do this quickly so you can negate the cell discharging during the measurement.
The code currently doesn't handle intermittent discharging as it relies on a constant rate being kept from one cycle to the next and so this would throw off the numbers.
On the todo list.
-
Theory becomes fact.
02/08/2019 at 21:23 • 0 commentsI inadvertently confirmed today that if you plug in a cell backwards you indeed do need to buy yourself a new Nano. :) Still works, but voltage calibration is way off and seems to bleed between channels. I messed up the ADC for sure.
In other news, I built a 10 slot 1A charger so I can charge the cells now at least as fast as I can discharge them. Looks good and works well, but two of my charger modules were DOA so that is waiting to become a Project for now.
<EDIT>
Replaced the Nano. Everything else survived.
Also got the replacement USB charger modules in today, and put them in. Cell charger project complete.
</EDIT>
-
Everything old is new again.
02/06/2019 at 18:54 • 0 commentsStill continuing to cycle the cells a second time. Still all going up in mAh value, save one which went down 30mAh.

10 cells left to do.
Ordered some Li-ion charger PCB and 18650 battery holders from Amazon. Both were 10 for $9, and will let me charge 10 at a time, at 1A. That should give me some more options for cycling cells I'm questioning, without being so darn slow.
<EDIT> Cell charger done. I wish I had done that way sooner... </EDIT>
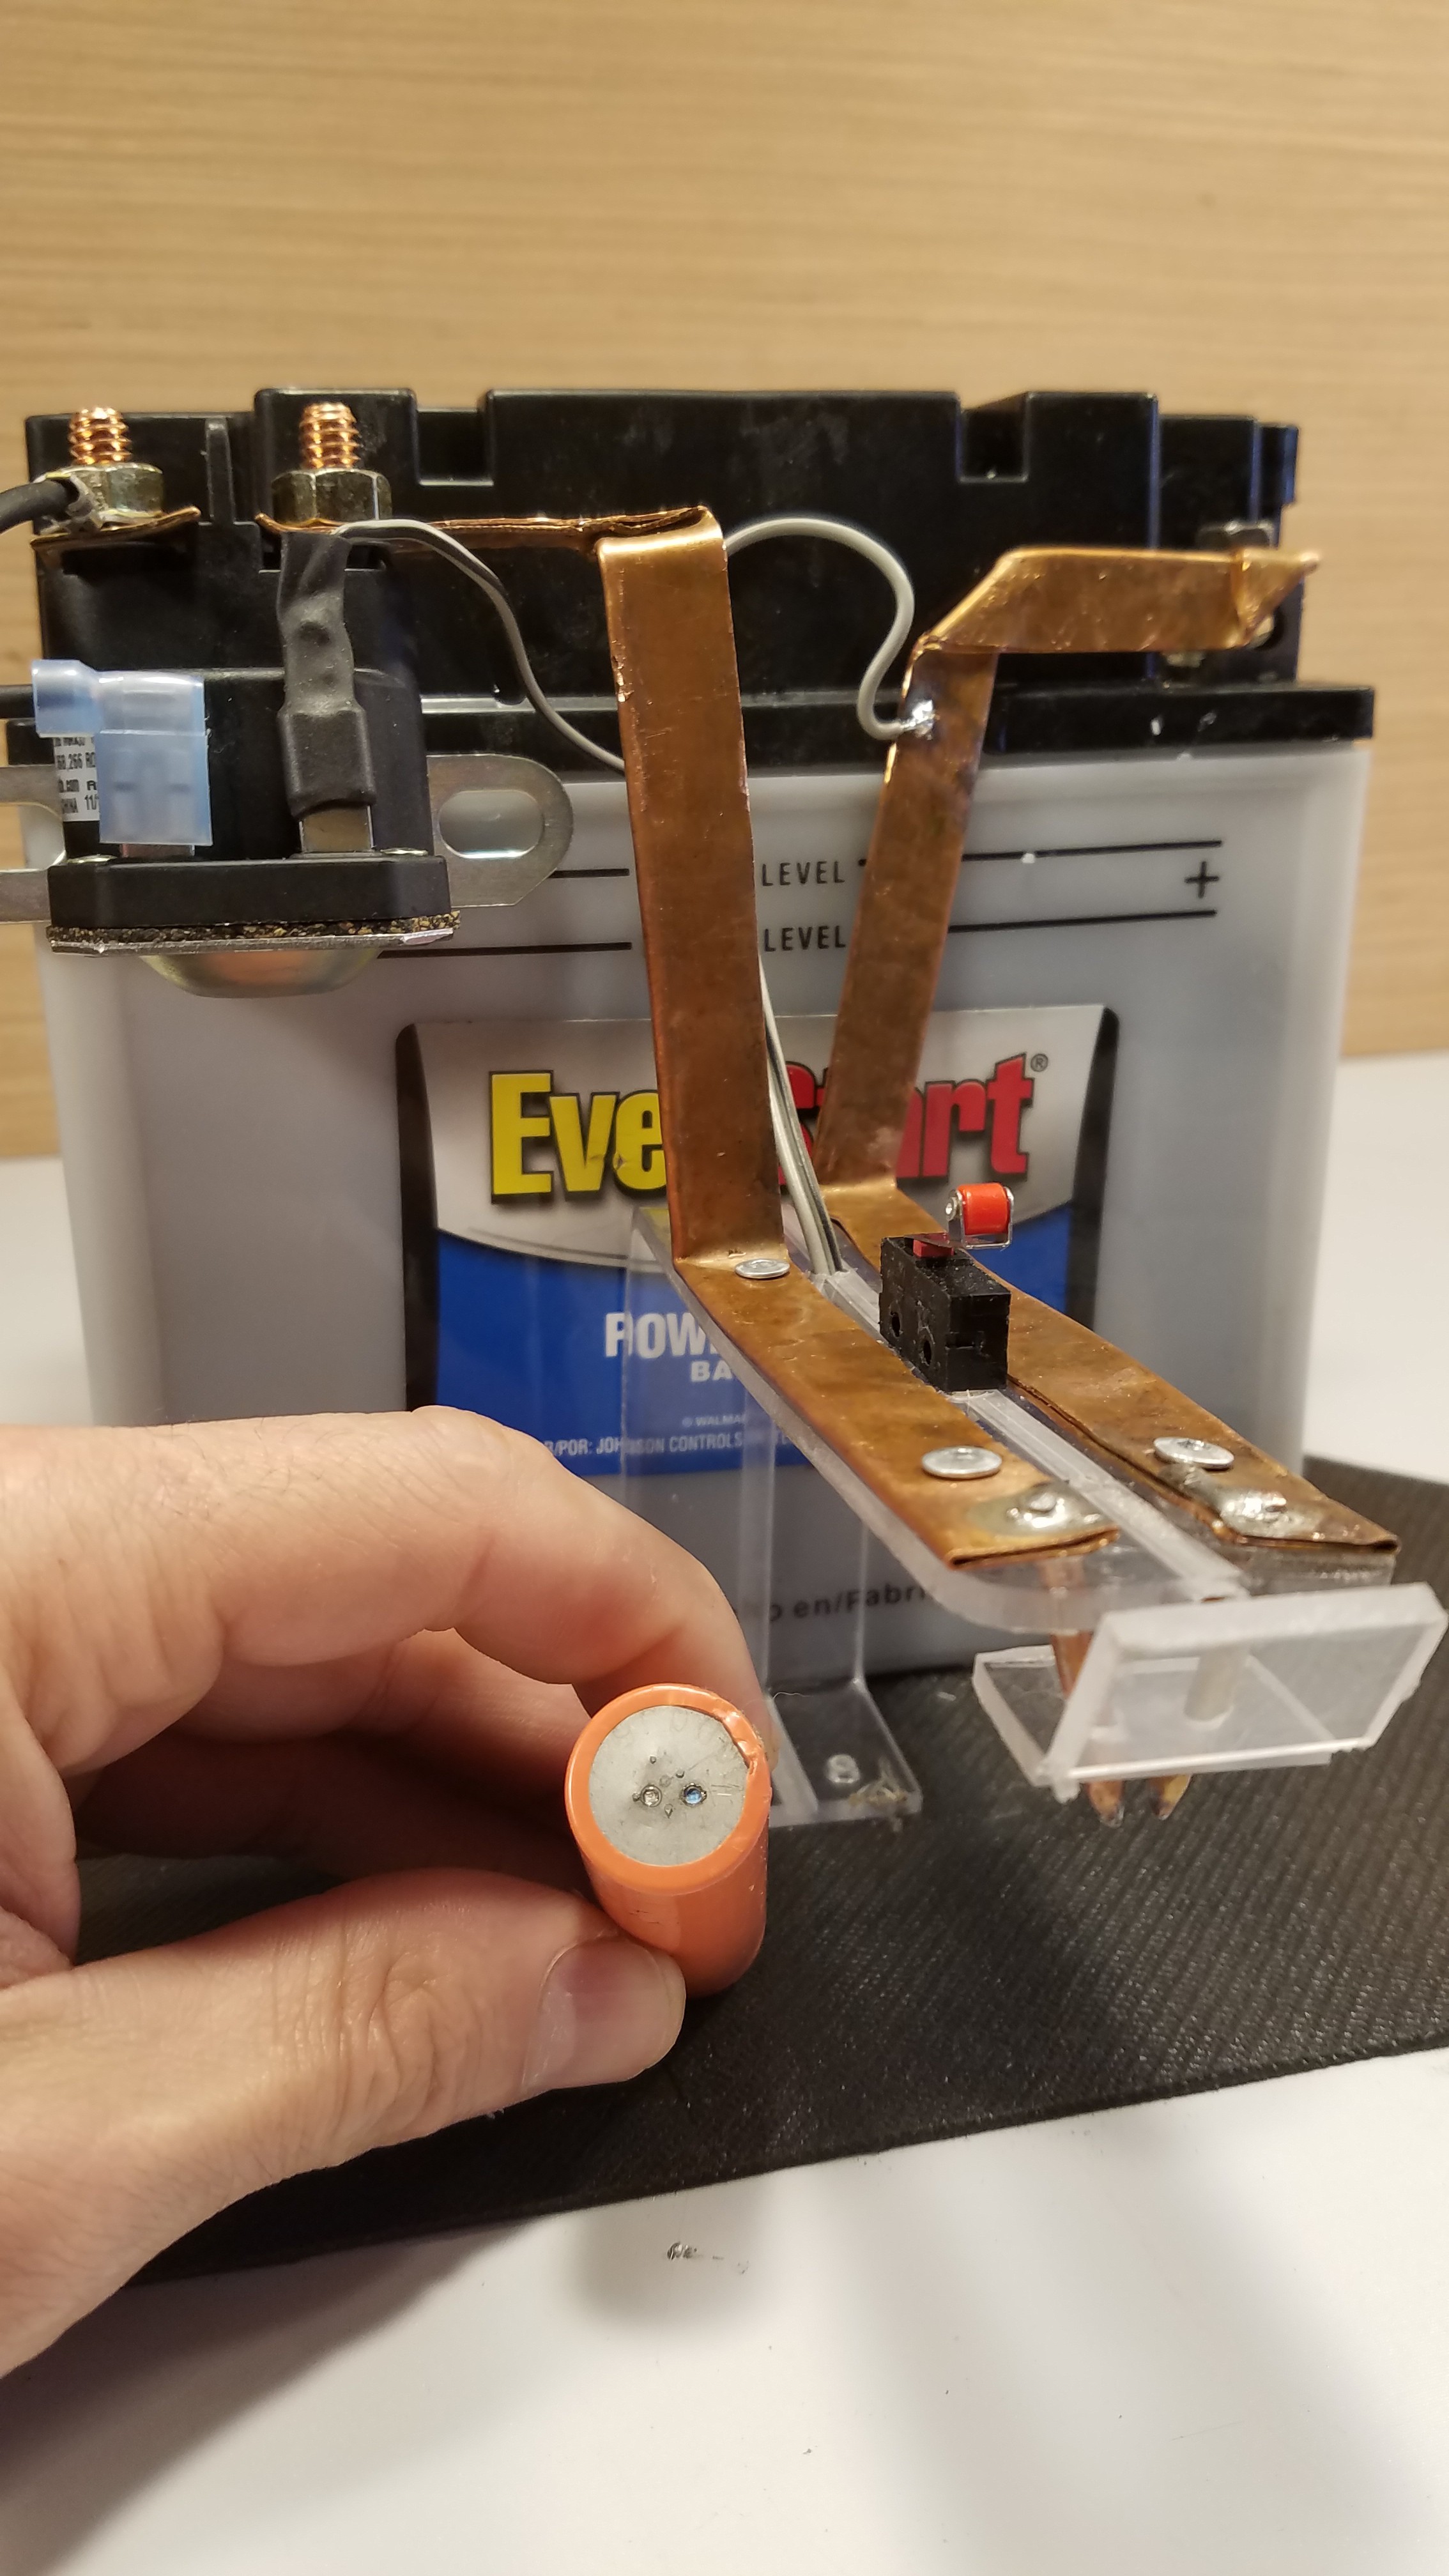
Also built a cell welder and tested it.
Works well, but you have to be careful to keep the pulse duration short, as shown on my test cell here where I burned through.
-
Balancing - Brute force fail, website success.
02/05/2019 at 20:05 • 0 commentsWhile I'm waiting for all my cells to cycle a second time, I've been messing around with some scripts for sorting the cells.
I started to write a little python script to calculate all the possible combinations of the cells, to basically randomly seek cell groups of 5 which most evenly match them.
#!/usr/bin/python
import itertools
files = open("cells.txt")
cells = []
for line in files:
  cells.append(int(line.rstrip()))

perm_iter = itertools.permutations(cells)
for item in perm_iter:
    groups = itertools.izip(*[itertools.islice(item, i, None, 5) for i in range(5)])
    print list( itertools.imap(sum,groups) )
I never got beyond printing them, because from what I can tell, this would take until the heat death of the universe to finish. In 10 minutes it tried only the combinations for the first 2 groups. The results are returning in lexicographical order as well, so even randomly stumbling upon the right answer would take nearly until the end.
I also tried just iterating through the list, with just dumb grouping of the strongest with the weakest and meeting in the middle. That was fast, but since the cell values were not linear... not perfect.
I think I'll need to be a bit more directed in my search. I'm sure there is something in between that will work. Just gotta find it. Or I could just do an acceptable job manually in about 5 minutes, but this is more fun.
Feel free to offer suggestions on a script to generate my matched sets of 5. :)
<EDIT>
I posed this question at the local hackerspace Facebook page, and Daniel Near suggested this:
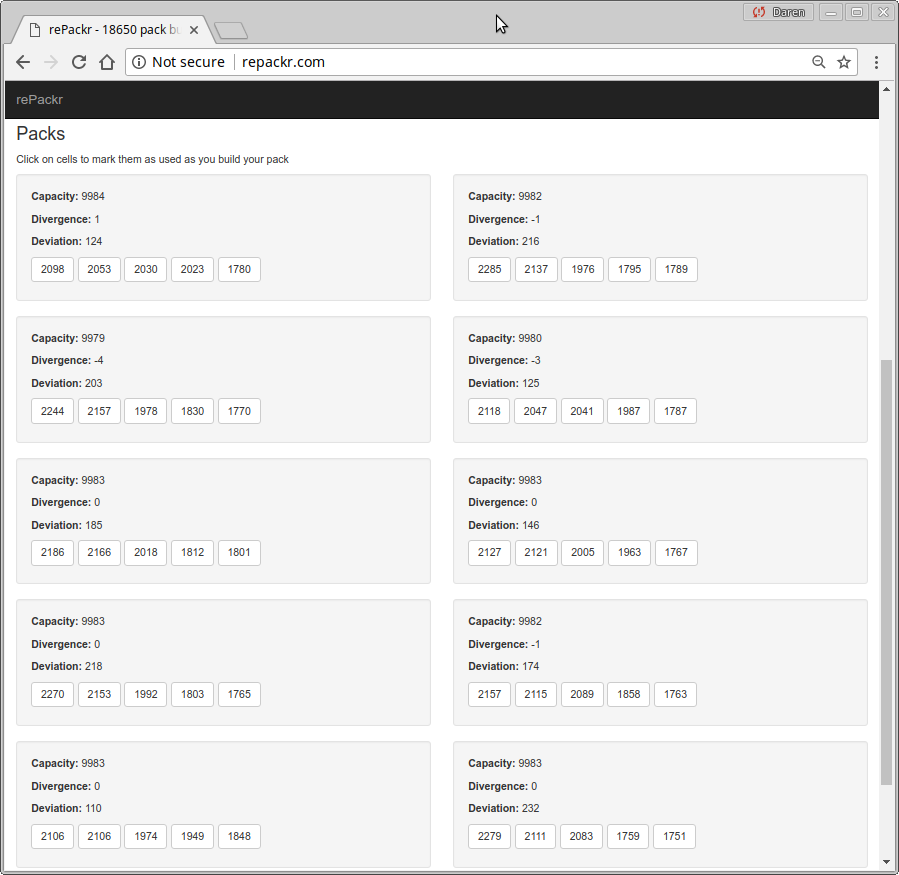
You paste your list of capacities as a CSV, enter the serial and parallel configuration desired, and...

That is just perfect. One less thing to do.
</EDIT>
-
Cell recovery and cycling.
02/04/2019 at 01:12 • 0 commentsCycling the cells at least twice seems to be key to getting a stable capacity value.
This is likely due to some of them being at 2.8v when I got them. That's below the maximum recommended discharge voltage of 3.0v and likely due to them sitting in a discharged state for an extended period of time before they arrived at my desk.
Although the majority seem to have recovered fine from this, it took 2 cycles to bring them back up to their new maximum capacity. I'm sure they all lost some capacity in the process, but they are still usable.
I fully cycled all the low scoring cells at least twice and most recovered about 100mAh of capacity in the process.

For kicks, I tried cycling a few a third time. This resulted in a maximum 25mAh gain, and two even lost a few mAh. Twice seems to be the number.
<EDIT>
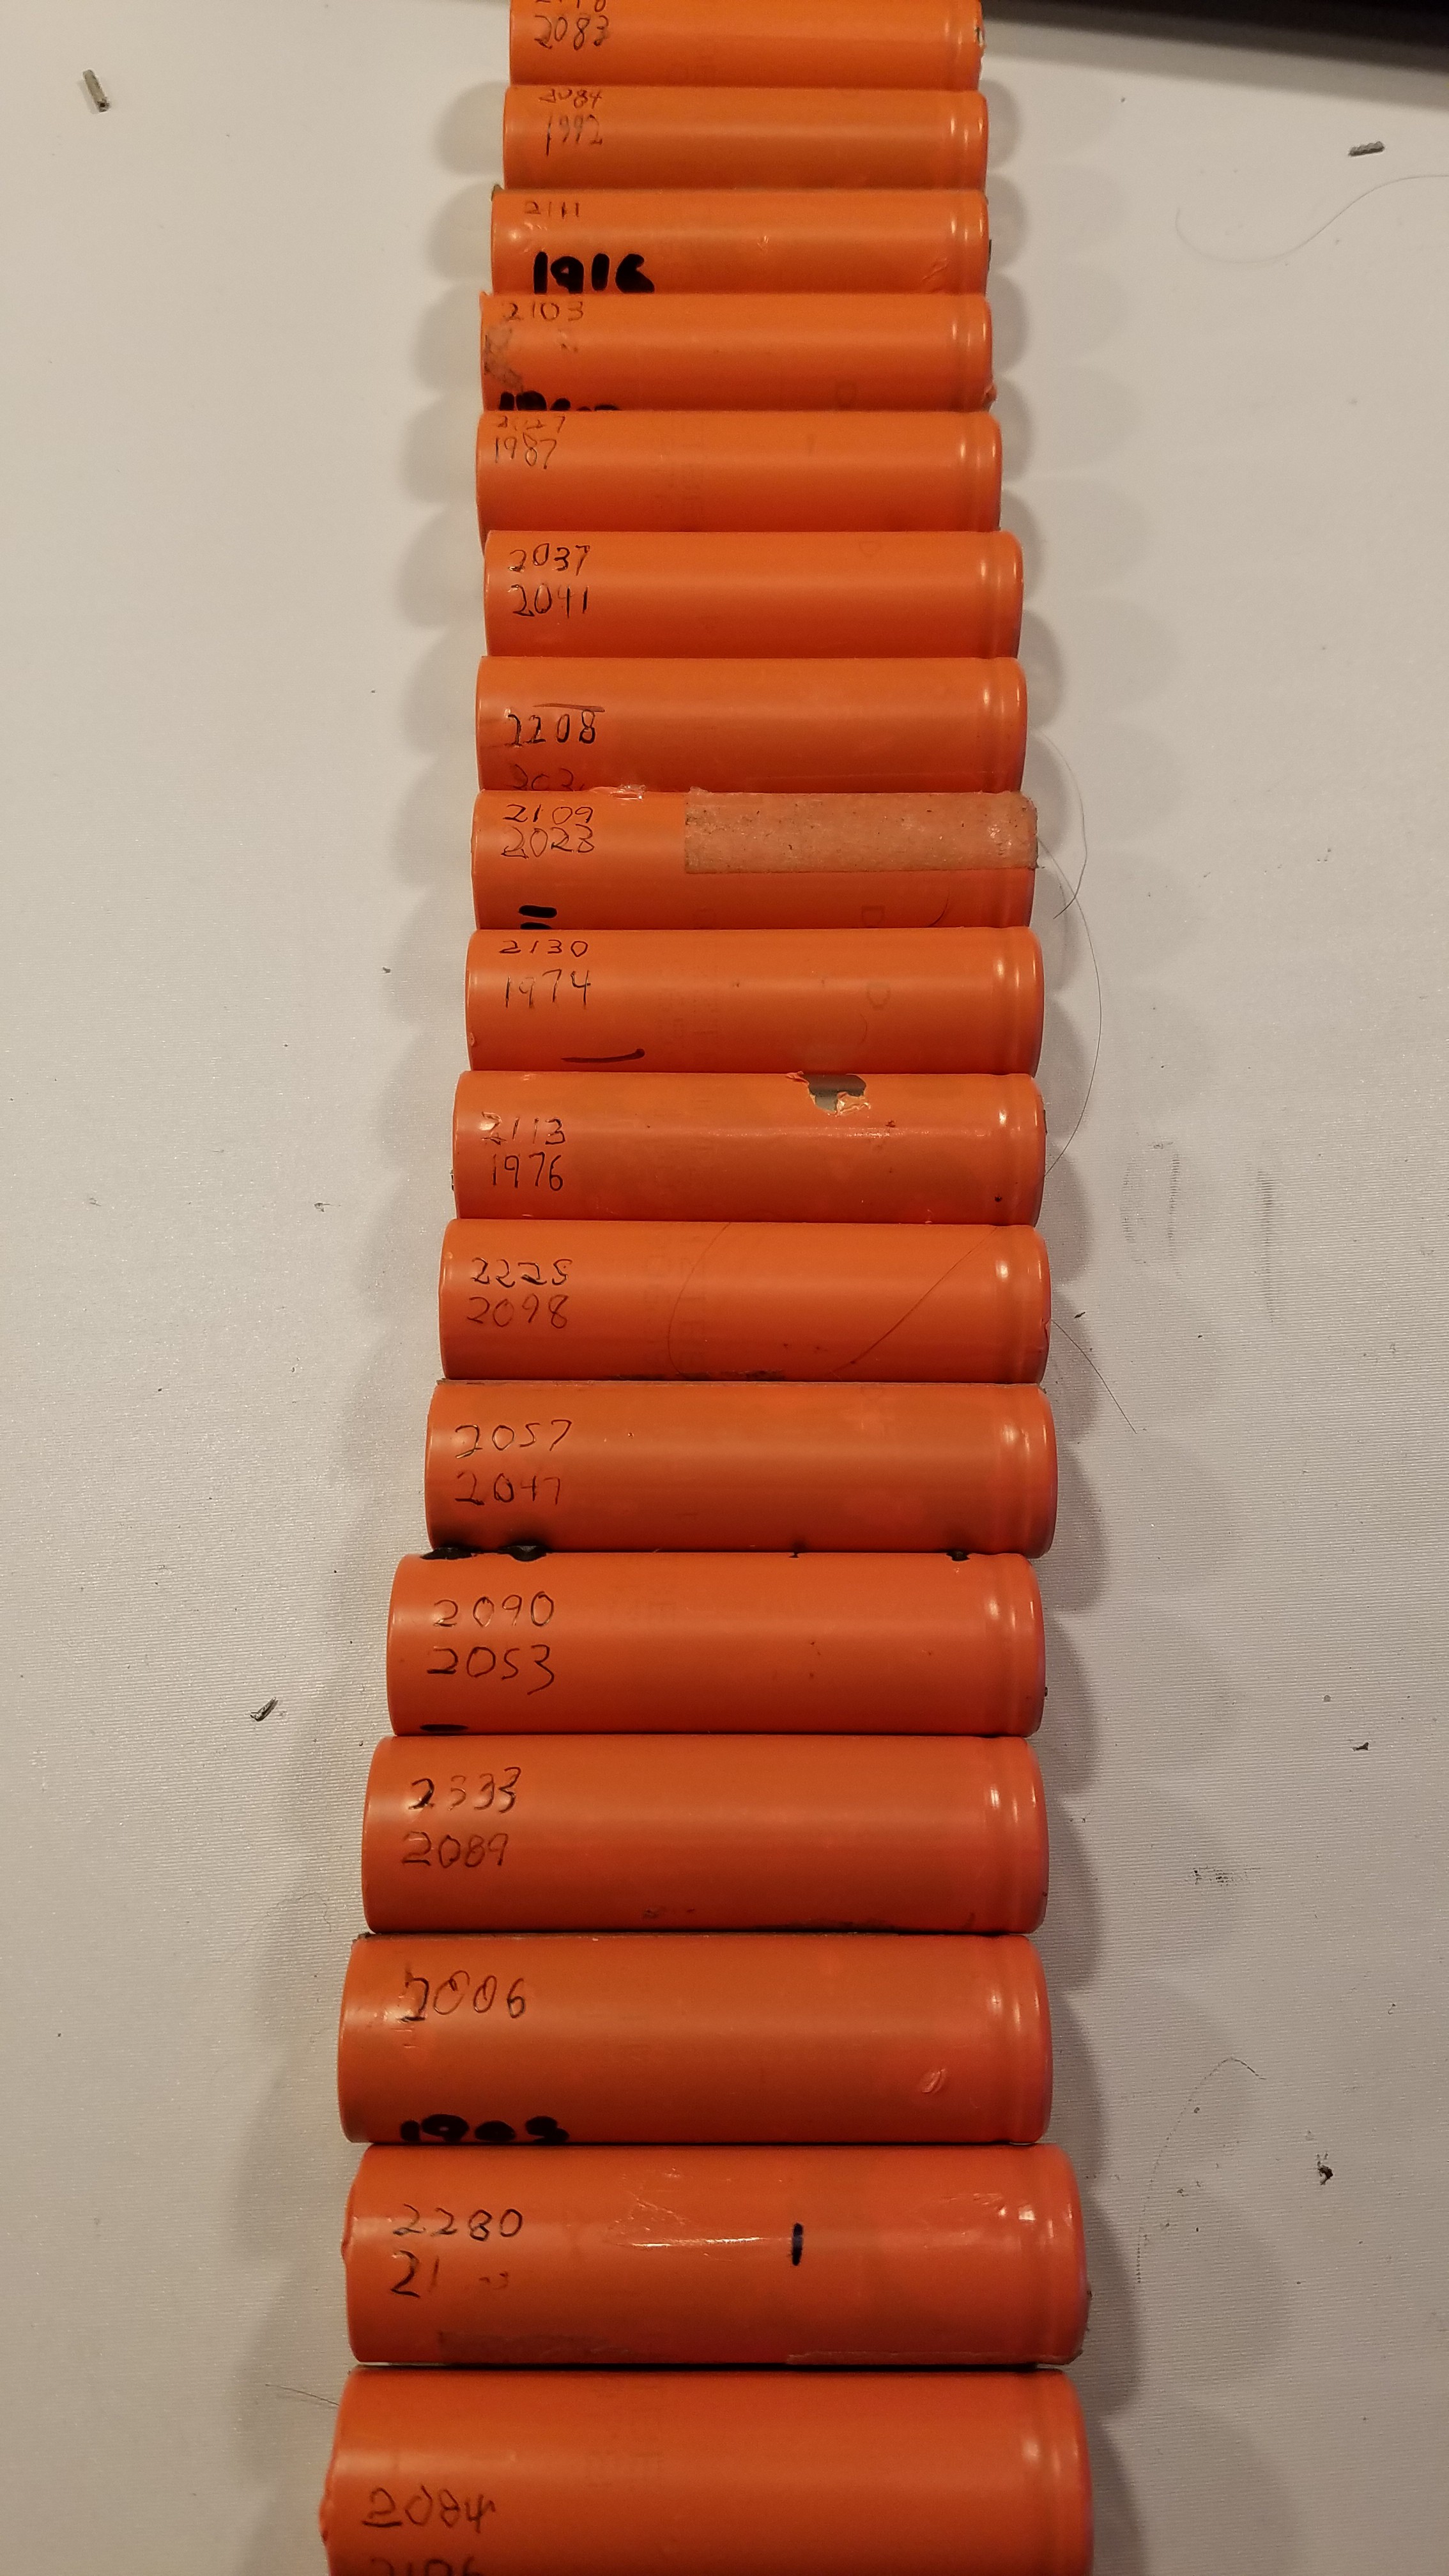
I've been moving on up from worst to best cycling them all a second time. The second cycle improvement numbers show no sign of stopping. The latest two cells went from 1974 to 2130 and 1976 to 2113. I'm going to have to do them all for my own sanity.
I need a good high amp charger so I can do them in parallel, or at this rate cycling them all again with my 2 cell desktop charger will take 168 hours. Ooof.
You can charge pretty much as many cells as you want in parallel. I'm not sure I fully understand how to do the charging properly though. What I read so far is... start out at constant current or 0.5-1.0C, at some point switch to constant voltage when you hit 4.20-4.25V, and then stop the charge when charge current drops to < 3% of C. Now how to do that in hardware...
</EDIT>
-
All the knobs go to 11.
02/01/2019 at 03:25 • 0 commentsI was down to the last 6 remaining cells to test. Charged, and in the process of discharging.. almost done.
Then the power went out. I was testing a cell welder. Word of advice.... Don't run a space heater on the same circuit as your home-brew cell welder. Duh...
So I charged those cells all the way back up, and discharged them again. Unfortunately I remembered the approximate capacity numbers from when it terminated.
They are all coming in at about 200 mAh higher on the second cycle than they would have on the first. I noticed this earlier on some of the other low-scoring cells also...
<EDIT> Ok, not all of them are increasing, so I'm a little less paranoid now. I'll probably still complete this task.
EDIT again... Two only increased slightly. Two others went up by 100mAh. Cycling more of them has resulted in all the low scoring cells going up 10-200mAh on the second cycle.. Too many variables.... I should just cycle all of them again and be done with it.
</EDIT>
This is not a problem with the capacity meter. However, it likely means I will need to cycle about 1/3 of the cells again to make sure they are back to their actual capacity. Now that I'm charging them in my two slot desk charger, and not all at once (temporarily wired into the BMS with a huge power supply), that is going to take forever.
But... I gotta do it. Doing it.
-
The bad cell black hole.
01/31/2019 at 19:32 • 0 commentsA curious thing has happened on a few cells. They would start discharging normally, then disappear.
Well, not physically, although that would be a lot more exciting. Sadly, no fireworks since I built this version of the discharger.
They dropped into a logic area I didn't account for. What that is, I have yet to look for. But I know the display stops updating for them, and when I take them out the cell voltage is lower than the ending voltage.
Given I just started the discharge, those cells are obviously toast, but they should be sitting in 'Done'.
I missed something.
Looking at it.
-
Logging and startup current fixes.
01/30/2019 at 02:50 • 0 commentsI rearranged the start sequence and serial logging so it makes more sense while starting up.
I also eliminated the bug where discharging starts at 100% load. You can now set the start PWM level.
int Start_PWM = 200; // Starting value for PWM before current control kicks in. 0-255While I was at it, I attributed the original article in the source.
New source is up.
-
Credit, where it is due.
01/29/2019 at 20:54 • 0 commentsI started with someone else's code and wiring first. I went back and found that project, so I could include it here now. https://www.instructables.com/id/DIY-Arduino-Battery-Capacity-Tester-V10-/
There is not much in the original code that has stayed the same, but starting with something working was a head start. I still need to attribute it yet.
- The math was simplified, fully switched to integers, and then largely switched back as I was just being anal about using so many floats. Works fine, why mess with it.
- A logical state now controls operational state. This prevents cells from restarting a cycle by recovering, and clears the associated math bits when it does restart one.
- Display and serial code was gutted and re-written.
- PWM current control was added.
- Converted to do 4 channels.
- The hardware was stripped down to just what was needed, but was basically already exactly the way I would have done it. The original is no safer, and does little better at protecting the Nano. It also sacrifices half the ADC resolution to do it. Minimal it is. :)
Minimalist Li-Ion Discharger/Capacity meter.
What you need to grade your scavenged cells for building balanced packs.
 MasterOfNull