 Hobby Hoarder
-
13D print all the parts
Charger
The charger is the most difficult part to print as it contains small holes with tight tolerances. I suggest you try and print this first before anything else. Use the best print quality on your printer, which are usually 0.10 or 0.05mm layer heights.
Dock, cover
You can print both at 0.2mm layer height.
Supports
No supports are needed for any of the parts. The interior of the dock is already designed with sloping support.
-
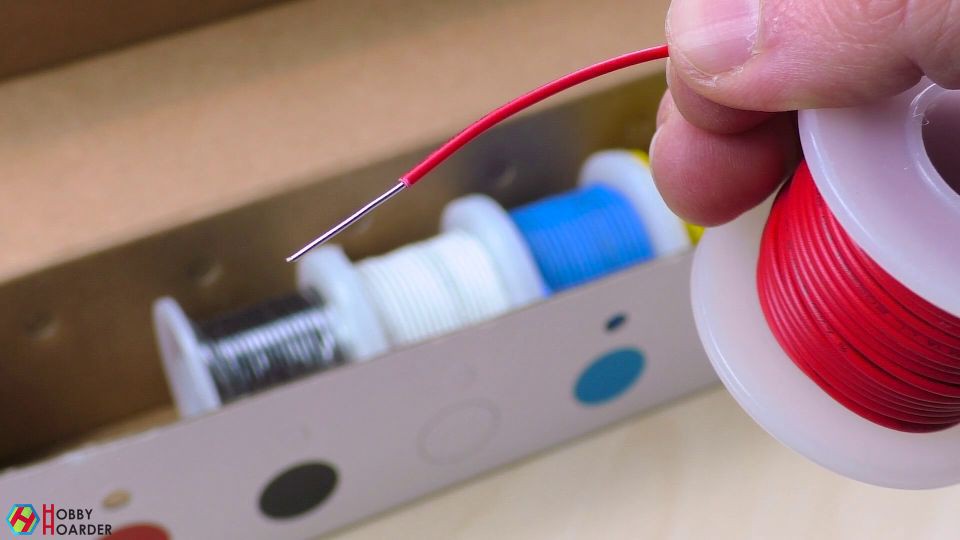
2Prepare the wires
The holes are for standard jumper wires that you can find with any breadboard or Arduino kit, but they have to be solid. Look for 22 AWG / 0.3mm2 size if you're buying new.
![]()
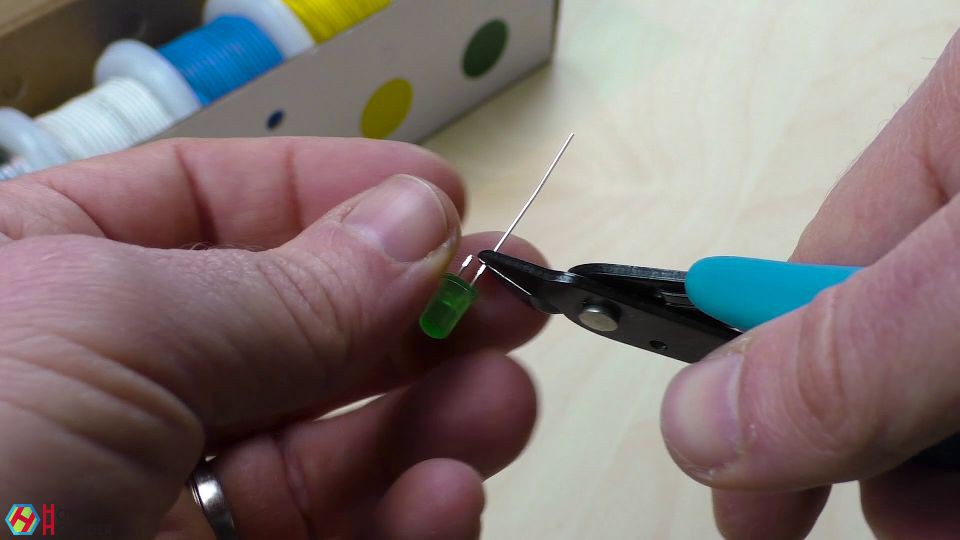
If you don't have any wires like that, you can improvise by cutting away an LED or a resistor.
![]()
-
3Prepare the spring
As for the spring, find an old pen and take one from there. The slot has a slope so that springs of different sizes can all fit inside.
![]()
-
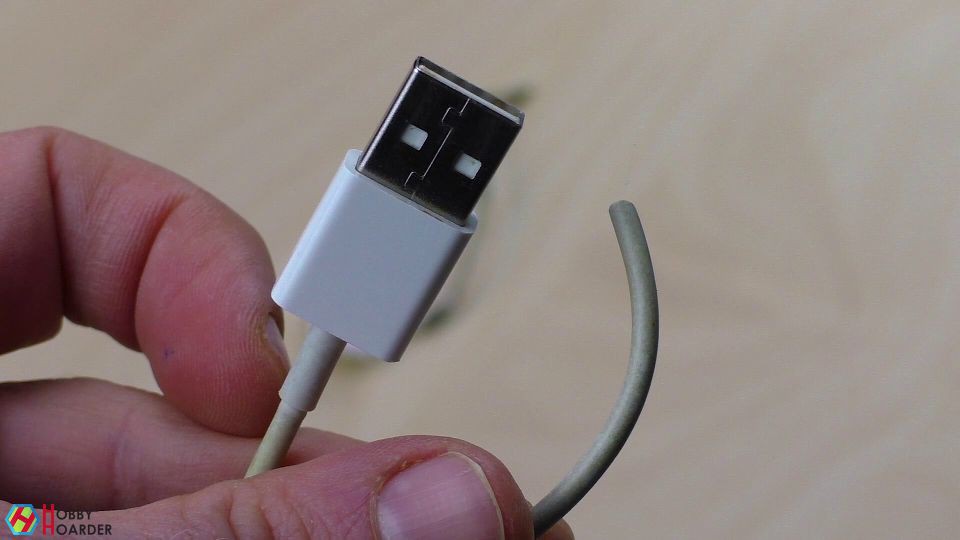
4Prepare USB cable
Find an old USB cable and cut away one section, but make sure you keep the Type-A male plug.
![]()
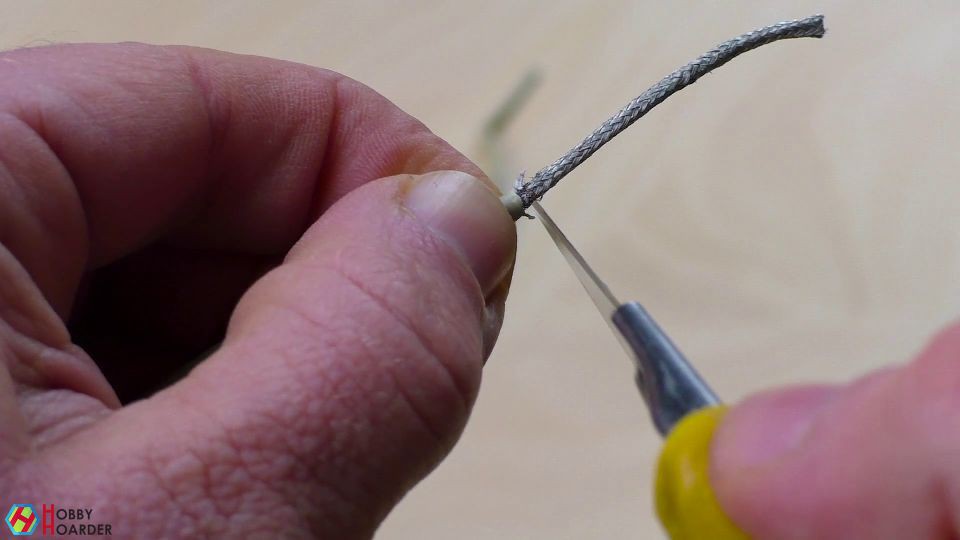
Strip the shielding and cut away all the wires except the red and blue ones.
![]()
![]()
-
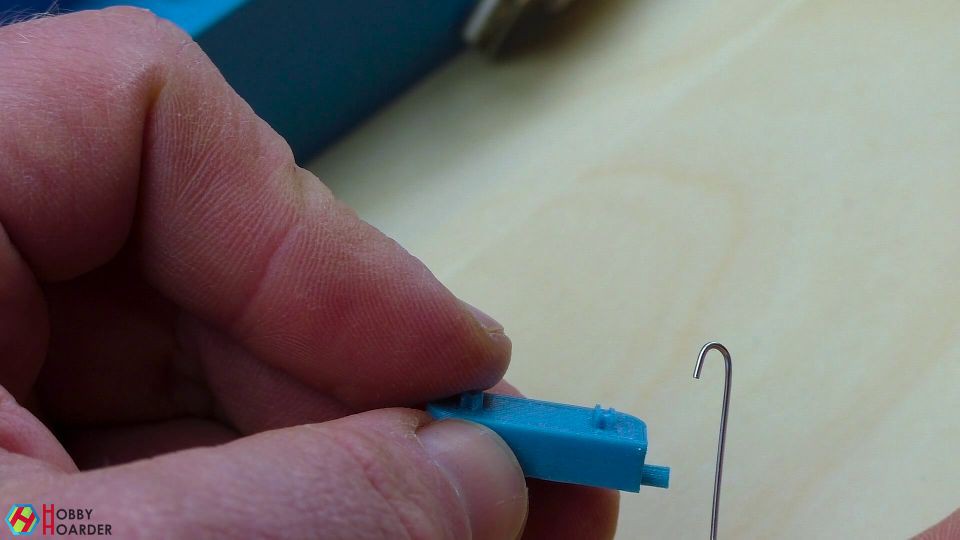
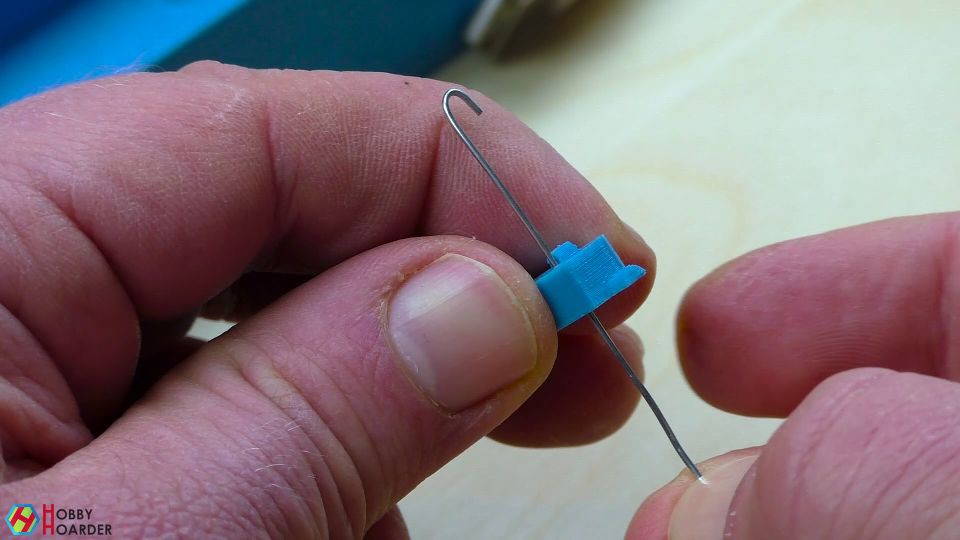
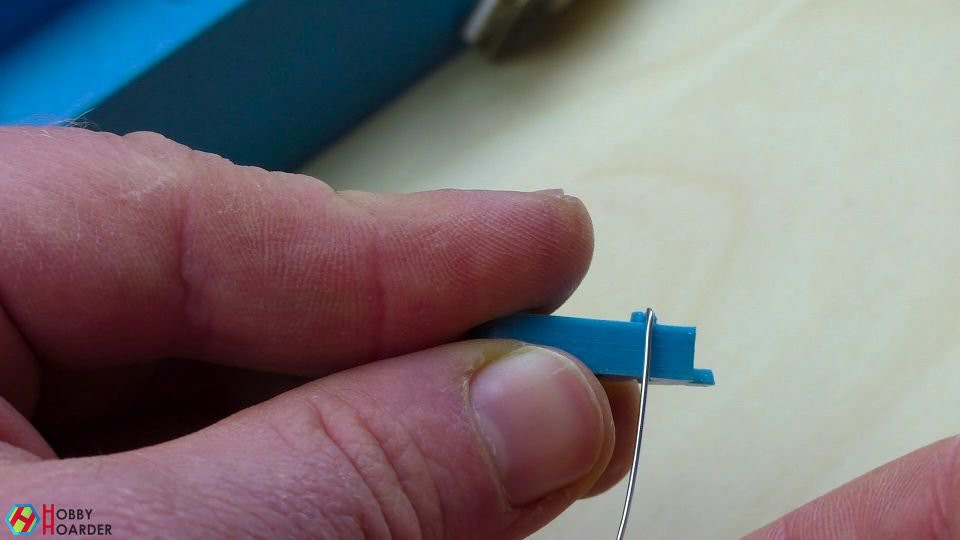
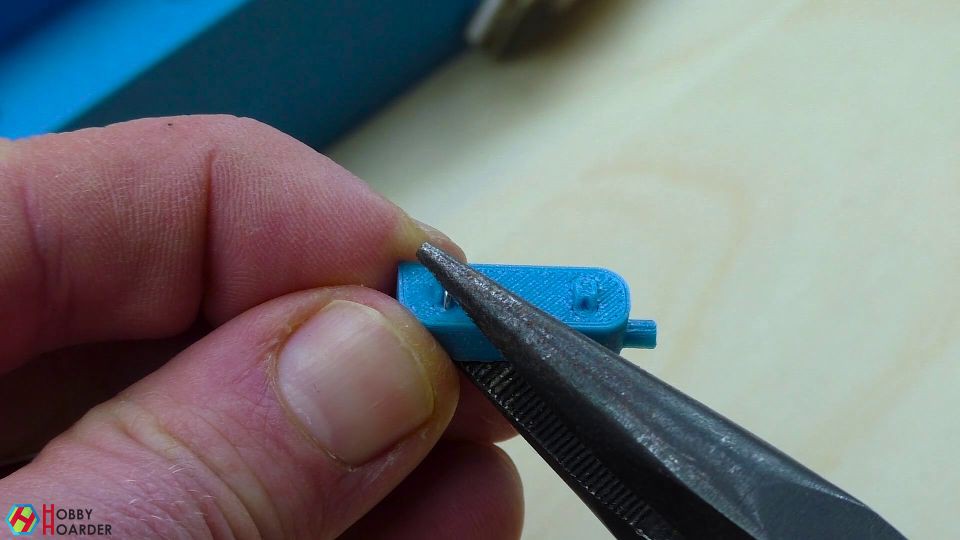
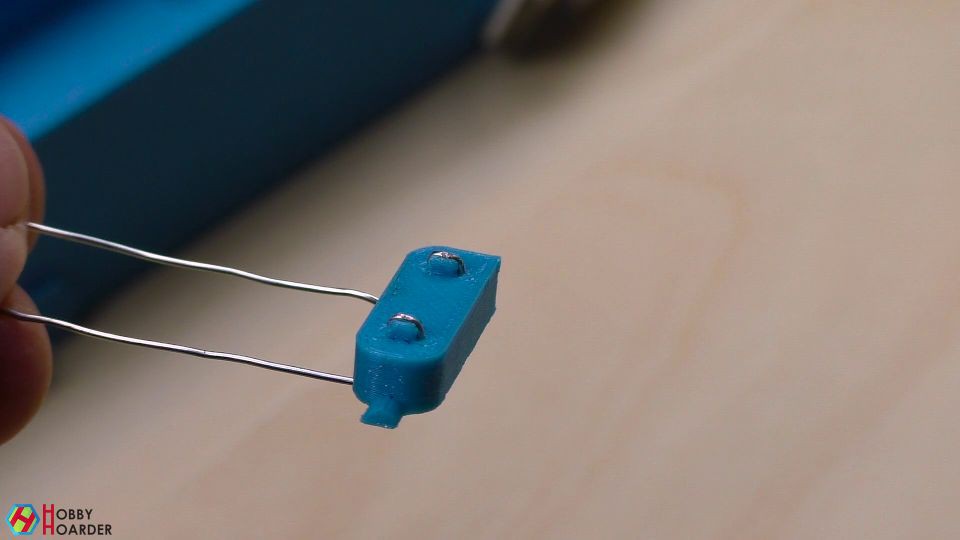
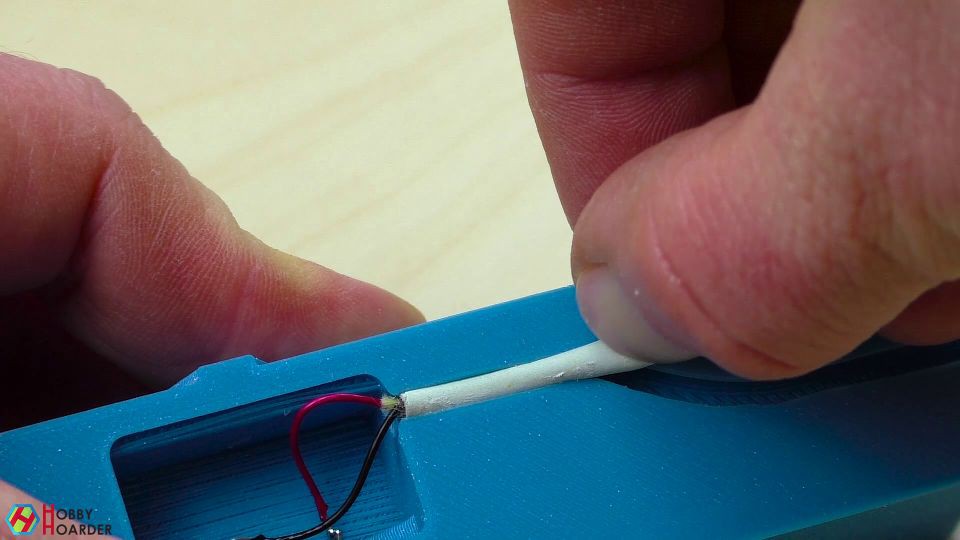
5Charger assembly
Insert the wire into the hole and bend it around the corner to get an U shape.
![]()
Then, insert the long end and push it through. Make sure the short end goes into the hole as well.
![]()
![]()
Small pliers are really useful here.
![]()
When you're adjusting the contacts on top of the charger, try to shape it in such a way to create a V shape. It can be a bit tricky and you'll probably have to try it a few times before it makes a good contact. Don't despair!
![]()
-
6(Optional) Reduce voltage
The 3DS has an input voltage of 4,6V while USB provides 5V. What should you do about it?
You might think it's ok to simply attach a resistor, but that won't work because the charging load isn't constant. A better option is to use either a buck converter or a low-dropout regulator.
![]()
The issue with buck converters is that most aren't capable of achieving such a small voltage difference.
Low dropout regulators don't suffer from this issue, but they can produce a lot of heat. Quick calculations for a typical LDO are showing around 55'C, which is getting very close to what PLA can handle. You should definitely keep it out of contact with the surface or use a heat sink.
Personally, I wouldn't bother with either and simply connect it directly to the USB at 5V. Devices like the 3DS are quality-built and the voltage difference should be well within the limits. In fact, every 3DS cable that you can buy has a standard USB plug and therefore charges at 5V. -
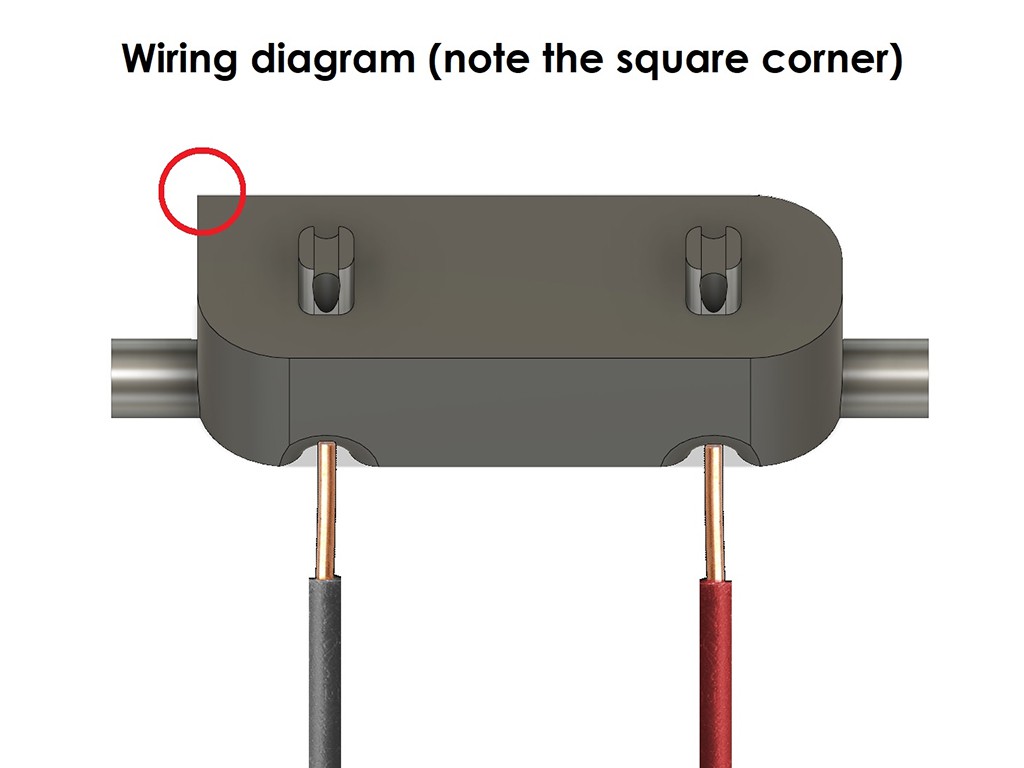
7Wiring
Looking at it straight on, the right wire is positive, so solder it with the red wire from the USB cable.
![]()
![]()
-
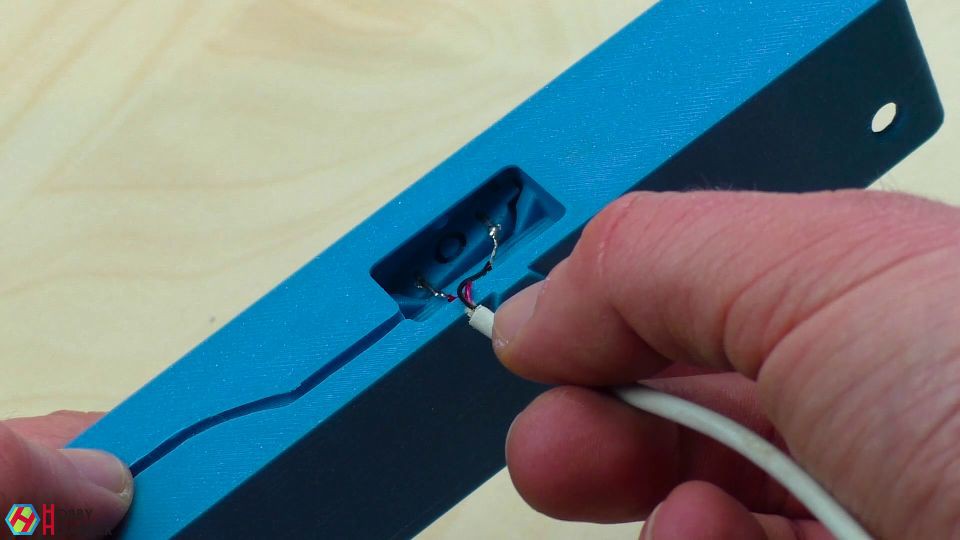
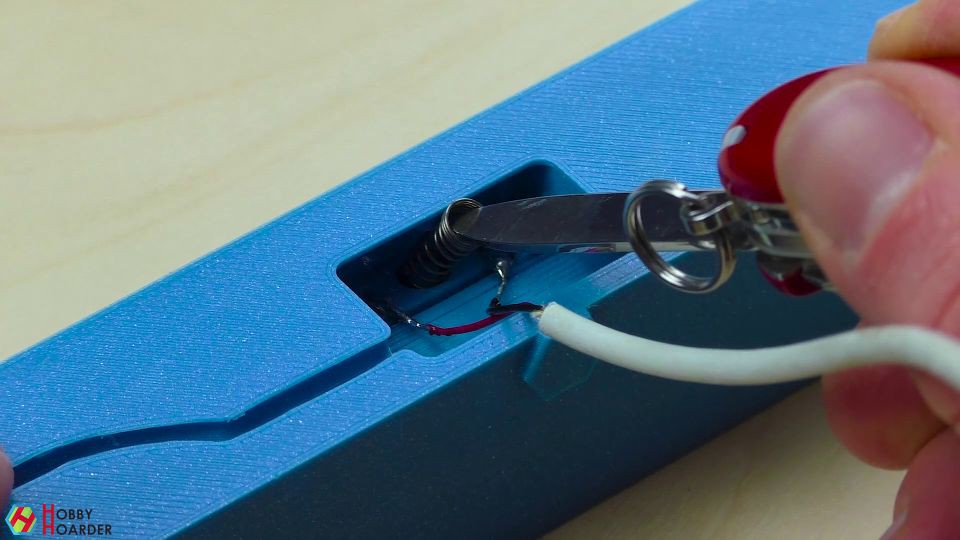
8Dock assembly
First, insert the charger.
![]()
Then, insert the spring. Use a small knife or screwdriver to guide it into place.
![]()
Finally, squeeze the cable inside the channel.
![]()
-
9Fine-tuning
For a better fit, you'll have to fine tune both the charger and the spring.
Charger/contacts
When you're adjusting the contacts on top of the charger, try to shape it in such a way to create a V shape. It can be a bit tricky and you'll probably have to try it a few times before it makes a good contact. Don't despair!
Spring
The stiffness of the spring is very important. If the spring is too strong, it will tilt the 3DS and lose contact. If it's not strong enough, it won't push against the charging contacts. You will have to tinker with the spring until you get a good fit. I did it by cutting away one loop at a time, putting the spring back in and trying if it works. Keep doing it until you get a reliable contact.
![]()
-
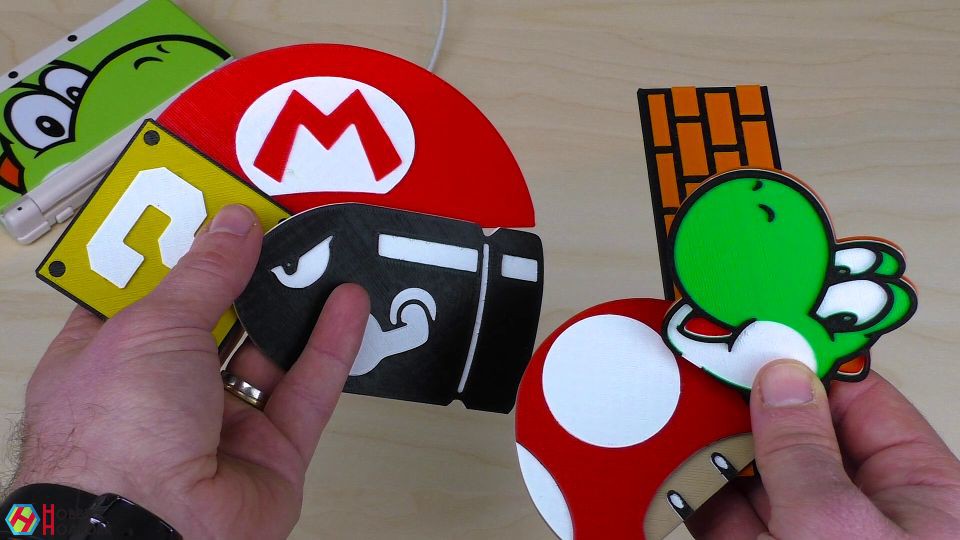
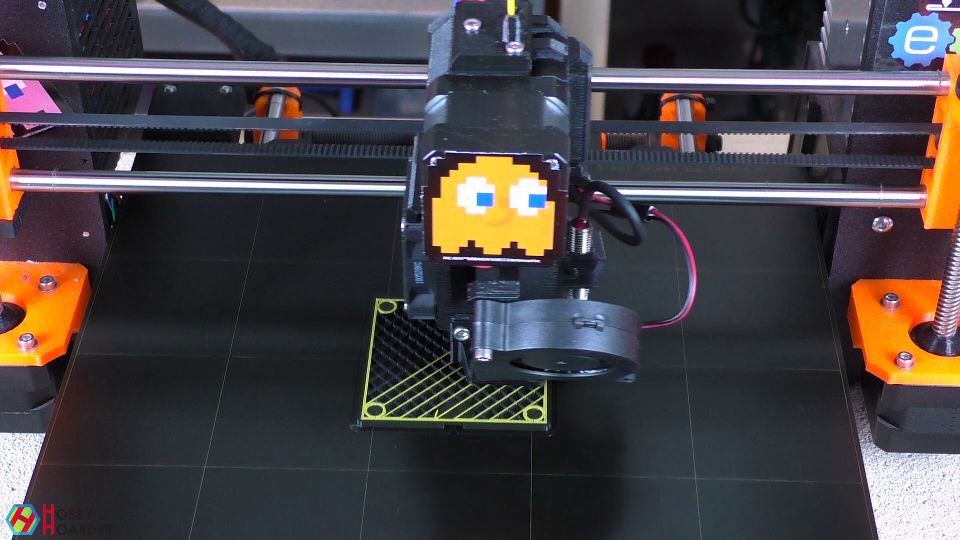
10Print the plates
![]()
For printing in multiple colors, you need to slice the model and save it as normal gcode. Then, you have to insert the M600 command. You can do this manually by opening the gcode, but the easiest way is to use the ColorPrint tool by Prusa. You simply upload the file, set height changes and save the new gcode. Here's the tool:
https://www.prusaprinters.org/color-print/![]()
If you're intereseted on how to design things for multi-color printing, you can watch my video that explains everything:
I'm also including a blank plate so that you can design your own. Import it into CAD of your choice (I recommend Tinkercad or Fusion360). The first layer is 2mm thick, every subsequent layer should be 0.8mm.
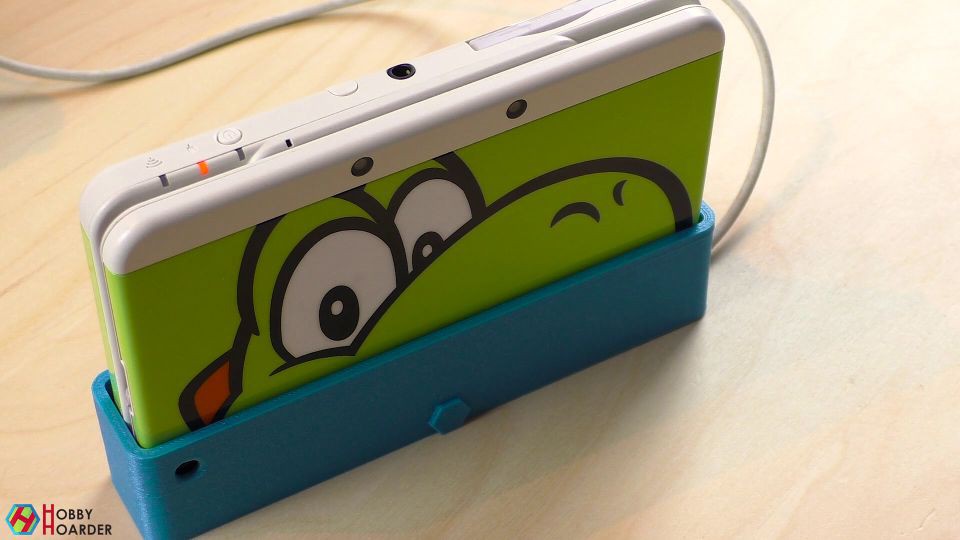
Charging dock for 3DS with swappable plates
3D printed charging dock for the New 3DS. No special tools required and it comes with swappable plates!


Discussions
Become a Hackaday.io Member
Create an account to leave a comment. Already have an account? Log In.