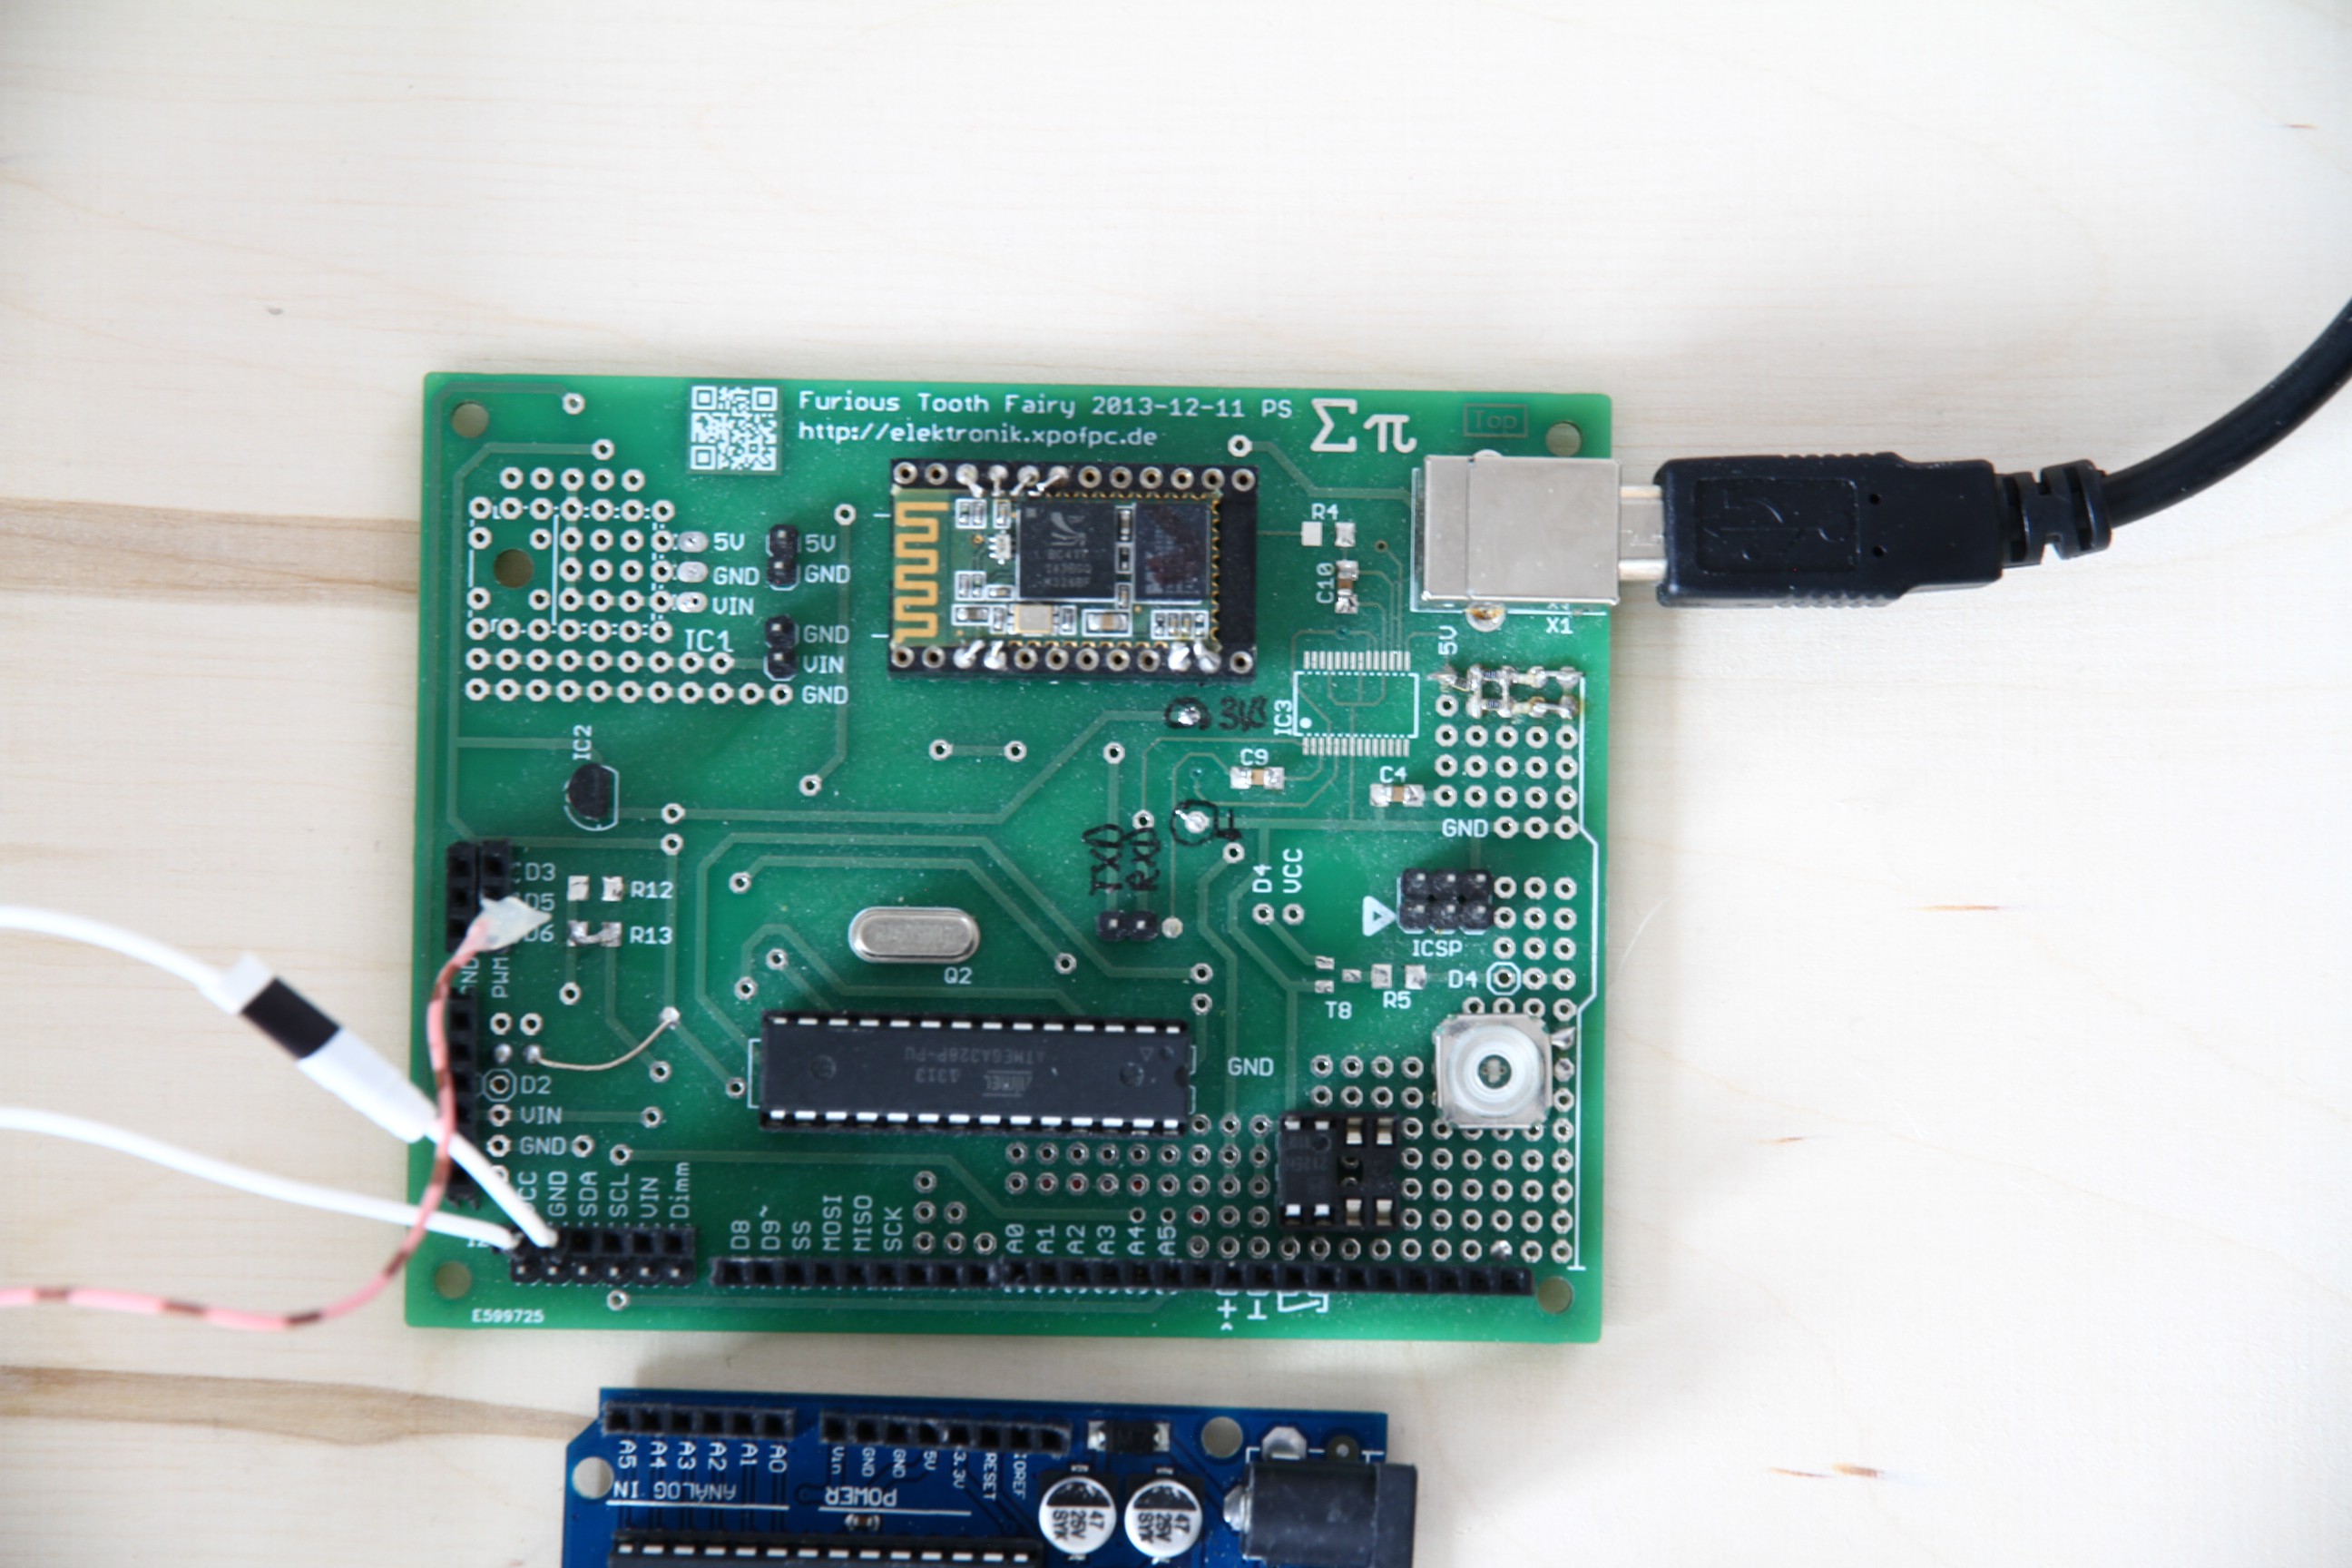
As mentioned before i used the #Furious Tooth Fairy as control board. But as mentioned in that project it is only a standard Arduino setup + Bluetooth (HC5). I decided early on, that i don't wan't to have buttons or touch. I thought if it is mounted to the wall it would be much cooler to remote control the clock via Bluetooth.

[As you can see the Board took some dust ... literaly]
This has also the Advantage, that there is no need for additional Hardware except for the BT Module.
I also thought about using some Wifi Stuff... but i still had these Boards on hand - and it is really easy to use a Bluetooth Terminal on a smartphone to control the Clock. On the #FTF there is a Voltageregulator for 3.3V, the Atmega, A switch, a Optocoupler, the BT Module and some pinheads. Also there are unpopulated Footprints for LM7805 and FT232RL.
BTW: Does somebody know how to utillize the FT232RL to programm an Arduino?
Edit: Mindblowingly easy: Just Bootload the Atmega once and connect the Reset via Capacitator to the FT232RL...
For first tests i used a Arduino Uno. So later i only needed to load the Software onto the Atmega328p and I'm ready to go. In the meantime i enjoyed the ease of Uploading via USB and the USB Terminal.
The WS2812 are just amazing ... i just realised i missed them my whole live :-D
You need only one Pin to control up to *a huge amount* of LEDs. In this project i control 110 effordless.
In the next Log i will tell a bit about the programming.
 Stefan-Xp
Discussions
Become a Hackaday.io Member
Create an account to leave a comment. Already have an account? Log In.