Environment Monitor
Monitor temperature and light levels. More features to come!
Monitor temperature and light levels. More features to come!
To make the experience fit your profile, pick a username and tell us what interests you.
We found and based on your interests.
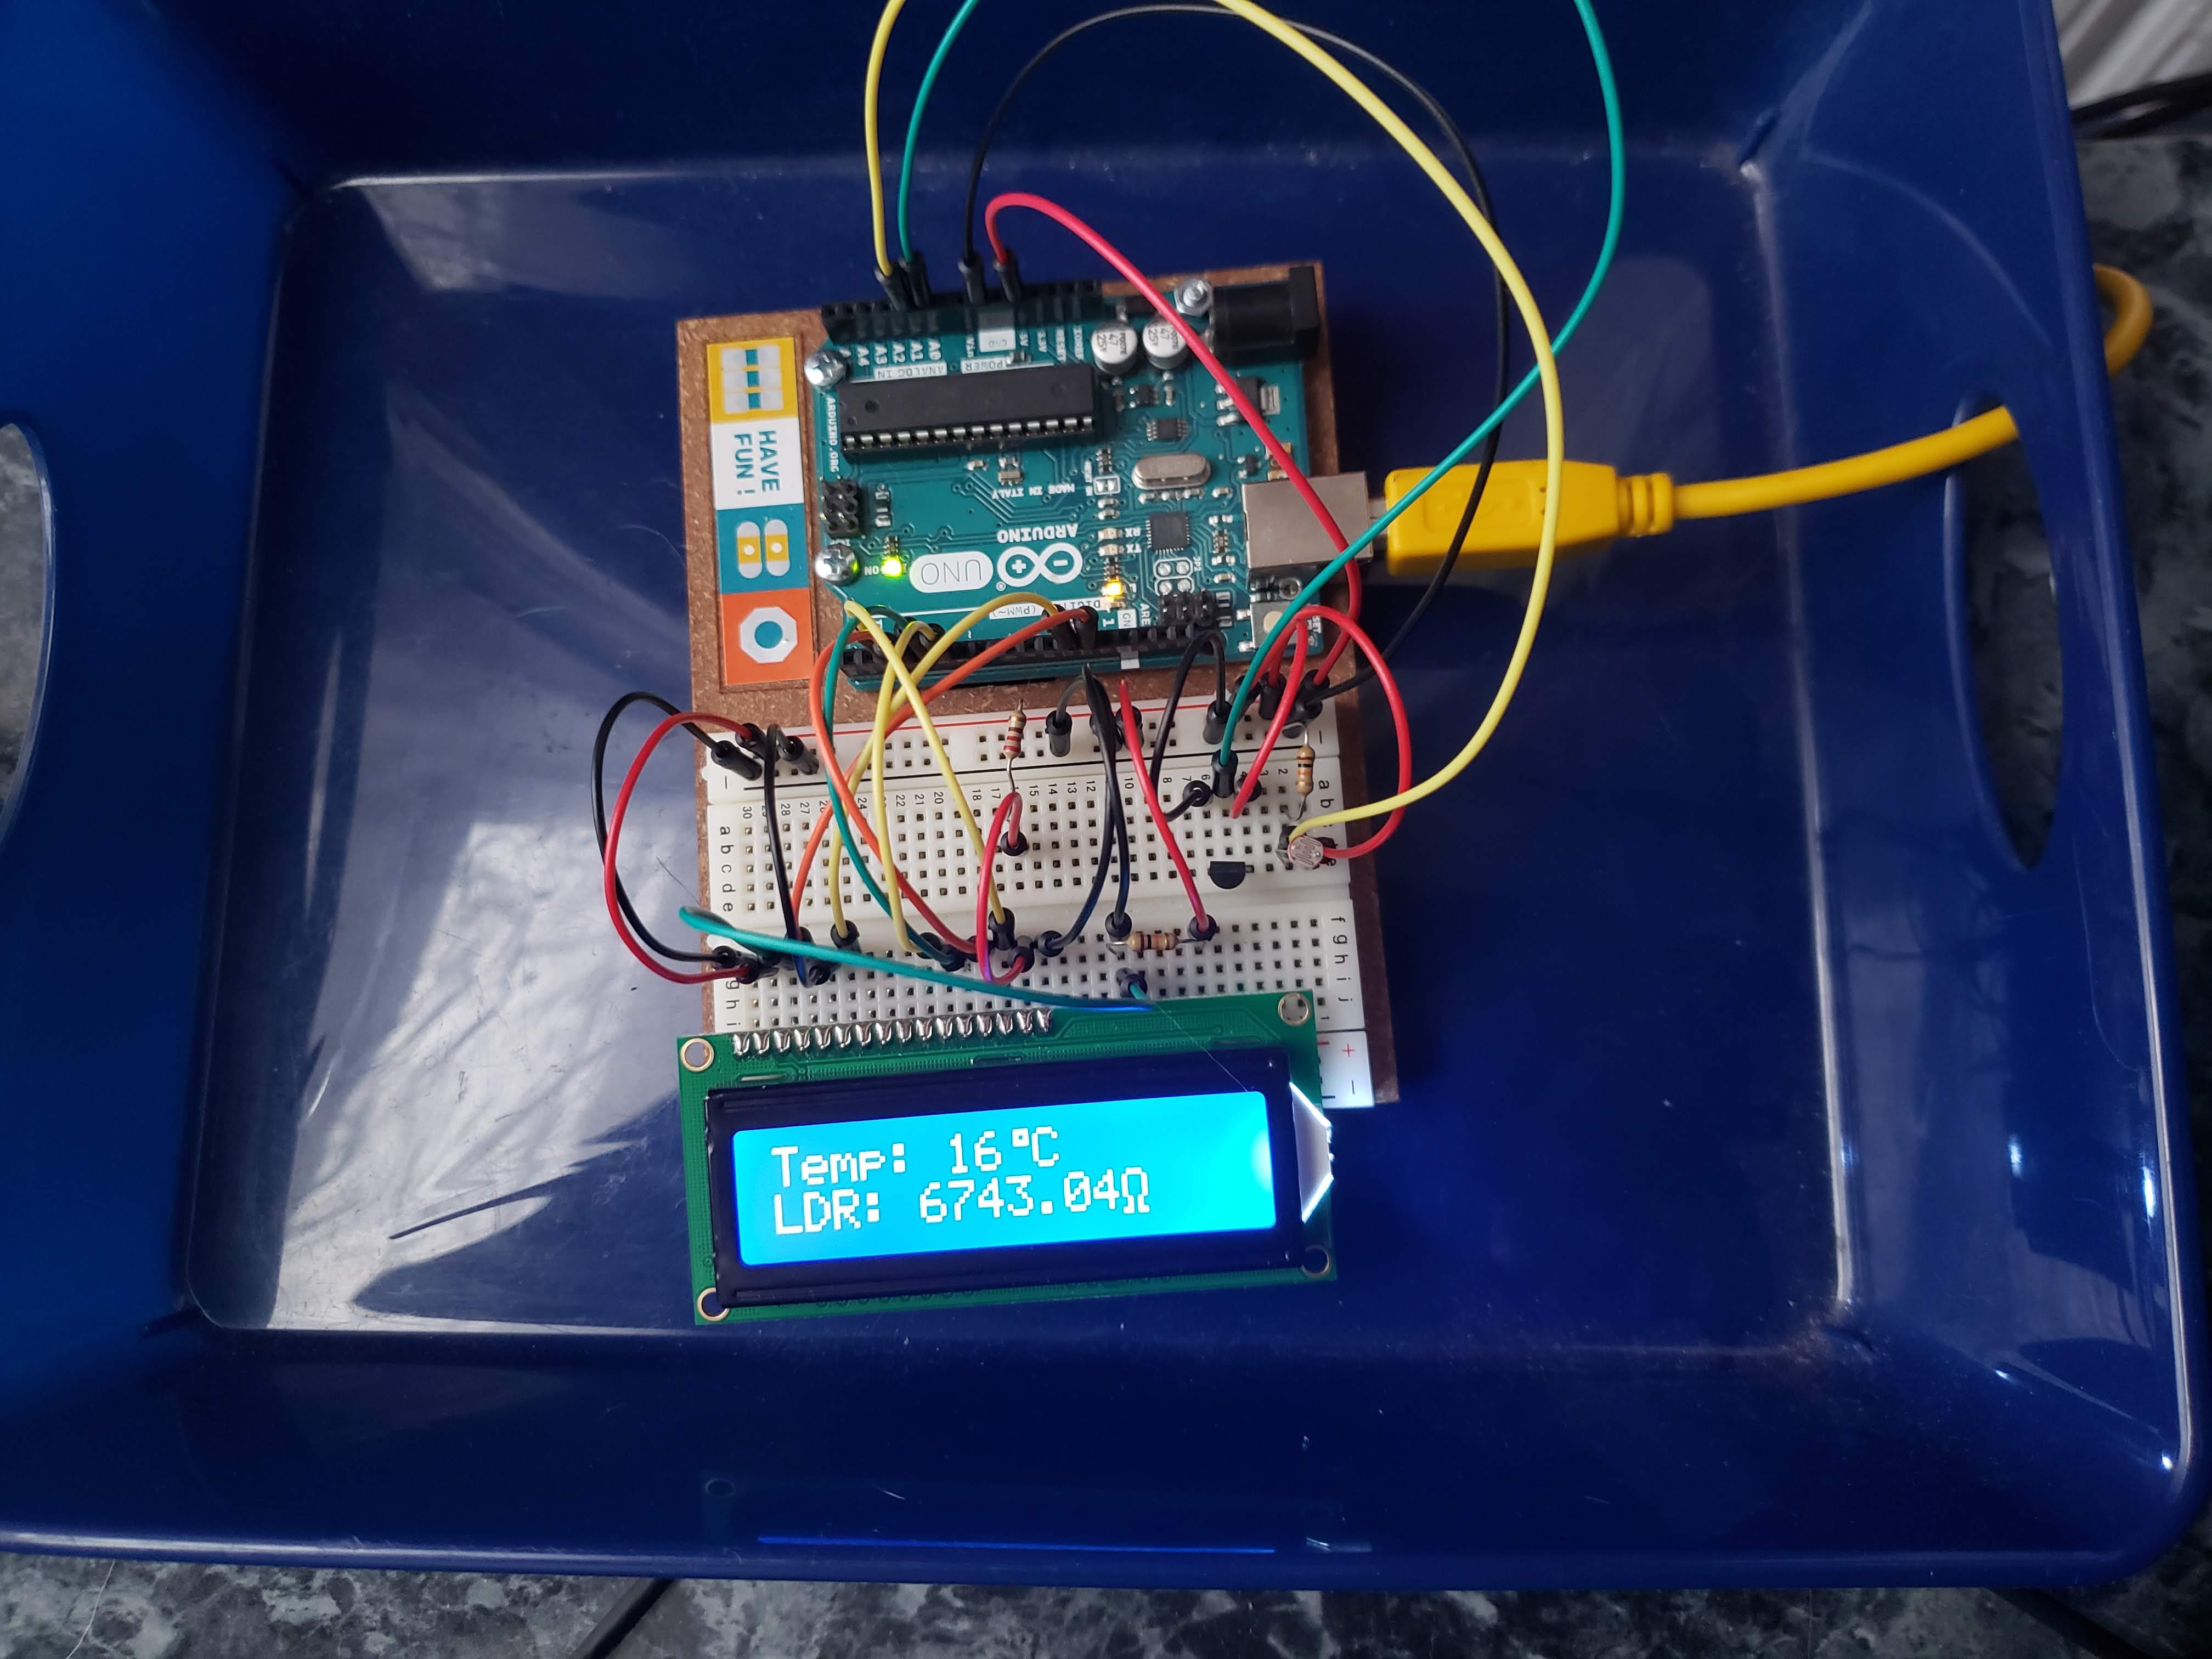
Finally added an LCD screen and a light-dependent resistor (LDR)!

I followed the schematic in the Crystal Ball project in the Arduino Projects Book to wire-up the LCD screen and the Light Theremin project to wire up the LDR. Instead of leaving a potentiometer in the design to control the contrast of the LCD display, I used the potentiometer to find the resistance that gave me an acceptable contrast (about 10k) and replaced it with a resistor near that value. The degree symbol and the omega were made using the createChar() method from the LiquidCrystal library.
As displayed in the picture above, the LCD display shows the temperature in degrees Celsius and the resistance of the LDR. The resistance of the LDR can be used a proxy for how much light there is: the lower the resistance, the more light there is. In order for it to measure lux, I will need to either devise a calibration experiment or find a luxmeter to use to relate lux to resistance. All About Circuits has a really good article about how to build a luxmeter that I referenced in this version's design.
To program this design, I gutted the Thermometer sketch I used in the previous design and re-wrote it as the Environment Monitor sketch. Both sketches can be found on my github:
https://github.com/themathochist1414/
The java program that I wrote to read data from the serial port can also be found on my github.
So now that I'm displaying more than one piece of data, the LCD screen makes more sense than a set of LEDs. There are fewer cables to manage and it's easier to read. However, in future designs, I might bring the LEDs back to display temperature because I think they're cool. I would have to consider setting it up in such a way that the LEDs do not interfere with the luxmeter, but that's a problem for future me.
Future Hardware Updates:
As an introduction to programming an Arduino, I decided to purchase one of the Arduino starter packs. It sat on my shelf for a few years, but I finally got around to exploring it…
One of the projects in the starter book is called the “Love-O-Meter.” In this project, the reader builds the “Love-O-Meter” using a thermistor and a few LEDs. A user squeezes the thermistor and the “Love-O-Meter” lights up LEDs depending on the temperature reading from the thermistor.
I thought it would be a cool idea to use this project as the basis for an environmental monitoring system so started designing a thermometer based on the “Love-O-Meter” code and schematic.
One of the major concepts introduced in this project is printing to the serial port. However, the Arduino IDE only displays the data on the serial port and does not have a way to automatically record and store it. To overcome this shortcoming, I looked-up how to communicate with an Arduino using Java. I found the jSerialComm library and wrote a Java program to record incoming data.
One of the “features” of the Arduino Uno is that it restarts its sketch whenever the serial port is open. At first, I thought this was kind of annoying, but I figured out how to make use of it in the Java program. After the Arduino Uno restarts, it prints random substrings from whatever sketch was loaded to it. To ignore this junk, I inserted a start phrase into the setup method that prints “Arduino Starting Up…” to the serial port. The Java program looks for this start phrase before it starts collecting data. Once the program finds the start phrase, it looks for substrings that start with an “@” sign and end in a newline. In a later version, I plan to implement regex to scan for specific patterns.
At this point in time, I have fabricated a thermometer that reports the temperature in Celsius representing the temperature using binary and 7 LEDs, one LED indicates whether the temperature is positive or negative and the other six are used to represent the temperature. The Arduino checks the temperature every so often (the user can tweak how often it checks), prints some data to the serial port, and updates the LEDs to display the temperature.
Some future updates to the environment monitor device:
Arduino Hardware/Software
Create an account to leave a comment. Already have an account? Log In.
Oh, and if you ever need help with regex, hit me up. I recently got sucked down the rabbit hole of regex, and I now dream in matches and groups.
Thanks, I appreciate it!
I'll take a look at Microchip and TI microcontrollers when I get the chance and I'll hit you up if I need help with regex.
It has been hard to keep-up with this project and my schoolwork. Haha. I've made a few updates on the hardware side of things and have plans to make the Java portion more robust. The java program pretty bare-bones in terms of error catching and user interface.
Become a member to follow this project and never miss any updates
Glad to see another person diving into hardware! Once you "graduate" from using Arduino I highly recommend looking into Microchip and TI microcontrollers, they have really good development tools as well.
Also, neat idea to use Java to parse the serial output. Good problem solving as well, to ignore the gibberish on startup.
Hopefully we see more of you around these parts! Cheers!