-
Fisheye lens
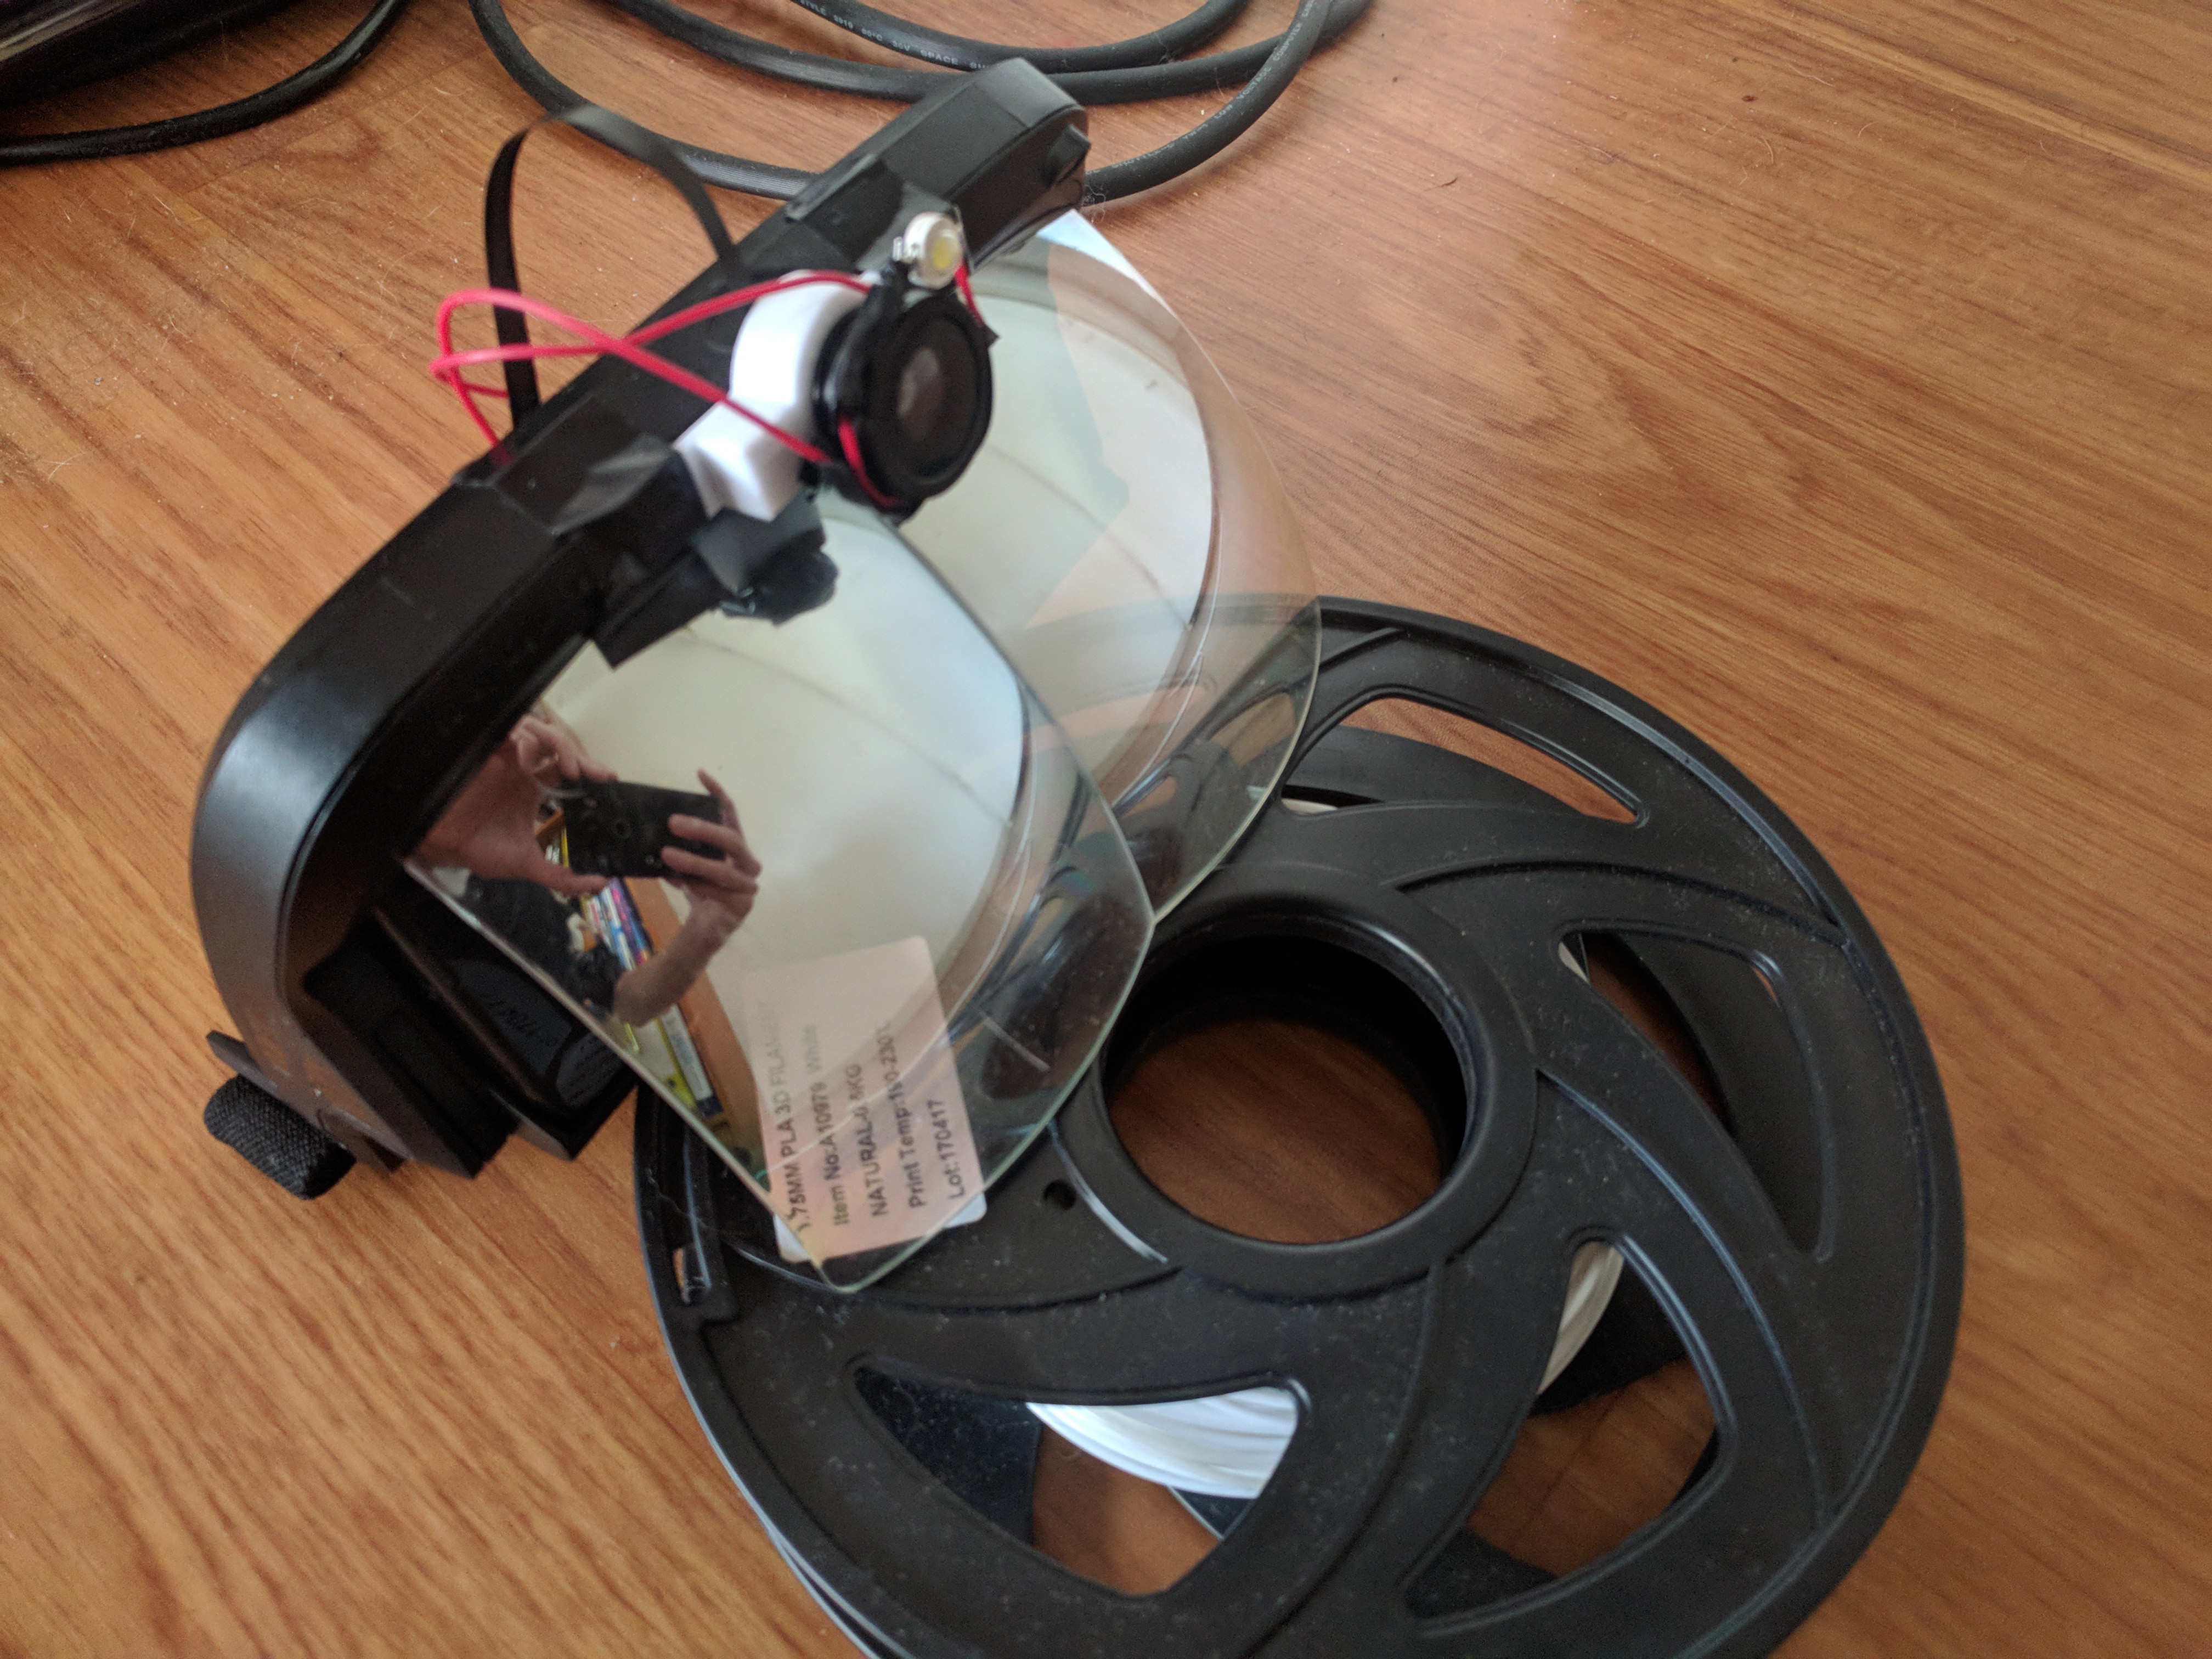
02/18/2019 at 16:13 • 0 commentsFeeling sick today, but found some time to make a bracket to attach a fisheye lens.

The way the glasses are designed there's only two simple ways to mount the camera: straight forward or in a 45 degree angle. Since the marker is usually on the floor or a table, it is best to have the camera aimed slightly downward. Although 45 degrees is too much, this would be improved in a custom frame. Ofcourse also the design would be improved to merge the lens with the headset more.
Haven't yet integrated it in software, but this won't be much of a problem and I'll probably get around to it quickly.
What does it mean? Fisheye cameras will allow for a much wider tracking camera close to 180 degrees. However I'm not sure QR code reading will go fluently without distortion correction, which could be a hit on performance. So I'm contemplating foregoing QR code support (for now). Next to that, the increased FOV will mean the marker will show up occupying less pixels, so either I need to increase the size of the marker, or increase the camera resolution (which would also be a performance hit).
-
First concept model
02/18/2019 at 11:53 • 0 commentsA little update; currently working on the BOM and for that I needed to build a 3D model to estimate costs for the glasses frame.
My plan is to go for a more VR goggle style design. They are easy to manufacture and have proven their ergonomic comfort to be reliable. The current glasses I use now miss the nose bridge and tend to slide down.
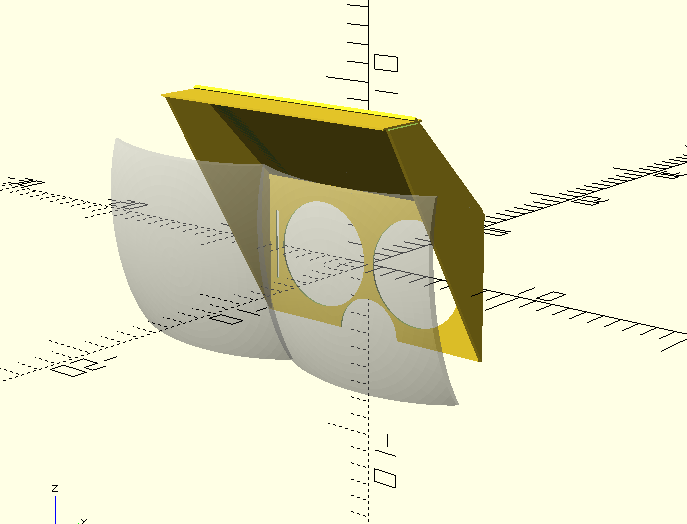
This is a rough sketch of the design I'm aiming for:

Note: the lenses are there for demonstration purposes but are not part of the design.
Some changes will be made; such as the side supports will be rounded to block out less of the users view, the eye holes will be joined, the nose bridge will be shaped better and more. This is a rough sketch of the design.
I've also found a supplier for the lenses that allows me to remain in budget.
-
Todo
02/10/2019 at 19:20 • 0 commentsHardware:
- Create birdbath AR lenses for a good price (hard)
- Perhaps using a dental vacuum form machine
- Design and lasercut a frame for the lenses
- Find a place to create flex ribbon extenders for a good price (hard)
- Create reflective QR codes
Software
- Take high-res picture on blob find and read QR code
- Create homescreen in Unity to start apps
- Create some demos in Unity
- Support for 3Dof controller - or 3Dof controller using additional phone
- More testing and tweaking in high light conditions
- Write and tweak vertex warping shader
-
Intro to reflective marker tracking
02/09/2019 at 16:31 • 0 commentsA short explanation of the positional tracker that I've made and that is used in these glasses.
The technique used are reflective markers with low exposure camera setting.
Basic steps are these:
- Calibrate the phone once by shining the LED (which is positioned next to the camera) on a piece of retro reflective material close up to the camera. This will put the camera in low exposure setting when auto-exposure is enabled. Then lock the exposure.
Some phones allow the exposure to be controlled directly without the use of auto-exposure. However this has become default only on later, higher end models of phones.
This calibration needs to be done once every reset, or after the camera has been released from the exposure lock.
- The camera feed is picked up from an OpenGL context, using a camera texture (GLES11 extension, available on all phones). A shader is ran over the camera input, comparing the colors in the camera texture with the color of the flash LED (or marker color). All other colors are filtered out. What remains are a few blobs.
- The remaining image is a black and white binary image, which is bitpacked using another shader, in a smaller image. Finally this much smaller image is downloaded to CPU with GLReadPixels.
- From these blobs, some might be static part of the scenery, such as a lamp or other object. The tracker remembers all objects, then flashes the LED briefly and identifies which objects disappeared and which stayed present. There are additional filters, but this is it in a nutshell.
- The blobs that disappeared are reflective blobs, and thus have a high likelihood of being retro reflective markers.
- The distance is taken from the radius of the marker circle, in a nutshell.
- Lastly a high resolution photo is taken so the QR code printed on the marker can be read out and the orientation of the marker can be determined. This step isn't fully integrated yet. (The QR code reader is implemented, and the POSIT algorithm for the orientation has been written and tested, but not yet all brought together in a working package). Right now, the object orientation is taken from the gyroscope and accelerometer.
Some clear upsides of this type of tracking are:
- Very minimal impact on performance. The biggest performance hit is a single iteration of the binary camera image on CPU, to do blob finding.
- Process doesn't get much heavier with more blobs. Scales well.
- Latency is low as the algorithm finishes quickly.
- Works exceptionally well in low light conditions, as reflective markers show up brightly and environment dimly. High light environments still need some extra work, but achievable (depends on brightness of LED too).
- No camera calibration required.
- Works well with low resolution cameras.
- Long range tracking. Longer range can be achieved by increasing the marker size too. Much better than sole QR code tracking.
- Solid tracking; it can stand shaking the camera (low impact by smearing) and finds the marker in <200ms from a dead drop point.
- The use of markers works well with multiplayer AR. SLAM has difficulty with this.
-
Bringing the price down to $50
02/09/2019 at 11:48 • 0 commentsGiven the cost of the AR glasses can be brought down to below $20, there is still the phone hardware left. Currently the phone costs at least $70 (for the Leagoo KICAA MIX).
However there are phones on Aliexpress that cost $30.
The differences between these price ranges can be seen in:
- the resolution ($70 gets you 1920x1080 or similar, $30 is 960x480~)
- the processor (Octacore 1.5ghz or Quadcore 1.3ghz, both MediaTek).
The cheaper ones have benefits:
- the screen is 4-5 inch. Currently the AR glasses don't make use of the entire screen with the bigger, expensive phones. Keeping a larger screen on costs extra battery. With custom lenses a higher resolution phone could have the benefit in pixel/degree, but currently not very much the case.
- a smaller screen allows for smaller AR glasses.
- weight is much lower. A 3000mah battery adds a lot of weight.
- the quad core CPU is probably more efficient. I think they're both on the same nm die size.
I'm fairly certain I can make the positional tracker work fine on the quad core CPU, perhaps with a somewhat lower camera resolution if needed.
What is left is that the cheaper phones have regular front cameras. The phones that are used now have long flex ribbons leading to the camera by design; the $30 phones do not. Thus a flex ribbon extender needs to be made. In my research I found this can be a hassle, due to custom connectors being used which can be hard to source, more so out of China. If anyone has any ideas, I'd like to hear them.
-
AR frame
02/09/2019 at 11:38 • 0 commentsCreating cheaper and better AR glasses frames
The AR frames I'm using at the moment are these from Aliexpress. There are a number of downsides to these glasses:
- The place where the camera is mounted is at the wrong angle. A small bracket correcting the angle needs to be placed on top so that the camera has better overlap with the screen FOV.
- The glasses do not rest on the nose. This is a missed opportunity, as this would allow the glasses to be mounted much more easily. Right now finding the sweet spot is a hassle to new users. Also resting the glasses on the nose allows the weight to be distributed better.
- The glasses are quite bulky.
- The price is dropping but could be cheaper.
- The glasses are sensitive to head shaking, because there is no nose rest and the strap is thin.
I've been thinking about building my own glasses in low quantity. My current idea is to:
- laser cut the frame, and aim for a more VR glasses design.
- the glasses rest on the nose, and a wide strap for the head is used so that head shaking is not a problem.
- this would be cheap to about $5 per frame
- for the lenses it's trickier. I'm currently contacting Chinese vacuum forming services to quote prices, but I predict this might still be pricey in low quantities. I'm thinking about trying to use a dental vacuum form device to manufacture small lenses, although these would be missing the coating, which would lessen stray light. This would come at $1 per lens/eye, so $2 total, and no costs in setup.
Less than $100, high FOV, mobile AR glasses
Augmented Reality glasses using modified lowcost Android phones

