Ryan
Ryan-
BlowerVision
03/09/2019 at 04:41 • 0 commentsHere's a video of me throwing some snow.
Runtime today was around 30 minutes, and the snow is a few weeks old and pretty tough.
-
3D Designed Motor Shroud
03/05/2019 at 05:08 • 2 comments![]()
This was the first time using Fusion 360 but it turned out well enough. I only spent about an hour designing this, but here it is:
https://www.thingiverse.com/thing:3469933![]()
![]()
![]()
![]()
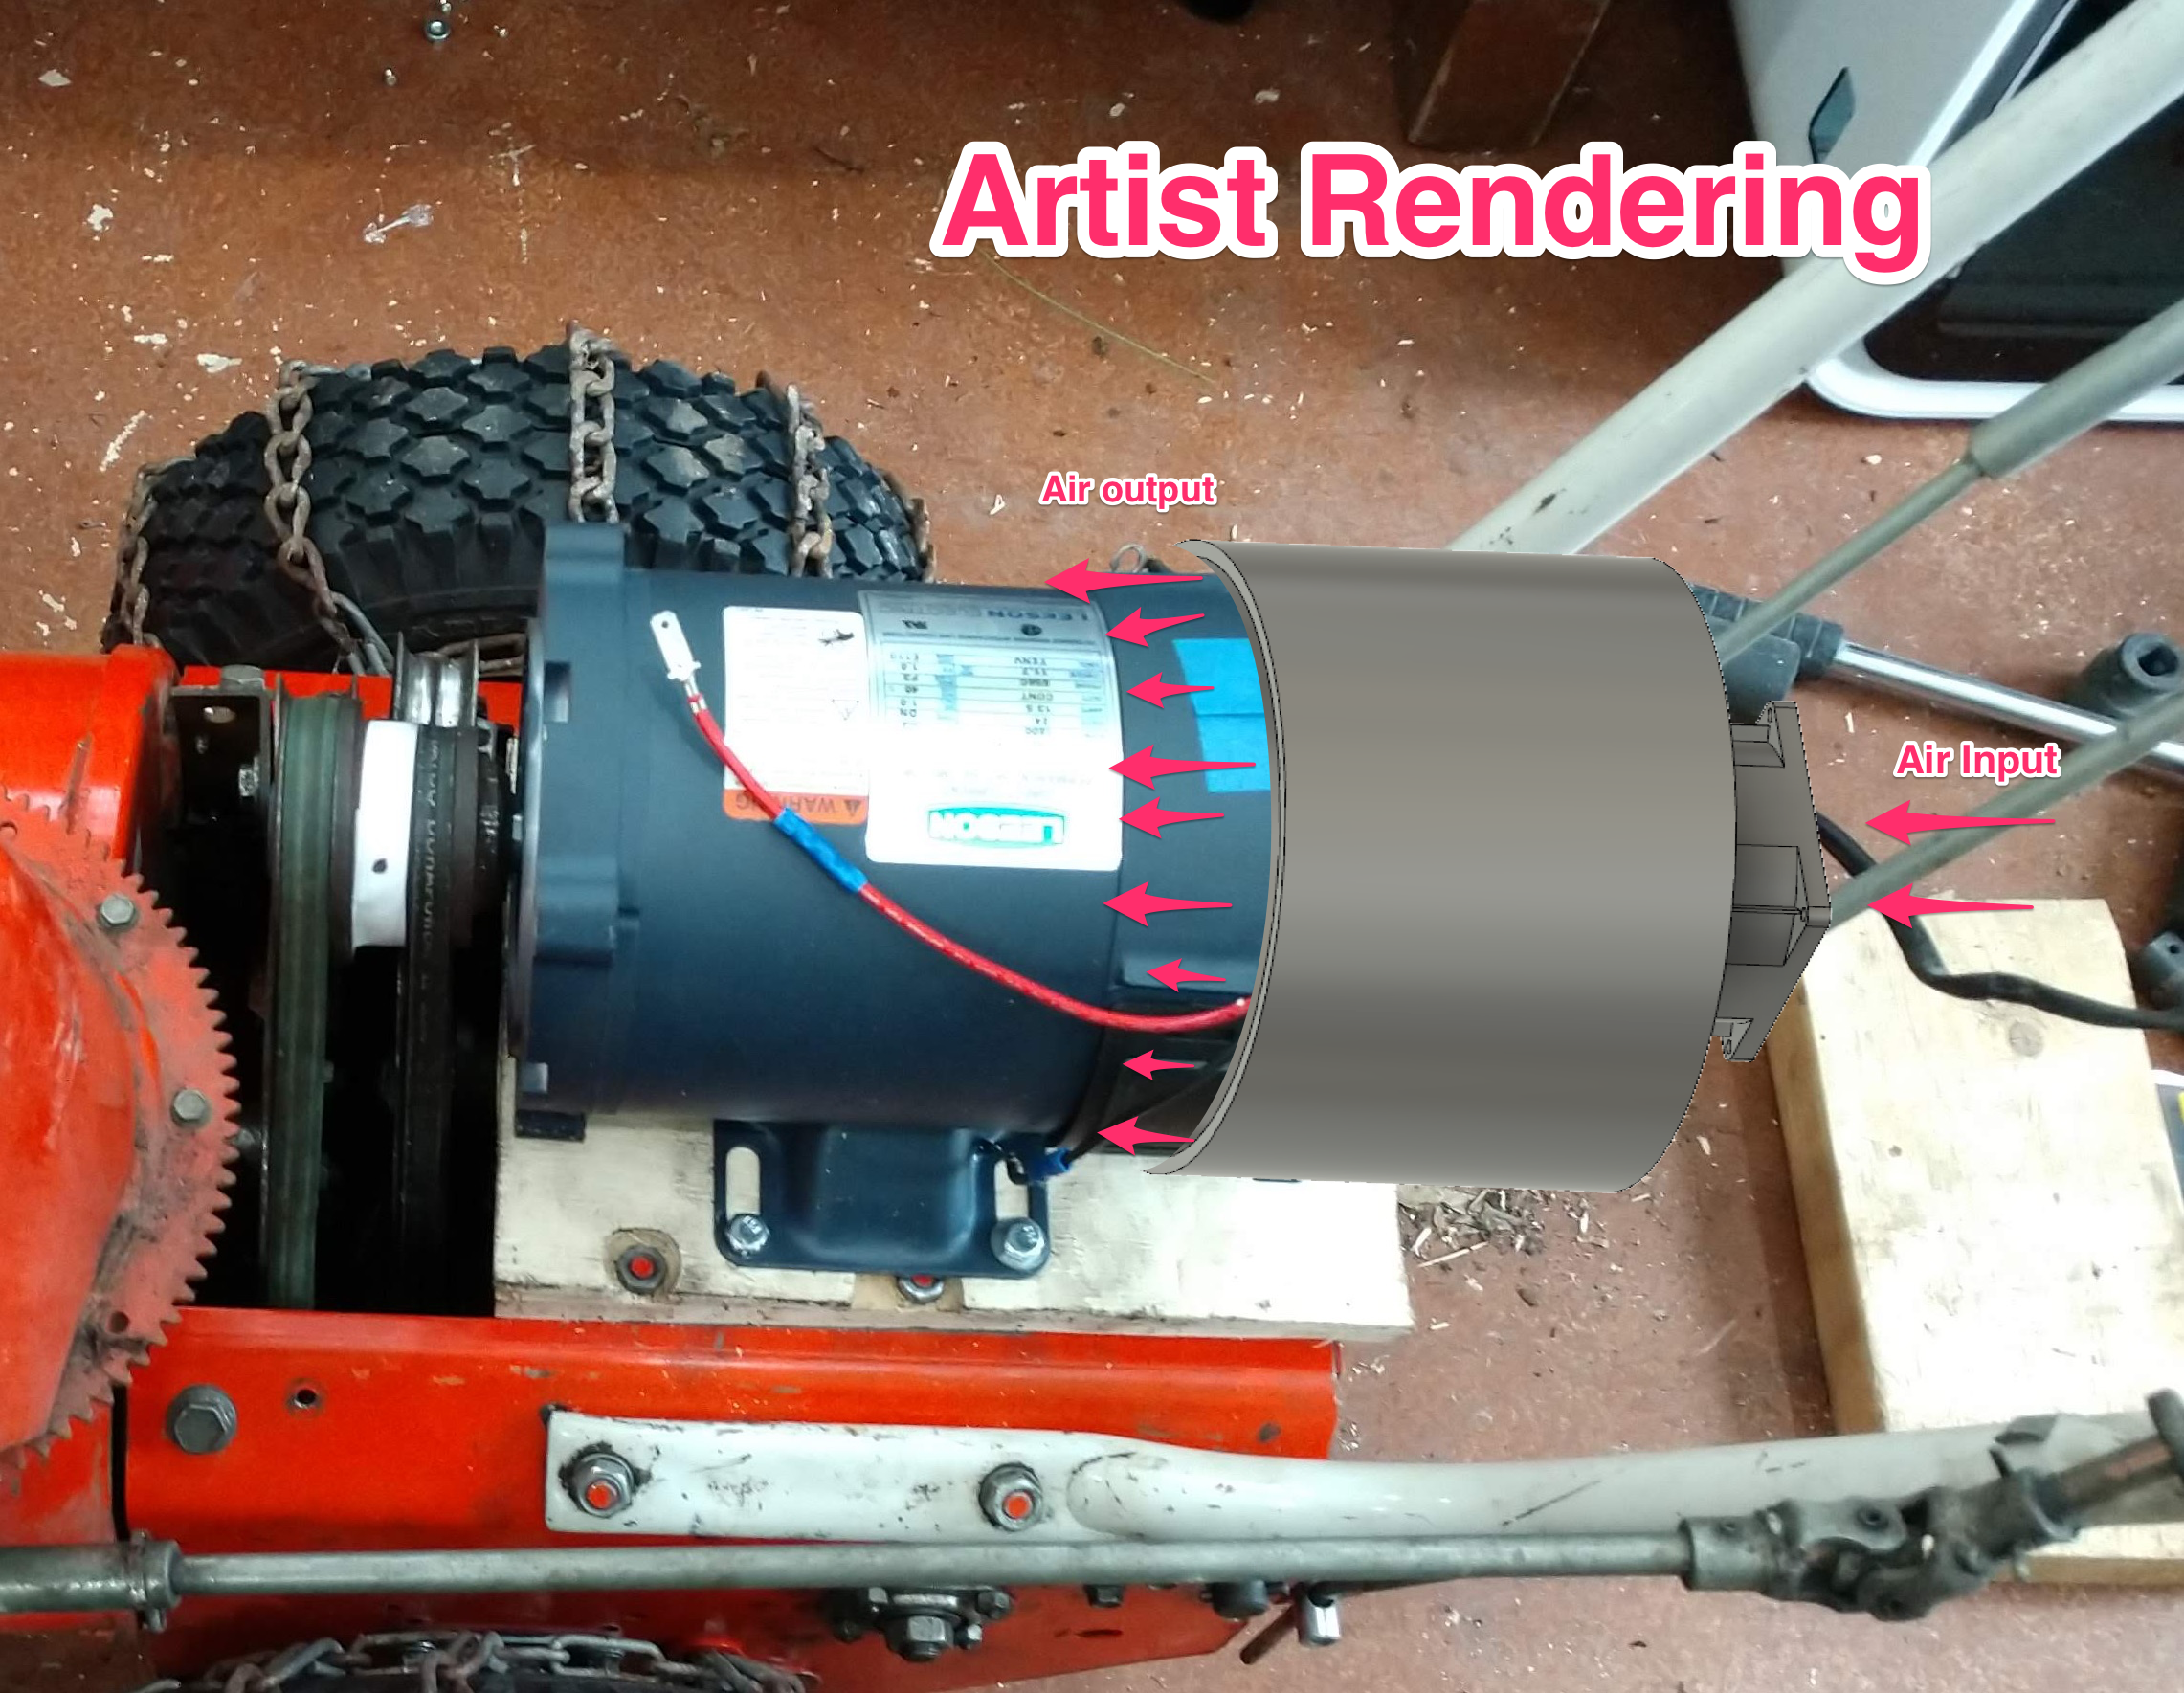
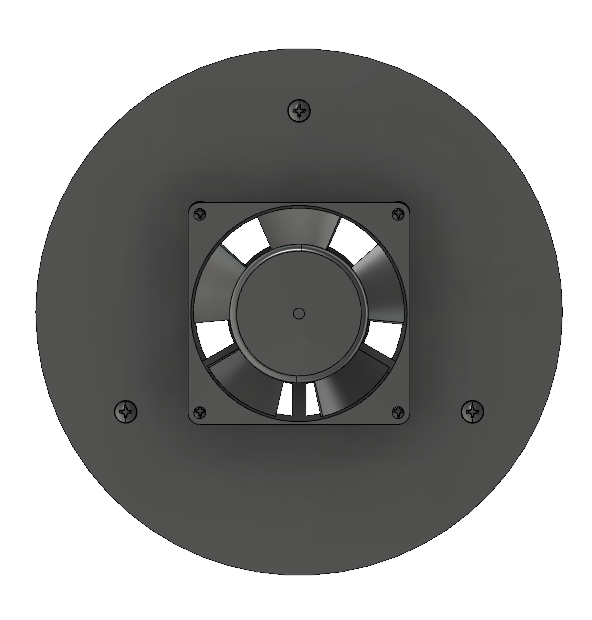
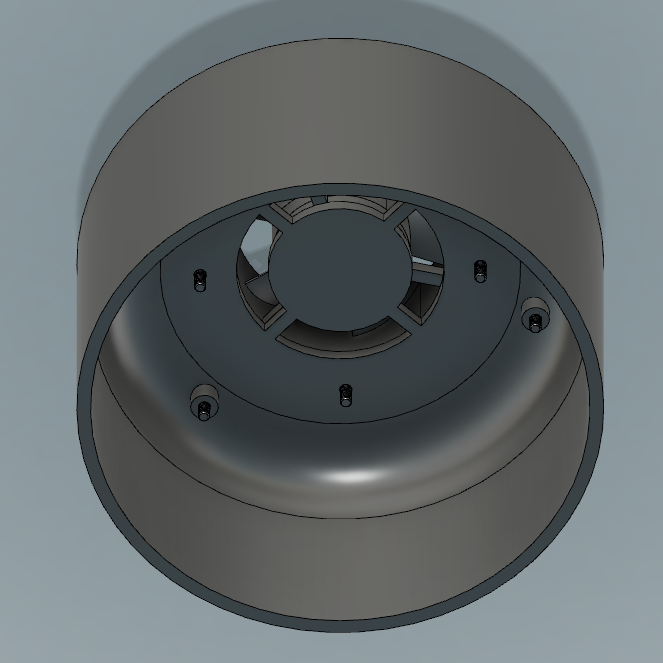
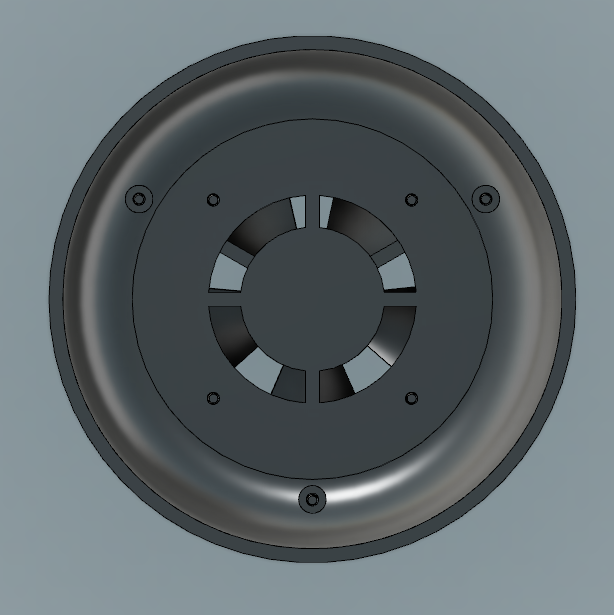
This is a cooling shroud, designed to force air from behind the motor around the back and along the main body. Here's a picture of it printing ... badly. I'm far too impatient to let it take it's time.
![]()
-
First Results, Success!
03/04/2019 at 17:08 • 0 comments![]()
First real test, I did this all on one battery charge. I only stopped when the motor started smoking a little (I changed a connector on the inside of the motor that had plastic that wasn’t high temp). This was over 3 feet deep at the start and tapers off to about a foot. Over a few weeks the sun has melted it a little so it was pretty tough. If I had shoveled it, I would have broken it off in chunks and just thrown them by hand.
But the snowblower just chewed it up! I’m really happy with the result! This might not win any awards, but it's enough for my needs.
If I get out there and snowblow the same day, I should be able to do all my driveways and sidewalks on one battery charge. That lets me slow charge the pack overnight with 70volts over 10 hours at 600mA. At that time / current / voltage there is no noticeable temperature increase in the batteries, so I assume most of the charge is going into the batteries. I don't think the batteries reach full charge, but they were designed to be between 40% and 80% most of the time so I don't need to charge to full peak.
Full disclosure, the motor does have some over-heating issues but I really pushed it's limits this time. I'll add a cooling fan, possibly some aluminum cooling fins, and call it done!
-
Video of it running in the Shop
03/02/2019 at 22:34 • 0 comments -
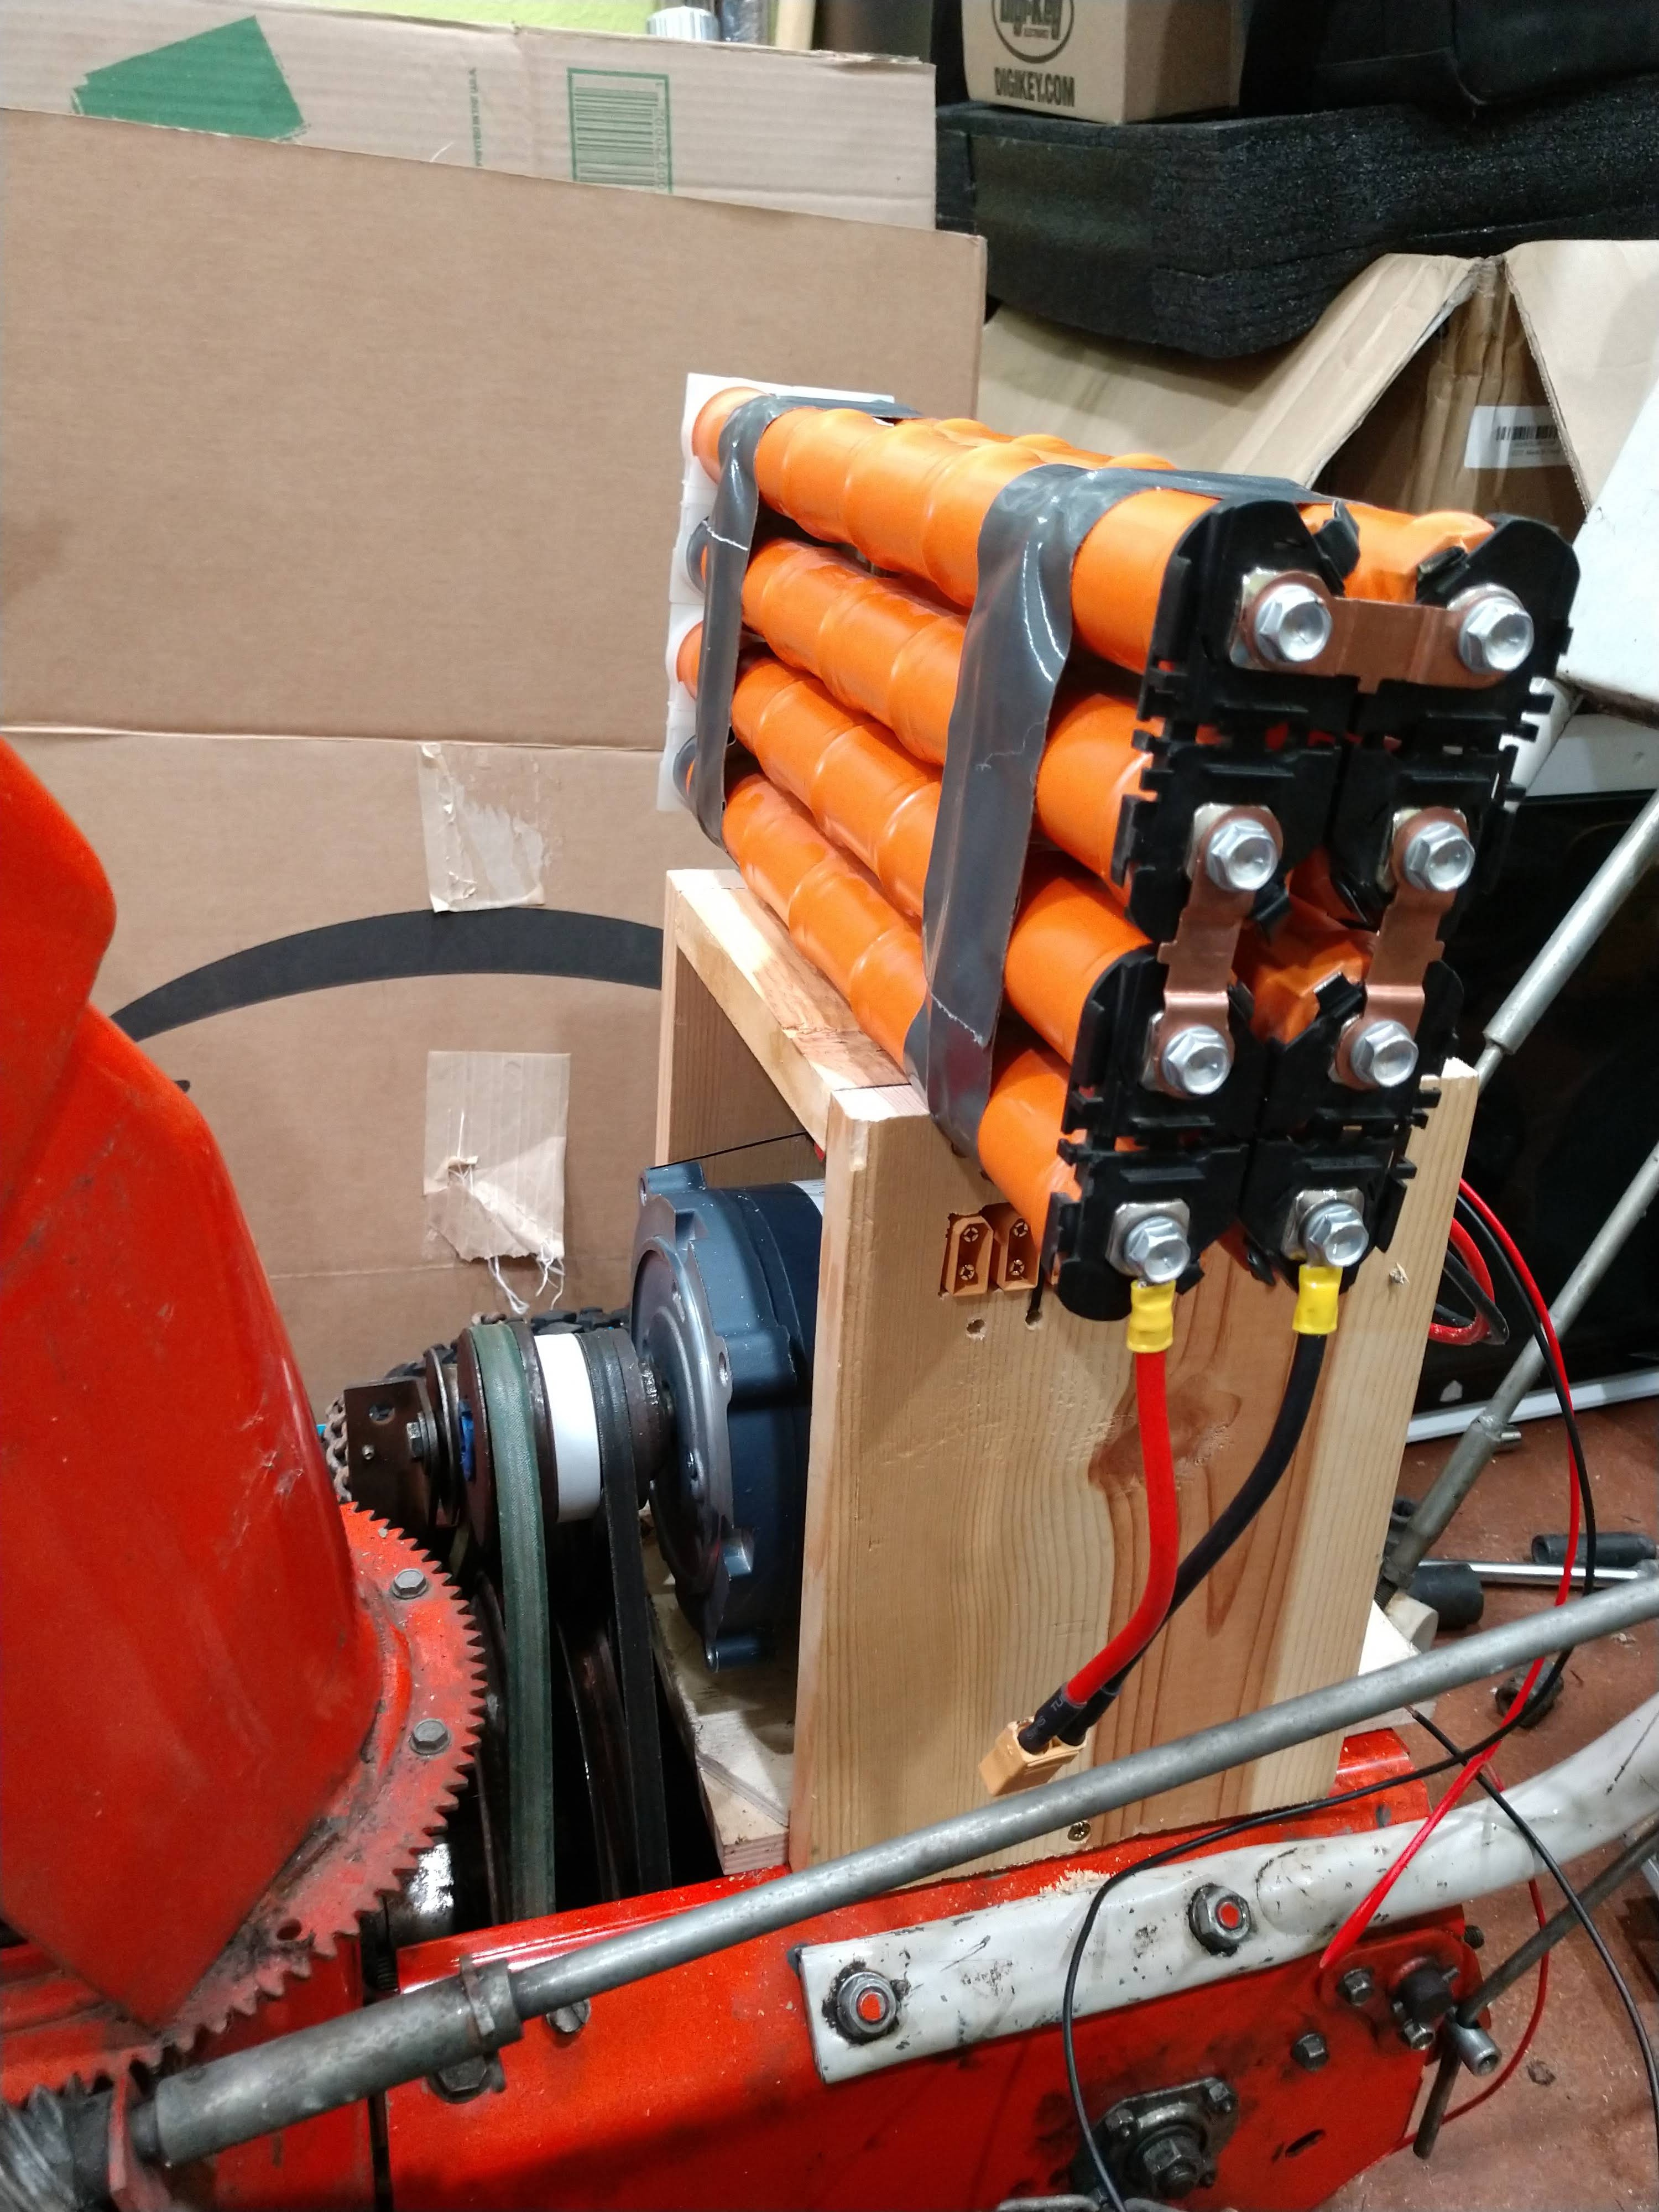
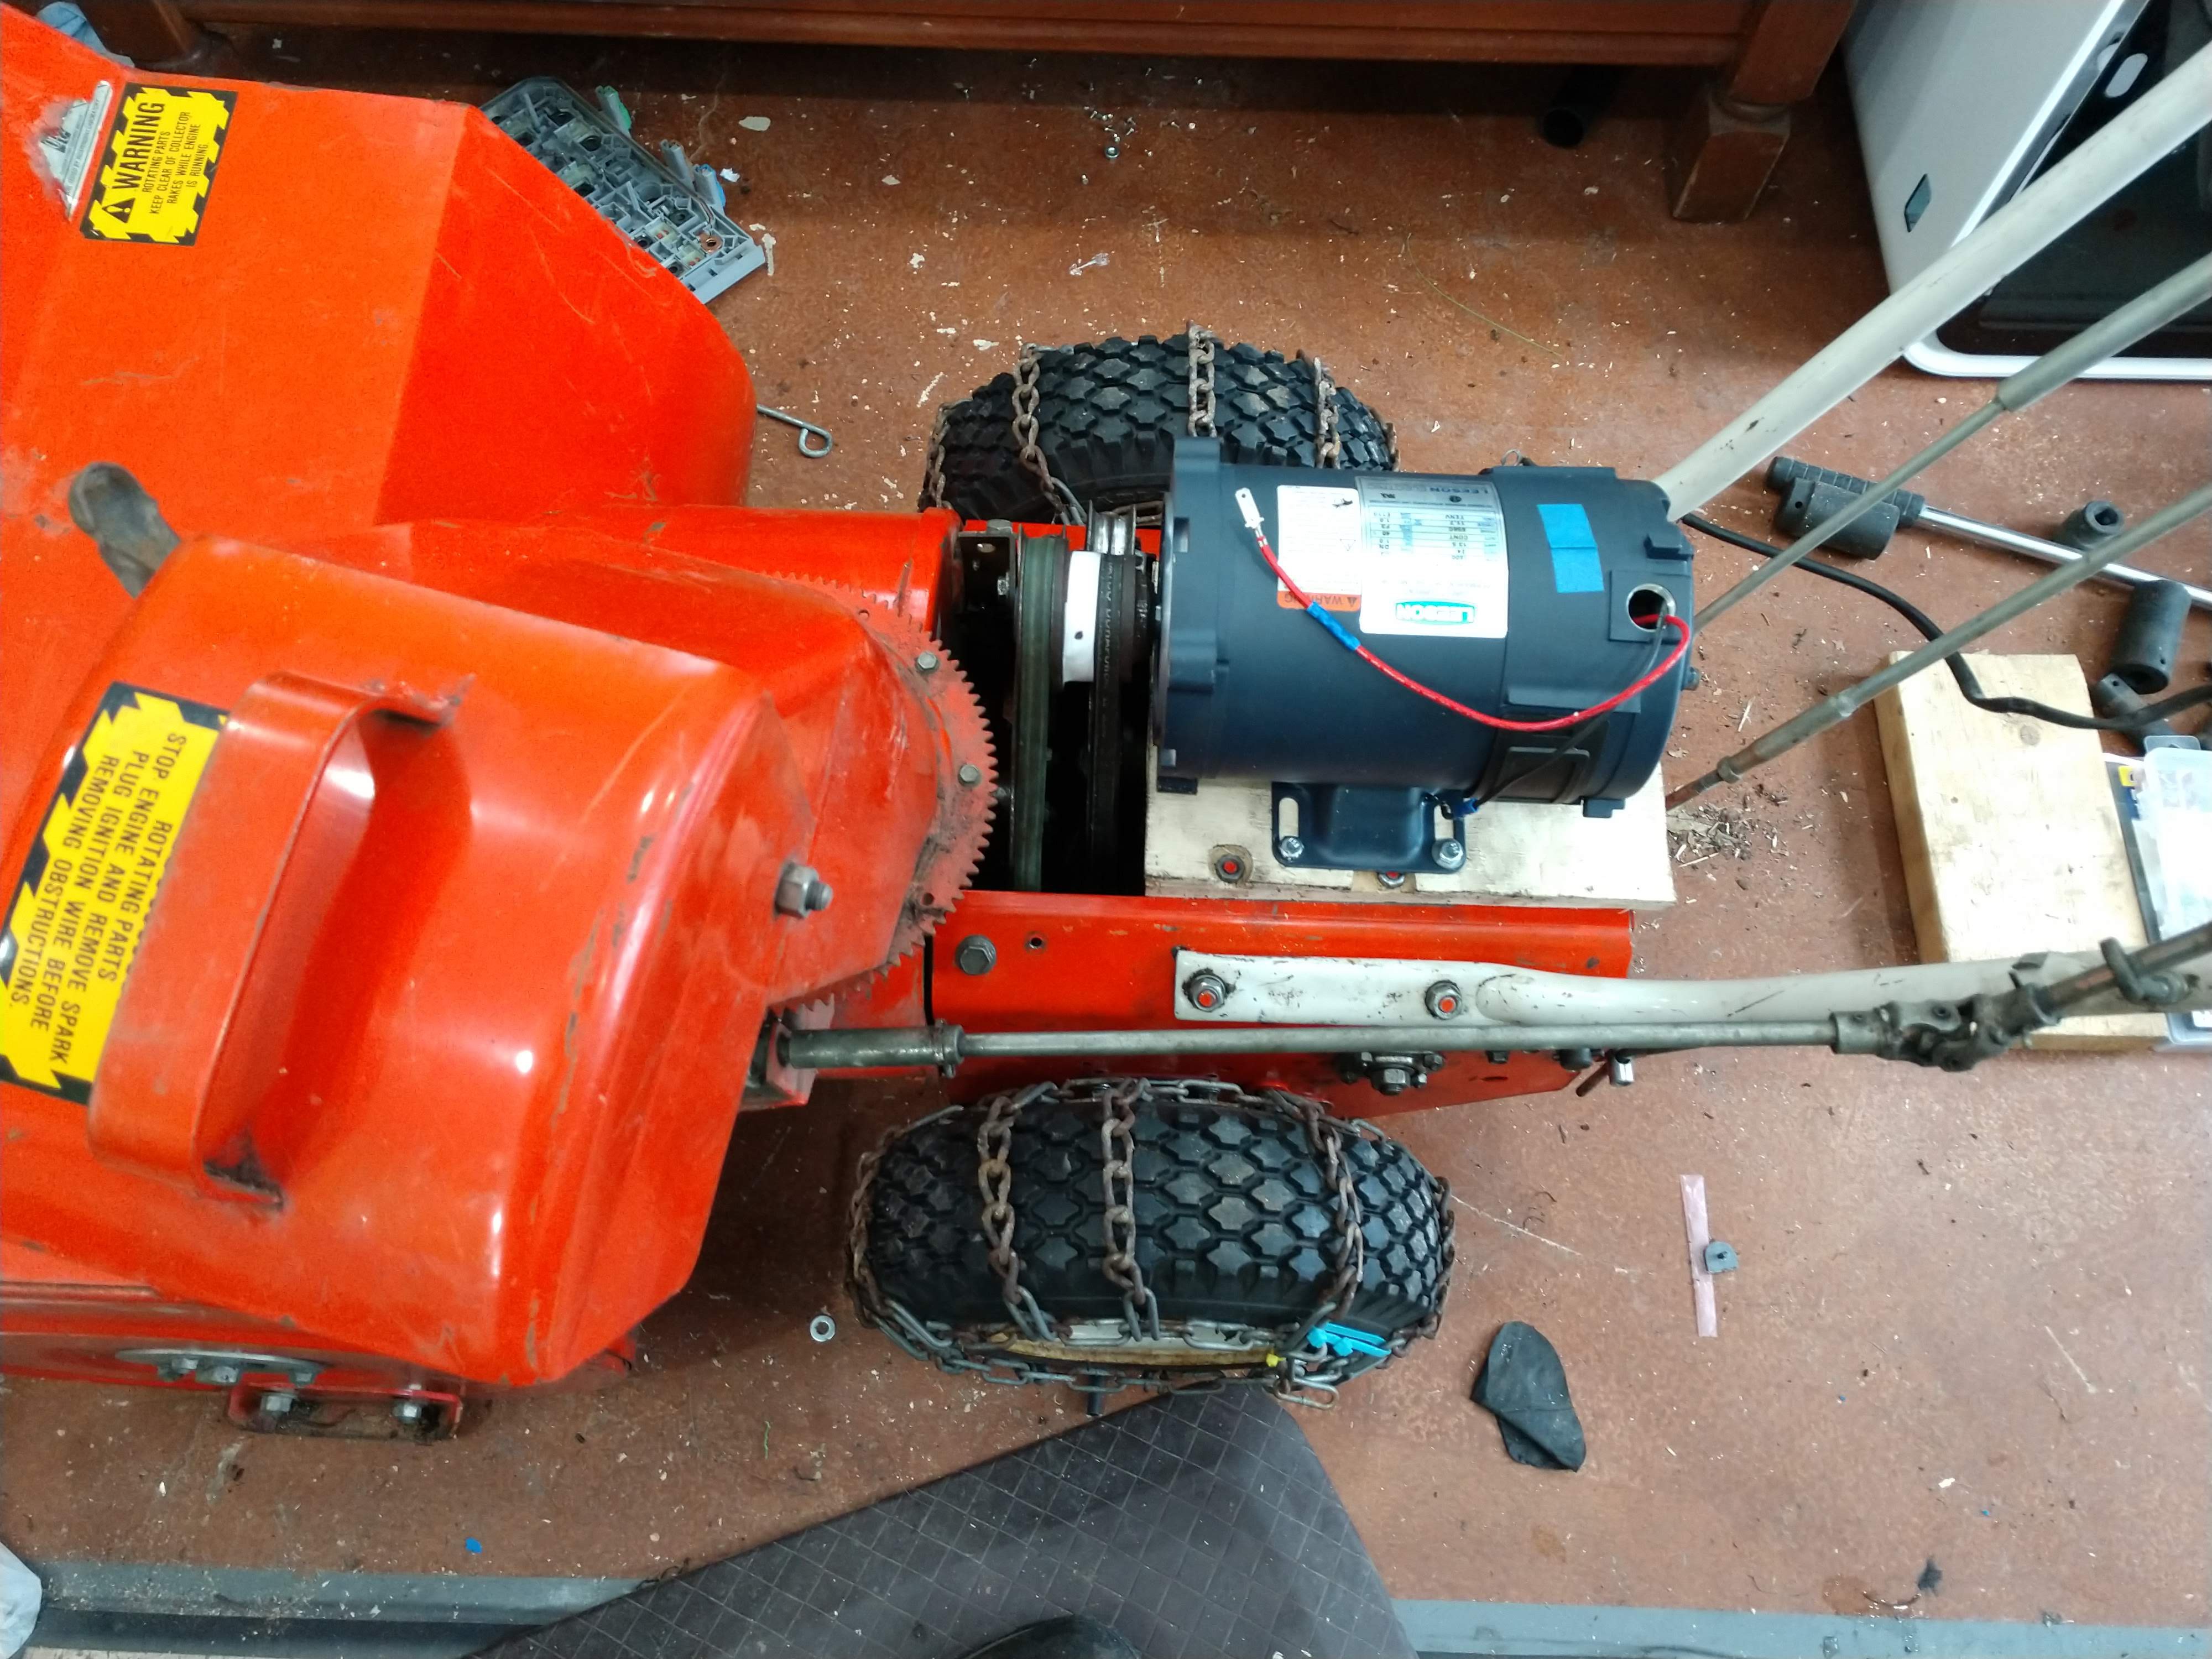
Motor and Battery Wiring
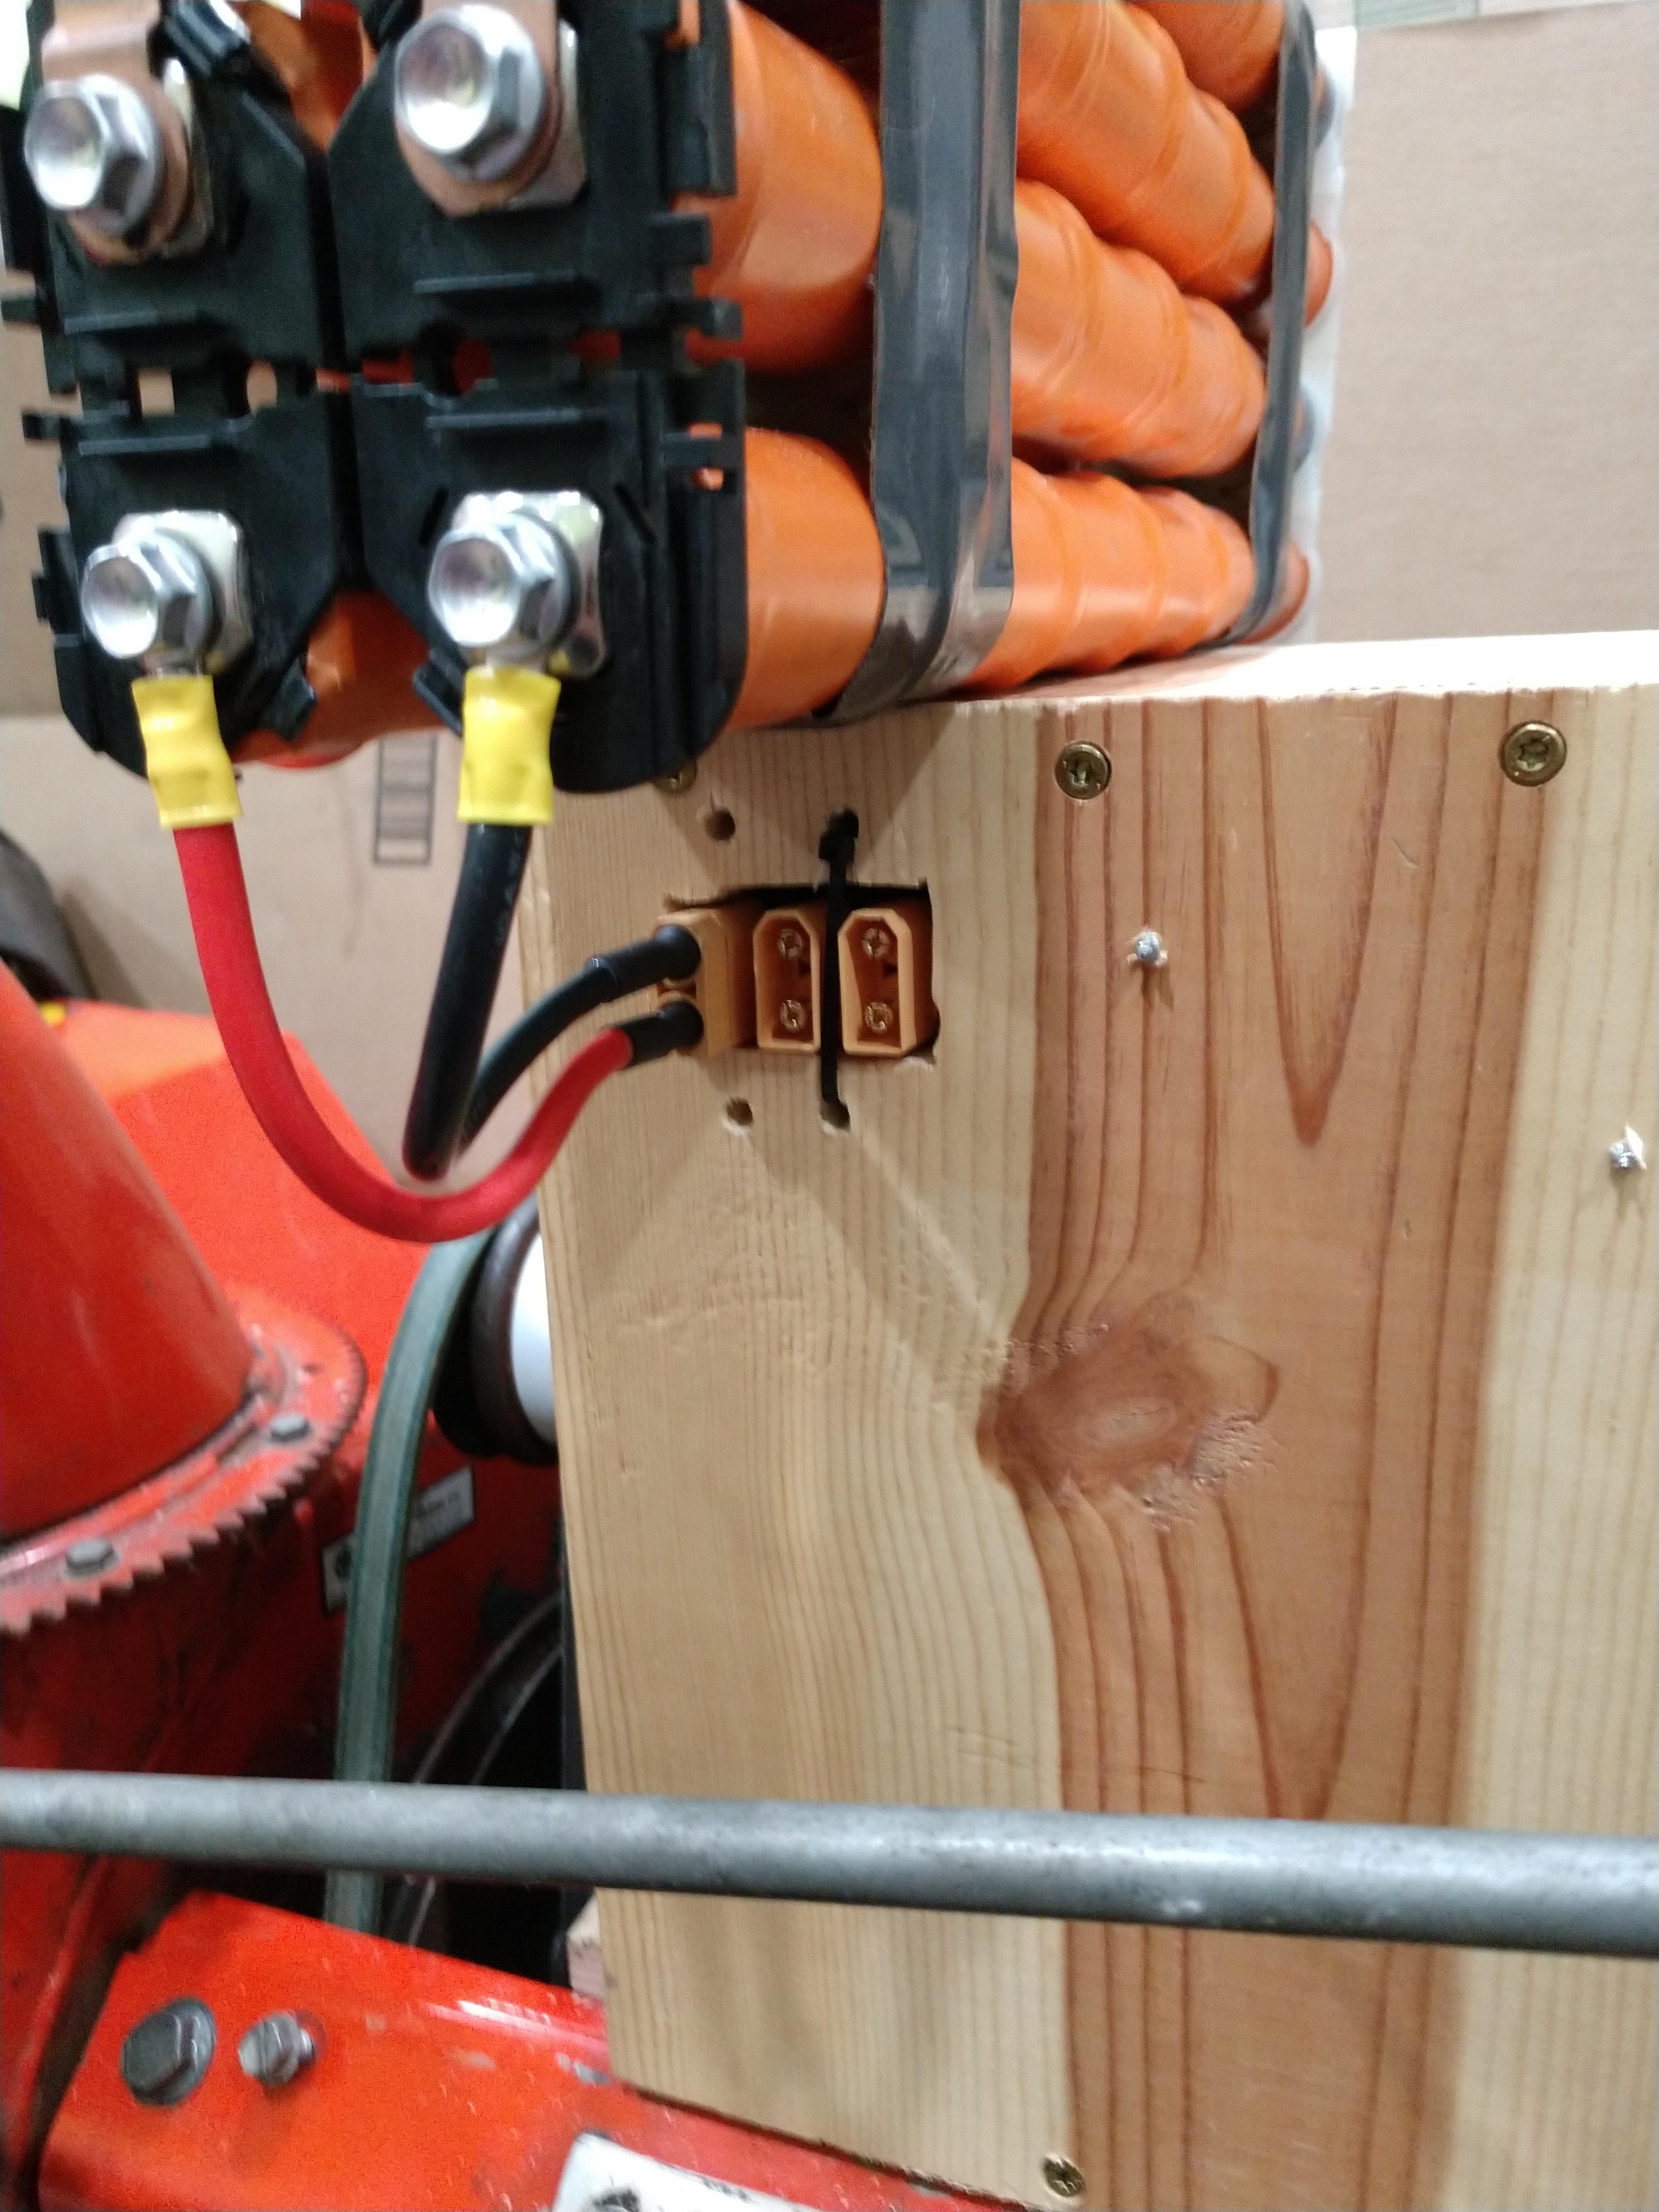
03/01/2019 at 18:29 • 0 commentsThe batteries will be mounted directly above the motor for better weight distribution. If you look under the battery, you can see I made a 3 to 1 parallel adapter so I can run 1 to 3 packs without needing to rewire.
![]()
![]()
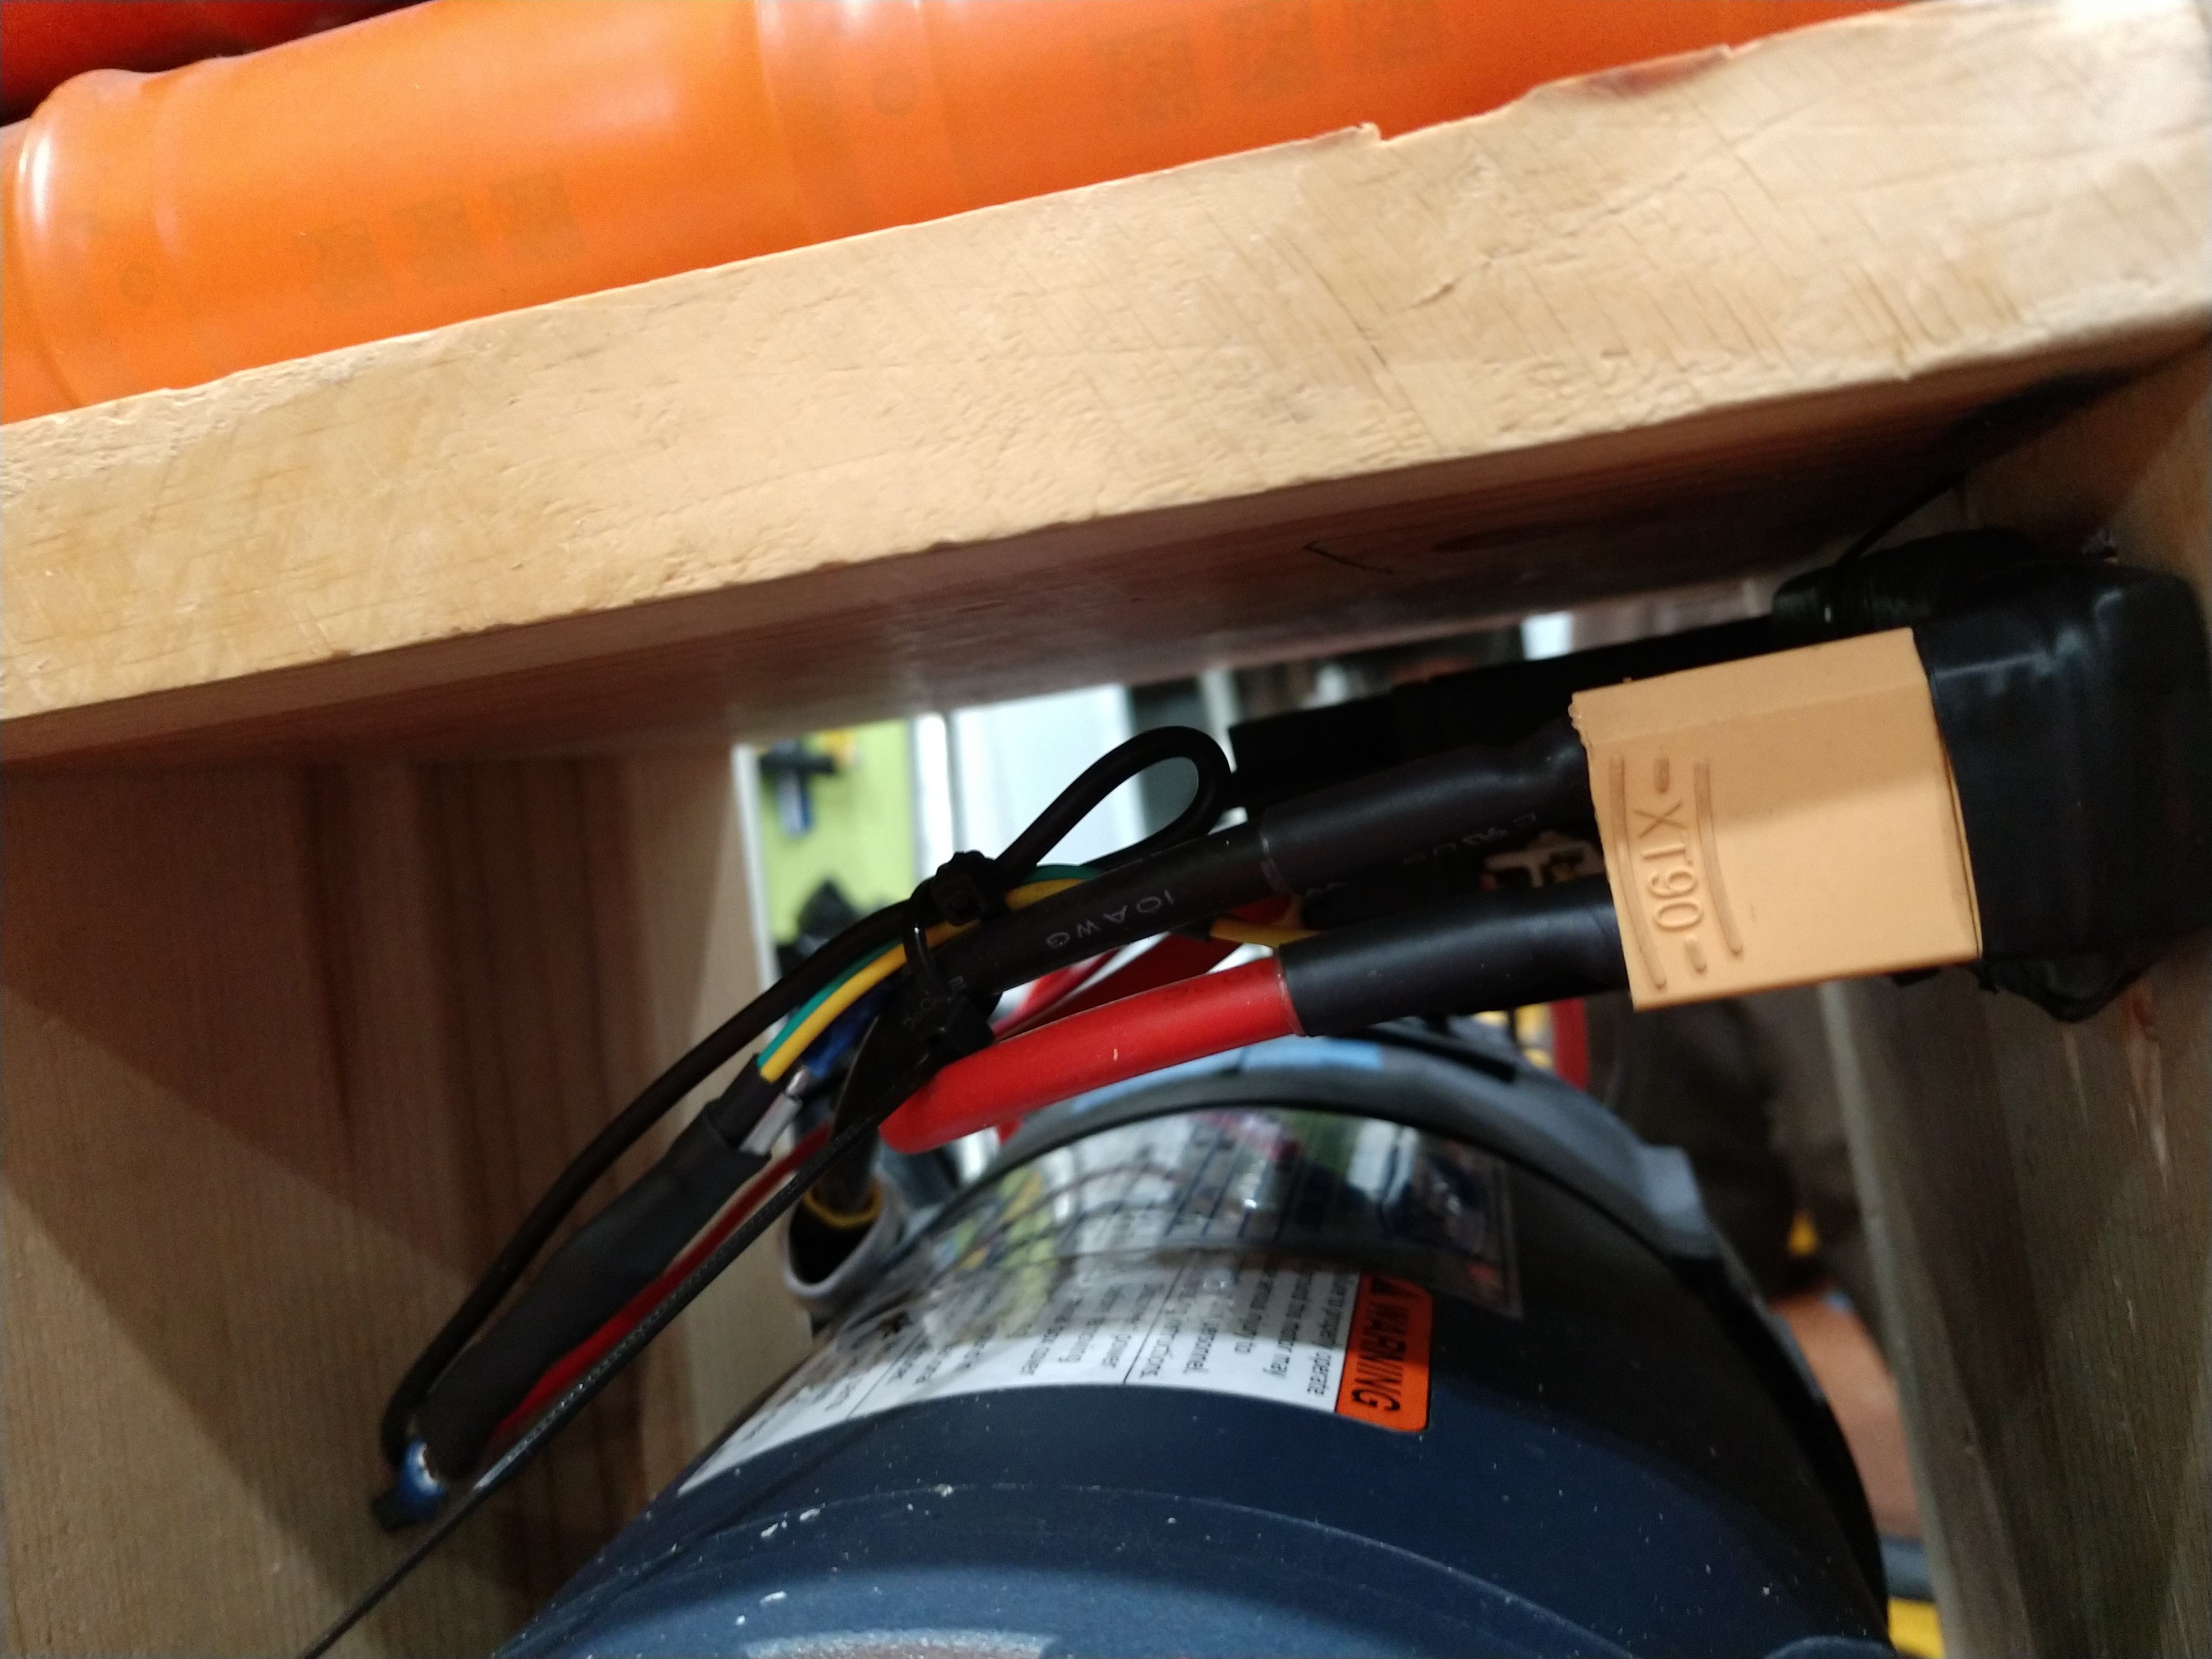
That's 3 XT90 connectors that come out the other side to a single XT90. I used brass bar to solder the connectors together, then covered them in electrical tape.
![]()
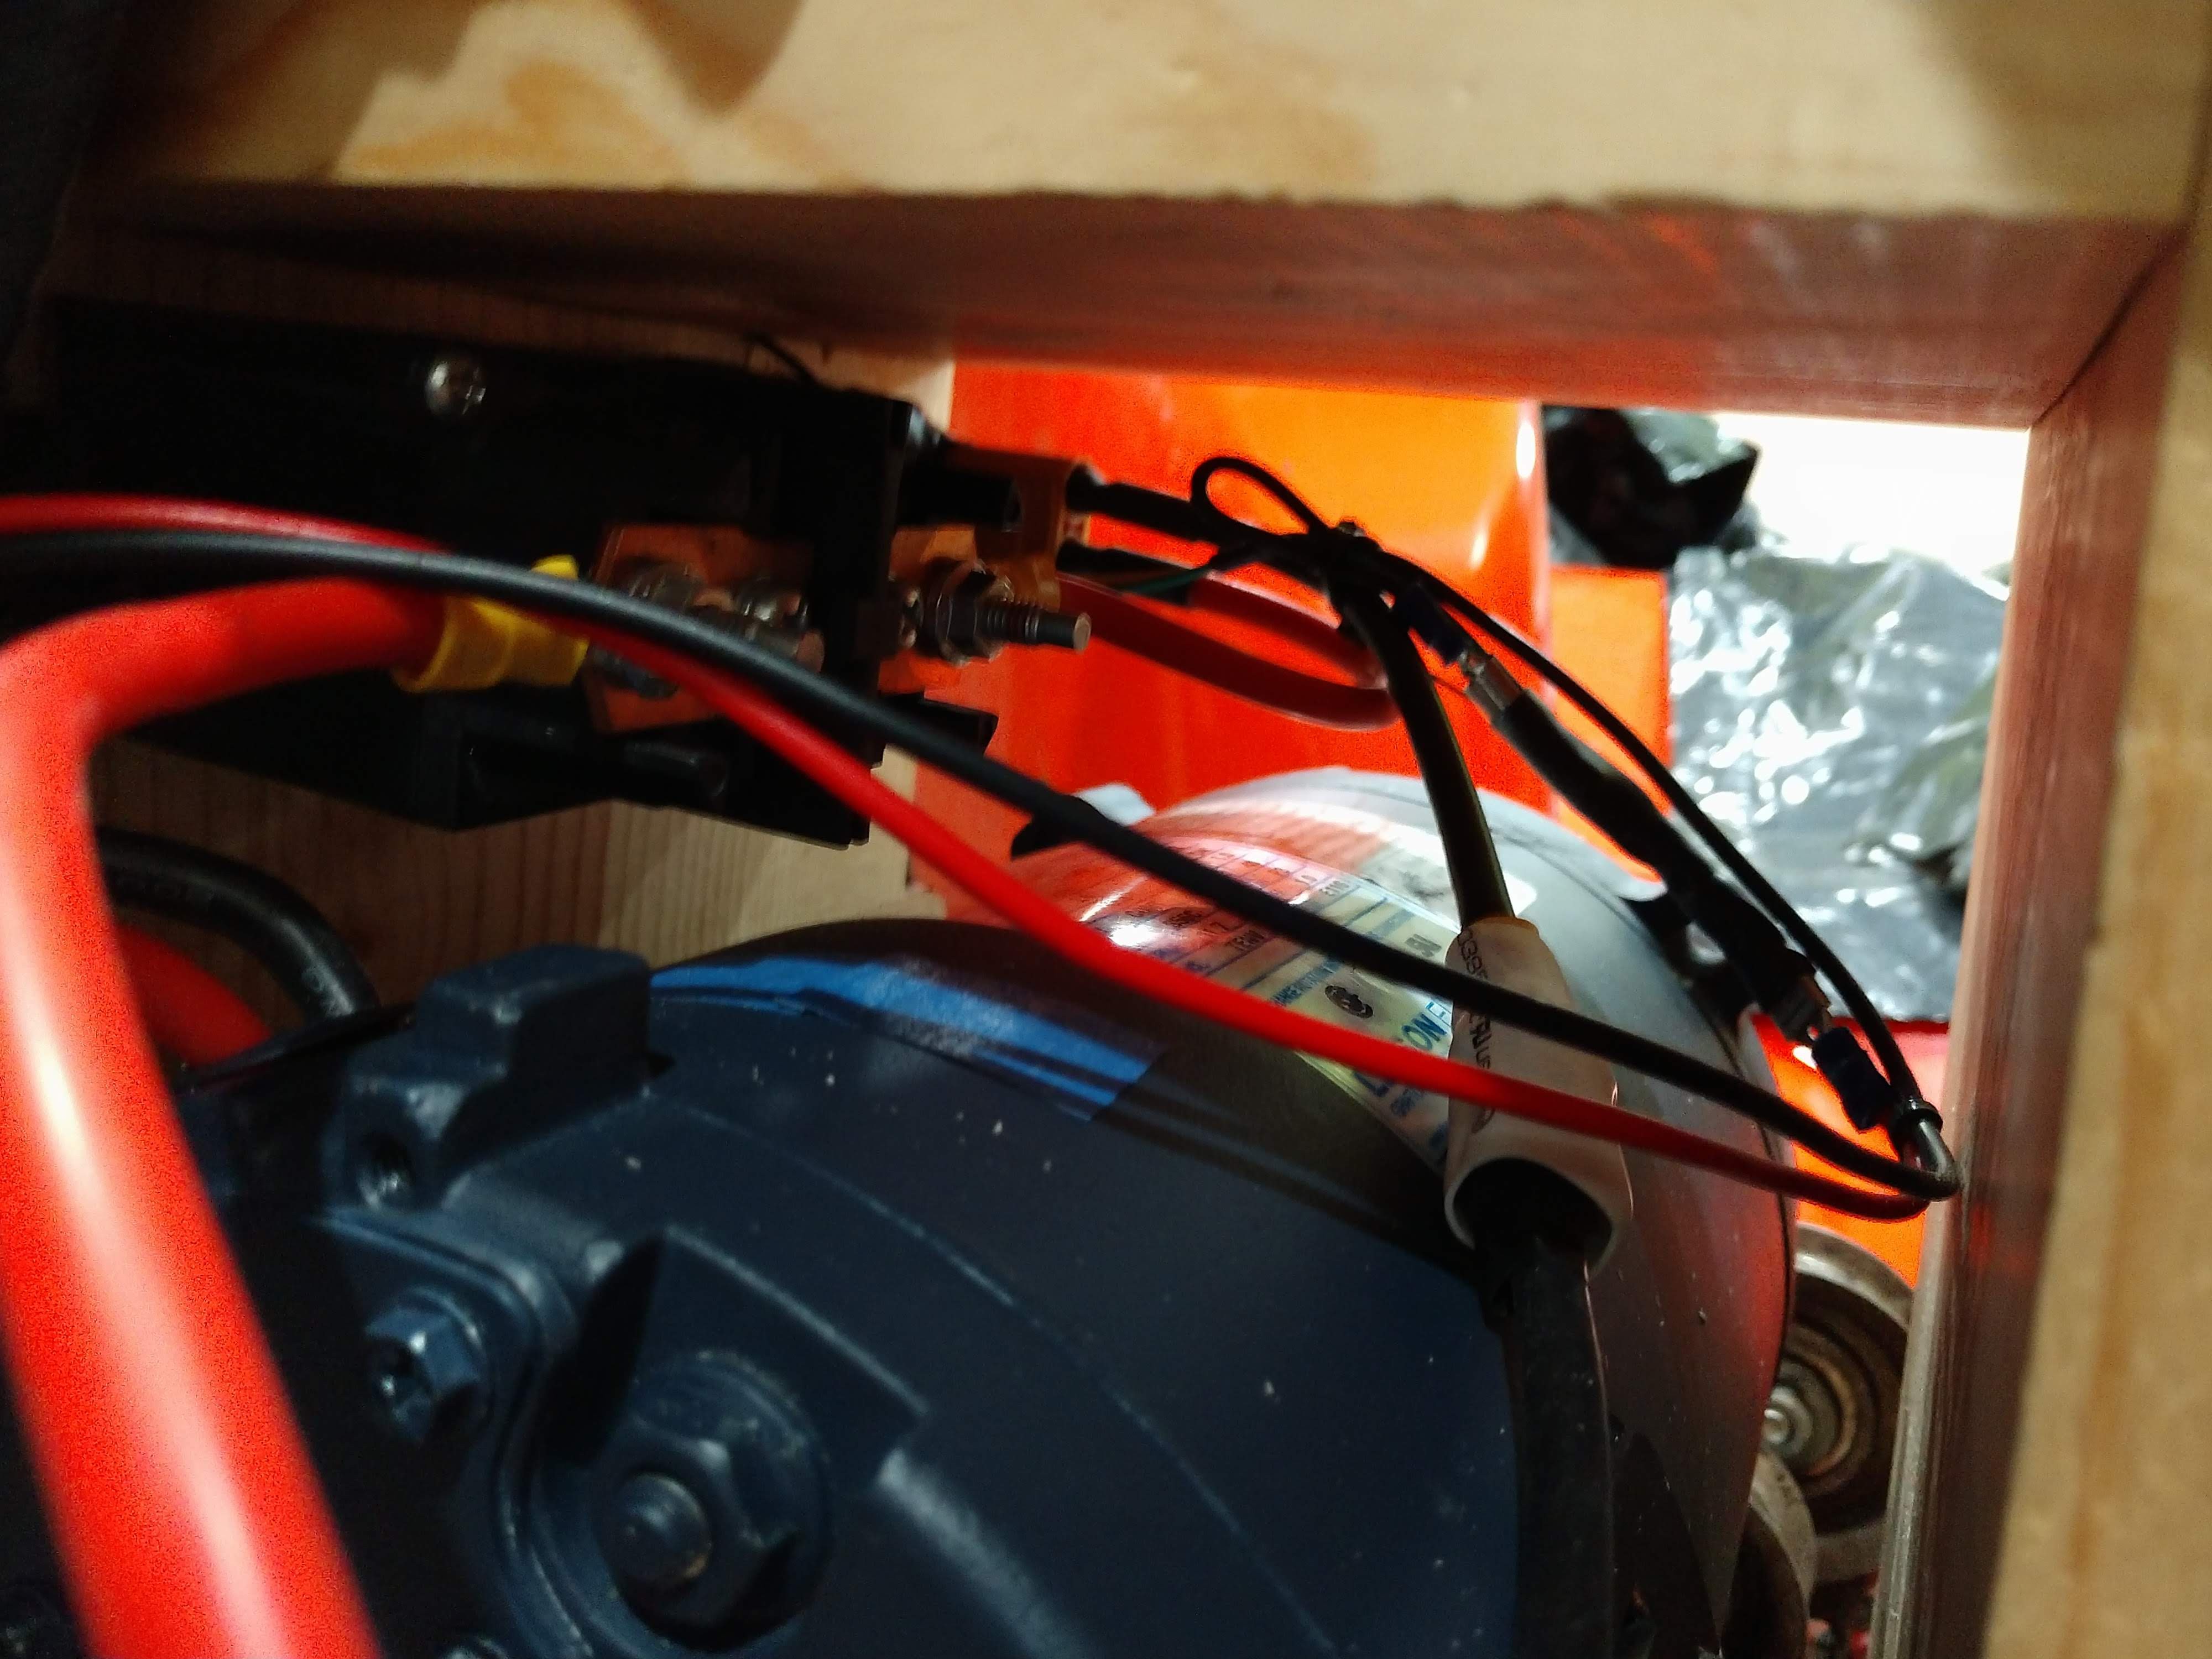
The power then goes to the Toyota Prius contactor, and to the motor. I upgraded the wiring going to the motor brushes from 18AWG to 10AWG. The windings on the inside are a work of art, they look like they can handle a lot more than their rating.
![]()
-
Bang!
02/28/2019 at 07:43 • 0 commentsDon't do this at home.
-
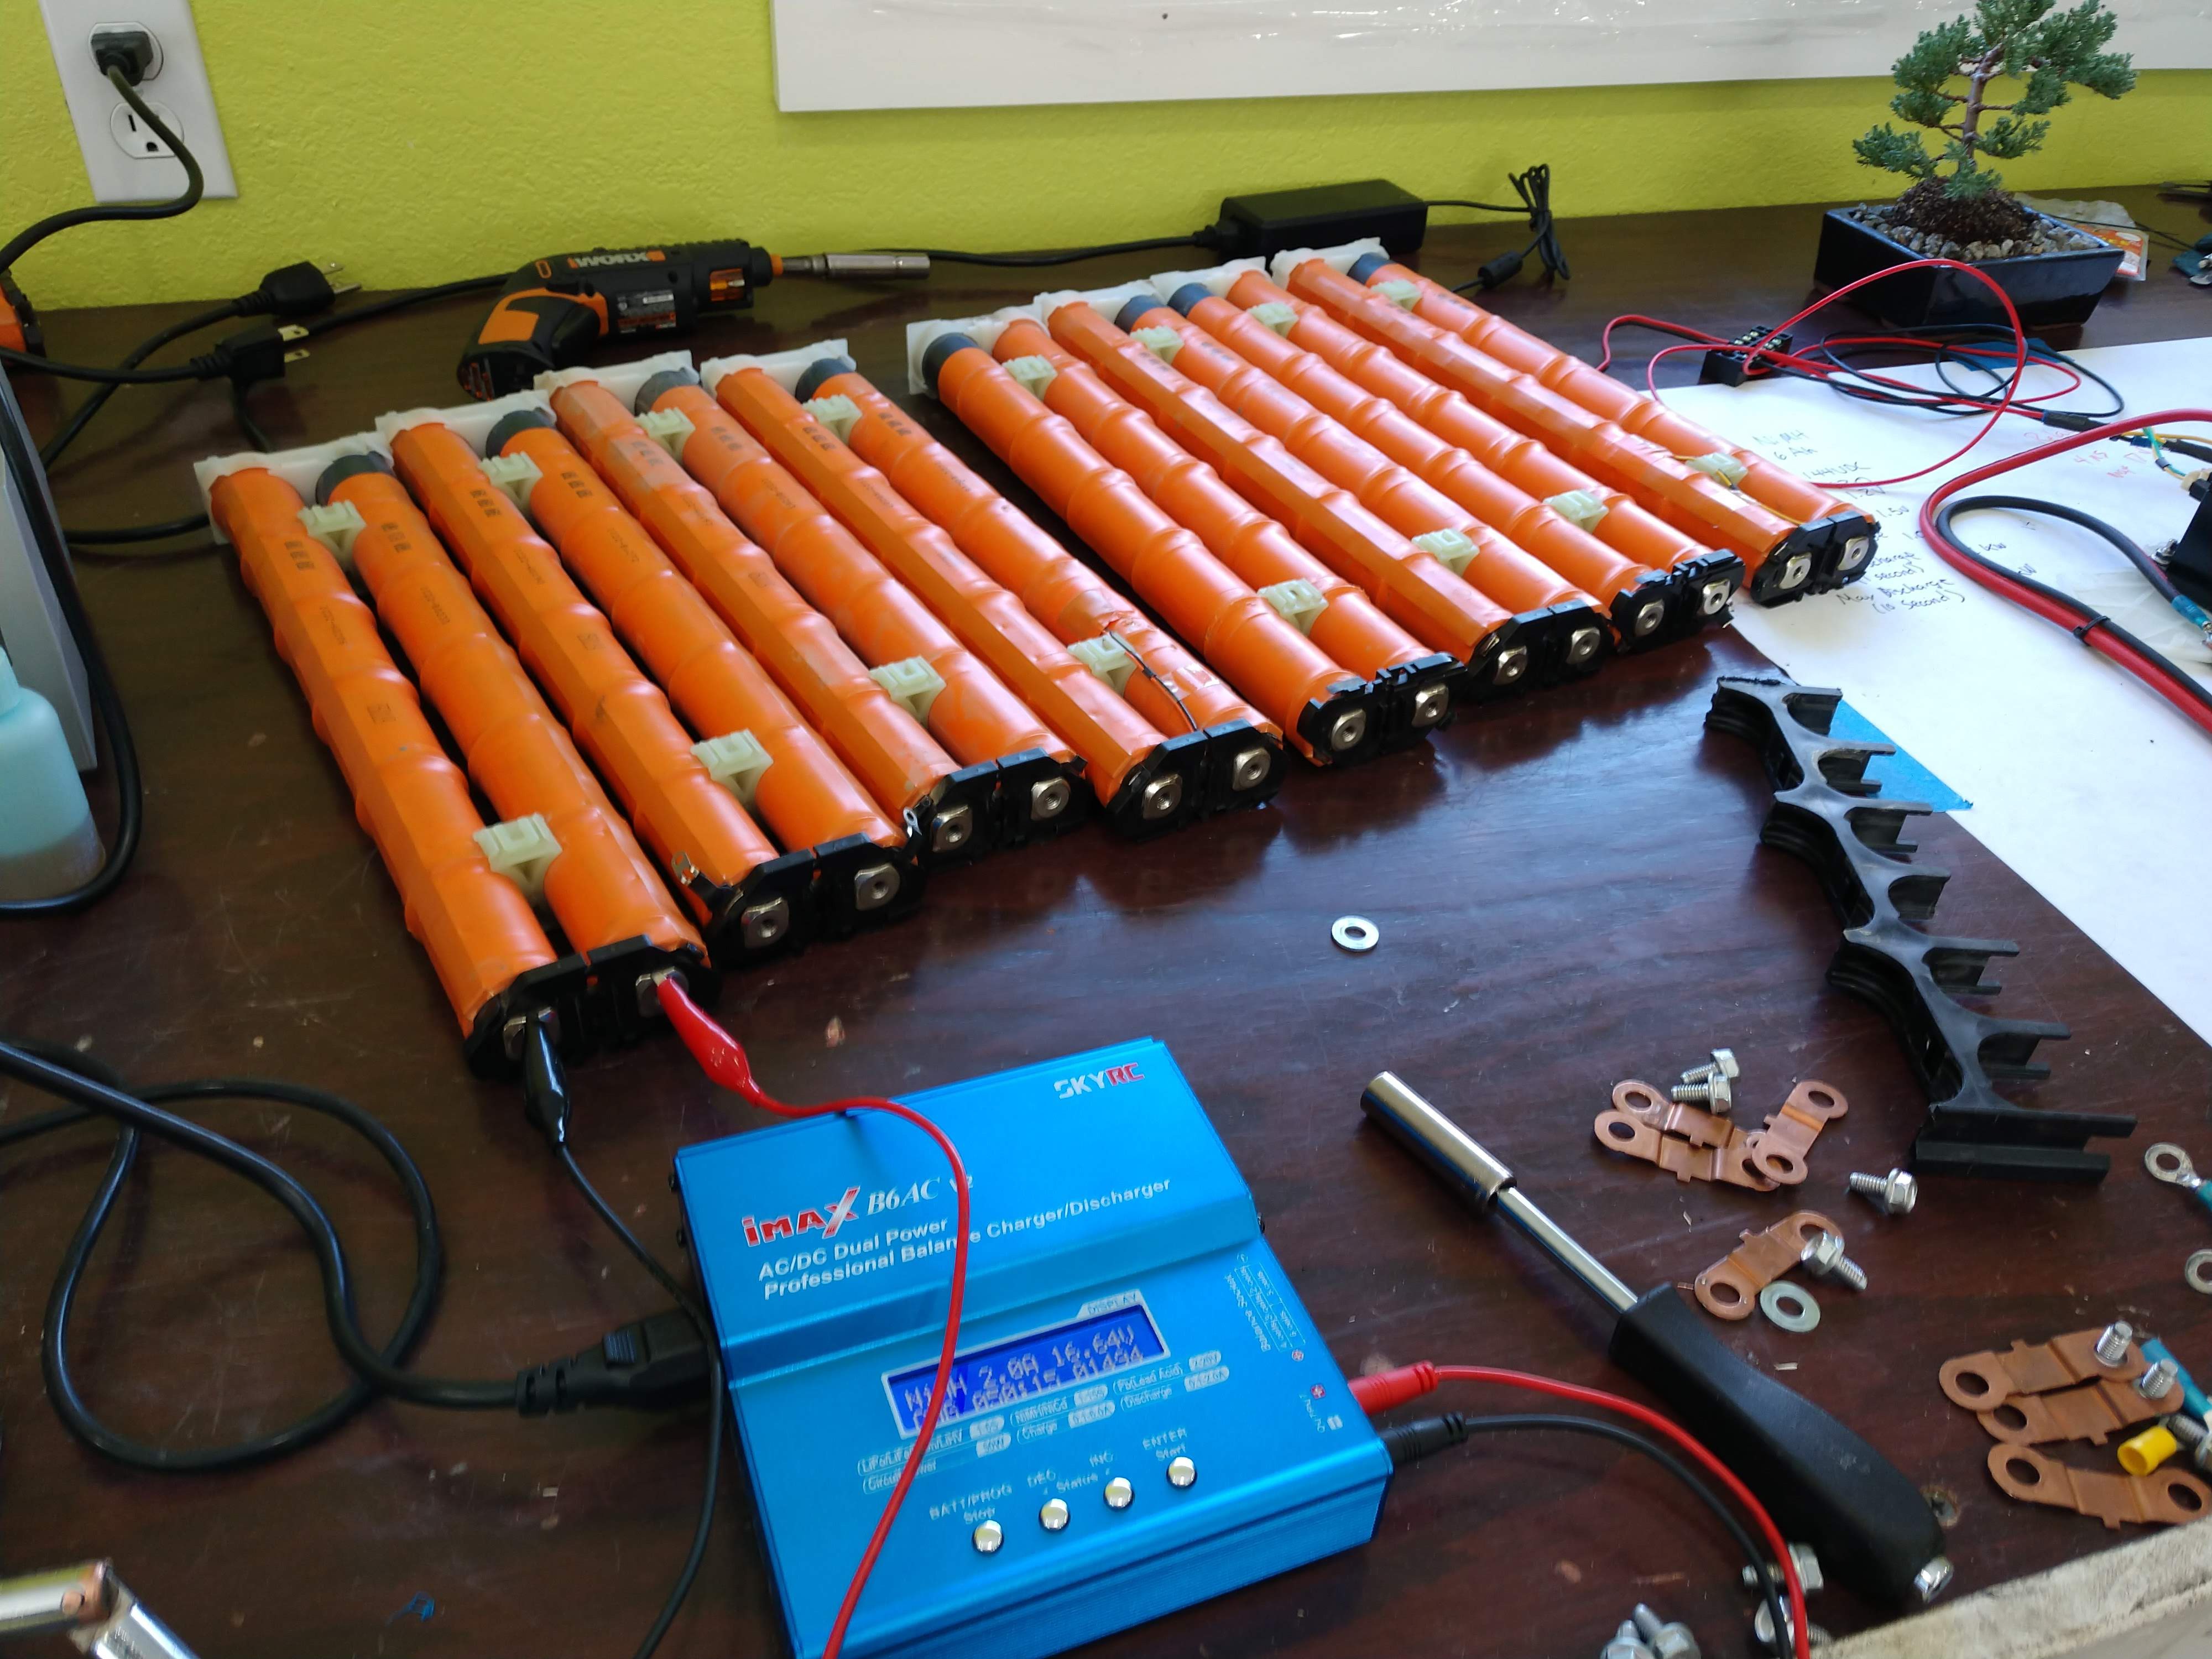
Big batteries need a big load
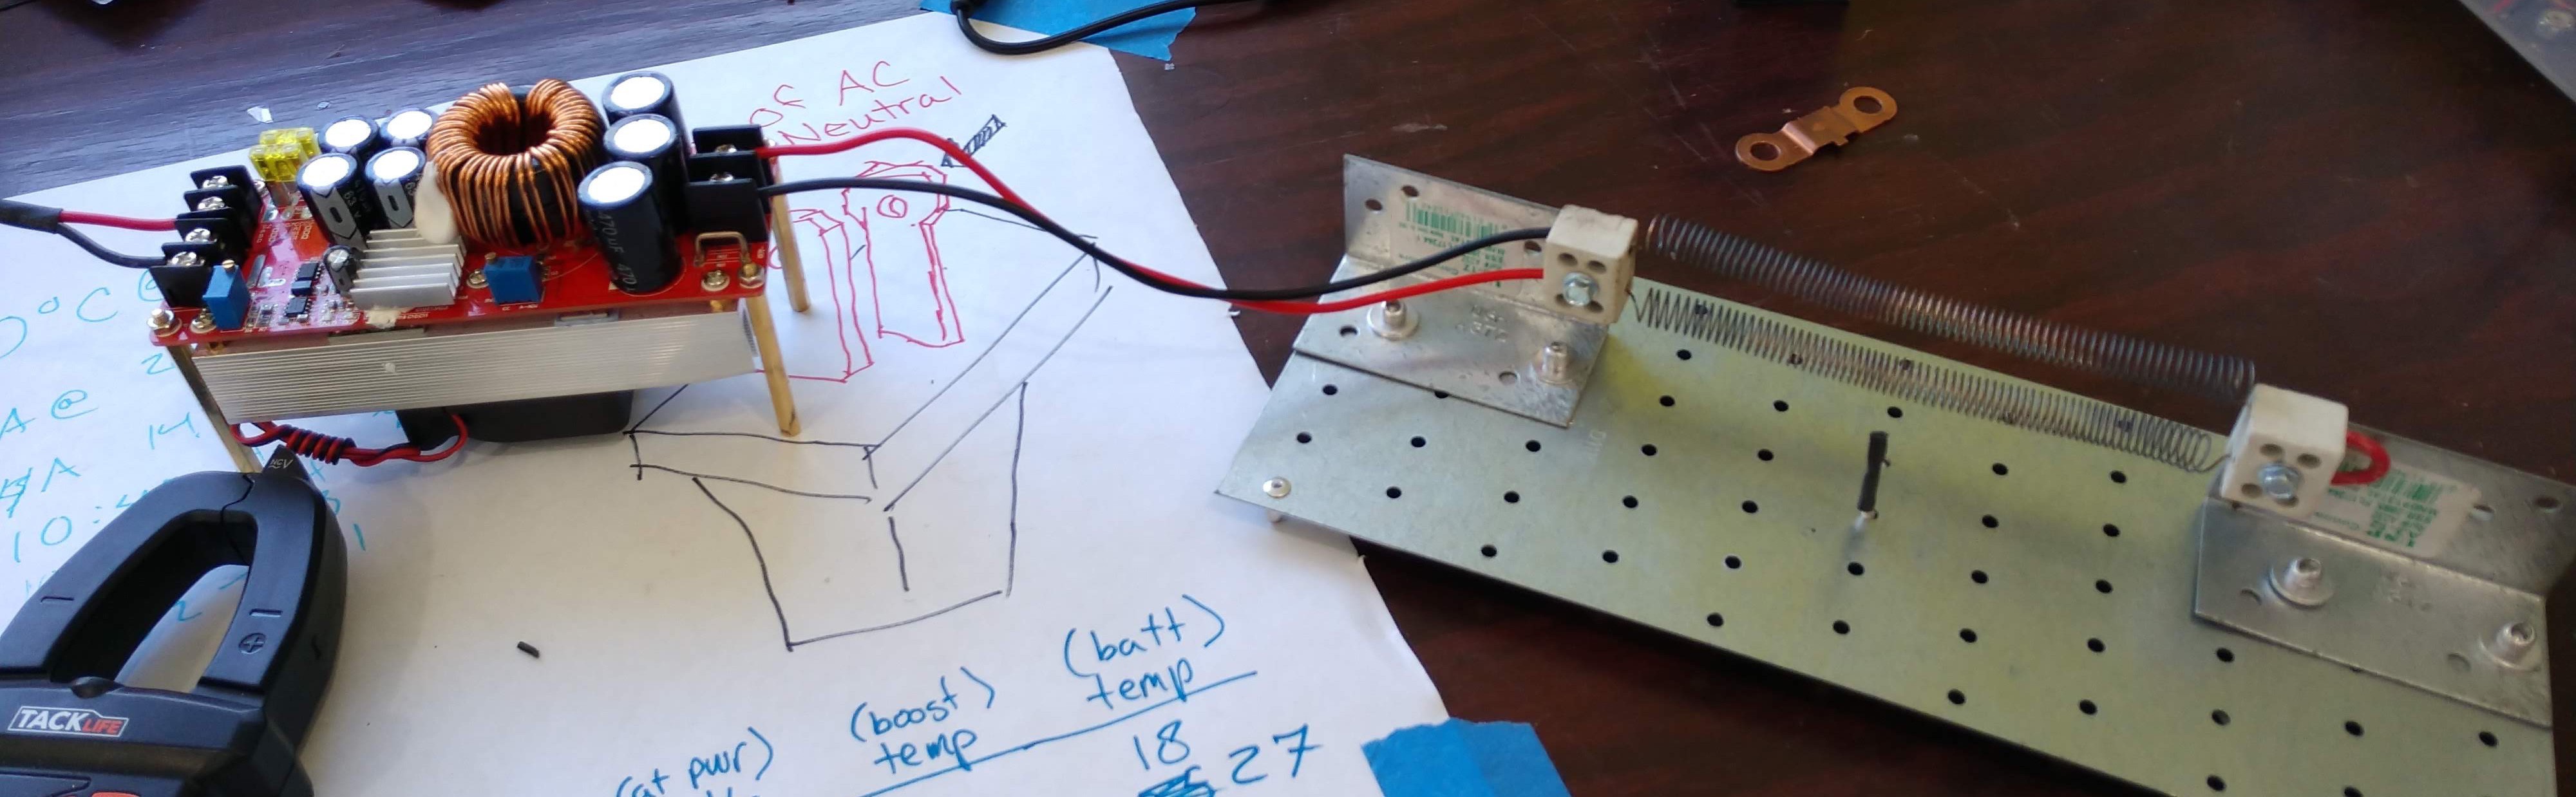
02/27/2019 at 19:44 • 0 commentsI was using my battery tester to discharge these batteries but it was taking far too long.
![]()
So I took some 22AWG 316 stainless steel wire, and made my own heater. Since it's so cold here in North Dakota I figured why not? With the boost converter inline, I pulled over 30A from these batteries for a few seconds, no problem.
![]()
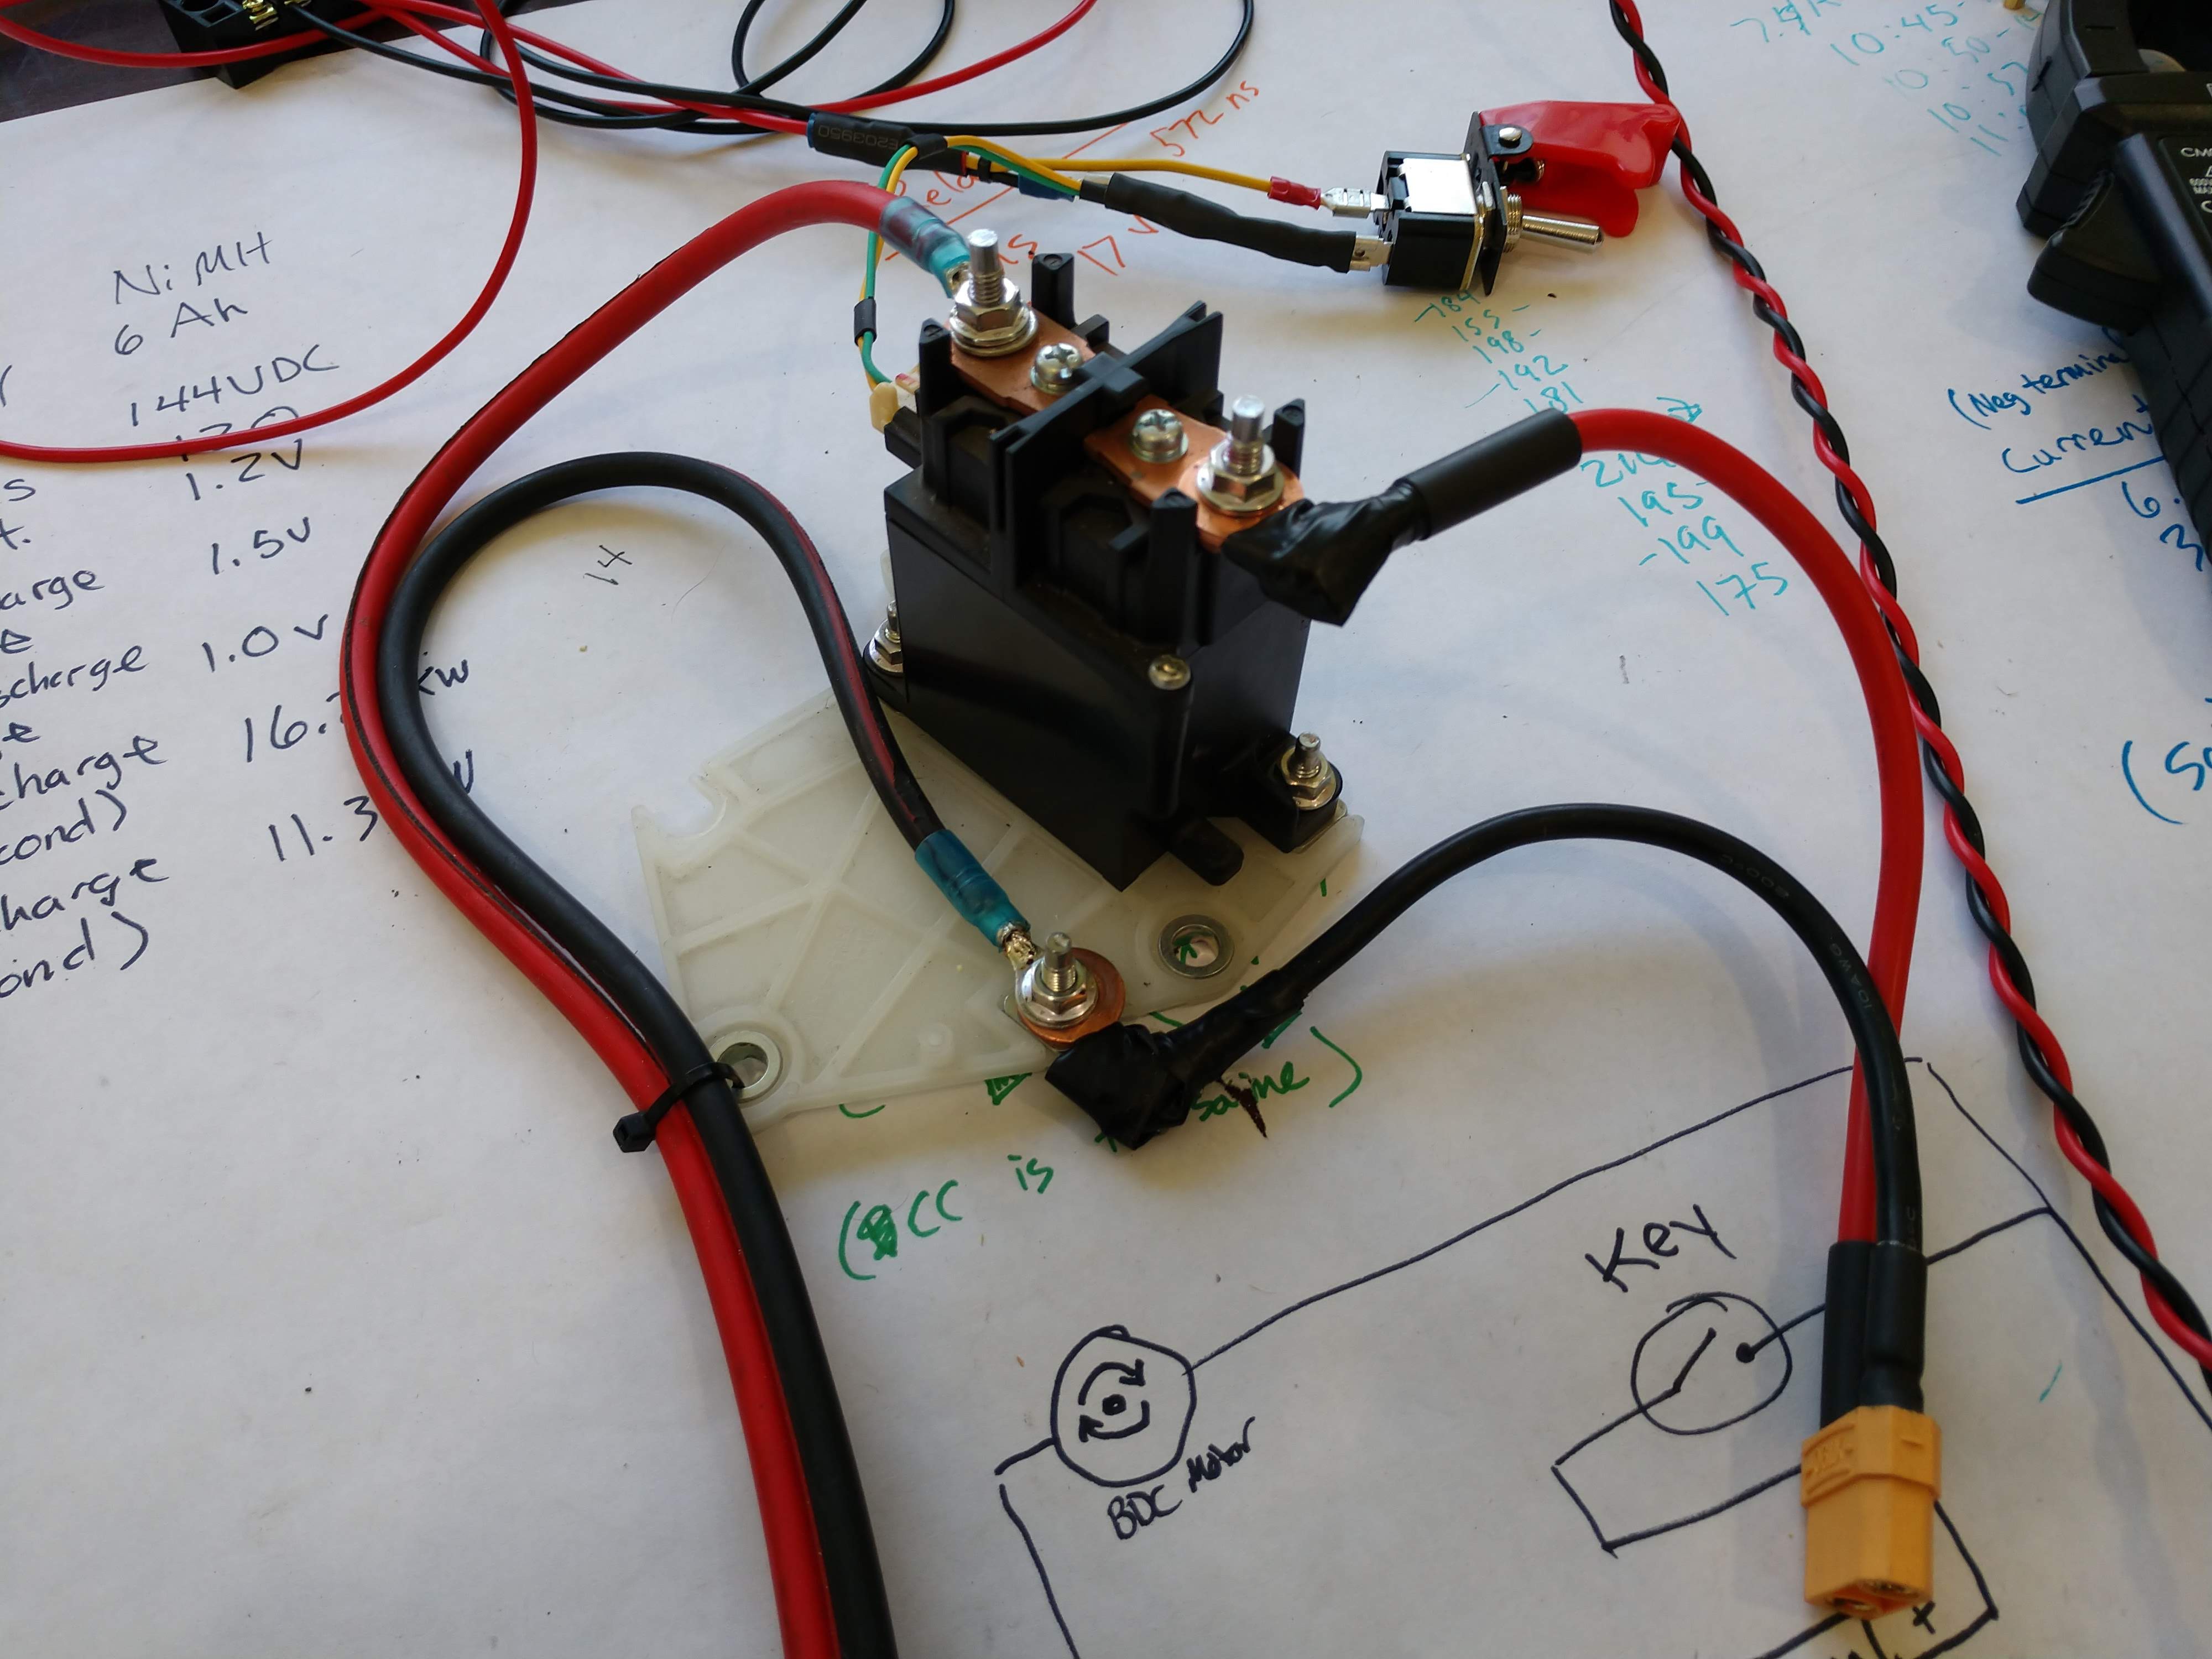
Also, here's a teaser photo of the contactor, more on that next time.
![]()
-
More Power
02/27/2019 at 19:08 • 0 commentsSo I just wanted to give a quick update on the project status.
I ran with the 48v system but since these batteries have a nominal voltage of 1.2, and with 12 cells, they have a nominal pack voltage of 14.4Volts. With 3 packs, that makes 43.2V nominal. I was very happy to be able to throw snow and drive on that voltage.
Now with the 48V controller, there's not much for documentation. I'm assuming since the voltage is in a multiple of 12, they allow for the charged voltage of lead acid batteries. If that's the case, then the controller could potentially handle 54V fully charged (13.5V max per battery). With that in mind, I wasn't sure if 4x12 cell packs would burn out the controller at closer to 57V. I realized the original small engine never stops spinning, so why should my motor?
I've taken out the speed controller and replaced it with a large battery contactor (high current relay) from a salvaged Hybrid Prius battery. This contactor works great! I will add a 12V regulator for onboard headlights and to control the relay. This'll just require that I disengage the clutch before starting up the motor. This should lower the initial starting current of the motor.
I've spent an enormous amount of time testing each battery pack, and bottom balancing them before combining them into their final configuration.
-
First Wet Run
02/20/2019 at 22:14 • 0 commentsOK so I'm not sure I'm using "wet run" correctly, but there's snow so .. ya
Here's a quick video of the first snow being thrown!
-
Back in one piece
02/20/2019 at 19:50 • 0 commentsI did 90% of the work last night, but today I spent half an hour and got it back together.
![]()
Electric Snowblower Conversion
Using a 1979 Ariens chassis, but replacing the small engine with a DC motor