Close
0%
0%

AND!XOR DC27 Badge

The trilogy is done

Similar projects worth following

CTF Leaderboard

Click here for the leaderboard

If you don't appear, there's not a problem, you either....

1) Haven't been near a proxy node at the conference yet

2) Haven't figured out the first step to appearing on the leaderboard...

BADGE HARDWARE SPECS

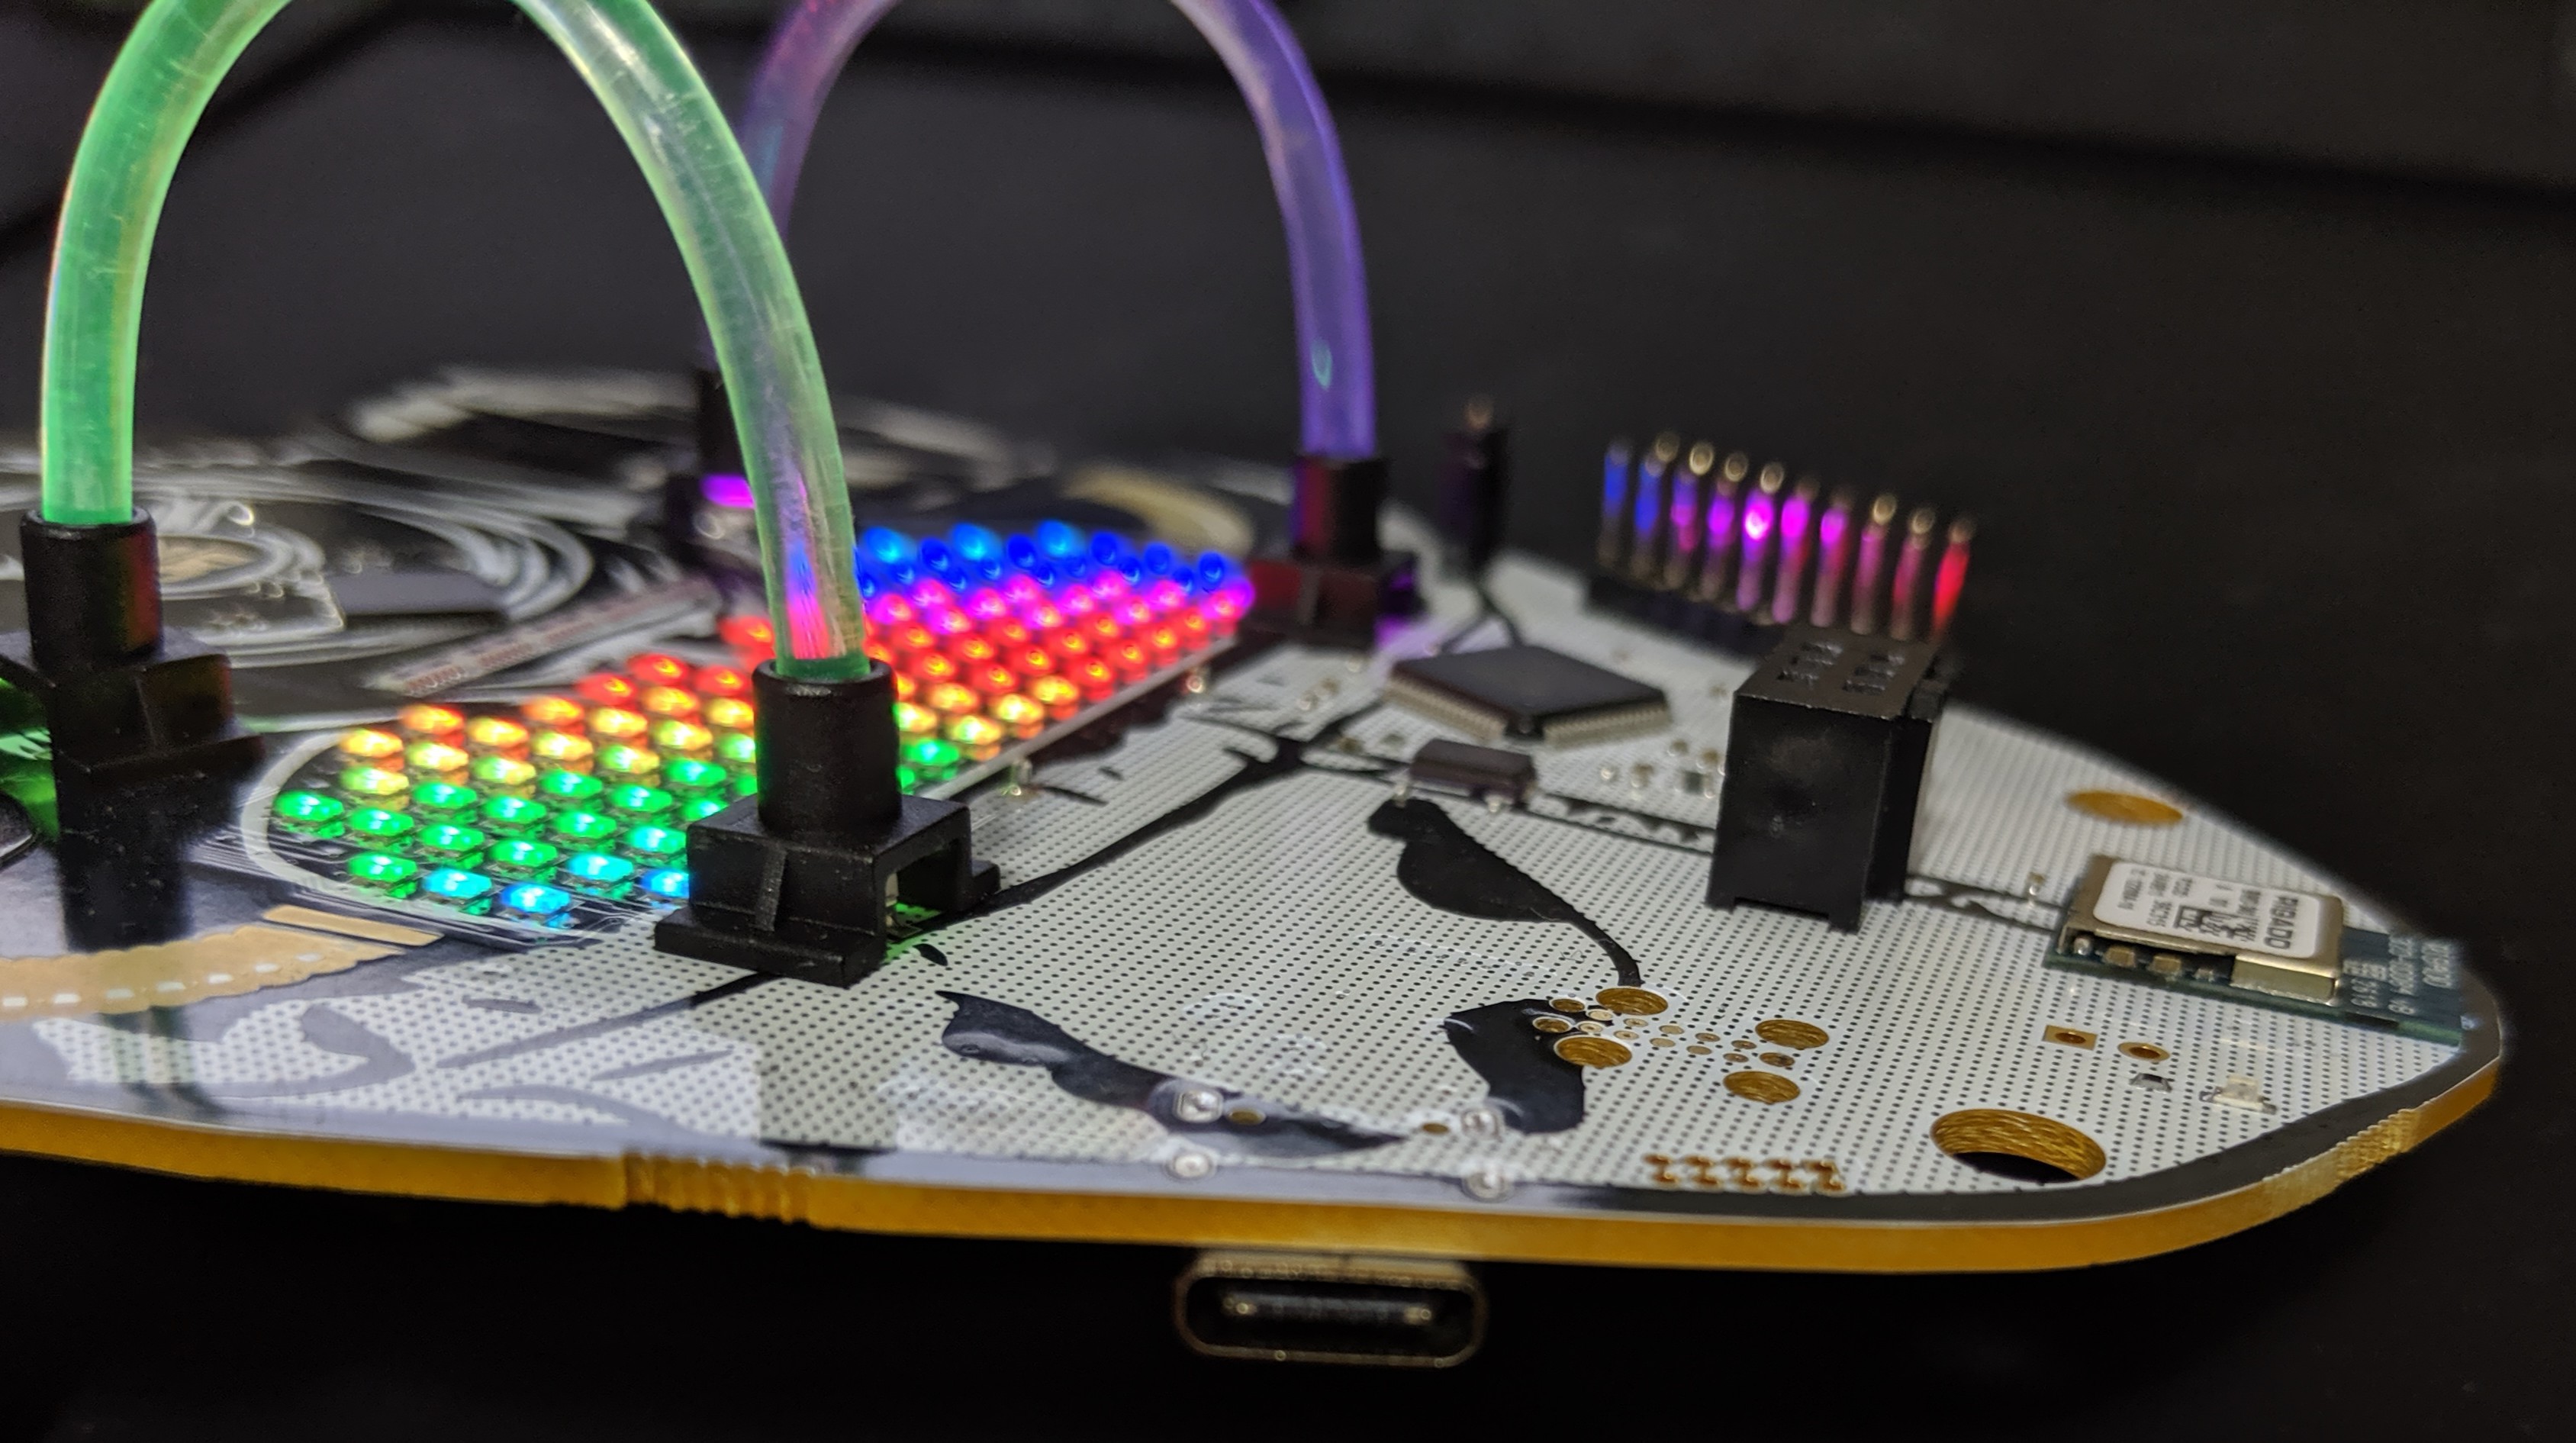
  • System on Chip - Rigado BMD-340 (NRF52840 core)  
  • LED RGB - HQ19-2333RGBC  
  • LED Controller - IS31FL3741  
  • LDO - LM1117 ADJ  
  • Boost - AAT1217-3.3  
  • Captouch IC - IQS333  
  • Battery Holder - Keystone 2460  
  • USB to UART Bridge / Hardware Hacking Debugger - FT2232H  
  • Light Pipe  
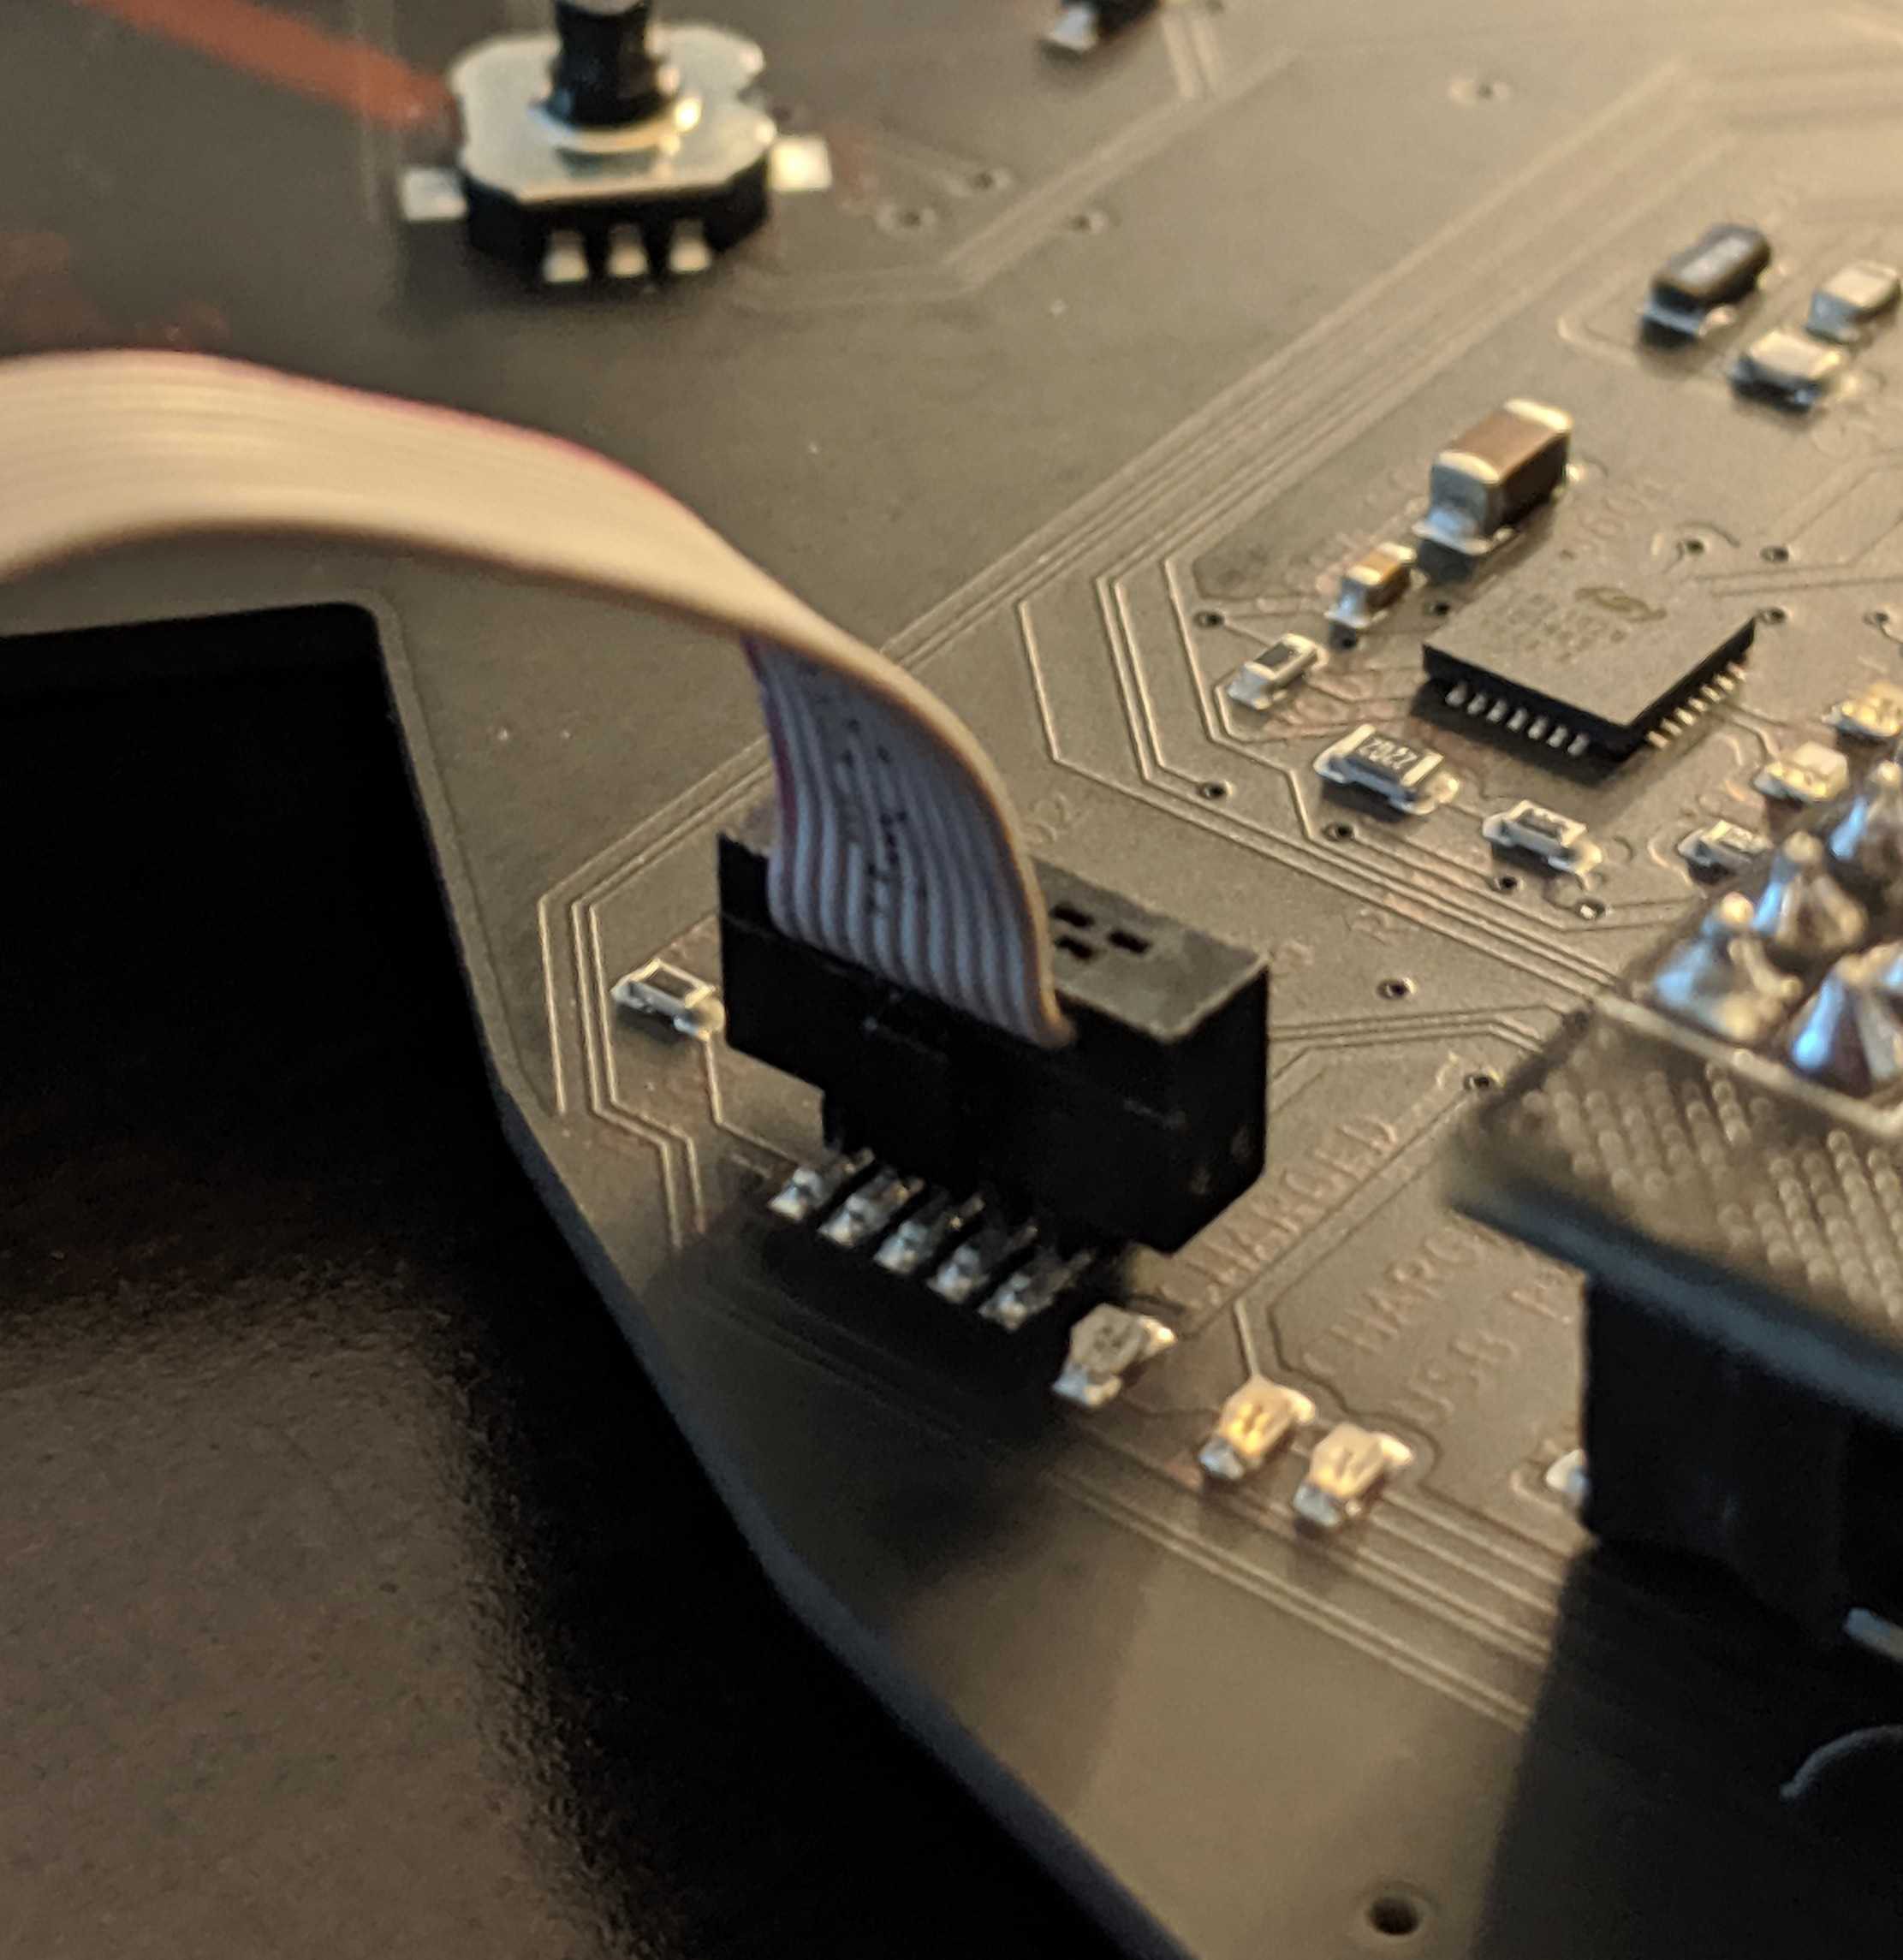
  • SWD Programming Interface  
  • Tag Connect Programming Interface  
  • SAO 1.69bis Interface  
  • USB C Interface

BADGE FUNCTIONS

  • Bling
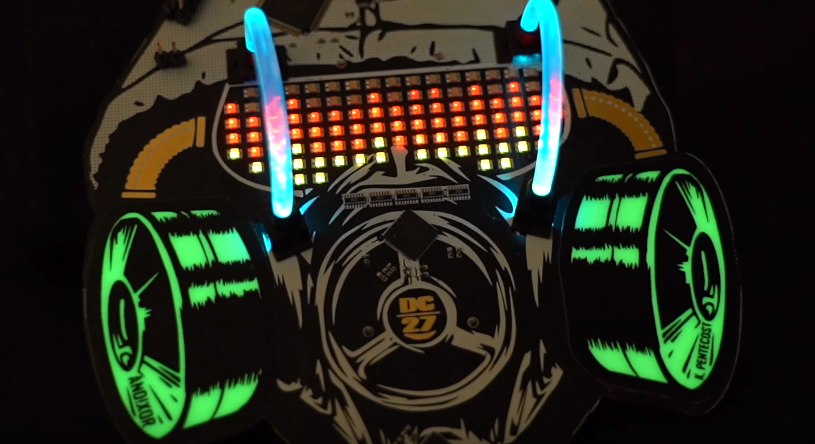
    • Full LED Matrix, LED Back Lit Light Pipes, Glow In The Dark Cap Sense
  • BOTNET
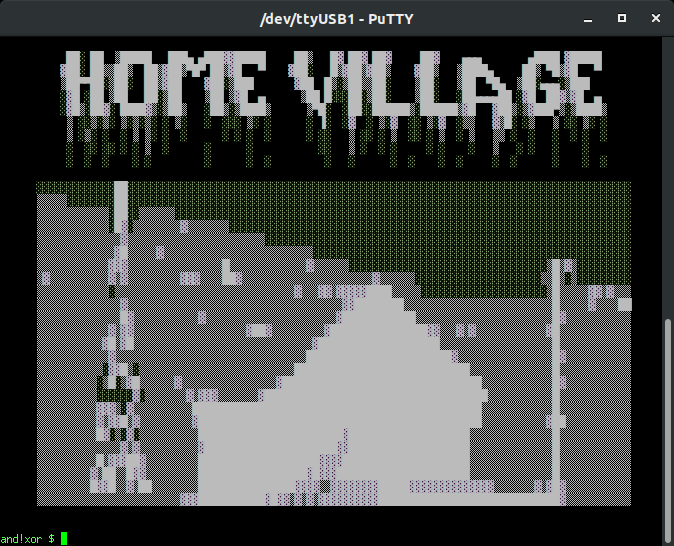
    • The badges create an IoT bluetooth mesh network throughout the conference. Consider this badge your wireless modem to join the party... To start, connect to your computer via USB-C, open a serial terminal, and connect to (/dev/ttyUSB1) with  serial settings 115200/8/N/1 within the conference area to join the mesh. Any command run on your own badge, can be remotely executed on other badges, without authentication or authorization.  These are IoT devices with industry standard security...meaning none!  With great power comes great responsibility, show us what you can do.
    • Future Log Coming Soon...
  • Badge Enabled Non Directive Enigma Routine (B.E.N.D.E.R)
    • The Badge Enabled Non Directive Enigma Routine is back for more embedded text based adventure hacking challenges. To start, plug this badge in to your computer, open a serial terminal, connect just like above, and type “bender help”
    • Future Log Coming Soon...
  • Hardware Hacking Tool
    • The badge includes an on board FTDI 2232 breakout. Which not only makes it the sexiest USB-C based tool out there, but adds the ability to hack embedded interfaces for UART (/dev/ttyUSB0), JTAG, SPI, I2C, and general bit-banging.  Hack the planet and other badges with this badge. 
    • Future Log Coming Soon...

WHO:: We are 5 dudes from California (and a guest star from Texas) with backgrounds in HW and SW engineering. We enjoy building and hacking things for fun. AND!XOR pronounced..."AND-NOT-EX-OR"...

WHAT:: We built a hackable, open badge for use at DEFCON 27 in Las Vegas and any other conferences in the future. The badge also serves as a dev board for hardware developers of any experience level from novice to expert sorcerer.

WHY:: The purpose is to put some really awesome hardware around the necks of a bunch of hackers and see what they come up with. We hope to encourage others to make use of the badge and come back with their own flavor in years to come, AND to promote embedded development across the community. Most importantly, the badge serves as a way to teach principles about security and hacking.

HOW:: Pure internet science. We've developed algorithms which calculate the spin rate of cat quarks for generating our ssh keys at a rate of (P+9)/((# of blackberry users)^2), where P is the probability that a cat will leave a house when a door is opened for them. Through philanthropy and sponsorship we are able to raise enough funds to give these away for FREE during hacker summer camp. Thank our generous sponsors:

WHERE:: Paris / Bally's / Planet Hollywood, Las Vegas

WHEN:: Aug 7th - Aug 11th, 2019

EXTRAS:: We are spending our free time and money outside of our busy work schedules to develop this from 5 separate locations across the US. So we are definitely open and encourage feedback, suggestions, and features to be added onto the badge. If you complain that there are not enough blinky's happening then you are welcome to build your own....

Read more »

  • 1 × FT2232H FTDI USB to UART Bridge / Hardware Hacking Debugger
  • 2 × Light Pipes N/A
  • 1 × SAO 1.69bis Interface Physical Interface Male
  • 1 × USB Type C Physical Interface Female
  • 1 × Rigado BMD-340 (NRF52840 core) System on Chip (SoC)

View all 11 components

  • B.E.N.D.E.R. Walkthrough

    Hyr0n09/30/2019 at 05:12 0 comments

    TLDR

    Spoiler Alert! This is a walk through for the Badge Enabled Non Directive Enigma Routine (B.E.N.D.E.R) v2.0. Major storyline and context is left out because it's assumed you have a badge, have given up, and just want to learn WTF was going on (and we encourage you to try this stuff as well). Let this be your guide and we assume you read the previous log on how to play B.E.N.D.E.R. 

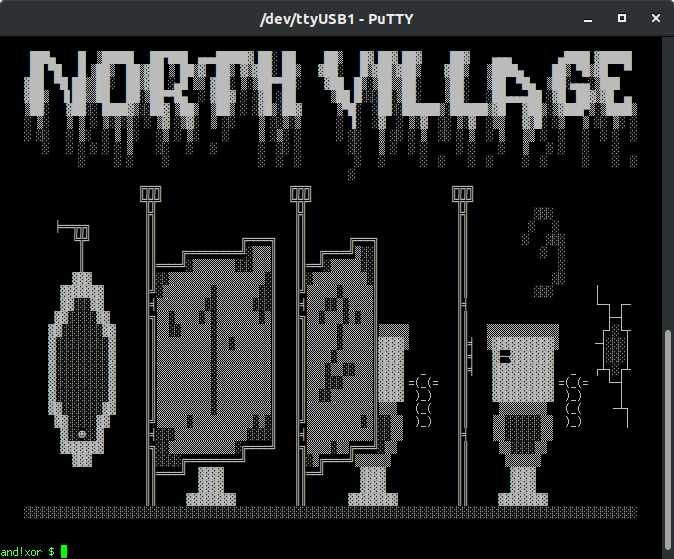
    North Village

    This challenge requires that the player exploit a buffer overflow to execute a command which requires root privileges to run. You are in a bathroom.

    Main Puzzle

    Looking at SHITTER_STALL_3 hints at the need to "flush" the toiler as it is about to "overflow" and that your gag sounds "ekoz" throughout the bathroom. EKOZ is a lulz version of ECHO and susceptible to a buffer overflow. By echoing a very long string > 24 characters, it overflows and executes the SYSTEM call command with root privileges.

    and!xor $ EKOZ 123456789012345678901234 FLUSH
    
      With great power comes great responsibility.
    
      Your super 1337 badge computer executes a flush.
      Almost everything goes down the hole, except a few remaining letters: CYBERPATHOGENS
      Something must be clogged as everything begins to flow back and fill up the bowl.
    

     Now that you know the letters in the toilet spelled out "CYBERPATHOGENS" one would think that this is the hidden password in the area that you need to yell into the GLORYHOLE

    and!xor $ HACK GLORYHOLE WITH CYBERPATHOGENS
      After yelling the password you hear a faint reply...
      CONDOM...COMBO...IM...A...TEAPOT...
    

     Now you are given a hint that the combination to the CONDOM_VENDING_MACHINE is related to "I'm a teapot," -> HTTP Status 418

    and!xor $ LOOK AT CONDOM_VENDING_MACHINE
      Always play it safe, even in the apocalpyse! The dispense knob wont turn, it requires a quarter.
      However gum is jammed in the coin slot (we hope its gum).
      There's also a 3 wheel COMBO_SPINNER for maintenance.
    
    and!xor $ HACK COMBO_SPINNER WITH 418
      The combination works, the door to the vending panel swings open, and some new l00t drops on the floor.
      North Village Hack: 15% Completion Earned
    

    The reward loot: USB_CONDOM

    Easter Egg

    There is a hidden phone number in SHITTER_STALL_2 which is revealed by looking at the tagging.

    and!xor $ LOOK AT SHITTER_STALL_2
      A nuclear winter toilet stall. Nothing here but a bunch of bathroom stall TAGGING.
    
    and!xor $ LOOK AT TAGGING
    
      4 GUD TIEM CALL 805-203-6888
      YELL NAYM IN GLORYHOLE

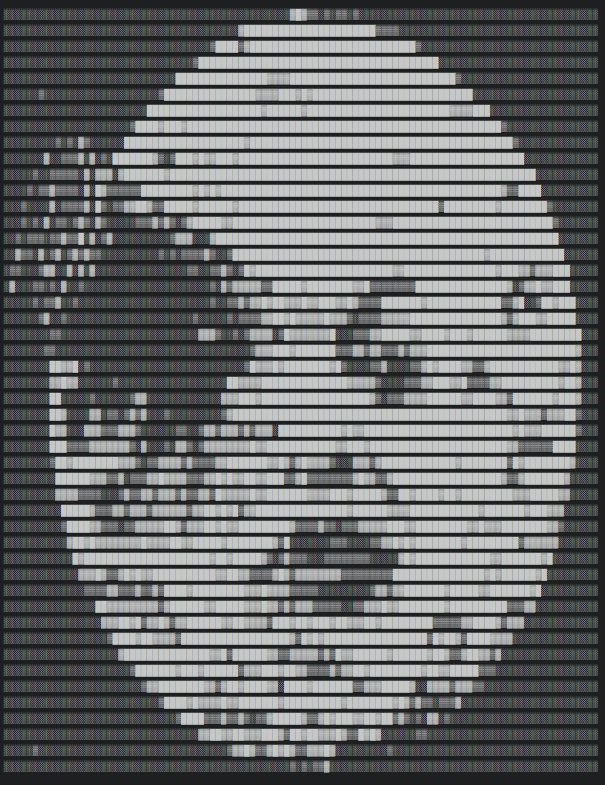
    Calling the phone number and listening to the voicemail plays a SSTV encoded photo. Decoding that photo is DICKBUTT.

    Yelling this in to the GLORYHOLE per its instructions unlocks the easter egg points.

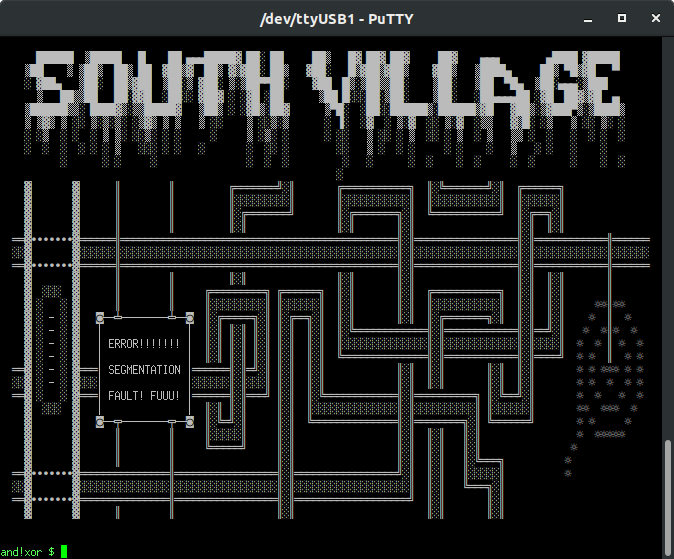
    South Village

    This challenge requires that the player decode a punch tape, debug the instructions, and submit a patch. You found the internet...a series of tubes...

    Main Puzzle

    Looking at the aptly titled binder "RTFM" provides instructions on how to look at the MASTER_TAPE and how to patch. Initially the player must look at the MASTER_TAPE and decode it to determine why the TACO_NET is offline. Tip of the hat to the TyMkrs for inspiring this puzzle from CypherCon 4.0.

    and!xor $ LOOK AT MASTER_TAPE
      Here's what your copy of the current master tape looks like...
    
      -^-^-^-^-^-^-
      | .O..O*..O |
      | OO..O*OO. |
      | .O..O*..O |
      | .O.O.*O.. |
      | ..O..*... |
      | O.OO.*... |
      | ....O*O.O |
      | O...O*O.. |
      -^-^-^-^-^-^-
    

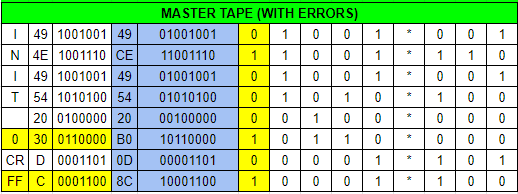
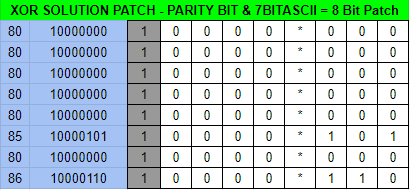
    Initially it should confuse the player given punched holes "O" are 1's on tape and dots "." are zero's. Translating this to a table, removing the parity bit, and finally to hexadecimal reveals its ASCII value.

    "INIT 0 CRFF" The errors are highlighted in yellow. No wonder it won't start. This needs to be changed to "INIT 5 CRLF" in addition to fixing the parity error given ASCII requires an EVEN parity; right now it is ODD which is EIA formatted. The following patch would fix this.

    Ensure you have the TAPE_PUNCH first, which is obtained from the EAST_VILLAGE as...

    Read more »

  • SWD all the things!

    Zapp08/01/2019 at 22:14 0 comments

    What's better than a blinky badge? A blinky badge that can hack!

    This post is an extension of hyr0n's post on all the wonderful things you can do with the FT2232H. It is also quite advanced as it will require you compile code and do some soldering. But the journey is worth it.

    This writeup is timely, just as I was able to make the SWD interface work successfully, Joe Grand tweeted this:

    In theory the technique below will work on the official DC27 badge although it is written to work with NRF52 targets.


    Note this log was adapted from: https://www.allaboutcircuits.com/technical-articles/getting-started-with-openocd-using-ft2232h-adapter-for-swd-debugging/

    Pre-requesites

    • An FT2232 device, preferably one of our badges.
    • A suitable linux build environment (git, make, etc)
    • arm-none-eabi-gdb (and related) tools
    • Appropriate connector for target device
      • SWD 10-pin 1.27mm pitch (Da Bomb badge)
      • Tagconnect 2050 (AND!XOR / DEF CON 27)
      • Wires, flux, solder, and a steady hand
    • Adapter from target connector to badge / FT2232 + jumper wires

    Hardware

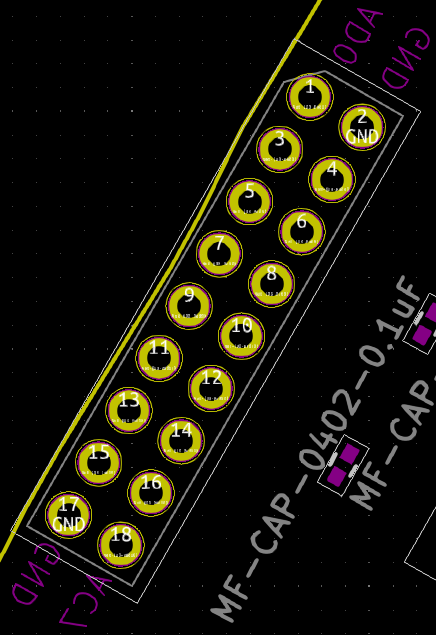
    Our badge has a dual channel FT2232. Channel A is broken out adjacent to the device.Referring to the FT2232HL datasheet, the key channel A pins for MPSSE are TCK/SK, TDI/DO, TDO/DI (ADBUS0, ADBUS1, and ADBUS2 respectively).
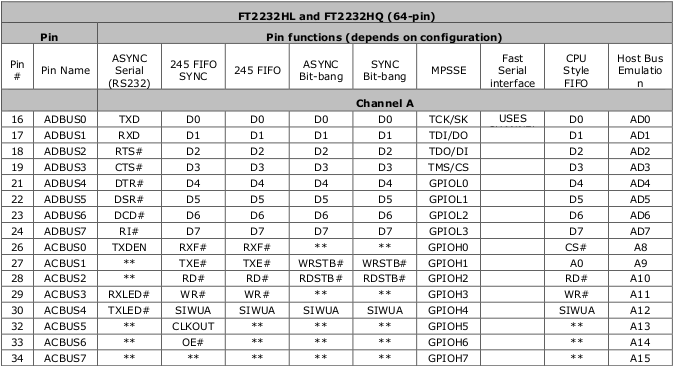
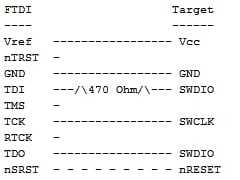
    The trick is wiring TDI to TDO with a resistor and to SWDIO on the SWD interface since the SWD interface is just SWDIO and SWCLK. SWO, nRESET, and Vcc can be ignored.FT2232H Wiring With TargetThe best way, in our opinion, is to slap a 470 ohm 0805 resistor between ADBUS1 and ADBUS2.
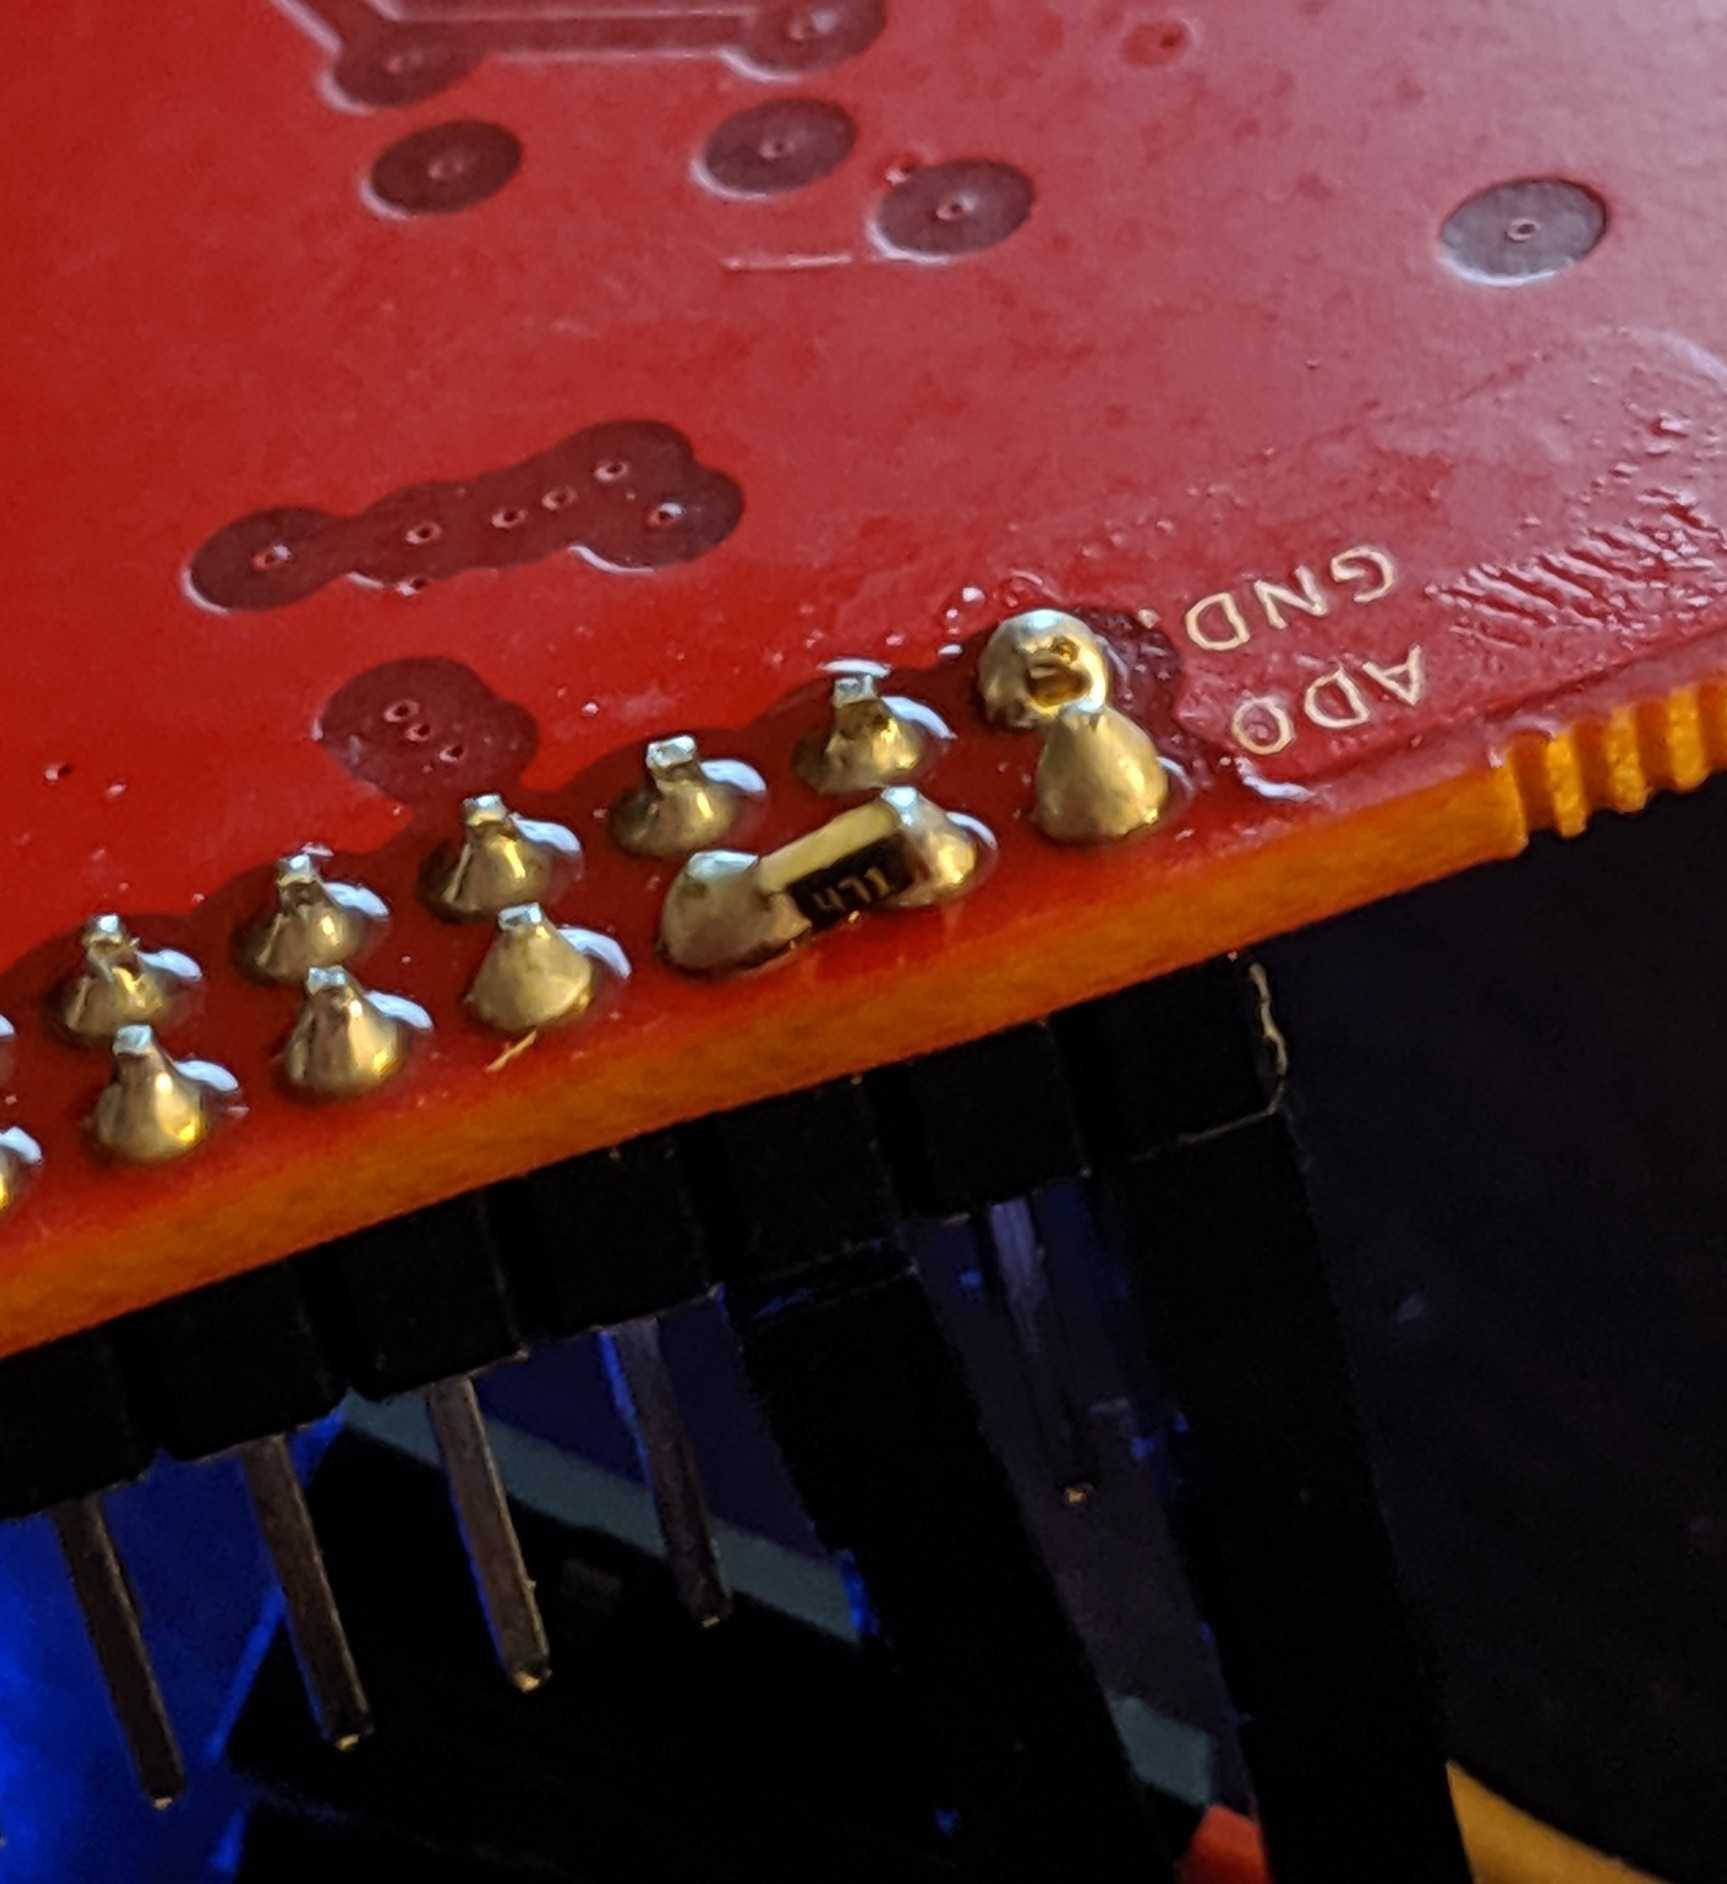
    Not so bad yet.

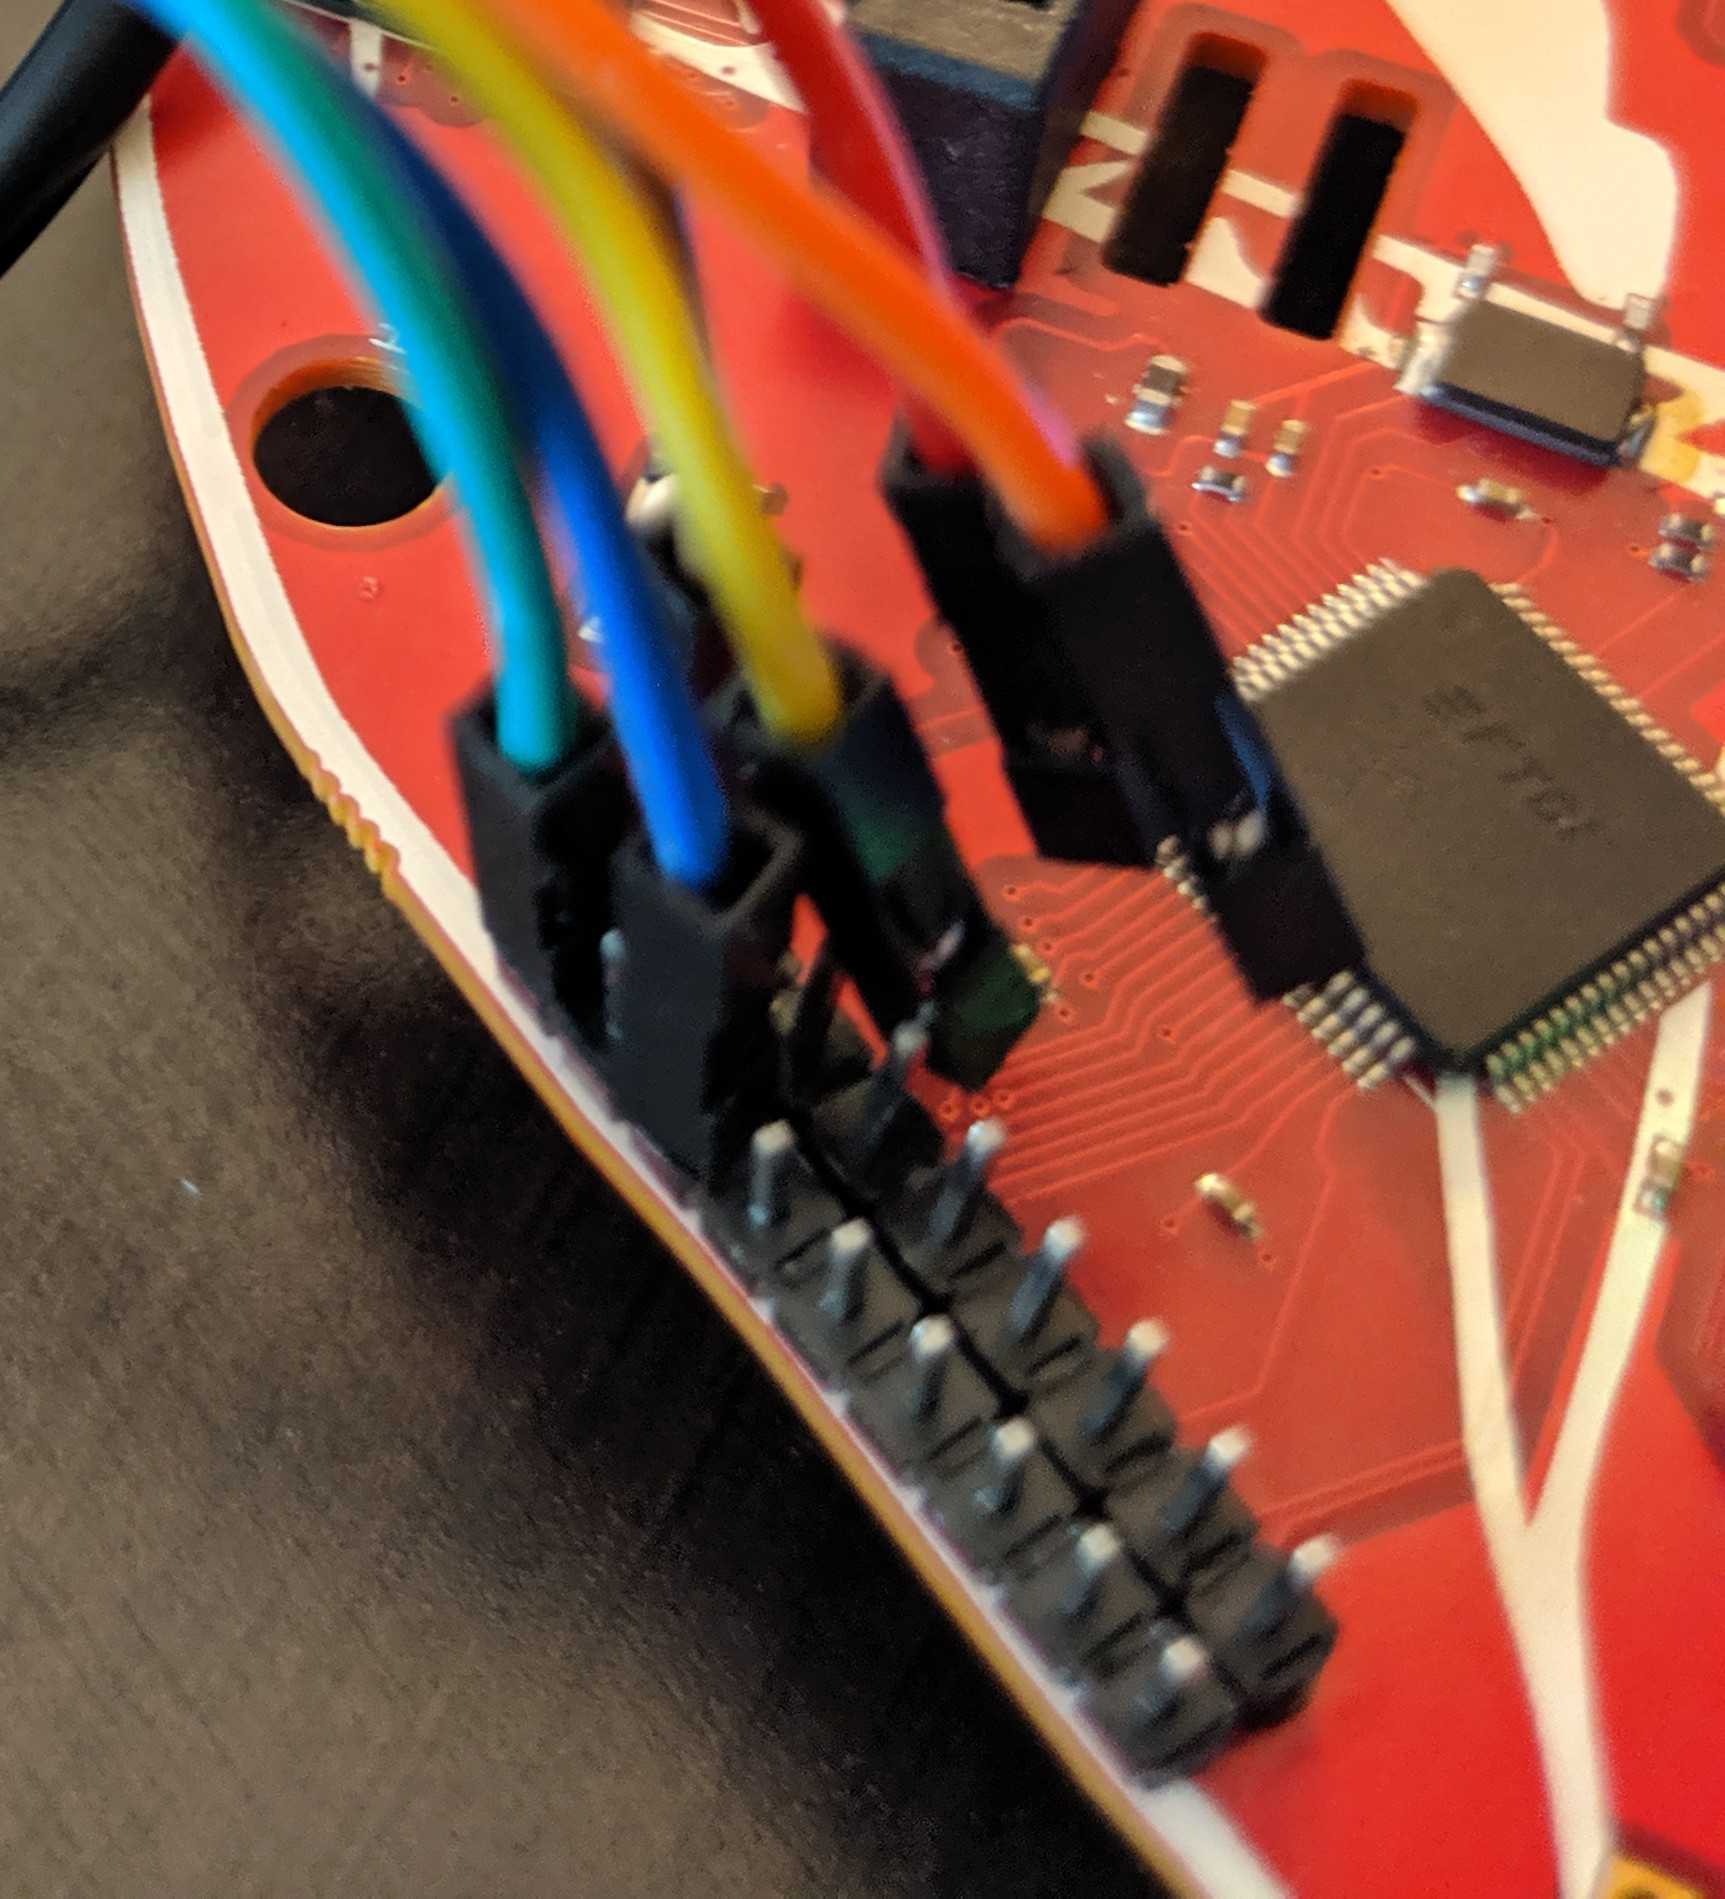
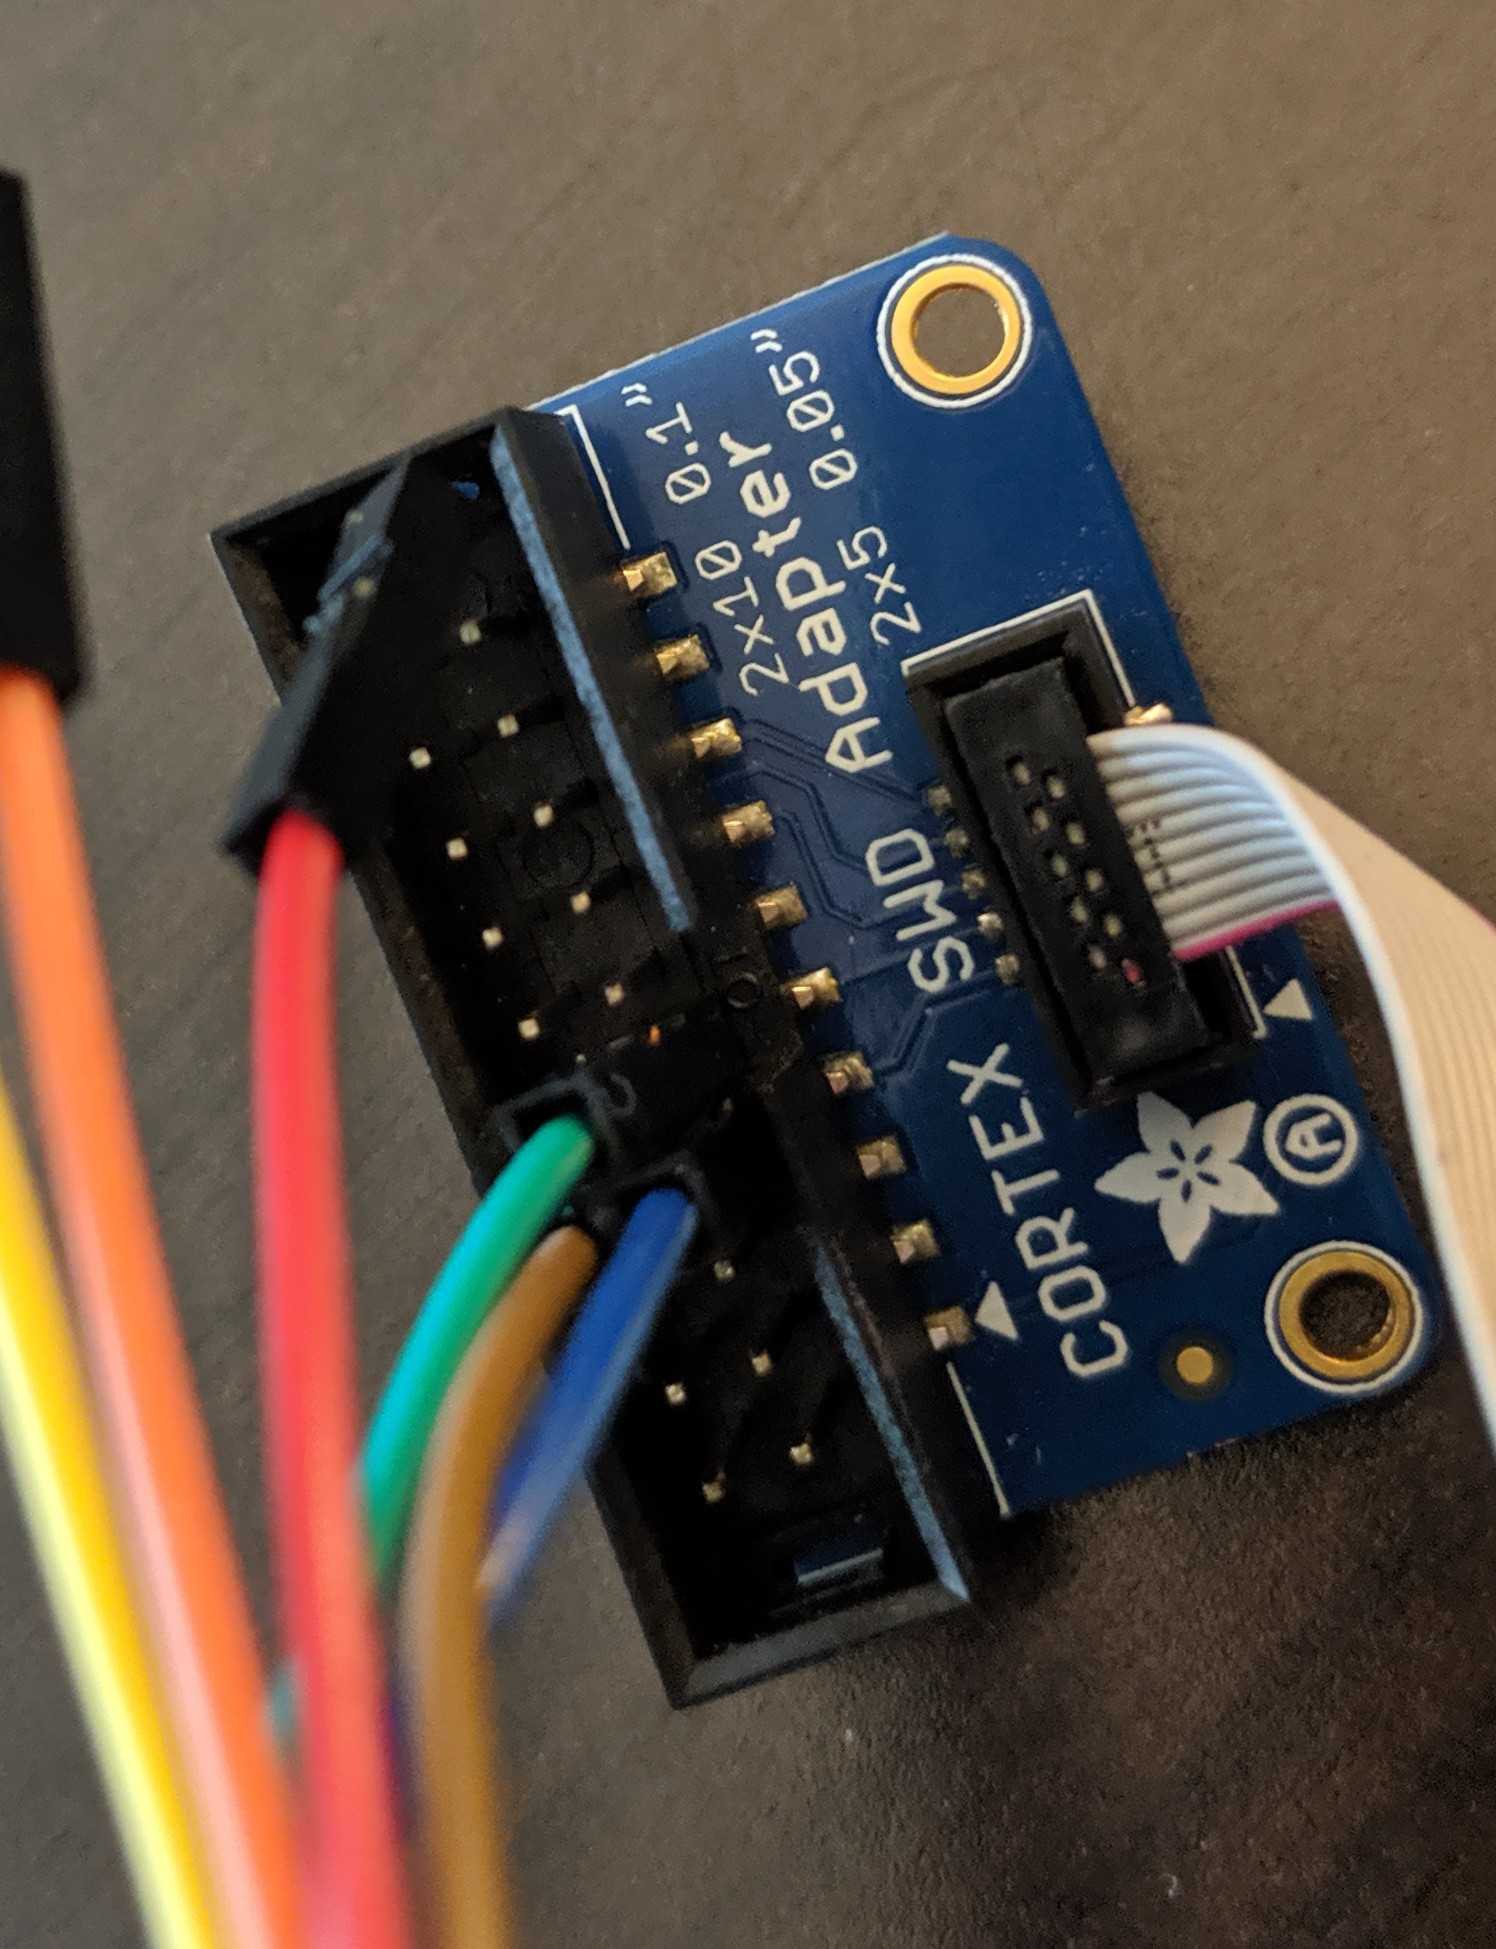
    Next step is to connect to the target. Refer to the FTDI to Target diagram. TDI(ADBUS1) and TDO(ADBUS2) pins are connected via a resistor then to SWDIO. Using your adapter or amazing electrical skills connect to the target device. We'll leave this one to you but for reference this is how we connected from the badge to Da Bomb badge using an Adafruit JTAG 20 pin to SWD 10 pin adapter YMMV.

    BADGE: TDO(ADBUS2) <==> Adapter: TMS <==> Da Bomb: SWDIO
    BADGE: TCK(ADBUS0)<==> Adapter: TCK <==> Da Bomb: SWCLK
    BADGE: GND <==> Adapter: GND <==> Da Bomb: GND

    Software

    I won't be going into the ARM tools in detail those are for other tutorials. But if you really must know I posted some resources here: GDB SWD Tutorial

    The key to making this all work is OpenOCD. Unfortunately binaries distributed with Ubuntu and other Linux distributions are lacking. Therefore we must compile our own. Just like the good ol' days on your parents' computer with your Slackware distribution.

    The Zylin distribution of OpenOCD seems to be well maintained but does not post binaries.
    First step, clone the repo:

    $ git clone http://openocd.zylin.com/openocd

    Next, bootstrap the environment. This will find unmet dependencies that need to be installed. I'll leave that to you.

    $ cd openocd
    $ ./bootstrap 
    + aclocal
    + libtoolize --automake --copy
    + autoconf
    + autoheader
    + automake --gnu --add-missing --copy
    Makefile.am:46: warning: wildcard $(srcdir: non-POSIX variable name
    Makefile.am:46: (probably a GNU make extension)
    Setting up submodules
    Generating build system...
    Bootstrap complete. Quick build instructions:
    ./configure ....


    Now the important part, configuring the build.

    $ ./configure \
        --enable-aice...
    Read more »

  • Not-so-retro-spective Production Log

    Zapp08/01/2019 at 01:38 0 comments

    This is our third year utilizing Macrofab as our PCBA. Each year we've improved our own production process to identify failures as close to the badge production as possible. A major part of this is providing Macrofab with the tools they need to quickly flash and test badges.
    This year we sent them a virtual machine (with OpenOCD), STLink V2 clones, and Tag Connect 2050s. The VM was pre-configured with the test firmware and tools to get the job done. A standard feature in our DC26 and DC27 badge is a Power on Self Test (POST). This year our POST tests the capacitive touch controller, internal file system, and LED driver. Any failures during POST results in a flashing green LED. After flashing each badge Macrofab simply needed to observe the green LED and LED matrix to know if the badge is functional.

    Initial Failures

    This year we manufactured 600 badges. Of those, 28 failed tested at Macrofab that they were not able to correct. Below is the breakdown of what they found:

    • 10 unable to flash
    • 4 LED matrix flashing too fast
    • 10 LEDs do not light up
    • 4 Some other POST failure

    Less than 5% failure, not bad, but not great either.

    Triage

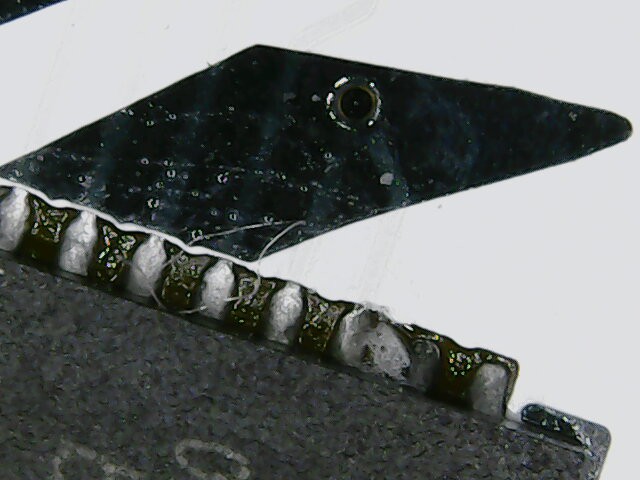
    Zapp spent the better part of a day testing each failed badge. Initial thoughts were that the LED driver, a massive QFN60 IC, had shorts between pins. Our DC26 badge had issues with this due to our paste layer. It's relatively easy to correct. The first badge triaged backed up this assumption. After a little touch up with a soldering iron, Zapp had a working badge. Note the extra solder blob between the pins.

    This assumption was quickly proven wrong, however, the second badge had a POST failure. Logs indicated a IQS333 failure (capacitive touch controller). The IQS333 is also a QFN part, but not as large. No amount of touch up on the IC helped resolve the issue. In fact it would occasionally correct itself then fail again.

    Zapp continued through the badges marking badges with failed LED drivers and/or failed captouch controllers. The LED matrix flashing too fast issue was quickly resolved with a flash of production firmware, however, all 4 badges were found to have capacitive touch failures.

    During the triage Zapp found a new failure mode which turned out to be a gap in the Macrofab test coverage, oops! Serial to the FT2232 was not tested. On 6 of the 28 badges serial was not functional.

    By the end of triage, failures were further grouped as:

    • No Serial (6 of 28)
    • No LEDs (13 of 28)
    • Capacitive Touch Failure (6 of 28)
    • Cannot flash (10 of 28)

    Many badges had multiple failures, womp womp

    BMD-340

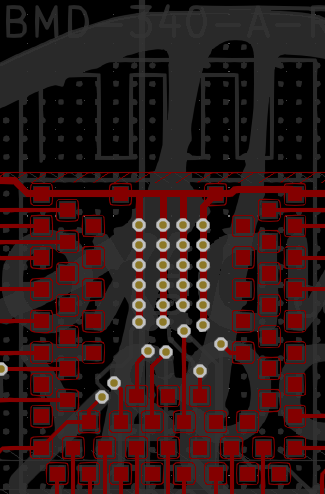
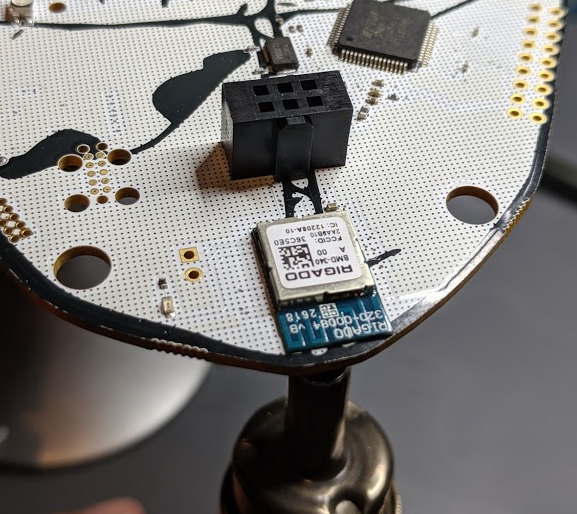
    With triage complete, Zapp started on the badges that could not be flashed. The BMD-340 module is connected directly to the SWD and Tag Connect headers, see schematic below for Tag Connect breakout. In fact the traces are very short on the PCB as well. This likely means the module did not reflow properly.

    The BMD-340 is a very complex footprint. 65 pins all under the module with 0.5mm pads.

    We decided to sacrifice one badge to investigate, using hot air from the bottom of the PCB, Zapp removed the module.

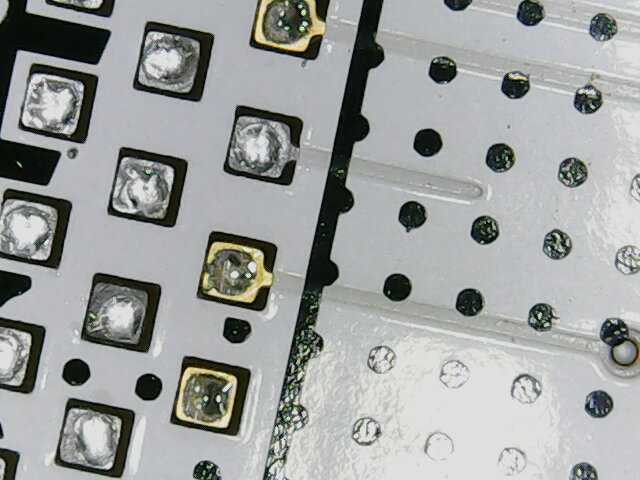
    What Zapp found was insufficient solder on the SWCLK pin.

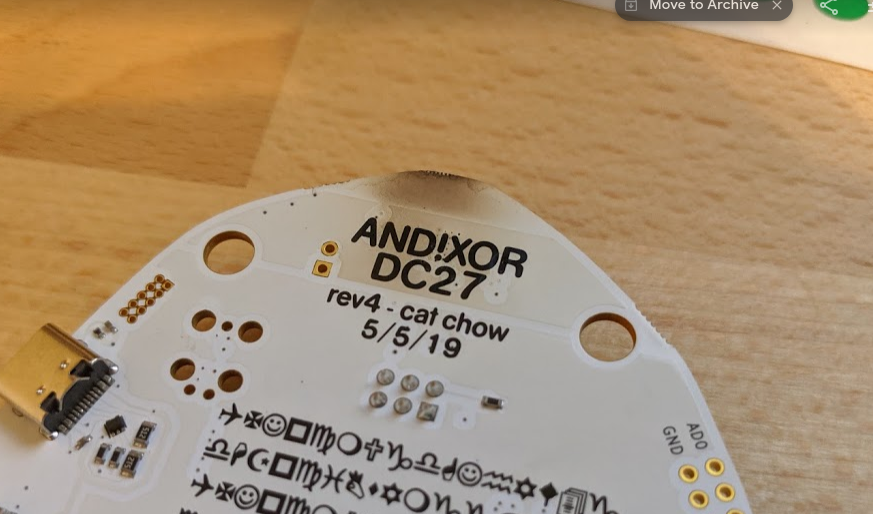
    What Zapp also found was his hot air was set *way* too high. Getting this right is harder than it sounds. Macrofab uses a lead-free process which requires a much higher temperature to melt solder. However, the only way to heat the board is from underneath the PCB. Zapp eventually dialed this in but a couple boards have some burn marks, sorry!


    With the root cause identified, the hard part was to come, resoldering the modules. To do so, Zapp applied some rosin flux (the good stuff) then using a soldering iron and some 63/37 solder applied tinned each pad on the PCB. It is important to ensure each pad has the same amount of solder to avoid issues. Zapp repeated the same process to the underside of the module, leaving some flux to help with the heat transfer when...

    Read more »

  • FTDI 2232H Breakout For Hardware Hacking

    Hyr0n07/23/2019 at 01:22 1 comment

    Introduction

    One of the functions we were most excited about including in this year's badge was an FTDI 2232H with breakout such that it could be used as a hardware hacking tool. Hack the other badges, IoT devices, embedded systems of your choice... Hack The Planet. Think of this like a Bus Pirate, however instead of a clunky embedded CLI you will be using software on your computer to interface with it.

    Many folks hear FTDI and just think of a serial UART to USB adapter. That's the 232R. However the FT X232H series can be used for a LOT more. For reference the "X" in the prior "X232H" that I mentioned refers to the number of channels on the chip. A standard "232H" has a single channel, a "2232H" has two channels, and a "4232H" (you guessed it) has four channels. By a channel, what this really means is that IC has an independent functional module performing the capabilities described in the data sheet. Our 2232H is like a two in one!

    Since we have a two channels on the "2232H," the first channel "A" we dedicated to the hardware hacking breakout (and to be compatible with applications which may only look for the default channel), where as the second channel "B" we integrated as our badge SoC's serial UART interface for the embedded terminal (BOTNET, BENDER). So when you plug in the badge to a computer, you will get two devices.

    On a Linux System...

    • Channel A (Hardware Hacking) - /dev/ttyUSB0
    • Channel B (Serial Terminal) - /dev/ttyUSB1

    On a Windows System...

    • Channel A (Hardware Hacking) - COM (N)
    • Channel B (Serial Terminal) - COM (N+1)

    Note that Windows keeps track of permanently assigns virtual COM ports to every serial device it ever interfaces with. So (for example) if the badge is the 45th device ever plugged in, Channel A = COM45 and Channel B = COM46  ¯\_(ツ)_/¯

    Also, bragging rights... based on our extensive market research (using Google while drinking) this badge is the FIRST USB-C based FTDI X232H Debugger / Hardware Hacking tool out there! No more three tries to plug in your USB cable and it has bling to light your path. Yep, let that sink in. 

    AND!XOR = King of Shit Mountain

    But if change scares you, or living in the past with comfortable hardware interfaces toots your fancy, here's a USB C to Mini Adapter

    Reading The Legend

    The legend at the top of this log is meant to be there as your quick reference. Visually line up those 9x2 cells of information with the 9x2 breakout pins on the badge. This is how you know what to wire up. Right off the bat, you probably think, "Uh... I only need the pins on the top far right like 90% of the time." The answer to that is usually going to be "Yes...but..." there is a lot you can do with this beyond the quick and dirty which would require the other pins (such as bit banging). Also before we go any further, here is a silk screened reference on the BACK of the badge (which makes it opposite) so if you are ever confused you can map up the pins with...

    Read more »

  • BENDER 2.0

    Hyr0n07/22/2019 at 03:53 0 comments

    The Badge Enabled Non Directive Enigma Routine (B.E.N.D.E.R) is back for more embedded text based adventure hacking challenges. This is our puzzle framework we introduced during our DC26 project. Essentially it takes the style of an older text based adventure game (e.g. Colossal Cave, Zork, etc.) with ANSI style graphics. You have a limited set of command line interface actions which you perform on items. However this is not purely isolated to the terminal shell. B.E.N.D.E.R. is a framework to help us present our security challenges with hacker friendly graphics and encapsulate the game story line in a fun way. You start the game in the Home Village and must travel either North, South, East, or West Villages to solve a number of challenges leveraging actual hacking skills and contextually "in game" items. Our badges are for hacker cons and will always try to explore and teach some aspect of security.

    For example, on the DC26 badge, in the North Village the hacker would "hack PIN_PAD with 1234" (or any four digit pin) causing the lights on the badge to blink. Solving the challenge required a logic analyzer or o-scope to see the timing on the I2C bus change, leveraging side channel power analysis to crack the pin which was randomized for every badge. As the delay got longer, you were closer to the actual pin.

    Another example from the DC26 badge, in the West Village where once using an in game smartphone app used to fly a WiFi enabled drone...nothing would happen... unless you were using an actual device to capture the WiFi packets coming from the badge and analyzing them in WireShark to learn the sekrets.

    Serial Connection

    B.E.N.D.E.R. is entirely accessed through a serial terminal.

    • Speed: 115200
    • Data Bits: 8
    • Stop Bits: 1
    • Parity: None
    • Flow Control: None
    • Window Columns (110) - This is important for the GFX to appear properly on your screen!
    • Window Rows (40) - This is important for the GFX to appear properly on your screen!

    An important thing to note, our badge mounts as TWO serial devices because we leverage the FTDI 2232H component. The first digit (2) in the component number signifies that there are actually two FT232H cores on the chip. We user the first one as the FT2232 breakout for hardware hacking and the second one for the embedded terminal. If you use Linux (and you always should), that means plugging in the badge will result in two USB mount points:

    • /dev/ttyUSB0 : The Hardware Hacking Breakout
    • /dev/ttyUSB1 : The Embedded Serial Terminal (BOTNET & B.E.N.D.E.R.)

    On Windows, this means you will get a virtual com port of N and N+1, choose the N+1. Windows keeps track of all serial devices every plugged in and saves them. So if the badge is the 45th device you have ever plugged in, the following would happen...

    • COM45 : The Hardwre Hacking Breakout
    • COM46: The Embedded Serial Terminal (BOTNET & B.E.N.D.E.R.)

    Now back to Linux. We have some better recommendations after clunking around last year. We still recommend a terminal with allows escape sequences and ANSI (otherwise you get no colors or GFX). Minicom can be a bit tricky to setup, but the following work great:

    • PuTTY
      • sudo apt-get install putty
      • usage: launch from your application tray
      • Ensure to set the Window Column (110) and Row (40) settings for proper GFX display
    • Screen
      • sudo apt-get install screen
      • command line application
      • usage: screen /dev/ttyUSB1 115200
      • Ensure to resize your console window such that the Window Column (110) and Row (40) settings can have proper GFX display
      • CTRL+A : Enters the screen command menu
      • CTRL+A then "\" to disconnect and quit

    Commands

    So how does one start? At the command line type "BENDER" for a list of sub commands.

    • BENDER (sub commands listed below)
      • STATUS: Status of your progress
      • WEIGHT: Set your weight (100-400lbs)
      • GENDER: Set your gender...
    Read more »

  • DC27 DOOM SAO - Hurt Me Plenty

    Hyr0n07/18/2019 at 05:48 0 comments

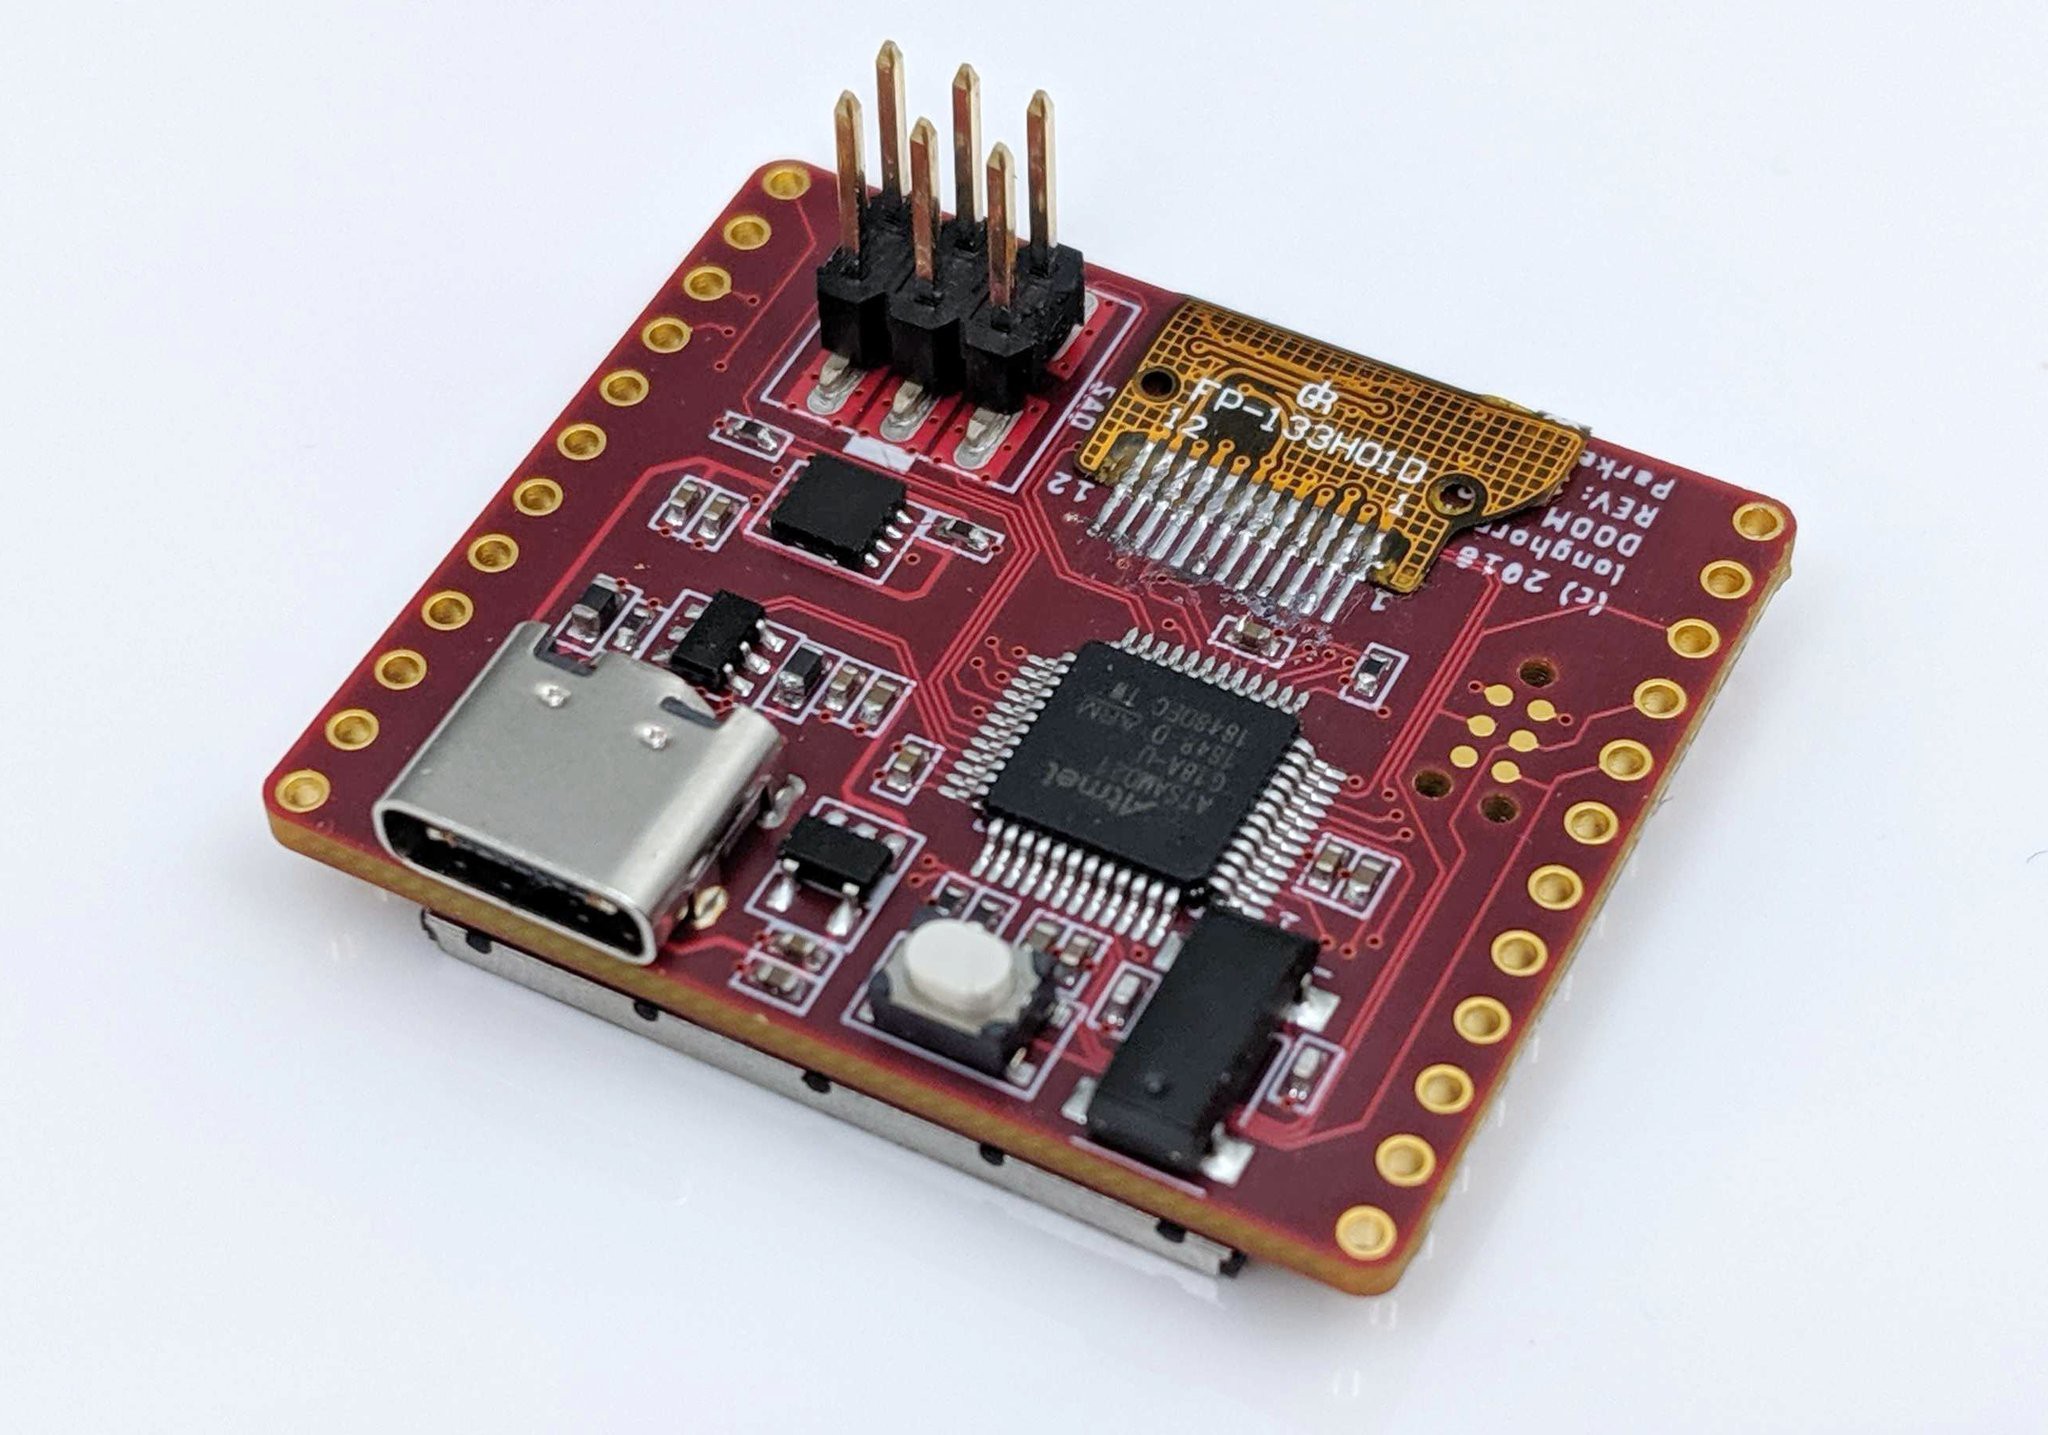
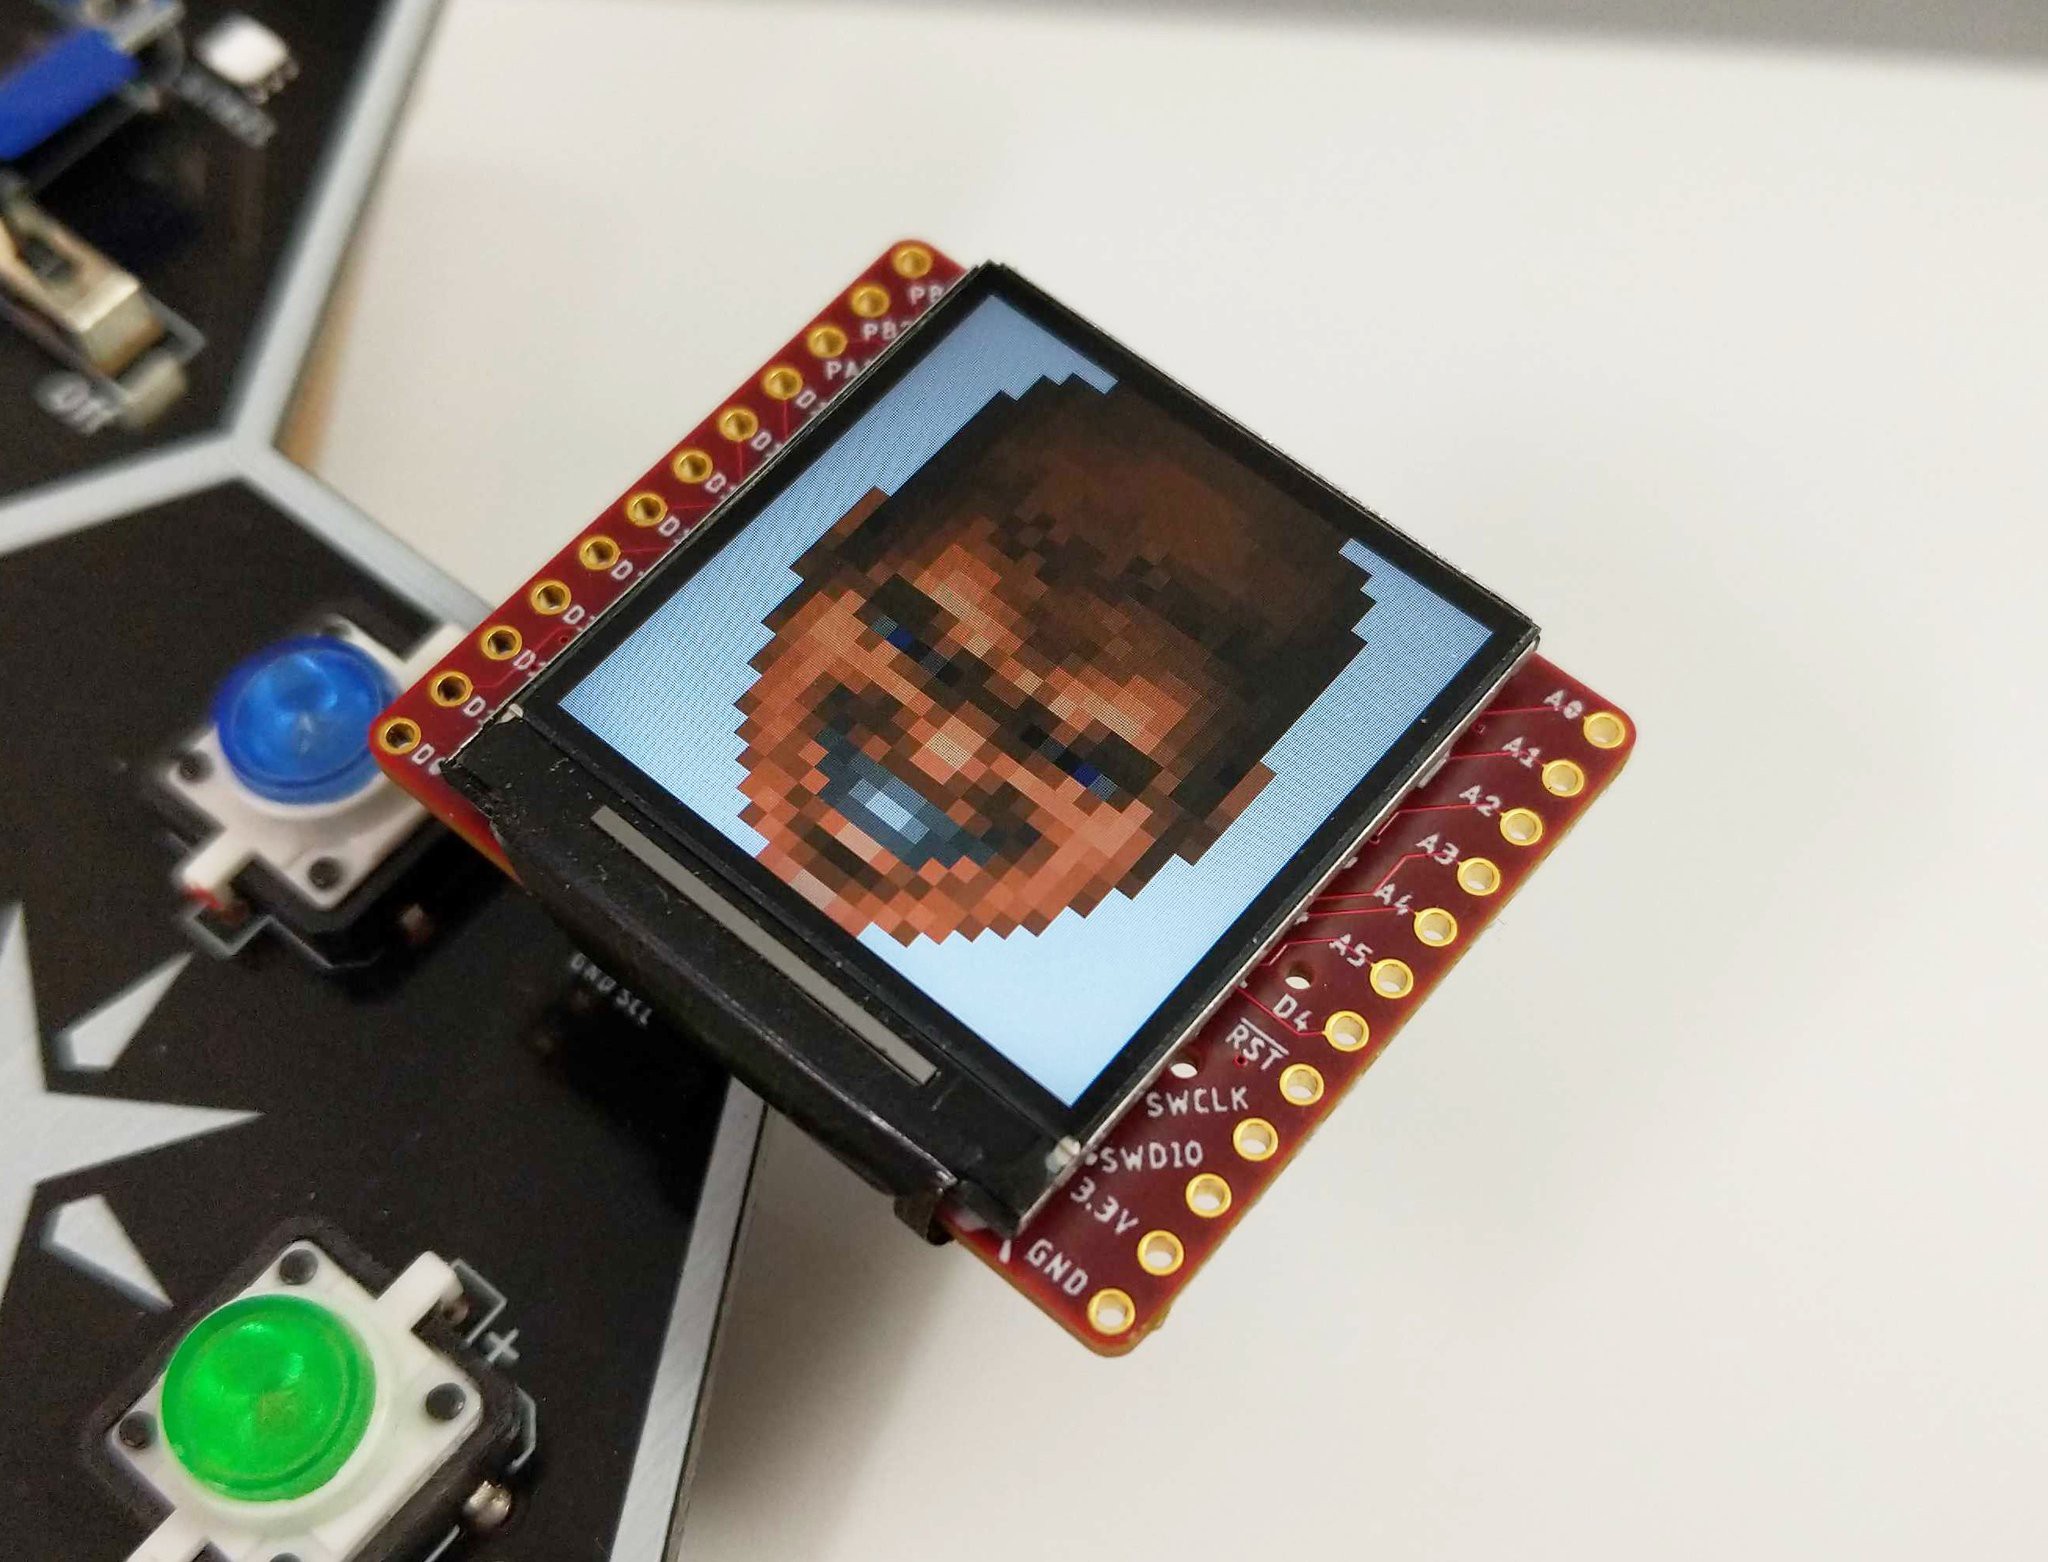
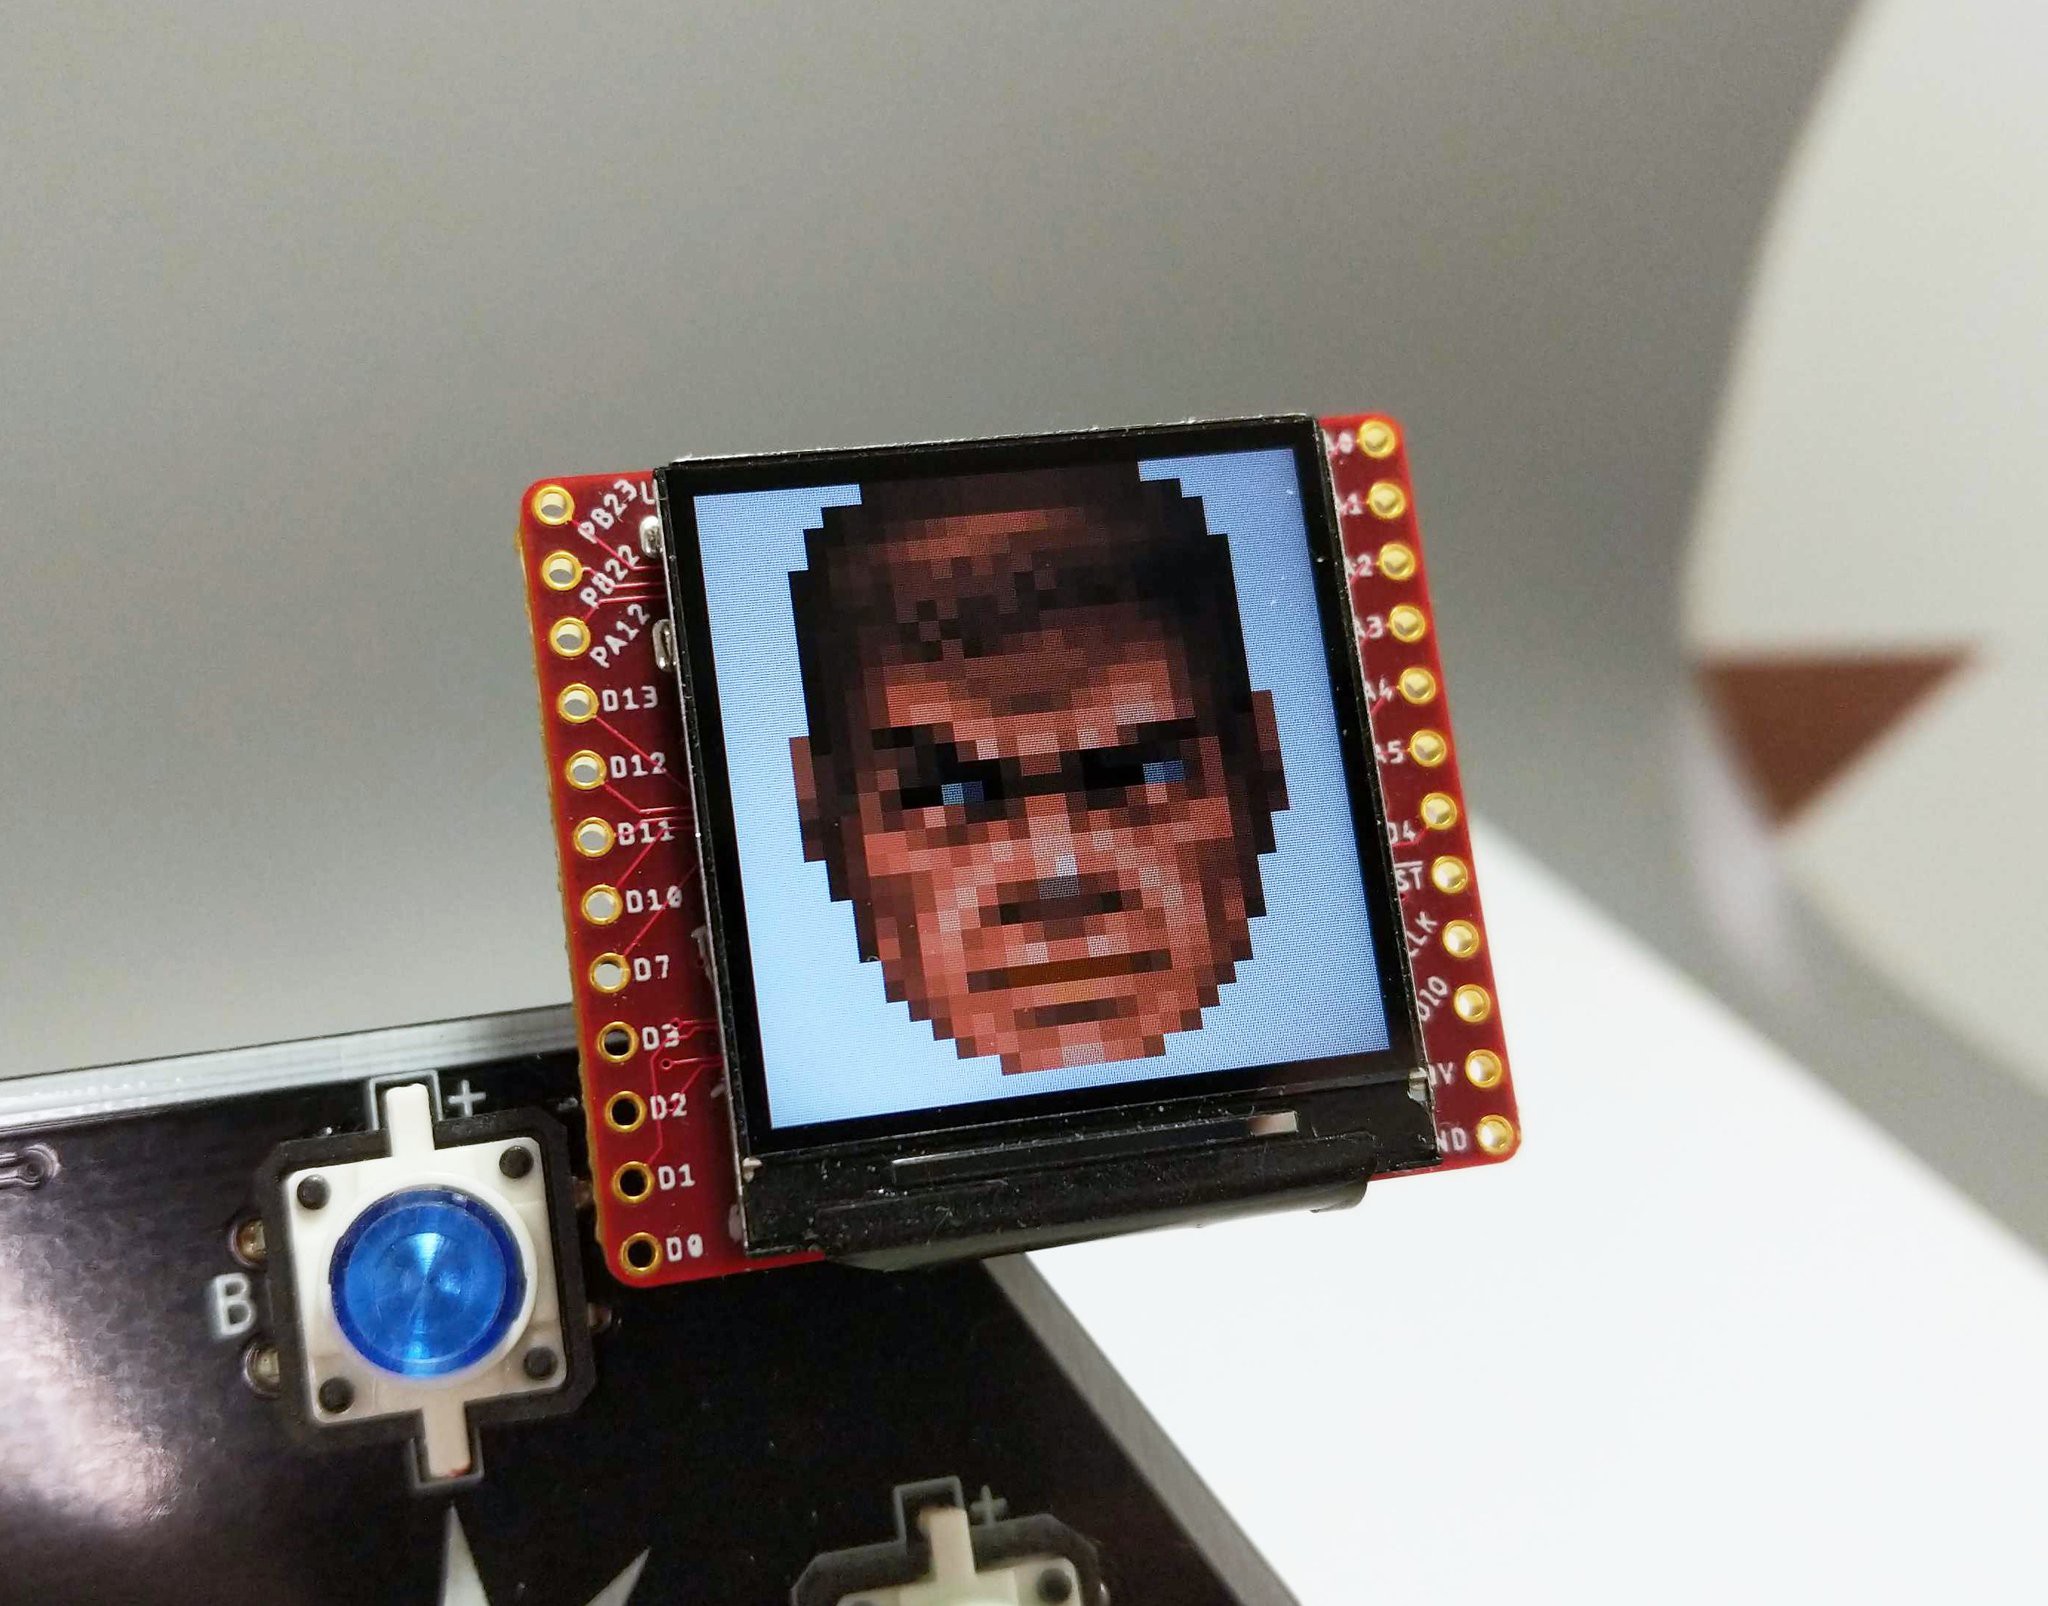
    We’ve been lucky this year to have Cr4bf04m on our team, aka LonghornEngineer, aka Parker Dillmann. He shared our goal of the DC27 project to make the badges free during hacker summer camp. Aside from philanthropist backers and generous sponsors (Urbane Security, MacroFab, Mouser, and Rigado), a way we helped raise funds this year was though designing three Shitty Superior Add Ons (SAO). Why aren’t they shitty? Because in the same way we want our badges to be more than some blinky lights and FR4… Our SAOs are actual embedded devices with MCU’s, firmware, challenges, easter eggs, and present some useful function which hackers can explore and learn from. Cr4bf04m wanted to engineer an add on which was a hardware hacking tool...that also displayed the face of our beloved space marine while fighting demons on the I2C bus. It’s open source, leverages the SAO v1.69bis standard, and is Arduino compatible so it’s easy to add your own functionality. The design has been discussed on the Macrofab Engineering Podcast (MEP) recently and after a long couple of weeks finalizing the firmware, here’s what the team has to show for this hardware hacking tool.

    Hardware

    • Arduino Compatible MCU ATSAMD21G18A
    • All unused I/O from the MCU is accessible
    • Physical Interface for the V1.69bis standard
    • High DPI ST7789 1.3" 240x240 LCD Screen
    • USB Type-C configured for USB 2.0 (REVERSIBLE)

    Functionality

    • Full implementation of the logical V1.69bis standard for integration with DC27 Badges
    • Auto mode for DOOM Guy for badges that are not DOOM SAO compatible
    • Serial Terminal accessible through the USB Type-C connector
    • User defined section for adding your own code
    • DOOM Guy Interface
    • DOOM Guy Bus Sniffer
    • I2C Bus Sniffer 
    • Serial UART Sniffer
    • EEPROM Persistence
    • Custom Application Mode

    The video at the top showed us going through the menu to exercise the functionality, below is an explanation of what those features entail.

    DOOM Guy Interface

    To claim one leverages SAO v1.69bis, means more than just providing 3V and GND... one needs to interact with the badge over I2C and GPIO. Through I2C integration, the DOOM SAO makes use of the AND!XOR SAO Reference Design and implements a menu accessible over serial UART.

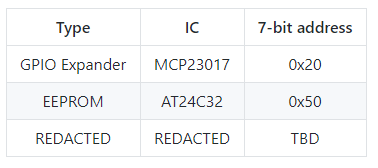
    Before we get in to the interface, a few technical details need to be understood. For I2C, virtual EEPROM was implemented as below based on the AT24C32 using a 7-bit address of 0x50.

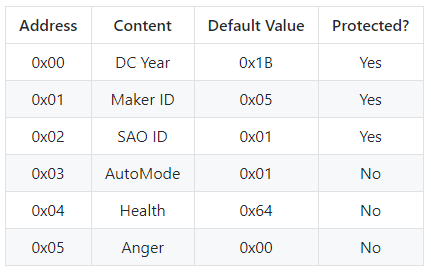
    The addressable space of the EEPROM then follows as:

    • DC Year: Use 0x1B for DC27
    • Maker ID: Unique identifier for SAO maker, AND!XOR uses 0x49 (Middle 8bits of our registered Bluetooth ID): Cr4bf04m uses 0x05.
    • SAO Type ID: Unique identifier assigned by the maker for the SAO: 0x01 for DOOM SAO
    • Data: Arbitrary data parseable by anything recognizing DC, Maker, and SAO values

    The leads to the DOOM SAO EEPROM at 0x50 having the following:

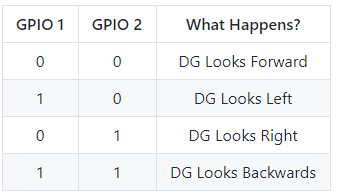
    With v1.69bis a GPIO interface was added to the standard for the badge to have additional control of the SAO. We have to use that too!

    All of this combined means its fully bonafide v1.69bis compatible with badges (that choose to interact with SAOs). Such as, when it gets plugged in to a badge, special things may happen… But this also means a lot should be provided to the hacker via an easy interface. Plug in that...

    Read more »

  • Reverse Engineering with Ghidra - SimTaco Floppy Challenge

    Hyr0n06/07/2019 at 02:21 0 comments

    So we gave it some time to rest, but it's time to walk through what our CypherCon hacking challenge was and the ways the folks who won were able to accomplish it. If we don't share, we don't learn. If you're thinking, WTF does this have to do with your electronic badge project we want to see that... we'll we're keeping that a sekret for a bit longer. So until the reveal, we put out hacking challenges for people to earn free badges.

    Why hacking for badges? Because we want to encourage people to learn new things, reward hackers with blingy electronics that contain even more embedded security puzzles to learn new things. Philanthropic hacker karma with knowledge gained. They're free, you just have to earn them :) Also a big shout out to our Philanthropists and Sponsors who are helping us make this happen: Urbane Security, Macrofab, Mouser, and Rigado.

    We made 40 of these Floppy disks loaded with a special binary and left them around the Wisconsin Conference center during CypherCon. Also this was inspired by the Floppy Disk badge @aprilwright made for DC26. Initially the first part of this challenge was, how the hell do you read the floppy? Conveniently, between the hundreds of hackers at the conference and it butting up against the Midwest Gaming Classic, there was a large collection of vintage computers around. Some folks tried putting the disks in, but were reminded...those computers weren't networked so how the hell would you get the file off anyway? Truth be told, if you don't have a stack of these laying around like Hyr0n does, then you go on Amazon and search for a "USB Floppy Drive." That simple. Now even though there are a dozen different brands, be forewarned they are all the same manufacturer and all are garbage. 1000000% Garbage where you have to pop in the disk just at the right time. Regardless they do work. So once a person got that disk being read by a computer, they found a file to copy off: "simtaco"

    First things first, chmod +x that binary to make it executable, cross your fingers it's not not not malware...and run it.

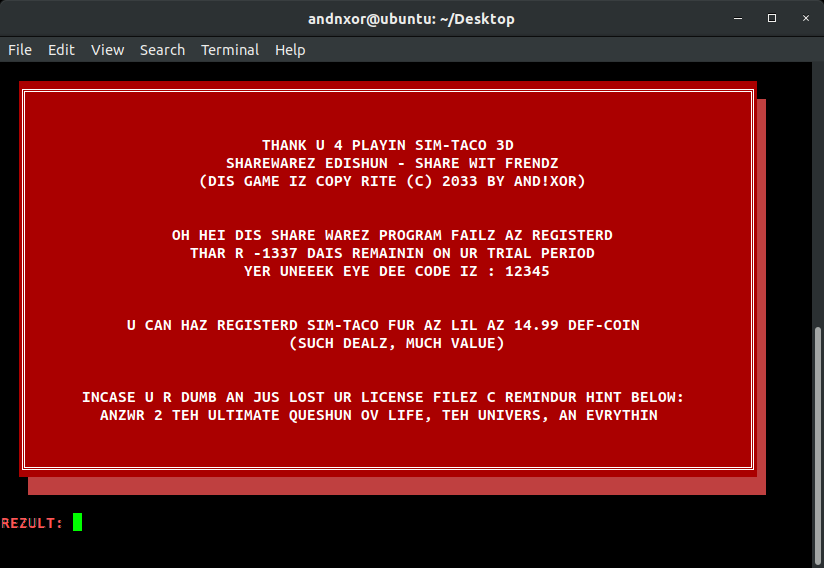
    So if you're thinking "42" - yeah that's the good cult reference, but no... this is a hacking challenge. You don't earn free badges that easily. For this we're gonna have to get up in that binaries guts. Last year I showed you my free open source software of choice for RE which was RadaRE2. We'll the NSA has spoiled us with their warez, because I've gone Ghidra and I'm never going back (sorry HexRays I dont have 1 BTC worth of license fees to shell out ANNUALLY for Ida). In case you aren't familiar with the name, the NSA open sourced their internal binary reverse engineering tool, Ghidra, back in February when Rob Joyce gave his talk at RSA. We were also curious in 2 months time how many people would flock to it. Actually every person who solved the challenge told us they were using Ghidra as well, which made all the sense to title this project log the way we did. Now there are ton's of write ups and tutorials on YouTube showing how to use Ghidra in depth. This post is NOT that. The intent of this is to show you just enough to peak your curiosity and show you that reverse engineering isn't black magic wizardry (like RF is). 

    For your reference here's a copy of the binary to play along: http://bit.ly/2EQMHgH

    Install Ghidra

    This is going to assume you run the same Linux system we do, Ubuntu 18.04.2 

    1. Download Ghidra: https://ghidra-sre.org/
    2. Install Java OpenJDK 11
      1. sudo apt install openjdk-11-jdk
    3. Unzip your Ghidra download anywhere then run "./ghidraRun"
      1. If Ghidra says it can't find your JDK, then you don't have the right version...
    Read more »

  • CypherCon - Hotel Hackery, Good Friends, and Good Times

    Hyr0n04/14/2019 at 02:56 0 comments

    HAI 2600

    So you may be wondering why the first log of our DEF CON badge project is titled after another conference: CypherCon. Something we briefly talk about but don't emphasize enough is that the members of AND!XOR are geographically distributed; i.e. we don't live near one another. So a few times a year we try to meet up at security conferences. From a "working on the badge" perspective this is what allows us to do things IRL, hang out together in the hotel rooms at night, debug the badge, design puzzles and hack the night away. See actual photo below... 

    But more importantly, socialization within other conferences, going to talks, and their villages is the main reason we go. Zapp has been there before and this was Hyr0n's first visit to Wisonsin. Overall a wonderful experience. Got to see old friends (Addie, Whisker ,Wire, GoetzmanWill, Krux, CarFucar, Mike SzczysViGreyTech), make new ones, even meet people we've talked to on Twitter for the past couple of years and have always missed one another in person (Rick Ridgley comes to mind, also we just need to say @d1g1t4l_t3mpl4r is a gentleman and a phreaking badass). It stresses me out to write this right now in fear that I forget to list someone's name from the weekend for love and shoutouts. If I did forget, don't hate me. I'm on 3 hours of sleep writing on an airplane with a screaming child behind me (I'm lucky to even get coherent sentences typed at this point). Just a reminder that you should always expand your scope beyond a single conference, attend as many as you can across the globe, since each one has a different vibe and you get to meet many awesome people. What can we say about CypherCon? It feel's like family. Everyone is so nice and welcoming, we love visiting the mid-west and need to get out there more often. We'll be back next year for certain.

    CypherCon TyMkrs Badge Challenge

    The ToyMakers created an amazing badge this year, it read paper tapes. As in, 50 years ago technology paper tapes and you had to either hand punch or submit jobs to create punched paper tape. You can see Hackaday Mike showing it here. Its not our place to go in to the depths of how their challenge worked, the scoring, etc... (that's someone else's write up to be done), but we can explain our part in it. Like many of the other villages, we were given code cards by Whisker to hand out in "whatever manner we see fit." Note, this also unofficially makes AND!XOR the first nomadic village right? See Zapp & Hyr0n brainstorm below...

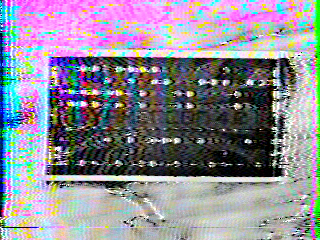
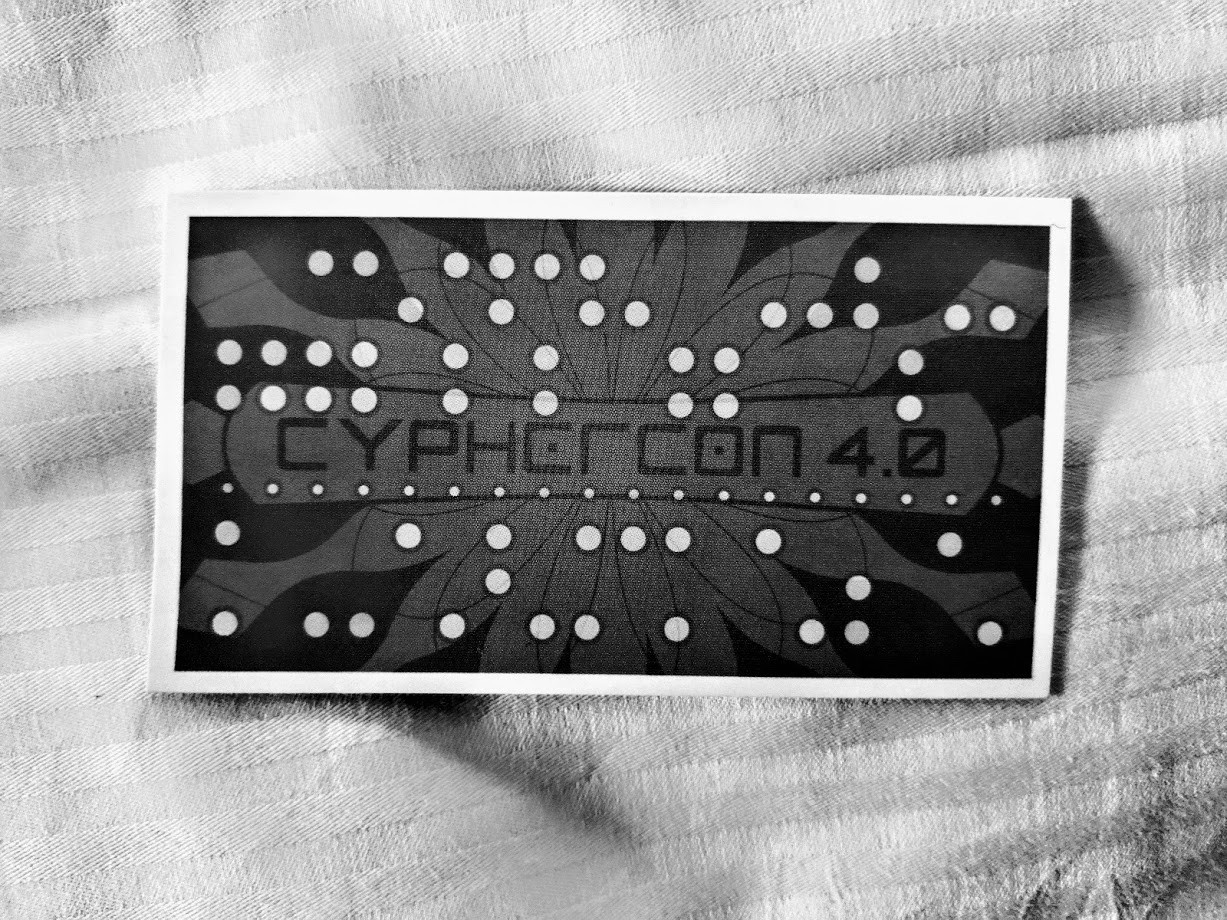
    Actually what we came up with isn't at all that original (many groups have used SSTV in the past) but it added layers of fun for some folks to learn something new while trying to get punch codes. We took a photo of the card and used Robot36 Slow Scan TV encoding. After all, if we are using 50+ year old computer program technology, what better way to transmit photos than with 50+ year old RF encoding technology? This creates a 36 second audio file which sounds amazing and was used as a voicemail. The phone number was released. Boy did we get some great voicemails from the conference attendees :) Anyway, once someone heard our recording they used an SSTV Decoder on their computer to translate the noise into a photo (assuming they knew what it was, if not then there was a lot of talk with the HAM folks or scouring the SigIDWiki.

    Yeah its really bad quality. In fact any background noise affects the decoding. It made us smile to walk into the restroom and to see a few hackers huddled in the corner calling the voicemail since it was the quietest place they could find? Here's the original photo for comparison.

    As you can see it probably took quite a few phone calls from devoted individuals to get enough samples...

    Read more »

View all 8 project logs

Enjoy this project?

Share

Discussions

taranclan wrote 08/30/2019 at 01:03 point

what are the Rigado BMD-340 (NRF52840 core), USB Type C, SAO 1.69bis Interface, LM1117 ADJ, AAT1217-3.3 and the IQS333Captouch IC used for, where can you buy the flexable Light Pipes and the HQ19-2333RGBC?

  Are you sure? yes | no

Mike Szczys wrote 03/19/2019 at 00:20 point

I'm cornering the world's supply of potatoes... better hope you secured your supplychain before giving away that nugget of info.

;-D

  Are you sure? yes | no

Sophi Kravitz wrote 03/13/2019 at 14:20 point

WOOOHOO excited to see this one! Internet science of cats LOL.

  Are you sure? yes | no

Similar Projects

Does this project spark your interest?

Become a member to follow this project and never miss any updates