-
1Hardware transformation : Remove the original controller
First, you have to open the back panel of the printer, unplug all the connectors and remove all the electronic parts.
-
2Hardware transformation : Smart extruder & Hotend reworkNow you have removed the heart of the printer, it's time to work on its head. As you may know, Replicator+'s head is full of features such as filament runout detector and bed contact sensor (actually the hotend can translate along the vertical axis and is stuck in the low position by a spring, with a Hall sensor which reads the translation, hence the bed contact). All the wires needed are embedded in the flat cable going to the smart extruder dock, then to the smart extruder via contacts (the smart extruder is magnetically maintained to its dock). We won't use this flat cable anymore, except to mechanically handle the wires we are about to add.
Remove the original thermocouple
The hot end temperature sensor is a thermocouple with an SPI driver. Although it could be kept, we will use a NTC 100k thermistor because Marlin dosen't support the Makerbot thermocouple driver.
---------- Thermocouple and it's driver board unmounted ----------Once removed, place the new NTC thermistor in the hotend cavity and extend the wires if needed (they have to go all the way to the Ramps controller).
Disconnect the heater cartridge but don't throw it
The heater cartridge is driven by a MOS-Fet which is located in the smart extruder. All the commands and power pass through the flat cable (that we won't use anymore) which comes from the electronics compartment to the head. With the new configuration we're building, the heater will be driver by the new board (ramps here) which has its own MOS-Fet. So you have to unsolder the cartridge and to sold new wires long enough to go to the electronics compartment.
Hack the filament sensor
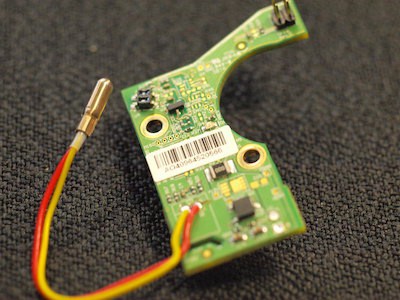
Now we've got the thermocouple removed and the heater cartridge wires unsoldered (and extended), it's time to get the filament sensor working with the future Marlin setup. Basically, the genuine filament sensor is a simple switch connected to the thermocouple driver via a little board shown below:
Filament sensor part reworked, with the two wires ready to be connected to the RampsBecause we got rid of the board it was connected to, we need to solder two wires (long enough to go all the way to the Ramps) in order to use the switch.
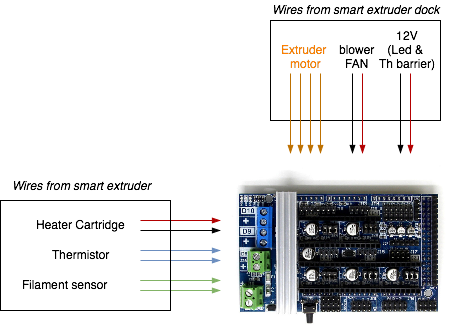
Ok we have now new wires coming out of the smart extruder :
- 2 wires for the heater cartridge
- 2 wires for the thermistor
- 2 wires for the filament sensor
You will have to make holes cuts some platic parts oh the smart extruder in order to get all the wires out.
-
3Hardware transformation : Smart extruder dock
Now it's time to work on the smart extruder dock which houses the extruder motor, the thermal barrier FAN, the blowing FAN and a LED that enlights your printing parts.
Remove Makerbot Original Parts
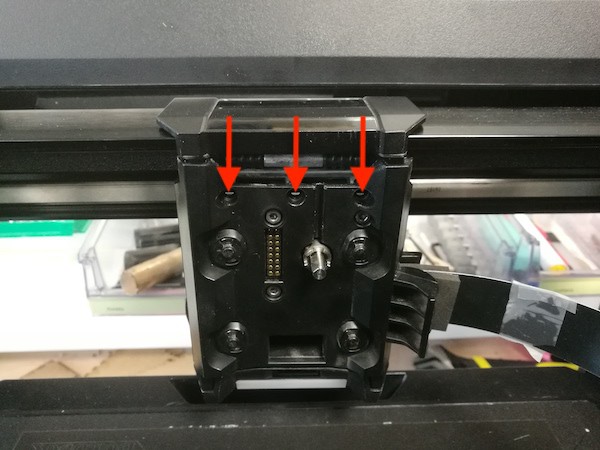
- Firstly you need to remove the SmartExtruder Docker back plate by unscrewed the 3 screws :
![]()
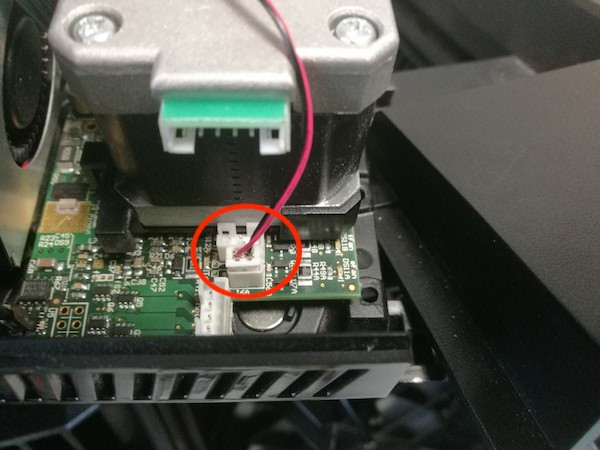
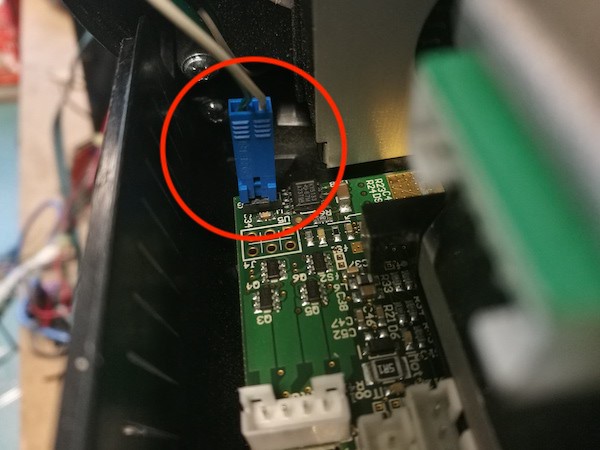
- Secondly disconnect the thermal barrier fan connector :
![]()
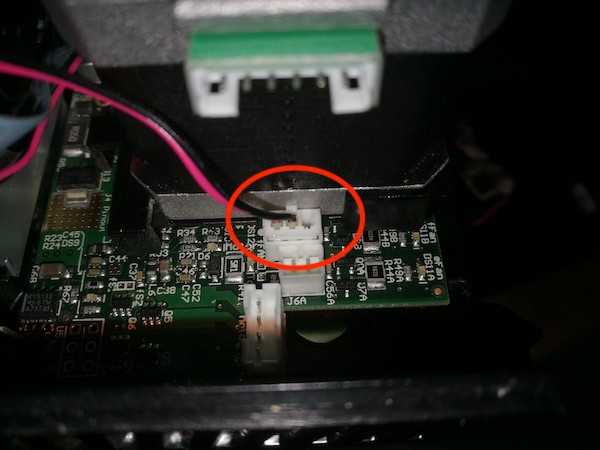
- Thirdly disconnect the fan duct connector :
![]()
- Fourth, disconnect the motor.
- Finally disconnect the led connector :
![]()
-
4Hardware transformation : Wire it all together
![]()
Connecting Ramps's flat connector
Connect all previously unplugged connectors to a flat cable (8 wires in our case : 4 for the nema, 2 for the blower fan and 2 for the thermal barrier fan/led ) and connect it to the Ramps (according the ramps datasheet). Be carfull, the led need a 5V, you can take the 5V in the powersupply or use the 12V from the etruder moteur with a 5V DC-DC step down regulator.
ATX
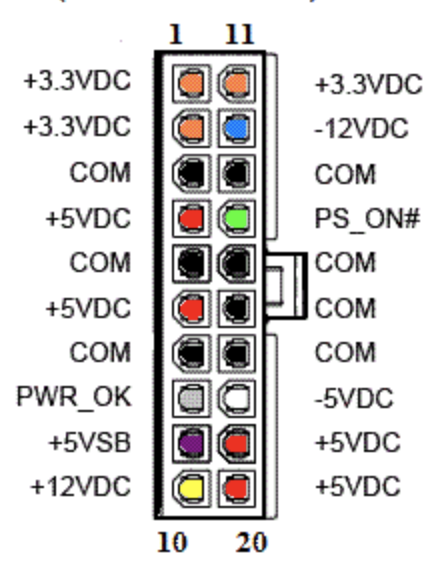
For the Harckerbot several cable of the ATX are needed you can use a femmale connector or cut the cables.
![]()
Hackerbot : MakerBot Replicator+ with RAMPS/Marlin
Turn your Makerbot Replicator+ into a full open hardware 3D printer
 samuel.heidmann

Discussions
Become a Hackaday.io Member
Create an account to leave a comment. Already have an account? Log In.